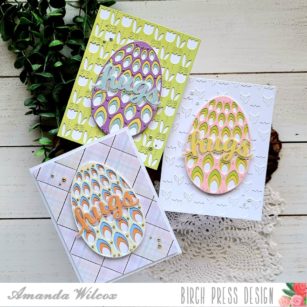
Hello everyone! It’s Amanda from Twiddler’s Nook today and I have a trio of cards to share featuring the petal egg layering set and a few different backgrounds to pair it with.

To start off today’s cards, I just pulled out a variety of cardstock colors – glitter and not – and started cutting the layers of the petal egg. It was so fun to mix and match, and just play, with all of them once they were cut out.
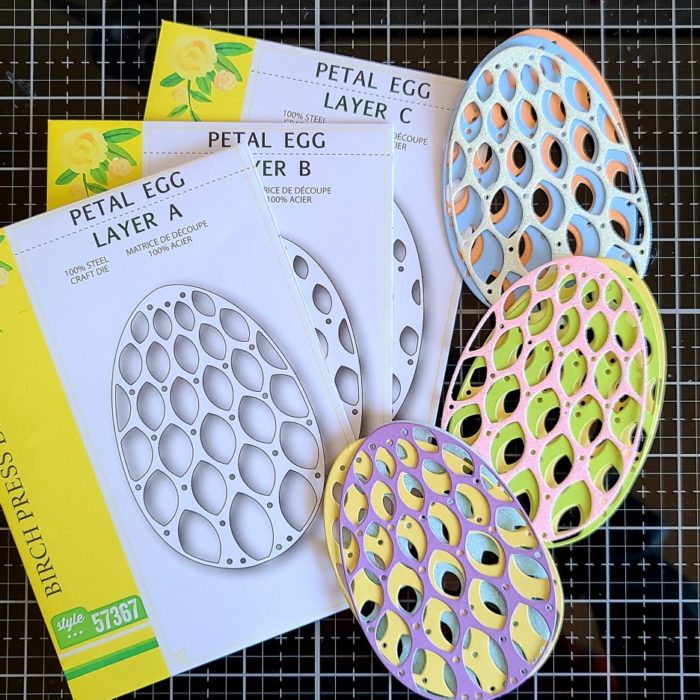
After I decided on the layers that I wanted to use together, I ended up with three complete eggs and thought it would be fun to make three cards to share with you today.

For my backgrounds, I used layer A and C of the Field of Blooms set. Then for my third card I pulled out the Memory Box spring plaid paper pad and chose one of the beautifully foiled pieces to use.
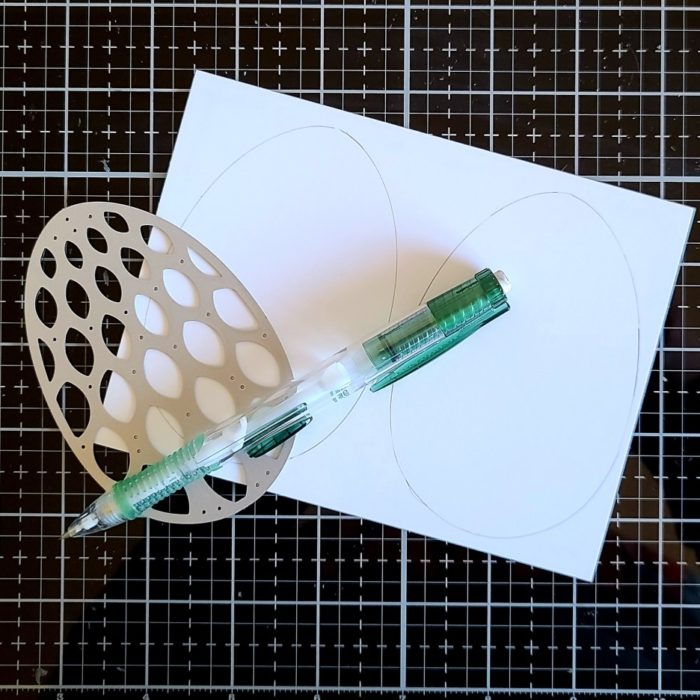
I used liquid glue to adhere all of my egg layers together and decided I wanted the backs to be solid so the background panels didn’t show through. Since there isn’t a solid egg shape I traced one of the dies three times and cut inside the tracing line and glued it to the back of my layers. If anything hung over, I just used my scissors to trim off the excess. Super easy and forgiving if you don’t fussy cut well.
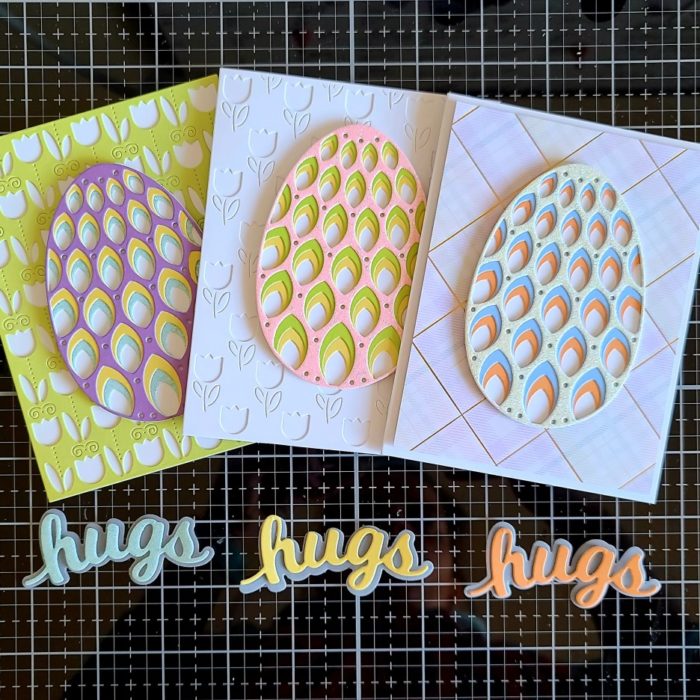
I used liquid glue to adhere the Field of Blooms backgrounds to white card bases and then used foam tape to add the plaid paper, which I had trimmed down to 4×5.25 inches. Then for my sentiment, I went with the hugs honey script dies. I cut the shadow from vellum and then the words from the same paper as the bottom layer of the egg it was coordinating with.
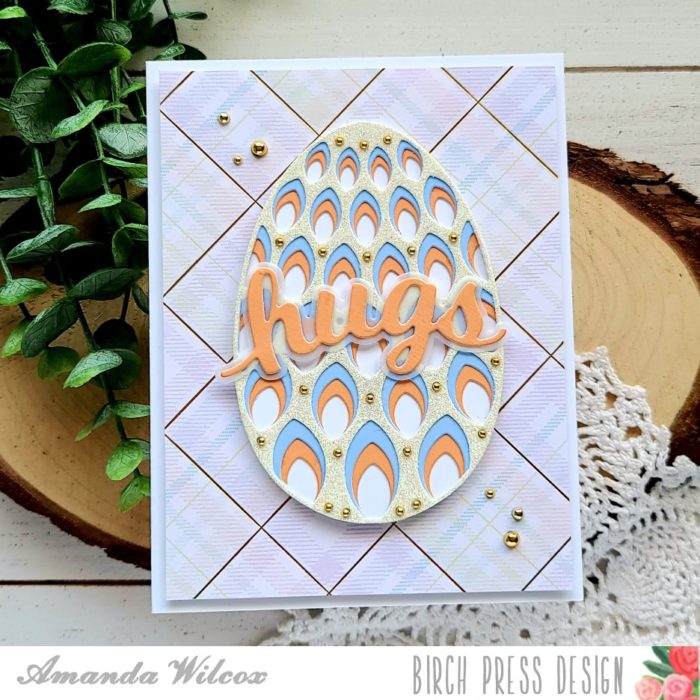
I adhered the sentiments with liquid glue and the popped the eggs up on each background with foam tape. For finishing touches I added baubles to each one. This first one has gold to play off the gold foiling in the patterned paper.
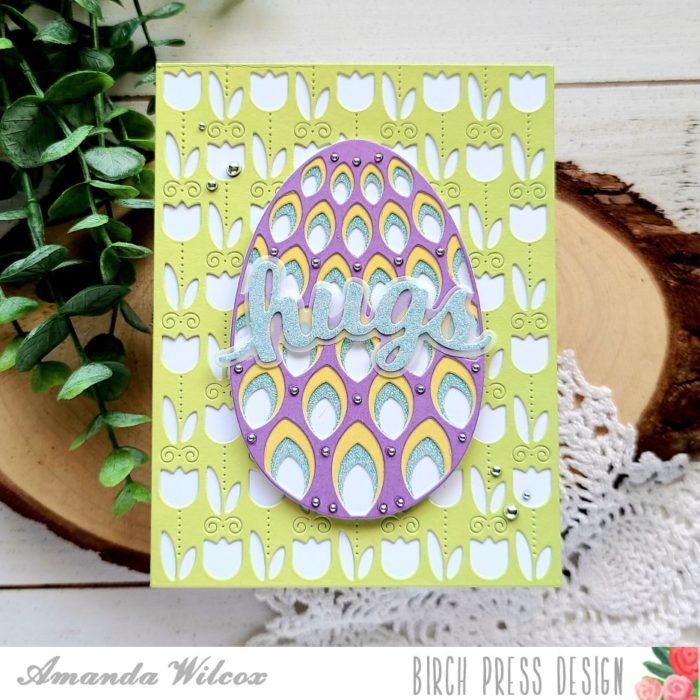
Then I used silver baubles for this one because I thought the bright colors worked well with the bright silver.
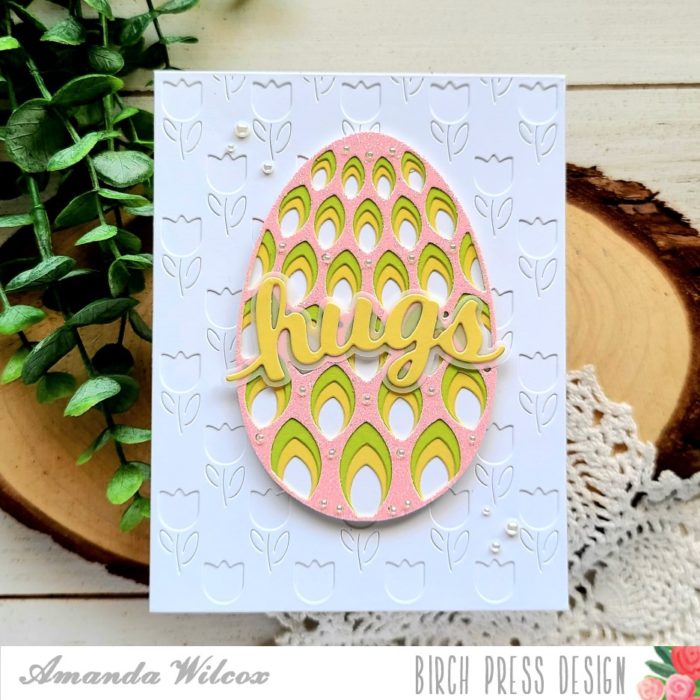
And for this final card, I chose pearls because it’s got a bit softer colors and I just loved how they worked with the pink glitter paper on the top layer of the egg.
I appreciate you sharing your time with me. Have a fabulous day!

Supplies


