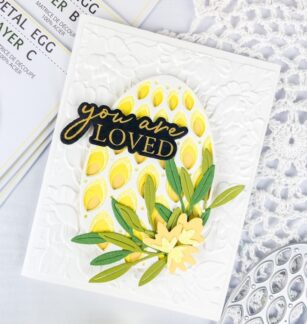
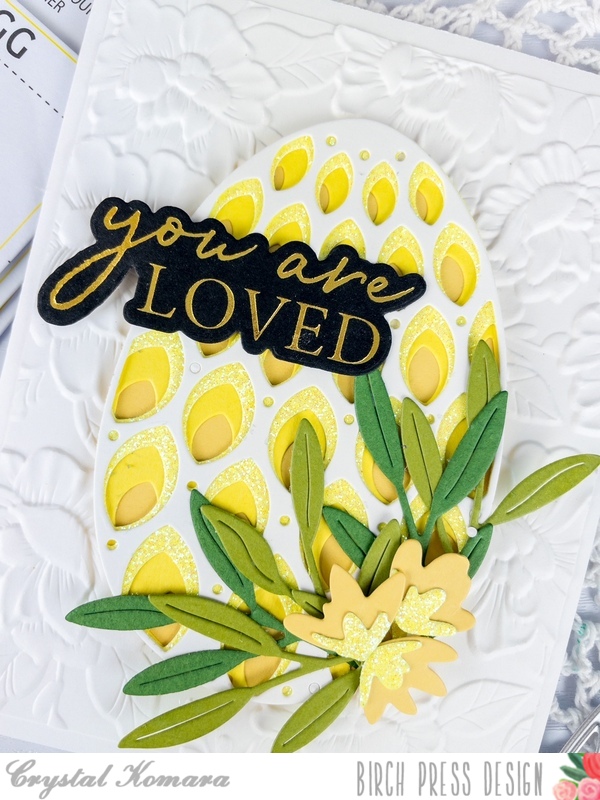
Hello readers and happy Tuesday! This is Design Team member Crystal Komara here with you today sharing a beautiful Easter card for the upcoming holiday using the Petal Egg Layer Set and a few other products from Birch Press Design.
![](https://i2.wp.com/blog.birchpressdesign.com/wp-content/uploads/2023/03/APC_2734-hdr.jpg?resize=600%2C800&ssl=1)
Card details:
The base of this A2 sized card is made from Neenah Solar White Smooth cardstock. For the first 5 1/4″ x 4″ layer, I ran a piece of the same Neenah white cardstock through the Blooming 3D embossing folder by Memory Box Co (a sister company of Birch Press Design).
Next, I created the layers of the Easter egg from the Petal Egg Layer set:
![](https://i2.wp.com/blog.birchpressdesign.com/wp-content/uploads/2023/03/APC_2692-hdr.jpg?resize=700%2C629&ssl=1)
![](https://i2.wp.com/blog.birchpressdesign.com/wp-content/uploads/2023/03/APC_2695-hdr.jpg?resize=700%2C540&ssl=1)
![](https://i0.wp.com/blog.birchpressdesign.com/wp-content/uploads/2023/03/APC_2698-hdr.jpg?resize=700%2C553&ssl=1)
![](https://i2.wp.com/blog.birchpressdesign.com/wp-content/uploads/2023/03/APC_2704-hdr.jpg?resize=700%2C745&ssl=1)
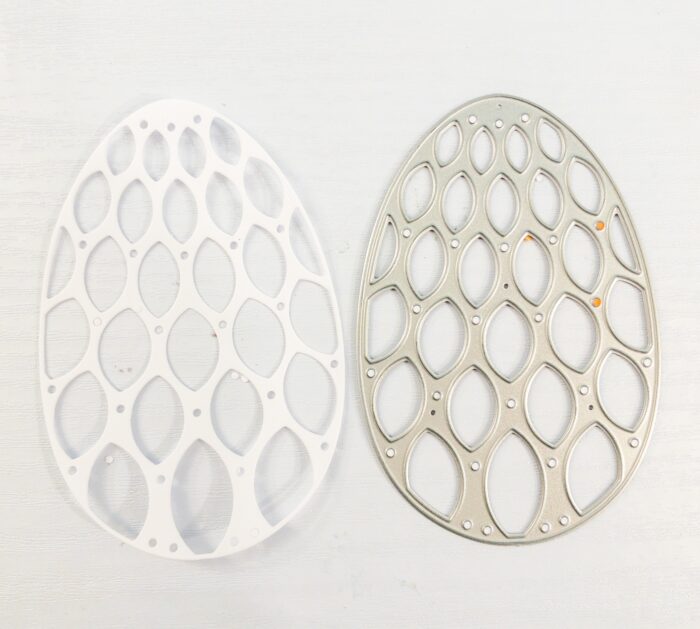
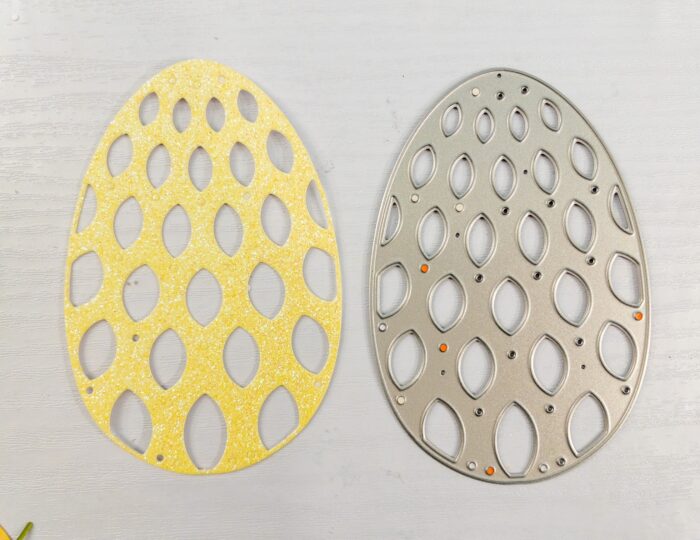
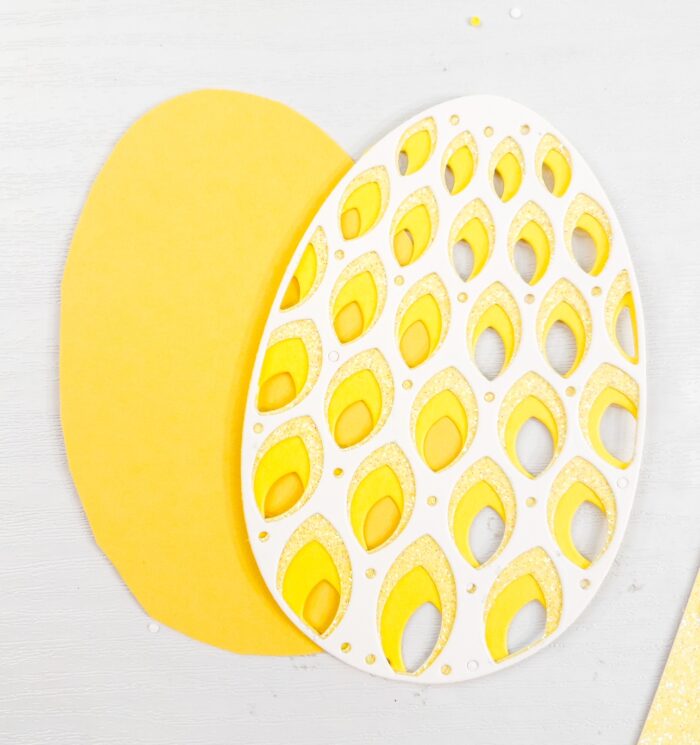
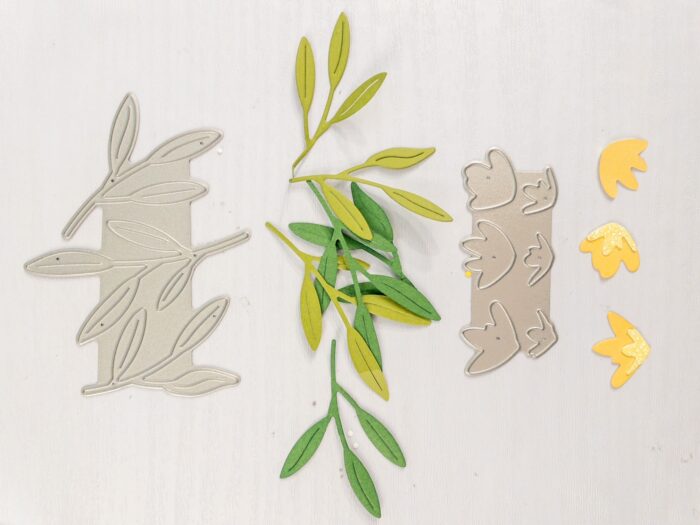
I adhered all four layers of the egg together using a fine-tip liquid glue. Once this was dried, I placed the egg in the center of the card. Then I used the Tiny Tuft Flowers and Leaves Contour dies. I cut the leaves from two different colored green cardstock and the flowers from both yellow cardstock and yellow glitter cardstock.
![](https://i0.wp.com/blog.birchpressdesign.com/wp-content/uploads/2023/03/APC_2701-hdr.jpg?resize=700%2C525&ssl=1)
I adhered the leaves and flowers to the lower right side of the egg using a fine-tip liquid glue.
![](https://i2.wp.com/blog.birchpressdesign.com/wp-content/uploads/2023/03/APC_2725-hdr-1.jpg?resize=600%2C800&ssl=1)
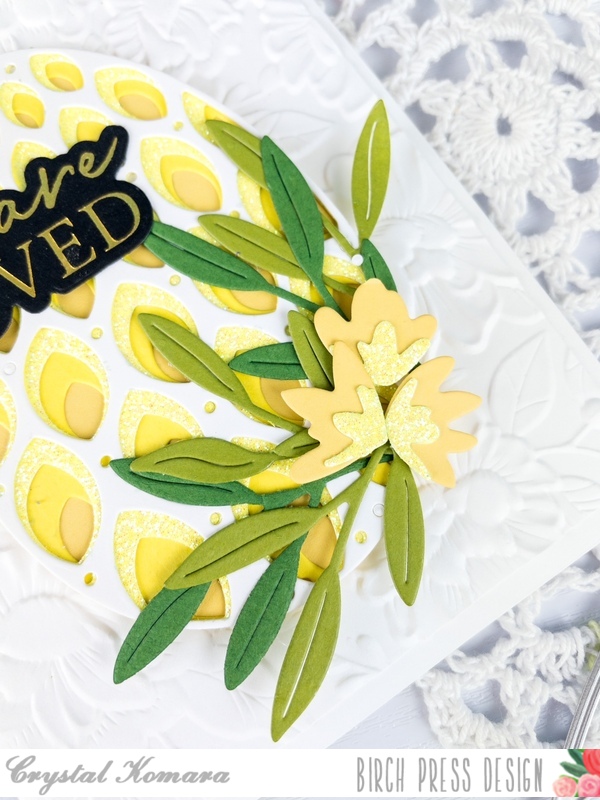
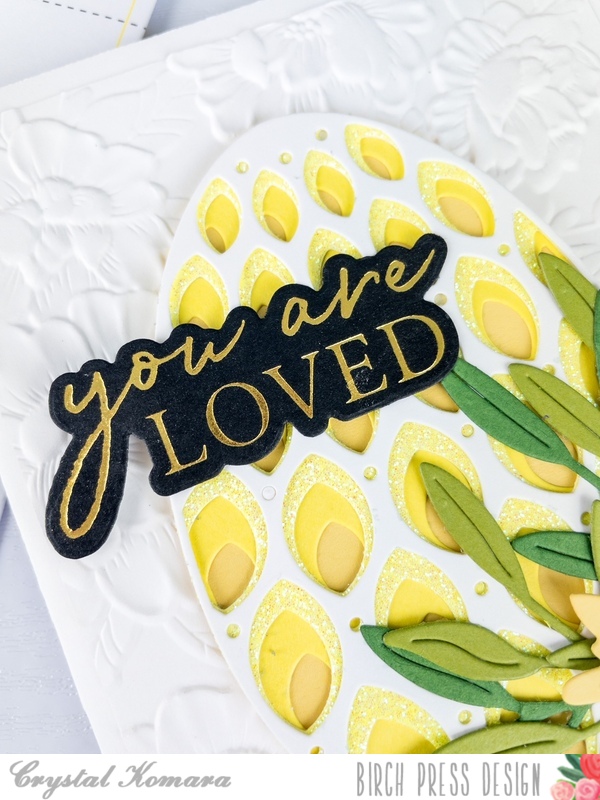
Using the You Are Loved Noted Script heat foil plate and die, I heat foiled the sentiment in gold foil on black cardstock. I used the coordinating die to die cut the sentiment out and adhered it over the egg using 3M foam adhesive for added dimension.
![](https://i1.wp.com/blog.birchpressdesign.com/wp-content/uploads/2023/03/APC_2728-hdr.jpg?resize=600%2C800&ssl=1)
![](https://i0.wp.com/blog.birchpressdesign.com/wp-content/uploads/2023/03/APC_2731-hdr.jpg?w=700&ssl=1)
I hope you have enjoyed today’s card! Thank you for visiting and have a wonderfully creative day!
![](https://i0.wp.com/blog.birchpressdesign.com/wp-content/uploads/2023/03/BPD-Signature-1.webp?resize=600%2C200&ssl=1)
Supplies
Comments by birch press
Two Cards from One Die Cut | by Tracey McNeely
"Thanks Lisa! Do you know which one was my original idea? lol"
Light-Up Christmas Cards with Layering Dies | by Ardyth Percy-Robb
"Thanks so much! The lights are from PearBlossom Press."
2 for 1 Rainbow Thank You Card Design | by Ardyth Percy-Robb
"Brilliant inking Ardyth! These cards are stunning!"
Lovely Butterflies Card | By Leigh Houston
"Thank you so much, Andre!"
Gate Fold Thank You | by Kimberly Wiener
"I love the tri fold card.. what a treat waiting inside!..."