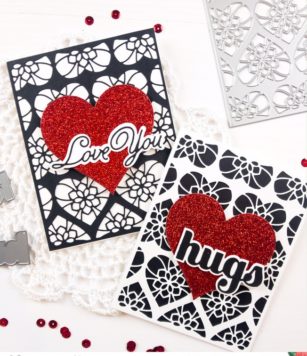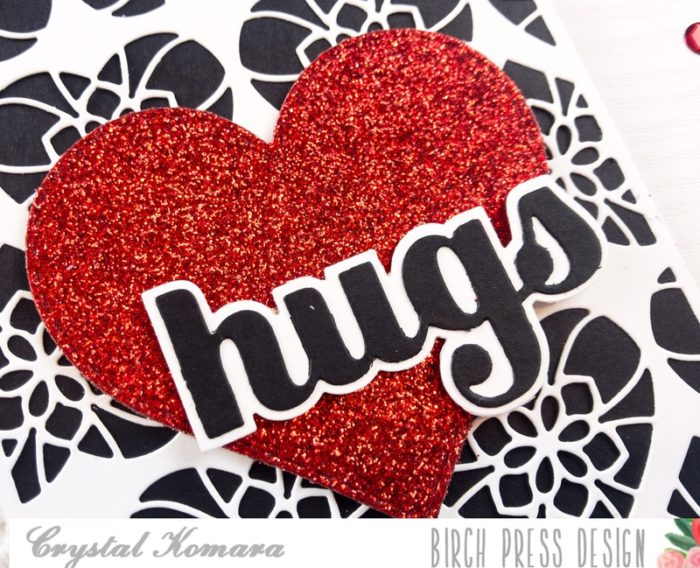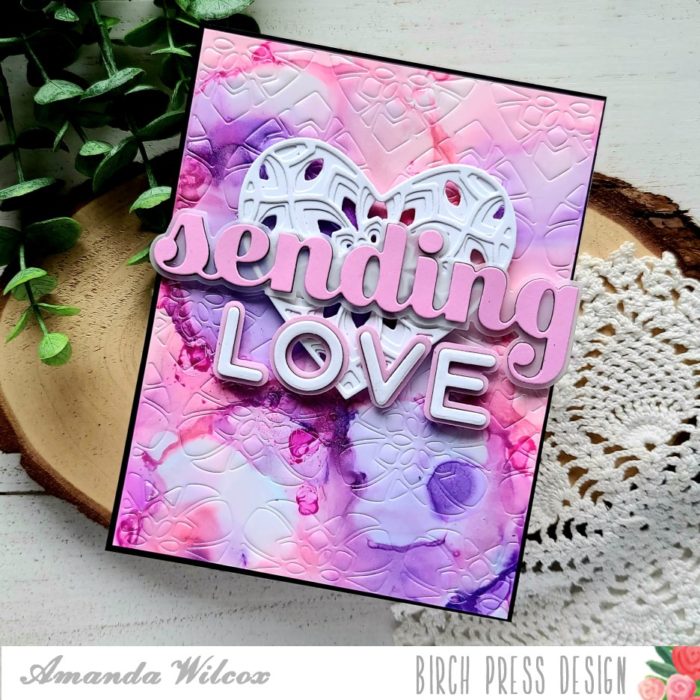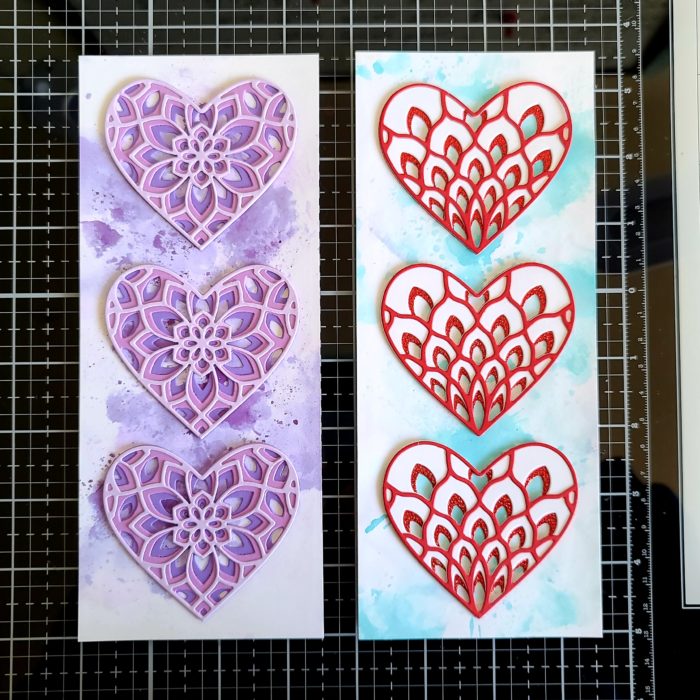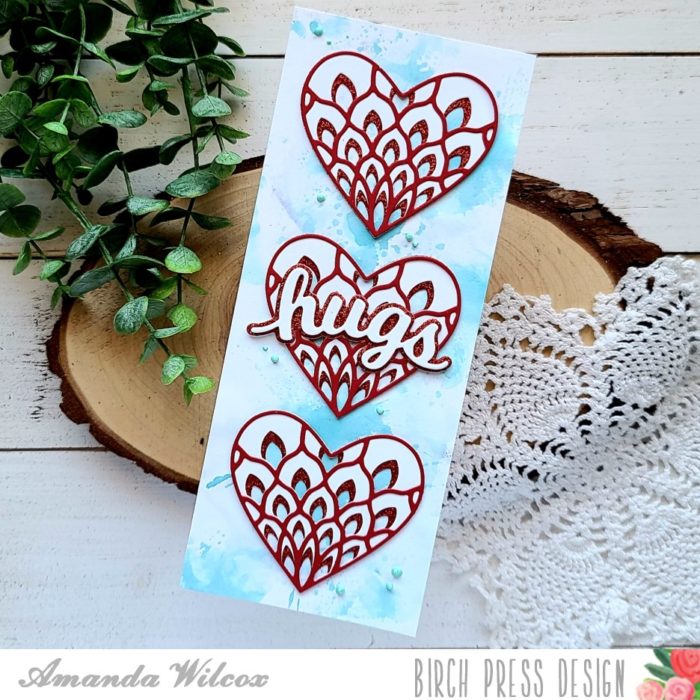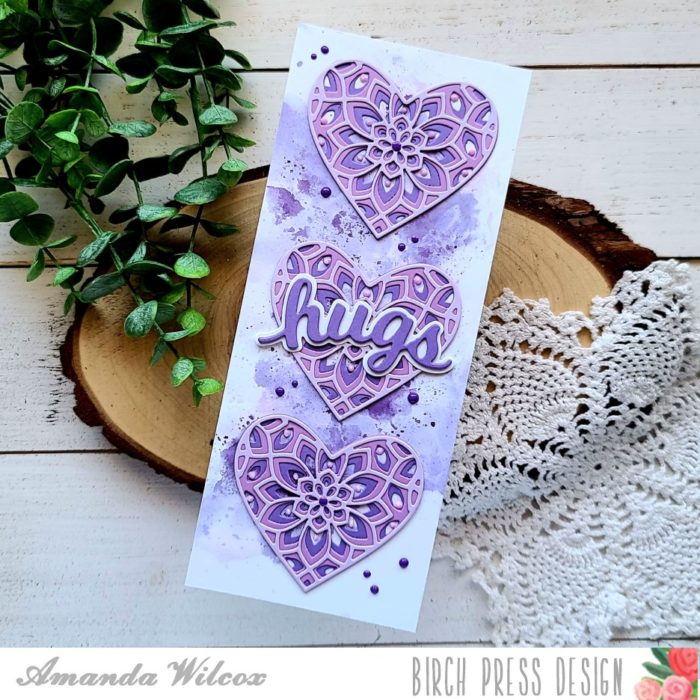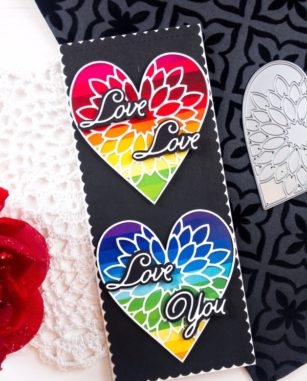
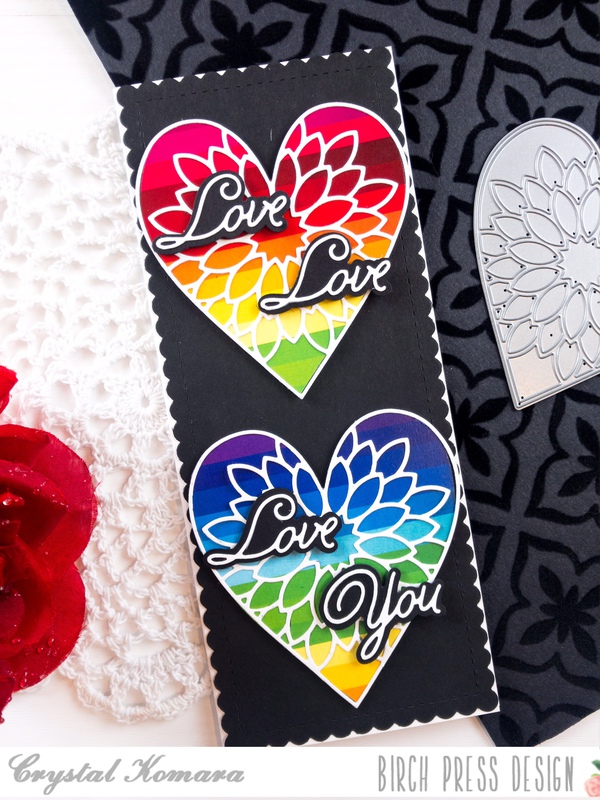
Hello crafty friends! This is Crystal here with you again today sharing another fun idea for a Valentine’s Day card using the Dahlia Heart Layering set. I am so in love with ALL the love themed products from Birch Press Design that I just can’t stop finding ways to use them!
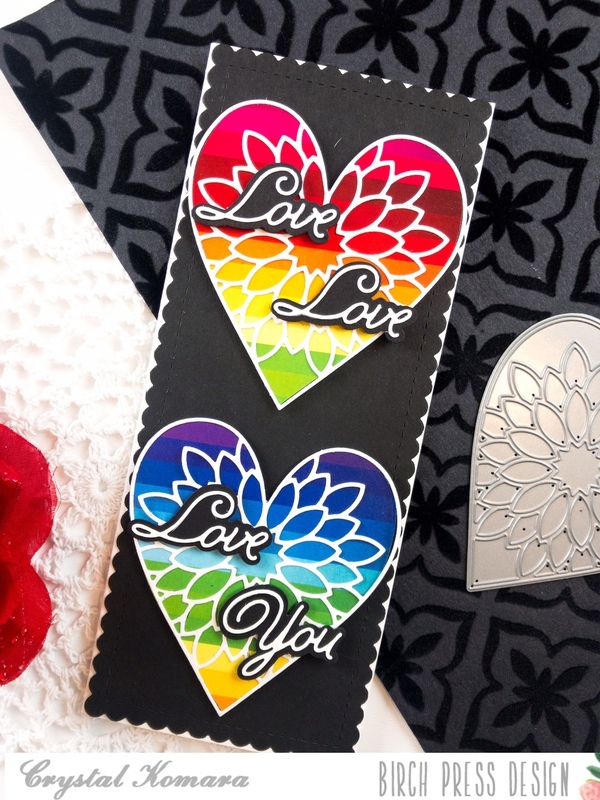
This colorful rainbow themed slimline card just makes me so happy, so please follow along to the end of this post to see how I made it.
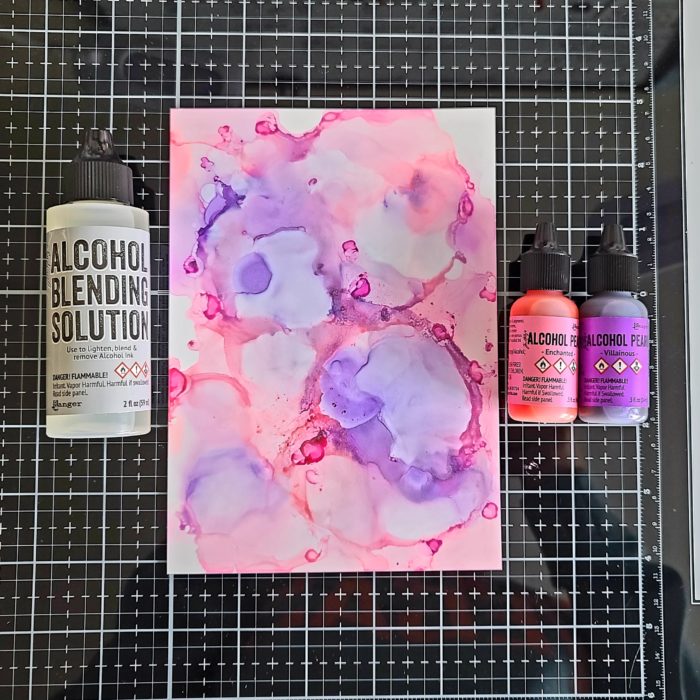
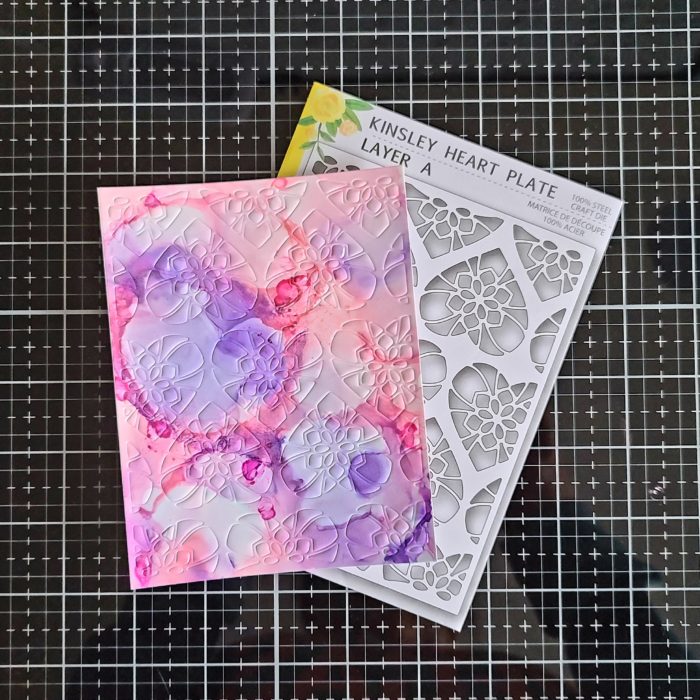
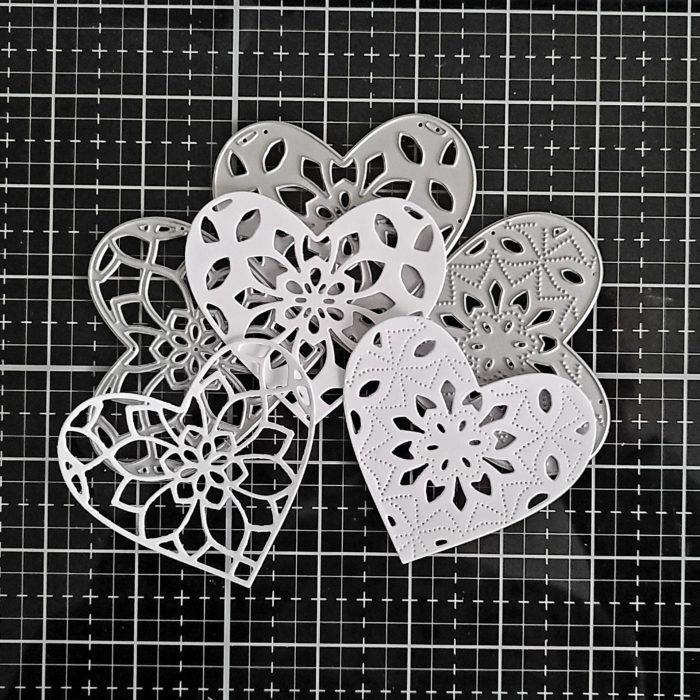
Here is a step-by-step breakdown of how I created this card:
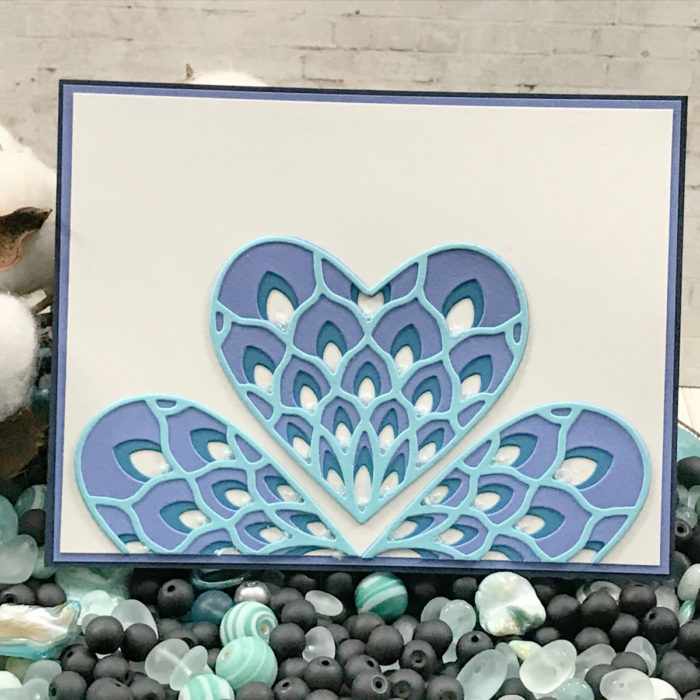
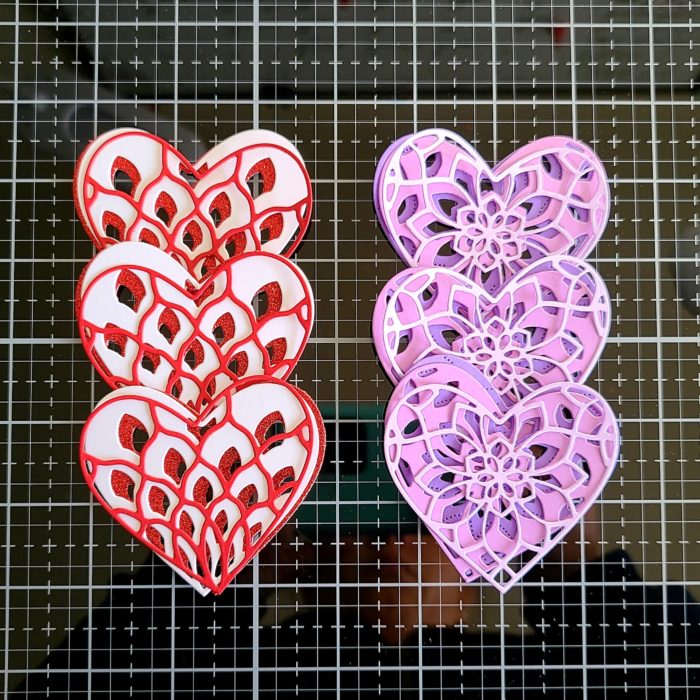
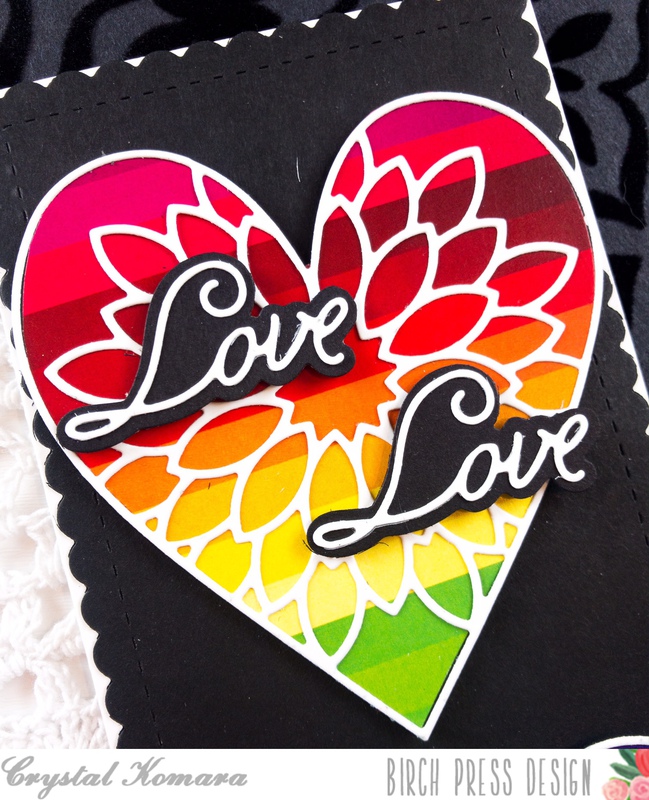
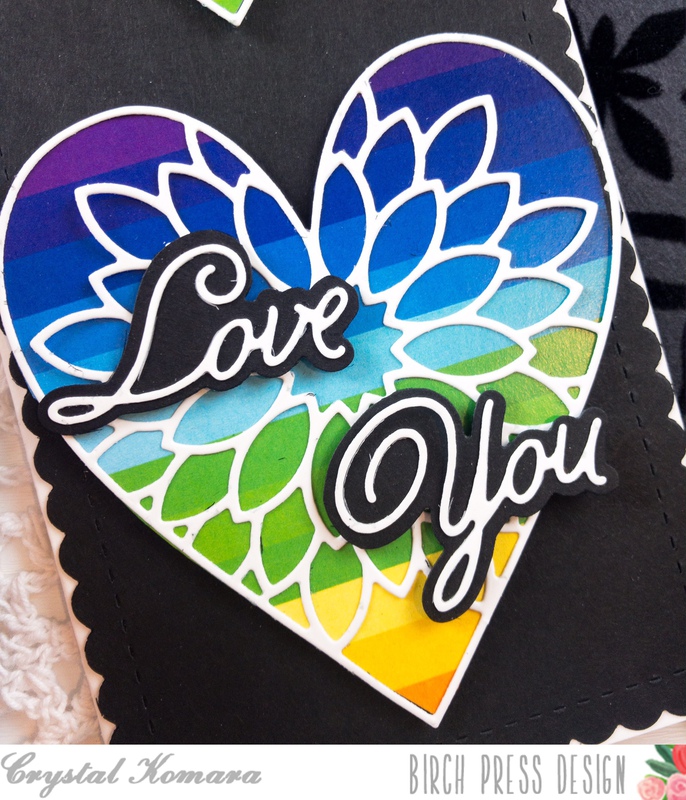
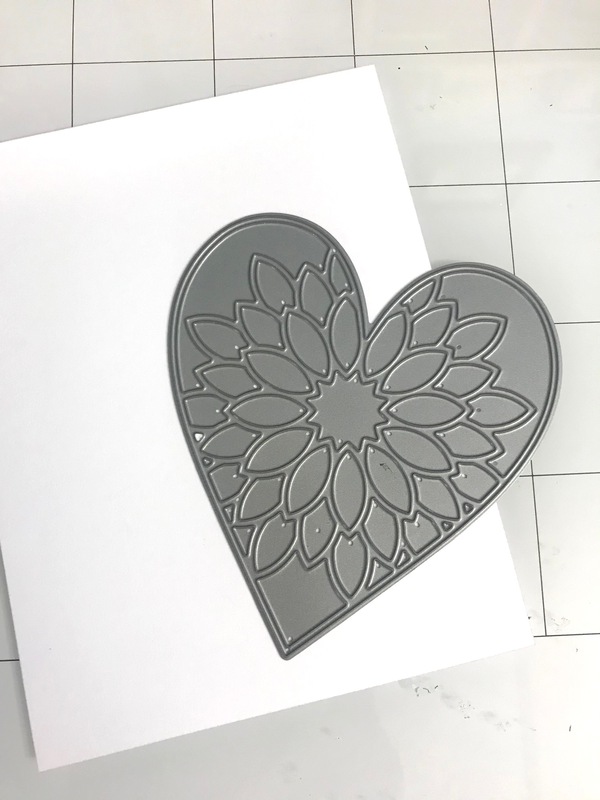
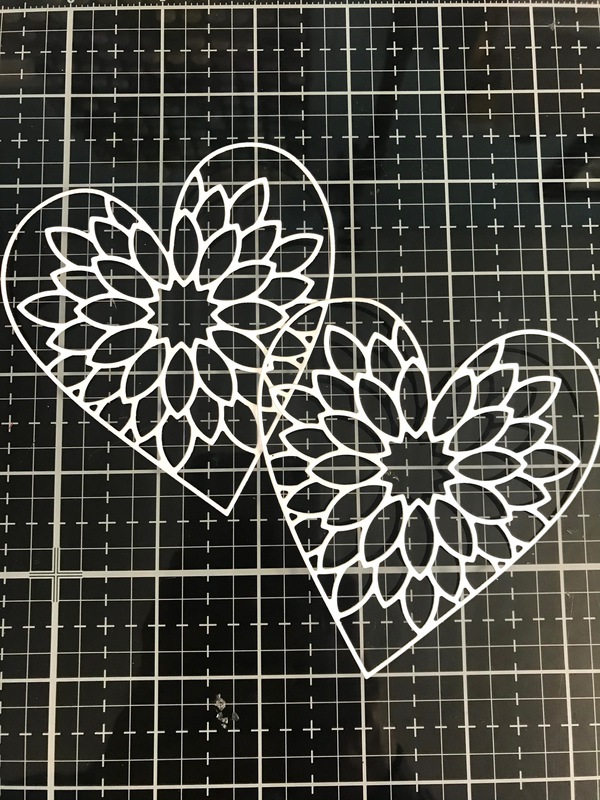
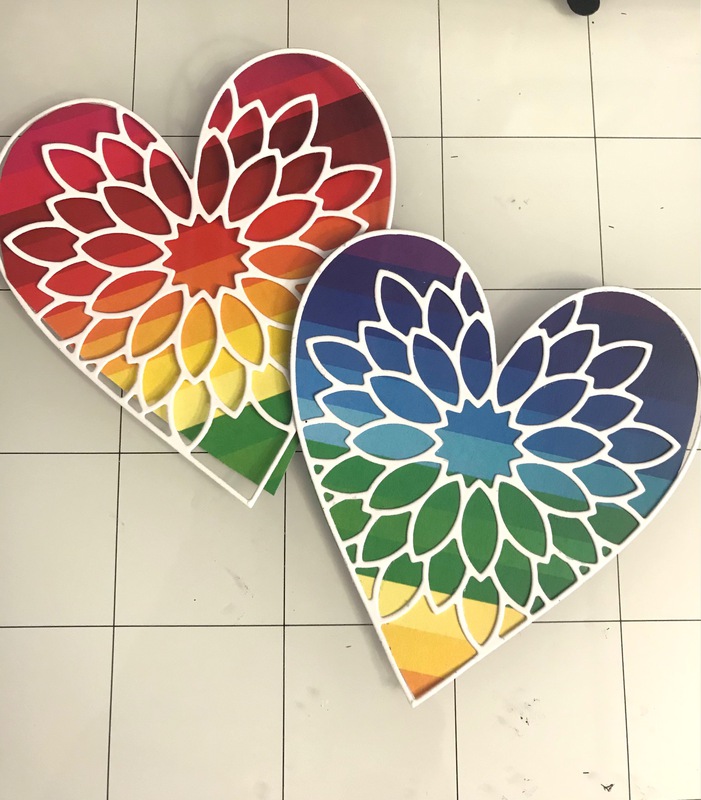
Step 1: Using Layer A of the Dahlia Heart dies, die cut two hearts from white cardstock.
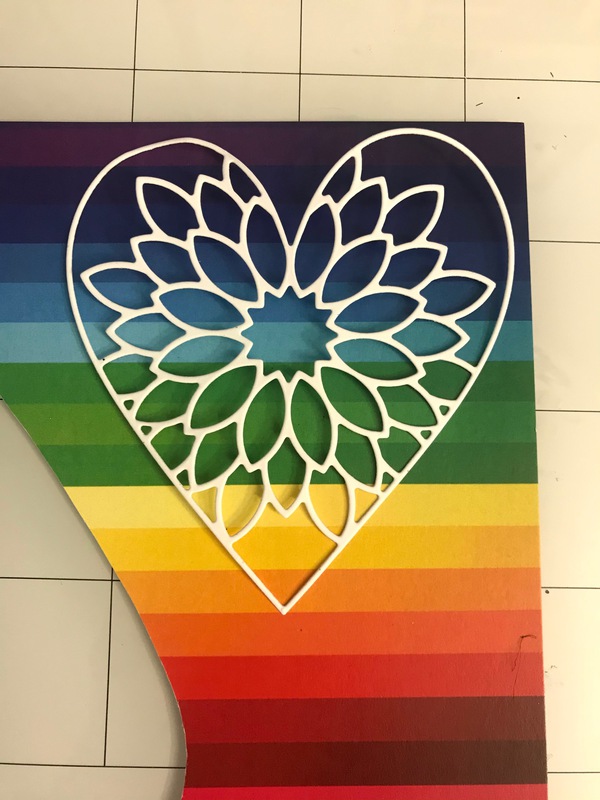
Step 2: Find a scrap piece of rainbow themed paper and layer the white die cut hearts over it and fussy cut around the heart. Trust me, this won’t be perfect – you’ll see below how wonky my fussy cut heart was, but you won’t be able to see it underneath the white outline die.
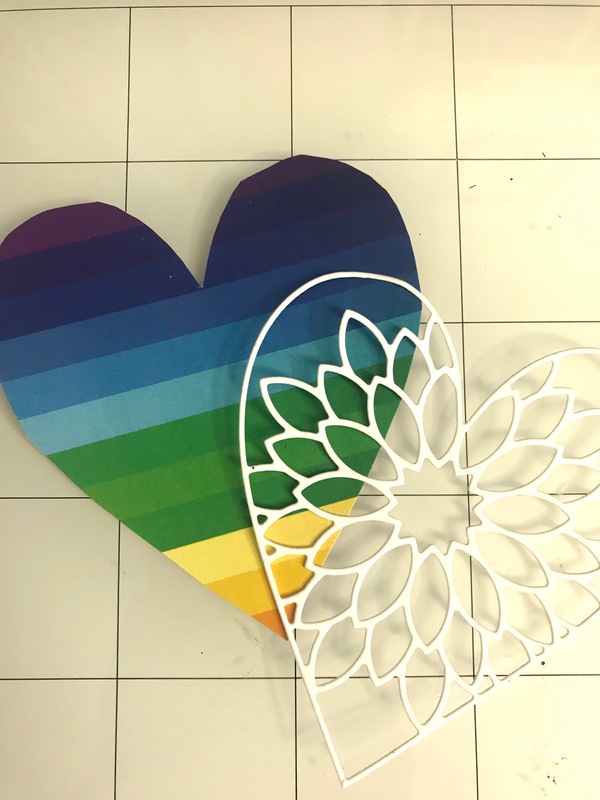
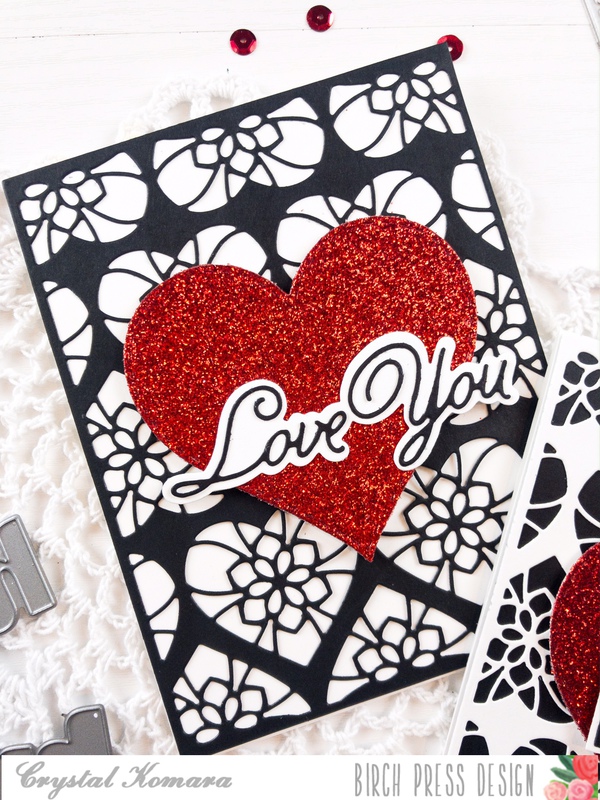
Step 3: Layer the white Dahlia outline over the rainbow paper and adhere using a thin liquid adhesive.
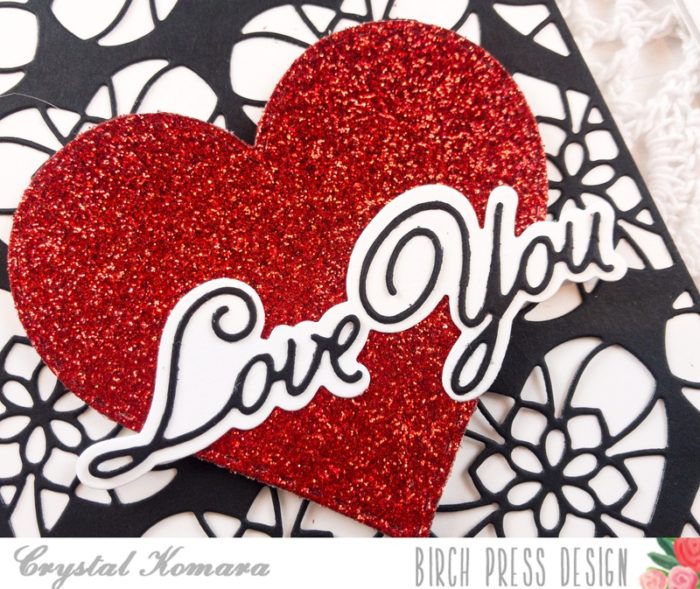
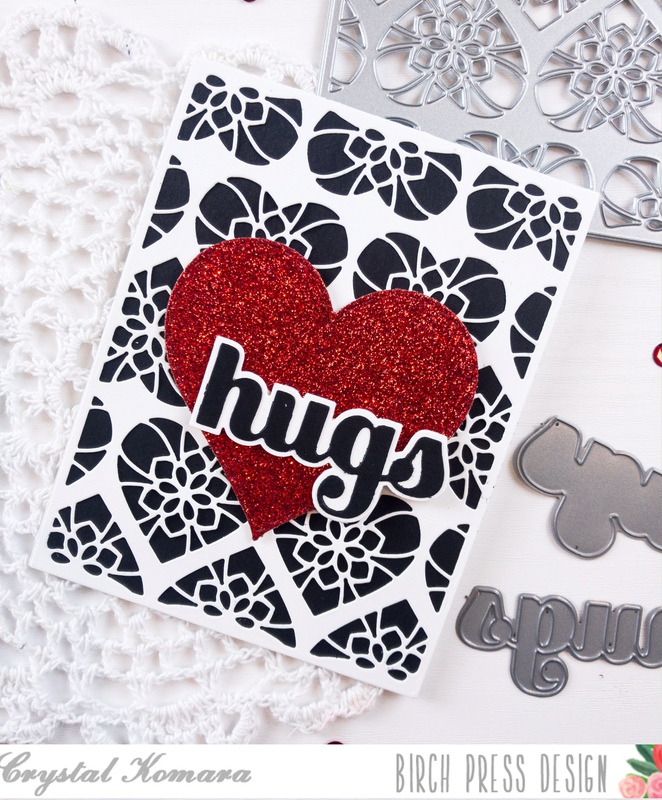
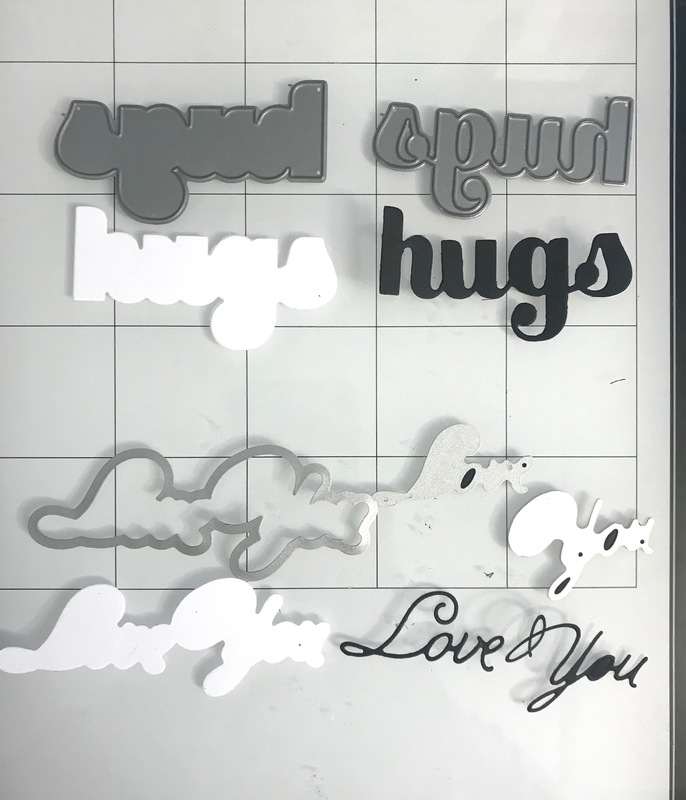
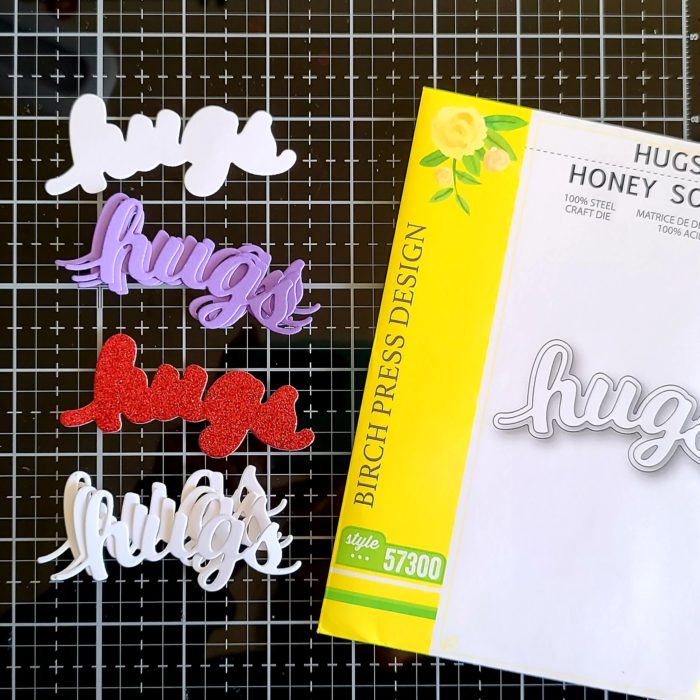
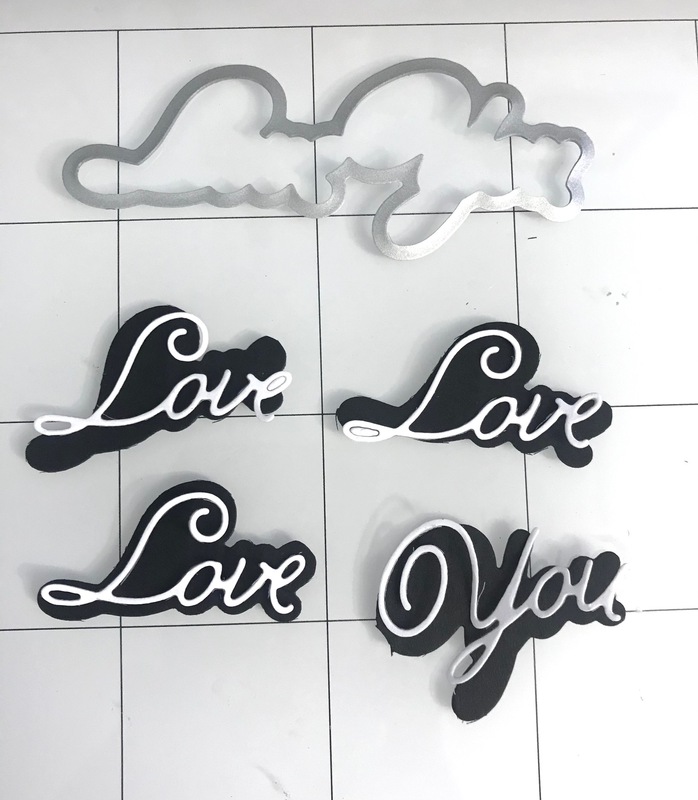
Step 4: Using the Love You Handwritten Outline dies, die cut the sentiment out four times from both black and white cardstock. Snip off the “you” for the first three words to get the “love, love, love you” sentiment.
For the base of the card I used an 80 lb. sheet of Neenah Solar White smooth cardstock. This slimline card measures 8 1/2″ x 3 1/2″. I die cut a black scalloped rectangle background to really make the rainbow hearts pop. I adhered the two hearts to the card using 3M foam adhesive for added dimension. Lastly, I added the sentiments over the hearts using a thin liquid adhesive.
I hope you have enjoyed this colorful card. Thanks for visiting and have a wonderfully creative day!

Supplies