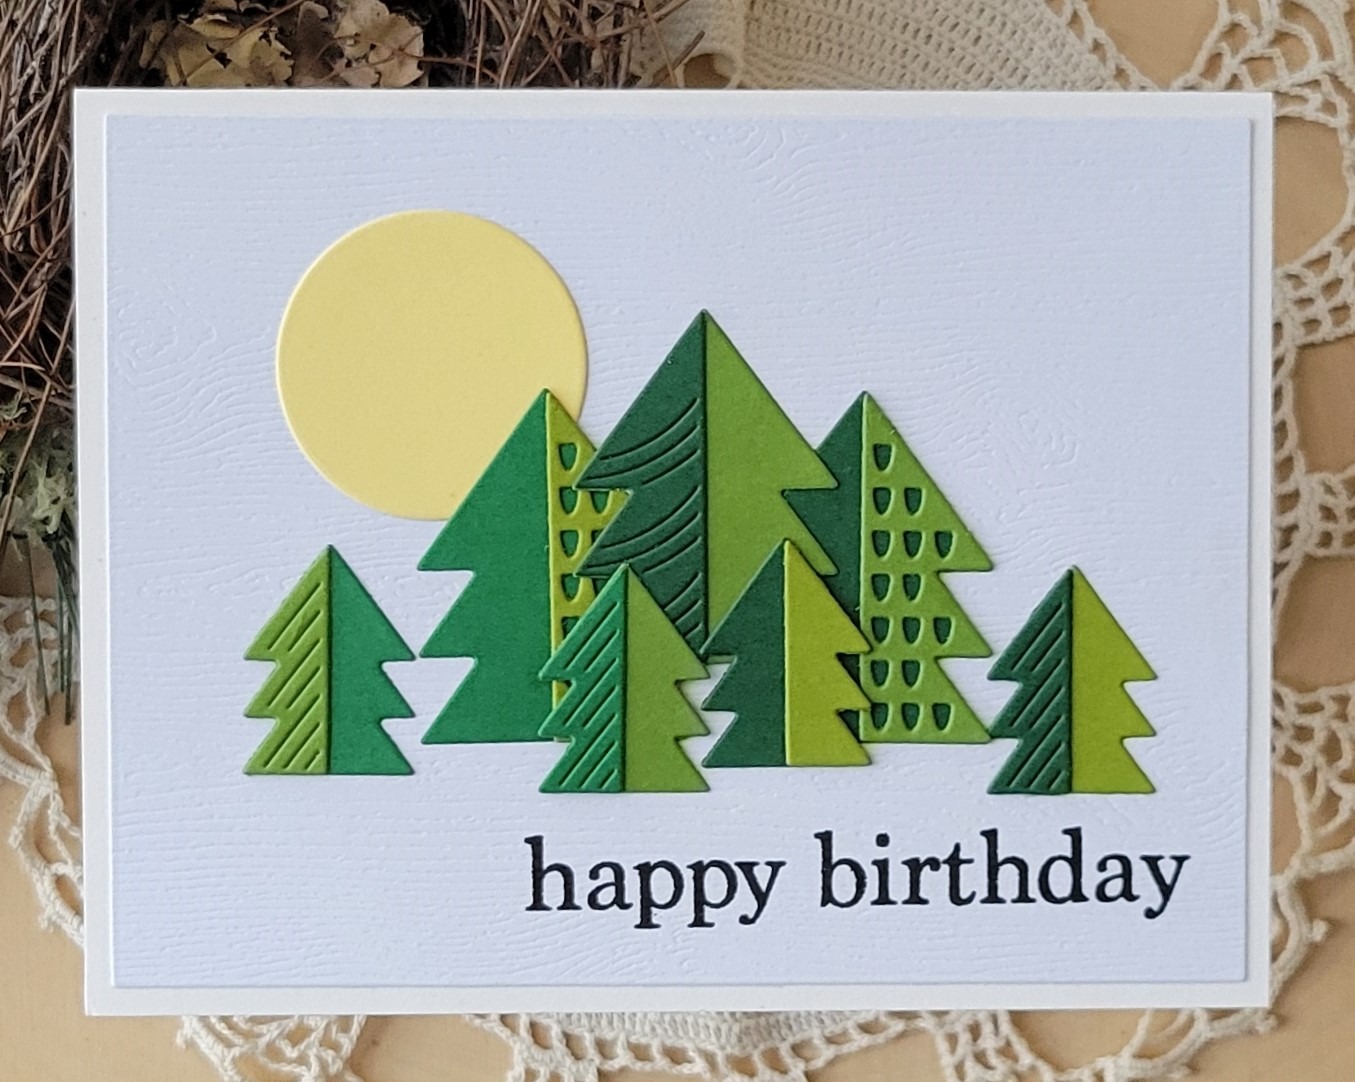
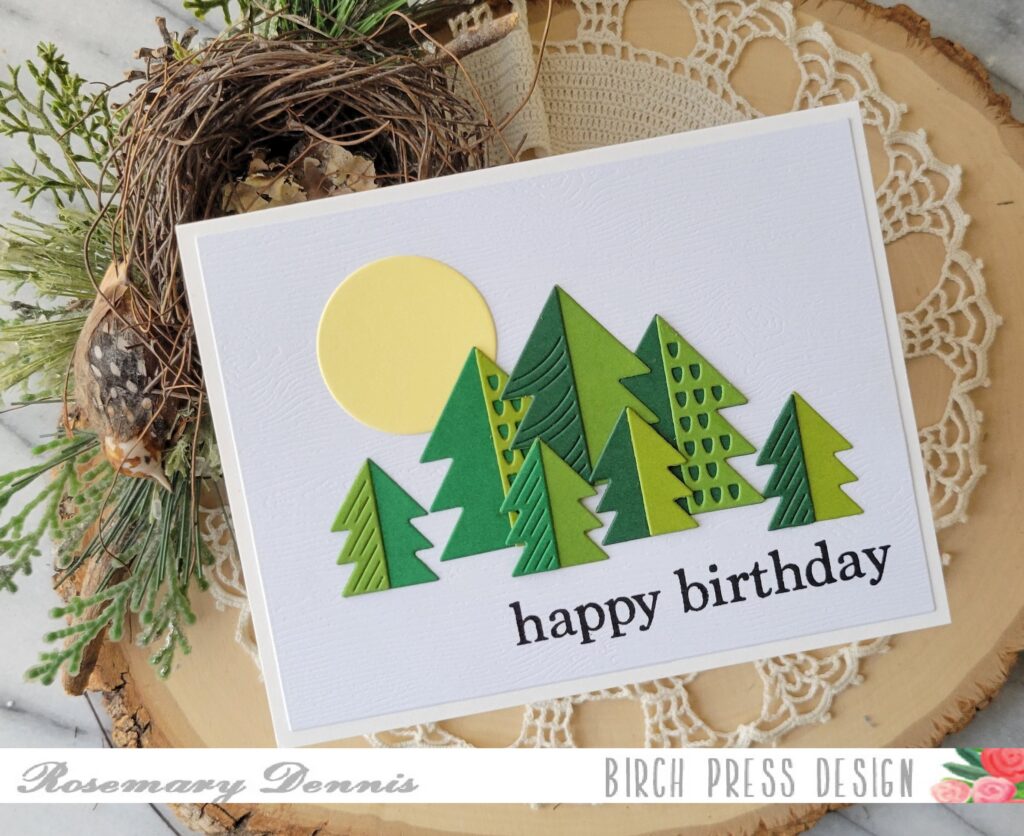
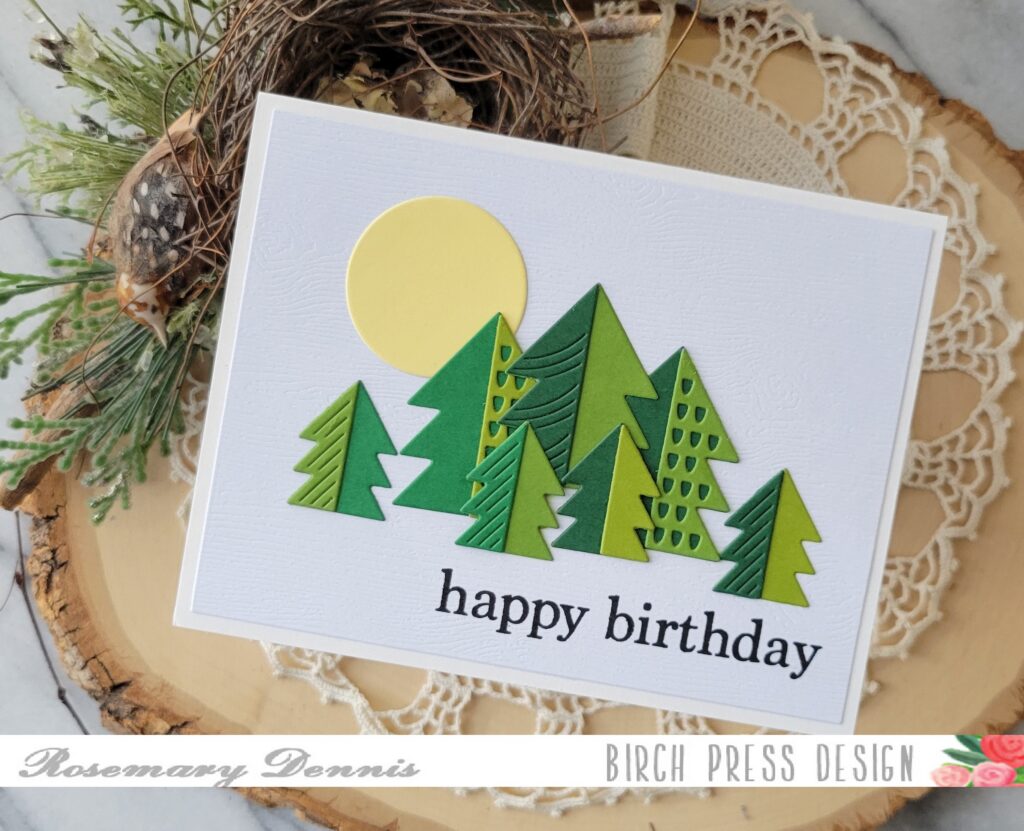
Hello friends! Rosemary here on the blog today sharing a birthday card with a little more of a masculine feel to it. I used the fun Block Print Pine Trees die set, as well as a sentiment from the Plain and Simple Birthday Greetings stamp. Here is what I created.
I started by pulling shades of green from the Memory Box Greenery 6×6 cardstock pad and die cutting trees. I then mixed and matched the different colors to make the different trees and adhered them together with glue.
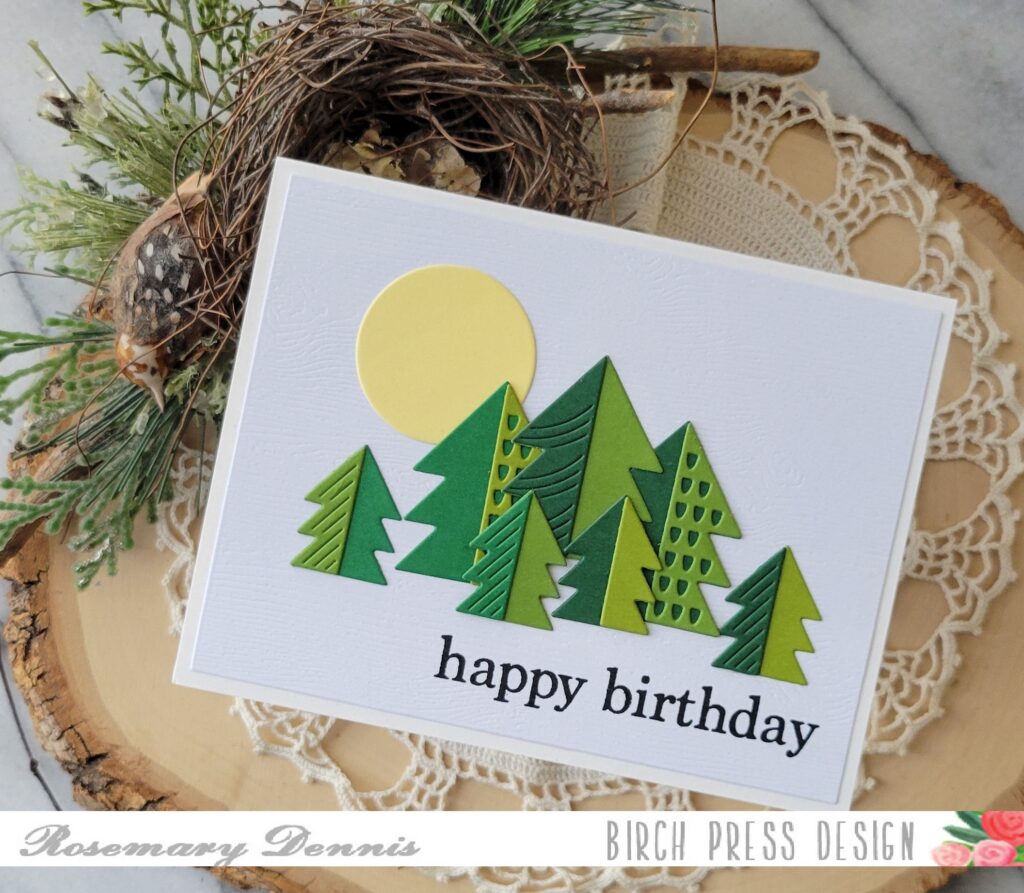
As the trees dried I tried out different arrangements and settled on the one you see. Now for the background. What to do, what to do? I know… a woodgrain background, lol! I also decided to add a sun in the background and used a yellow from the Memory Box Sunrise 6×6 cardstock pad.
I love the Memory Box woodgrain cardstock and decided to use a piece of the white woodgrain cardstock. I die cut it down to fit a card front and then searched for a sentiment.
I settled on the happy birthday sentiment and stamped it on to the woodgrain panel. I did stamp it several times to make sure I got the best coverage I could.
I adhered everything to the card front with glue as I didn’t want to add any more bulk to the card. I then adhered the panel to a off white cardstock base to provide just a little bit of contrast.
Well, that is it for me. I hope you enjoyed today’s project. Thanks for stopping by the blog today. Have a wonderful day.
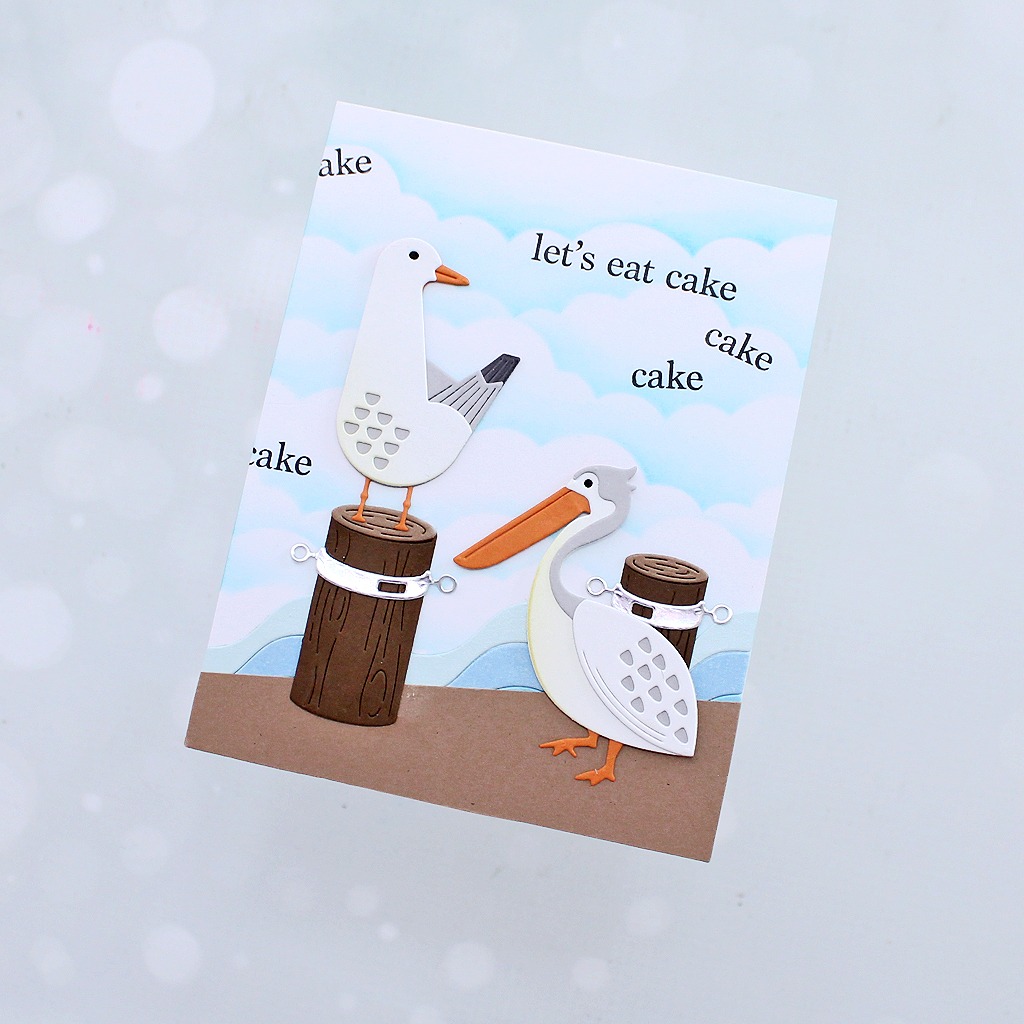
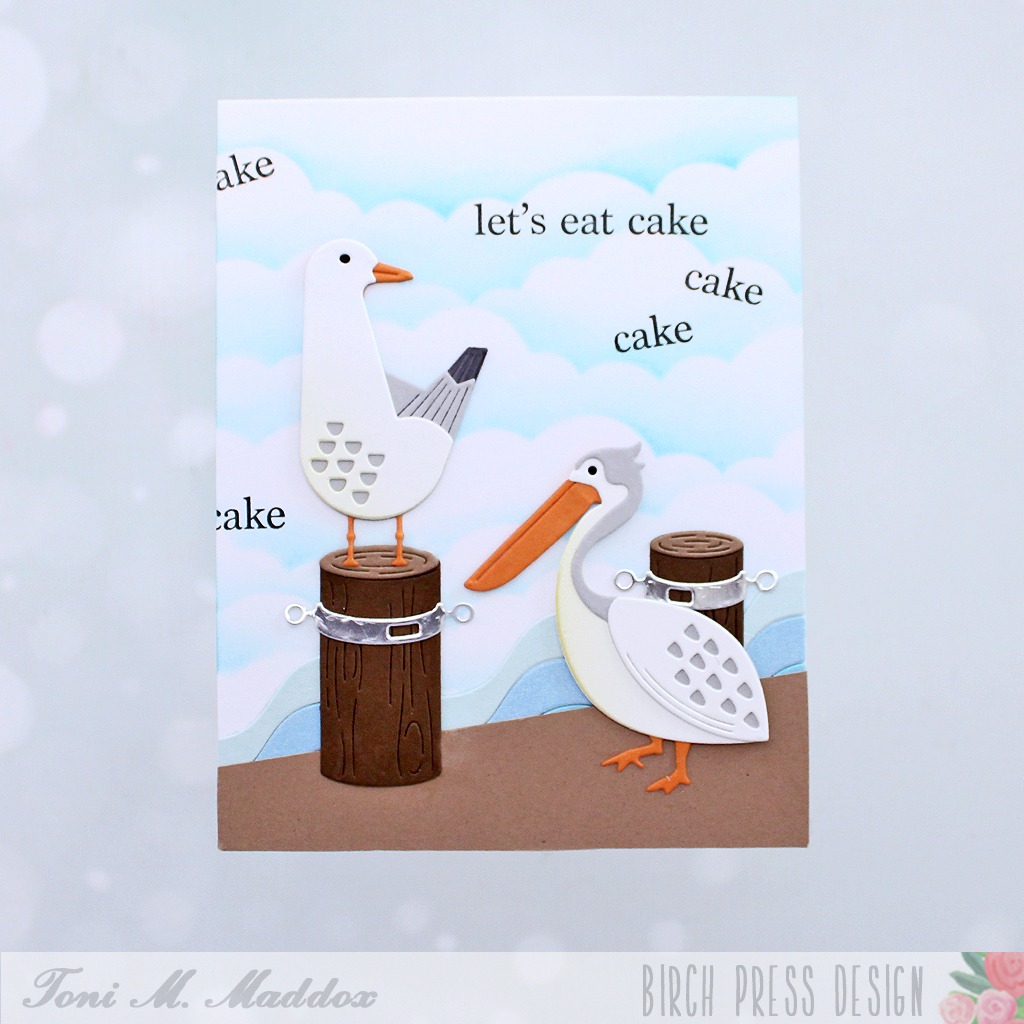
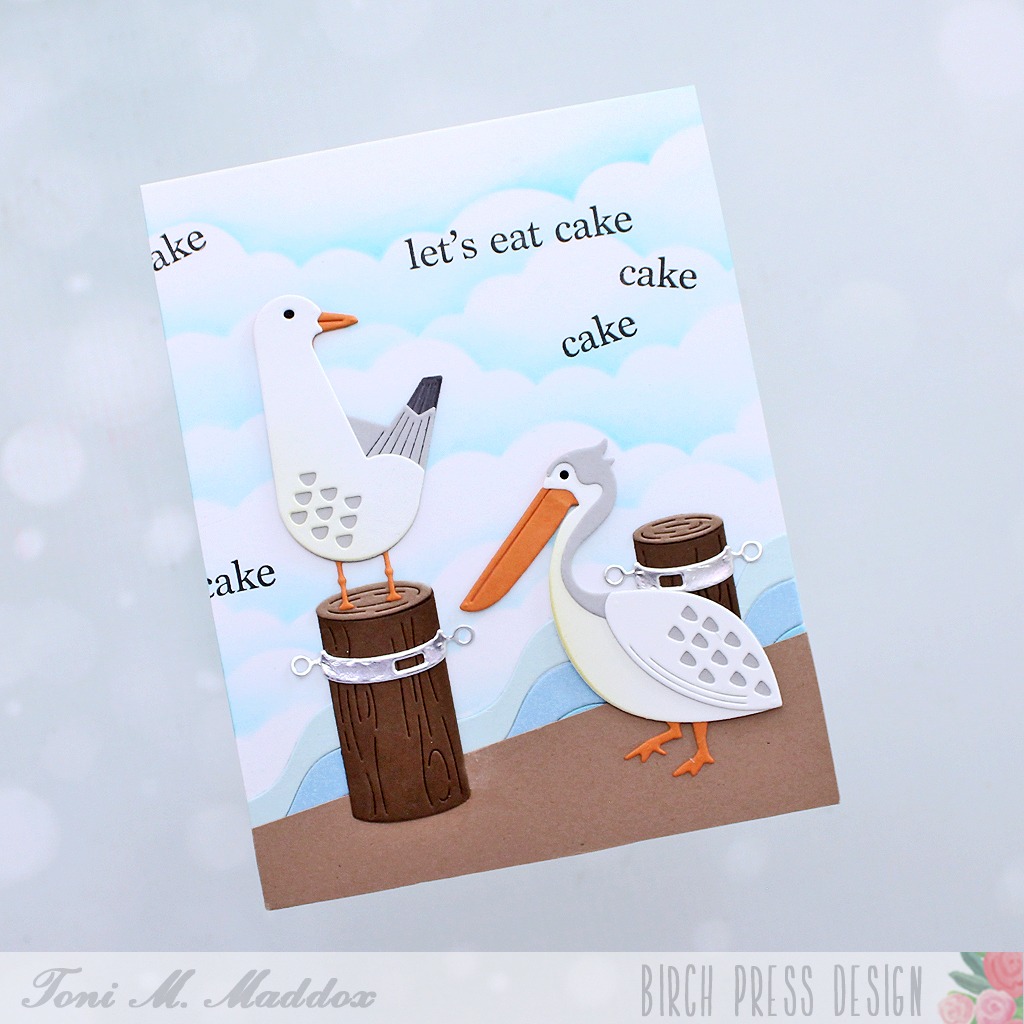
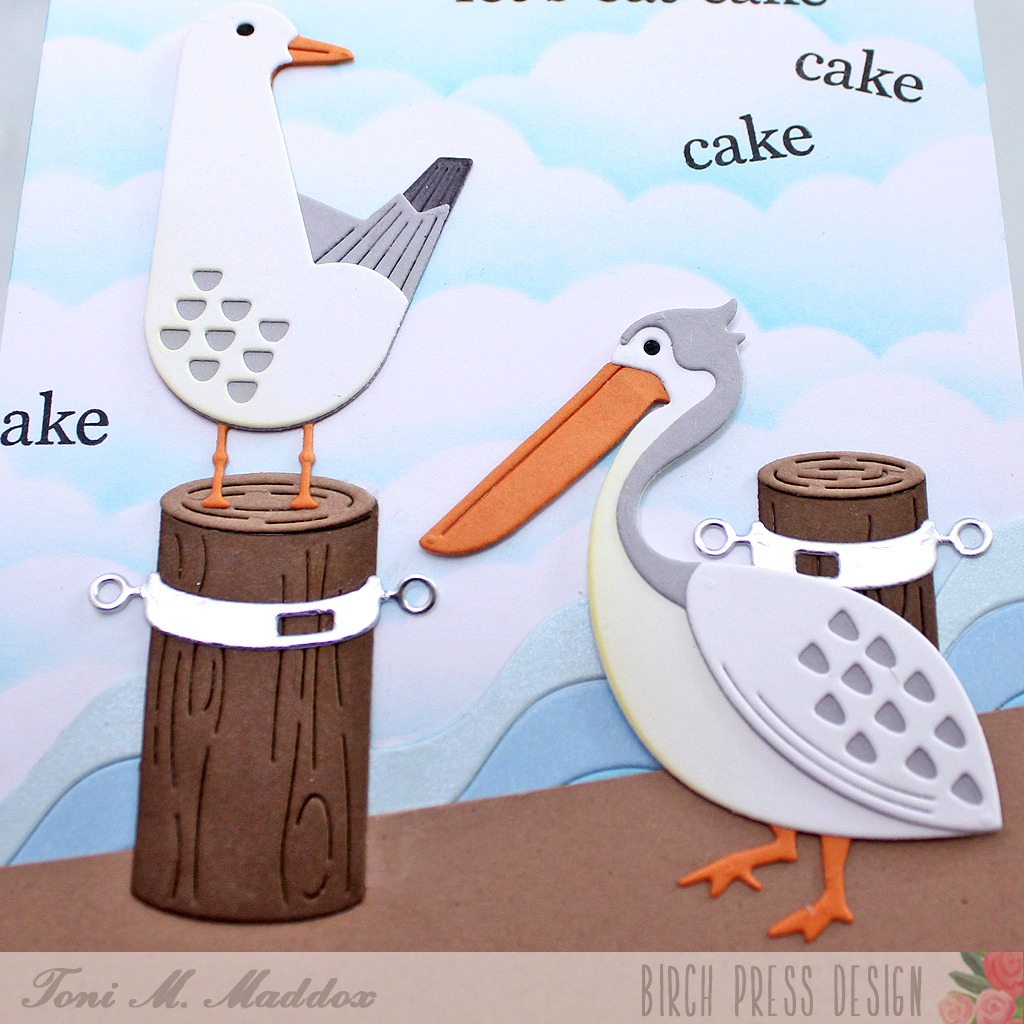
Ahoy, friends! Toni with you today sharing a nautical birthday card that’s sure to get a chuckle from the recipient.
I started the card by sponging the background with a cloud stencil and Catherine Pooler ink.
Next, I added the Birch Press Design Corner Waves cut from a few shades of scrap blue cardstocks beneath an angle-cut piece of kraft cardstock with the Birch Press Design Waterfront Pilings to represent a pier.
The birds, Birch Press Design Block Print Curious Seagull and Block Print Pelican, were fun to assemble and ever so cute. Notice how I sponged just a touch of yellow on their bellies for a bit of shading.
My final step was to add the Birch Press Design Plain & Simple Birthday Greetings stamped in Versafine Clair Nocturne. I can totally hear the seagulls overhead!
I hope you enjoyed today’s card and have a great rest of your week!
Feel free to visit my blog, Frankie Helps Craft, for a full list of supplies used and to check out my other creations.
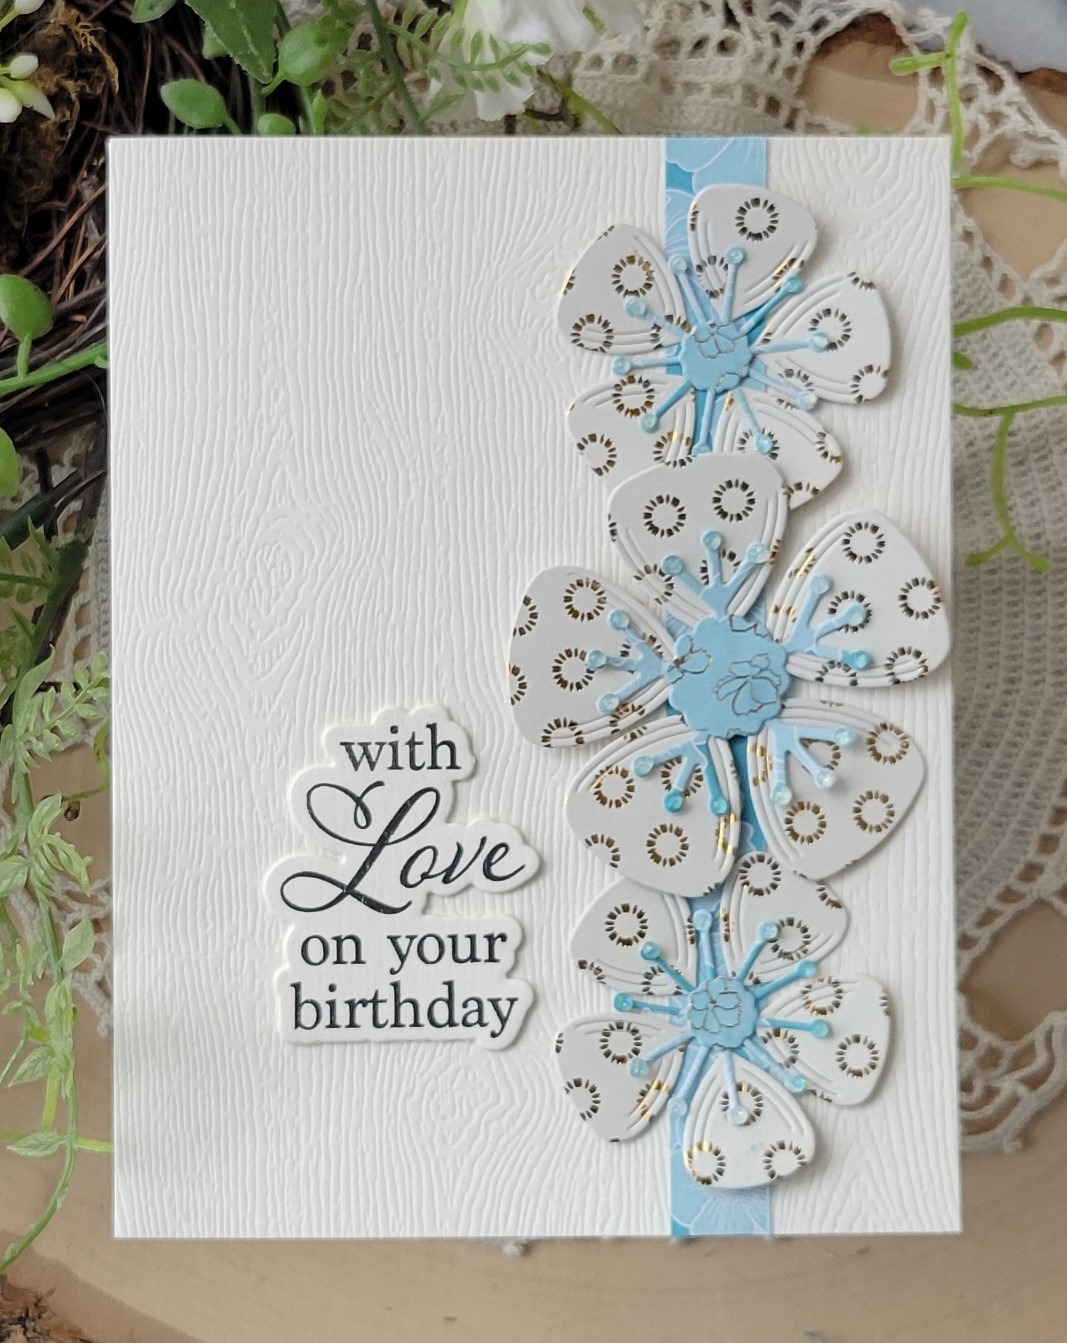
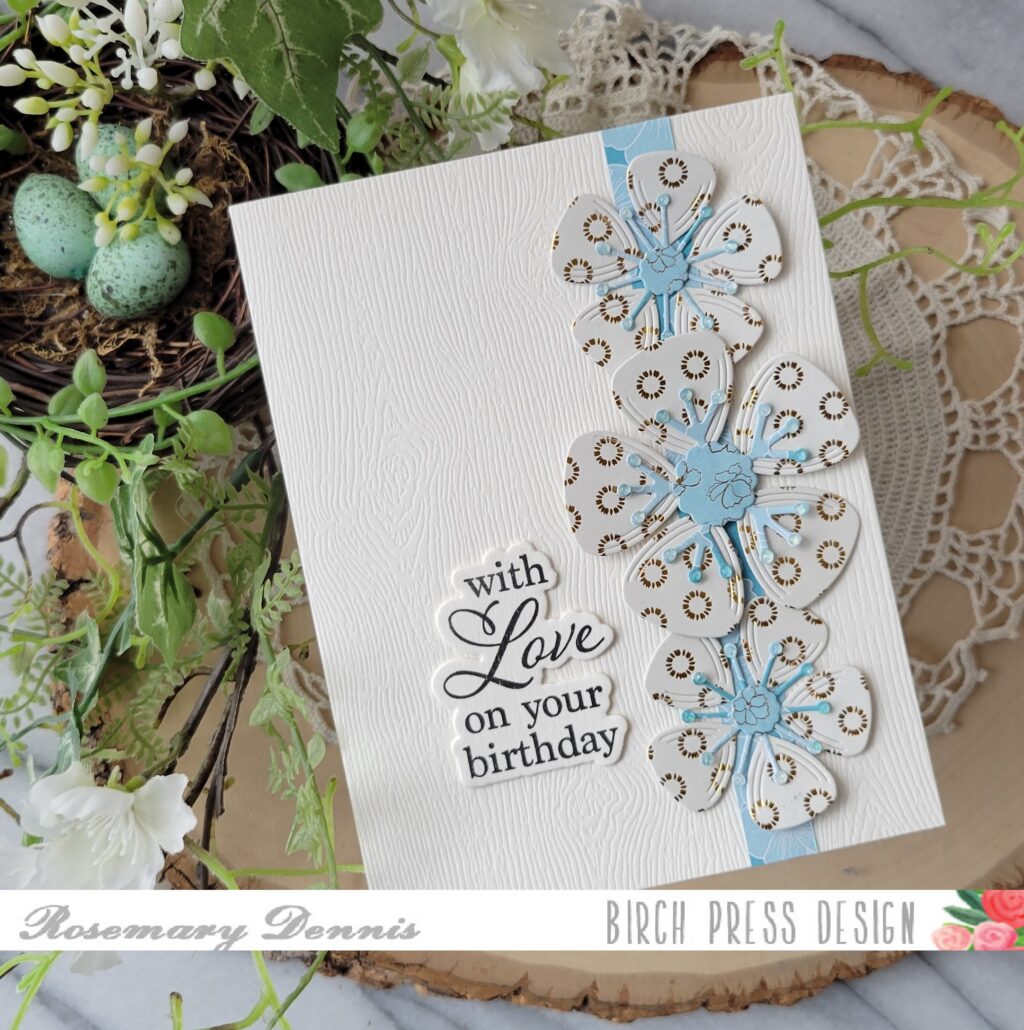
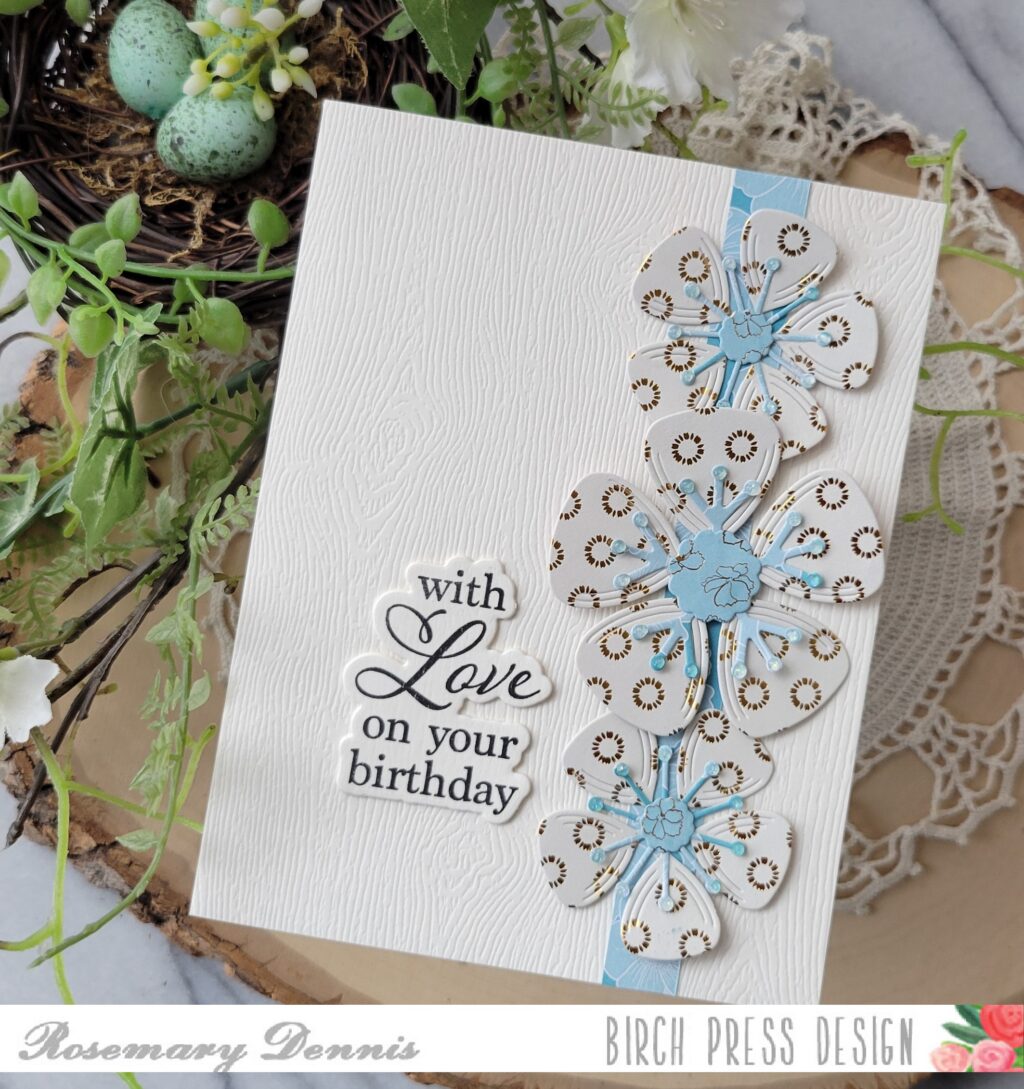
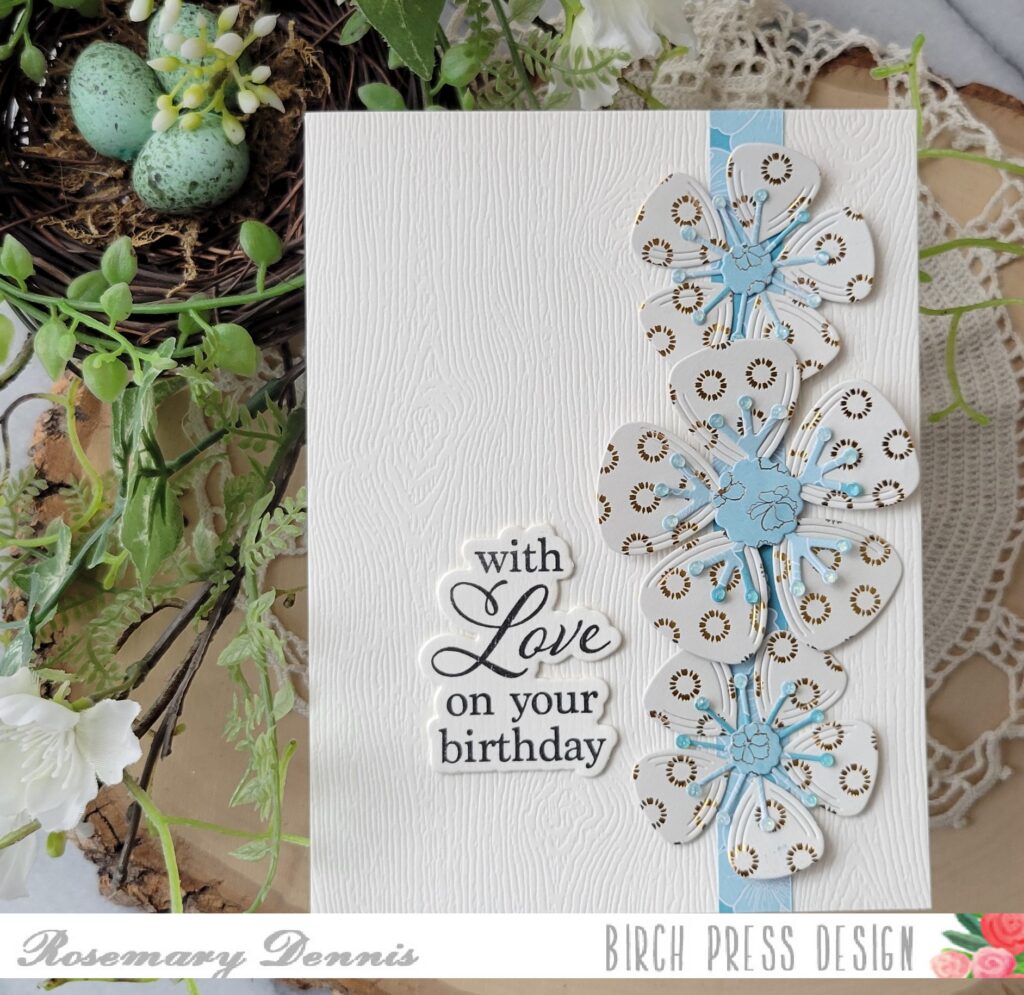
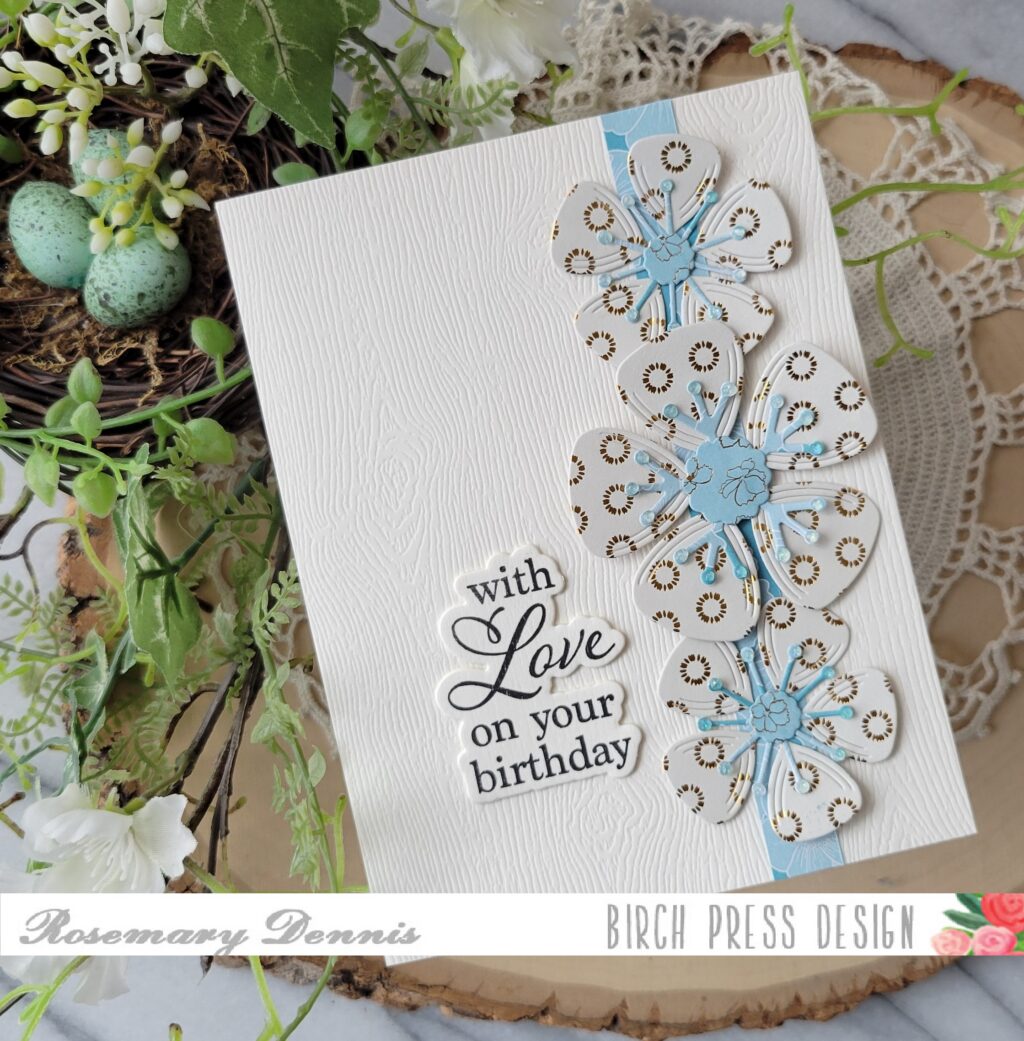
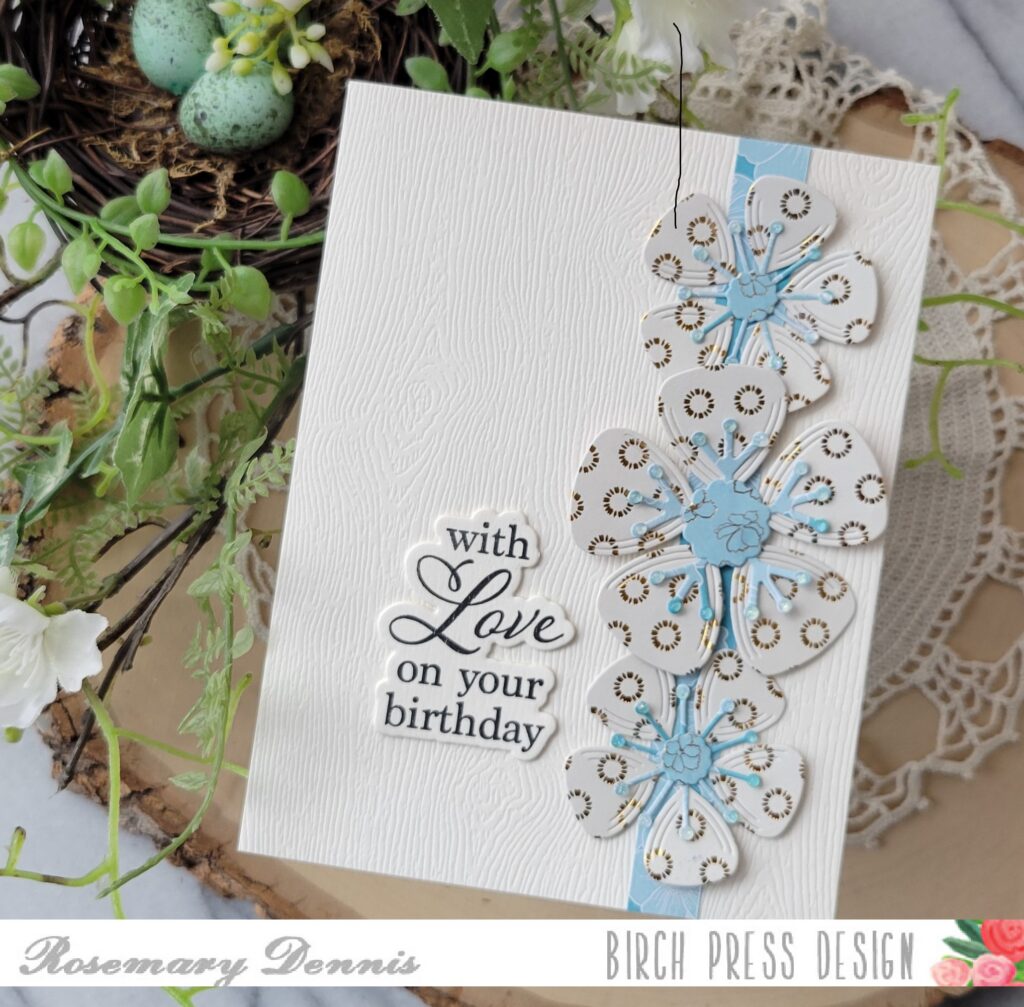
Hello everyone! Rosemary here on the blog today with a simple design using the Block Print Lovely Flower and Elegant Birthday Sentiments stamp and die set. I also used some papers from the Memory Box Anemone Grove 6×6 paper pad. Let’s look at what I made.
I guess this month I have a theme of using patterned paper, lol! I’m often hesitant to use patterned paper for die cutting, but decided that I would give it a try, again. For this card I decided to make sure that I used a more neutral pattern for the flowers. For that I chose a cream paper with gold foiling.
I chose a light blue paper with gold foiled flowers to use for the flower centers. A strip of the flip side for the blue paper was used as an accent as well.
I adhered all the pieces of the flowers together and set them aside to dry. I love the Memory Box woodgrain cardstock for backgrounds as it adds a nice subtle look. I trimmed down a piece of cream woodgrain and then added the strip of patterned paper.
The flowers were then adhered to the paper strip. I used a thin foam square for the large flower and then glue for the two smaller flowers. A dot of a crystal lacquer was added to each of the little stymens and I set aside the panel to dry.
I finished with the sentiment that I stamped in black on the reverse side of a piece of the cream woodgrain cardstock thus achieving a nice cohesive look. I hope you enjoyed today’s project. Thanks for stopping by and have a wonderful day.
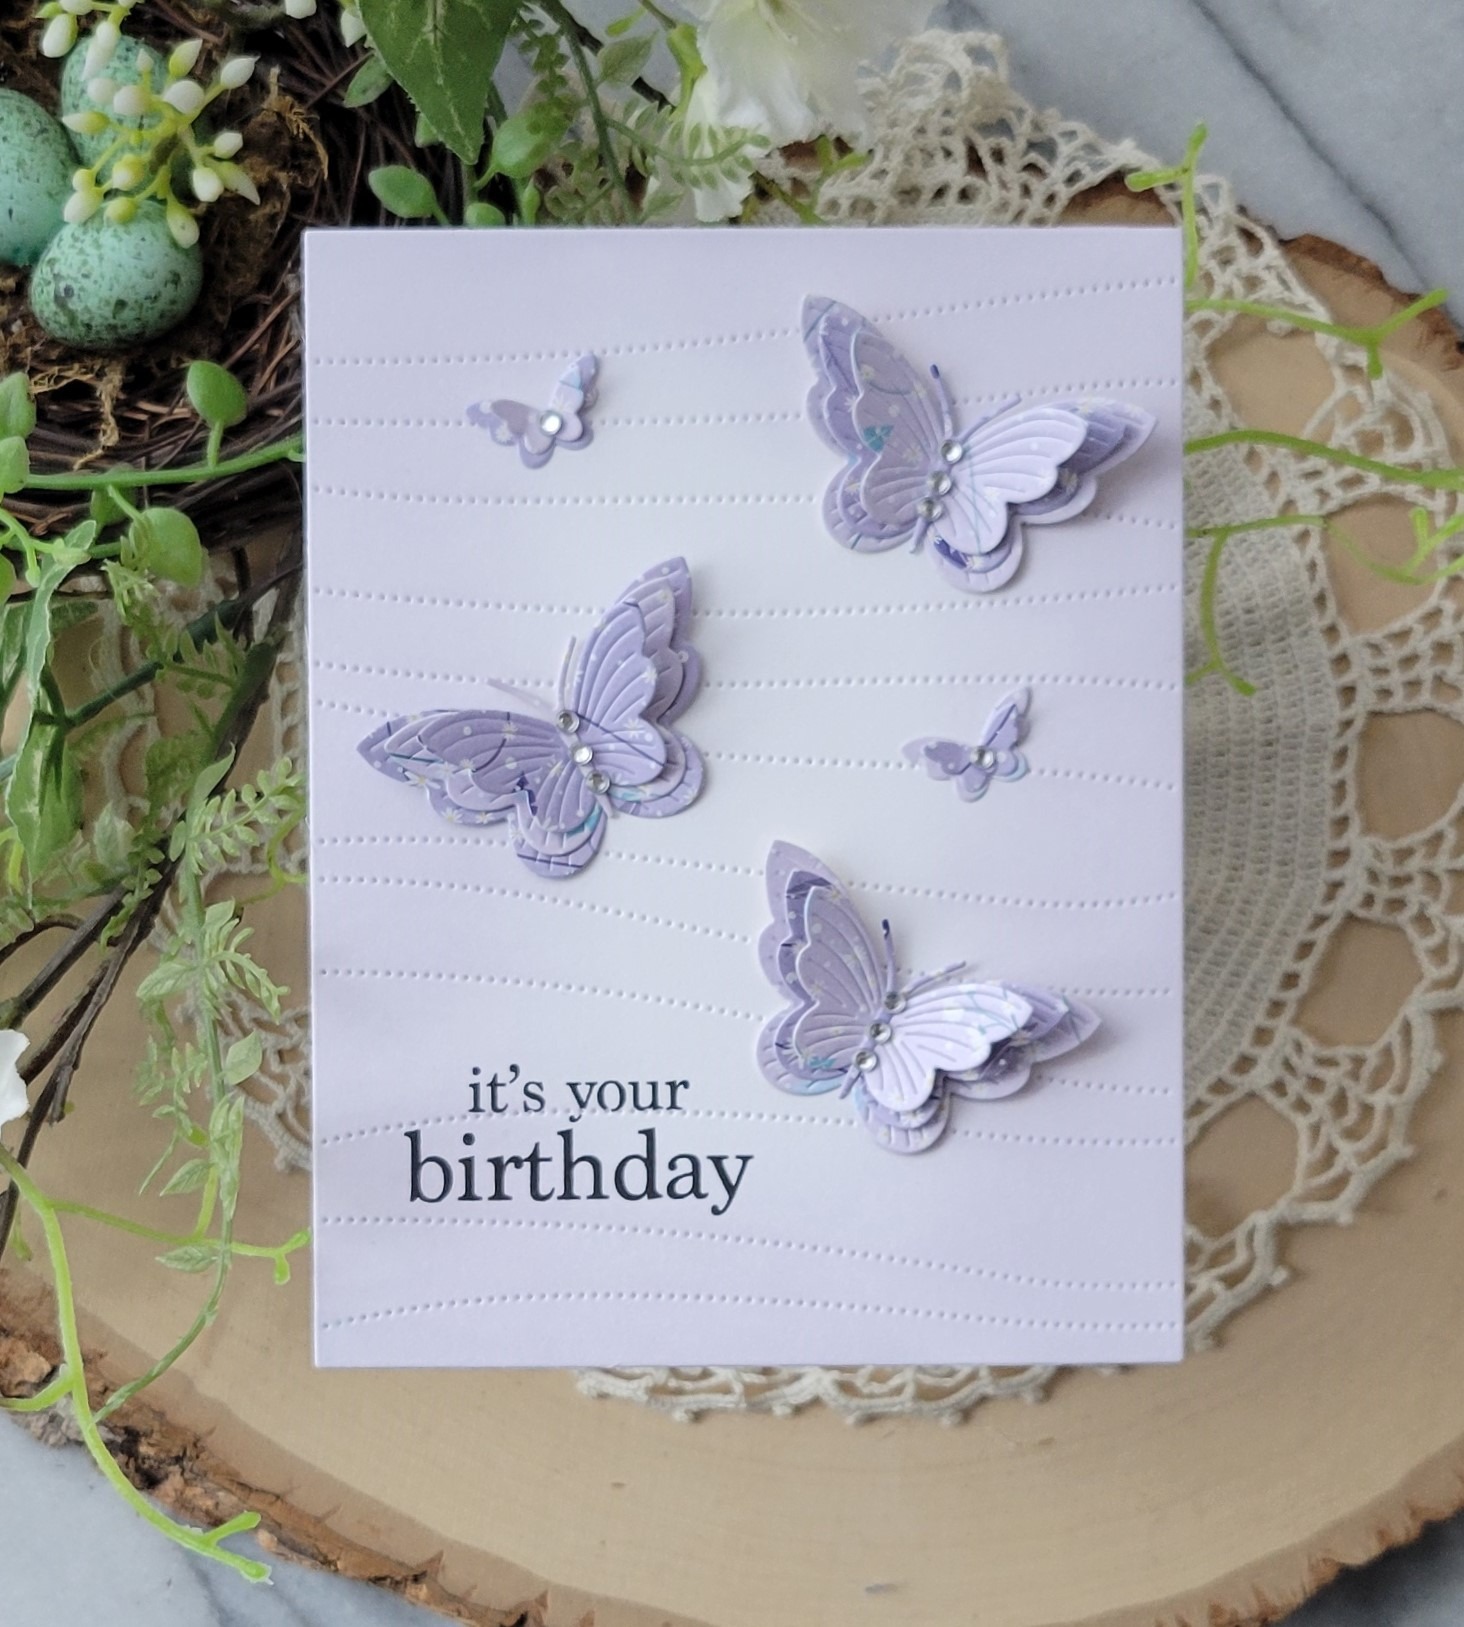
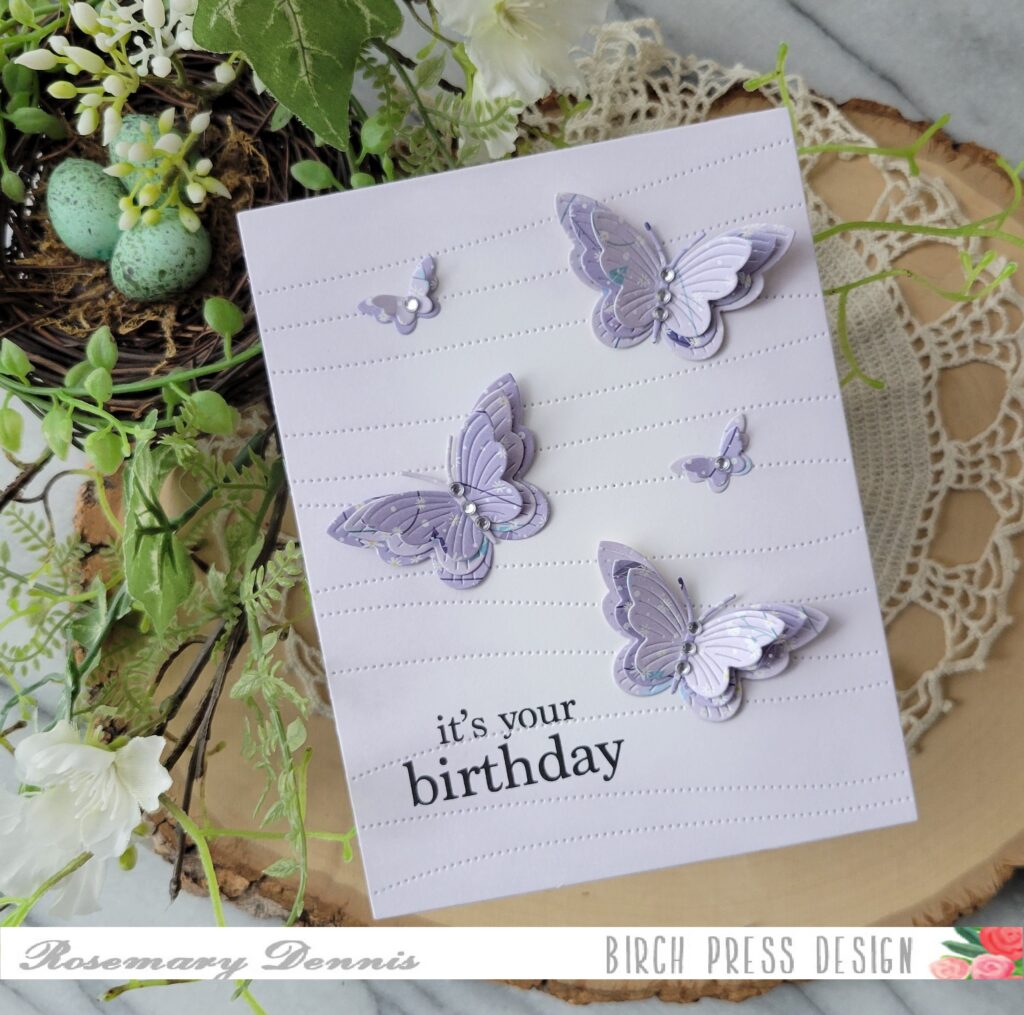
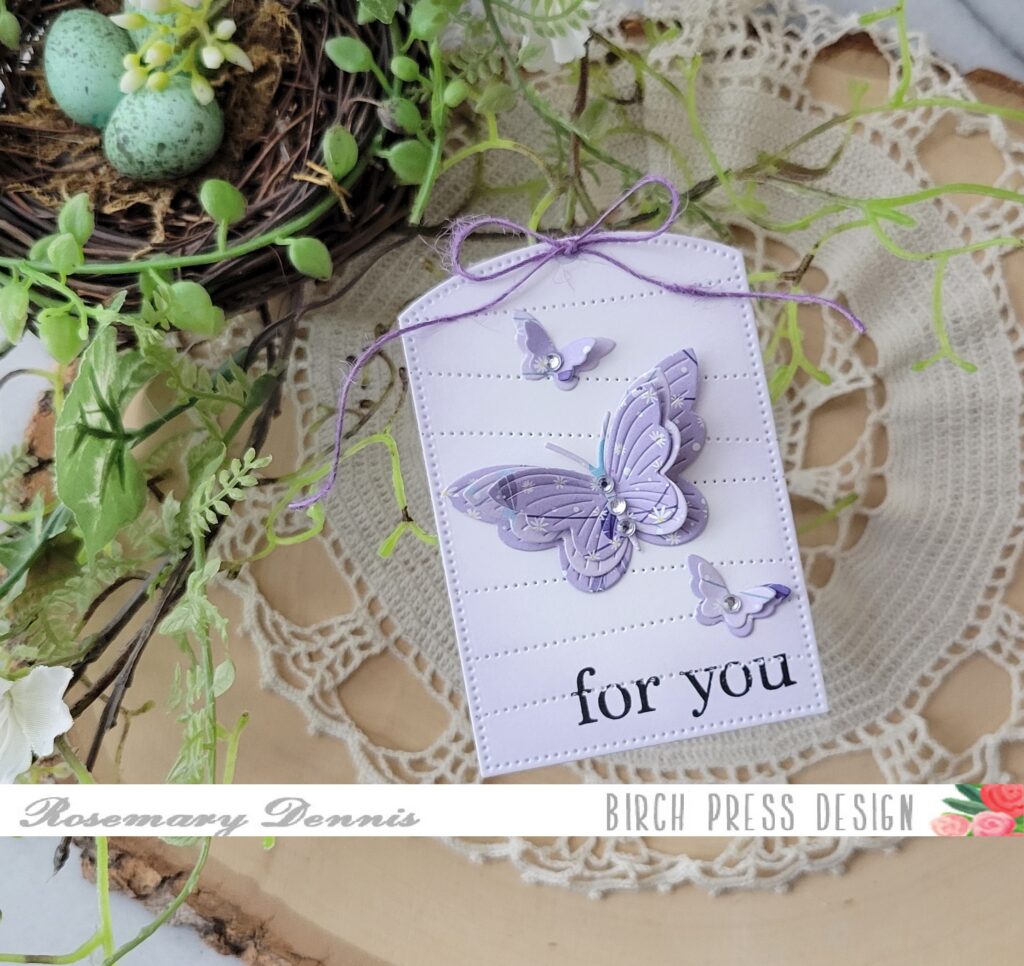
Hello everyone! Rosemary here with a sweet birthday card and tag made with the Linear Boho Butterflies dies and pretty papers from the Memory Box Anemone Grove 6×6 pad. Let’s look at what I created:
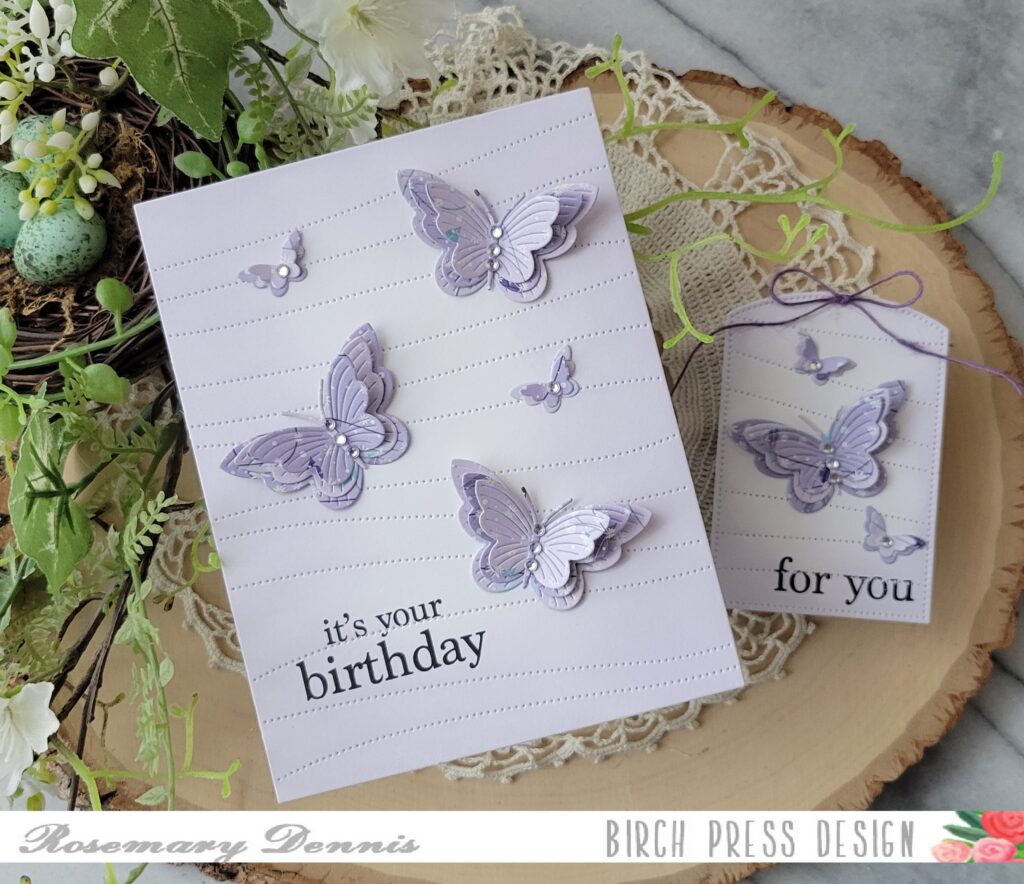
As I started thinking about how I wanted to use the Linear Boho Butterflies dies I thought it would be fun to use some patterned paper. I looked through my Memory Box 6×6 pads and settled on the Anenome Grove pad. I went with papers that both had a light purple hue to them and a subtle pattern.
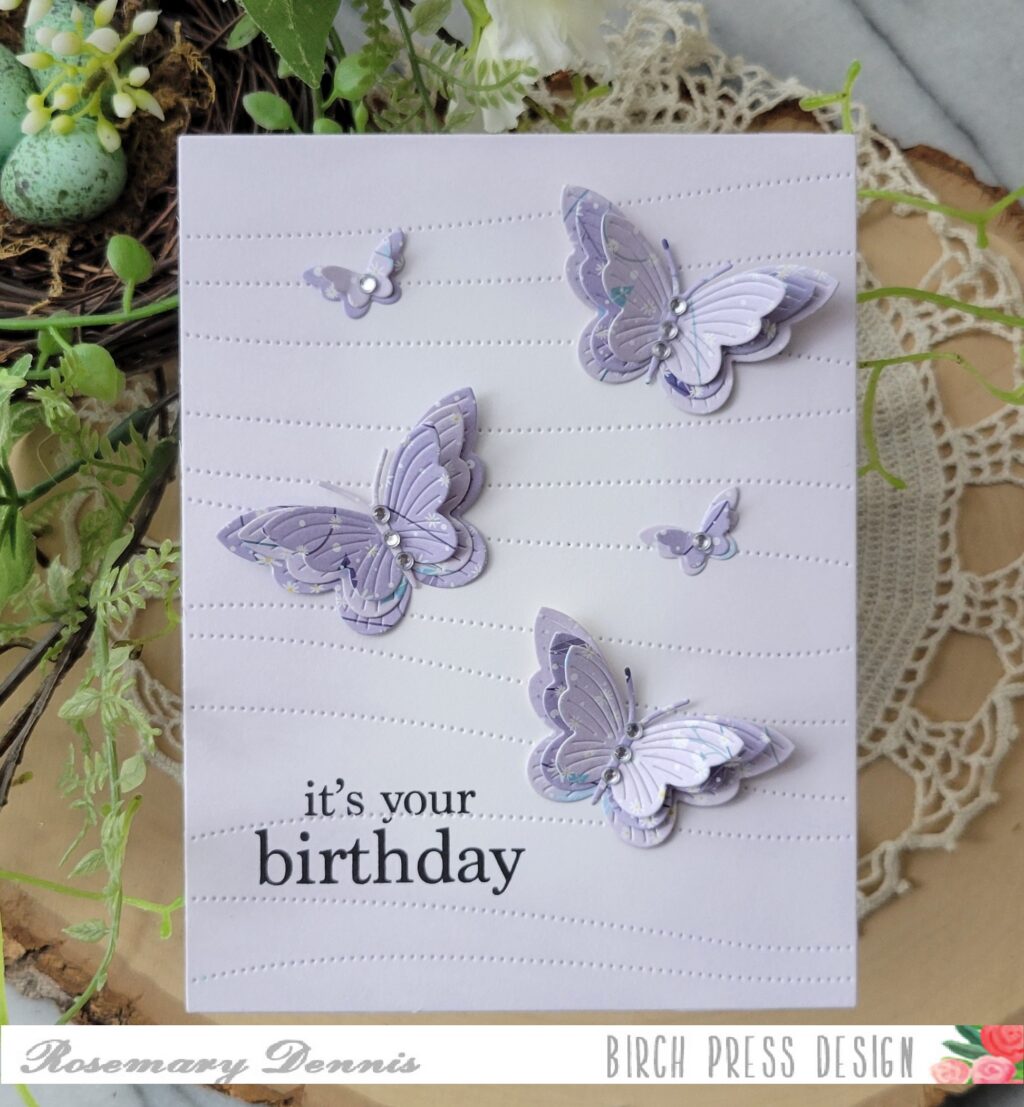
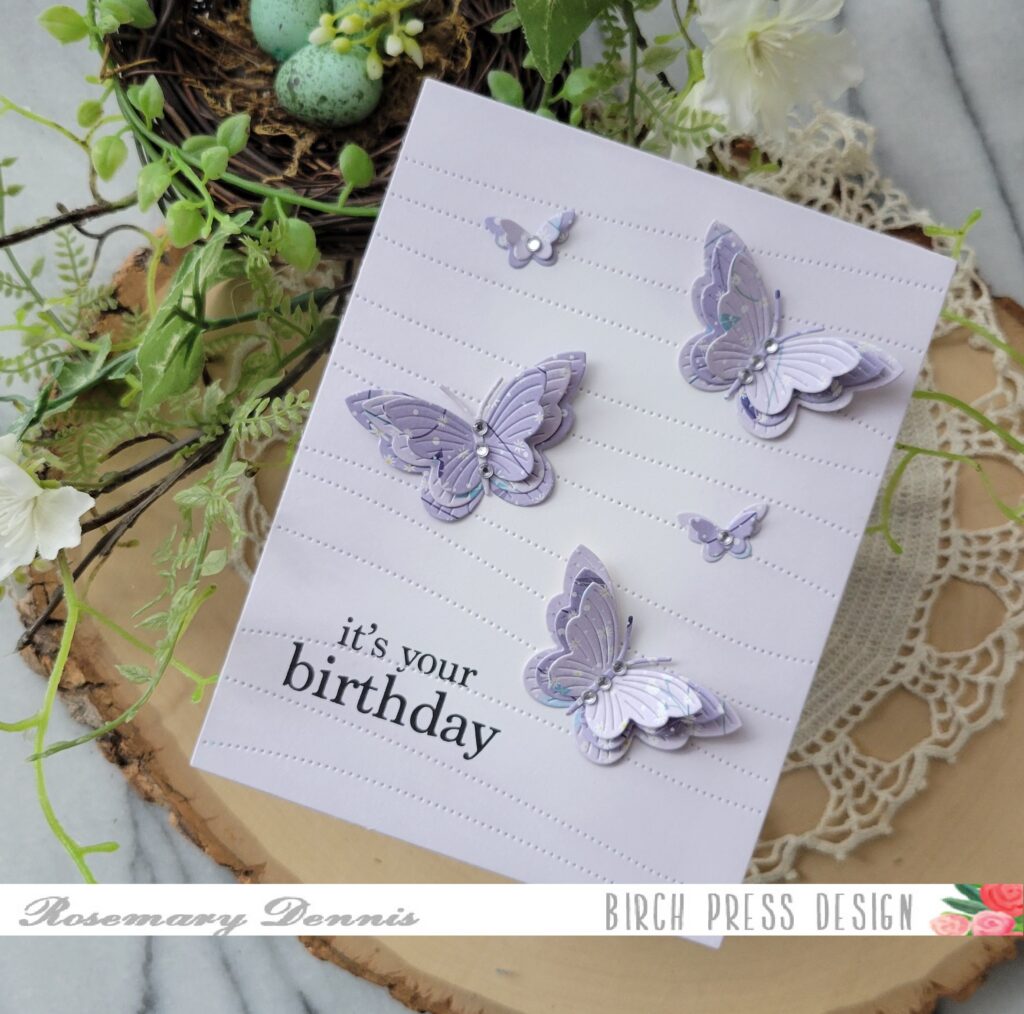
I wasn’t exactly sure how I was going to use the butterflies so I decided to die cut multiples from each piece of patterned paper. The bodies of the butterflies were also die cut from the same papers. As I played around with ideas I thought it would be fun to use the Pinpoint Contour Plate to provide some movement on the background. The panel was die cut from white cardstock and set aside.
There are three large butterflies and two tiny butterflies in the die set. I decided to layer all three of the larger butterflies together by alternating the different patterned papers. The look is very subtle, but pretty. I also layered the two tiny butterflies in the same manner. To finish off the butterflies I added clear Memory Box fairy jewels to the bodies of all the butterflies. To keep the subtle purple going I ink blended a light purple ink around the edges of the background panel and then added the butterflies and sentiment to the card.
After I finished the card I still had one large layered butterfly and two tiny layered butterflies left. So I thought it would be fun to make a little tag. I used a scrap of white cardstock and die cut it with the Pinpoint Contour Plate and then die cut it further with a Memory Box Curved Cap Pinpoint Layers die. I added the same light purple ink around the edges and stamped the sentiment. Both sentiments are from the Plain and Simple Birthday Greetings. I finished with a little bow made with purple twine.
I love how both the card and the tag turned out. I hope you enjoyed today’s project. I had a lot of fun creating them.
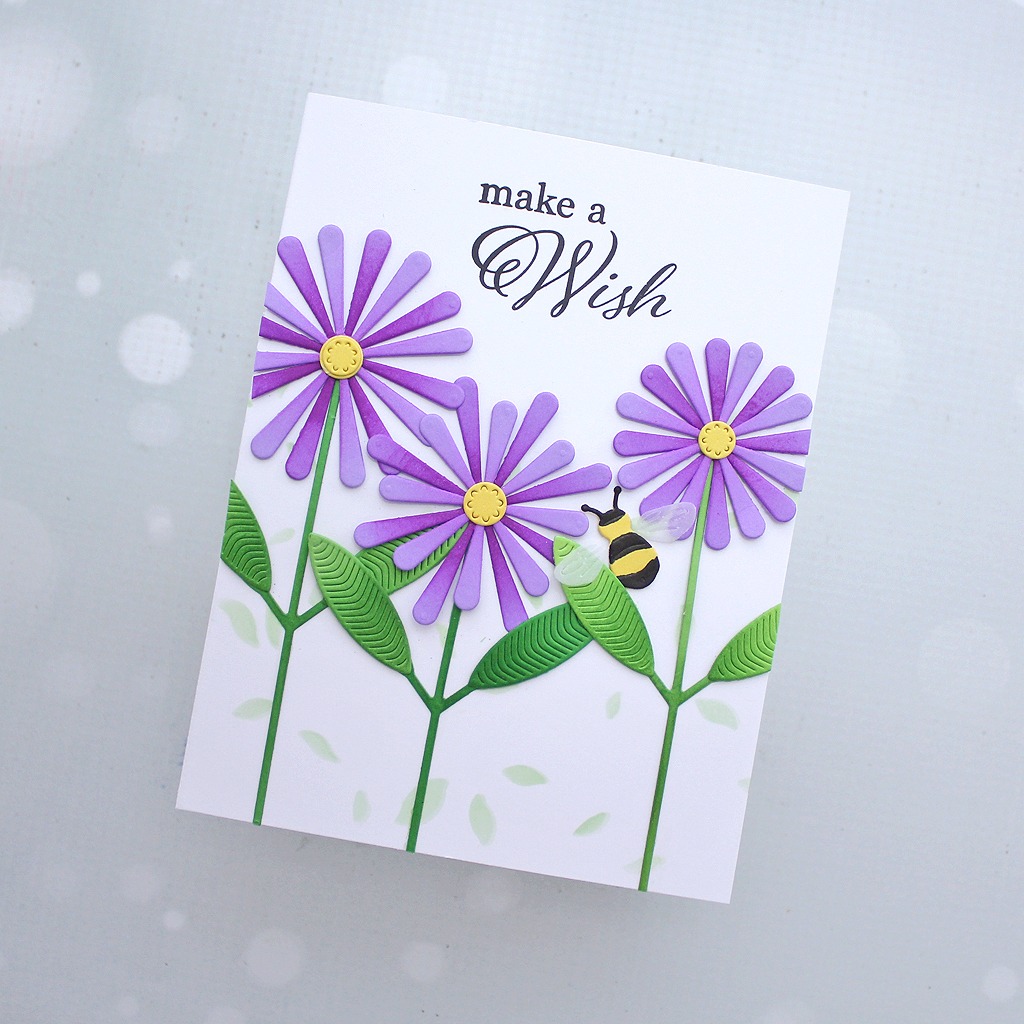
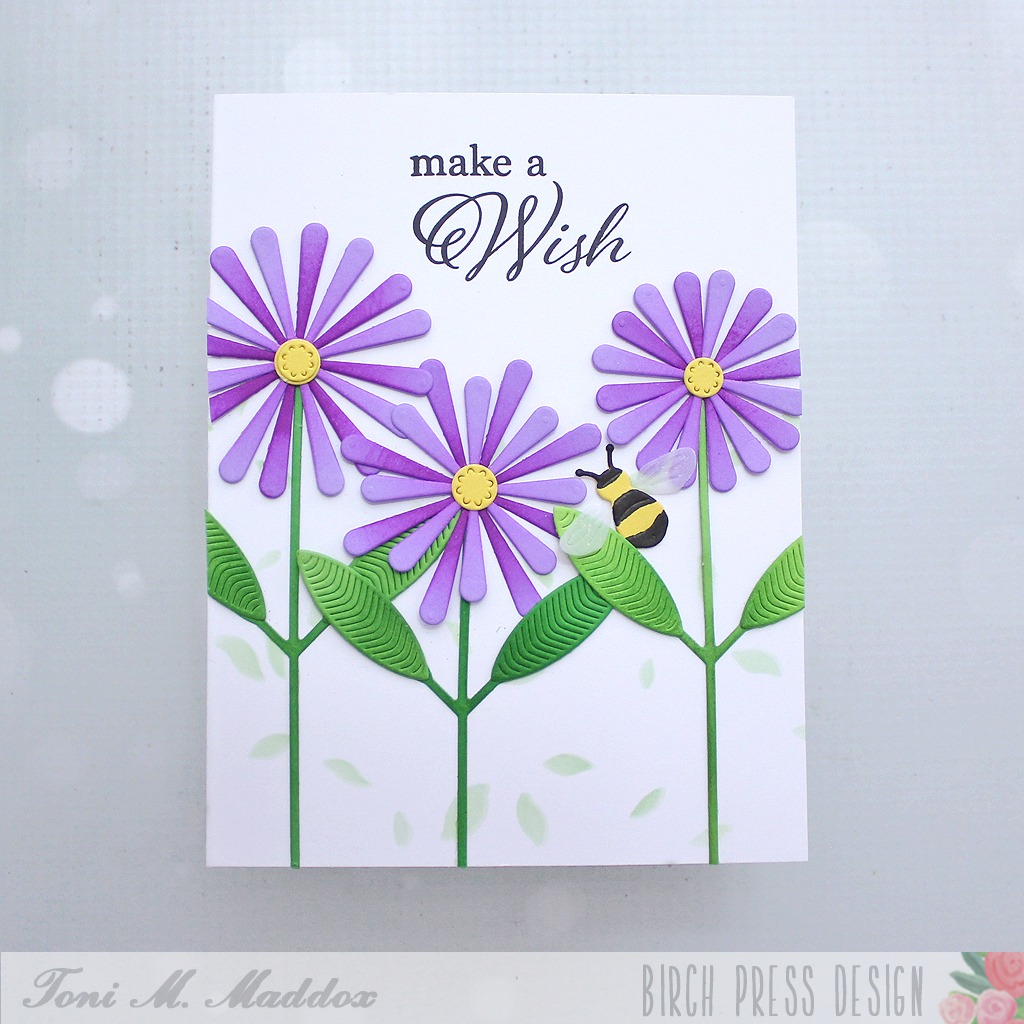
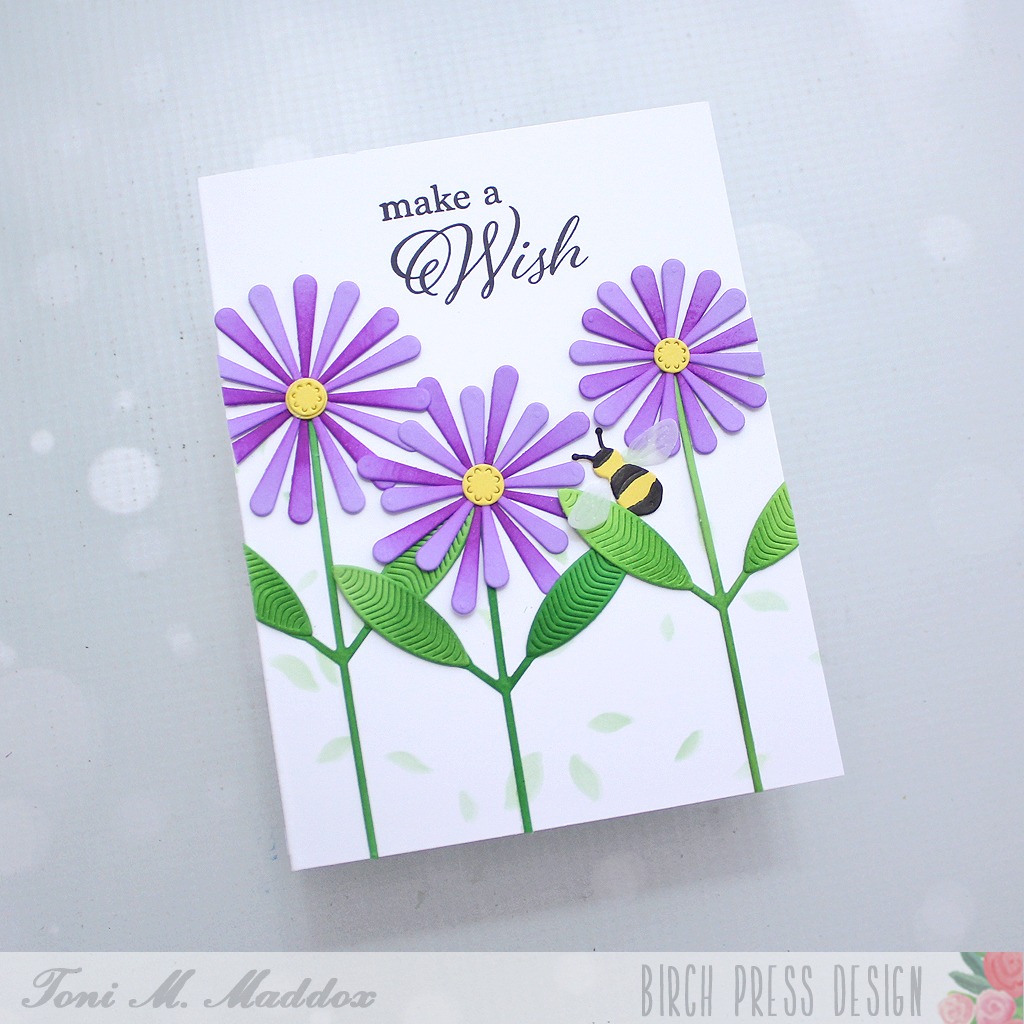
Greetings, friends! Toni here with you today and I’m sharing a cheerful birthday card featuring Block Print Daisy Flowers.
I cut out a few of the Block Print Daisy Flowers using Memory Box 6×6 Lagoon cardstock for the petals. I then used Catherine Pooler ink to add some variation in the color.
In addition, I sponged the Memory Box 6×6 Greenery cardstock with a bit of ink to create shadow on the stems.
I used a Poppy Stamps Fanciful Flowers stencil with Catherine Pooler ink to add the idea of more greenery behind the daisies.
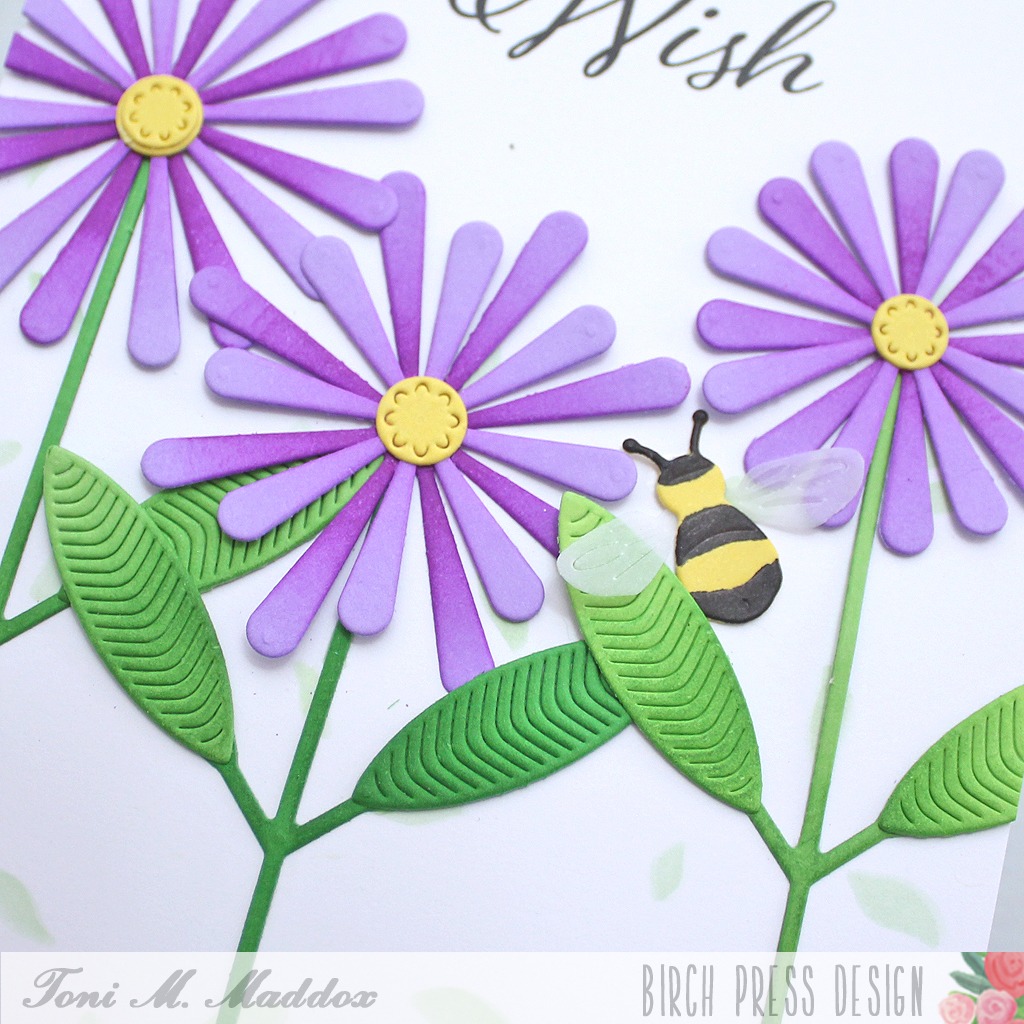
For the Block Print Buzzing Bumblebee, I used the same shade of Memory Box 6×6 Sunrise yellow I had used for the flower centers. Super cute!
My final step was to add the Elegant Birthday Sentiments at the top, stamped in Versafine Clair Nocturne.
I hope you enjoyed today’s card and have a great rest of your week!
Feel free to visit my blog, Frankie Helps Craft, for a full list of supplies used and to check out my other creations.
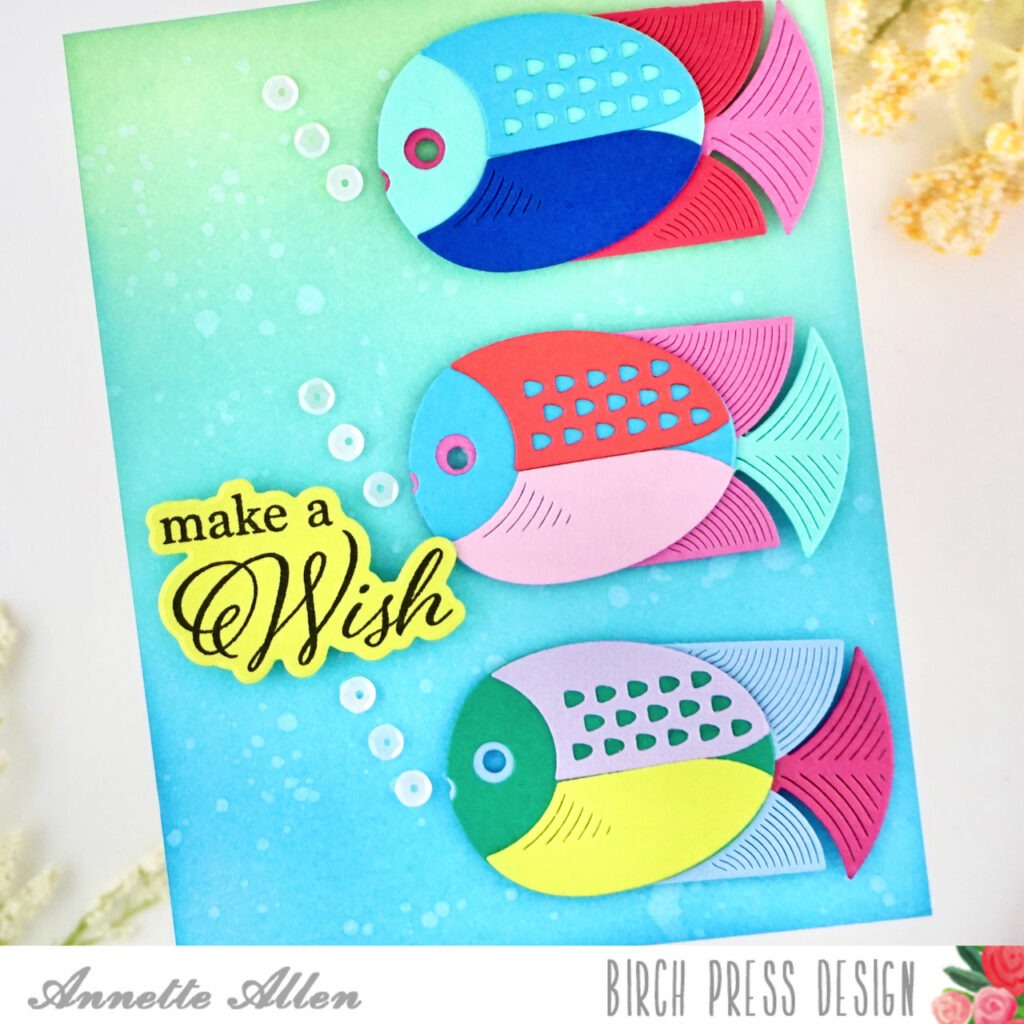
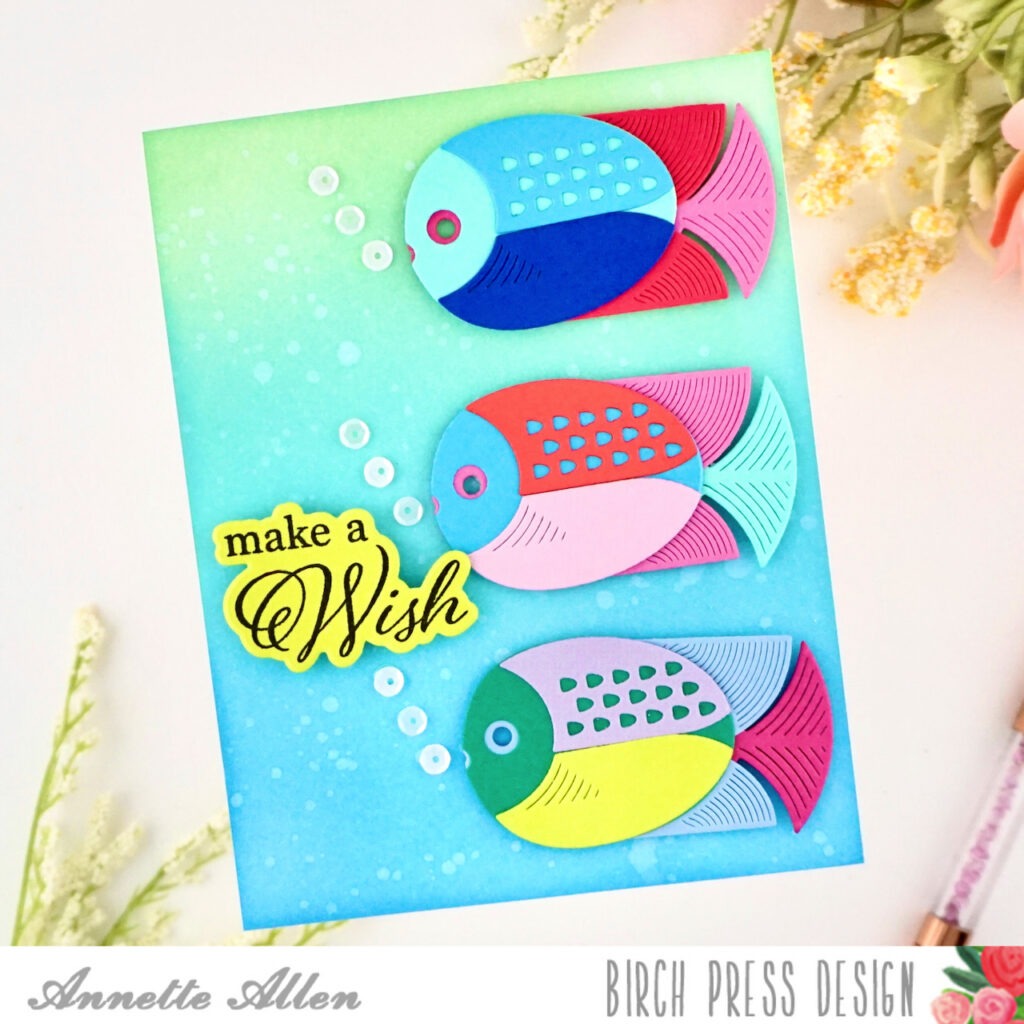
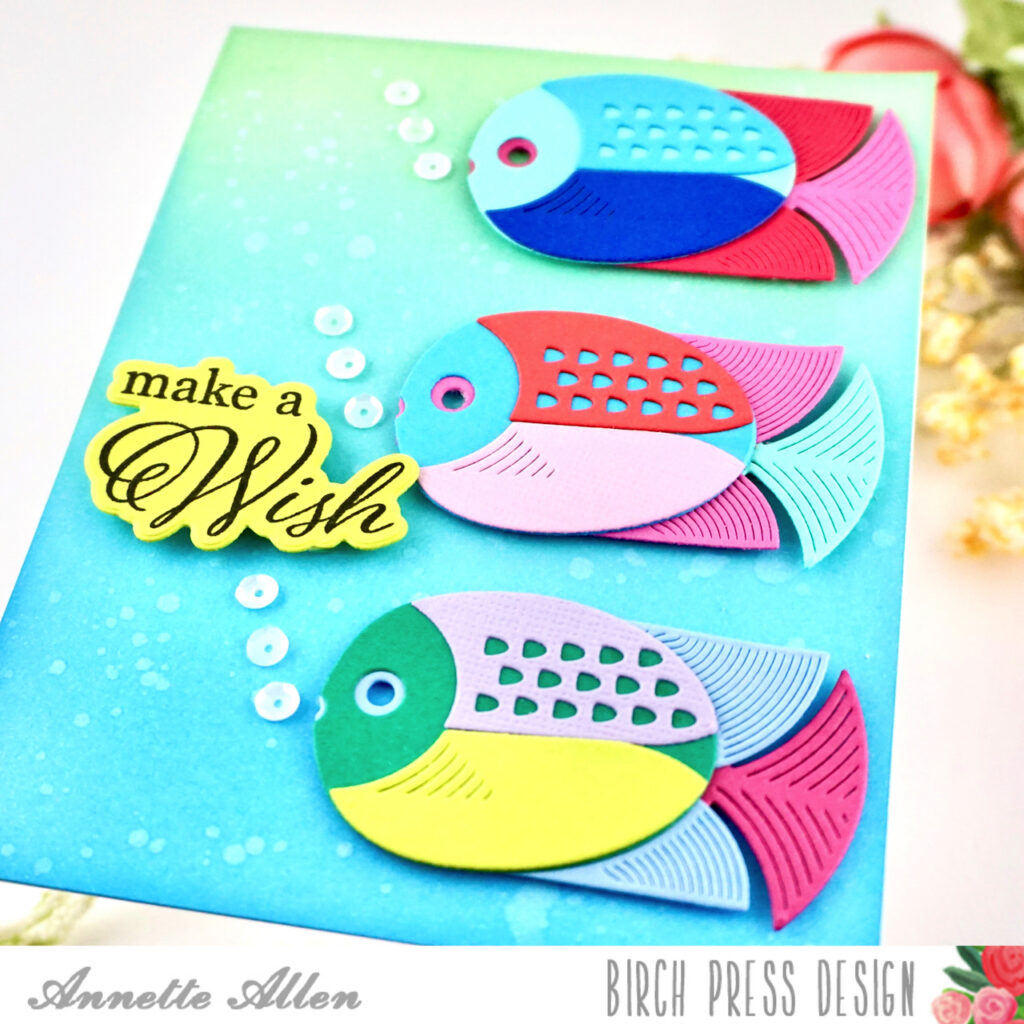
Welcome Birch Press Design friends, Annette Allen (myclevercreations) here with you today and I am sharing my first post as one of the newest design team members. YAY! So let’s get started…
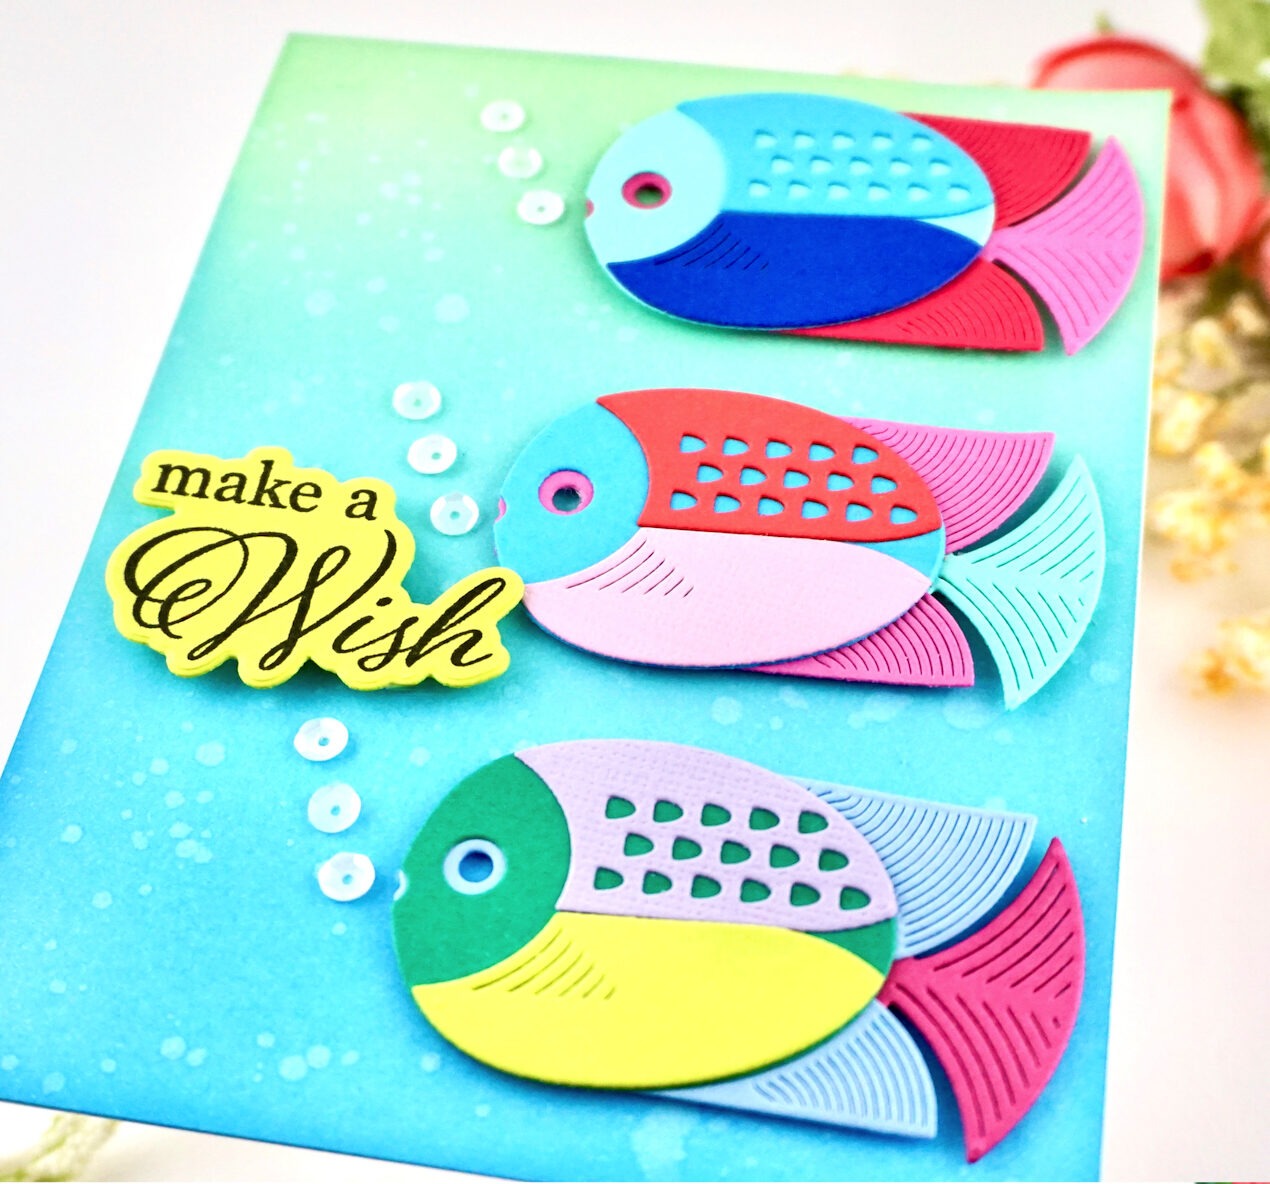
I first started with die cutting the Block Print Glider Fish three times on colored cardstock. I did not plan the colors I just picked out some scraps and started die cutting. Adhere all the pieces together using liquid glue.
Don’t worry about how the colors go because as you can see, you can mix and match most colors and they just look fun. I might add that the Block Print Glider Fish is very easy to piece together.
Create a card, A2 size on white cardstock.
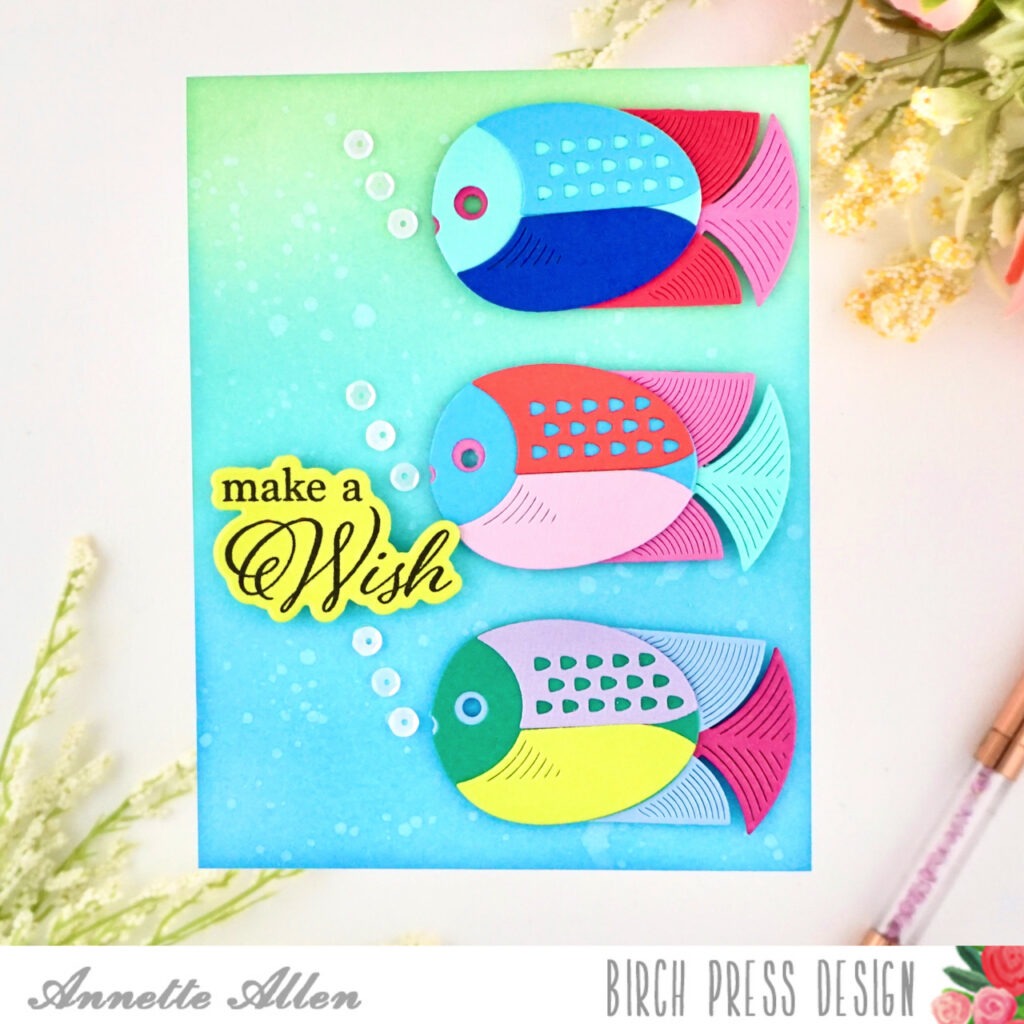
Cut a A2 panel on white cardstock and ink blend three colors. I went more with the traditional colors of the sea. Pick colors that you love to ink blend together. I used Oxide inks, so I am going to sprinkle a little water. If you use this technique, make sure to let your panel dry completely before adhering it to your card base.
Once dry, adhere to card base.
Add some foam tape to the back of our cute Block Print Glider Fish and add them to the right side of the card. Try and leave an even amount of space between them.
Adhere some small white sequins in front of each fish. Gives the appearance of bubbles.
Stamp the sentiment from the Elegant Birthday Sentiments clear stamp on one of the colors of cardstock you used on the fish using black ink and die cut using the coordinating dies. Add foam tape to the back and adhere to the left side of the card.
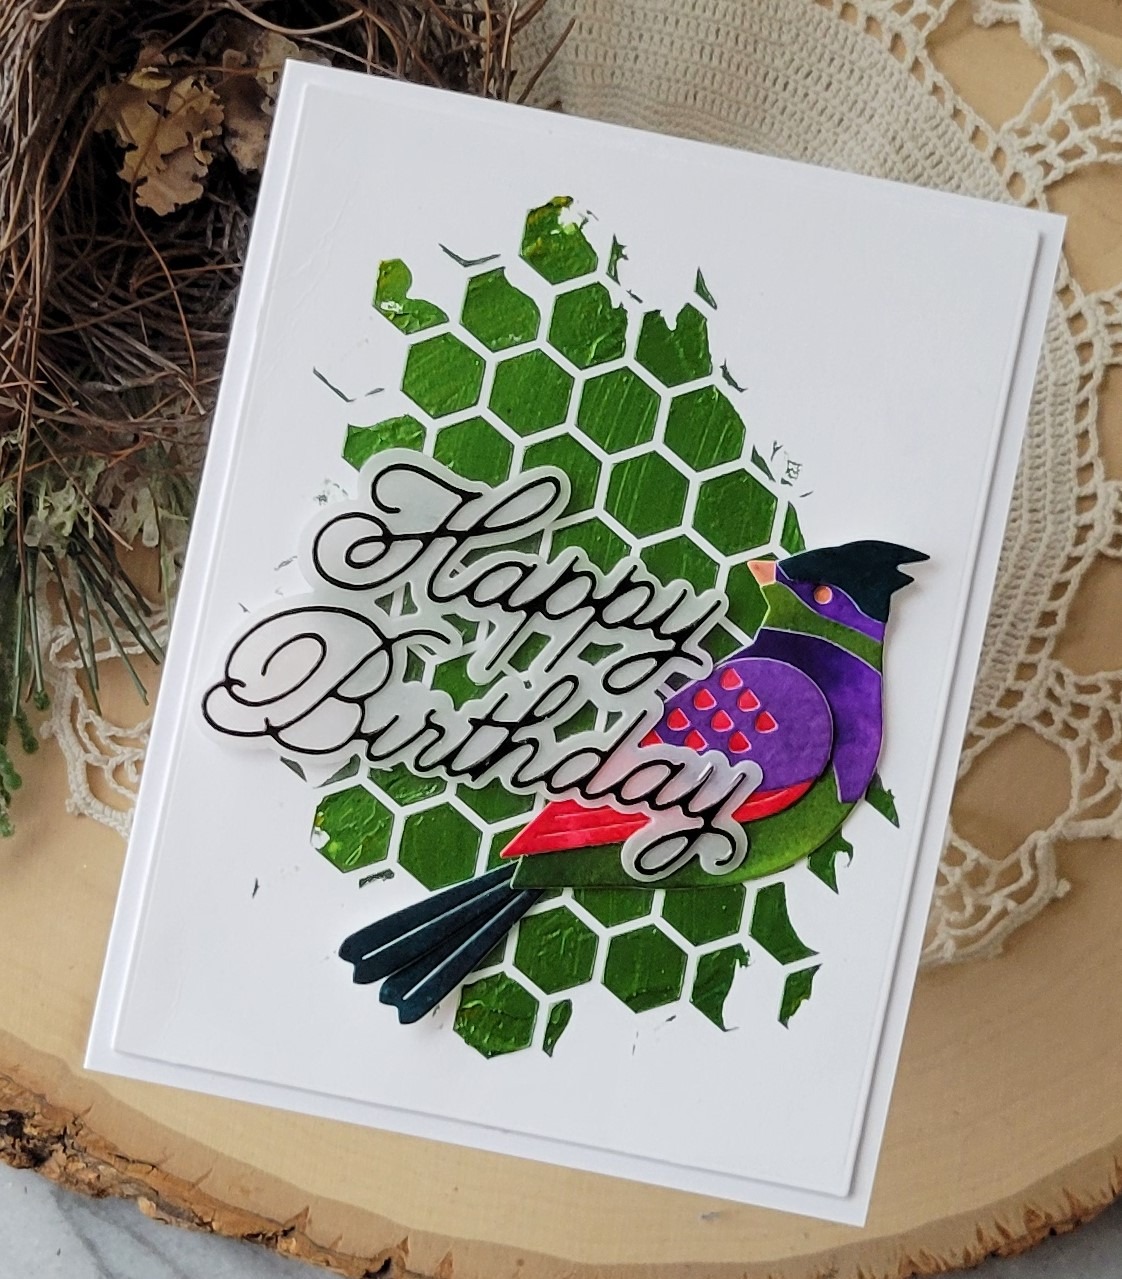
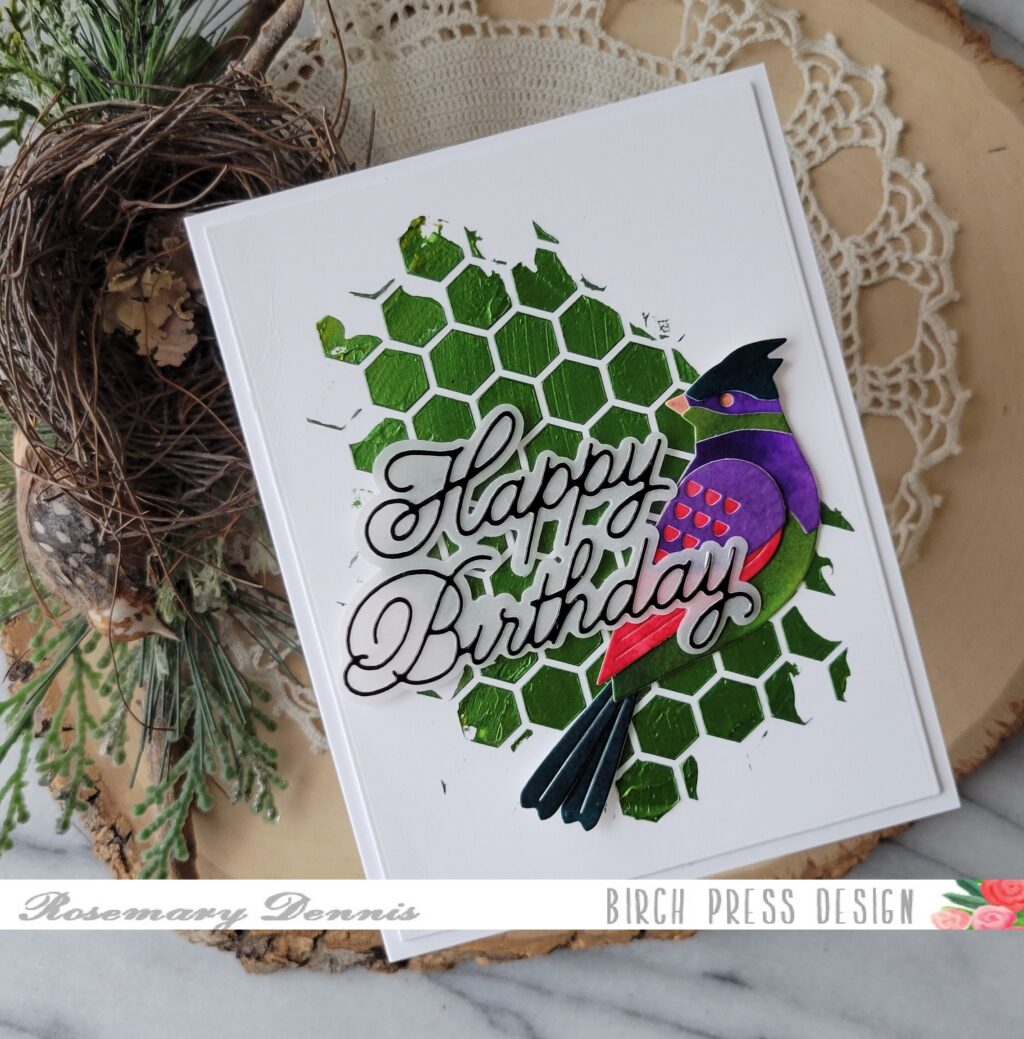
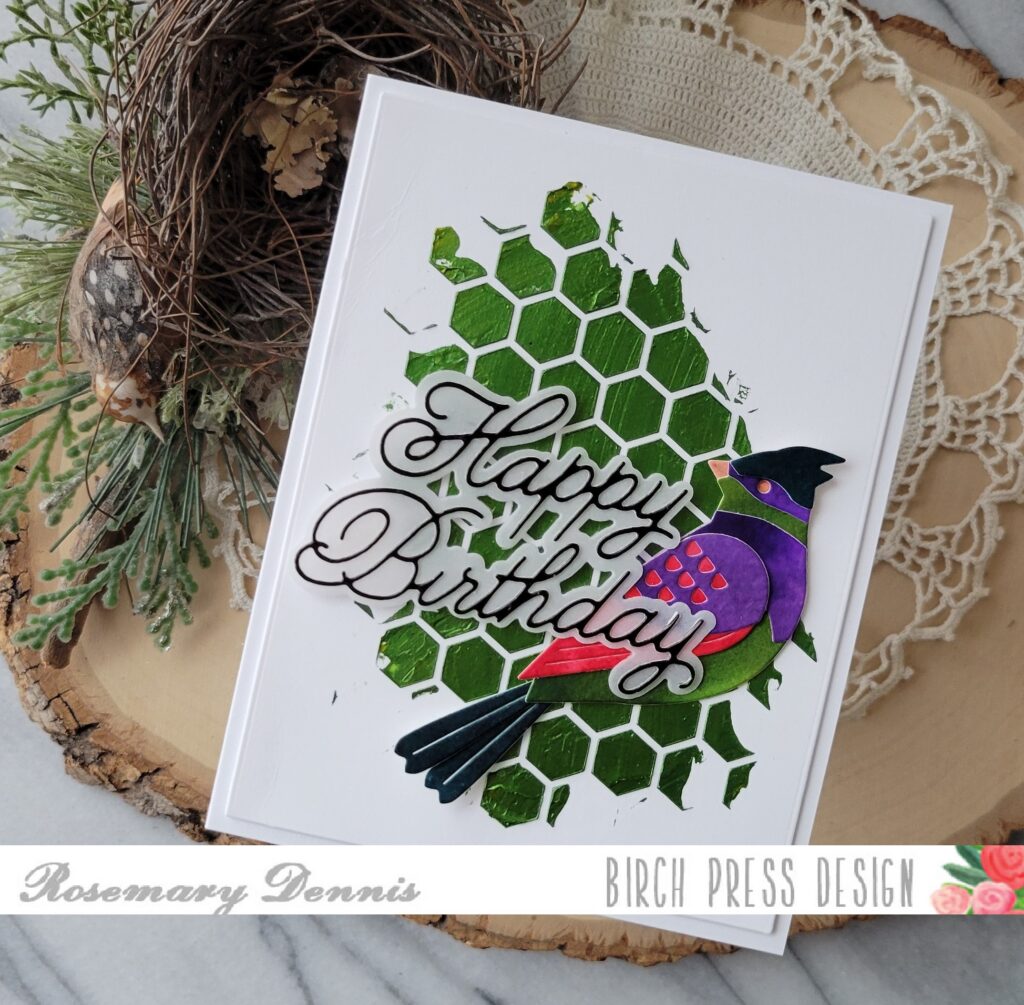
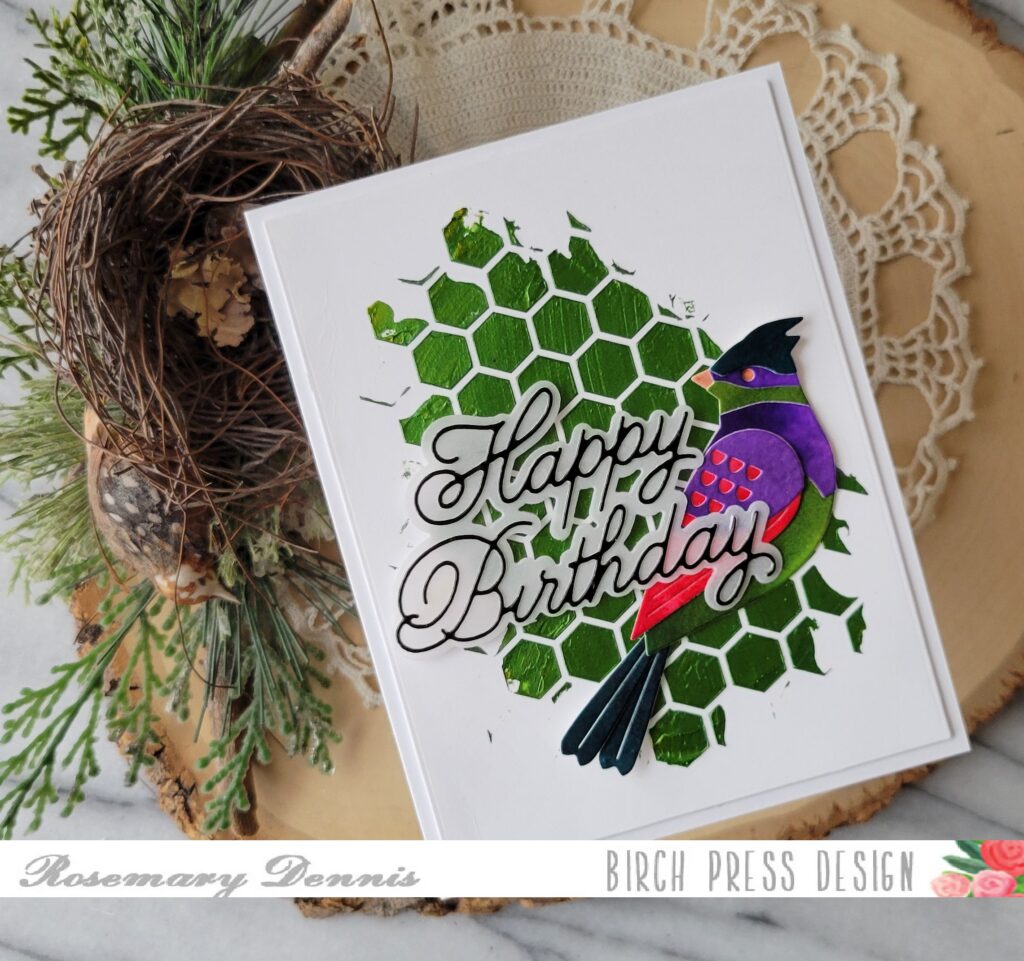
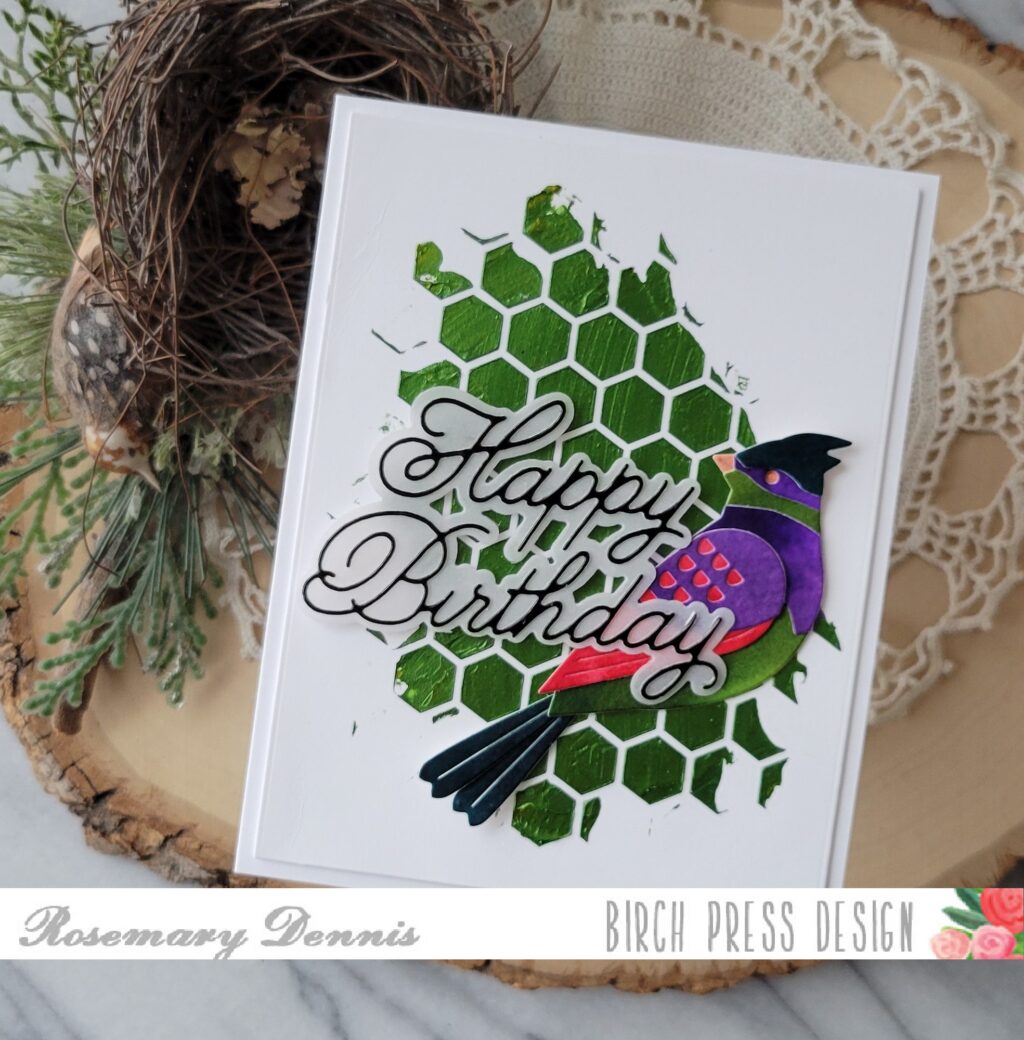
Hello, hello! Rosemary here on the blog today share a fun mixed media card that I made with the new Block Print Tropical Perched Bird and Handwritten Happy Birthday and Outline dies. I also used the Honeycomb Stencil for the project. Let’s take a look at what I made.
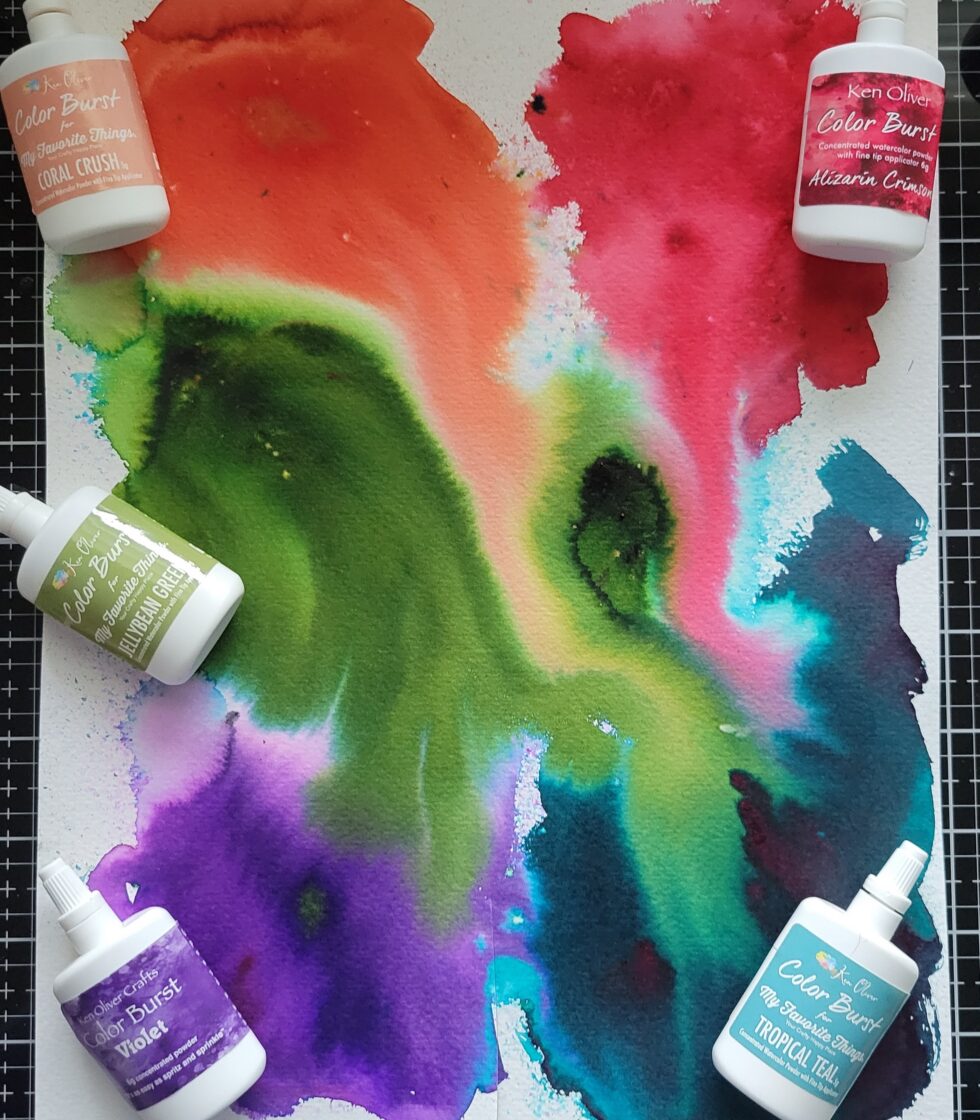
When I started the card I used just going to use some colored cardstock to create my bird. Then I started going through my supplies and I found containers of some Ken Oliver color burst medium that I had purchased long ago. So I decided to grab a sheet of watercolor cardstock and see what happened. Below is what happened, lol.
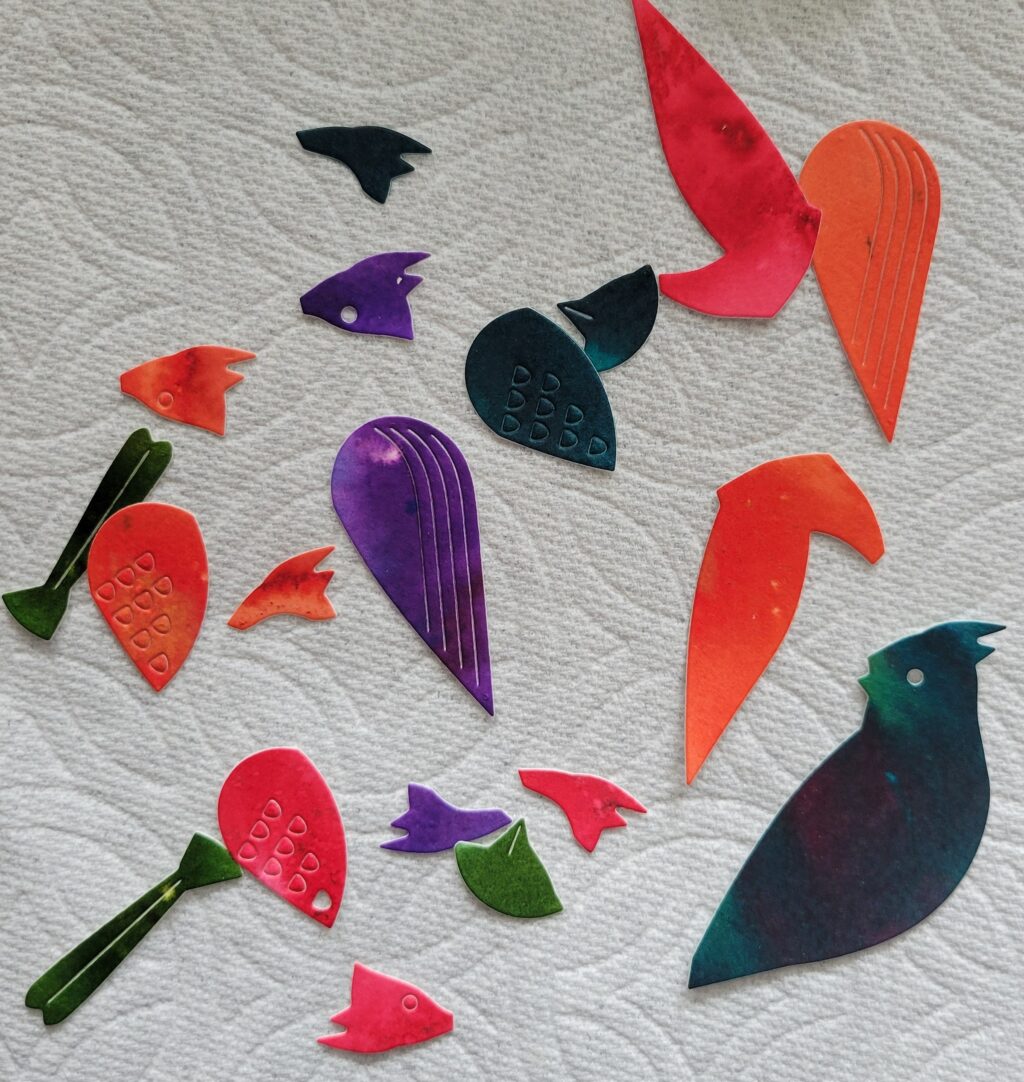
Bit of a mess, right? But I knew I could make something out of it once I cut all the pieces. I cut both dies multiple times so that I would have enough pieces to come up with the right combination.
Here are the majority of the pieces.
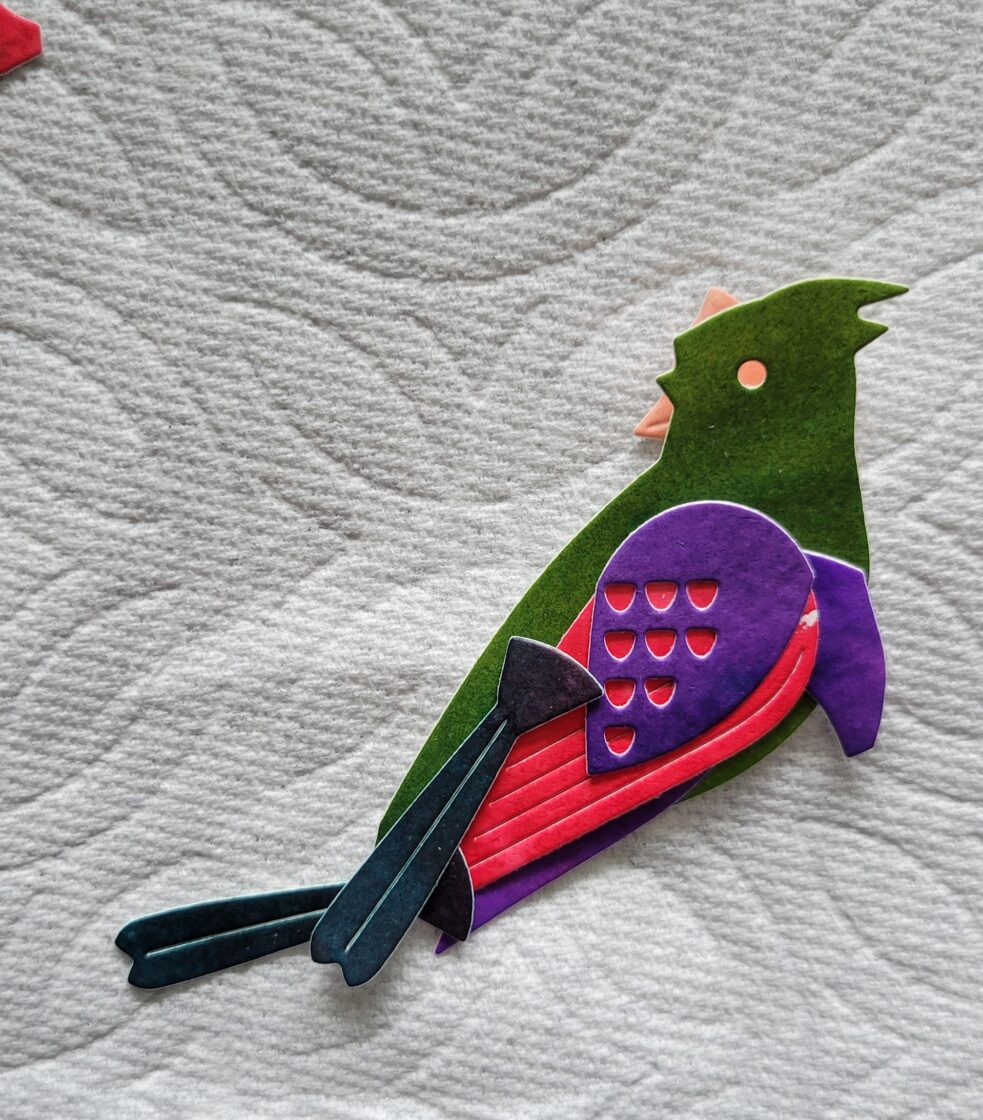
And here is the combination that I decided upon. Originally I was going to have more red in the bird, but in the end decided to limit that color to just the wing.
I adhered the bird with liquid glue and then set him aside to dry. I used a sketch layout for my card and decided to use the Honeycomb stencil for the background. I thought I would just do some ink blending, but then decided to take a look at some of the stencil butters that I had. I decided to combine a bright yellow and bright green and came up with this darker green that you see. I die cut white heavystock cardstock and then applied my stencil butter mix.
Once the panel was dry I got to work putting the card together. I adhered the bird with glue and then added the sentiment (which I had already had die cut and ready to go) with rolled up glue dots and glue
I hope you enjoyed today’s project. I had a lot of fun creating it using supplies that to be honest I had forgotten I had! Thanks for stopping by and have a wonderful day!
Creating a Showstopping Birthday Card with the Block Print Pretty Peacock
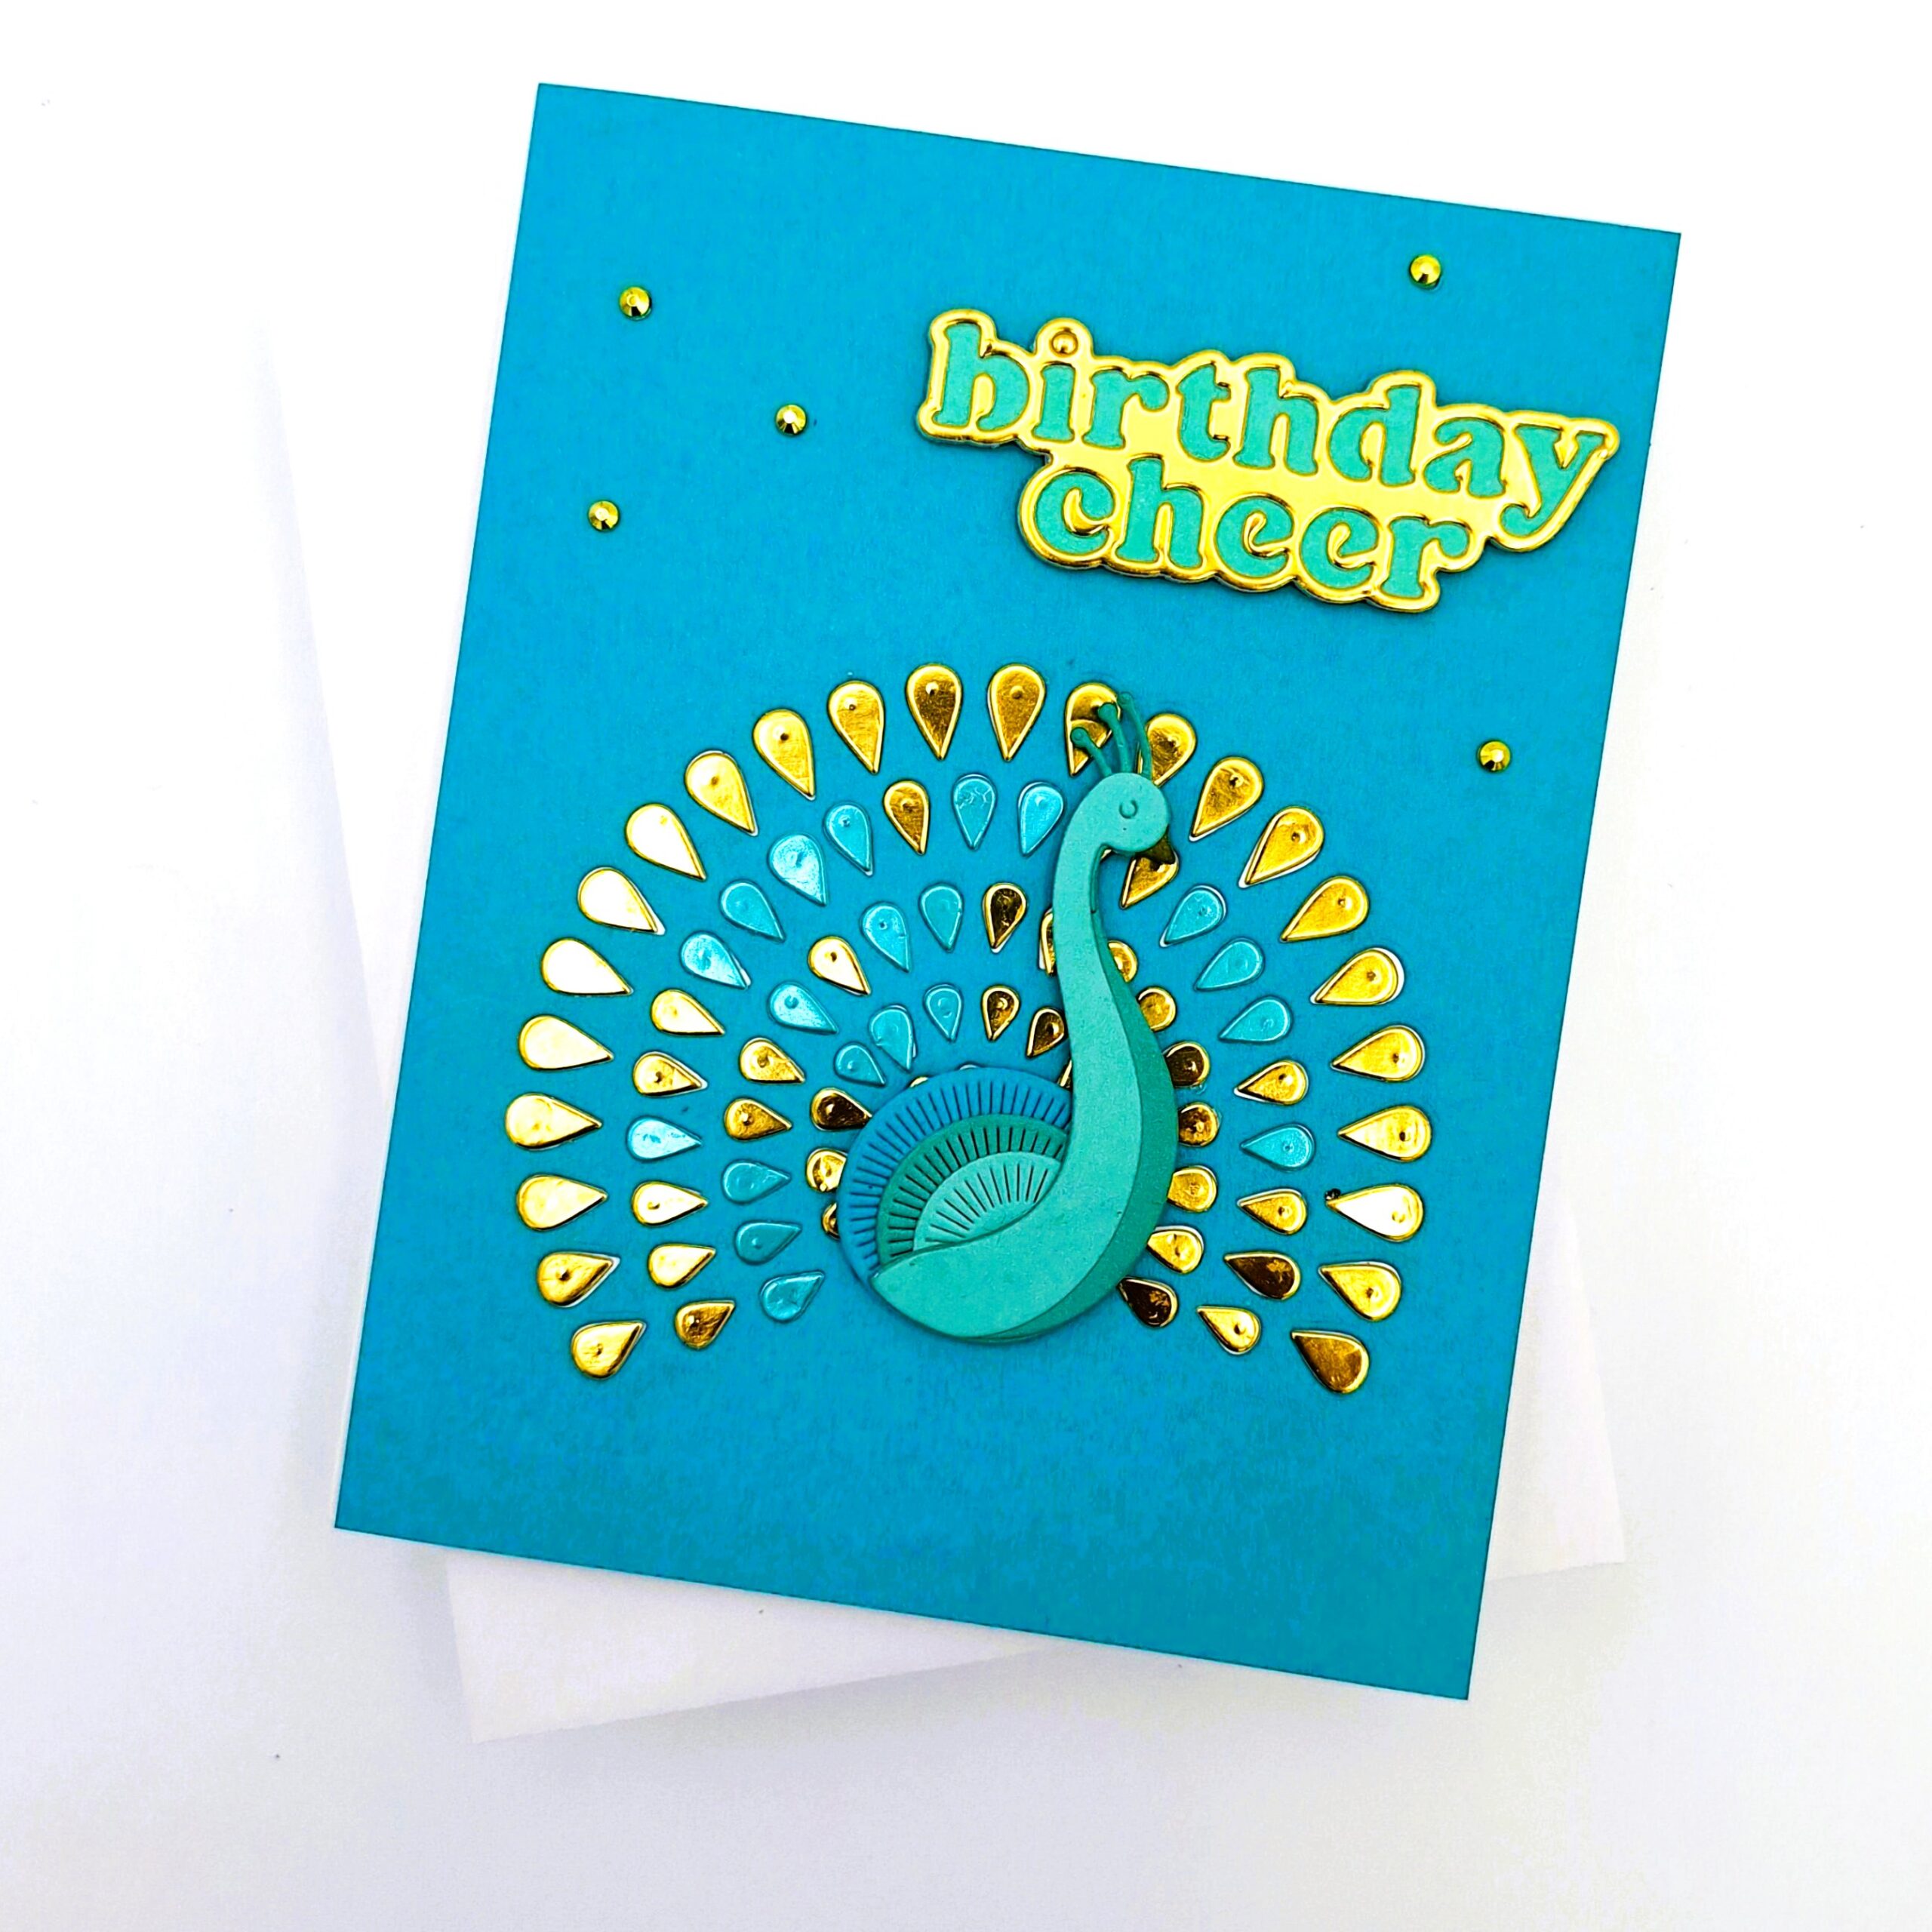
If you’ve been looking for a card project that feels like a true wow moment — this is it. The Block Print Pretty Peacock from Birch Press is one of those dies that stops people in their tracks, and when you pair it with gold details and a rich teal cardstock, the result is honestly stunning. Let’s walk through how this “Birthday Cheer” card came together and check out the below video for other fun ways to use this beautiful die set!
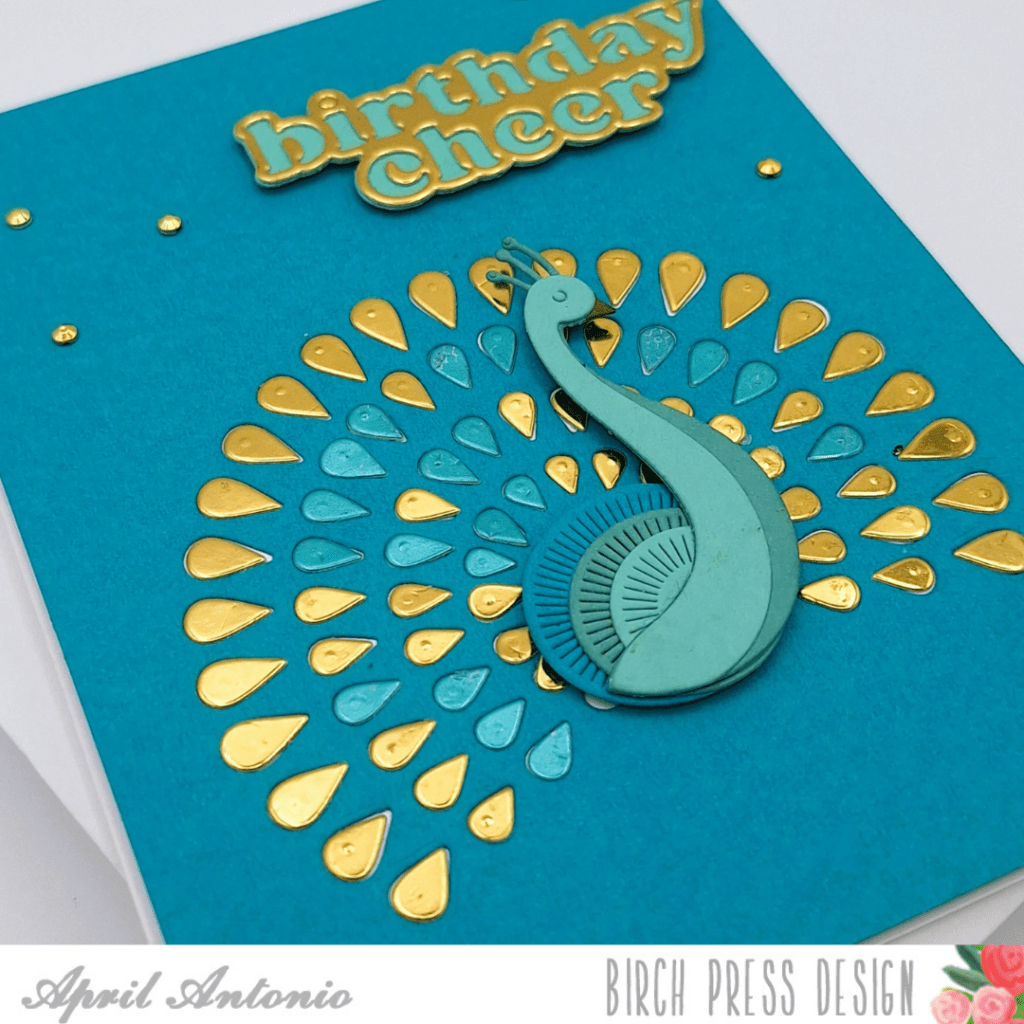
Starting with the base The foundation of this card is the Memory Box Lagoon Cardstock Pack — and honestly, it was the perfect choice for this card base. That deep teal is such a gorgeous backdrop for all the gold and shimmer that comes later. I cut my card base from the lagoon cardstock and immediately knew it was going to be a good day at the craft table.
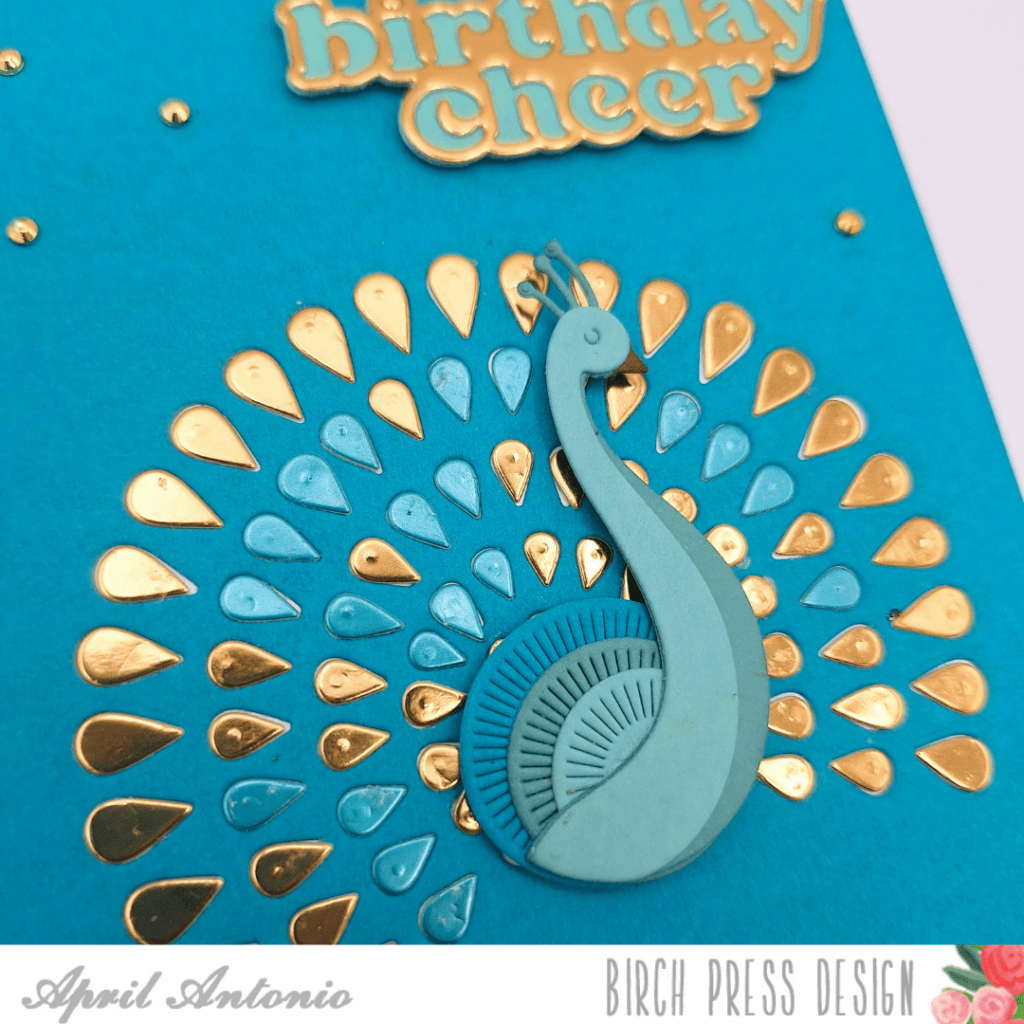
Die cutting the peacock Now for the star of the show – the Block Print Pretty Peacock die. This die is an absolute dream to work with. The tail feathers are made up of beautifully detailed teardrop shapes arranged in a gorgeous fan pattern, and the whole design just has this elegant, almost art deco feel to it. I diecut the peacock tail directly into the teal card base, which creates that beautiful inlay look where the die cut openings become part of the design itself.
For the paper piecing, I used the Memory Box Rainbow Reflections Mirror Pad behind the tail openings to get those gorgeous gold foil teardrop feathers, and those lighter, shimmery teal tones woven through the inner feathers. The combination of gold mirror and soft teal creates such a rich, layered look — it really mimics the iridescence of a real peacock tail.
Building the peacock body The peacock body is die cut separately and foam mounted on top of the card for that lovely dimensional lift. Once the body was mounted, the whole card really started to come alive.
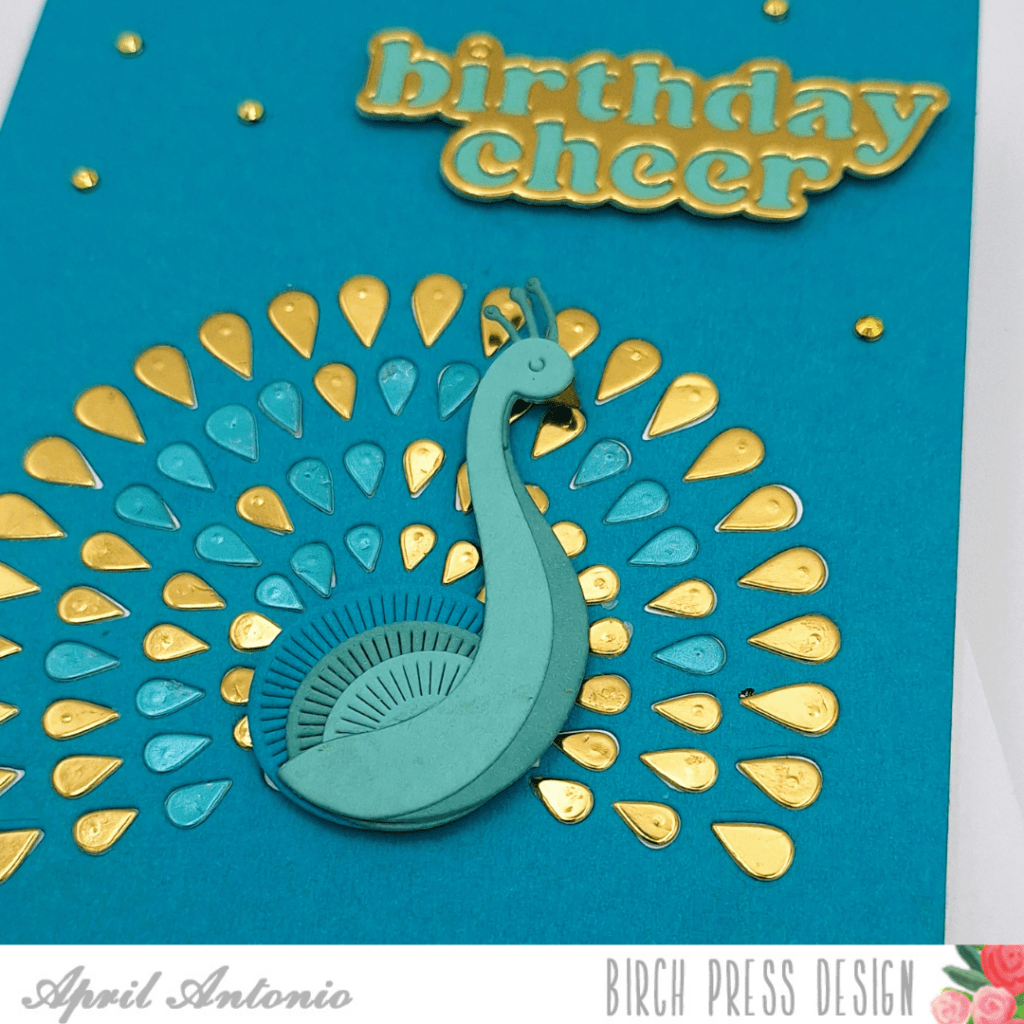
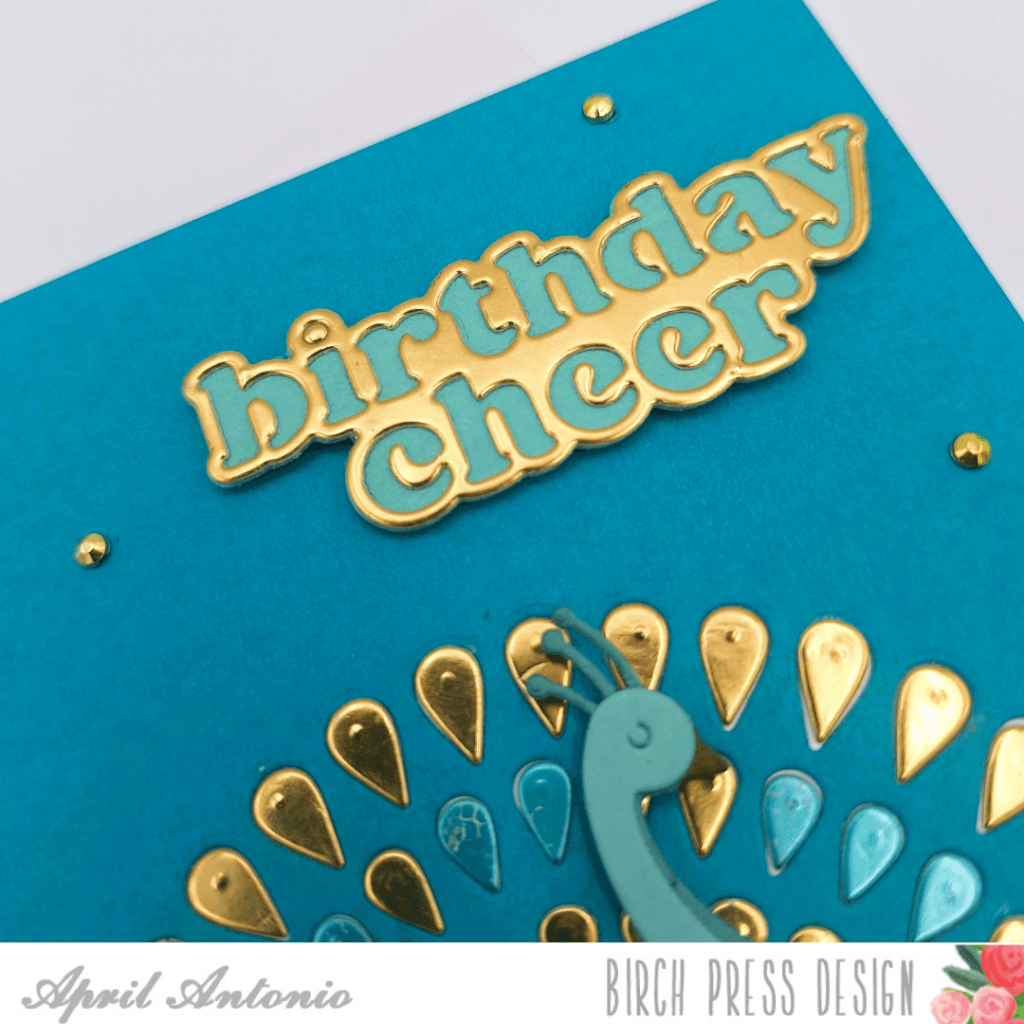
Adding the sentiment For the sentiment, I used the Birthday Cheer Vintage Sentiment die — and it is such a perfect match for this card. The chunky, retro-style lettering in gold (die cut from the Rainbow Reflections Mirror Pad) with teal cardstock as the shadow which gives it this gorgeous two-tone effect. I also have the Thinking of You Vintage Sentiment die on hand, which means this same peacock design could easily be adapted for so many other occasions — something to keep in mind if you fall in love with this color combo like I did!
Finishing touches To finish things off, I scattered some Open Studio Fairy Jewels across the card — a mix of warm gold and rich jewel-toned gems that tie everything together beautifully. A few gems clustered near the sentiment and dotted around the feathers adds just the right amount of sparkle without competing with all those gorgeous gold mirror feathers.
The end result is a card that looks incredibly intricate but is really all about letting these amazing dies do the heavy lifting. The Block Print Pretty Peacock is such a versatile, show-stopping die — I can’t wait to make more versions of this one!
Have you made a card with the Block Print Pretty Peacock?
We’d love to see your creations! Tag us and share your version — this is one of those designs that’s beautiful in every colorway.
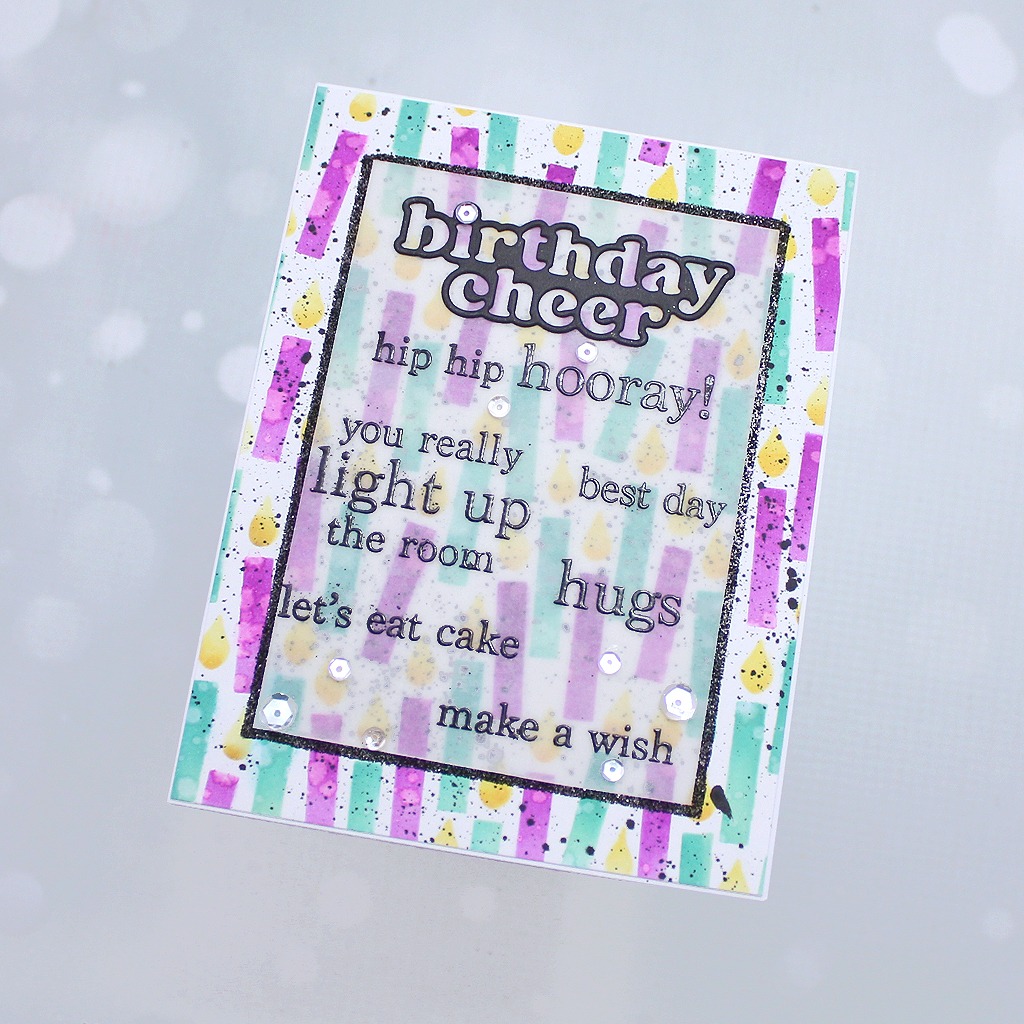
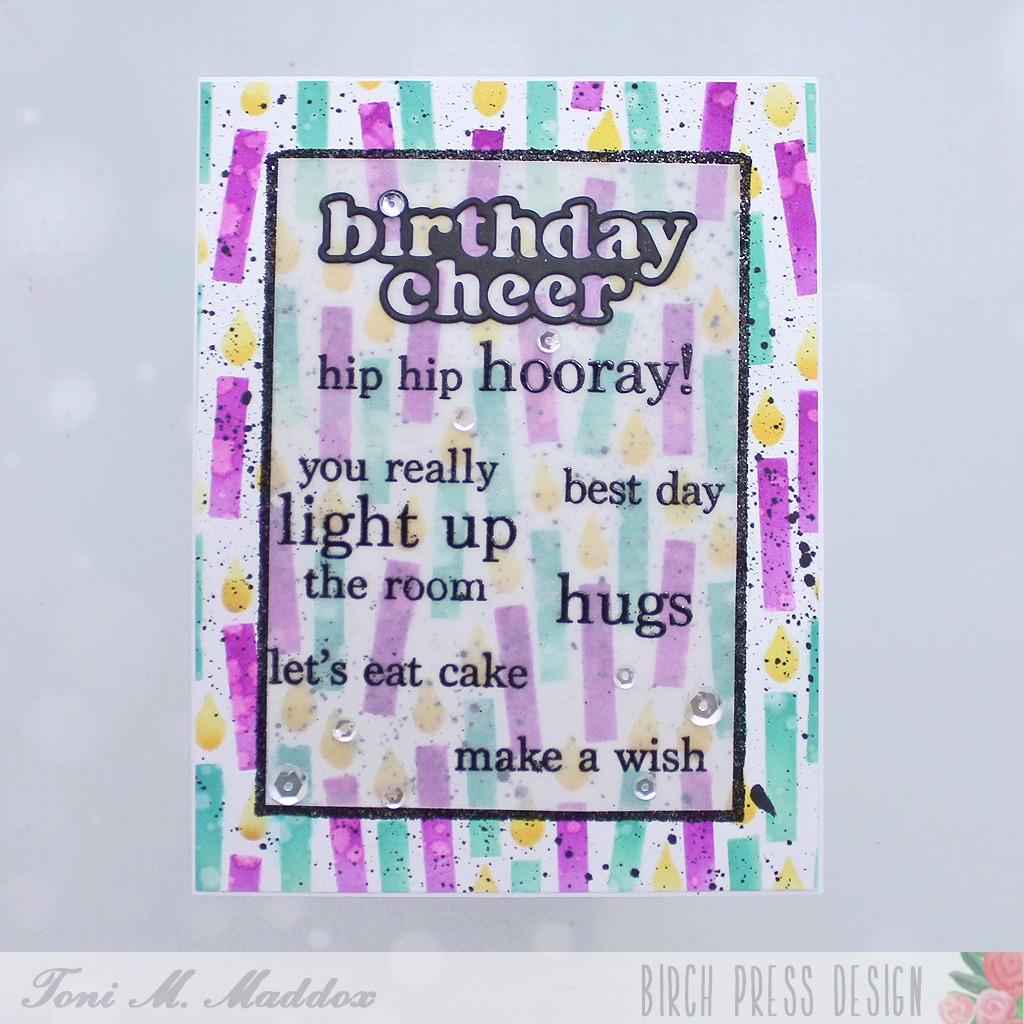
Greetings, friends! We can never have too many birthday cards on hand, right? Toni here sharing two birthday cards, one quite feminine and the other cheerfully unisex.
I created the background of my first card using the Birthday Candle Blowout Stencils. I spattered that with ink for a funky vibe.
Next, I arrange some of the Plain & Simple Birthday Greetings on my MISTI and embossed them on sturdy vellum. I left a space at the top to add the Plain & Simple Birthday Greetings sentiment diecut.
I covered the back of the vellum panel with double-sided tape, leaving a small margin that I burnished with black glitter.
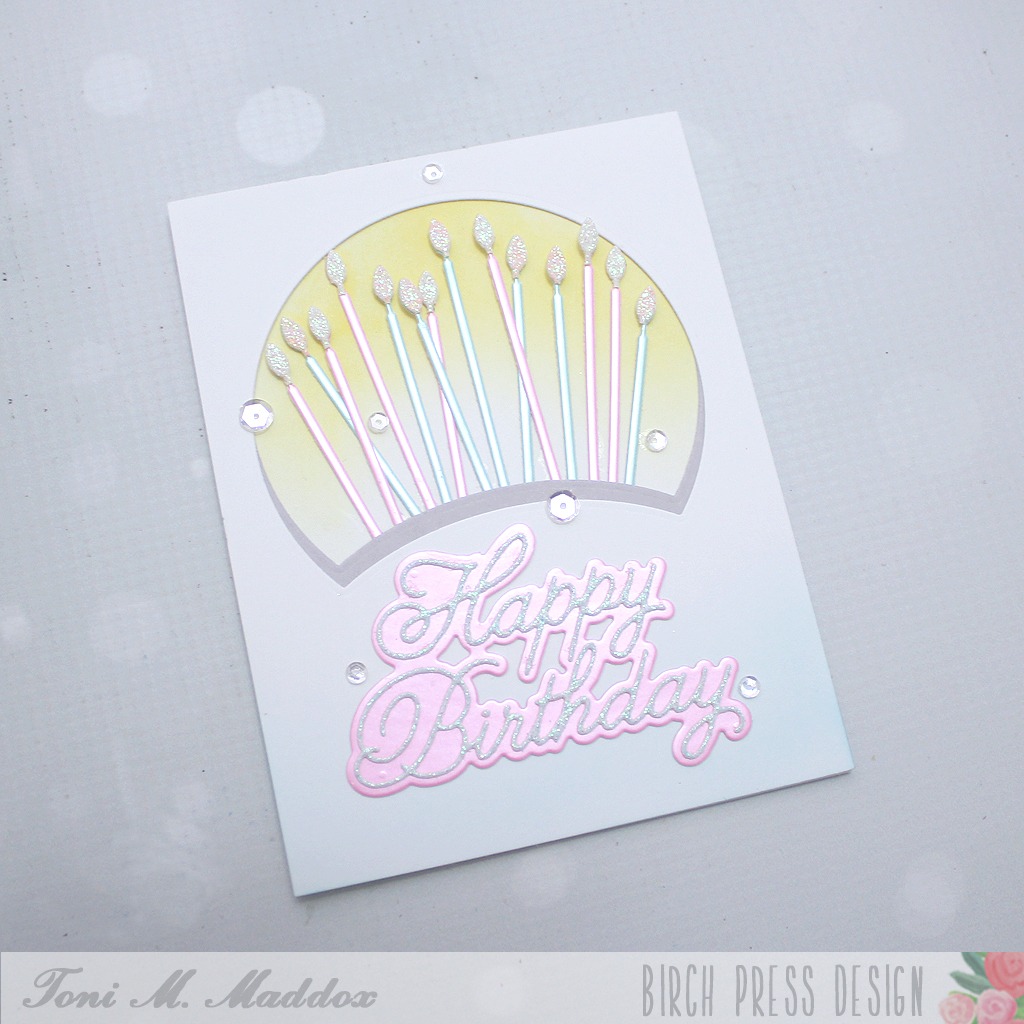
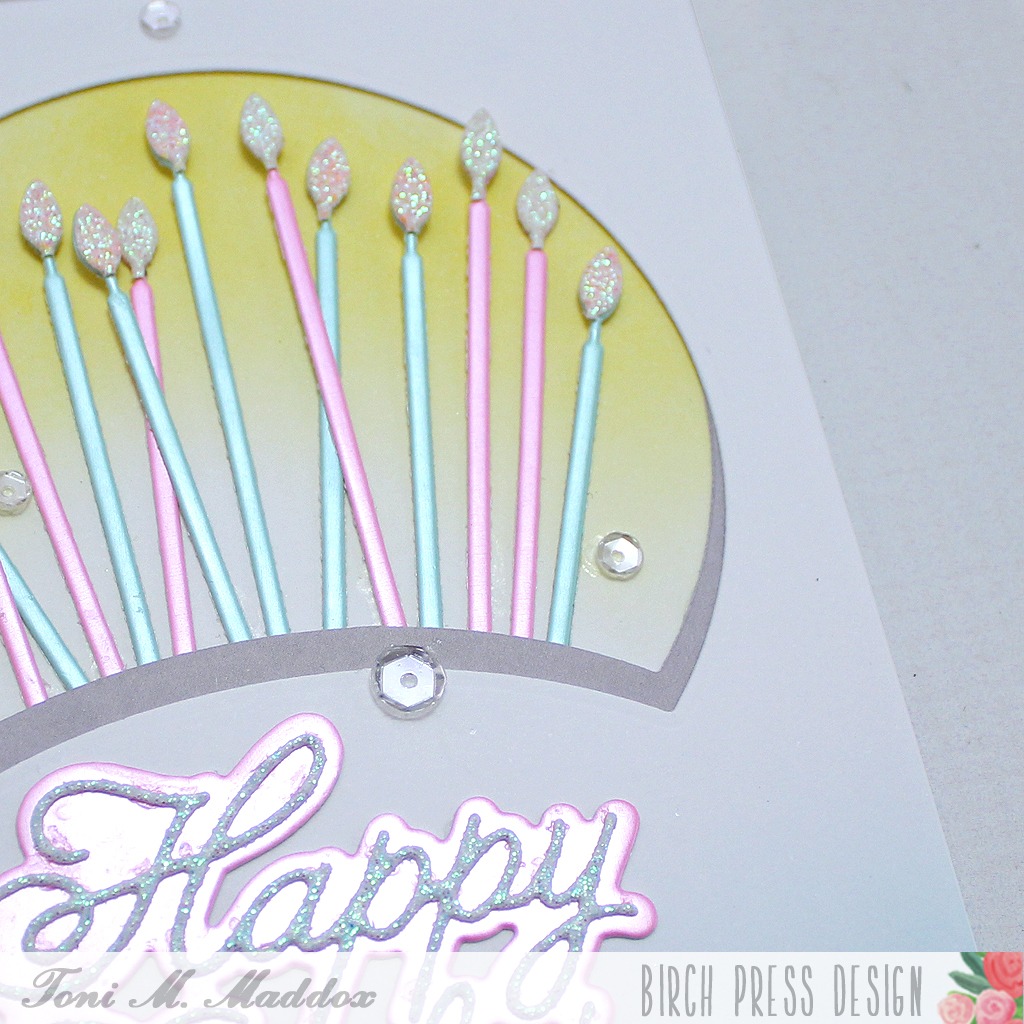
My second card definitely has a more feminine feel to it, don’t you agree?
I created an aperture and shadow with the Block Print Forest Scene die. A random assortment of Tall Party Candles cut from mirror and glitter cardstocks fill the space.
Finally, I sponged a bit of blue at the bottom of the card front before adding the Handwritten Happy Birthday & Outline. Pretty!
I hope you enjoyed today’s card and have a great rest of your week!
Feel free to visit my blog, Frankie Helps Craft, for a full list of supplies used and to check out my other creations.
Hello and happy March everyone! Rosemary here on the blog today with a sweet birthday card that I think just says “spring”! I used the new Block Print Bird Duo, Block Print Mod Branches and Elegant Birthday Sentiments for my card. Let’s have a look at what I made.
This card is similar to the card I posted at the end of February in that I die cut white cardstock and then blended on the ink. But this time I decided to use Memory Box white woodgrain cardstock for all my die cutting to give the the birds and branch a little bit more interest.
To do the blending on these small pieces I love to use my Waffle Flower 0+ blending brushes. You can see them in the photo. Inking tiny pieces with them is a breeze!
I decided to keep a relatively cohesive color scheme to keep things simple and allow me to complete the card rather quickly. I used two shades of green ink for the leaves, stem and parts of the bird. Then I threw blue, yellow and a little bit of red for the berries into the mix.
Here I have the branch mostly completed. Below are all the pieces of the birds inked up and ready to be assembled.
I love dimension on my cards, but with the cost of postage being so high now days I often refrain from using foam squares. In order to obtain some dimension without adding thickness I will often not completely glue down pieces. For example, the leaves are only glued down at the base of the stem and the wings of the birds at the top. That way I can lift up the pieces and give the illusion of dimension.
Once everything was assembled I die cut another piece of white woodgrain cardstock with a medium sized rectangle and adhered that to a bright green cardstock base with double sided tape. I then adhered the branch (which was a little tricky, lol) and the birds using glue. I finished with the sentiment that was stamped and die cut with the matching die.
I hope you enjoyed today’s card. Thanks for stopping by and have a lovely day!