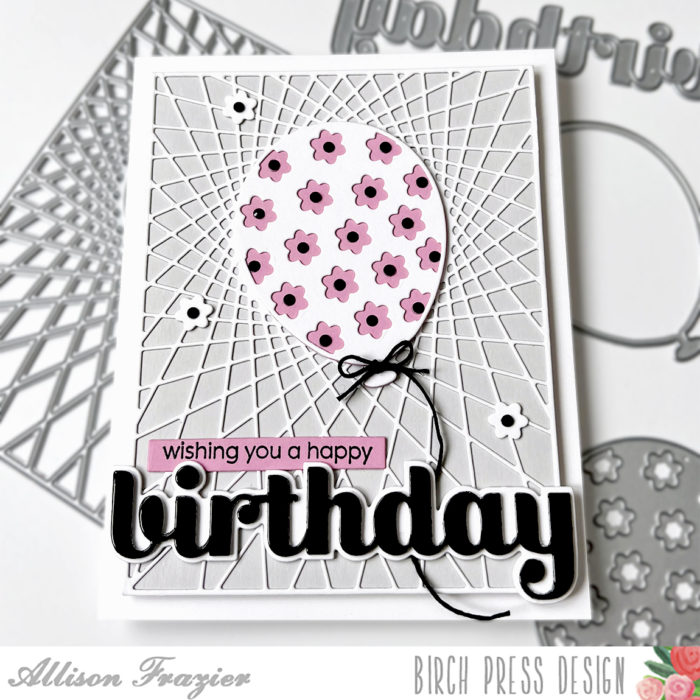
Welcome crafty friends! It is Natasha here today and I am so excited to share a card using beautiful new dies from Birch Press Designs new release. The new Contour Layer dies are so beautiful, be sure to check them out in the shop!
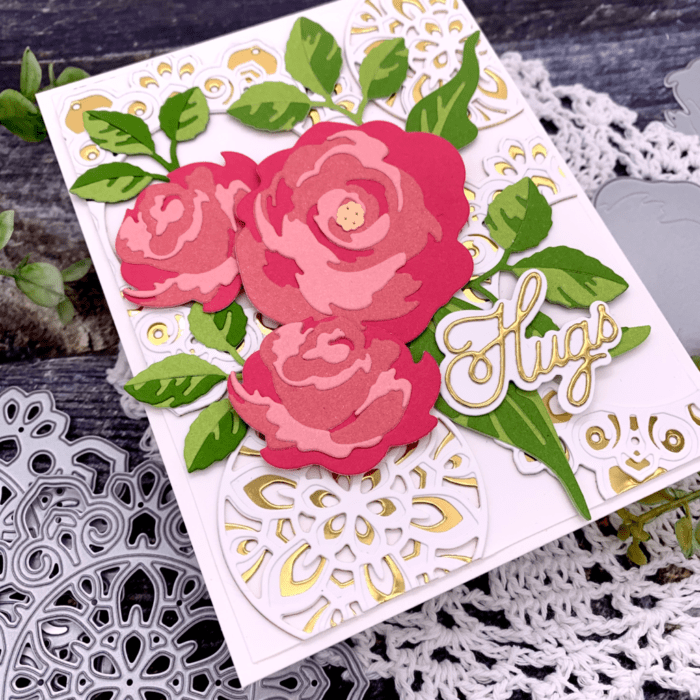
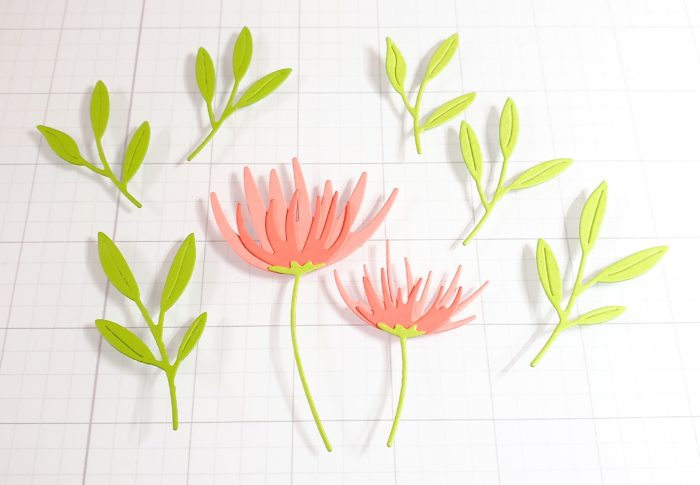
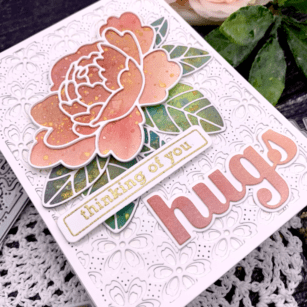
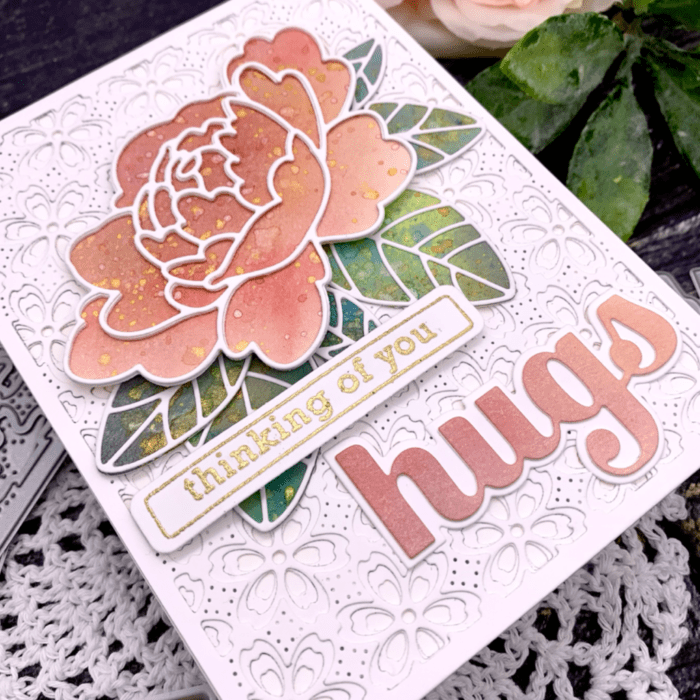
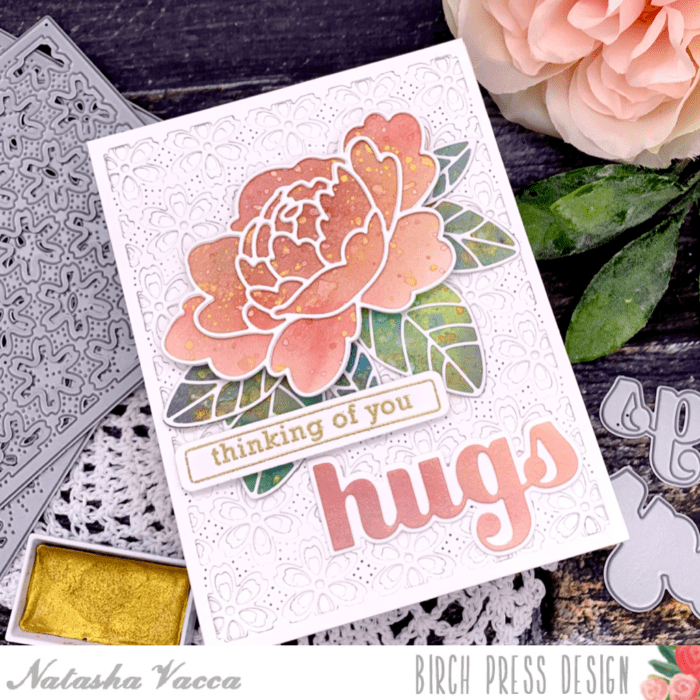
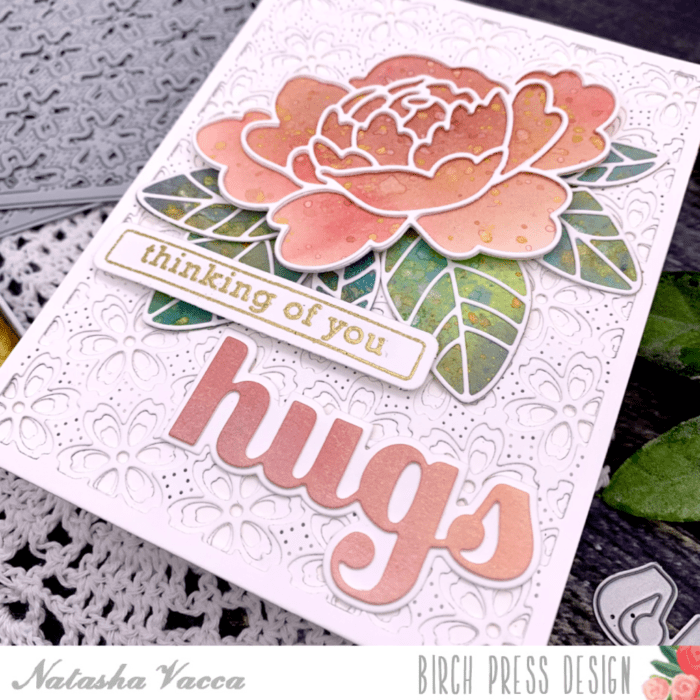
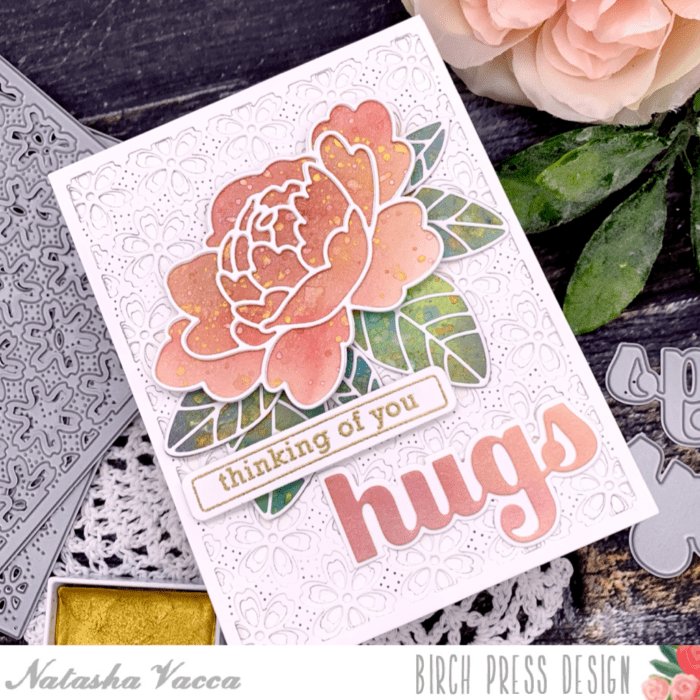
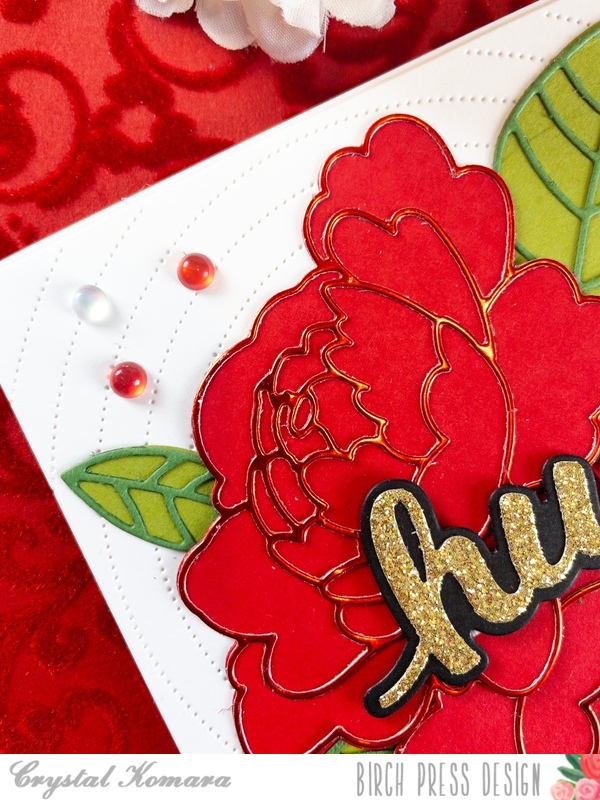
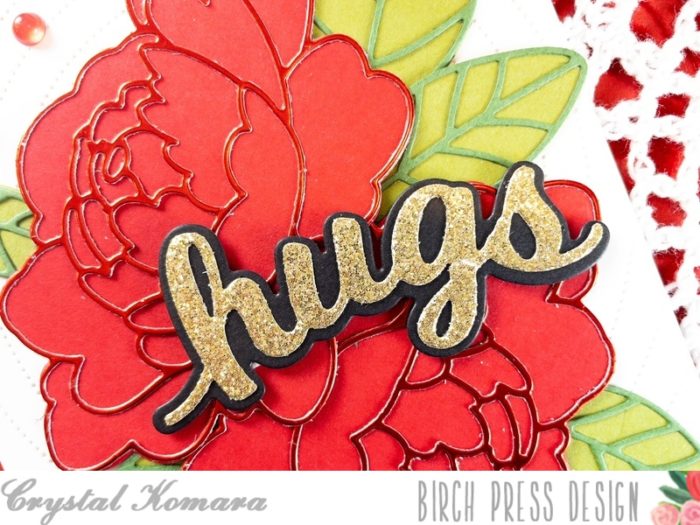
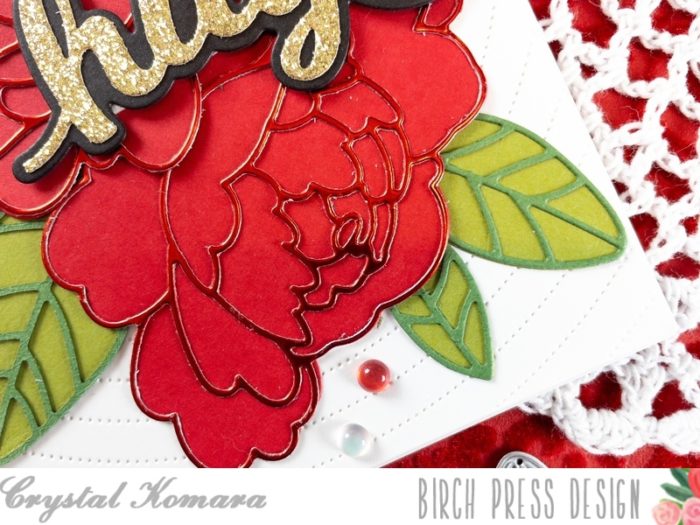
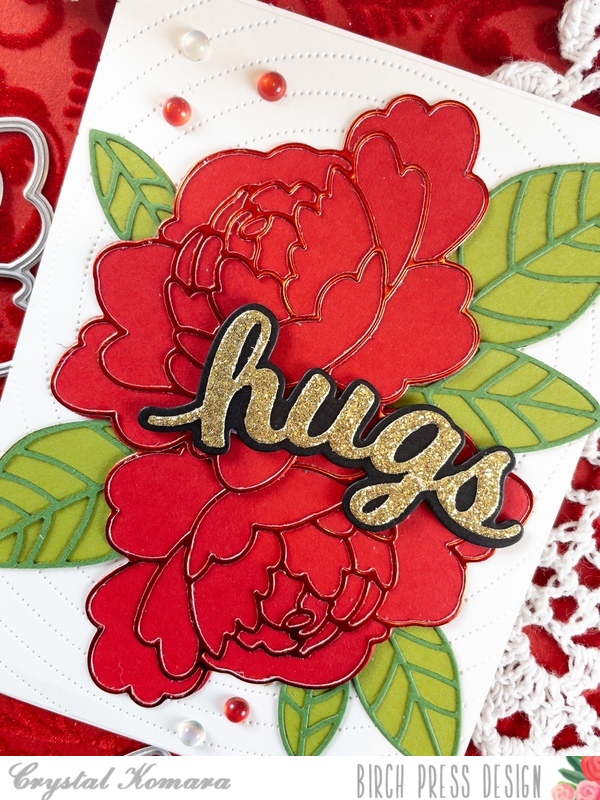
To begin I started with 2 new die sets, the Winsome Rose and Leaves Contour Layers, as well as the Dainty Rose and Leaves Contour Layers. These 2 sets coordinate so beautifully together! I chose 3 colors of card stock for my roses and then 2 colors for my leaves. I die cut the roses in 3 colors. I then die cut the leaves from each set in 2 colors of green card stock. I then adhered these together using liquid glue. These new dies are so beautiful and so easy to use. When you die cut them you can see where each layer goes, it truly was so easy to do. I then set these aside to work on my card panel background.
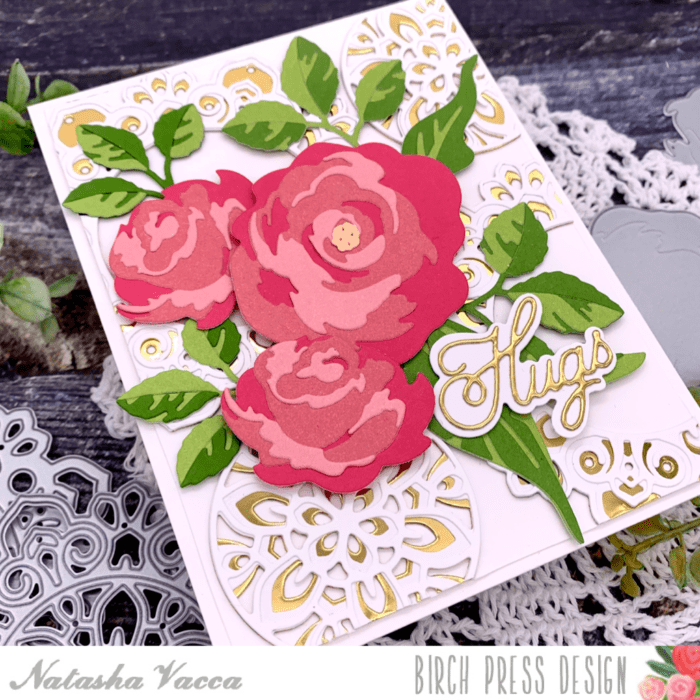
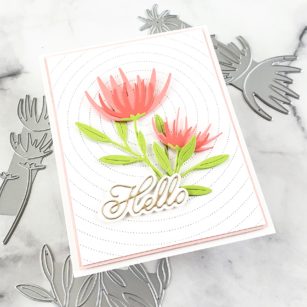
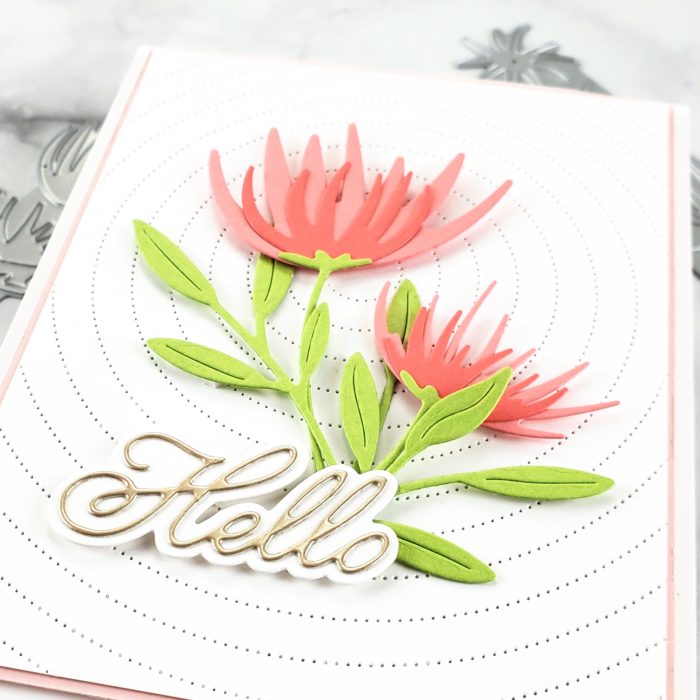
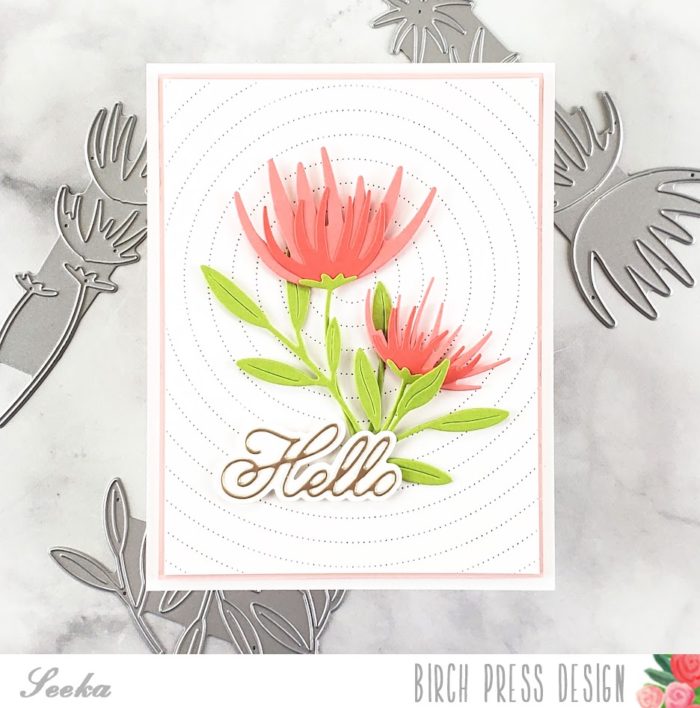
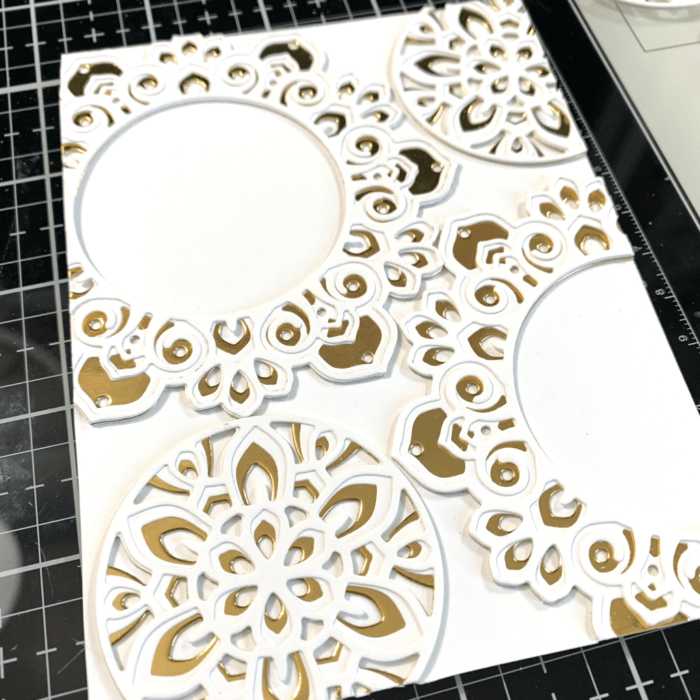
For my card panel, I am using the Tranquility layer dies. I used all 3 layers (A, B, and C). I started by die cutting layer C using the Rainbow Reflections Mirror Pad (Memory Box) in a gold foil. These papers are so beautiful, I love the shine! I die cut layer C 2 times using a gold foil from this paper pad. Next I die cut layer A and B using white card stock. I cut all 3 layers 2 times. I then adhered each layer together, placing layer C on the bottom, then added layer B, and placed A on top. I adhered these with liquid glue. Once these were adhered I die cut a piece of white card stock using a rectangle die from my stash. I then placed the Tranquility layers on my card panel. I used the outside layers and then the circle separately. You can see this in the photo below. Once I liked where they were, I adhered them with liquid glue and trimmed the excess off using my paper trimmer.
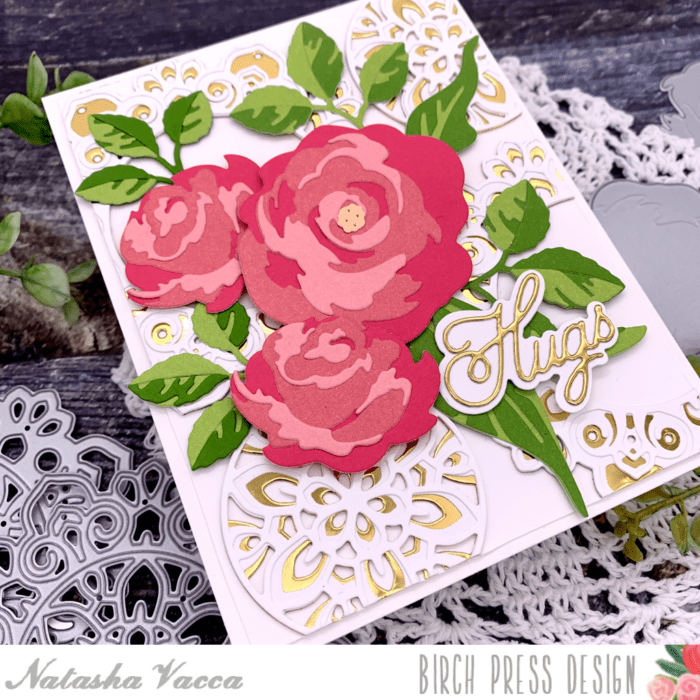
Next I used all the roses and leaves and placed them on top of the Tranquility layered background. I loved this combination, as I felt it added such a beautiful elegance behind my flowers! Once I determined where my flowers and leaves were going, I adhered them with both liquid and foam tape.
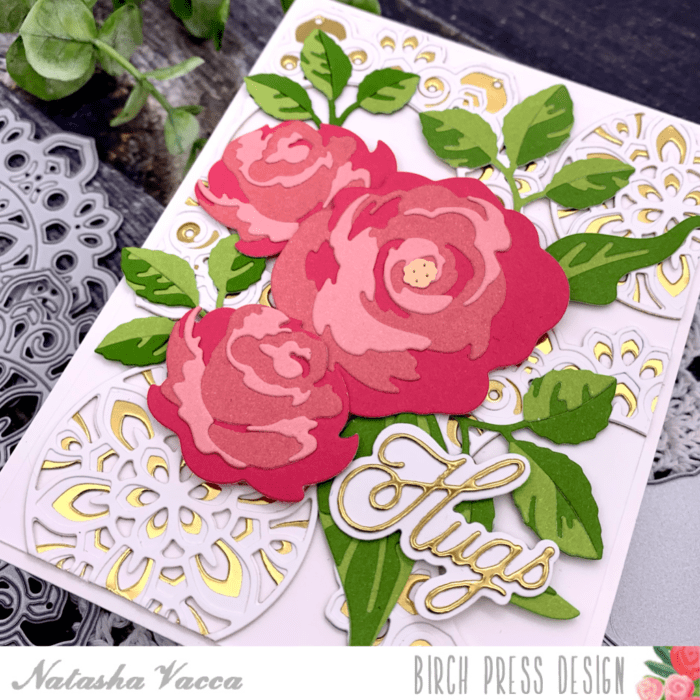
To complete my card I die cut the sentiment Hugs – from the Handwritten Hugs and Outline collection. I die cut the shadow using white card stock and then the script Hugs in the same gold card stock from the Rainbow Reflections Mirror Pad (Memory Box). I then adhered these together and added this to my card panel. To complete my card I adhered this to an A2 card base.
Thank you so much for stopping by today! I hope you liked today’s card! I will be back soon!