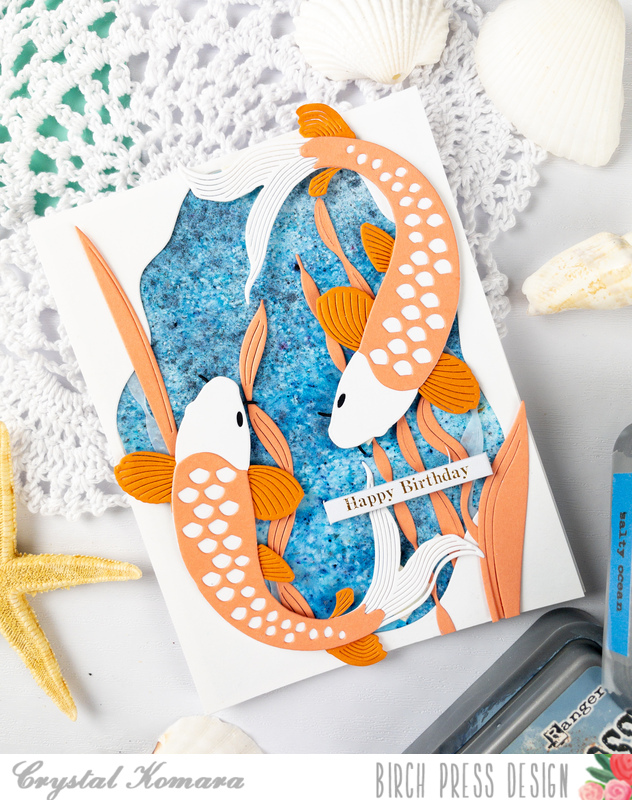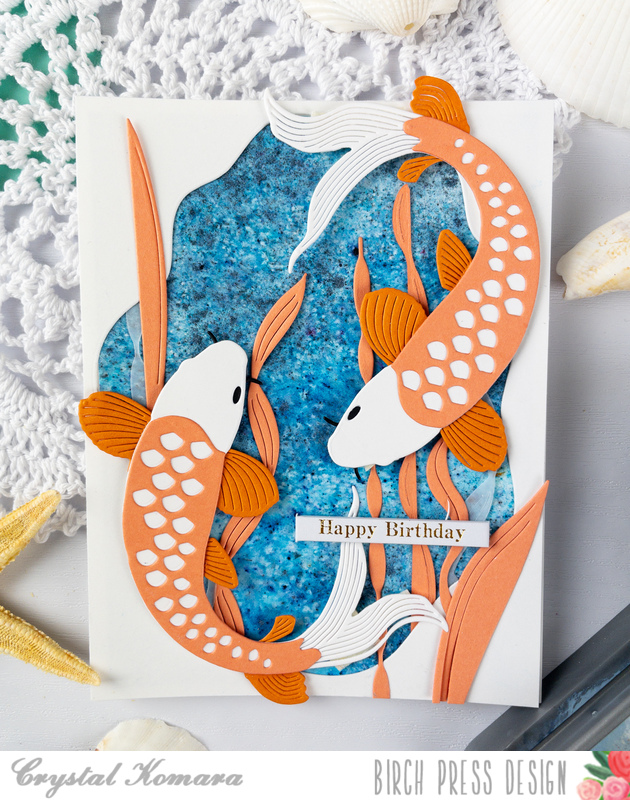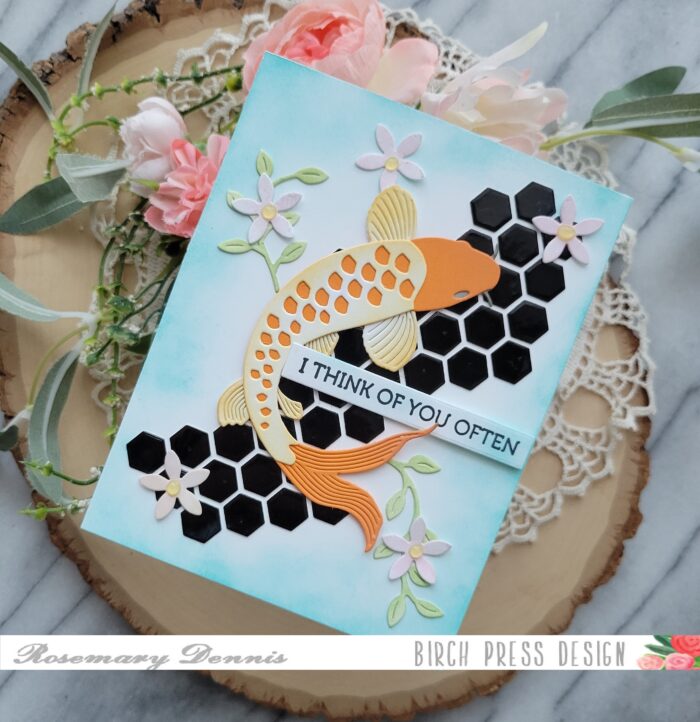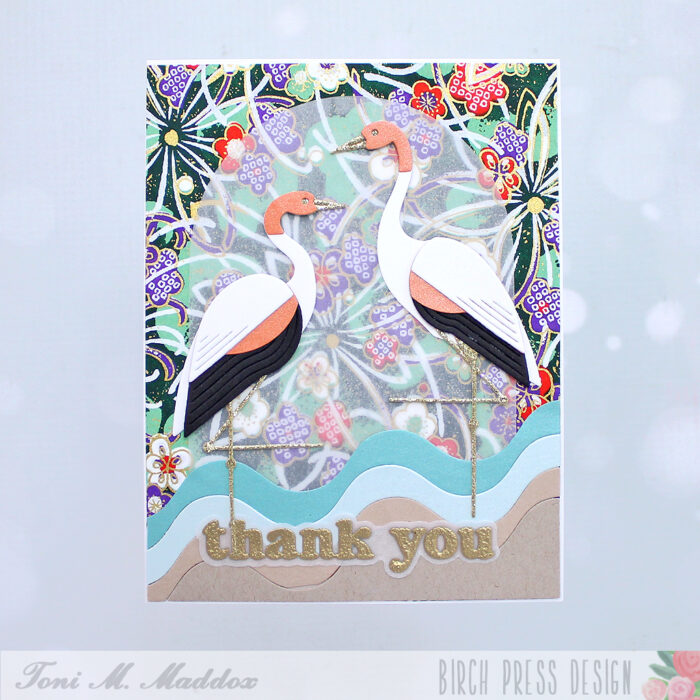
Happy end of August everyone! Rosemary here on the blog today with a card inspired by one of my favorite movies: Finding Nemo! Let’s take a look at what I created.
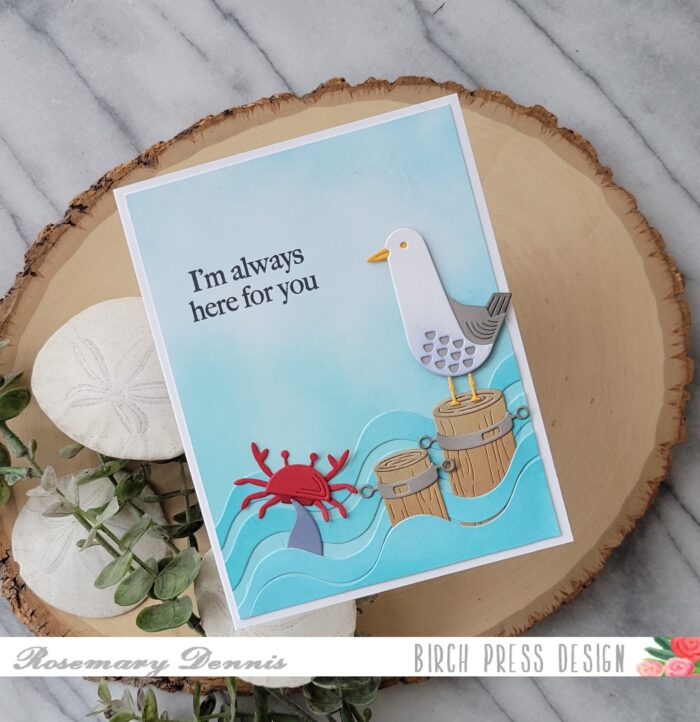
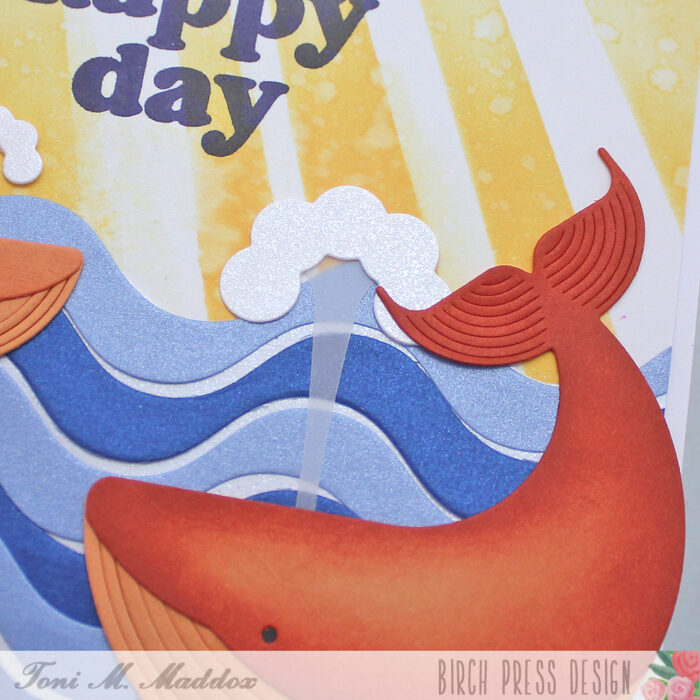
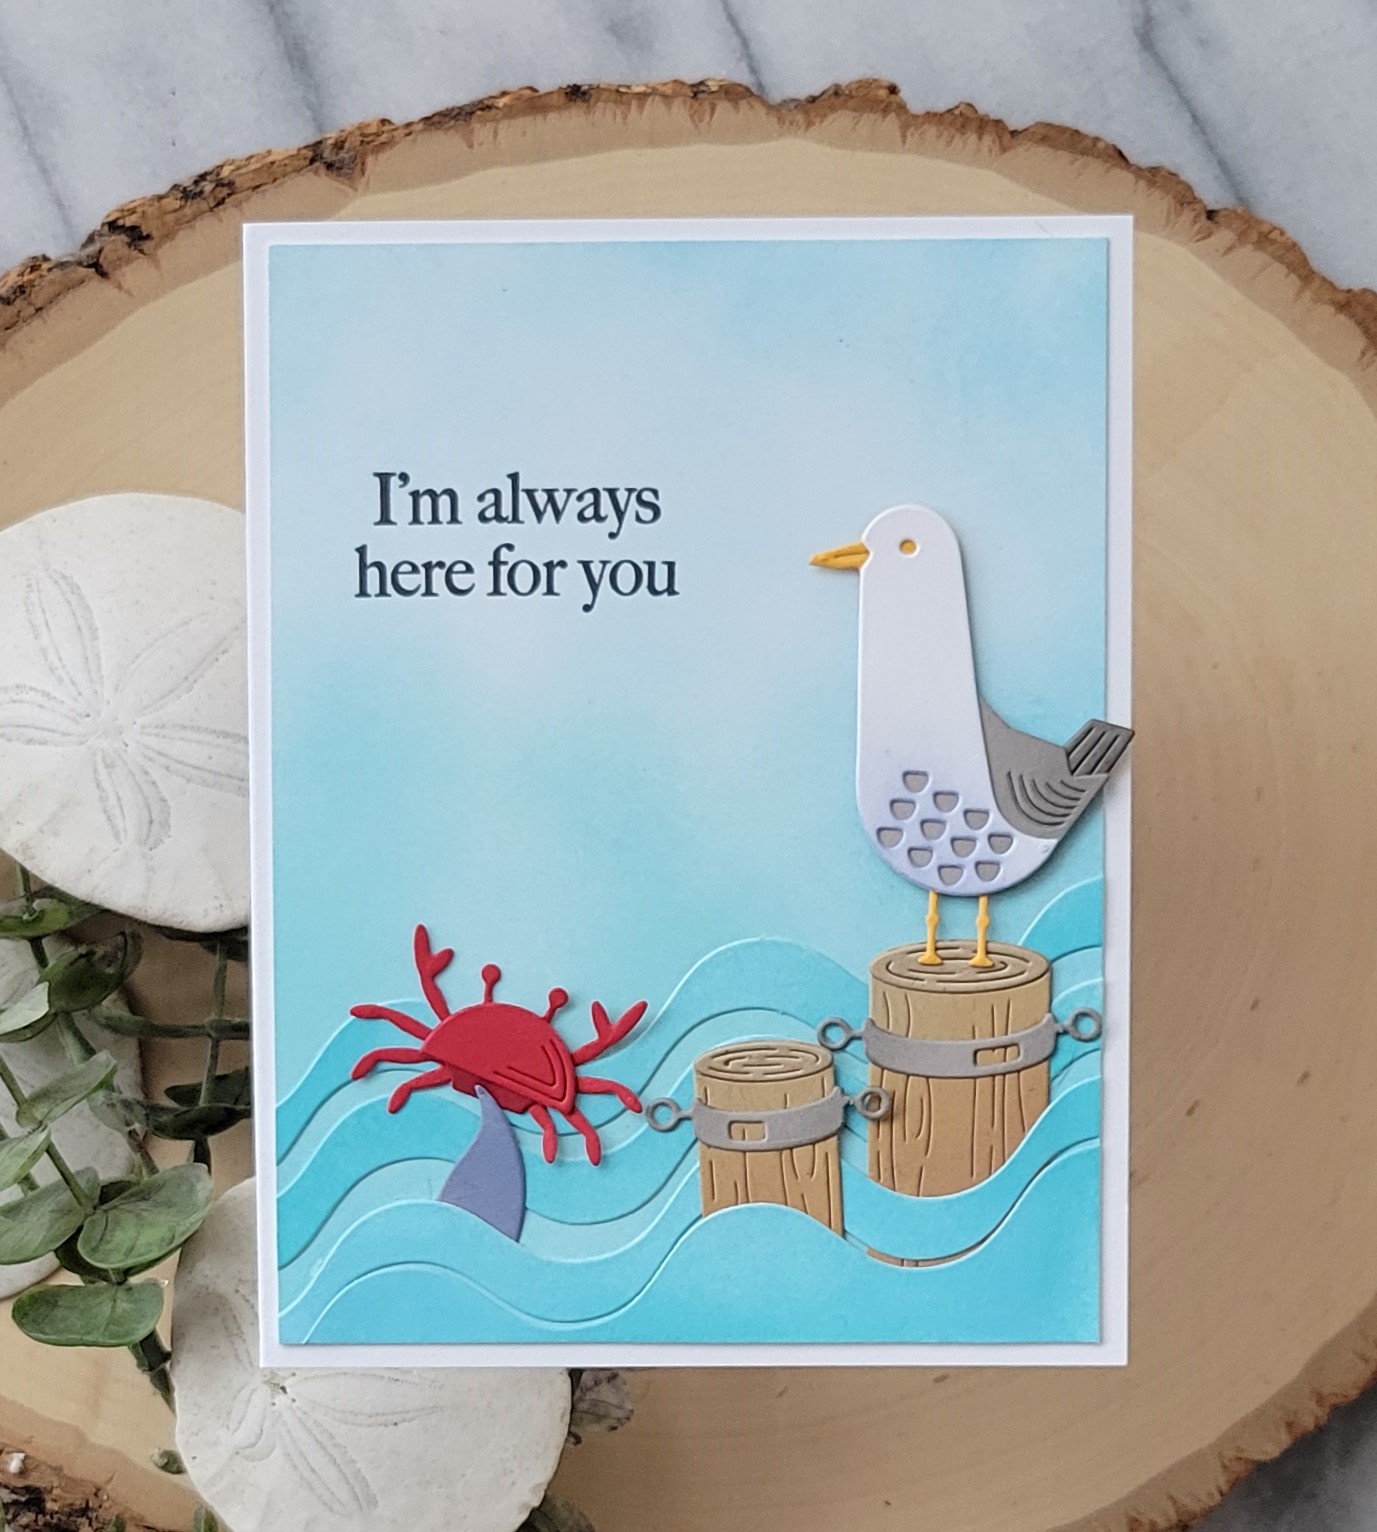
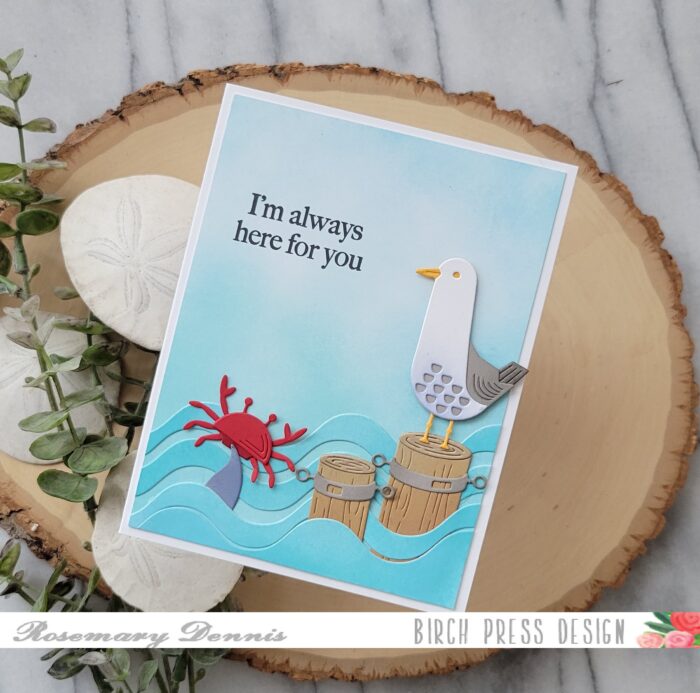
One of my favorite scenes in Finding Nemo is at the end of the movie when Dorie is asking if the crabs have seen Marlin and they ignore her so she grabs one and sticks it up above the waves to where a group of seagulls are sitting on a buoy. When I saw the new Block Print Dancing Crabs die set I immediately knew I wanted to recreate that scene. I used the new Waterfront Pilings dies, Block Print Happy Seaqull and Corner Waves dies to complete the card.
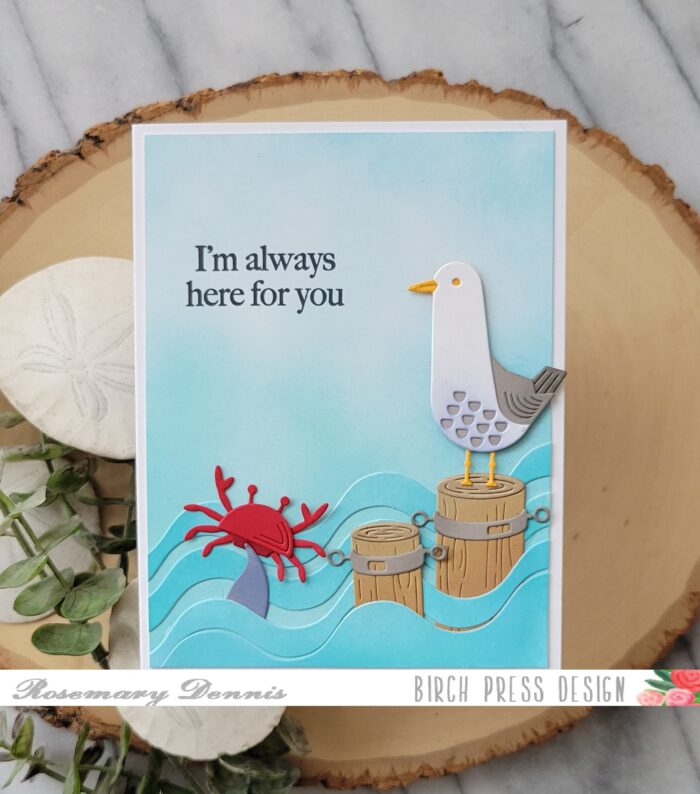
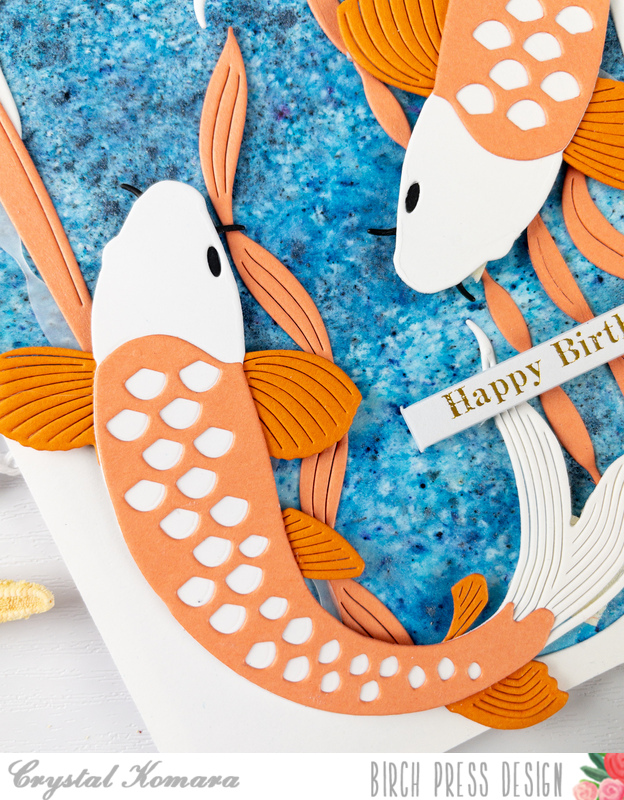
I started by inking up my panel with Tumbled Glass distress oxide ink. I used Tumbled Glass and Broken China on a piece of white cardstock that I die cut the corner waves from so there would be some contrast between the “waves” and the ocean/sky. The main panel was die cut to fit a card front and the sentiment from an Open Studio stamp set was stamped in black ink.
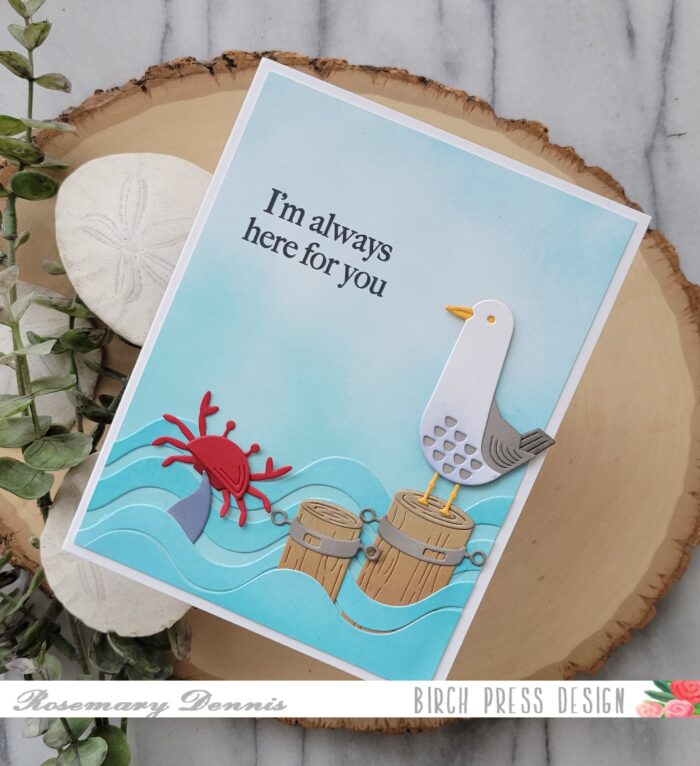
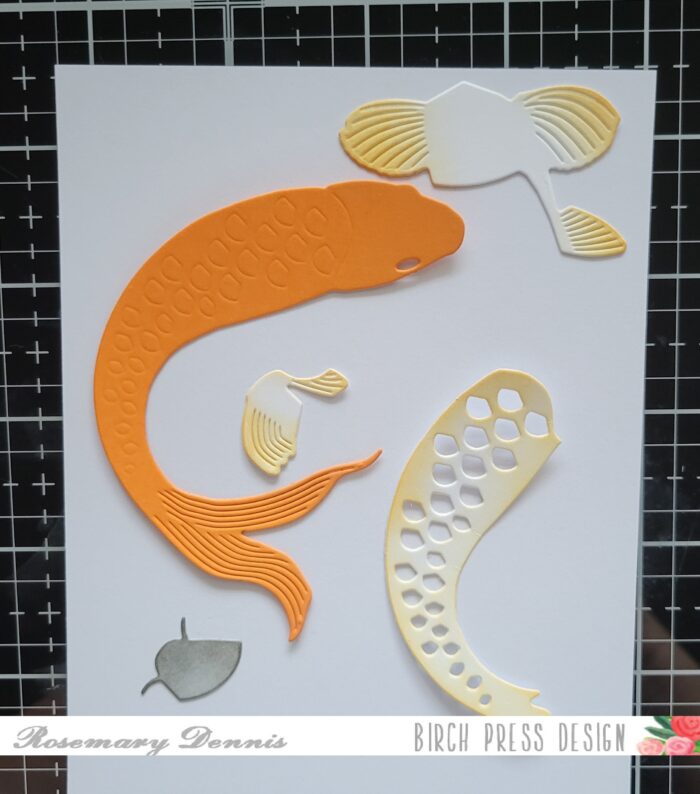
The I die cut the rest of the pieces that I needed to complete the card. I die cut the seagull from white, gray and yellow cardstock. A little bit of gray ink was added to the seagull’s tummy and then everything was adhered together with liquid adhesive and set aside to dry. It is hard to tell, but I did use two different red cardstocks for my little crab. There are two crabs in the set and I used the smallest one for my card. The pilings were die cut from kraft cardstock and then some brown ink was blended on to darken the bases. The tops were left un-inked. The bands around the pilings were die cut from gray cardstock and also got a little bit of inking.
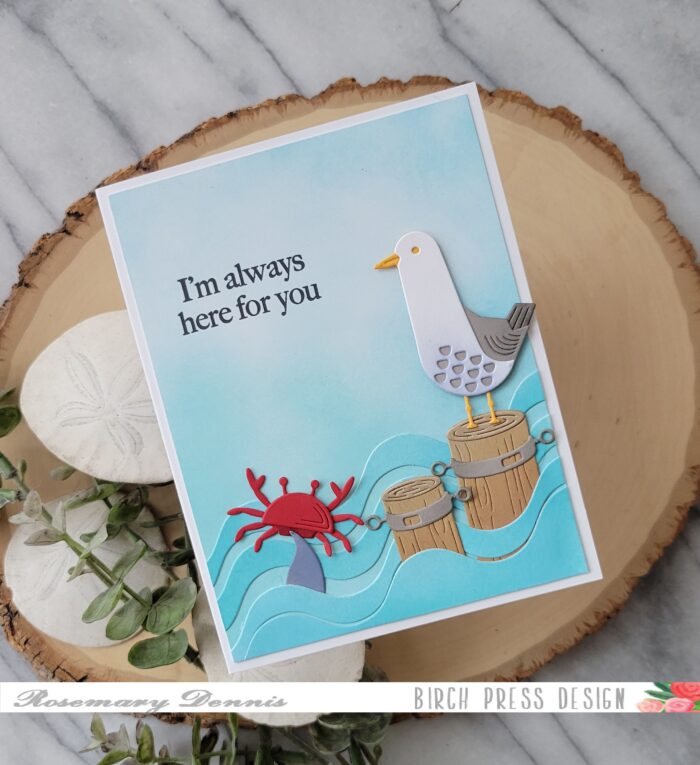
The fin is from the new Block Print Majestic Whale. I die cut it from gray cardstock and then blended on blue in to change the color. Now it was time to assemble the card. I used liquid adhesive to attach everything. It was a bit tricky getting the “waves and the pilings adhered as I wanted them to be. I attached the bottom “wave” and then placed the pilings behind it, tilting the smaller piling. Then I added the second wave, tucking the fin into that one and working it behind the smaller piling. The final two waves were added behind the pilings and then the pilings were fully glued in place. I finished by attaching the seagull and the little crab.
I absolutely love how this card turned out! I was a little tricky, but so worth the effort. Let me know what you think and if it reminds you of Finding Nemo! Thanks for stopping by and have a wonderful day!