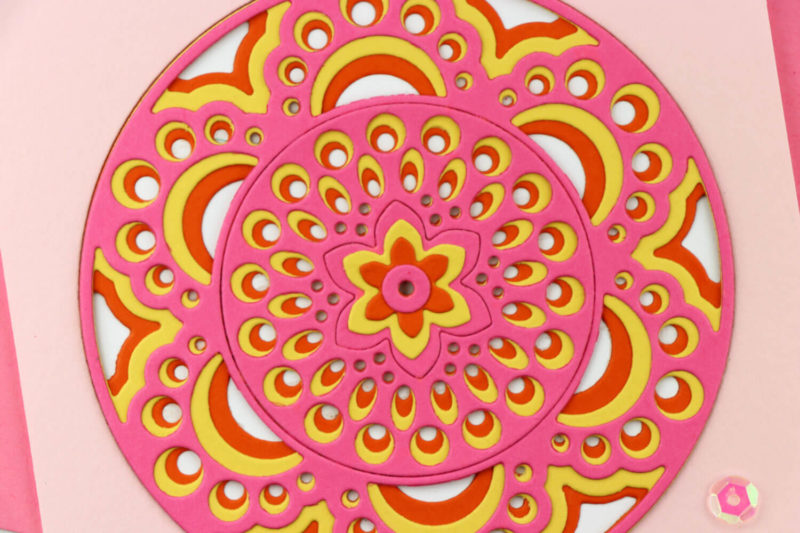
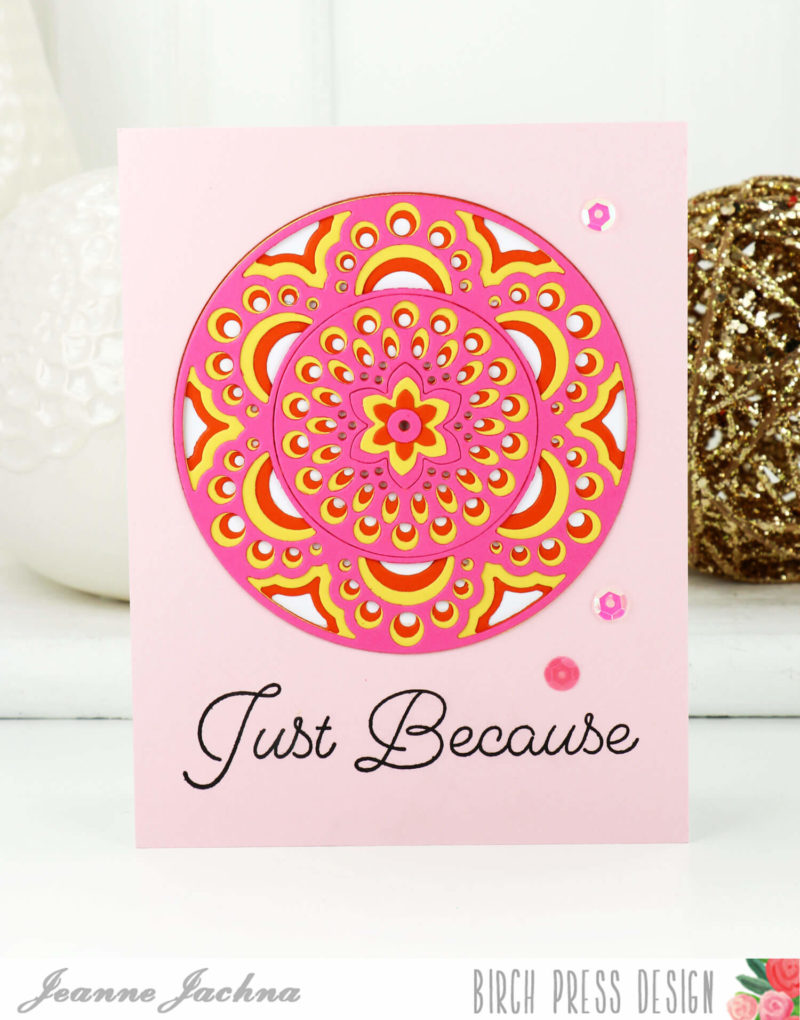
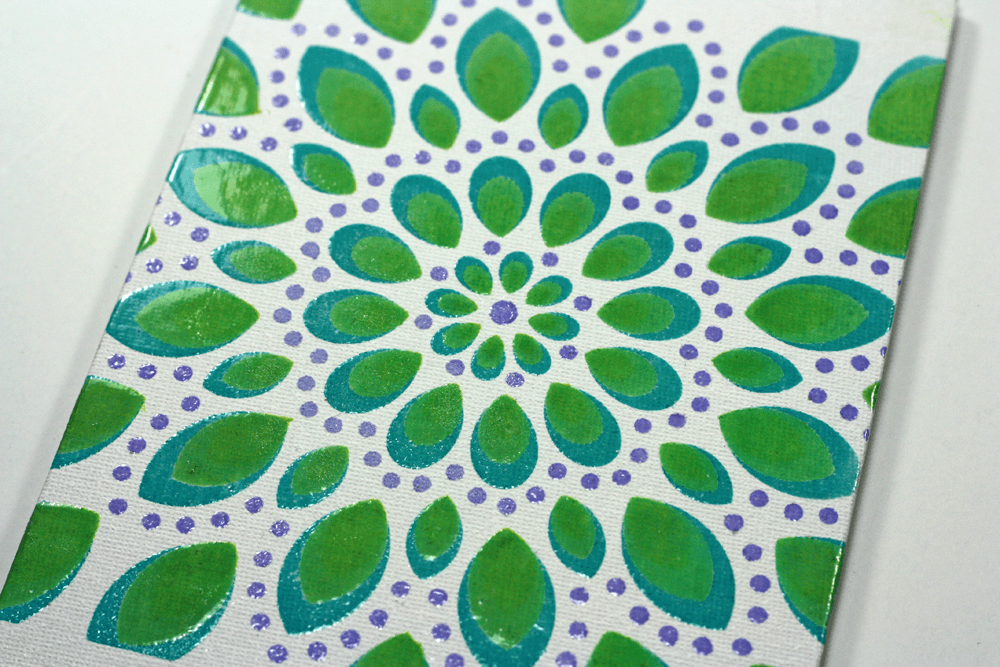
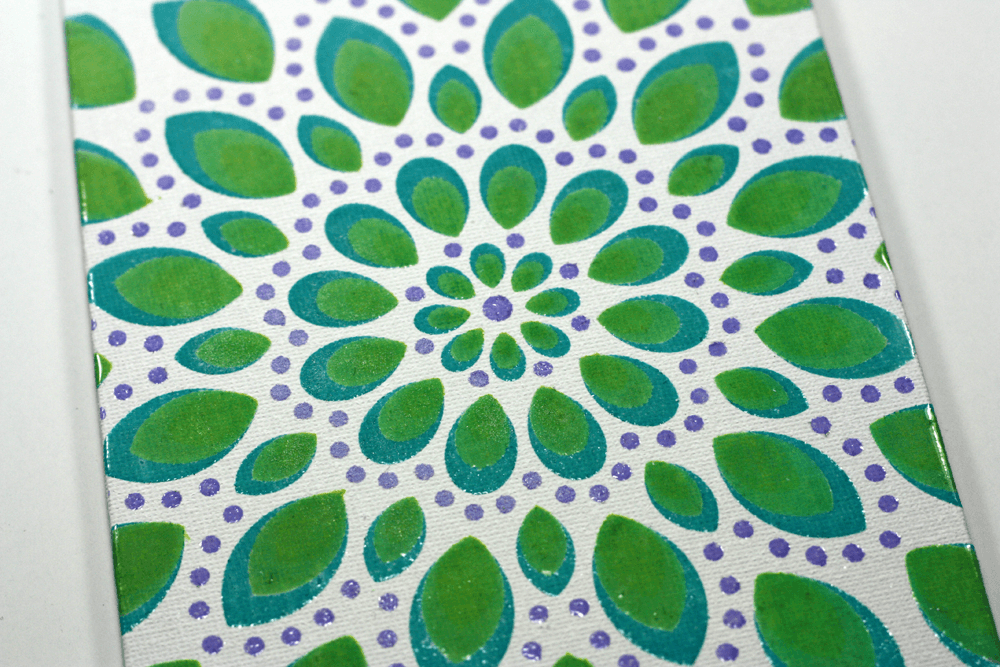
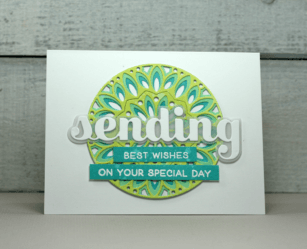
Thanks for stopping by! Jeanne here today with a pretty in pink mandala inspired card made with the Bali Layered Die set! I love to send cards for all occasions but the most special are the ones sent just because – a little note to let someone know they’re on my mind.
I started with a panel of soft pink card stock the same size as the front of my card base. I die cut the panel with the Mandala Circle Base and then stamped a sentiment from the Just Because clear stamp set. I always stamp before assembling my projects because if something goes wrong it’s easier to start over at the beginning!
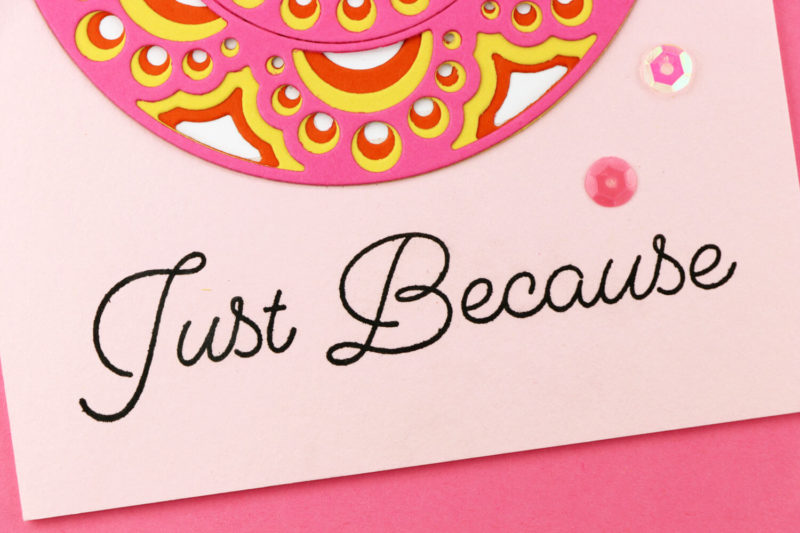
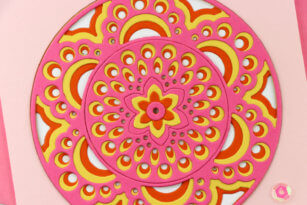
I attached the panel to my card base and then cut the Bali layers in orange yellow and pink – colors that remind me of flowers.
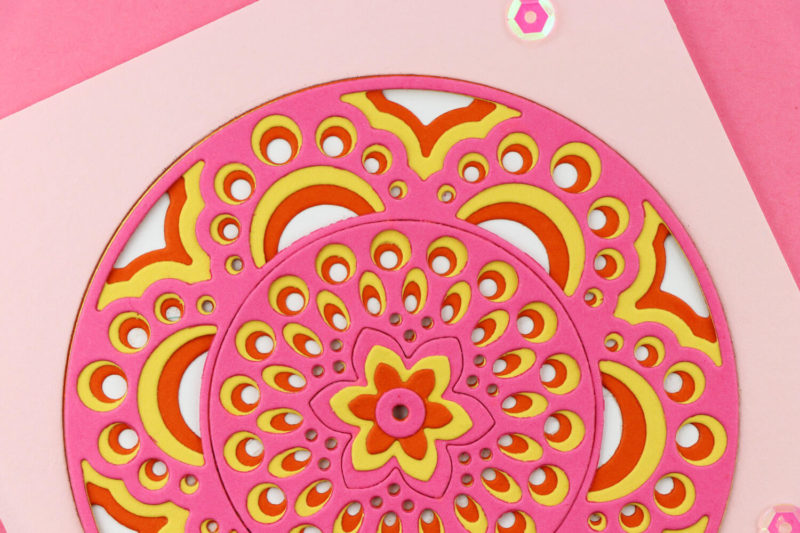
I adhered the die cut circles directly inside the circle opening. I’ve found if you adhere them together and then try to inlay them inside the opening it won’t quite fit as smoothly. The finishing touch is the flower in the center of the mandala made from the die cut pieces, and a sprinkle of Pretty In Pink sequins from the shop.
I hope you find some time to make today!

Finished Size 4.25 x 5.5″
Supplies


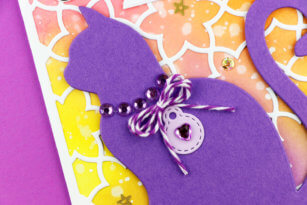
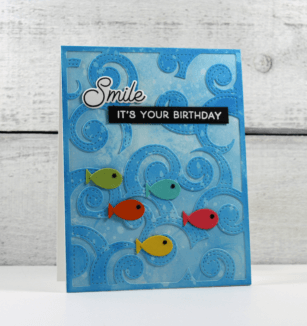
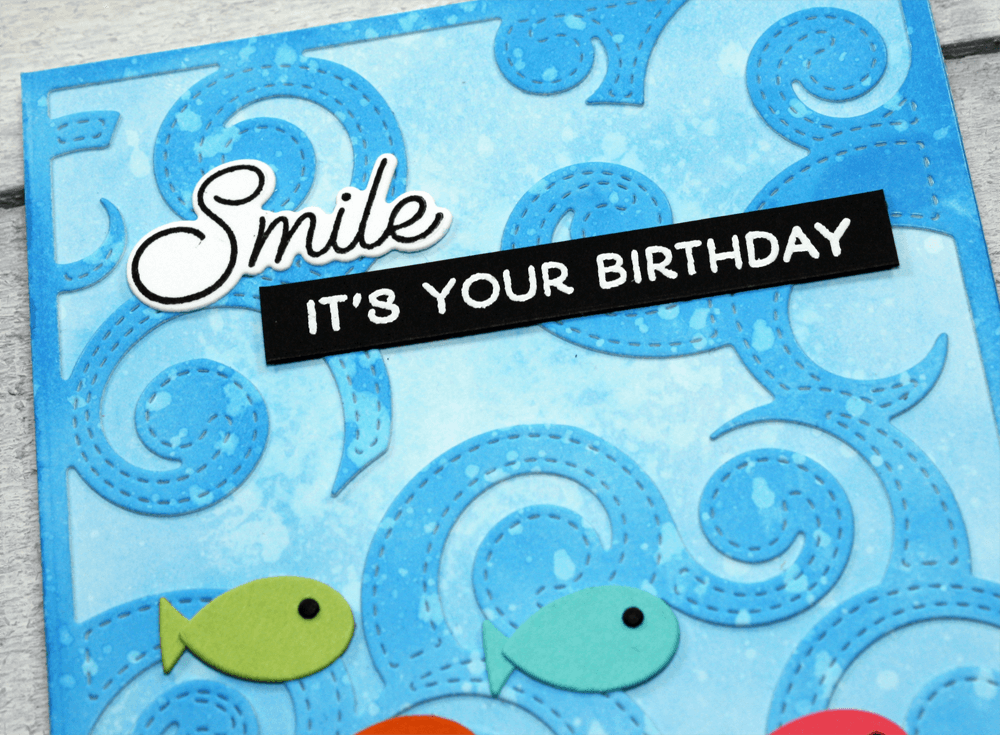
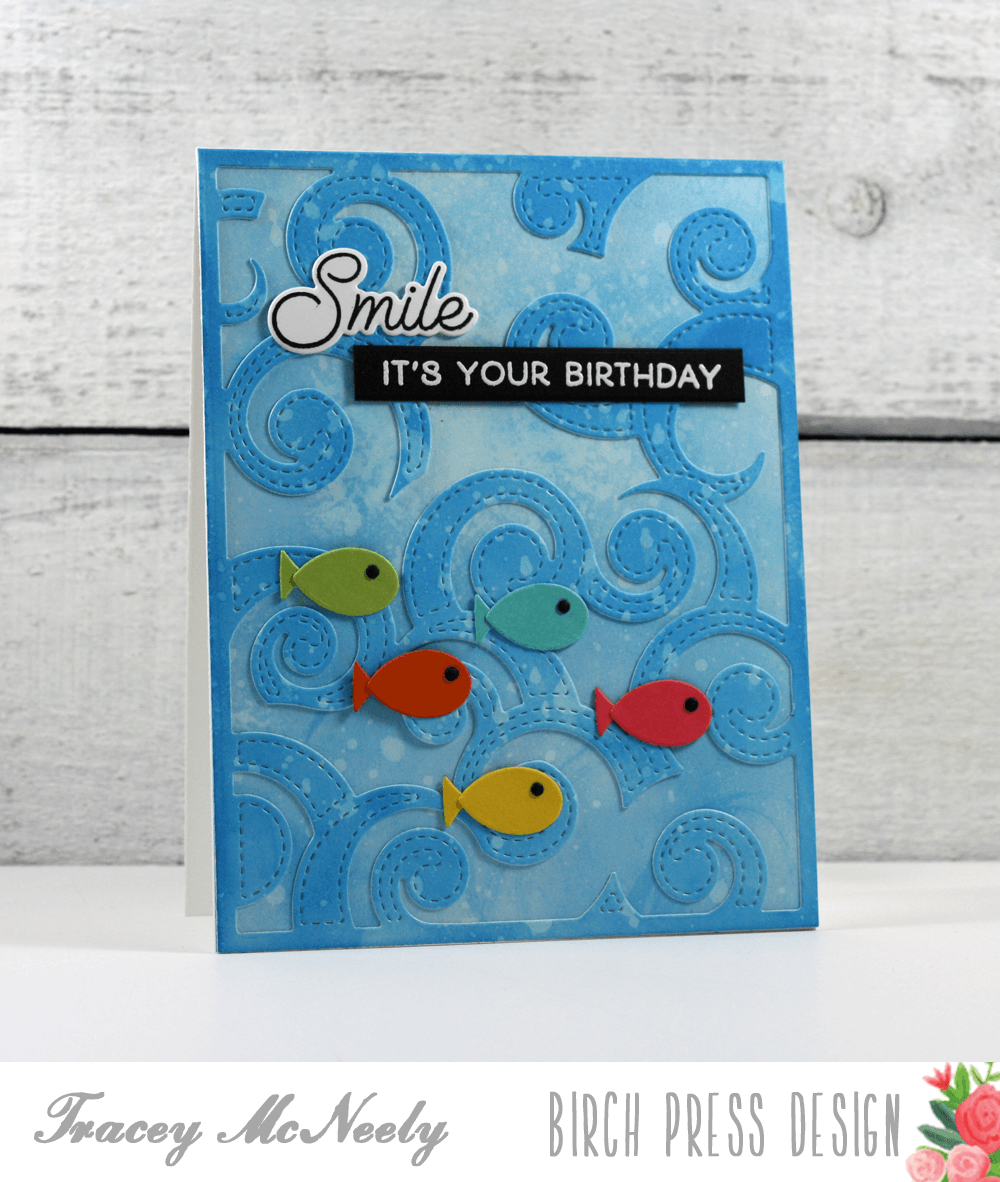
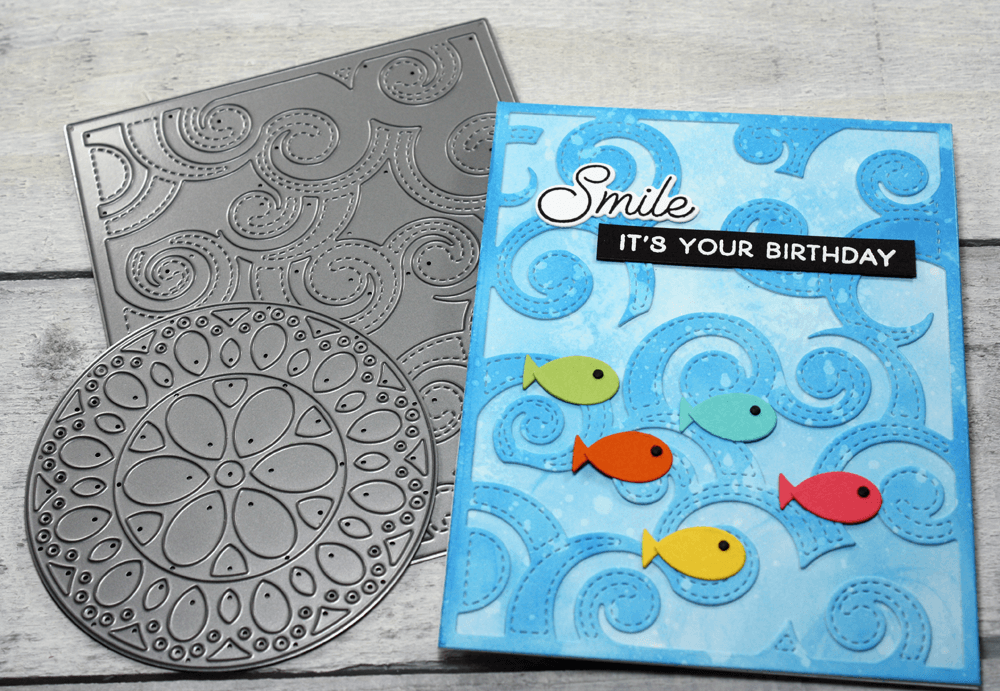
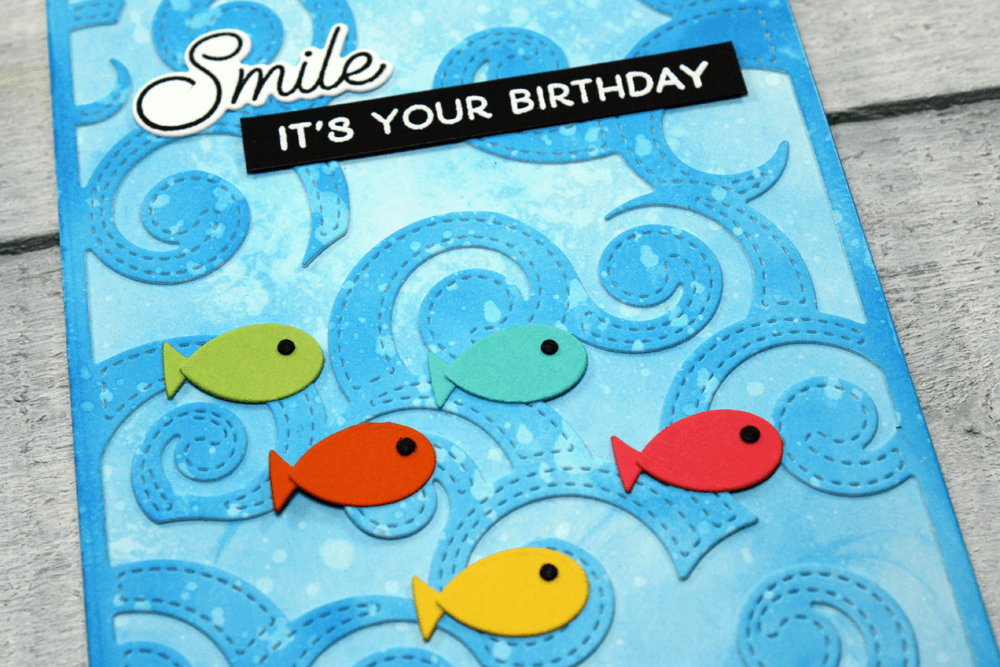
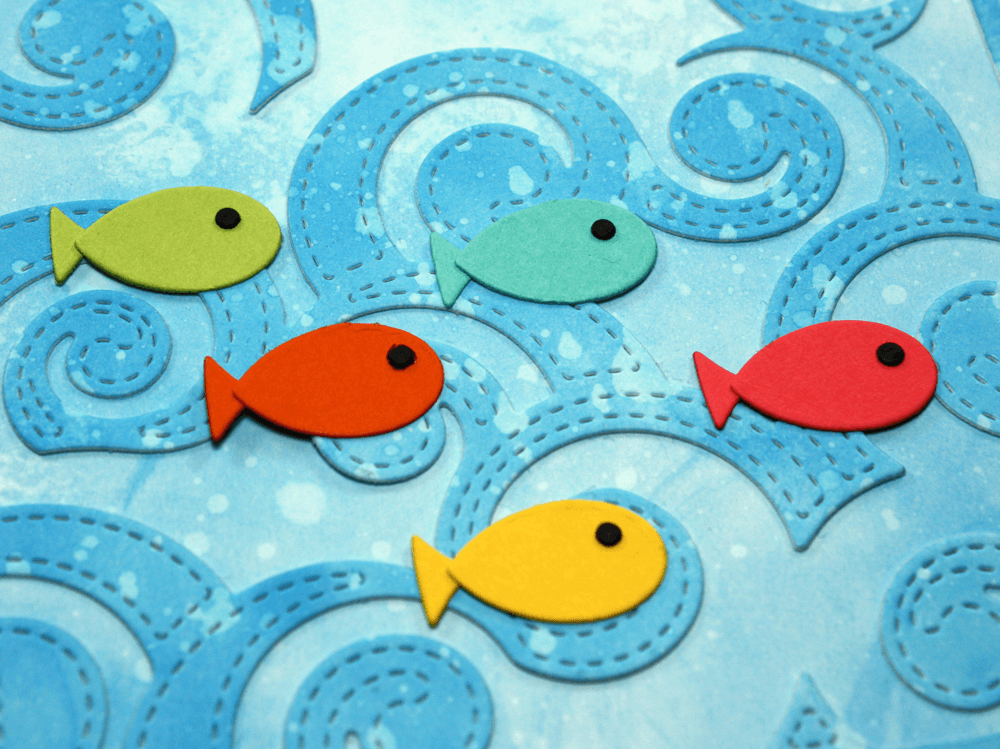
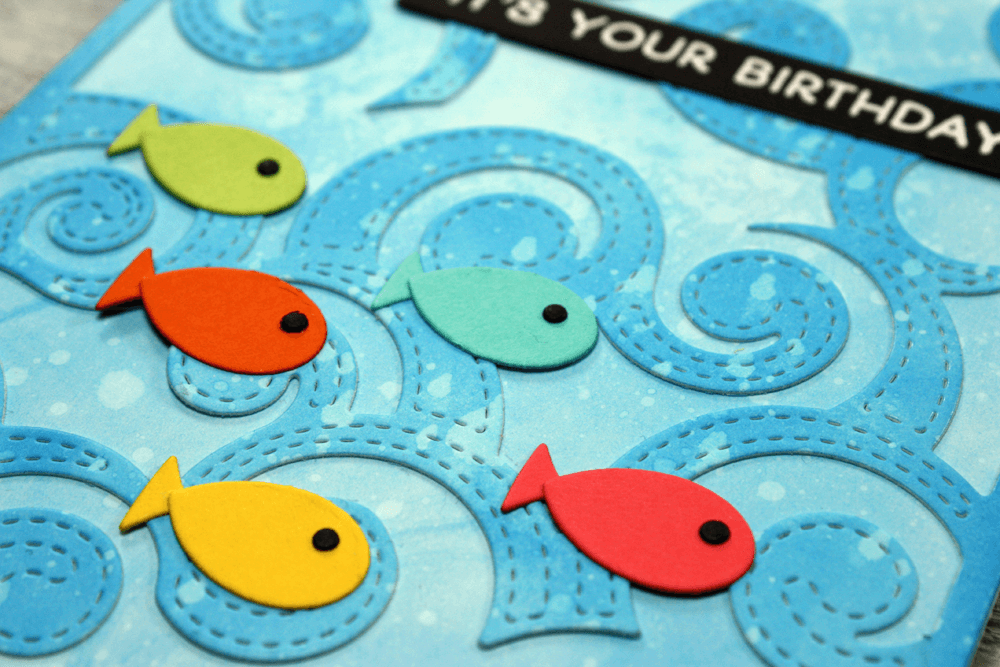
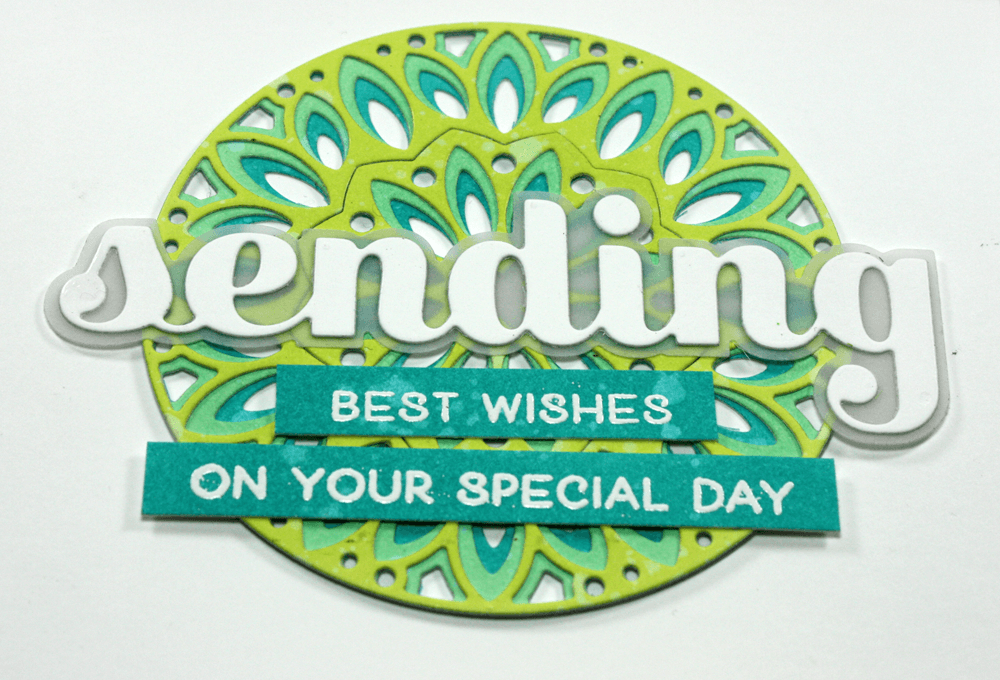
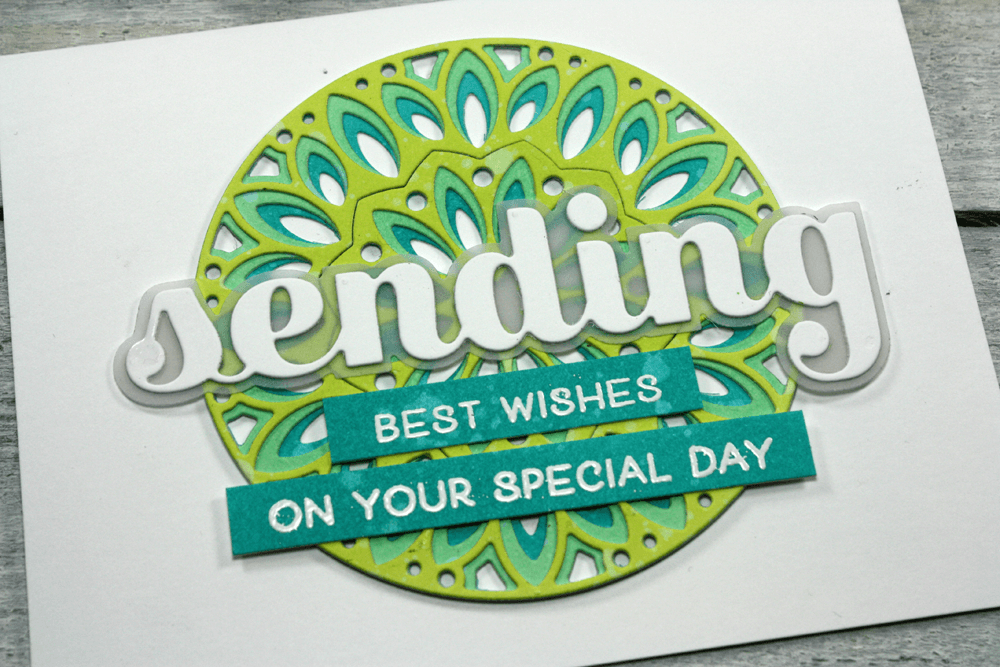
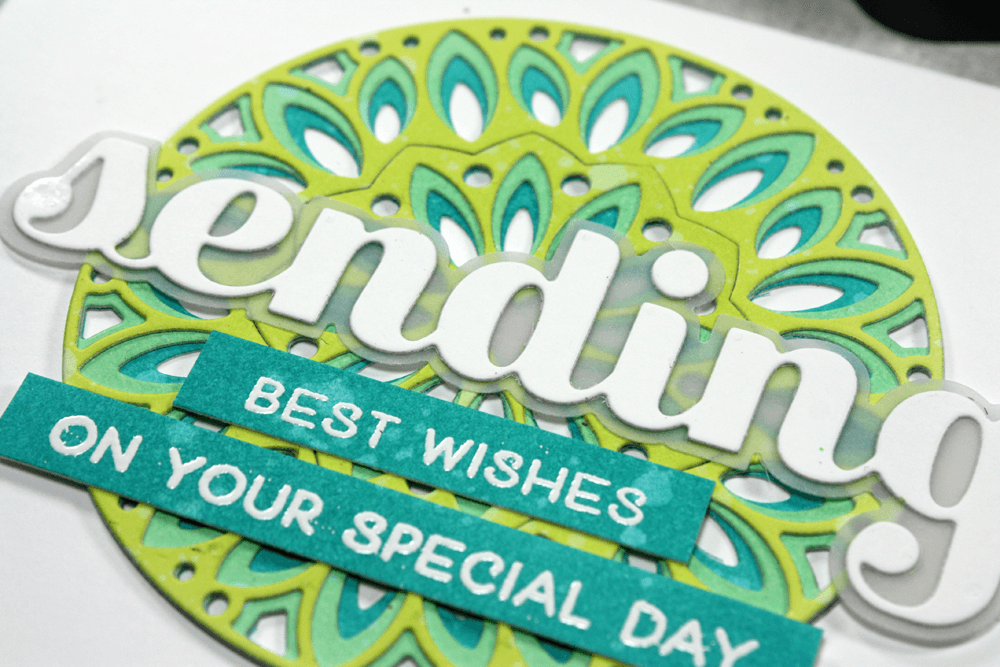
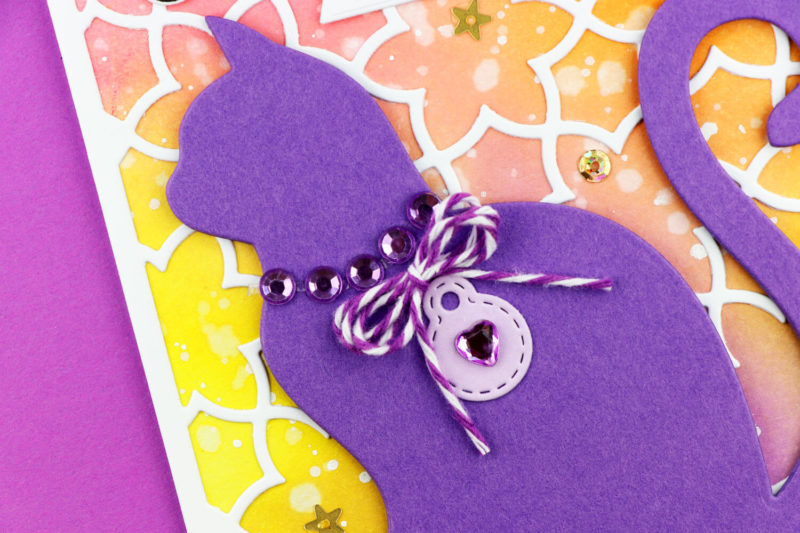 Do you love animals? For most of my life I’ve been surrounded by different pets. I’ve had dogs and cats and lots of more interesting things my children have brought home for some TLC… baby bunnies and birds, toads and turtles. My card today features the Purrfect Cats die cut.
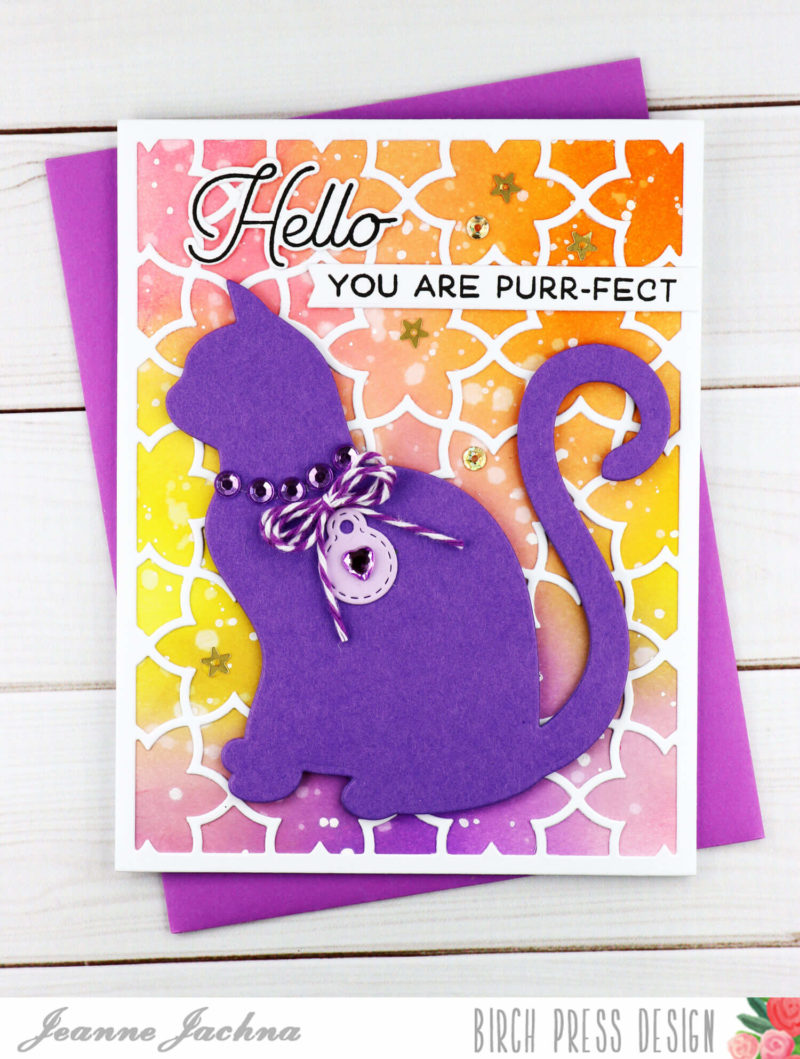 I love the intricate layered dies from Birch Press Design but I confess that I am always hesitant to cover them up. The backgrounds are so beautiful I always think they should take center stage. Sometimes I worry that if I add die cuts and embellishments that my card will look too busy or cluttered.
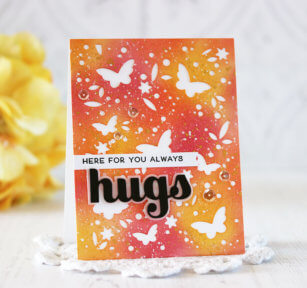
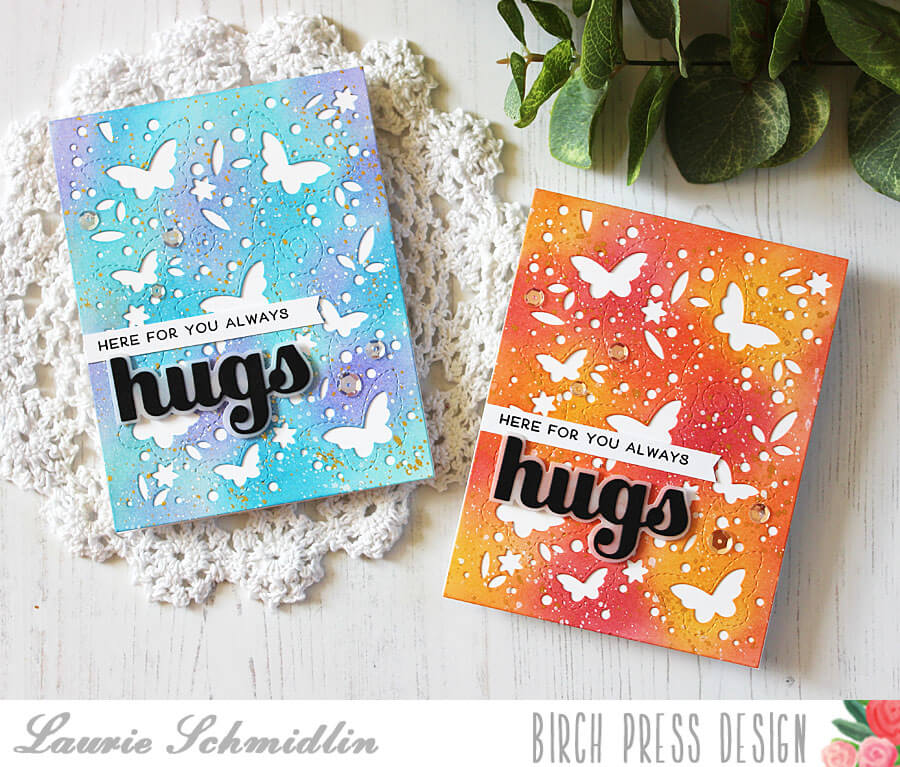
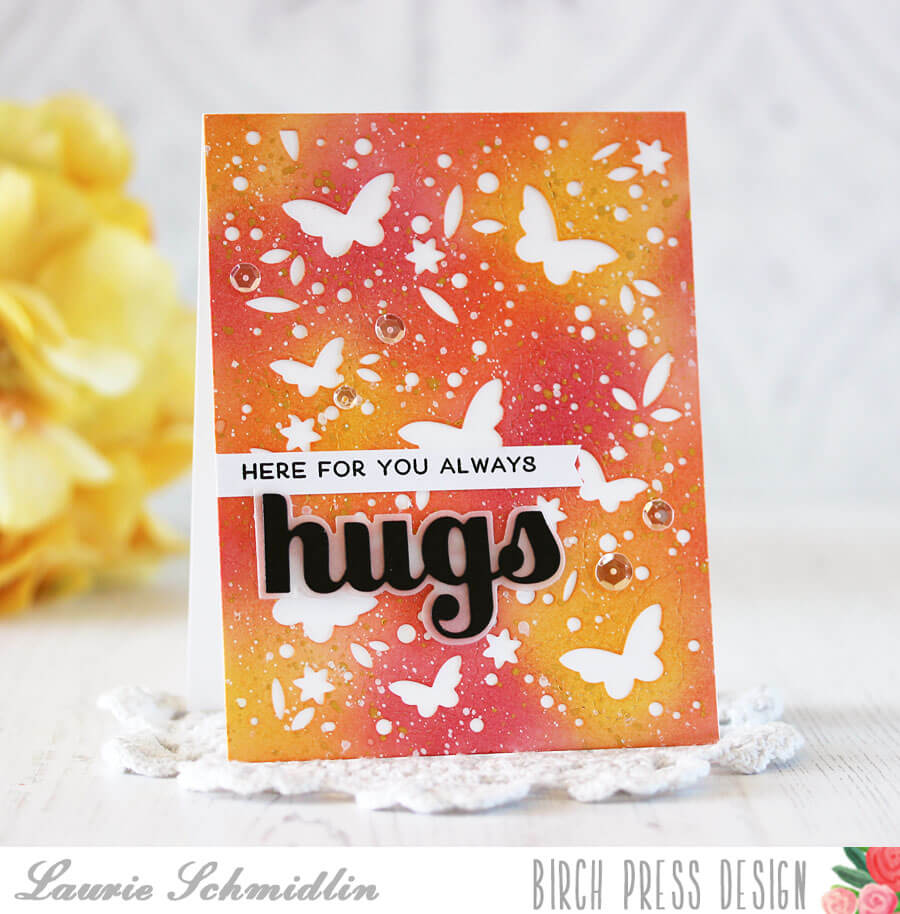
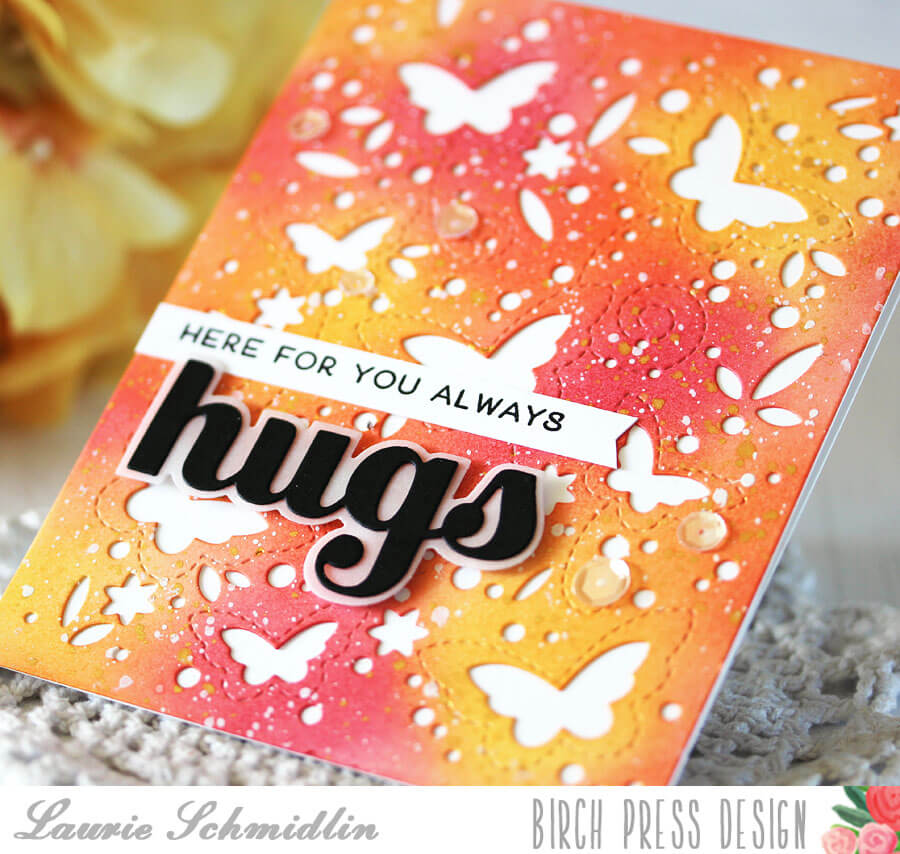
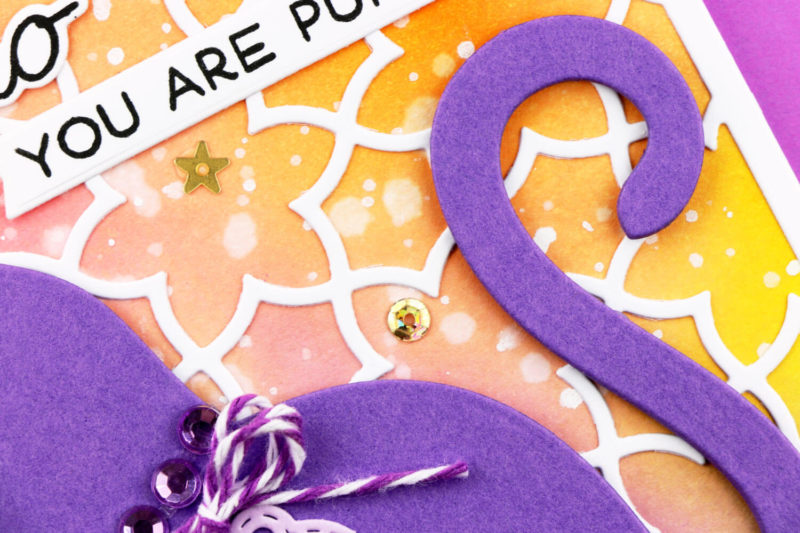 I started my card with a distress ink background in Squeezed Lemonade, Mustard Seed, Dried Marigold, Worn Lipstick and Wilted Violet. The panel was splattered with water and white ink before I topped it with a Sevilla Layer A die cut. The Purrfect Cats die cut works well with the busy background because it is a large solid die cut in contrast with the detailed colorful background.
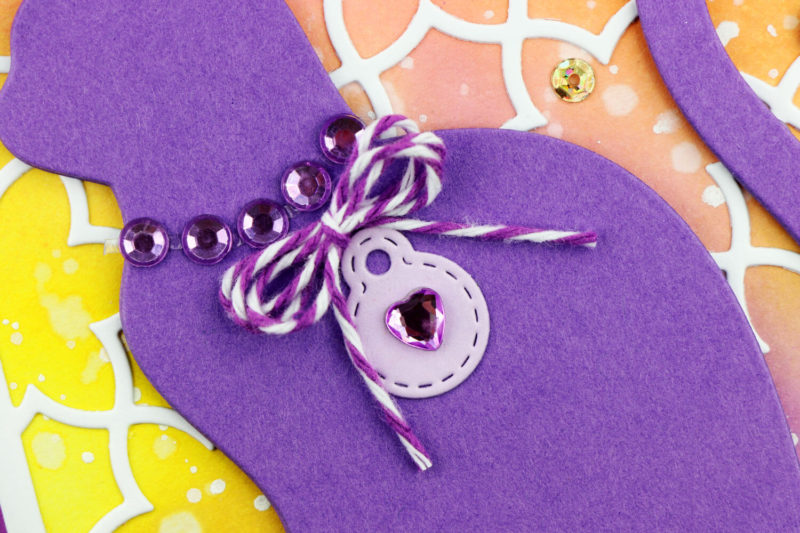 I triple cut the cat and glued the die cuts together to make one thick die cut. I embellished the cat with some rhinestones, a twine bow and a bitty die cut tag. The background is embellished with gold sequins from the Not So Heavy Metal tin from the store.
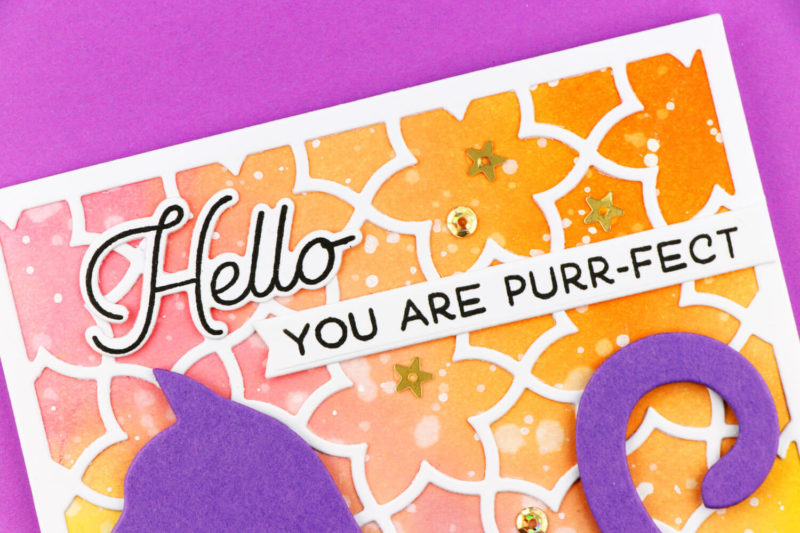 The sentiment is from the Love and Miss You stamp set. The coordinating die set cuts the large word sentiments from the stamp set.
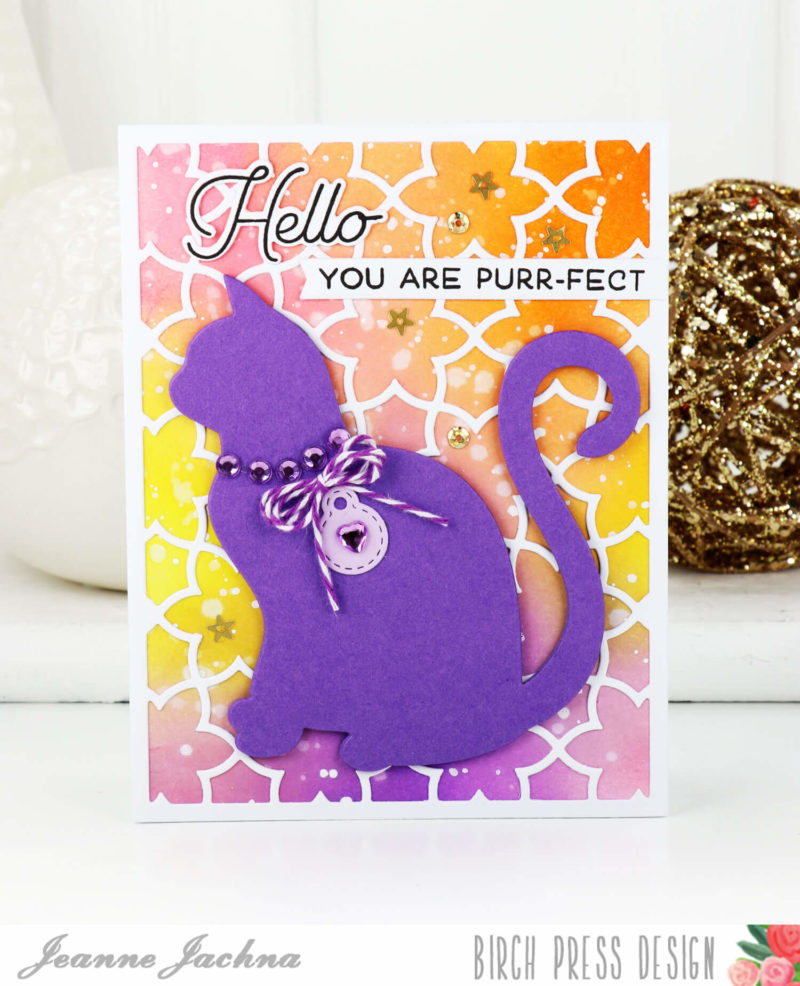


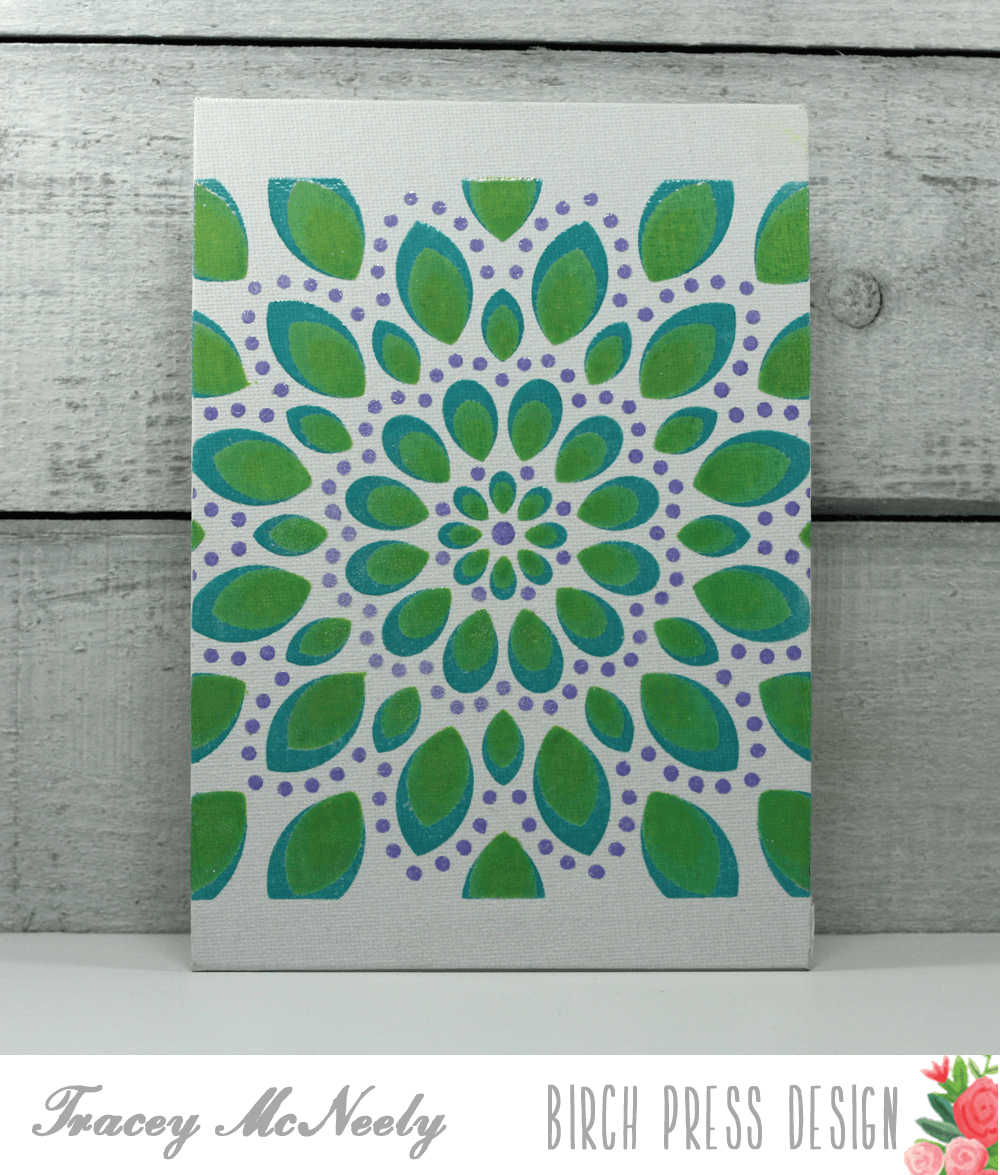
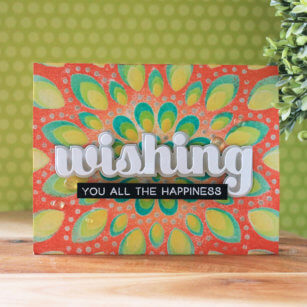
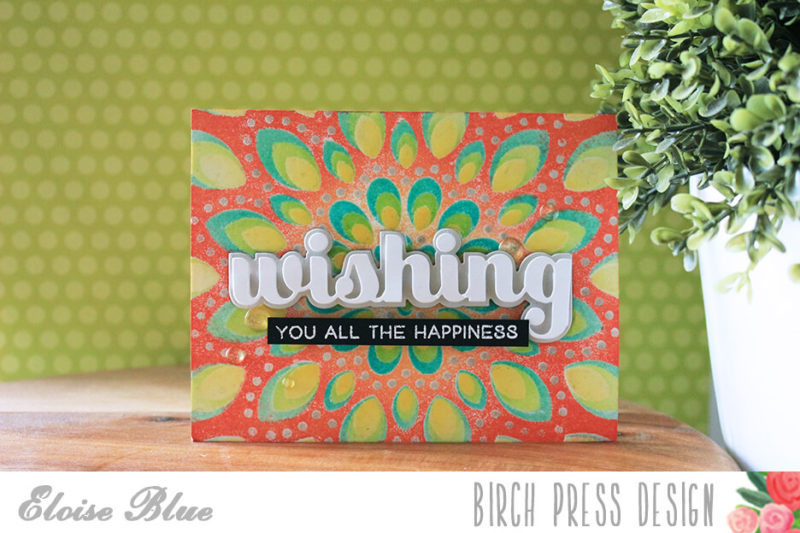
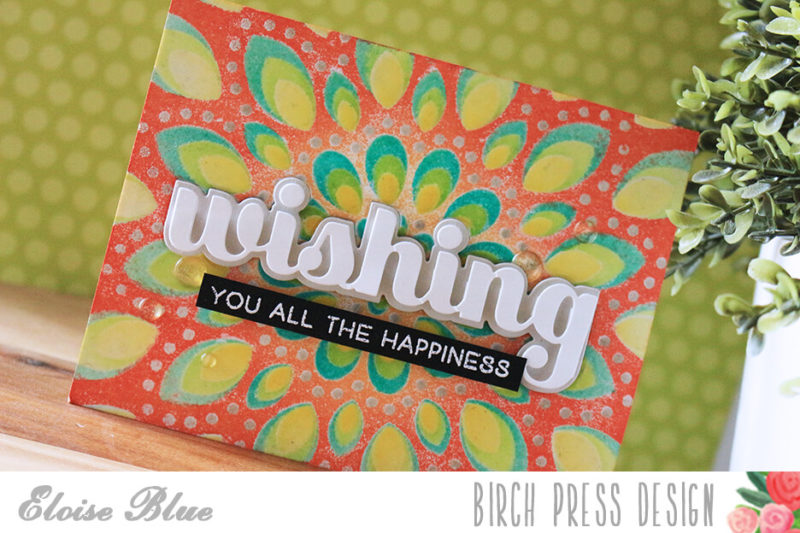
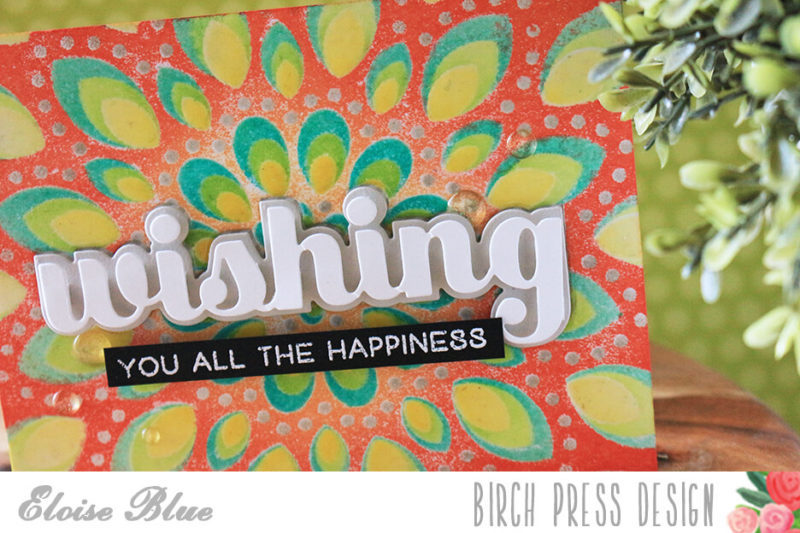
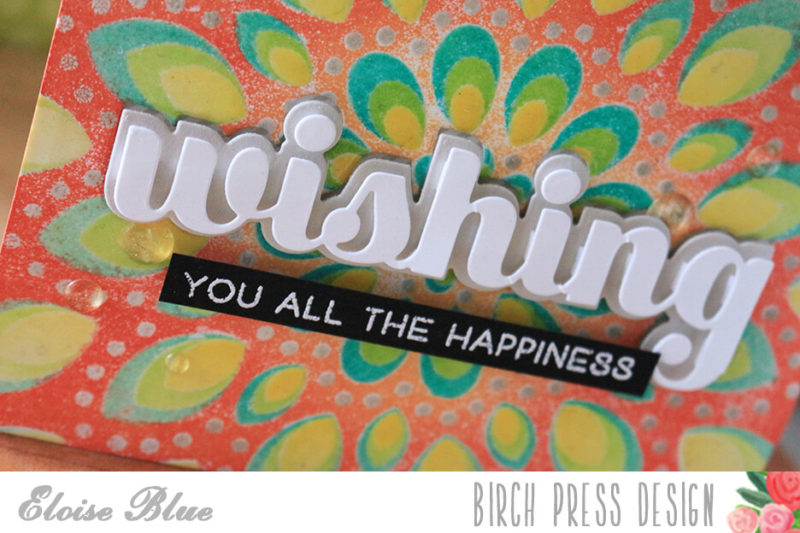
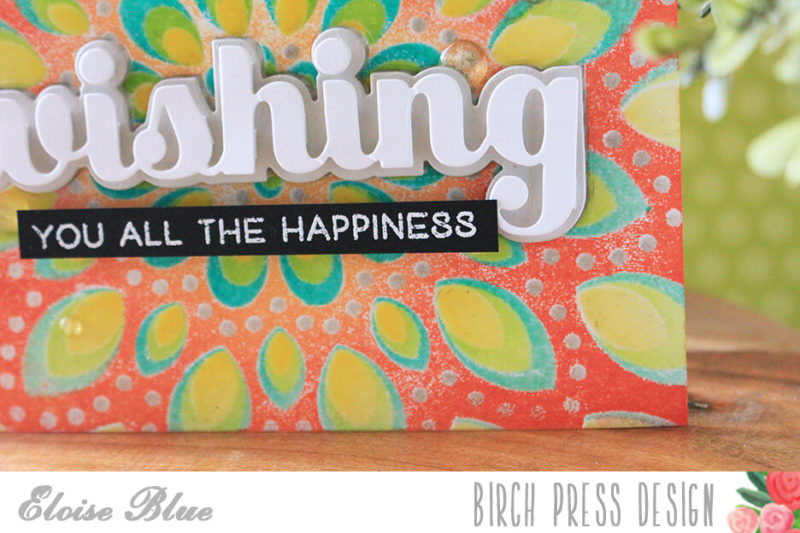
 Welcome to another inspiration post here at Birch Press Design. I just can seem to get enough of the new Mandala dies and today I have a video tutorial to create a pretty wedding card. I am using the
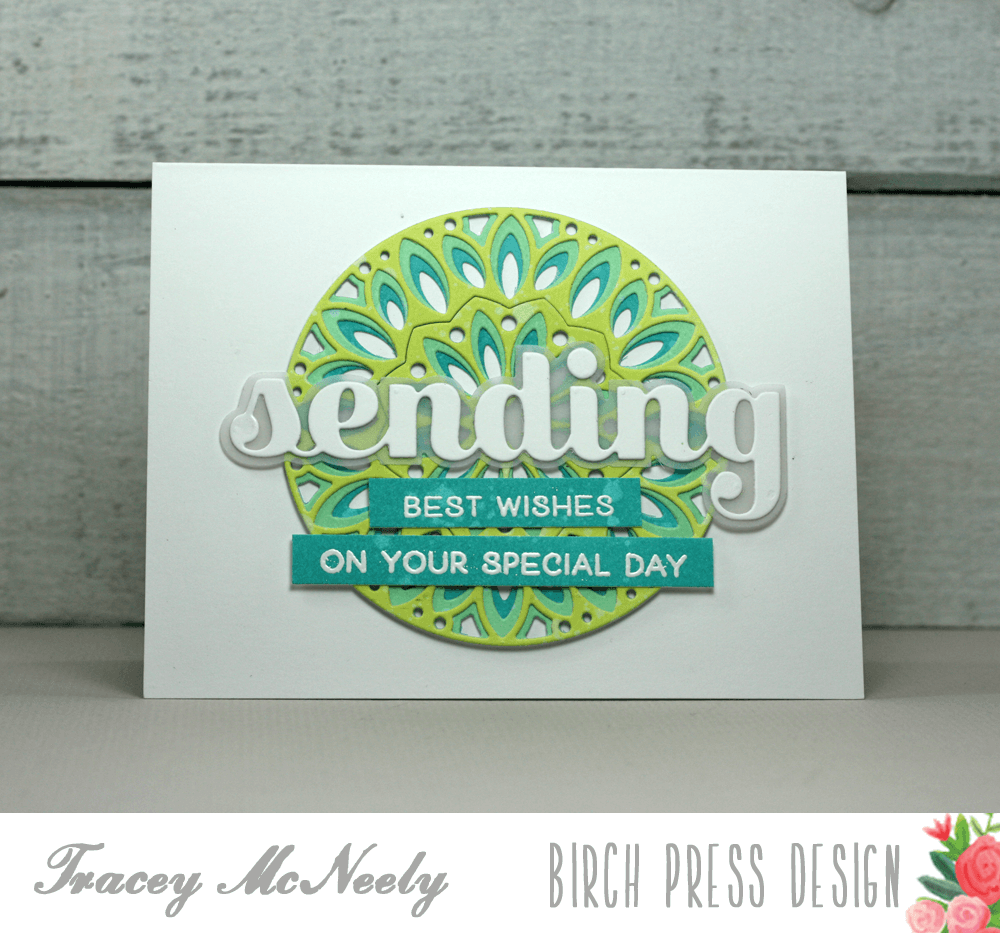
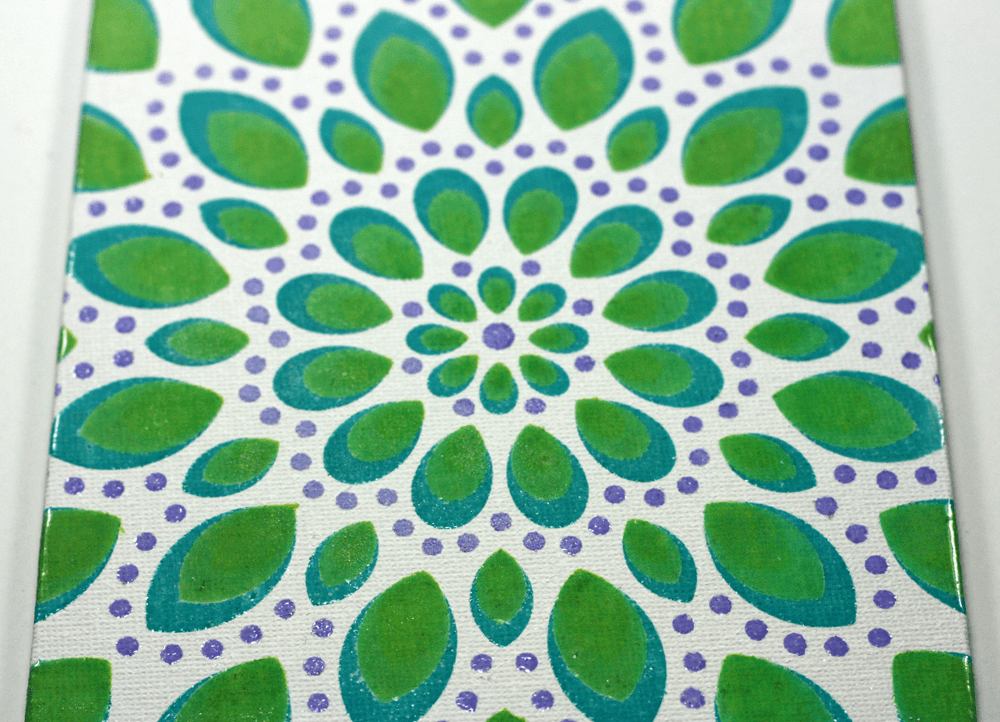
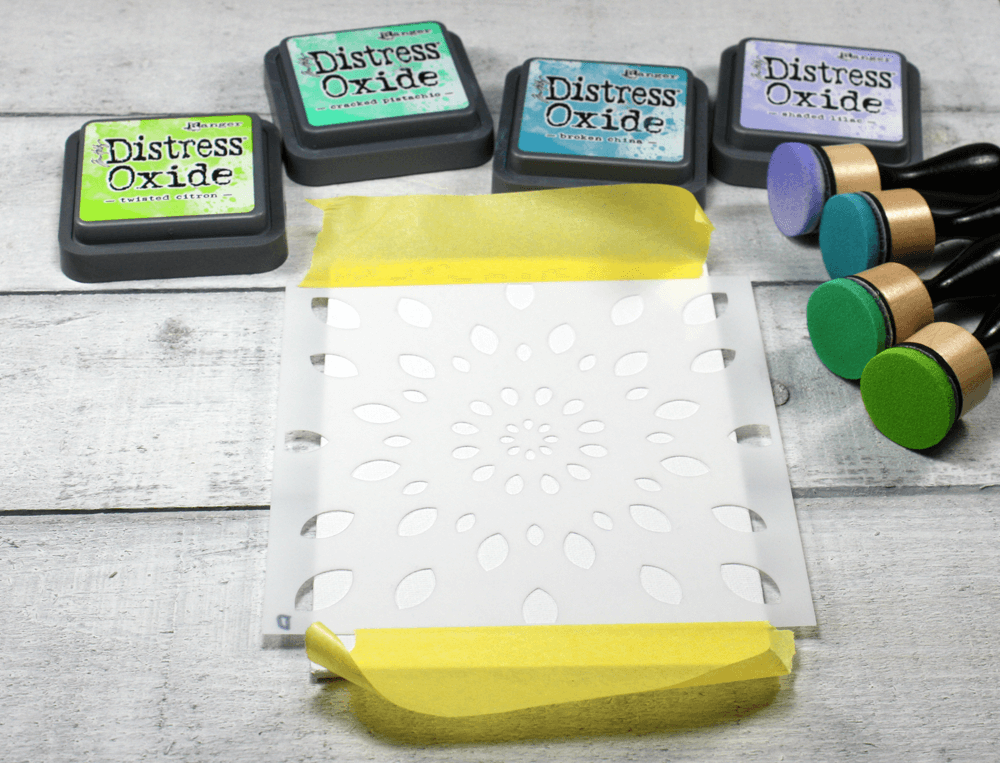
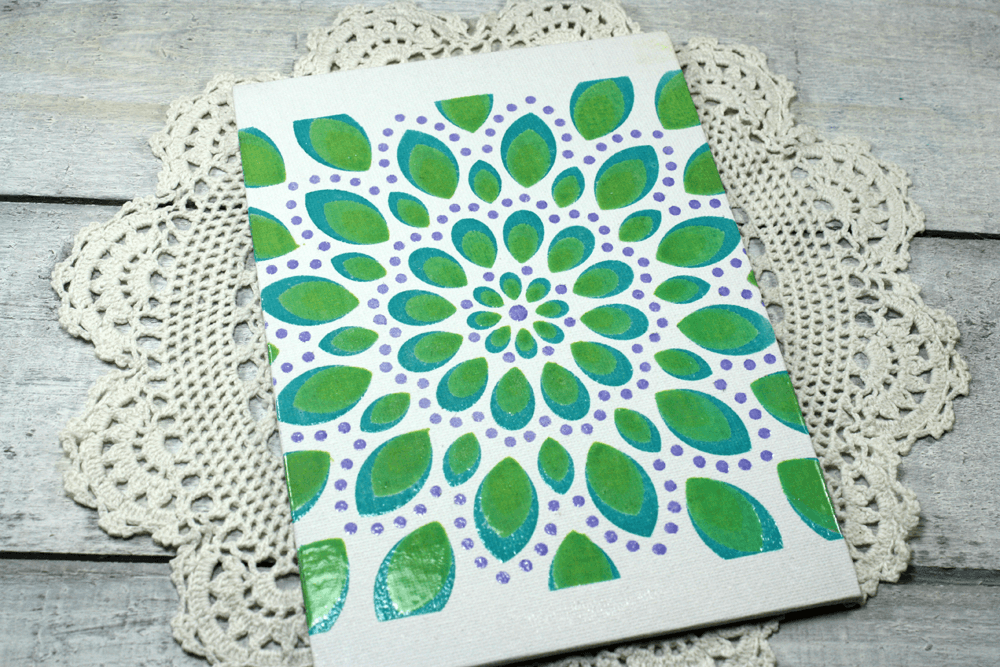
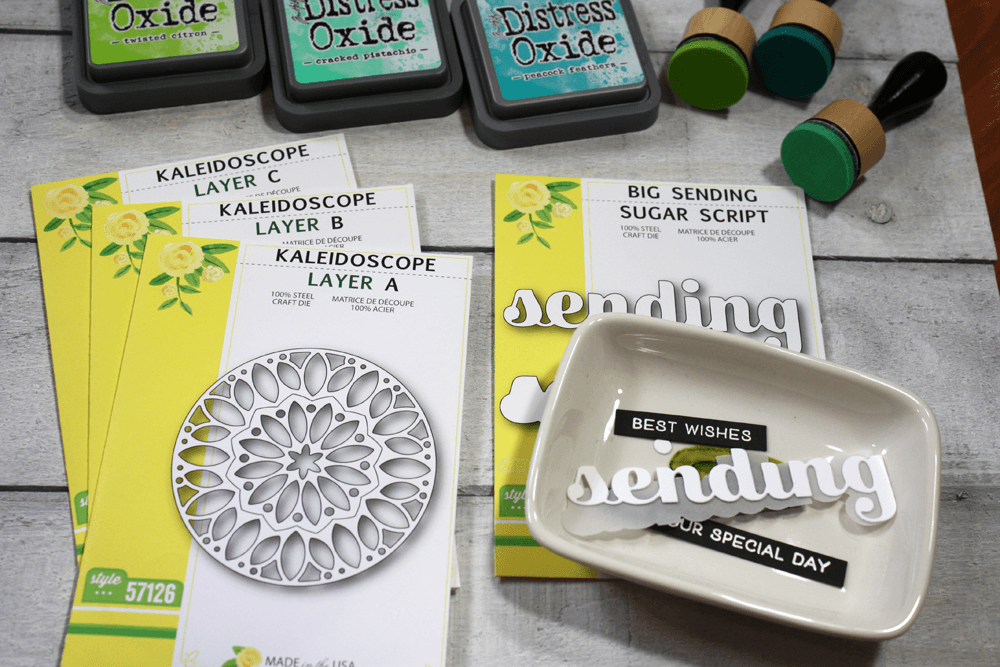 The video below will show you how I created all the elements for my cards using Distress Oxide inks and Bristol Smooth cardstock to create my own custom coloured cardstock to use with the dies.
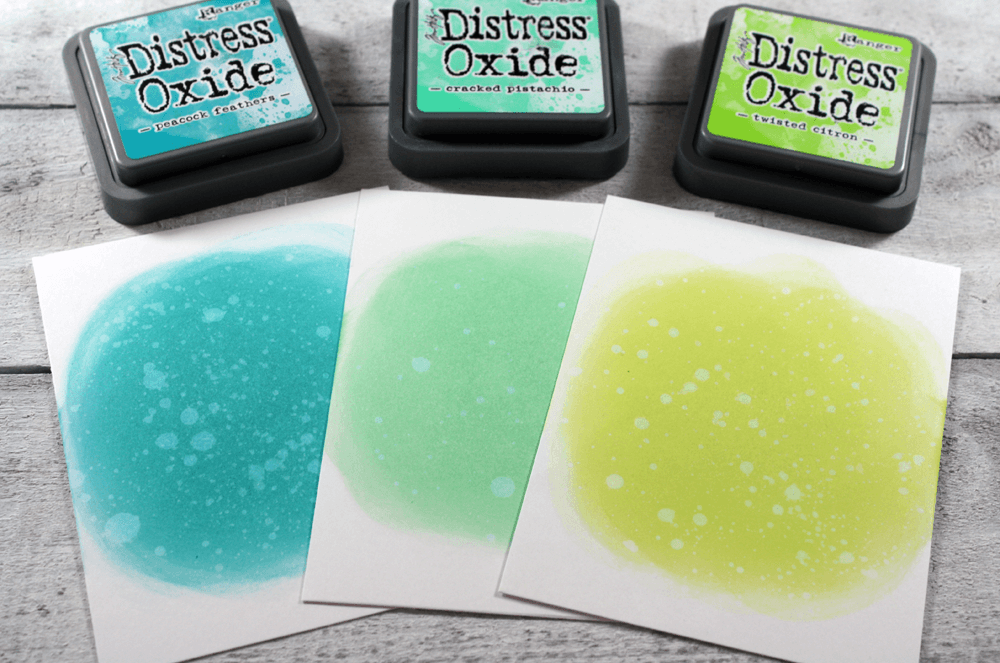


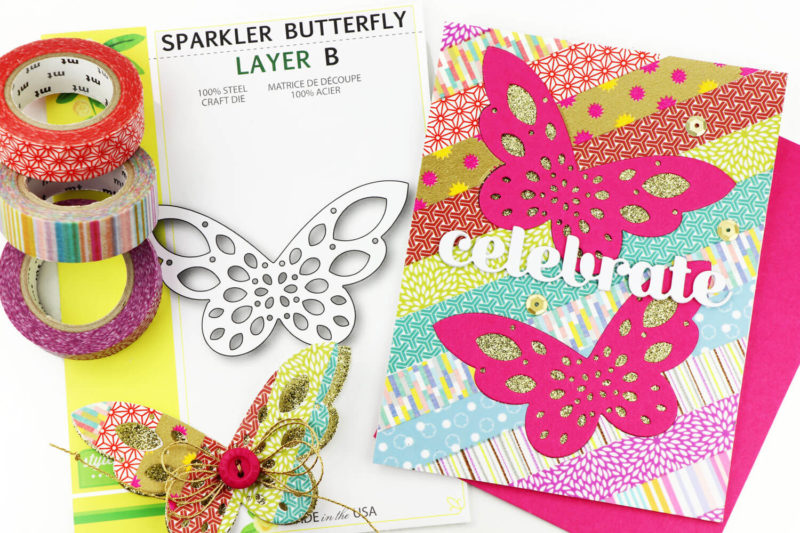
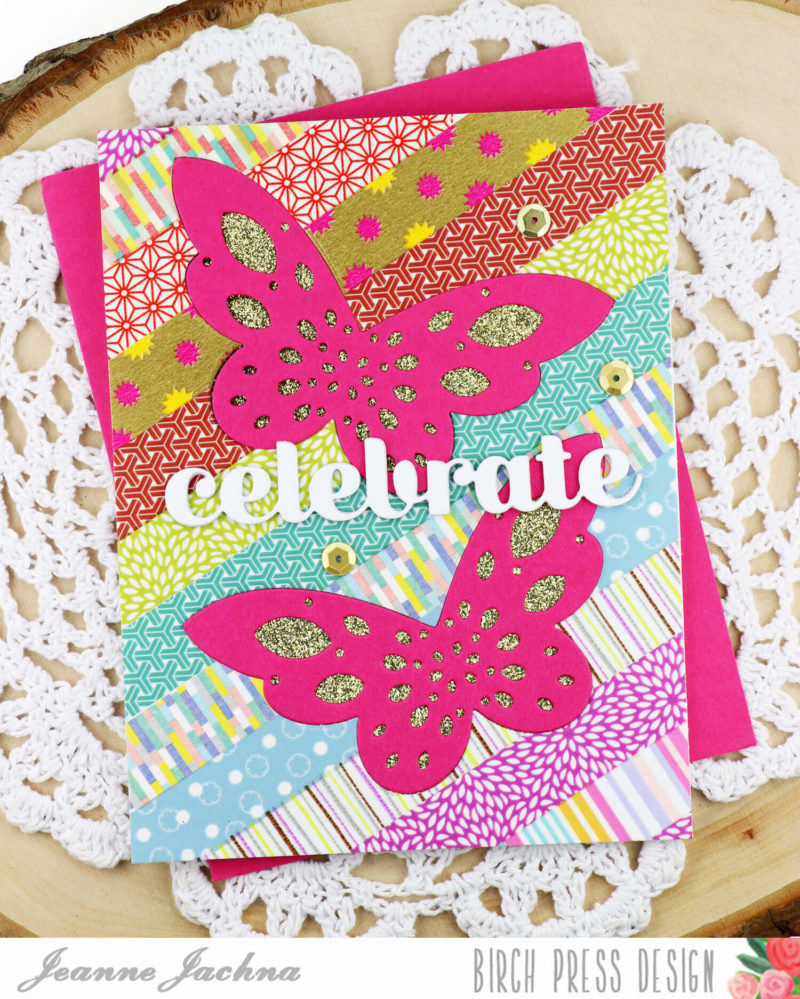
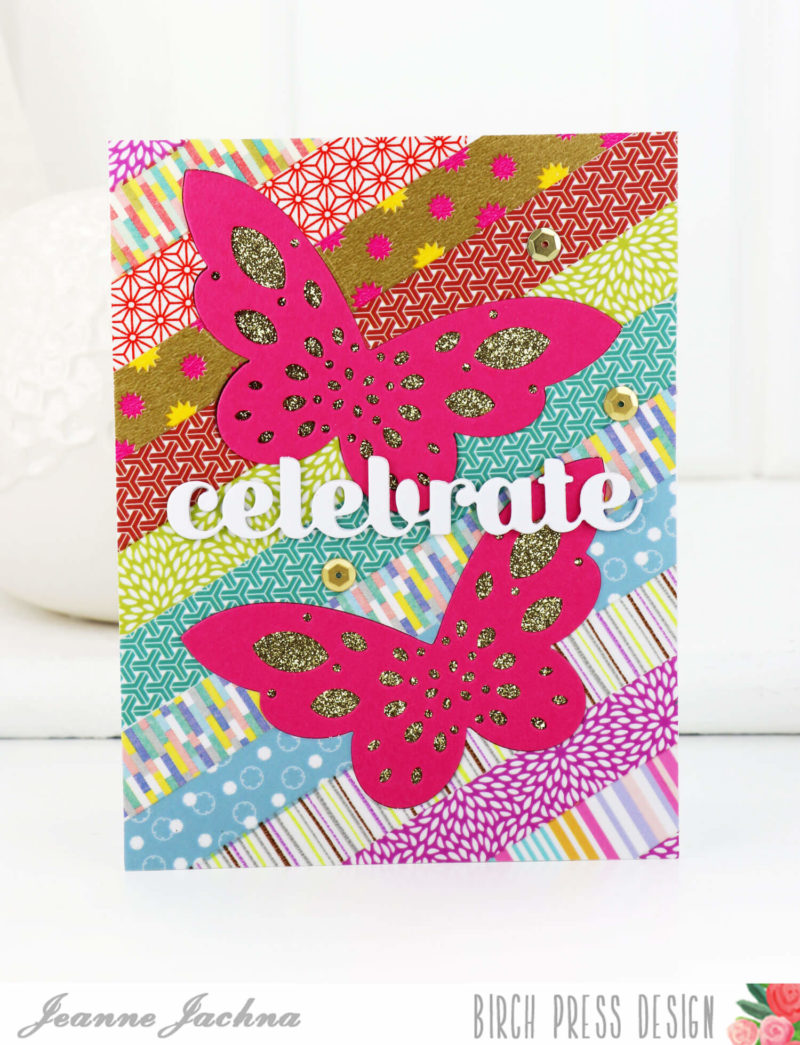
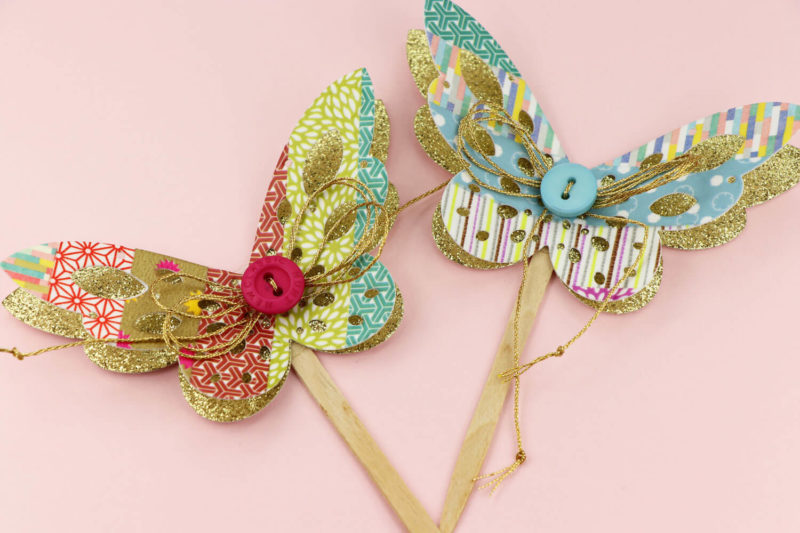
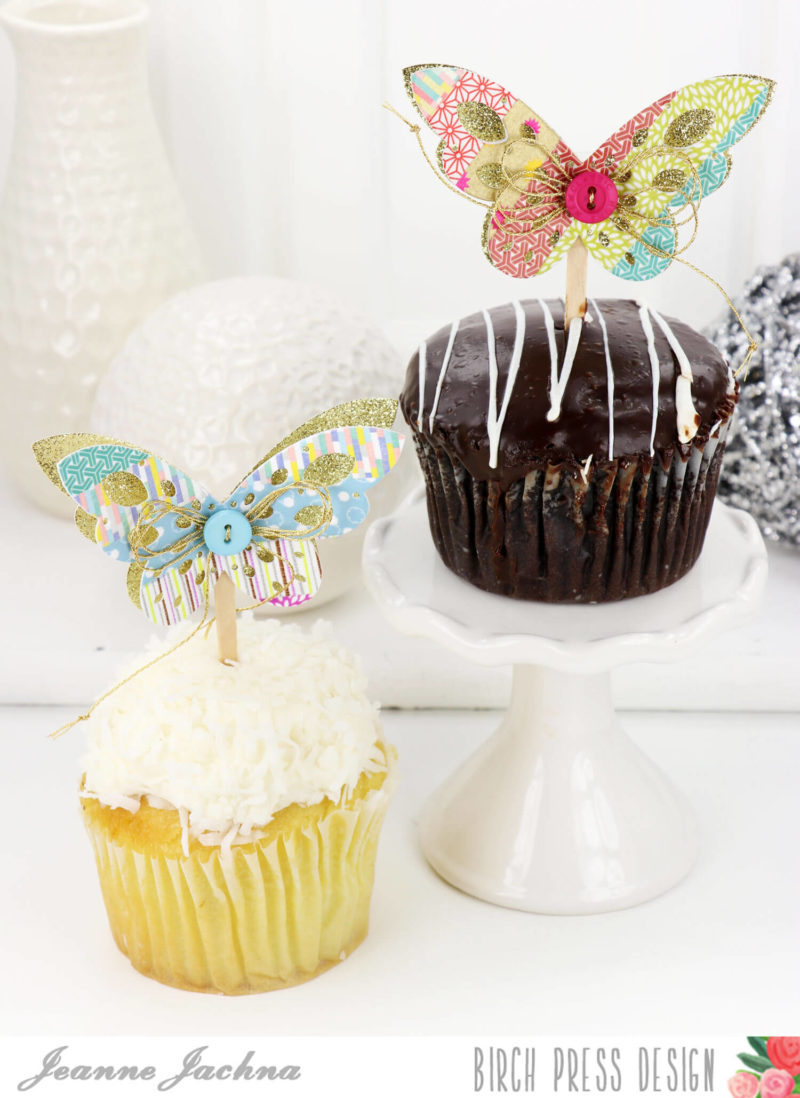


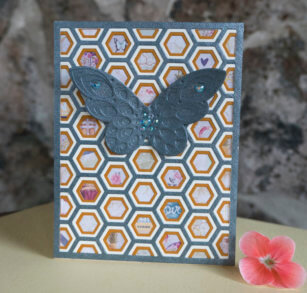
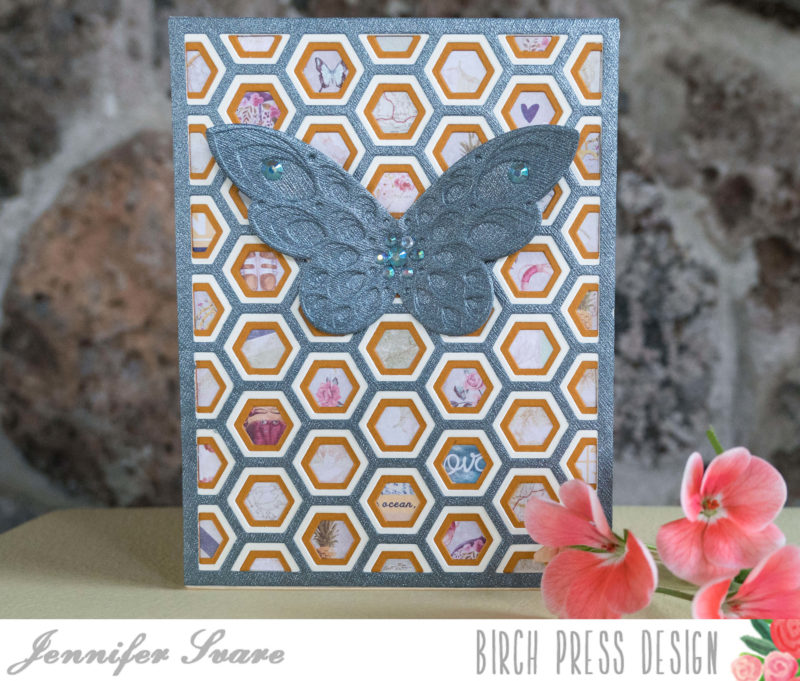 Hello! Today I got to make two very fun cards that I’ve been excited to make for a long time. I’m so glad I waited, because the new
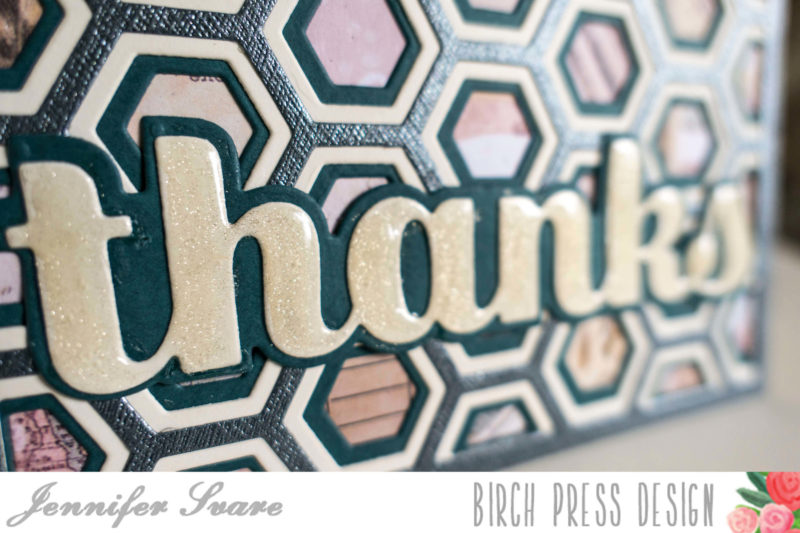
 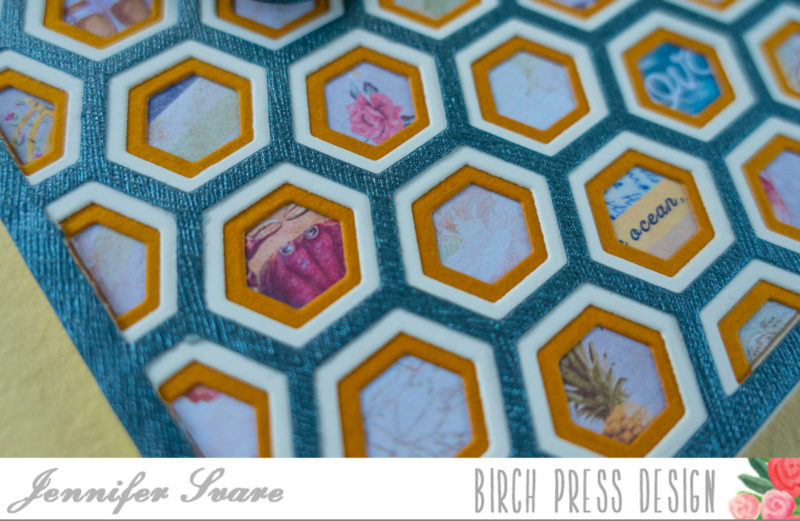 When die cutting the patterned paper for the little hexagon inlays, it was so much fun to see what pieces came through. I love cards that have the depth of really looking into the details. There are so many fun things to look at. (I love the crab peeking out of the hexagon above).
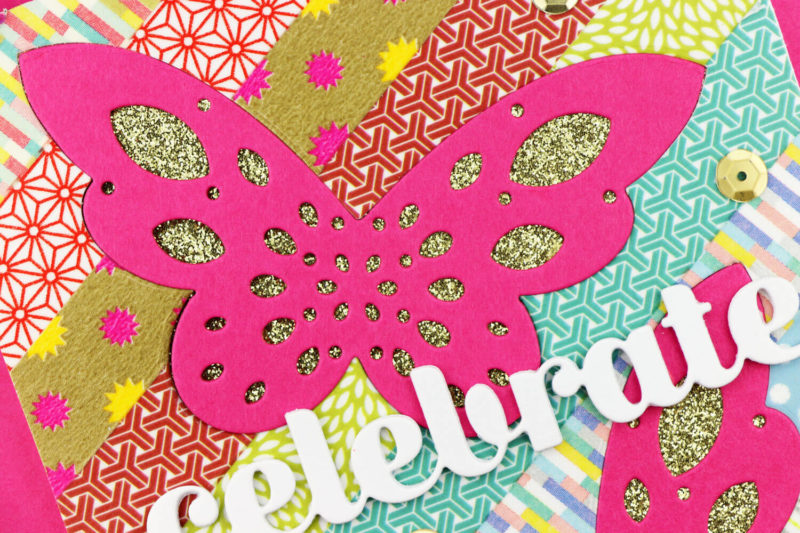
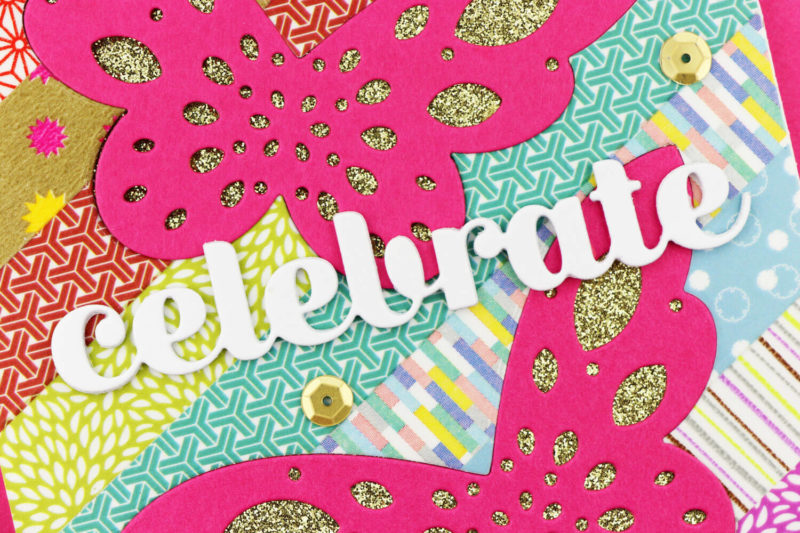
 Layering dies give limitless look and feel to cards because of the color combination, layering, and inlaying options. Using the same color for all of the butterfly layers really put the focus on texture.
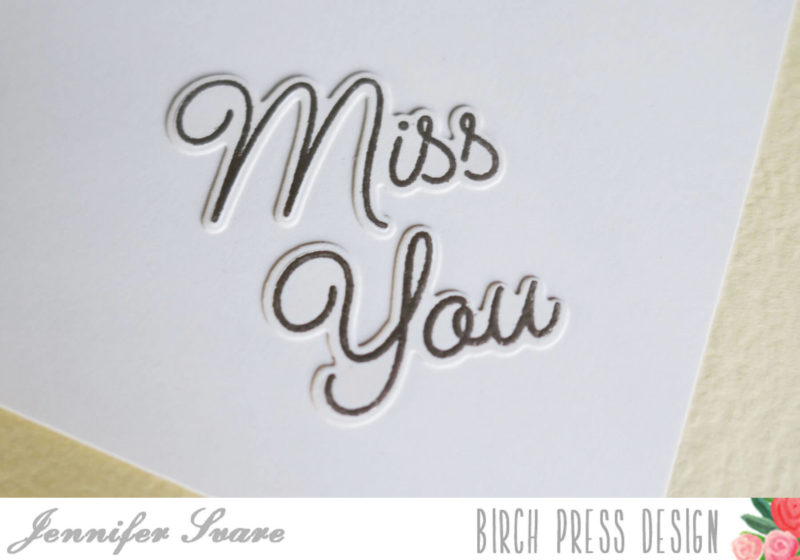 The thought behind the “miss you” card is very sentimental… the “Miss You” from the
  I glued only the center of the butterfly so the wings would sit off the base. A few jewels were added to the butterfly.
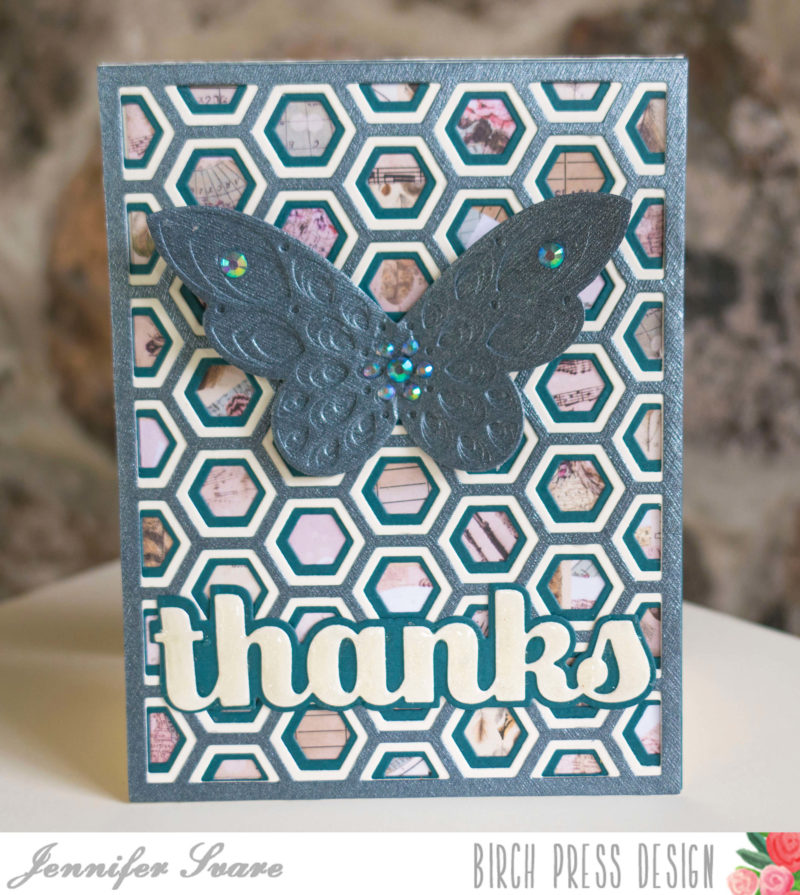 Many of these layering dies would work for this general idea and any of the Prima paper pads offer incredible, small details that are perfectly sized for the hexagons. The thank you card uses the beautiful