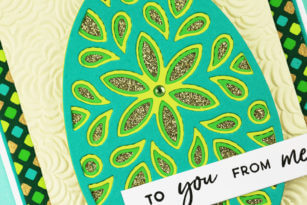
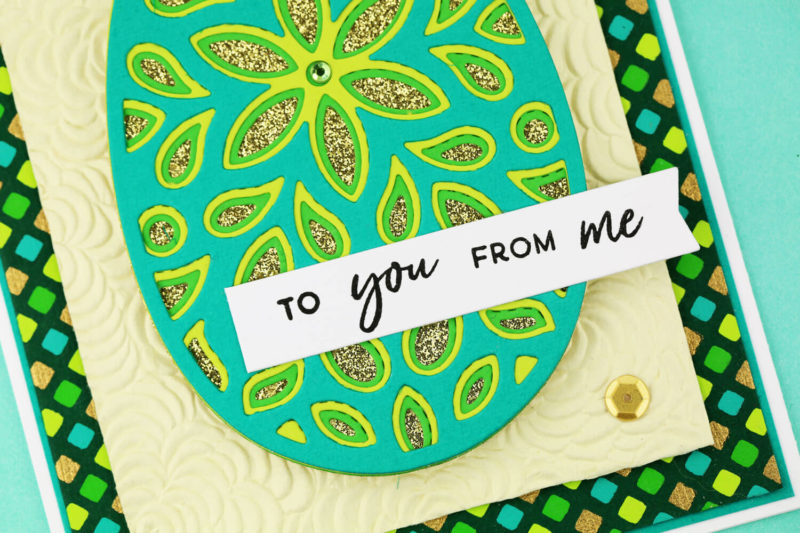
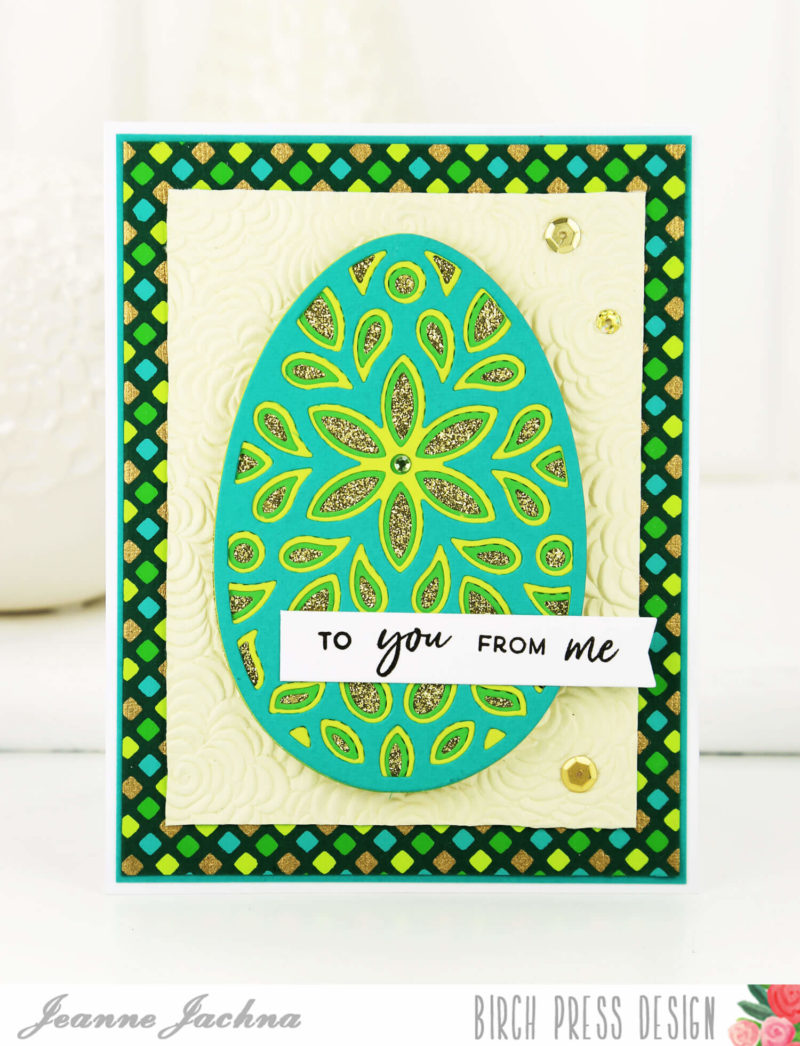
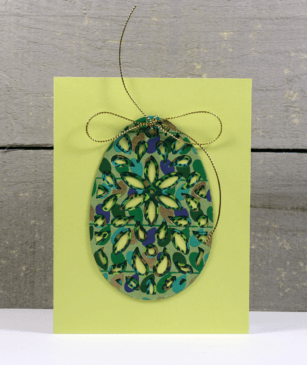
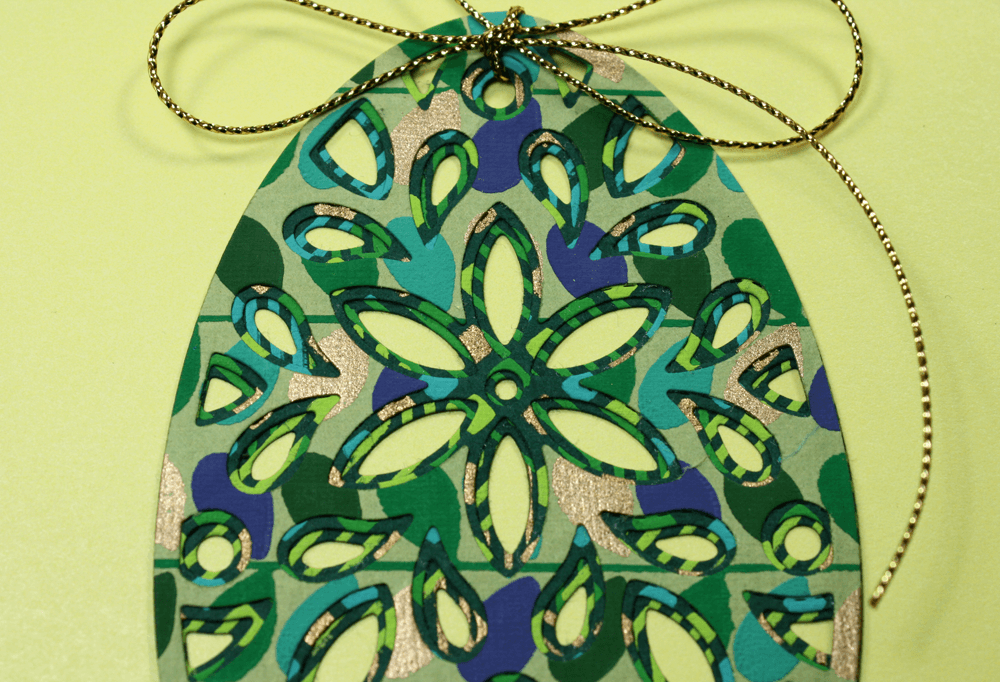
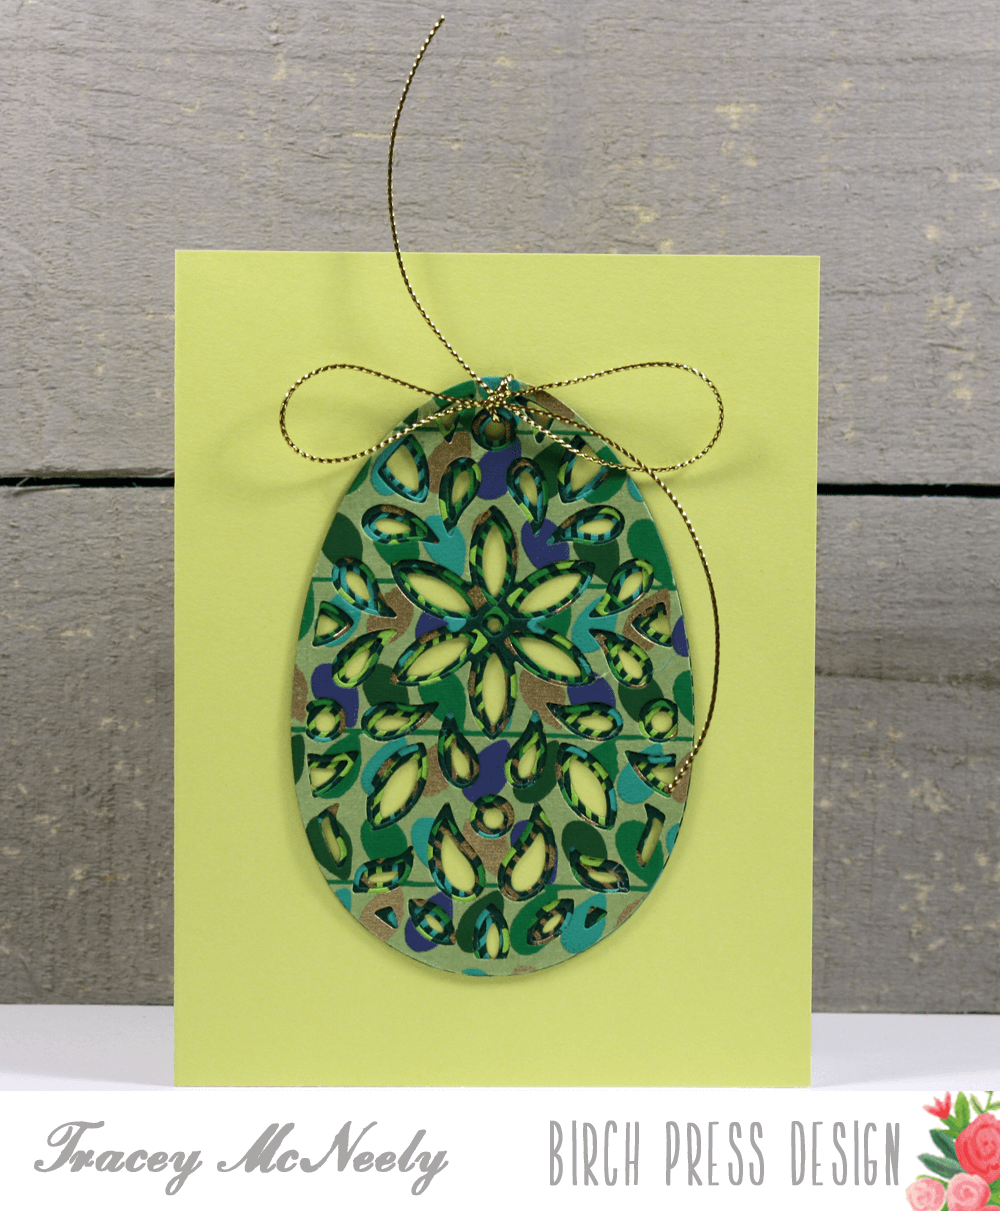
Hi it’s Jeanne posting on the blog today! And wow! Have I got a gorgeous project to share with you today! I made this beautiful emerald and teal Easter Egg card.
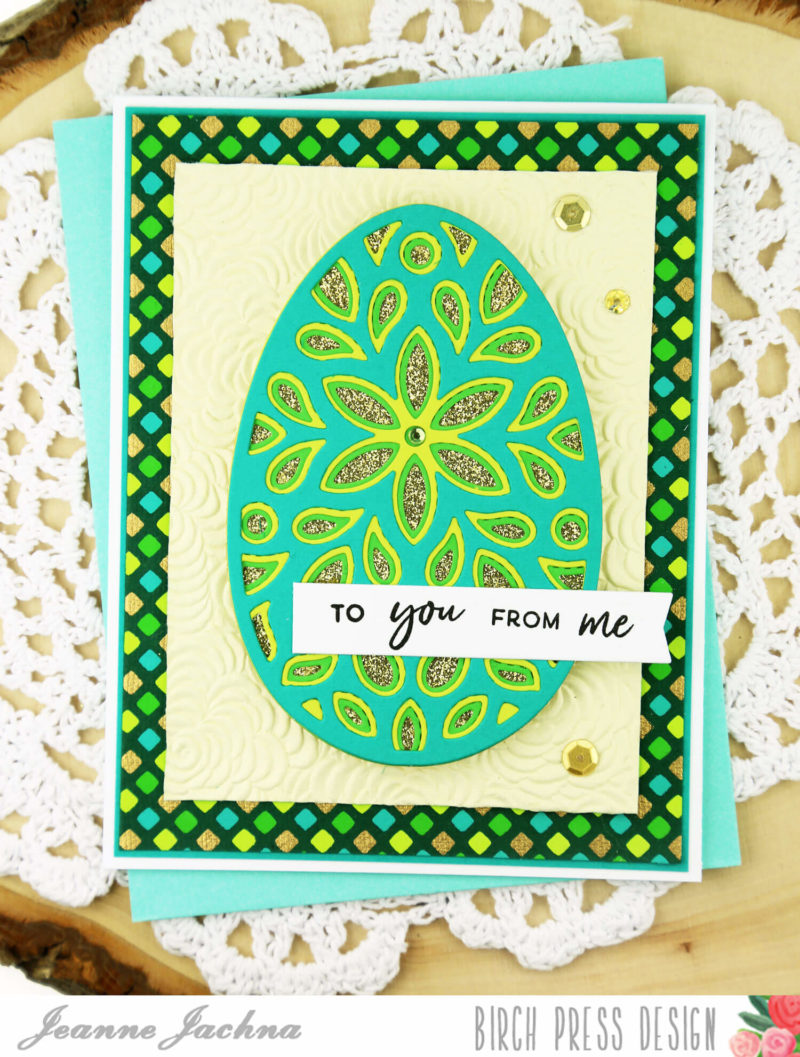
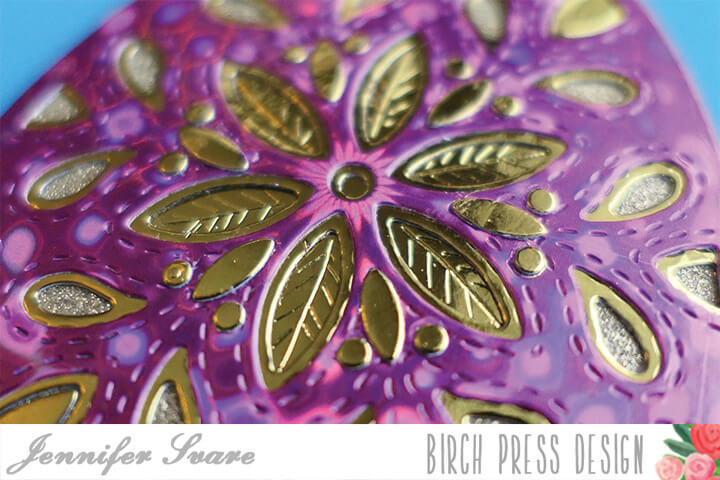
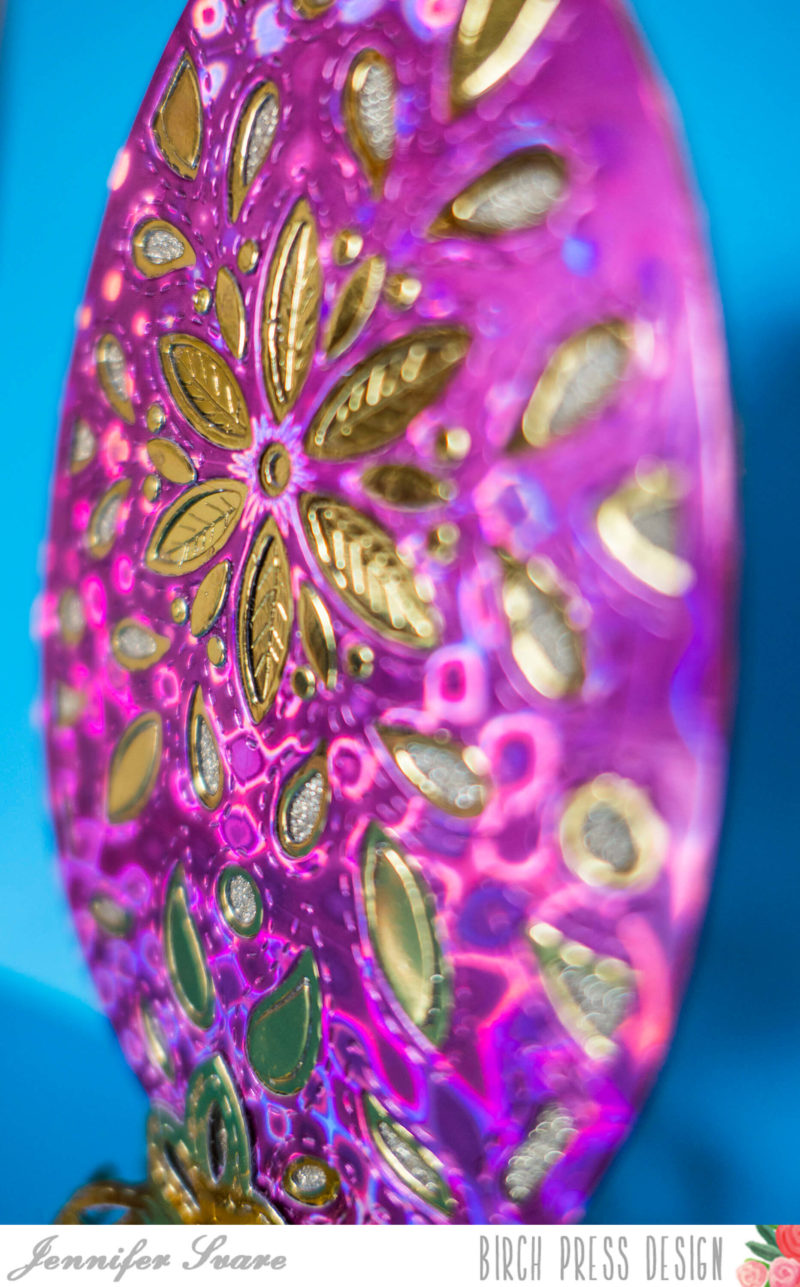
The Birch Press Design Layered dies have a rich expensive look when layered together. The Fiori Egg is no exception. With the new hand made papers in the shop this will impress everyone on your greeting card list.
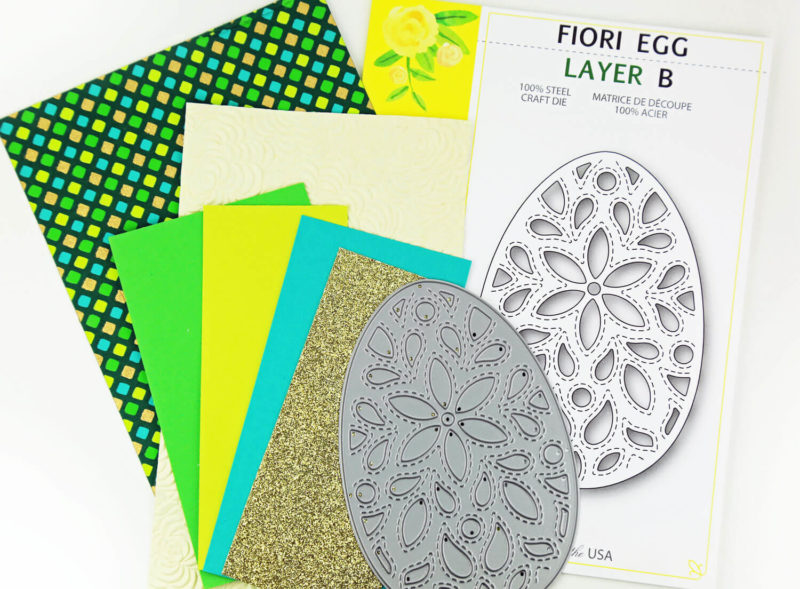
I’ve never worked with hand made paper before. I was surprised by the thickness and soft cottony feel. This paper is gorgeous and you’re not going to want to waste even the tiniest scrap! The Cabbage Rose Ivory has deep embossing, and the Diamond Dot has metallic gold accents. All the hand made papers in the shop are “tree free” meaning that they are made from 100% recycled material. I would have never guessed that these thick and rich elegant, hand made papers are eco friendly! You can see them all here.
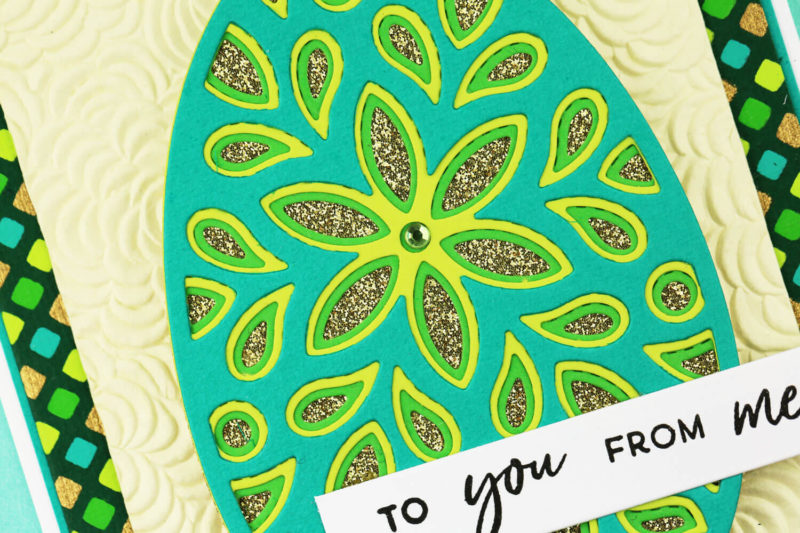
I cut the Fiori Egg plates in colors that coordinate with the Diamond Dot handmade paper ; teal, emerald, lime and GOLD.
The gold solid egg was cut with the largest egg from the Stitched Egg die set. This is a set of three eggs with a stitched outline detail.
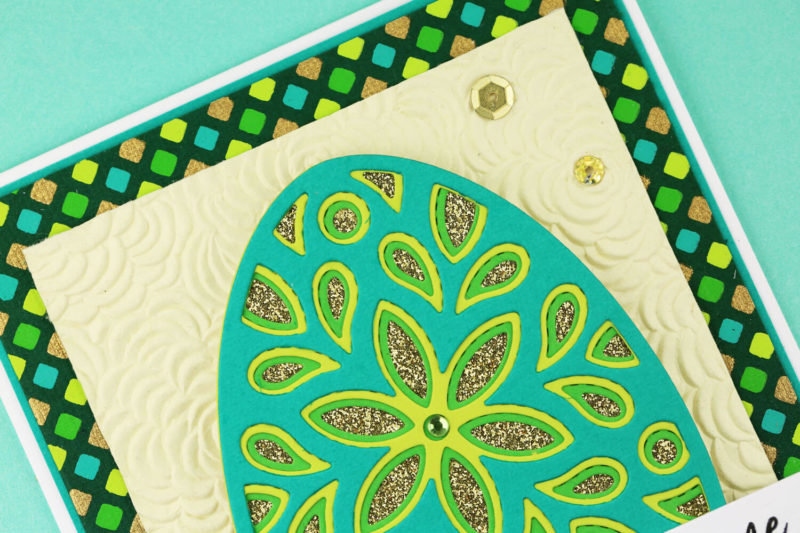
The finishing touch was a gem in the egg center, and some gold sequins to repeat the gold in the background paper, and egg layer. The sequins are from the Not So Heavy Metal tin in the store.
 I wish you could see this beauty in person – all that gold is total eye candy!

 Birch Press Design Fiori Egg Layer A Shop at: BPD |
 Birch Press Design Fiori Egg Layer B Shop at: BPD |
 Birch Press Design Fiori Egg Layer C Shop at: BPD |
 Birch Press Deisgn Stitched Egg Set Shop at: BPD |
 Birch Press Design A Little Birdie Stamps Shop at: BPD |
 Birch Press Design Cabbage Rose Ivory Handmade Paper Shop at: BPD |
 Birch Press Design Diamond Dot Handmade Paper Shop at: BPD |
 Birch Press Design Not So Heavy Metal Sequins Shop at: BPD |


 Have you seen the new spring release at Birch Press Design? The
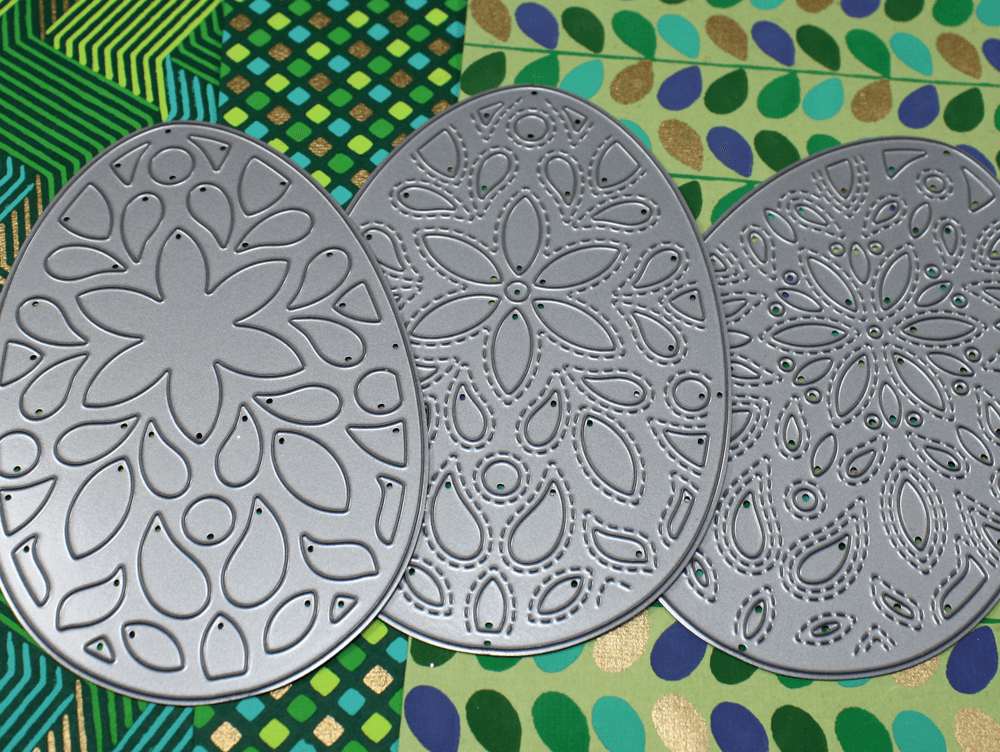
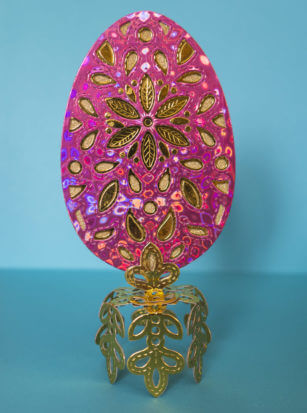
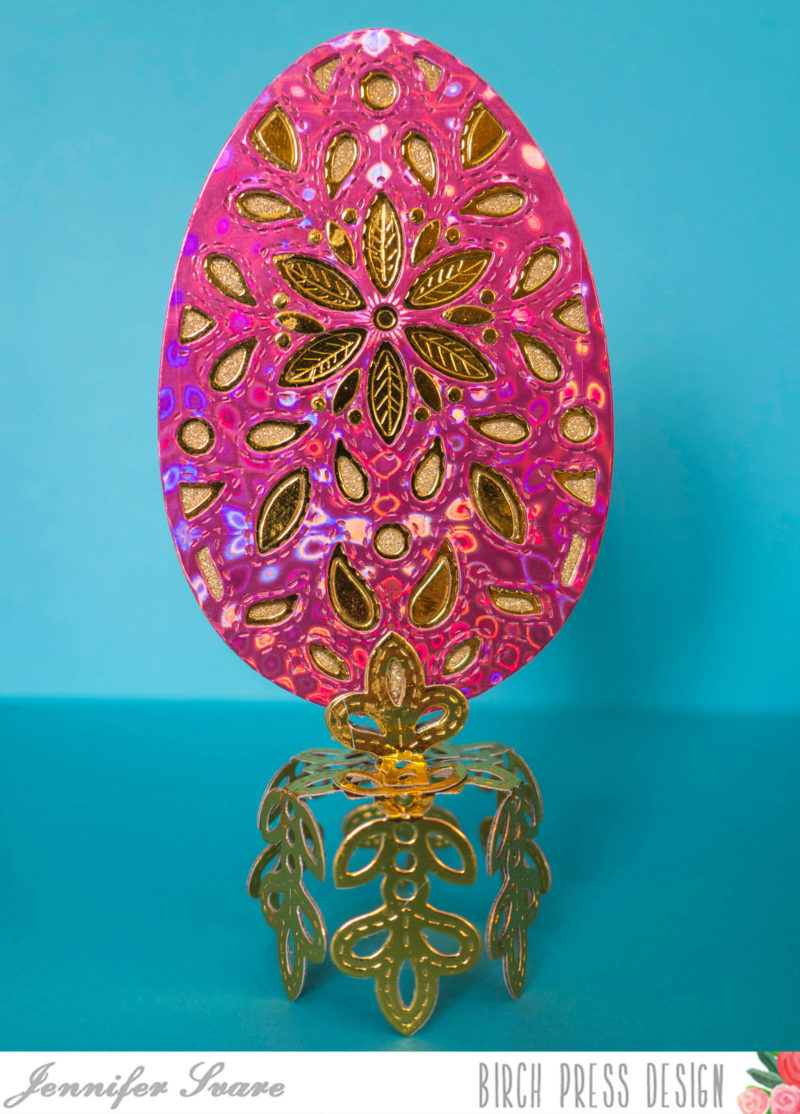
 Aren’t these papers and dies magnificient? I hope that you are inspired to create a faux Fabergé egg of your own. All the new products are in the shop at Birch Press Design. Join each week on Mondays, Wednesdays and Fridays for more Birch Press inspiration.


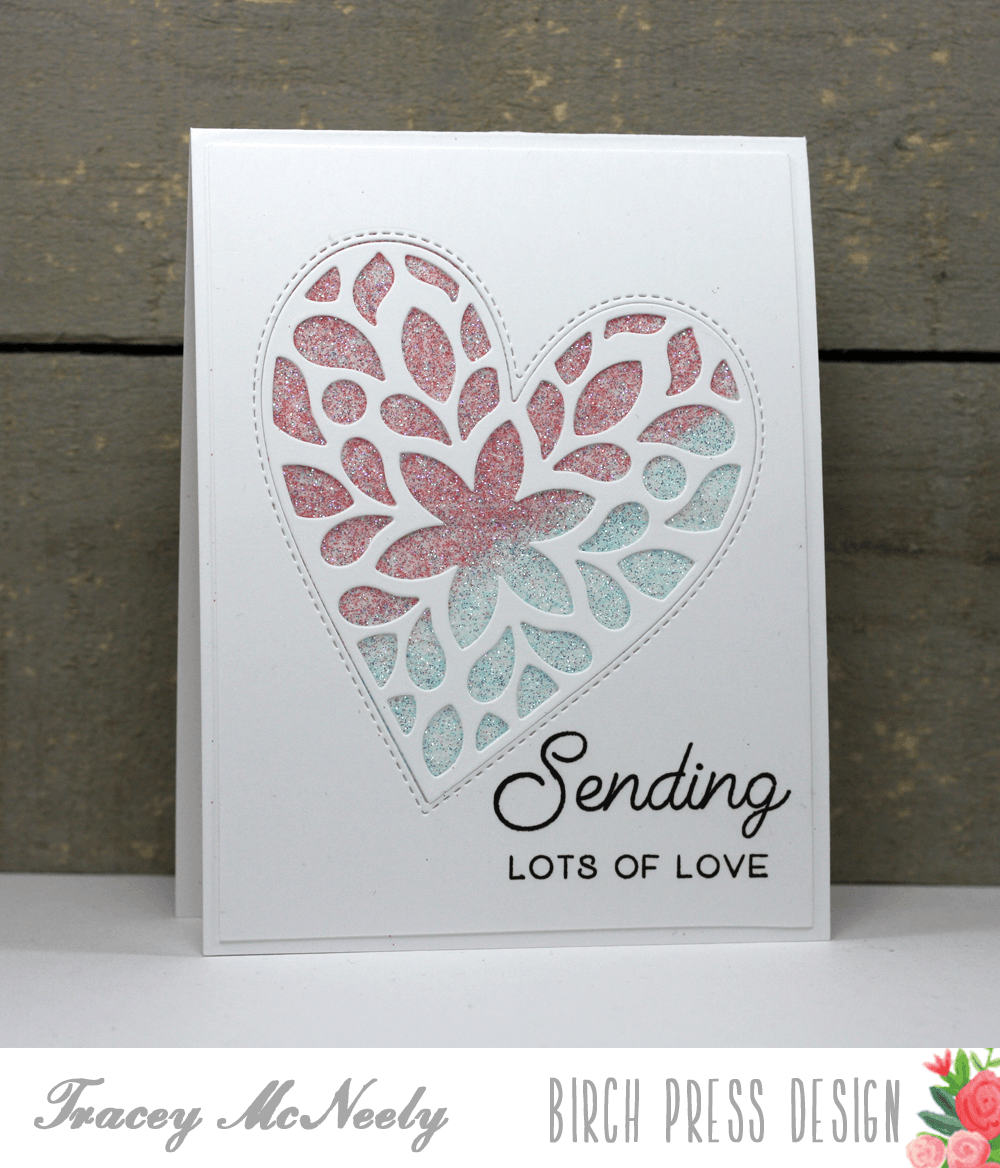
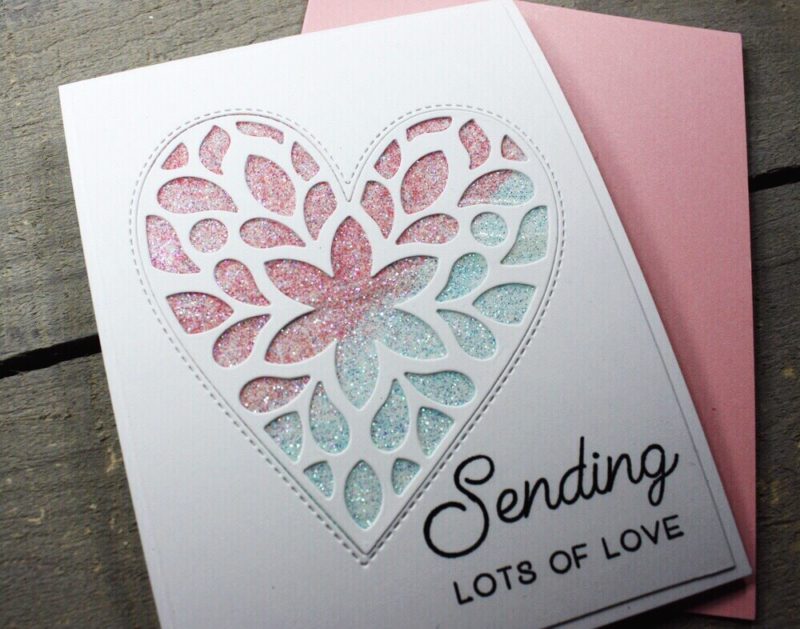
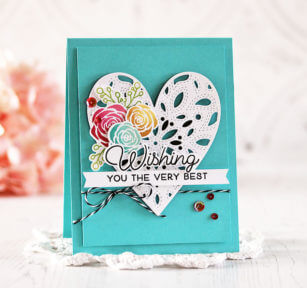
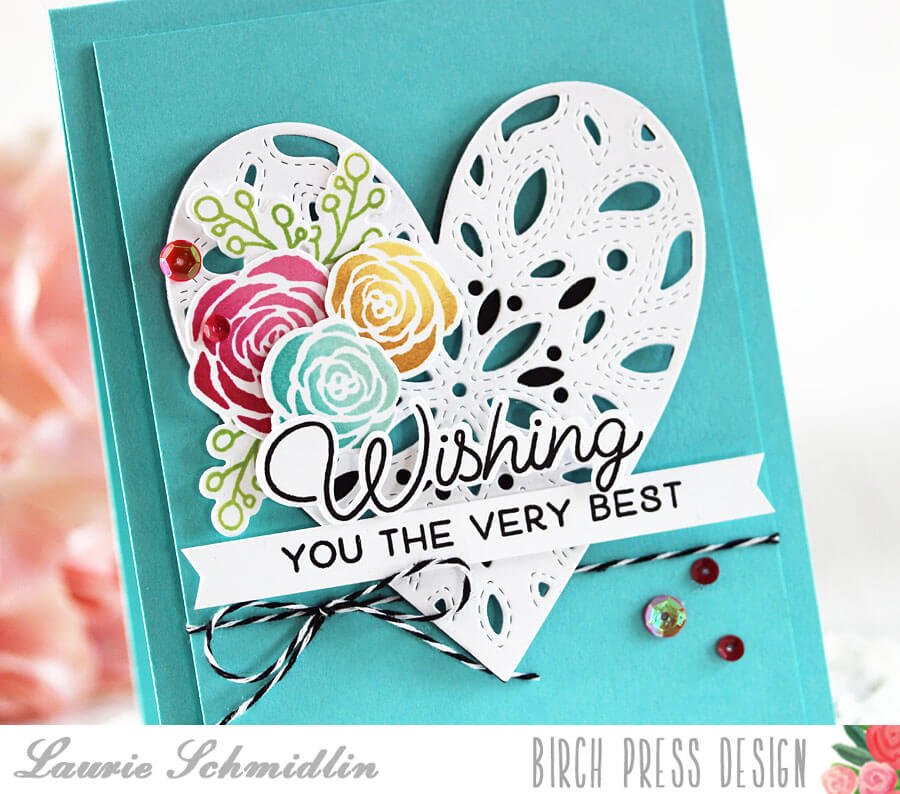
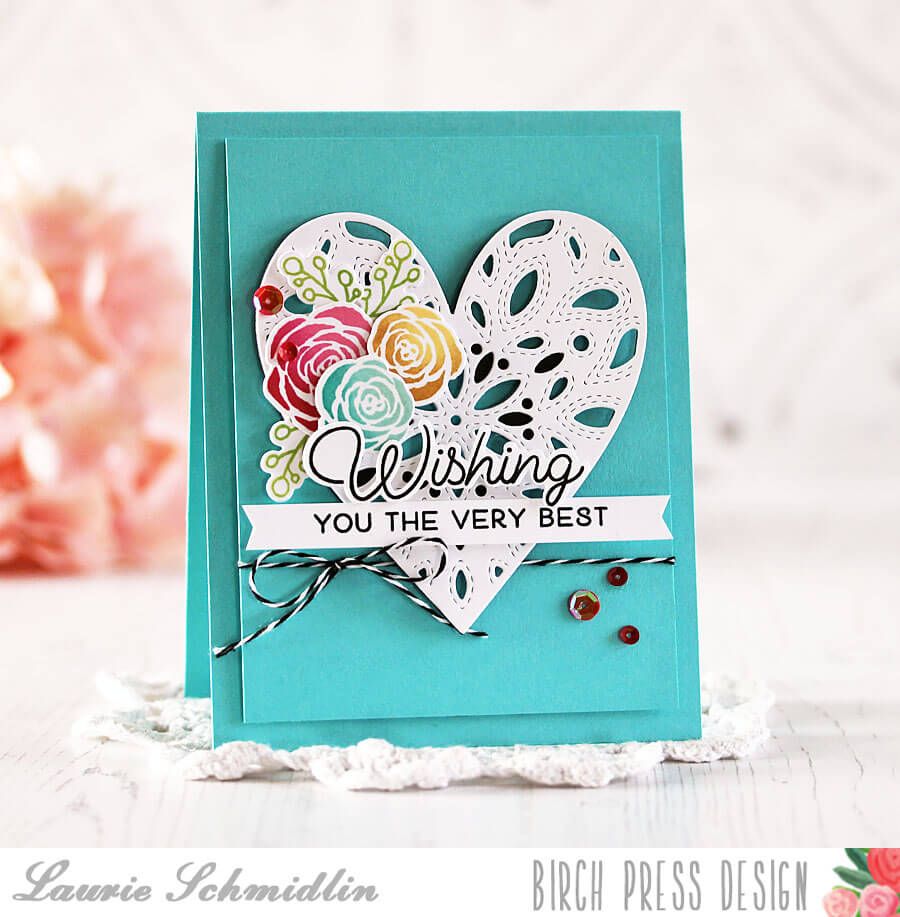
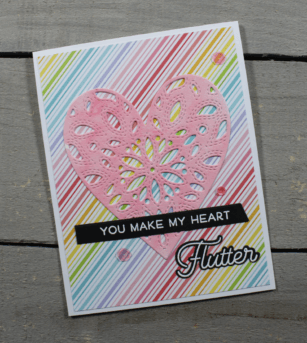
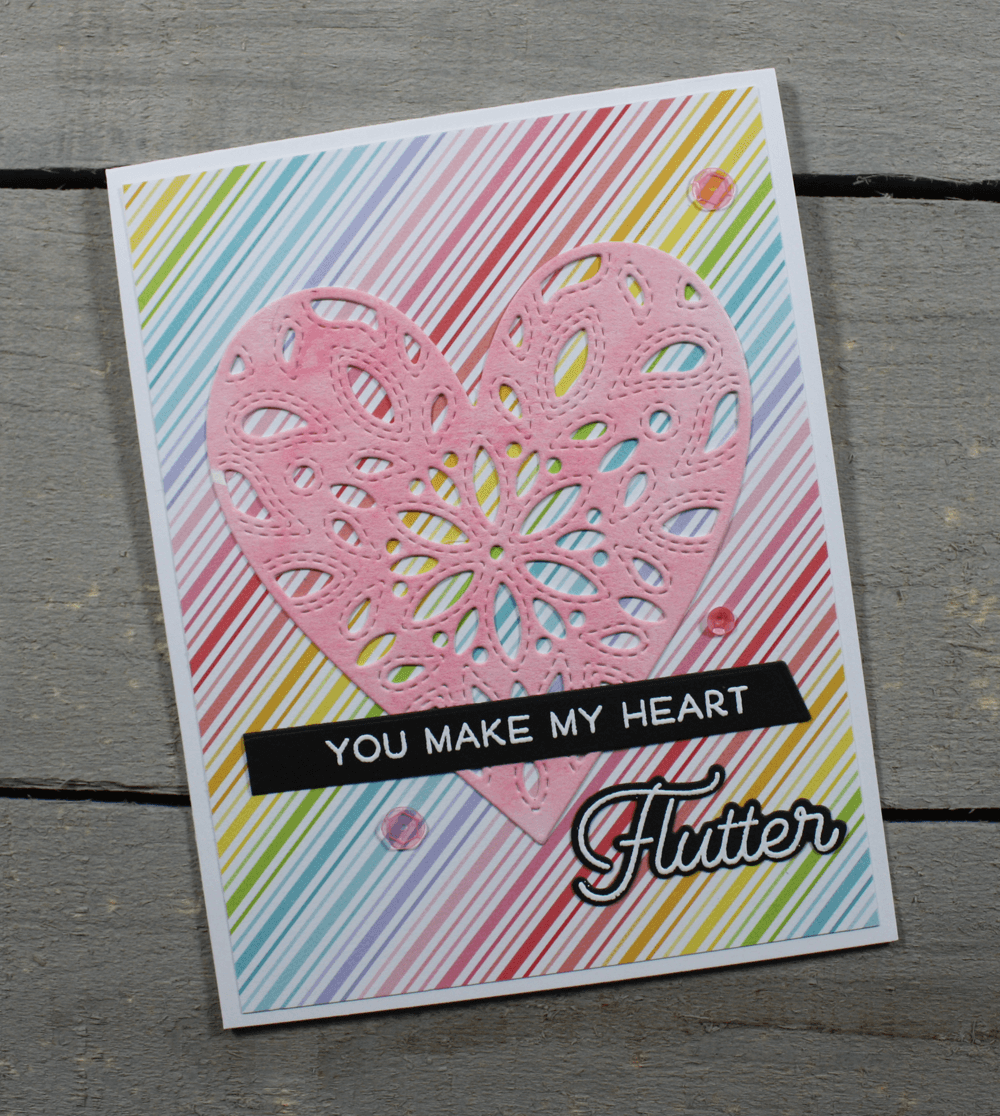
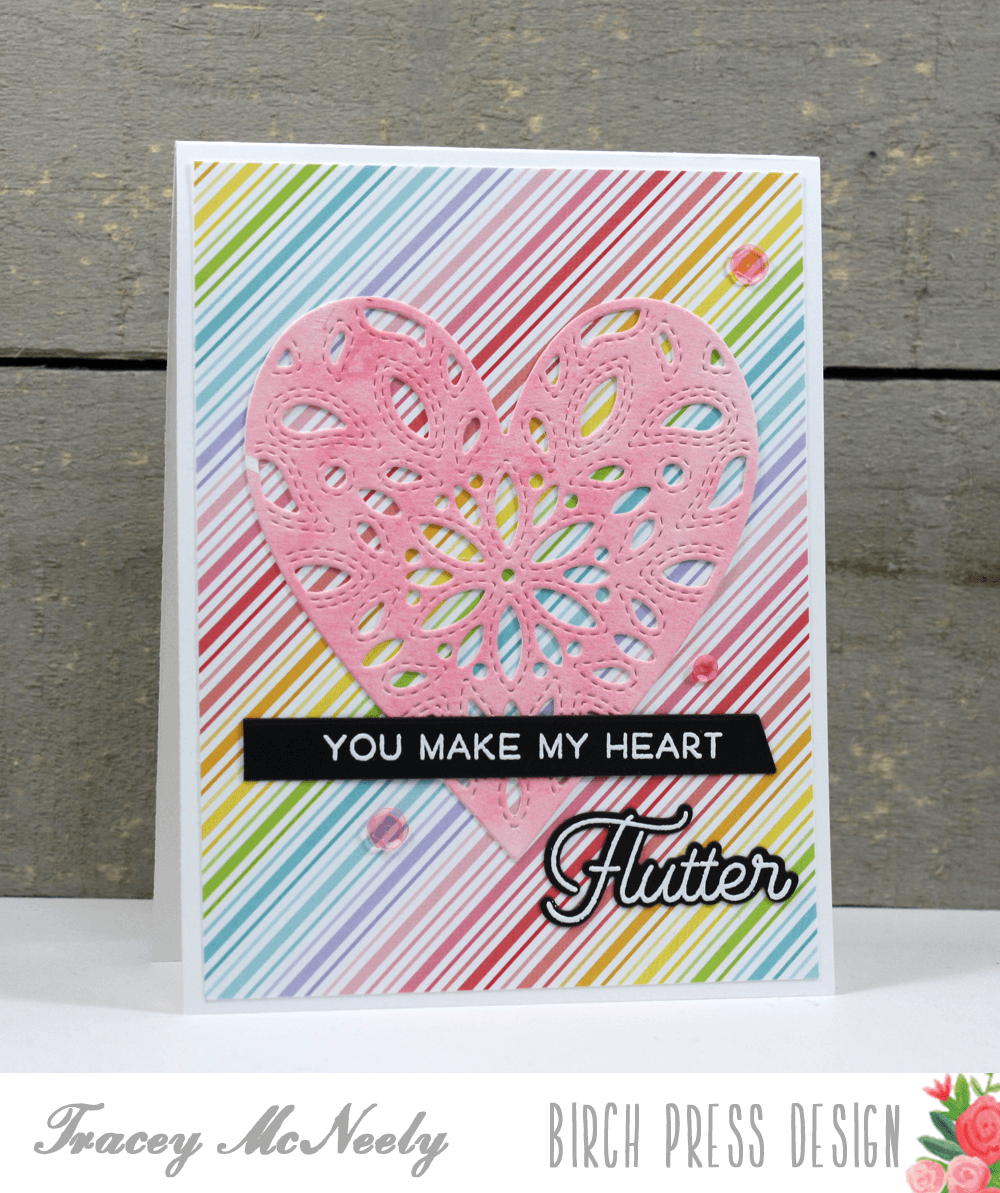
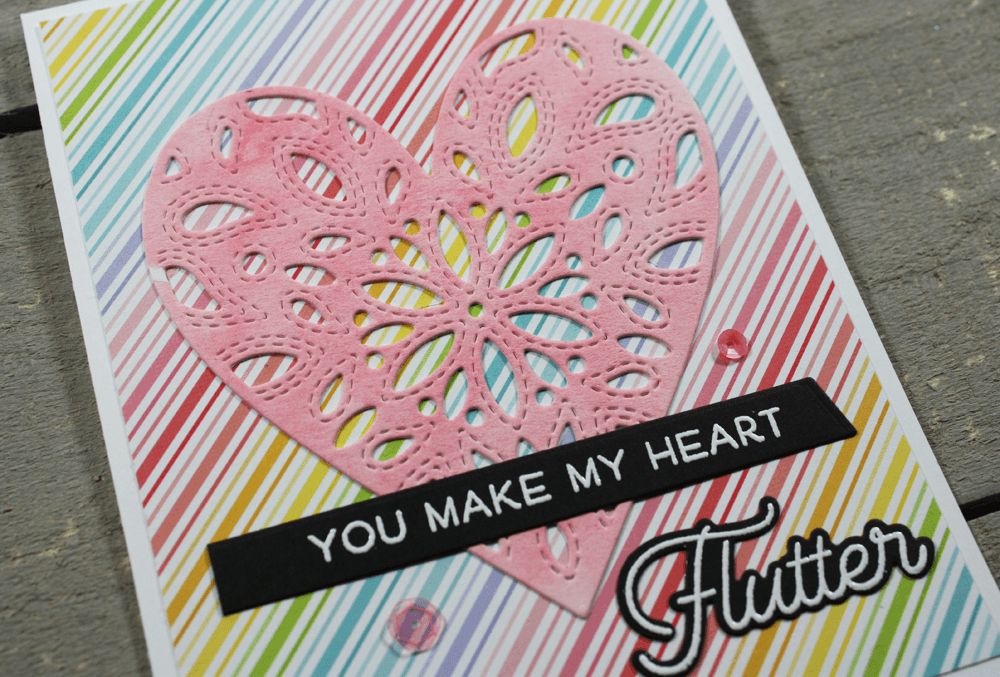
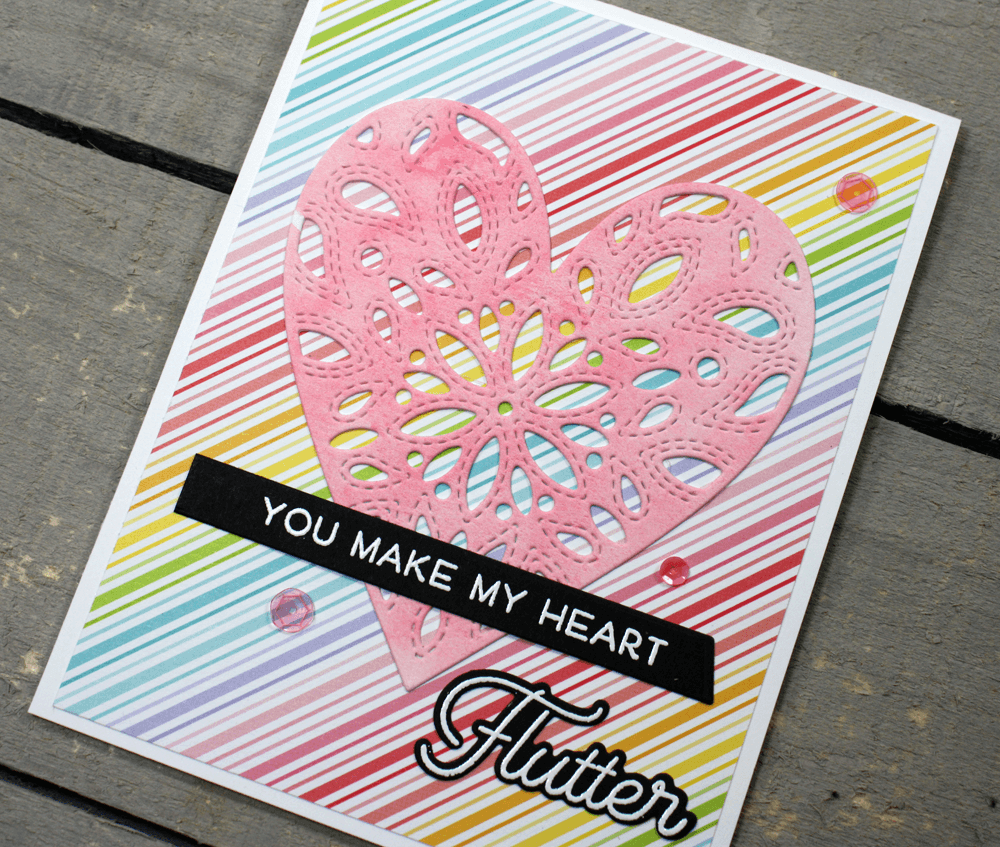
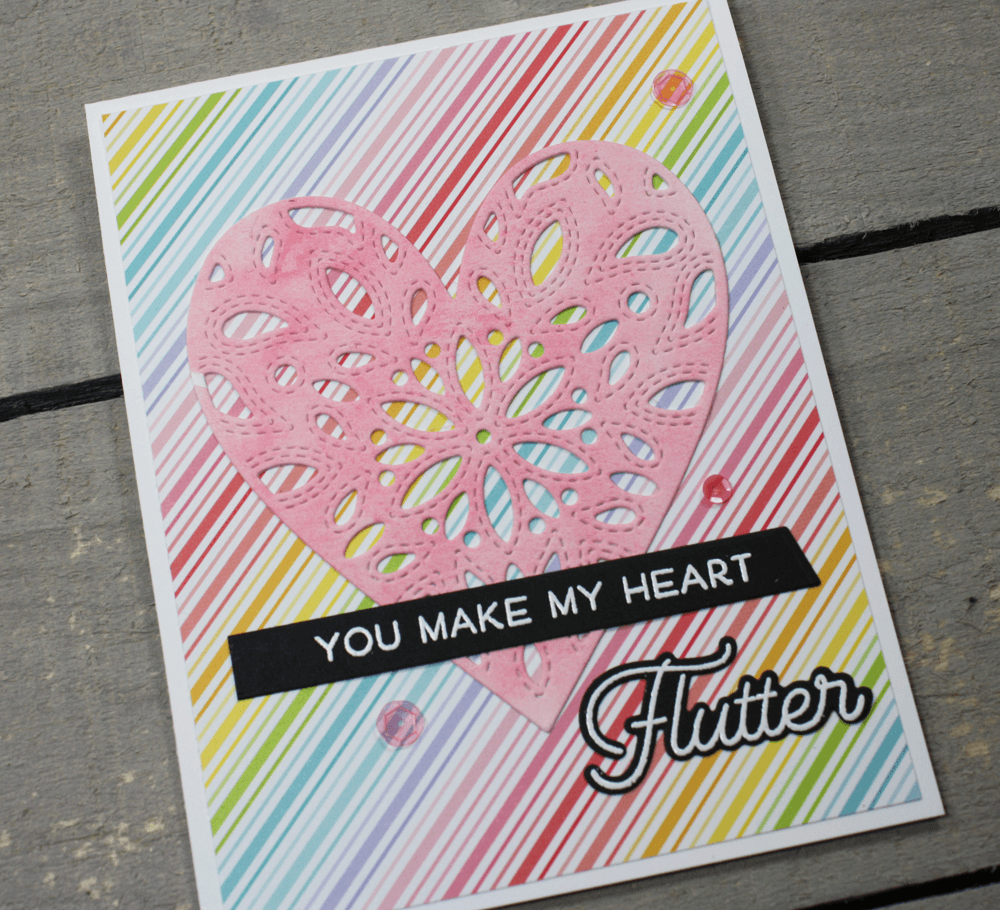
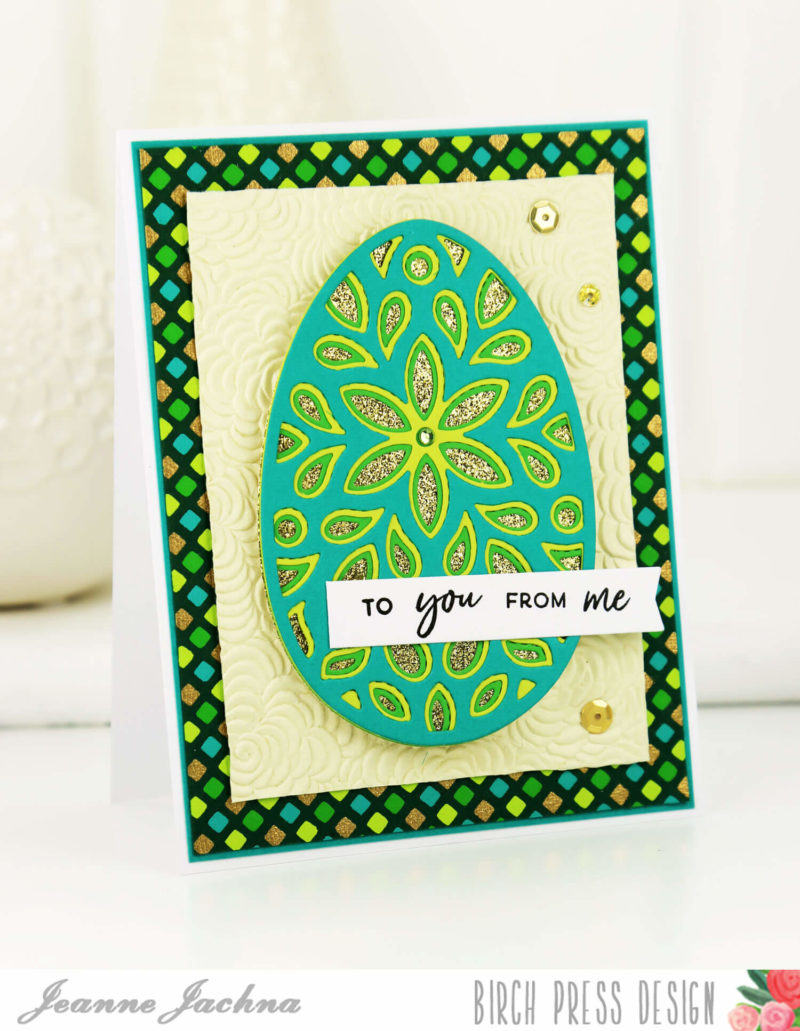
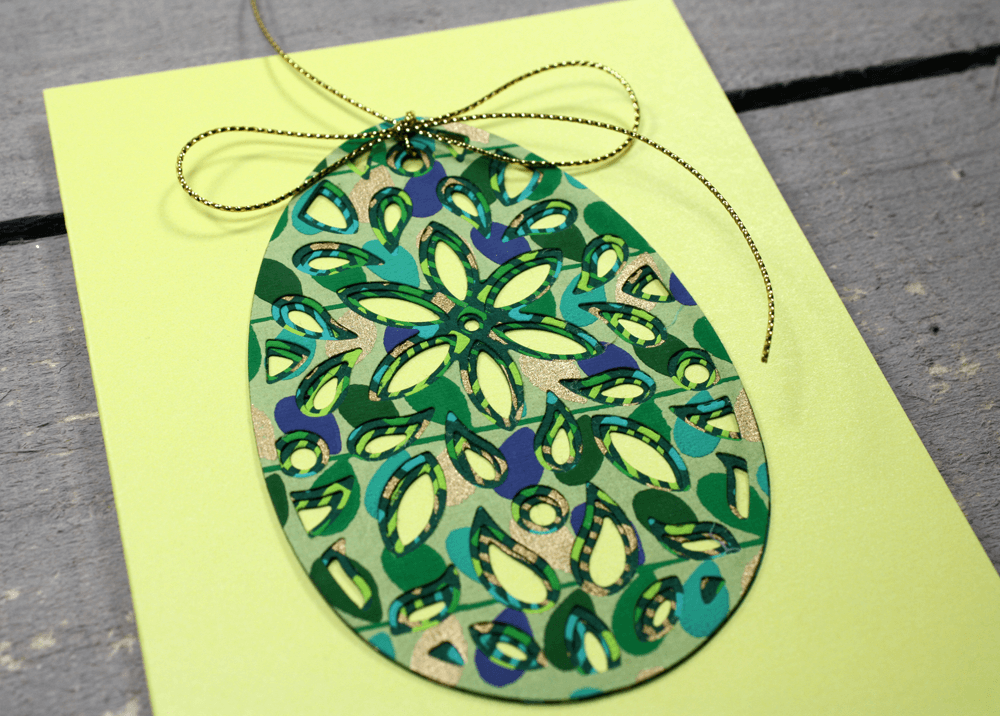
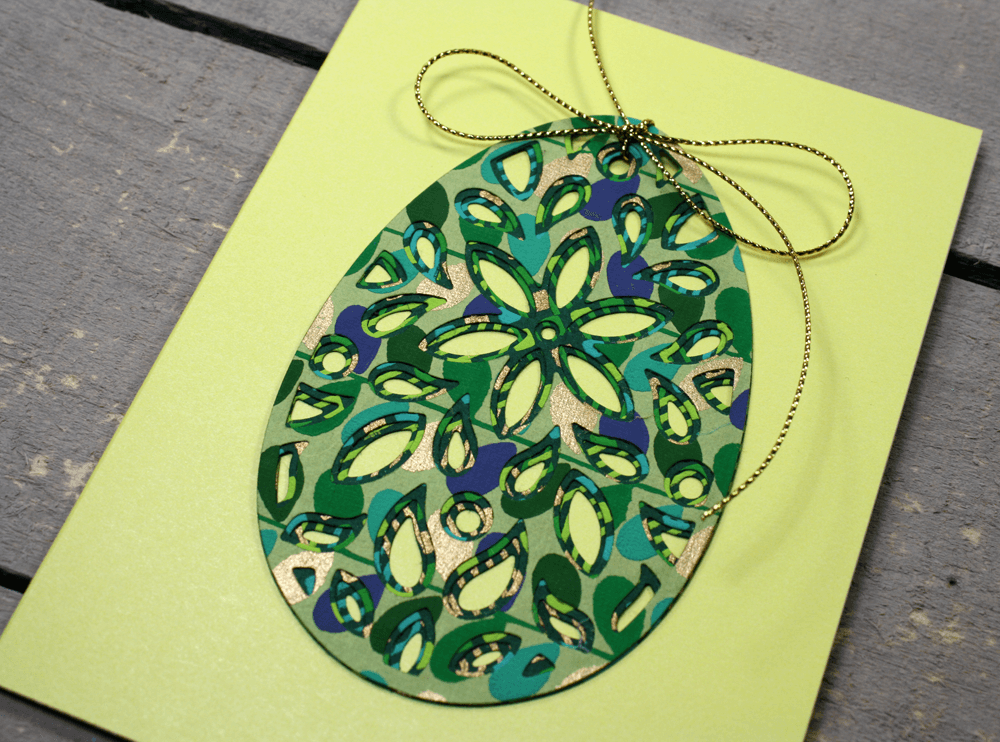
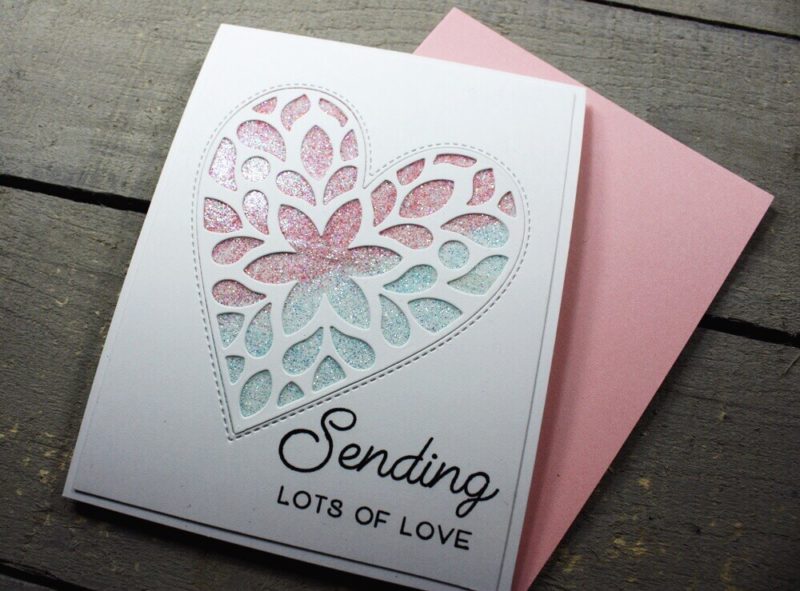 Another look at the whole card.
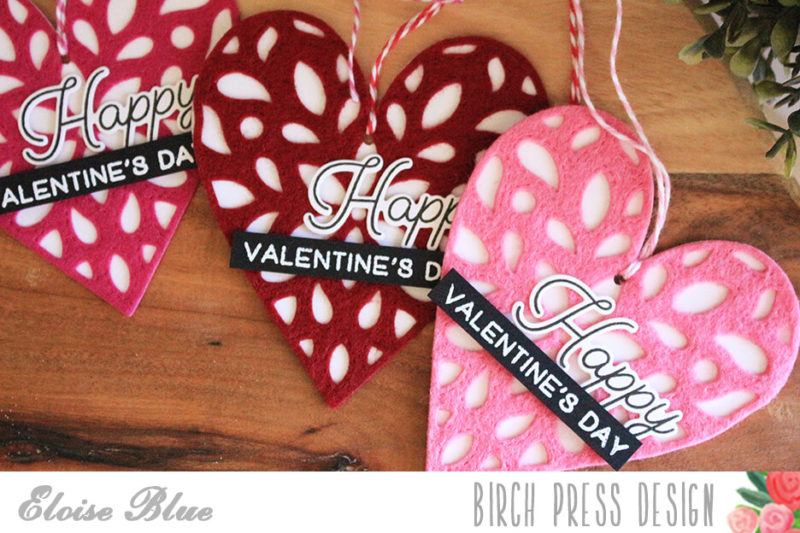
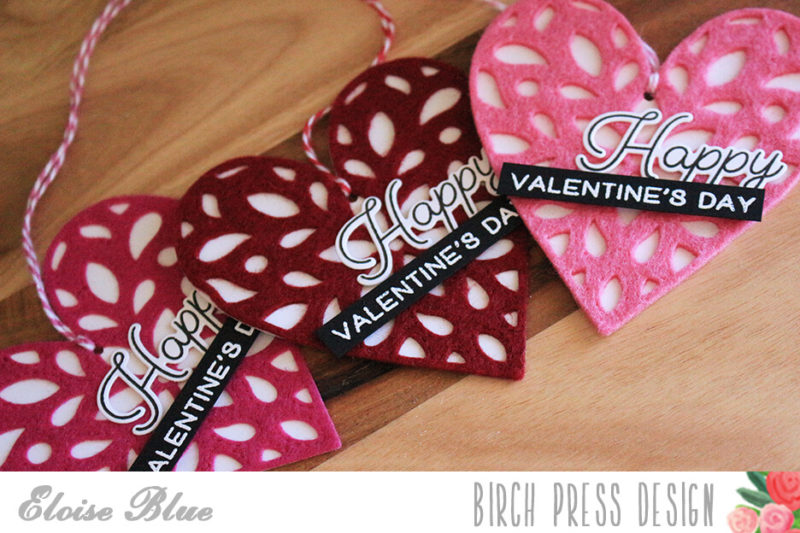
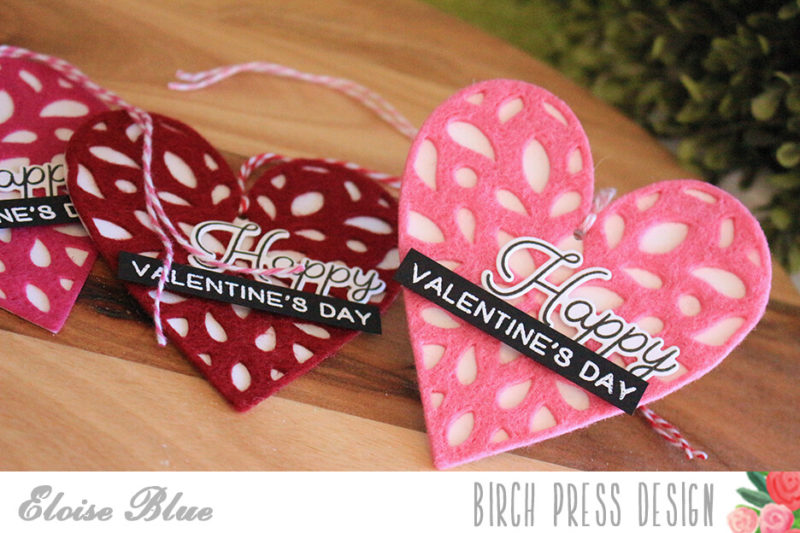
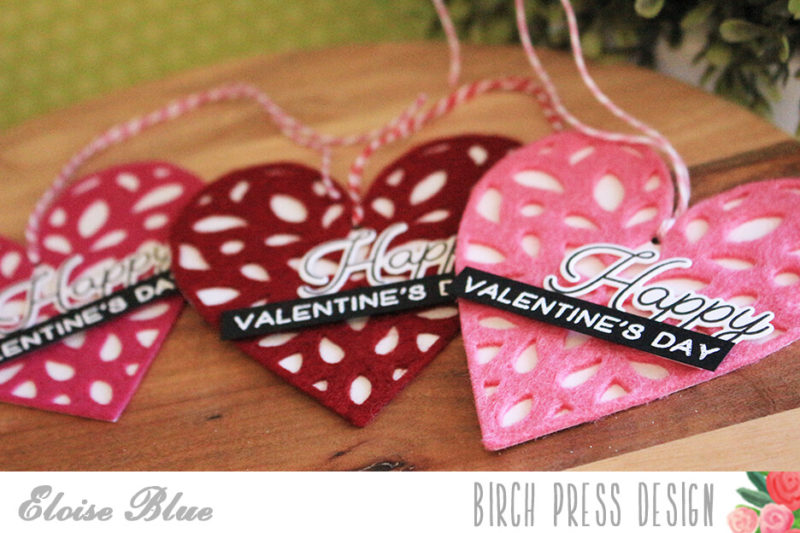
 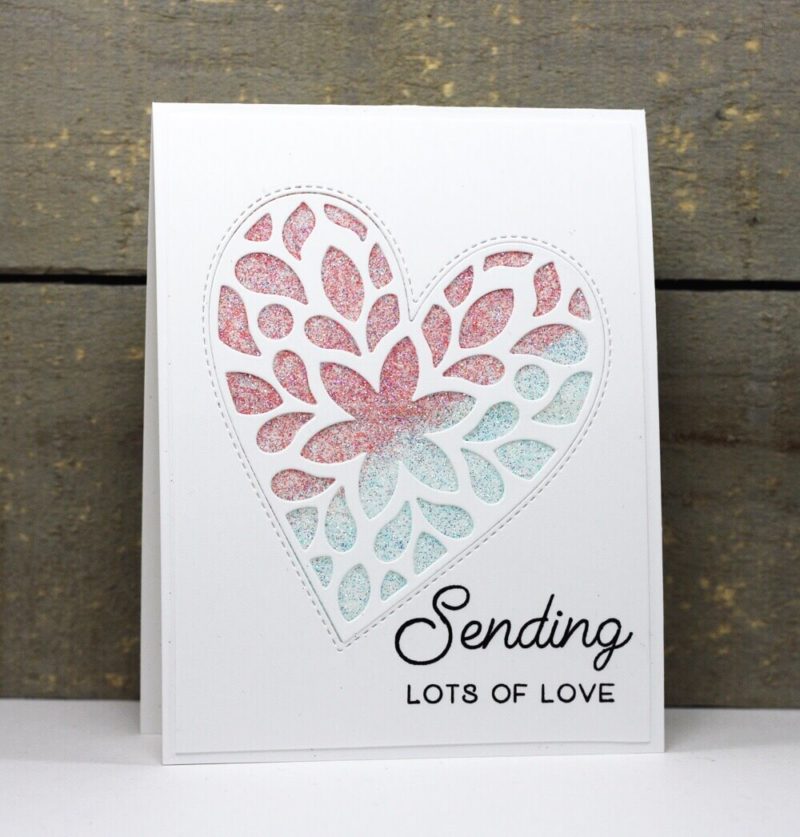 Thank you for joining me today and I hope I have inspired you to use some of this years Valentines release to make a card to show someone how much you love them any time of the year. Pop back in on Friday for some more Birch Press Design inspiration.


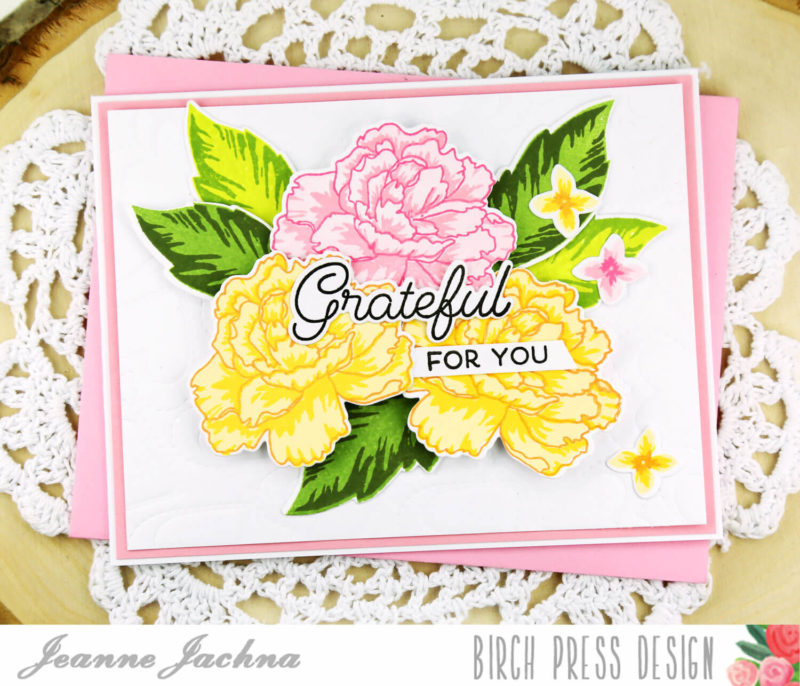
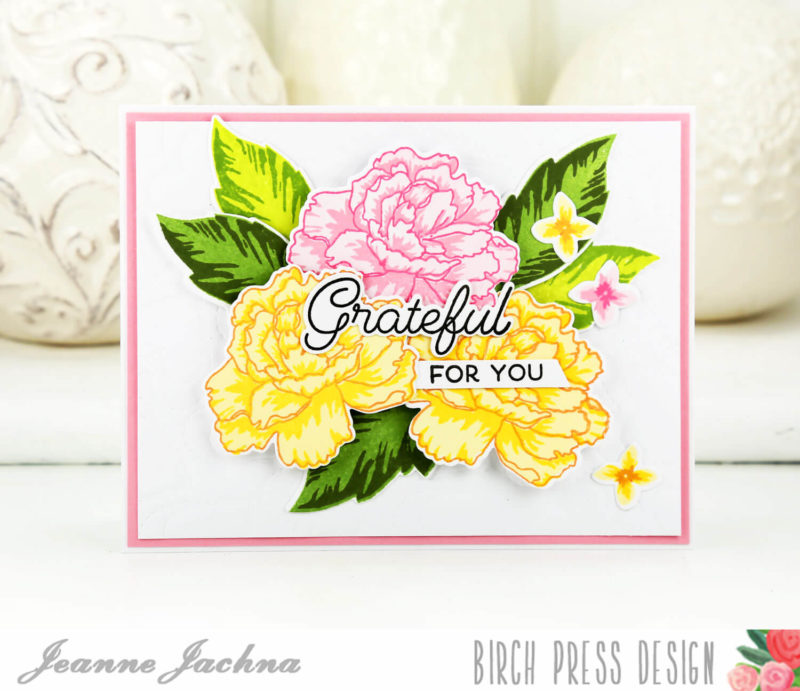
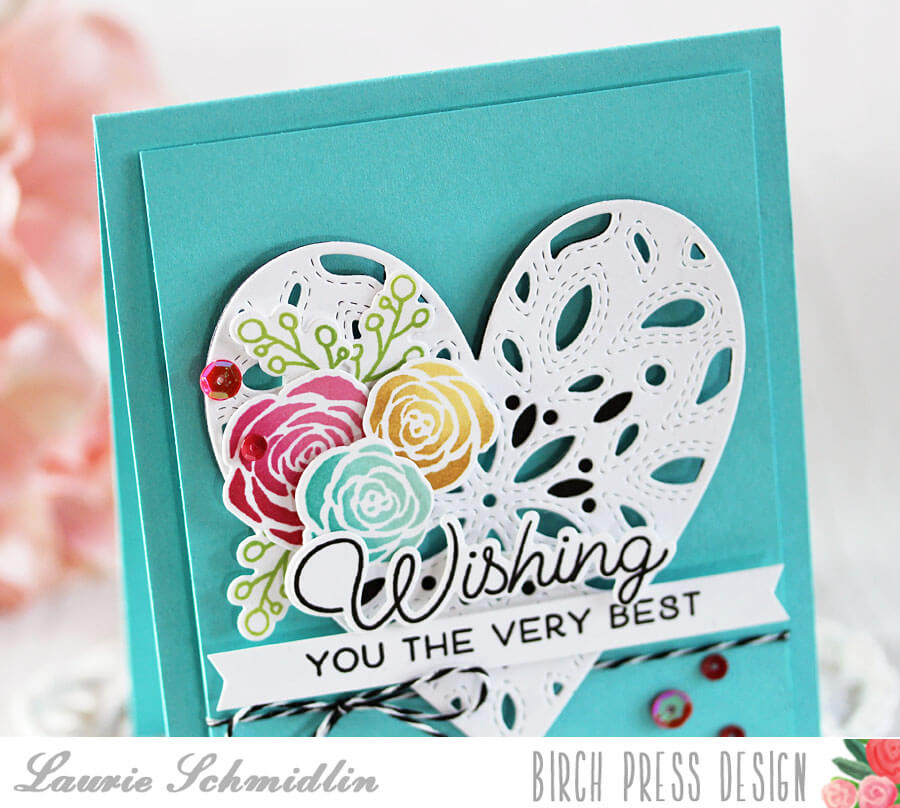
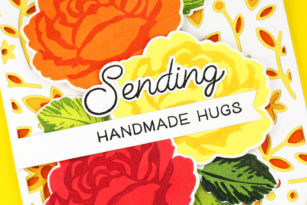
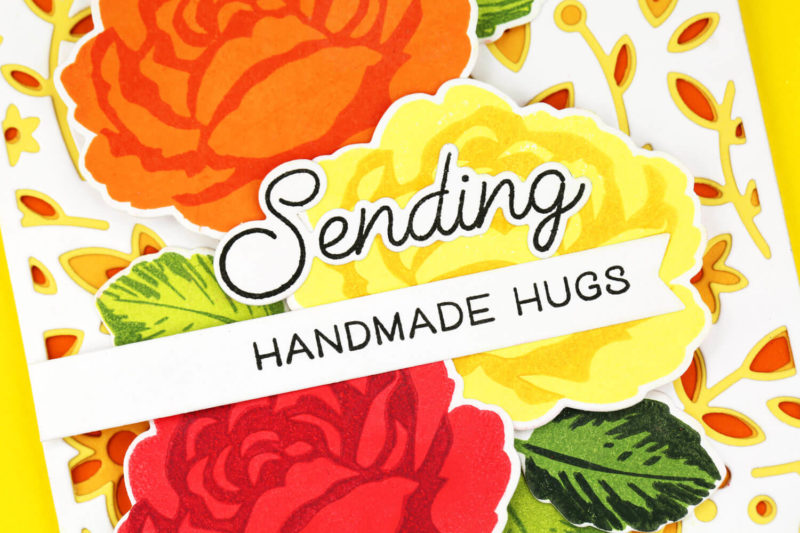
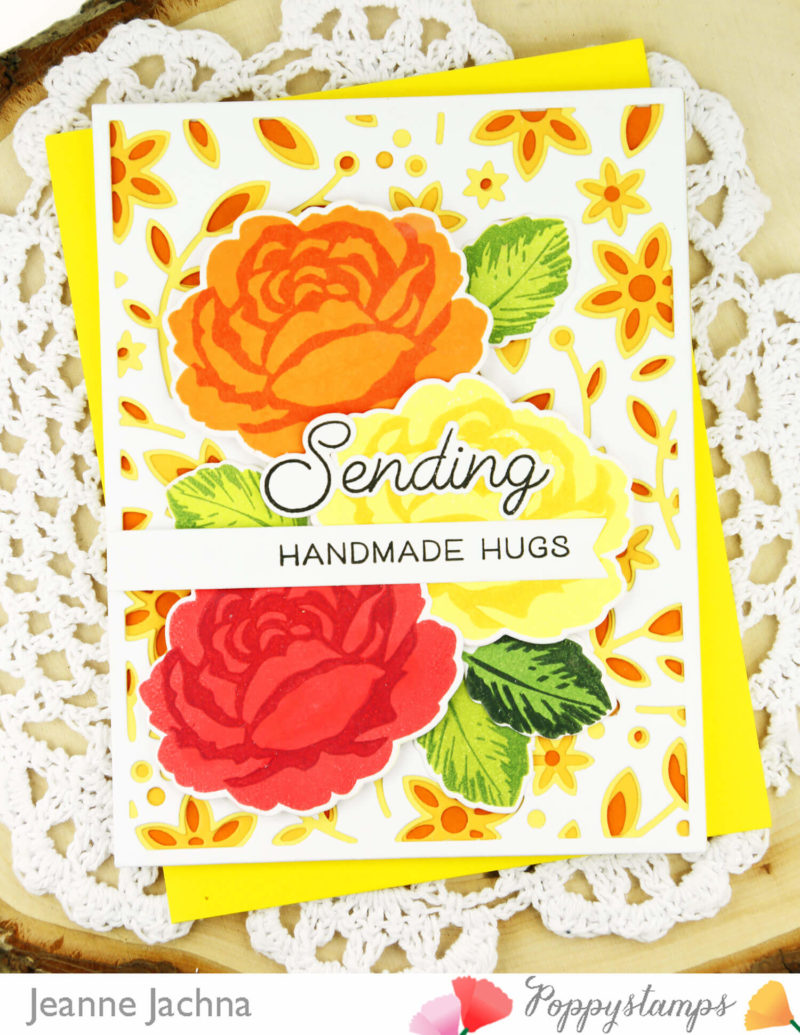
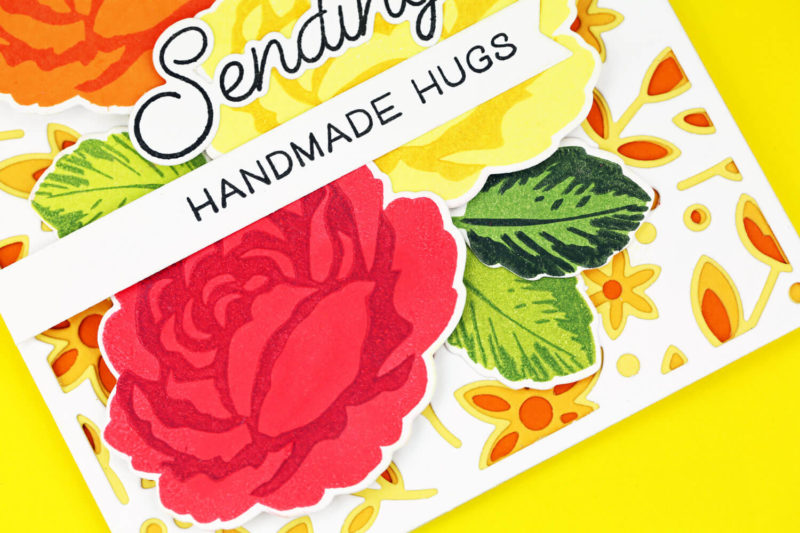
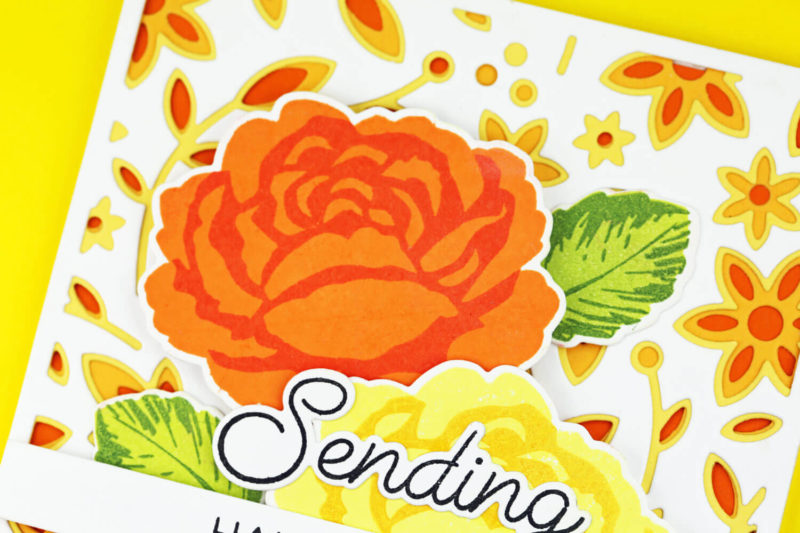
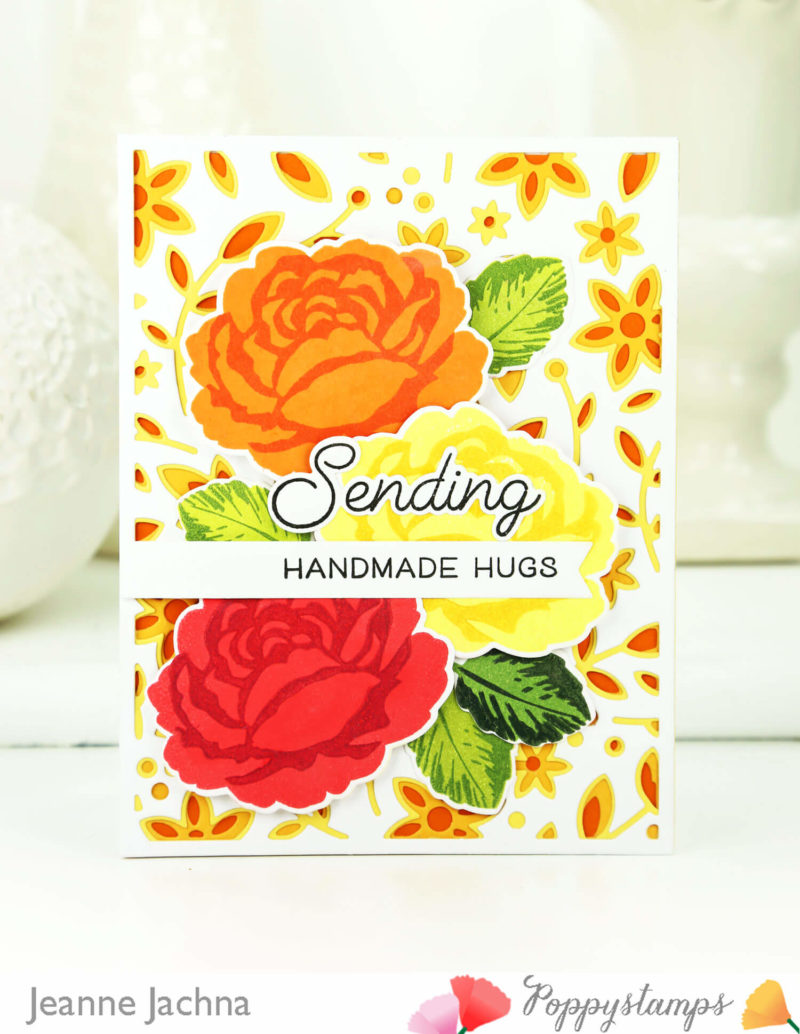
 I hope you’re having a great day! I’m a big fan of all the wonderful stamps in the shop! Just look at these Delicate Peonies!