Category: Dilay Nacar

  • Linear Triangle Paper Weaving | By Dilay Nacar

    Linear Triangle Paper Weaving | By Dilay Nacar

    Hello, friends!

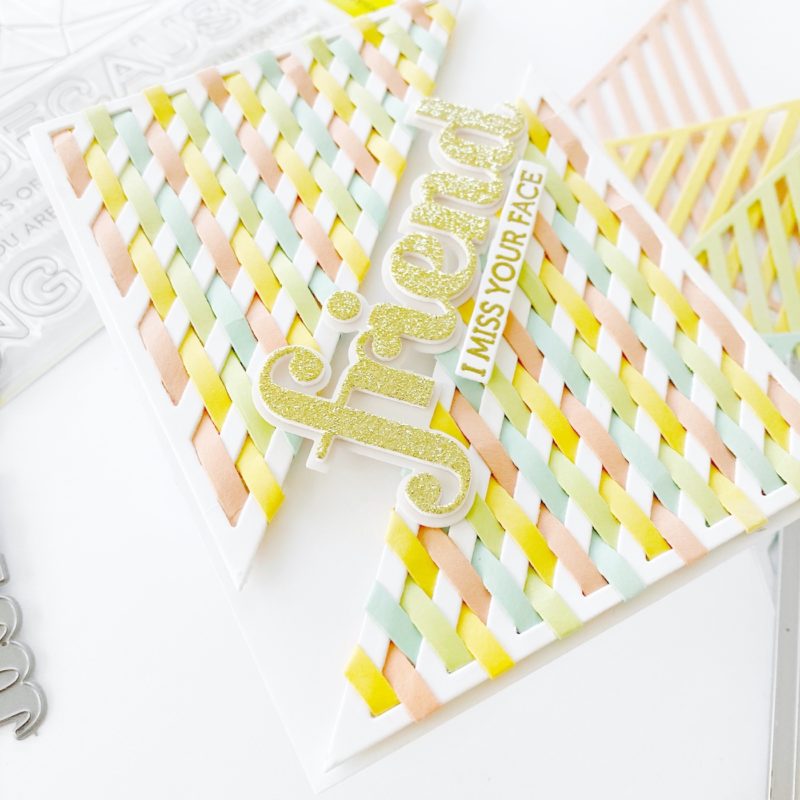
    Dilay here and today, I’m sharing an unconventional (but super fun) way to use the brand new Linear Triangle die! The moment I saw this die, I envisioned a card that incorporated it with paper weaving, and this is what I created!
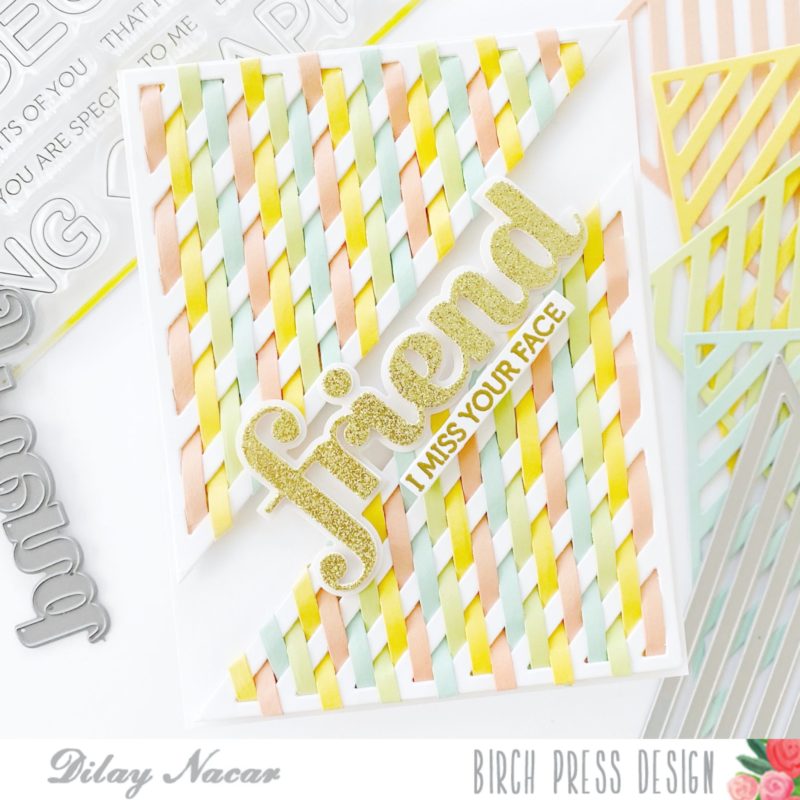
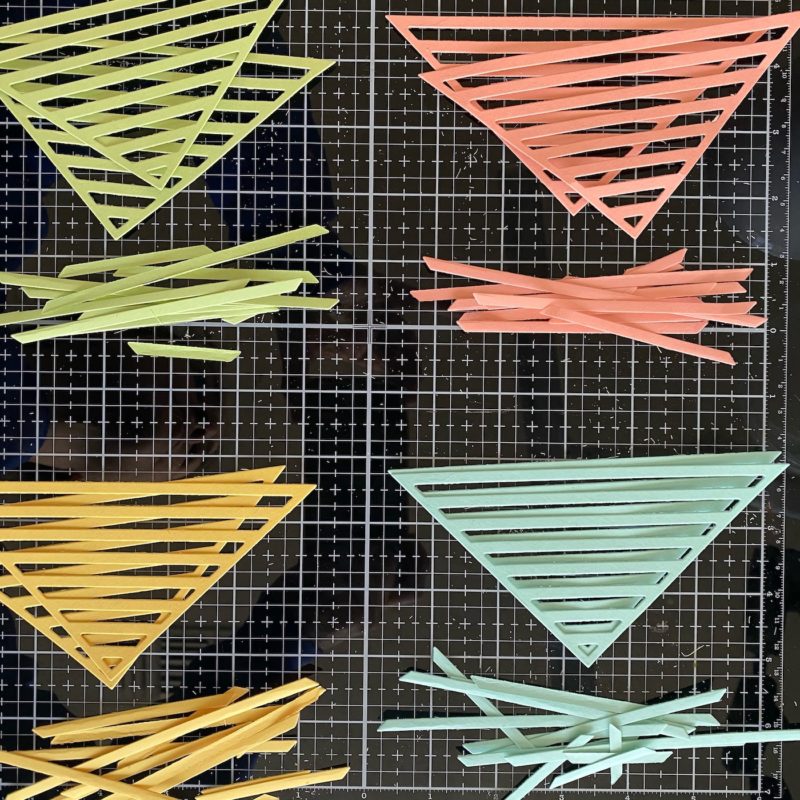
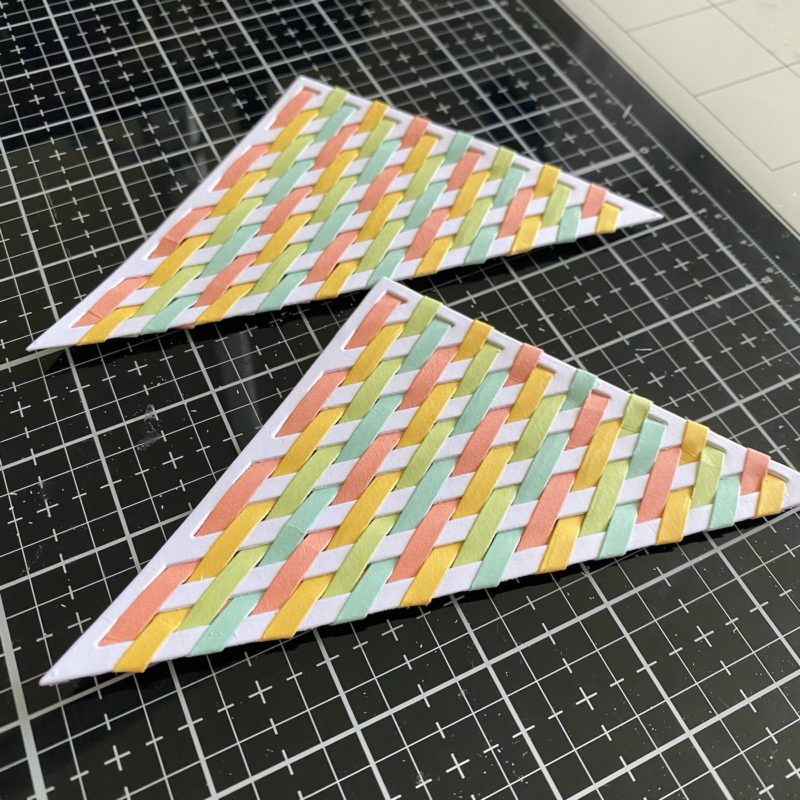
    To begin, I picked out a few of my favorite cardstock colors and die cut them using the Linear Triangle die. I did the same with white cardstock, then using a simple paper weaving technique, I weaved the colored cardstock strips through the white triangle.
    While weaving, I made sure to keep the strips evenly spaced and straight and once completely woven, I used glue to secure the ends of the strip to the white triangle.
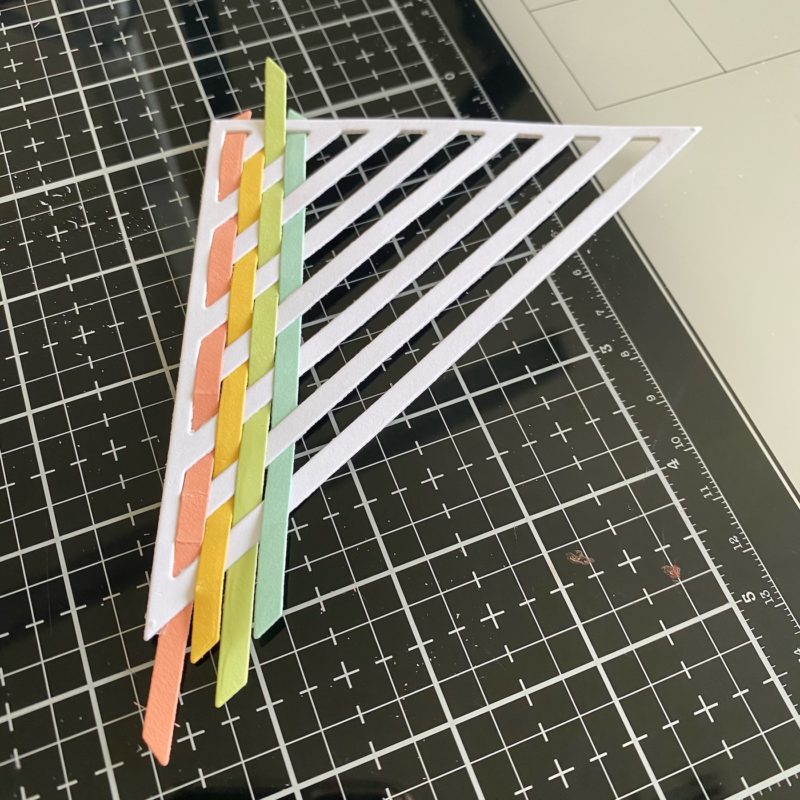
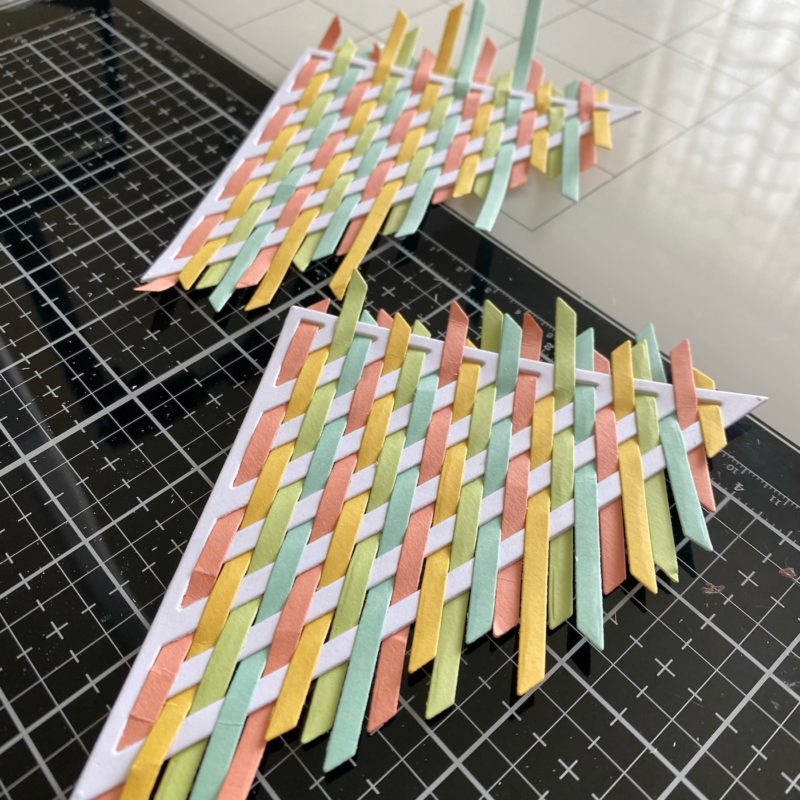
    After allowing it to dry, I trimmed off the overhang then adhered the triangles onto an A2-sized panel using thin foam adhesive.
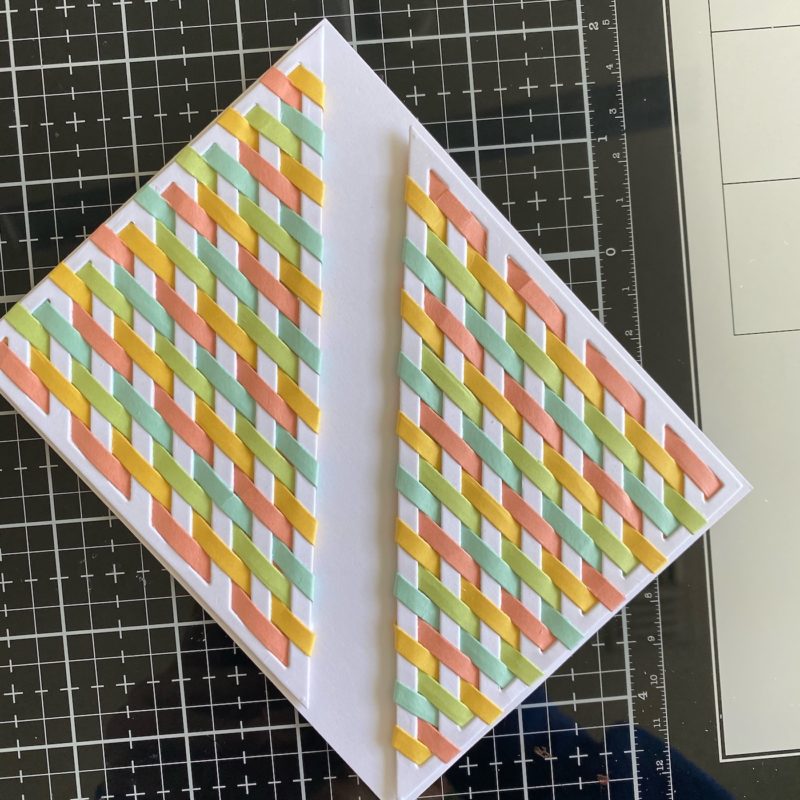
    For the sentiment, I die cut the Big Friend Sugar Script Die, twice in white cardstock and once in gold then die cut the shadow die in heavyweight vellum. I stacked all of the layers together then adhered them to the center of the panel with liquid glue. 
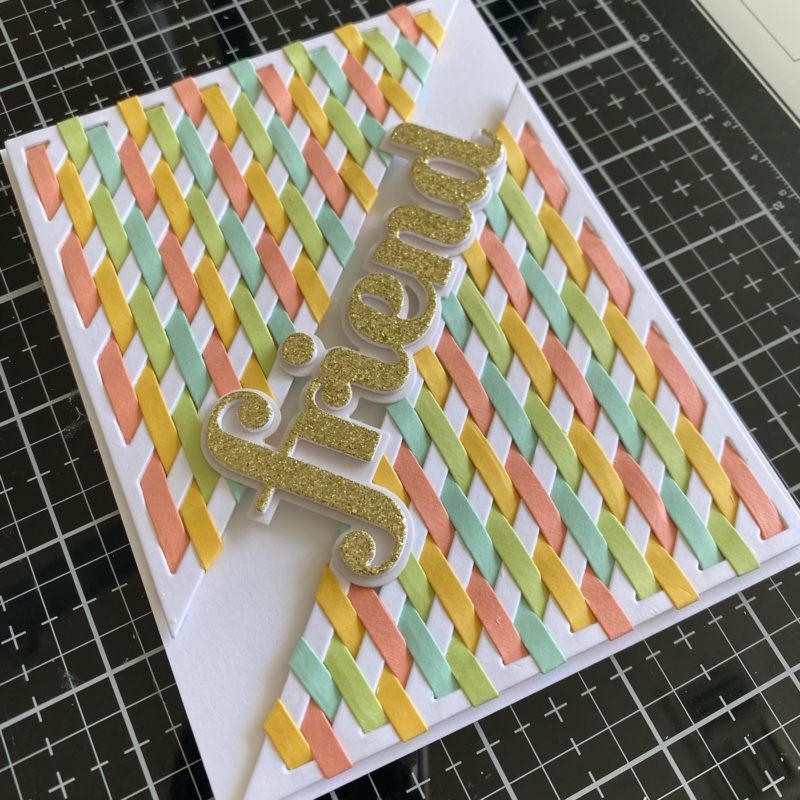
    For the sub-sentiment, I used the ‘I miss your face’ stamp from the new Crystal Lingo clear stamp set, heat embossing it in gold then adhering it under the main sentiment with a foam square. 
    I hope that you enjoyed my card today! I love using dies in different ways, and this die was just perfect to use with paper weaving. I hope you’re inspired to try it out too! Wishing everyone a wonderful day!

  • One Layer Friend | By Dilay Nacar

    One Layer Friend | By Dilay Nacar

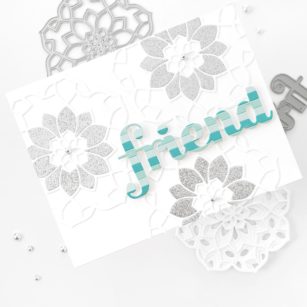
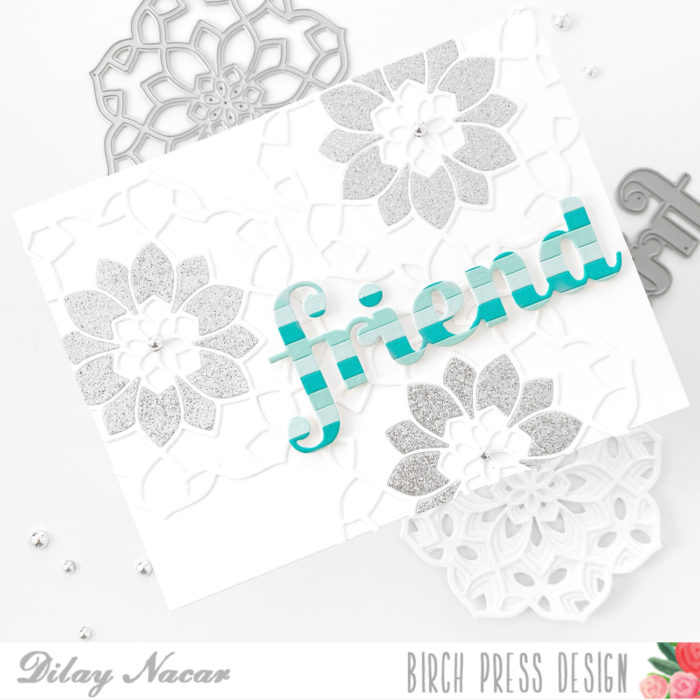
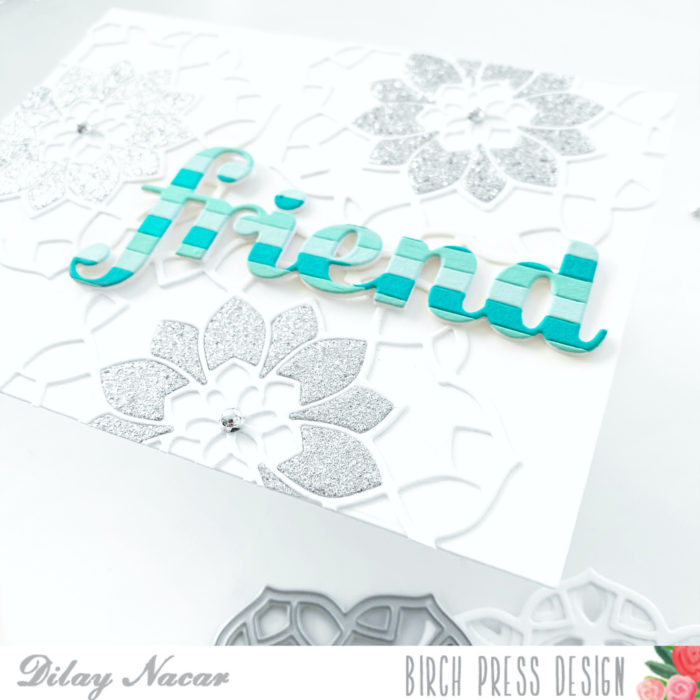
    Hello, friends! Dilay here and I am back to share a clean and simple card that I created using one of my favorite dies: the ‘Kinsley Layer Set’. However this time, I used it a bit differently – I only used one layer! By using just the first layer, I was able to create an intricate background easily and quickly!

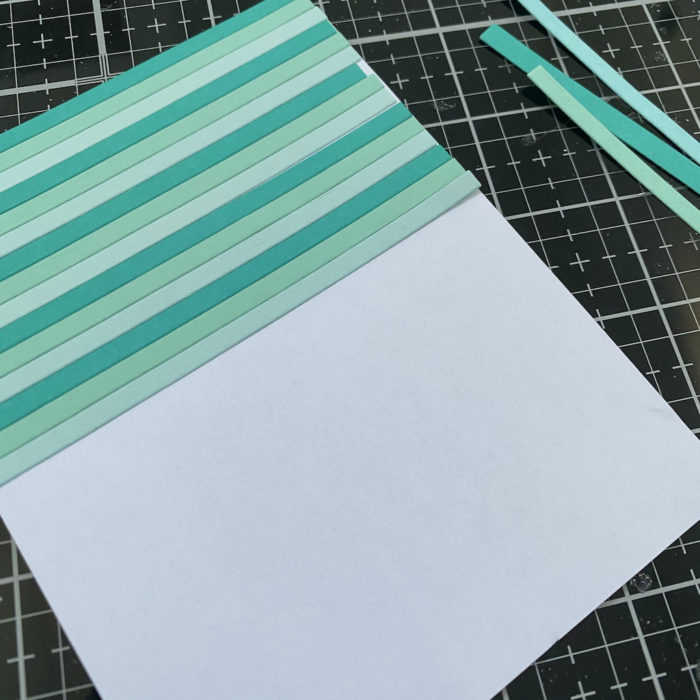
    To get started, I cut multiple shades of teal cardstock (you can use any color for this step) into thin strips. I then used tape runner to adhere the strips onto a piece of white cardstock to create a background design to later die cut. I then set this aside to dry and started on the next step.

    Strips of teal cardstock adhered to cardstock

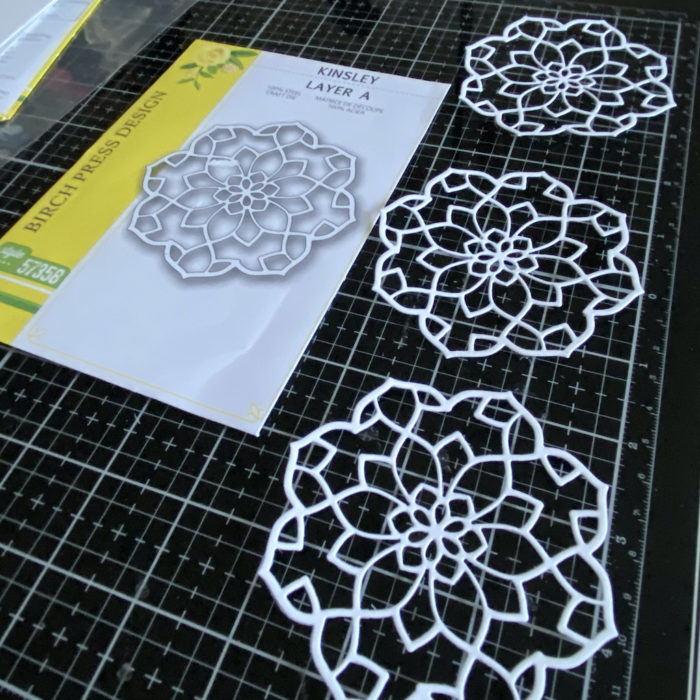
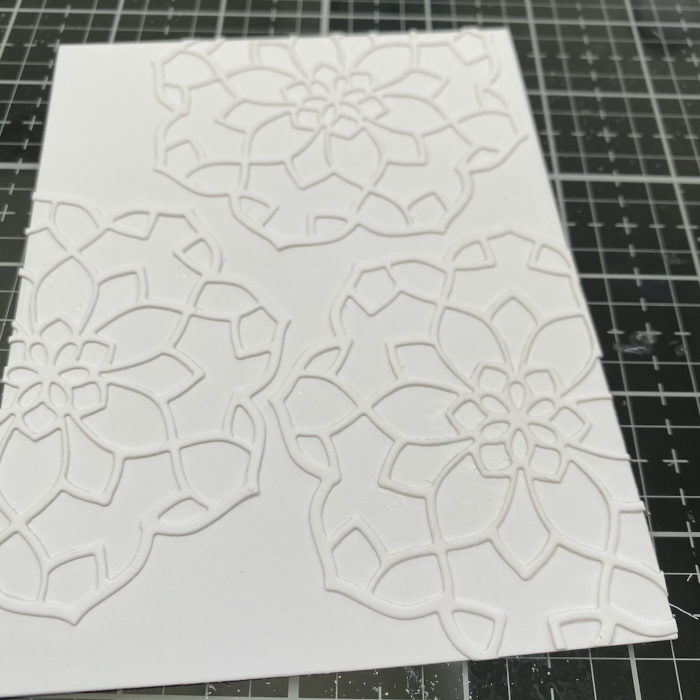
    For the background of the card, I cut a piece of heavyweight white cardstock to an A2 size base (5.5” x 4.25”) as the panel. Next, I die cut only the ‘Kinsley Layer A’ die 3 times in white cardstock and adhered the 3 onto the panel in a design that I liked, trimming off any extra.

    Die cut ‘Kinsley Layer A’ only 3 times
    Adhered all 3 to A2 base to create background

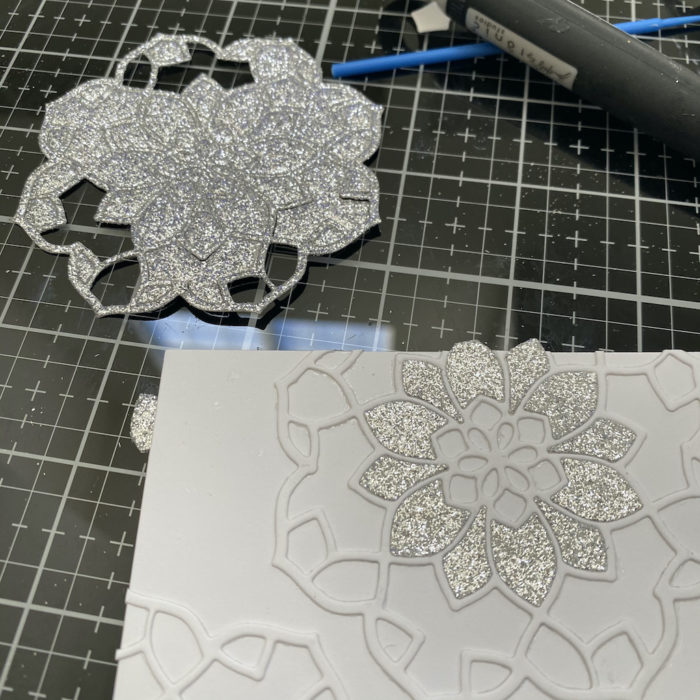
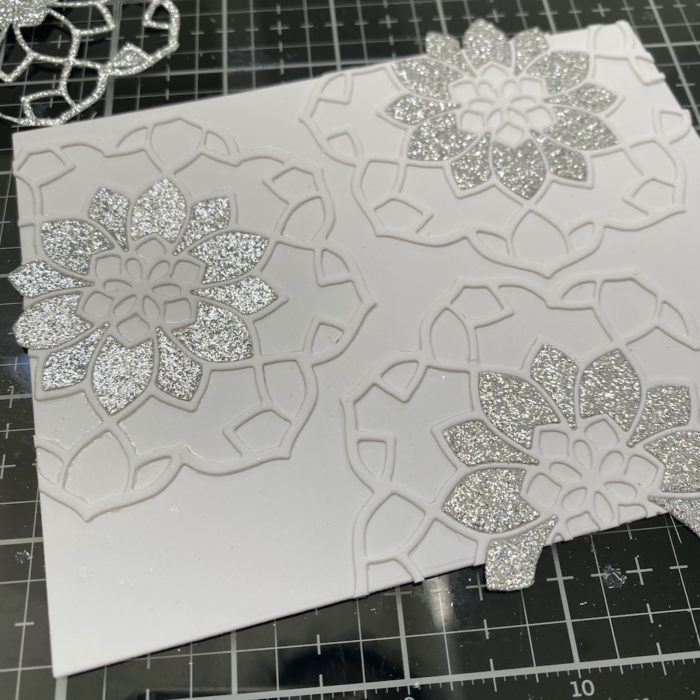
    I then die cut the same die 3 more times from silver glitter cardstock and used the negative pieces to fill in the center portions of the ‘flower’, adhering them with liquid adhesive. I set that aside to dry.

    Die cut ‘Kinsley Layer A’ in silver glitter cardstock 3 times
    Filled in centers using negative pieces of glitter cardstock

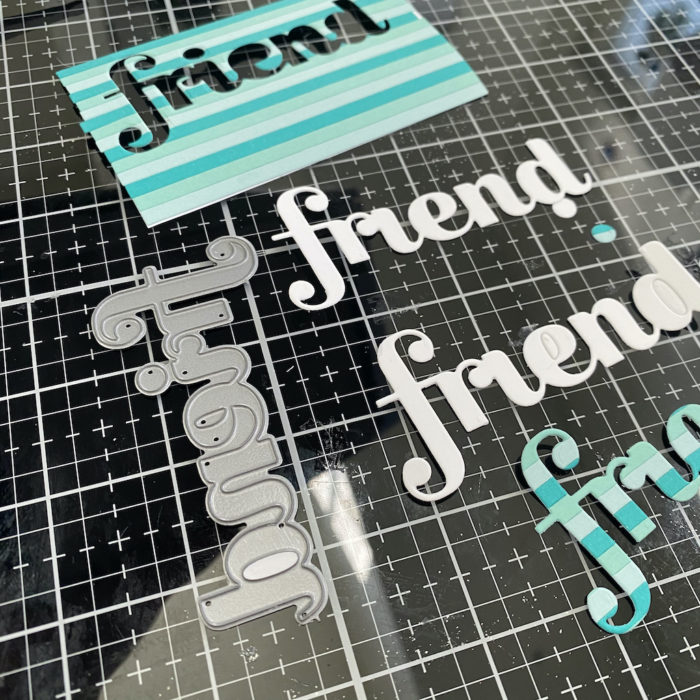
    Next, I die cut the ‘Big Friend Sugar Script Die’  using the teal strip design sheet, and once again in white to adhere behind it for added stability and extra dimension. Finally, once the layers dried, I adhered the the sentiment onto the base and added silver flat bobbles to the center of the flowers. 

    Die cut strips in ‘Big Friend Sugar Script Die’

    This technique is great if you’re looking to stretch your dies or create something a little more subtle. You can recreate this card with just about any layer die and color!
    I hope you you enjoyed my post today and found some inspiration!

  • Rainbow Snowflake | By Dilay Nacar

    Rainbow Snowflake | By Dilay Nacar

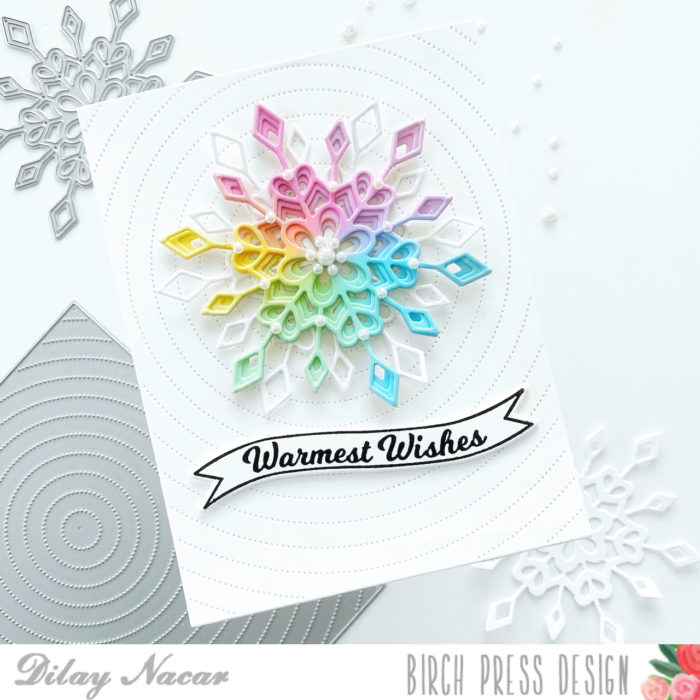
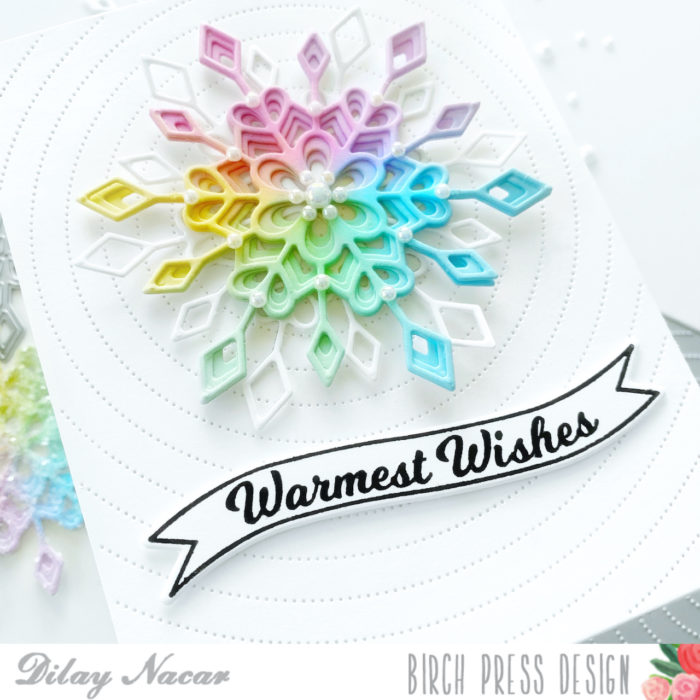
    Welcome back, crafty friends! Dilay here from justcallmedee.com sharing a fun, holiday-themed rainbow snowflake card! Today’s card is quick and easy to recreate,  perfect for your last minute cards!

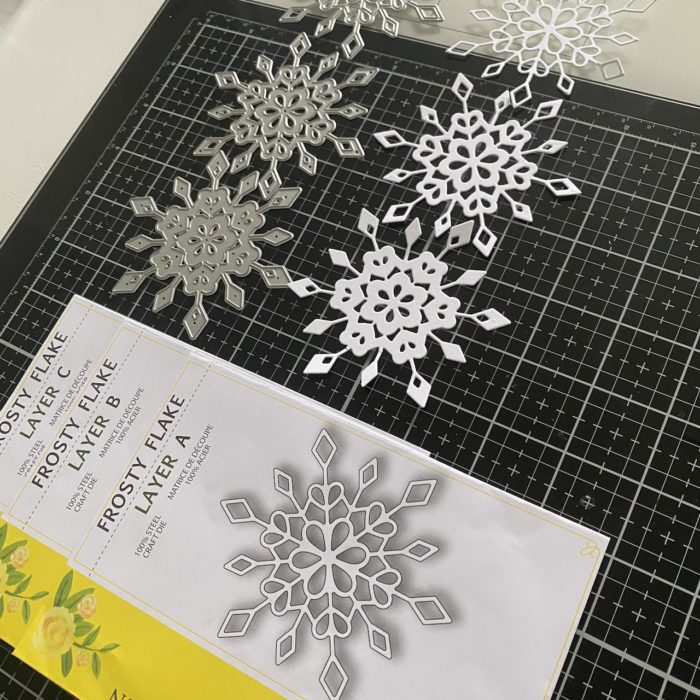
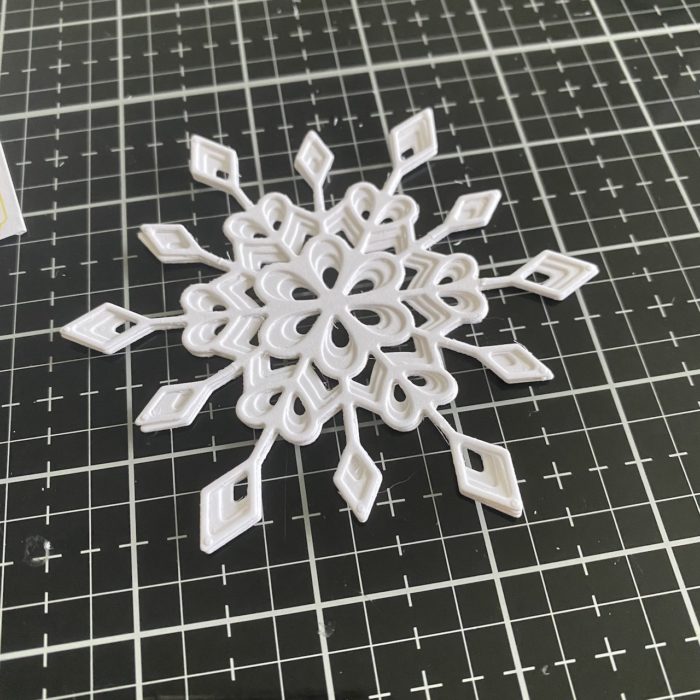
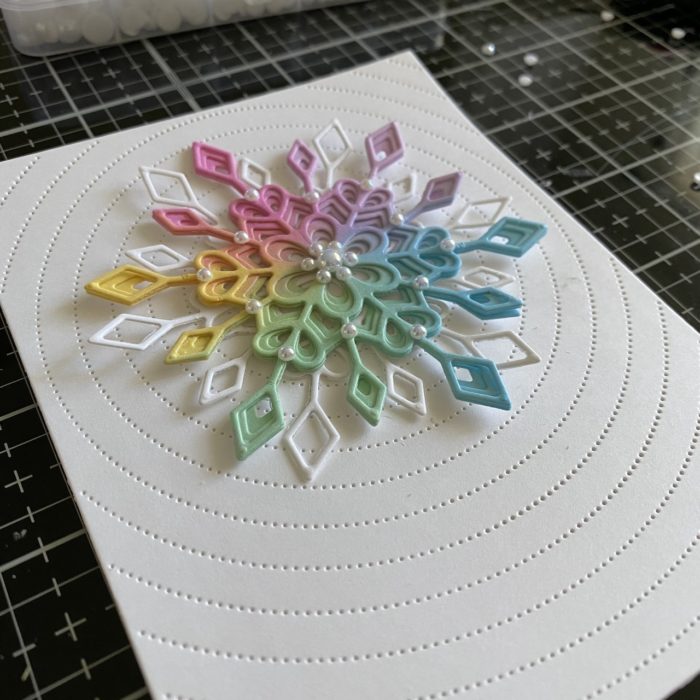
    To begin, I die cut the ‘Frosty Flake Layer Set’ A, B, and C layering die and adhered them together. I also cut an additional layer A and set that aside to place under my snowflake for added dimension. 

    Frosty Flake layers A. B, and C
    A, B, and C layered and adhered together

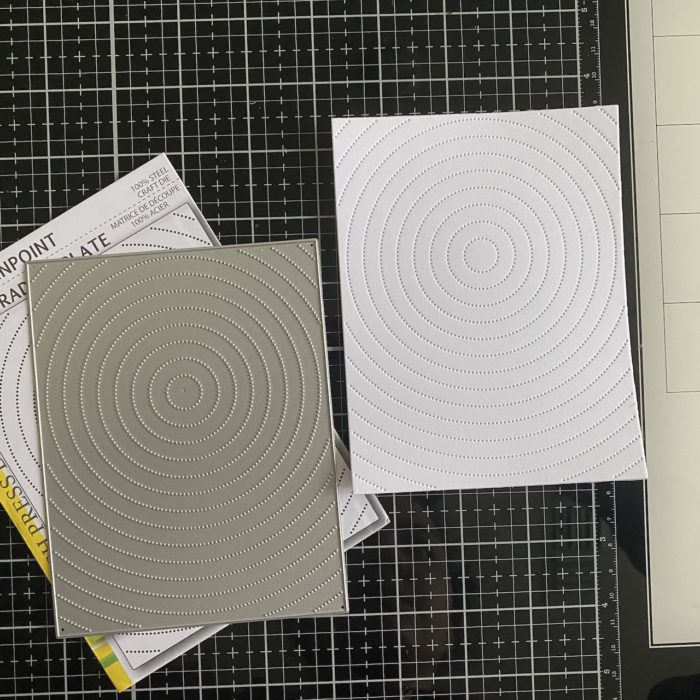
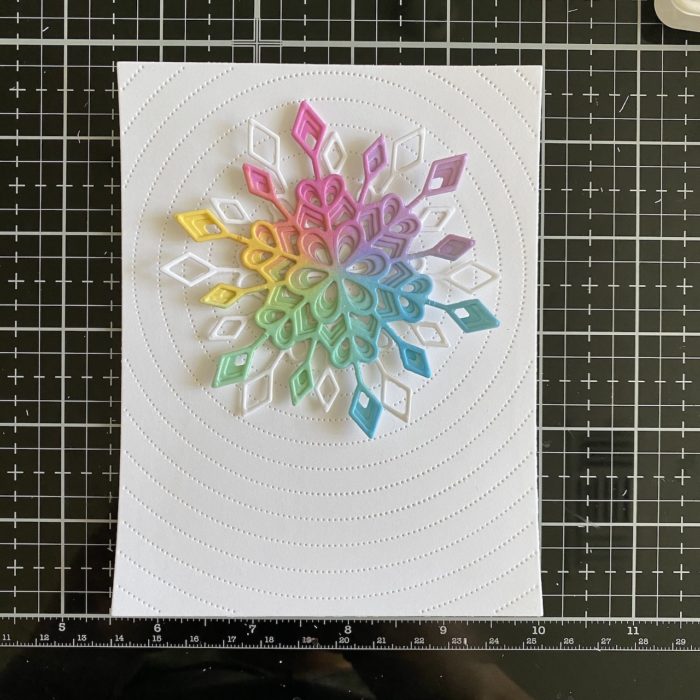
    Next, I ink blended the snowflake using colors in rainbow order and set that aside to dry while I worked on the background. For this step, I cut an A2 sized background using the ‘Radial Pinpoint Plate’ die then adhered that onto another piece of A2 sized white cardstock for added stability. 

    Pinpoint Radial Plate

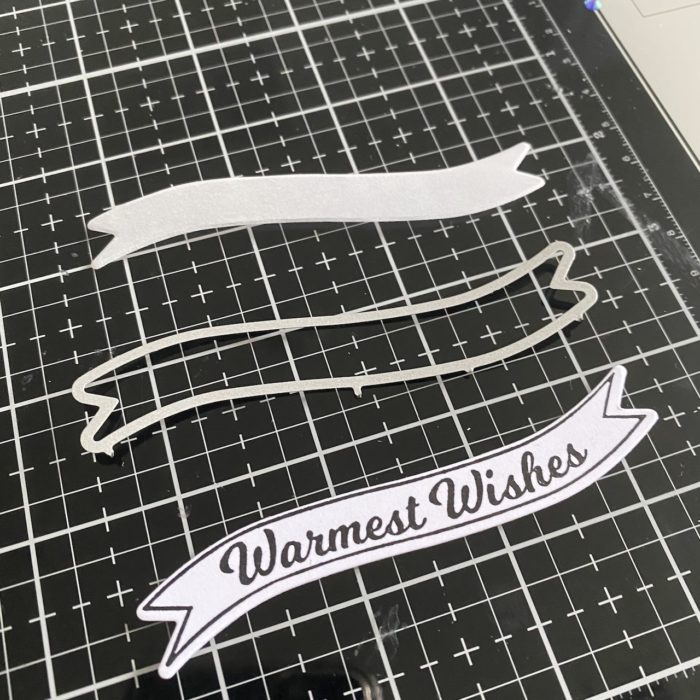
    Next, I created the sentiment using the ‘Warm Wishes’ stamp from the ‘Christmas Ornament and Labels’ stamp set, first stamping it in black ink then die cutting it with the coordinating banner die. 

    Sentiment
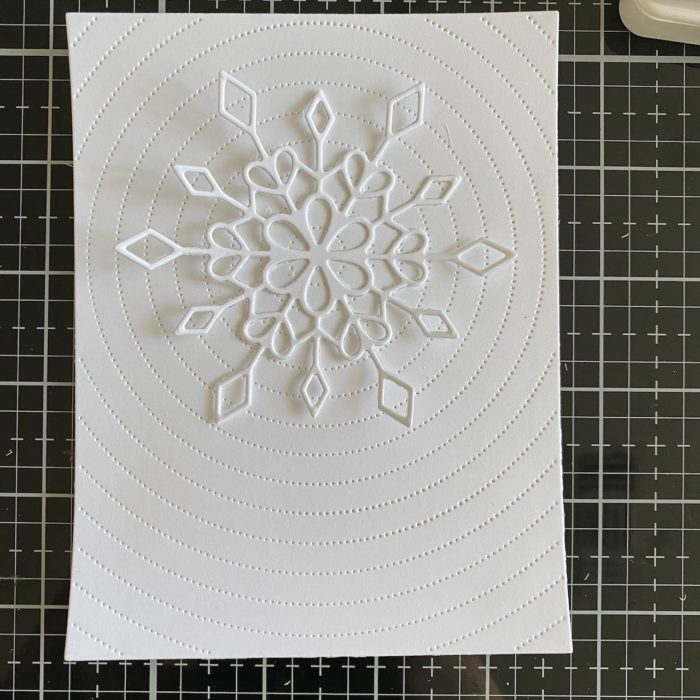
    Layer A adhered to center of background

    To put the card together, I glued the extra layer A to the center of the ‘Radial Pinpoint Plate’ panel background then glued the snowflake on top of that. Once dry, I added a few iridescent flat back pearls and adhered the banner sentiment with foam tape.

    Embellishments

    I hope you enjoyed this fun, non-traditional holiday card! Thank you so much for visiting and I wish you a very happy holiday season!

  • Elegant  Fall Themed Thanks | By Dilay Nacar

    Elegant Fall Themed Thanks | By Dilay Nacar

    Welcome, everyone! Dilay here, and I’m back today to share another fall-themed card with a clean and simple design that is perfect for the season!  Let’s get started! 

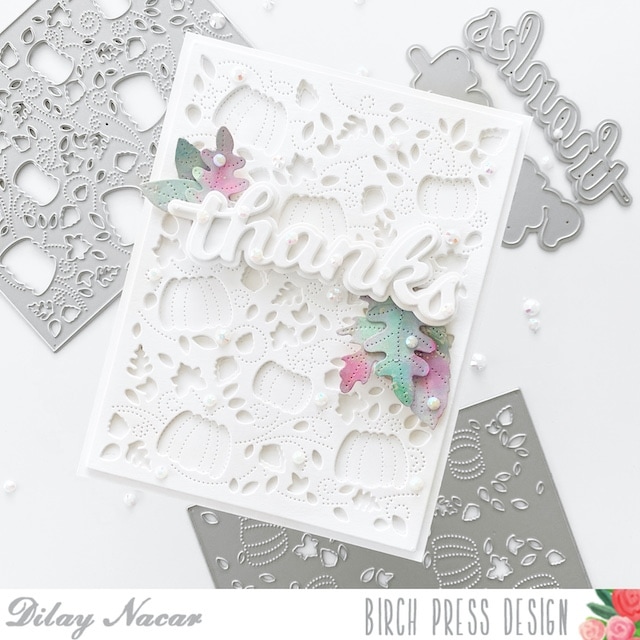
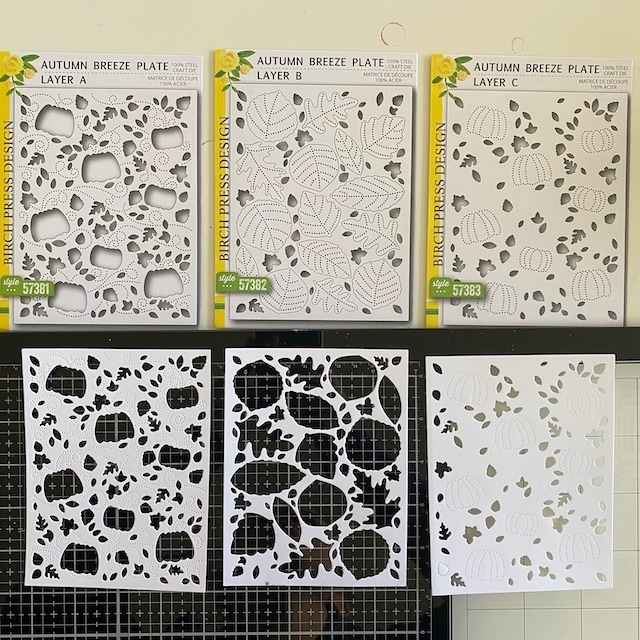
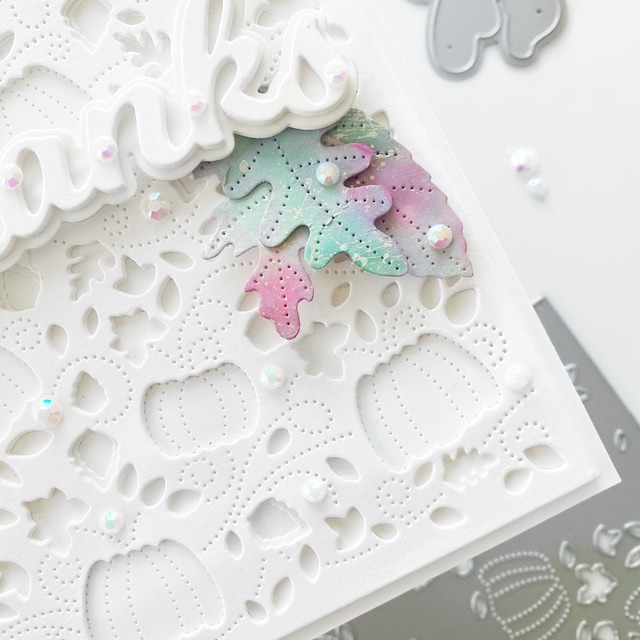
    I began by cutting a solid piece of white cardstock down to an A2 (4.25” x 5.5”) size for the base of my card. Next, I die cut layers A, B and C from the ‘Autumn Breeze’ plate set, again in white cardstock, and adhered layer A and C onto the base.

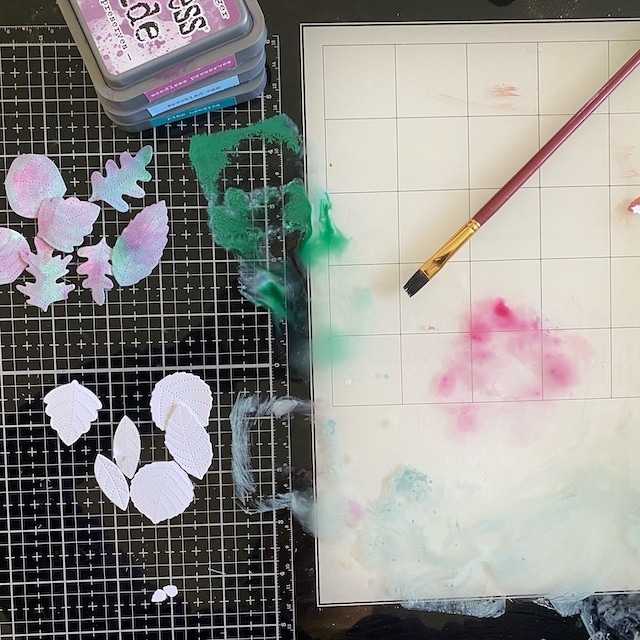
    Then, I brush-colored the leaf cutouts from panel B using Distress Oxide inks diluted with a little water – this technique produces a distressed look and feel once dry, mimicking real leaves (I chose to use non-traditional fall colors, but any colors would look great for this step!) I then used a brush to splatter silver paint onto the leaves for an added touch. I set those aside to dry while I worked on the next step. 

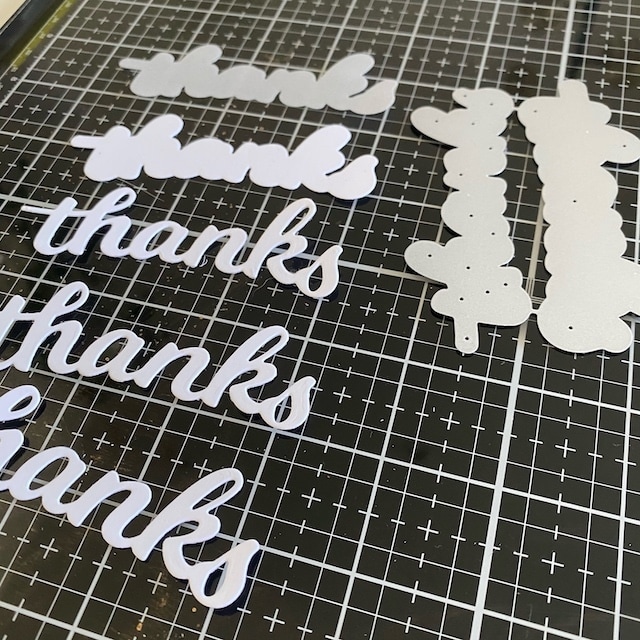
    For the sentiment, I chose something that would blend in nicely with the background and allow the leaves to ‘pop’.  I die cut ‘Honey Script Thanks’ word die three times in white cardstock and the shadow once in white cardstock and once in vellum, and stacked them together using liquid glue. I then adhered the completed sentiment onto the center of the base.

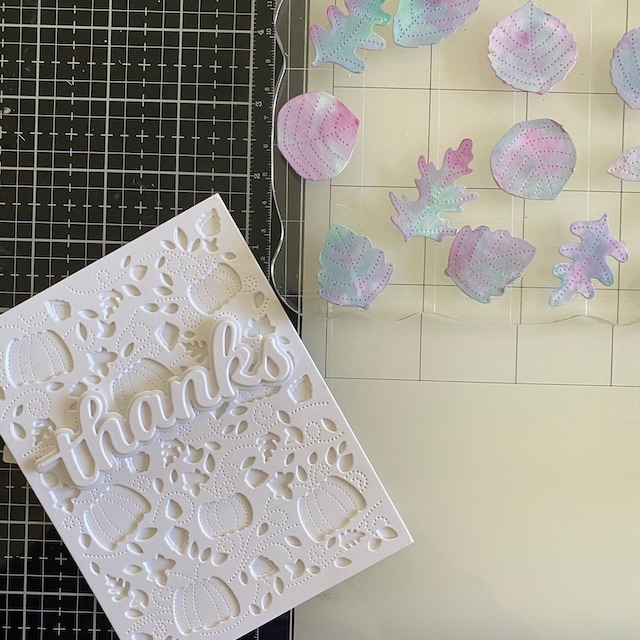
    Once the leaves were dry, I tucked a few under both ends of the sentiment (you’ll have some leaves leftover for a another card). To finish, I added white iridescent rhinestones throughout the design to give it some sparkle! 

    I hope you enjoyed today’s design and found some inspiration! Wishing everyone a wonderful holiday week!

  • Pumpkin Lacework | By Dilay Nacar

    Pumpkin Lacework | By Dilay Nacar

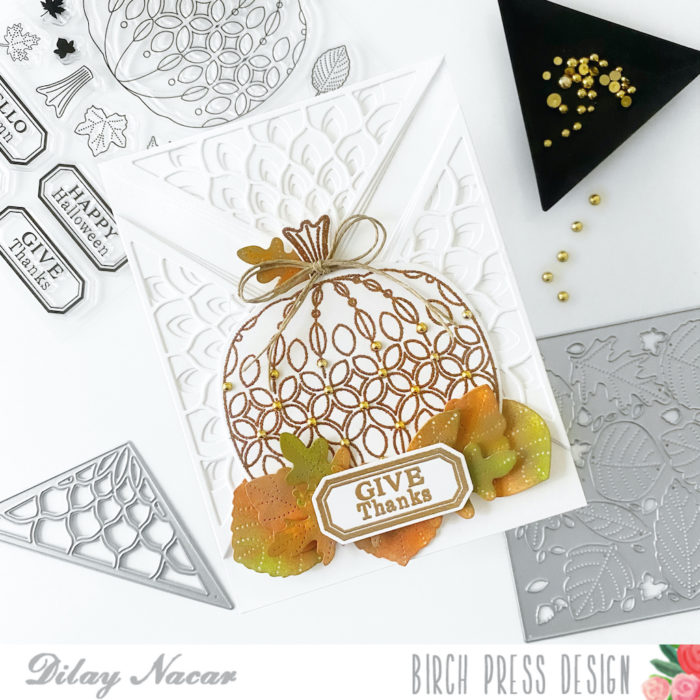
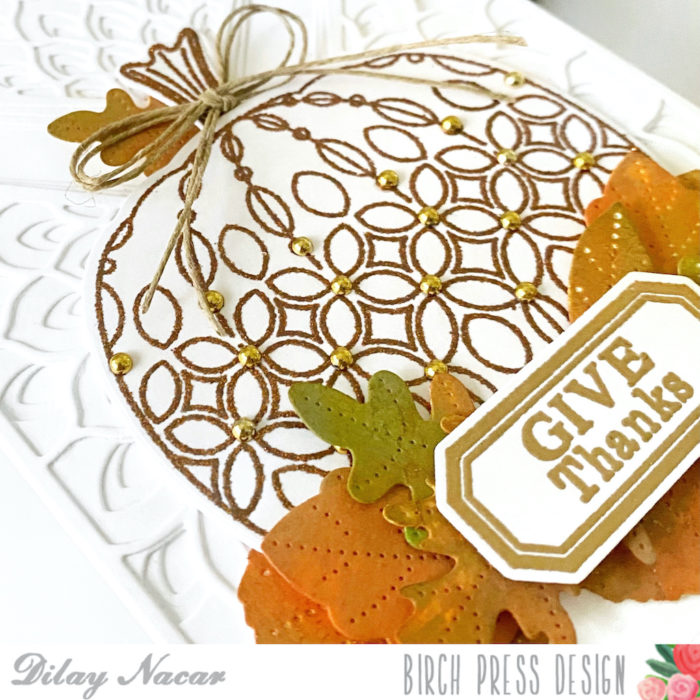
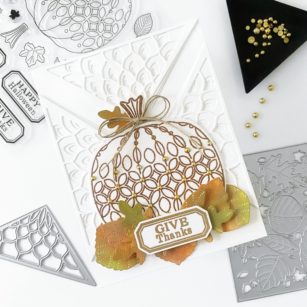
    Hi, crafty friends! Dilay Nacar here from JustCallMeDee.com and I am so excited to be sharing my first card as a member of the Birch Press Design Team! It’s truly an honor to be sharing my creations and today, I’ll be going over a fall themed ‘Give Thanks’ card that I created using some of my favorite dies and stamps!

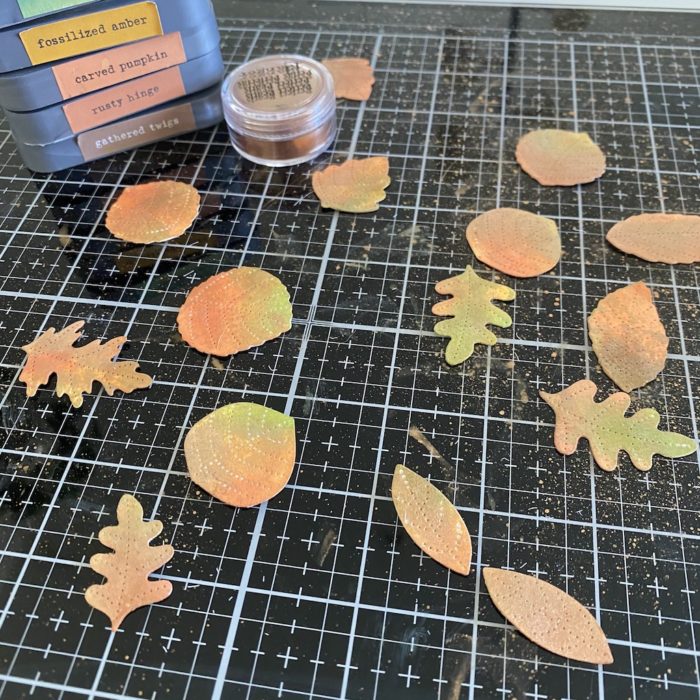
    To begin, I made the leaves using Layer B from ‘Autumn Breeze Plate Layer Set’ die and Bristol Smooth cardstock, then colored them various fall colors using the ‘smooshing’ technique with Distress Oxide inks. I set these aside to dry while I worked on the background.

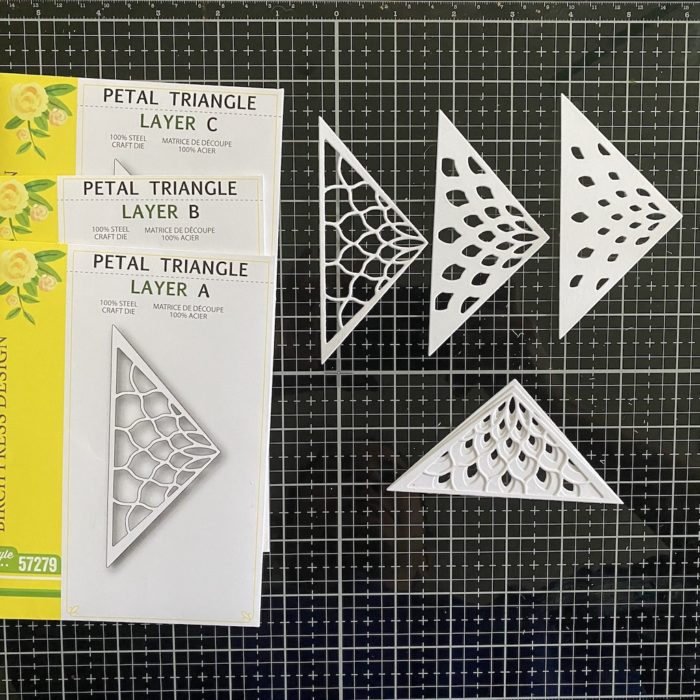
    For this layer, I wanted a clean white background with layered detail, so I used the ‘Petal Triangle Layer Set’. I die cut each layer (A, B, and C) in white heavyweight cardstock then adhered them together using liquid adhesive. I prepared 3 sets of these triangles – one for each of the sides and one for the top of the card – then used liquid adhesive to adhere them onto an A2 sized, white 100 lb cardstock base.

    Next, I used the ‘Pumpkin Lacework’ stamp and die to make the main image. I heat embossed the pumpkin stamp and stem stamp using a copper embossing powder. I cut out the image using the coordinating die and adhered it onto the background.

    Once leaves were dry, I placed them along the bottom of the pumpkin image (and one on the stem) then made a bow using a piece of twine and adhered it onto the stem.

    For the sentiment, I used the same ‘Pumpkin Lacework’ stamp and die set and heat embossed it using a fine gold embossing powder. I used foam tape to adhere it along the bottom of the pumpkin.

    Finally, to complete my card, I used off-brand gold flat back bobbles and placed them throughout the pumpkin pattern.

    I hope you enjoyed my card today and found some inspiration for your next creation!