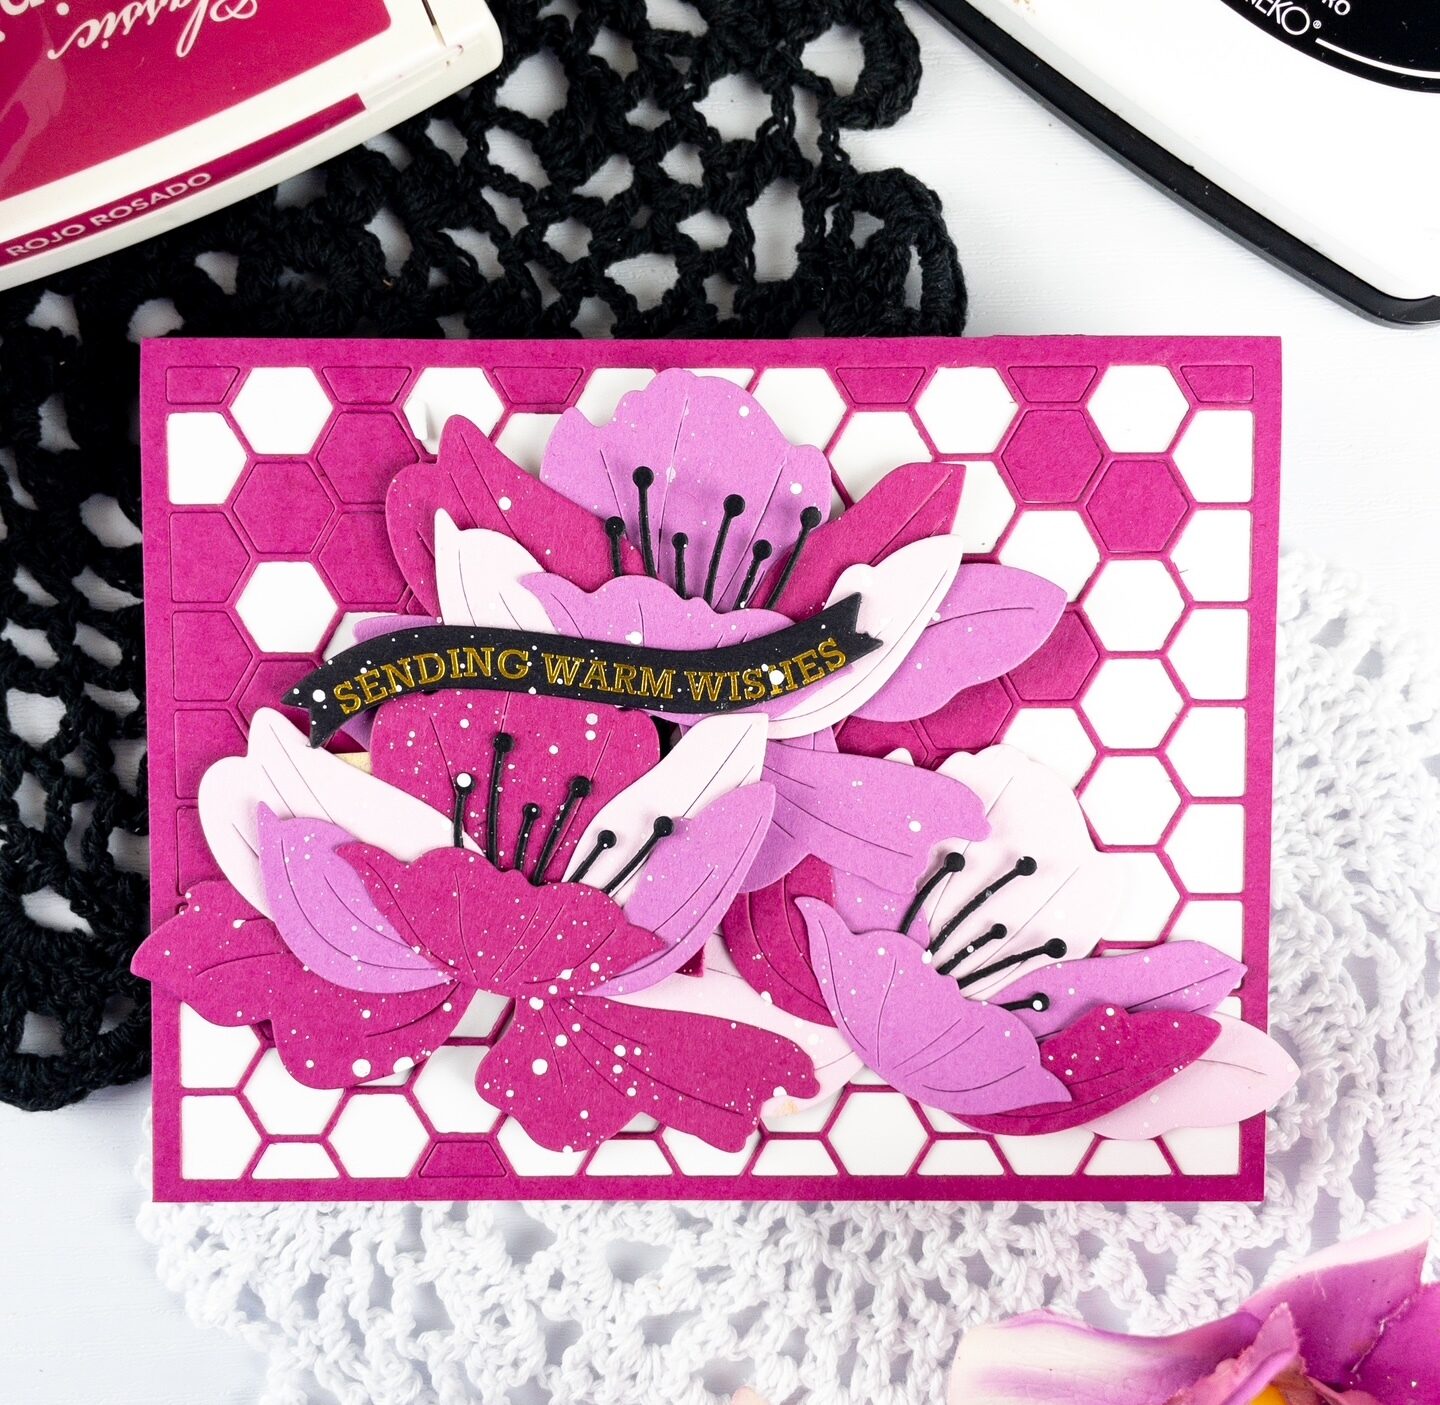
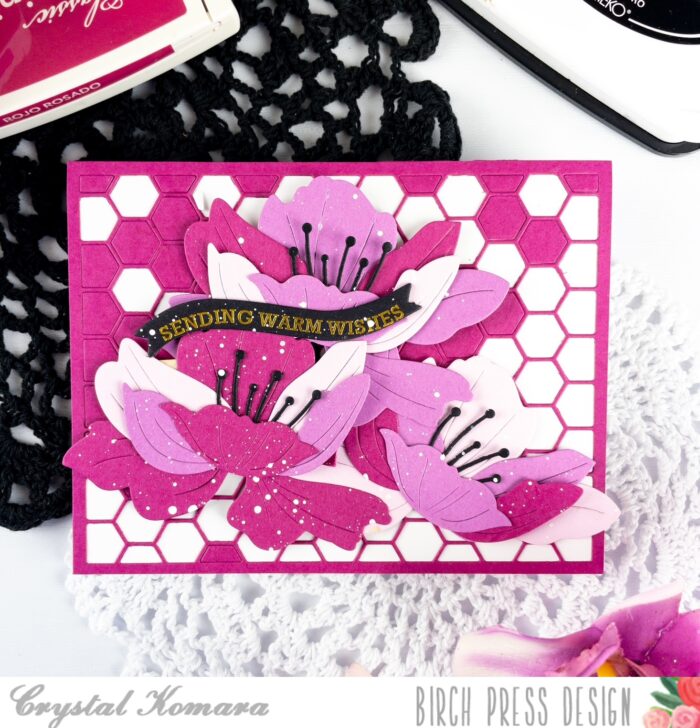
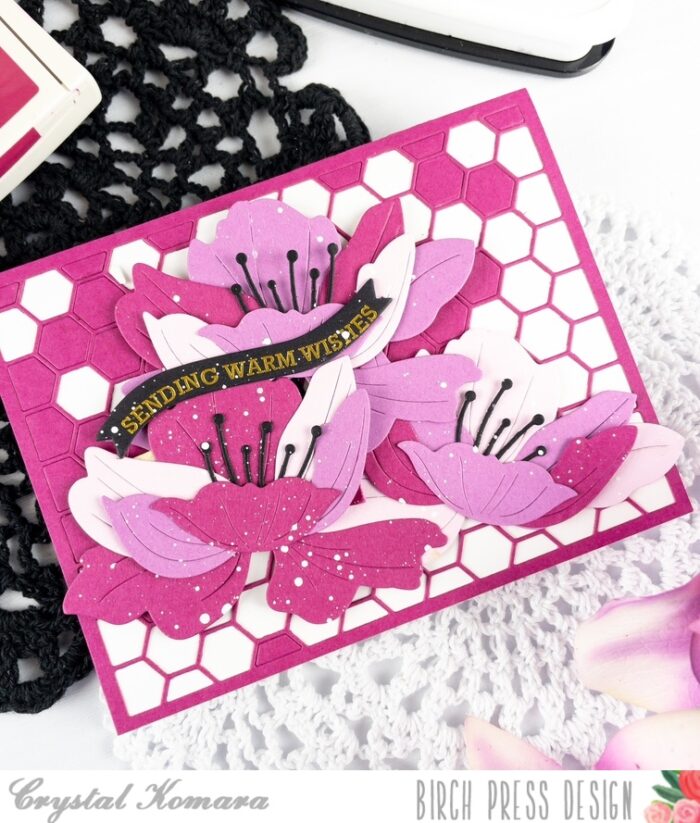
Hello friends and happy Tuesday! This is Design Team member Crystal Komara here with you today sharing a monochromatic pink card using a mixture of old and new products from Birch Press Design.
First, for this card, we’ll use the following products:
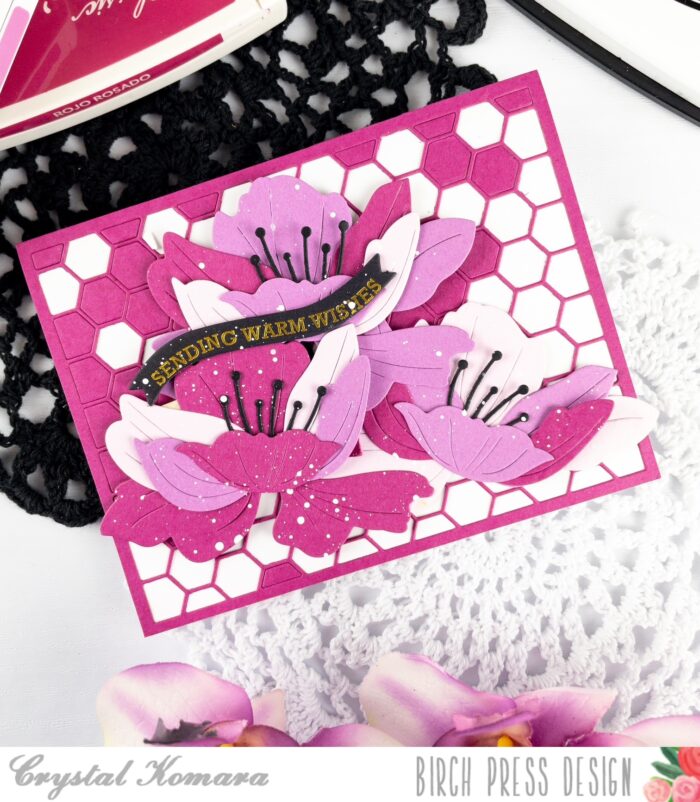
The base of this A2 sized card is made from 110 lb. Neenah Solar White Smooth cardstock. In the past I used to use 80 lb. Neenah Solar White cardstock, but I have now switched to a heavier card base and I love it! It really holds up well. Using the Honeycomb Plate, I die cut the background from a bright pink cardstock and adhered it directly to the white card base.
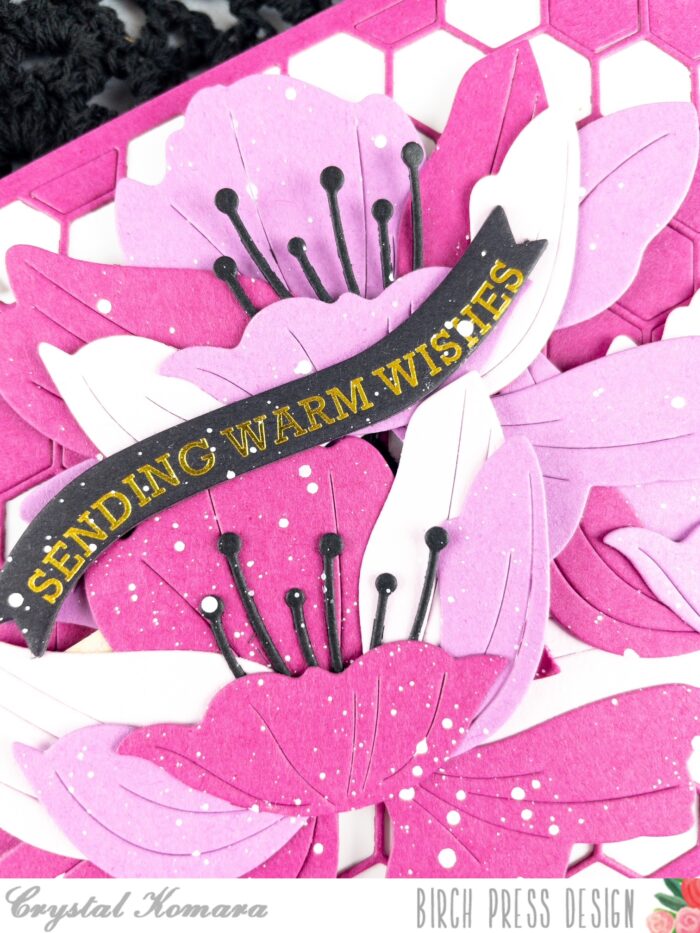
Using the Perky Blooms Contour Layers die, I die cut the flowers from three different colored pink cardstock and then adhered them together with a fine-tip liquid glue. Once the three flowers were completed and adhered together, I splattered them with white acrylic paint. Once dry, I adhered the flowers to the card with 3M foam adhesive for added dimension.
Lastly, I added a black foil tab sentiment from sister company, Memory Box.
Thanks for visiting and have a wonderfully creative day!
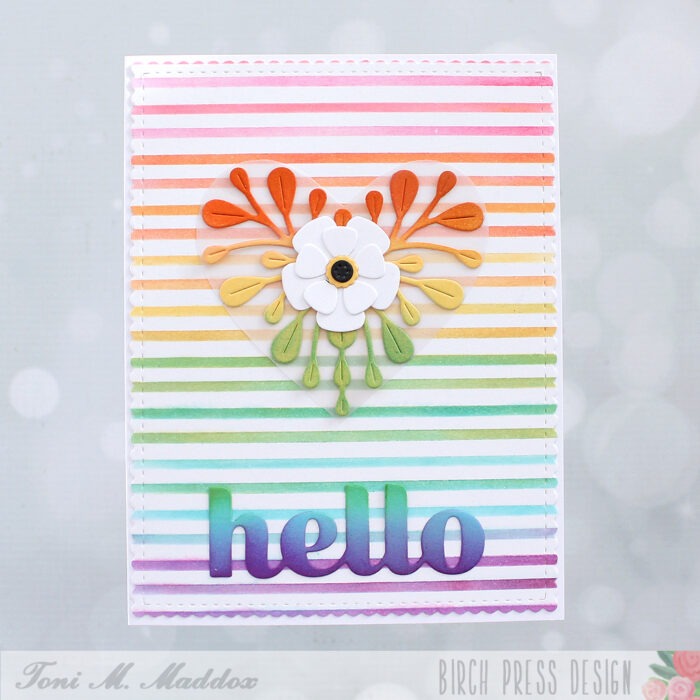
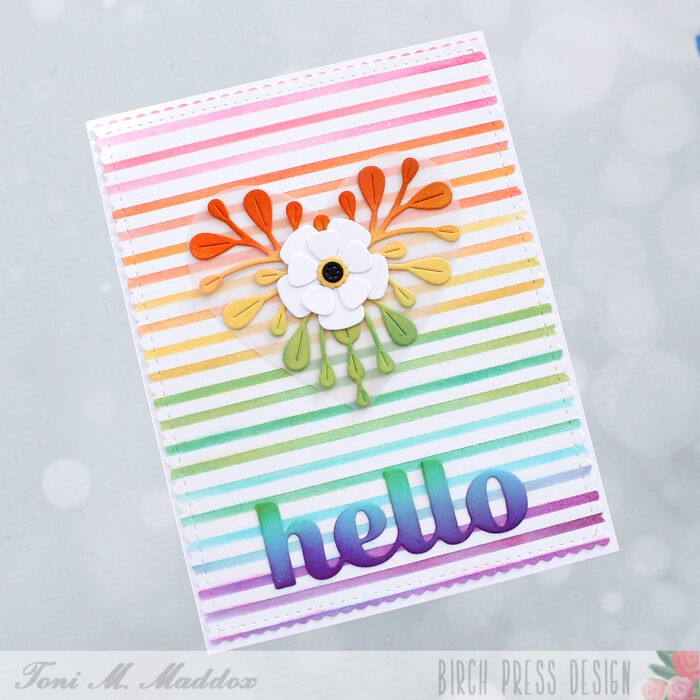
Hello, friends! Toni here with the first of two cards using the Linear Stripes stencil.
For this first card, I used the stencil along with Catherine Pooler inks to color up a white card base. I allowed the inks to blend every few lines to create a rainbow effect.
I then repositioned the stencil so I could repeat the process, creating a gorgeous gradient. I love the blending of the colors so very much!
I applied ink in a gradient pattern on the Block Print Garden Heart leaves as well as the Sugar Script Big Hello to blend in a bit with the stripes behind it.
I used vellum behind as the Block Print Garden Heart base because obviously more rainbow showing the better!
I hope you enjoyed today’s card and have a great rest of your week!
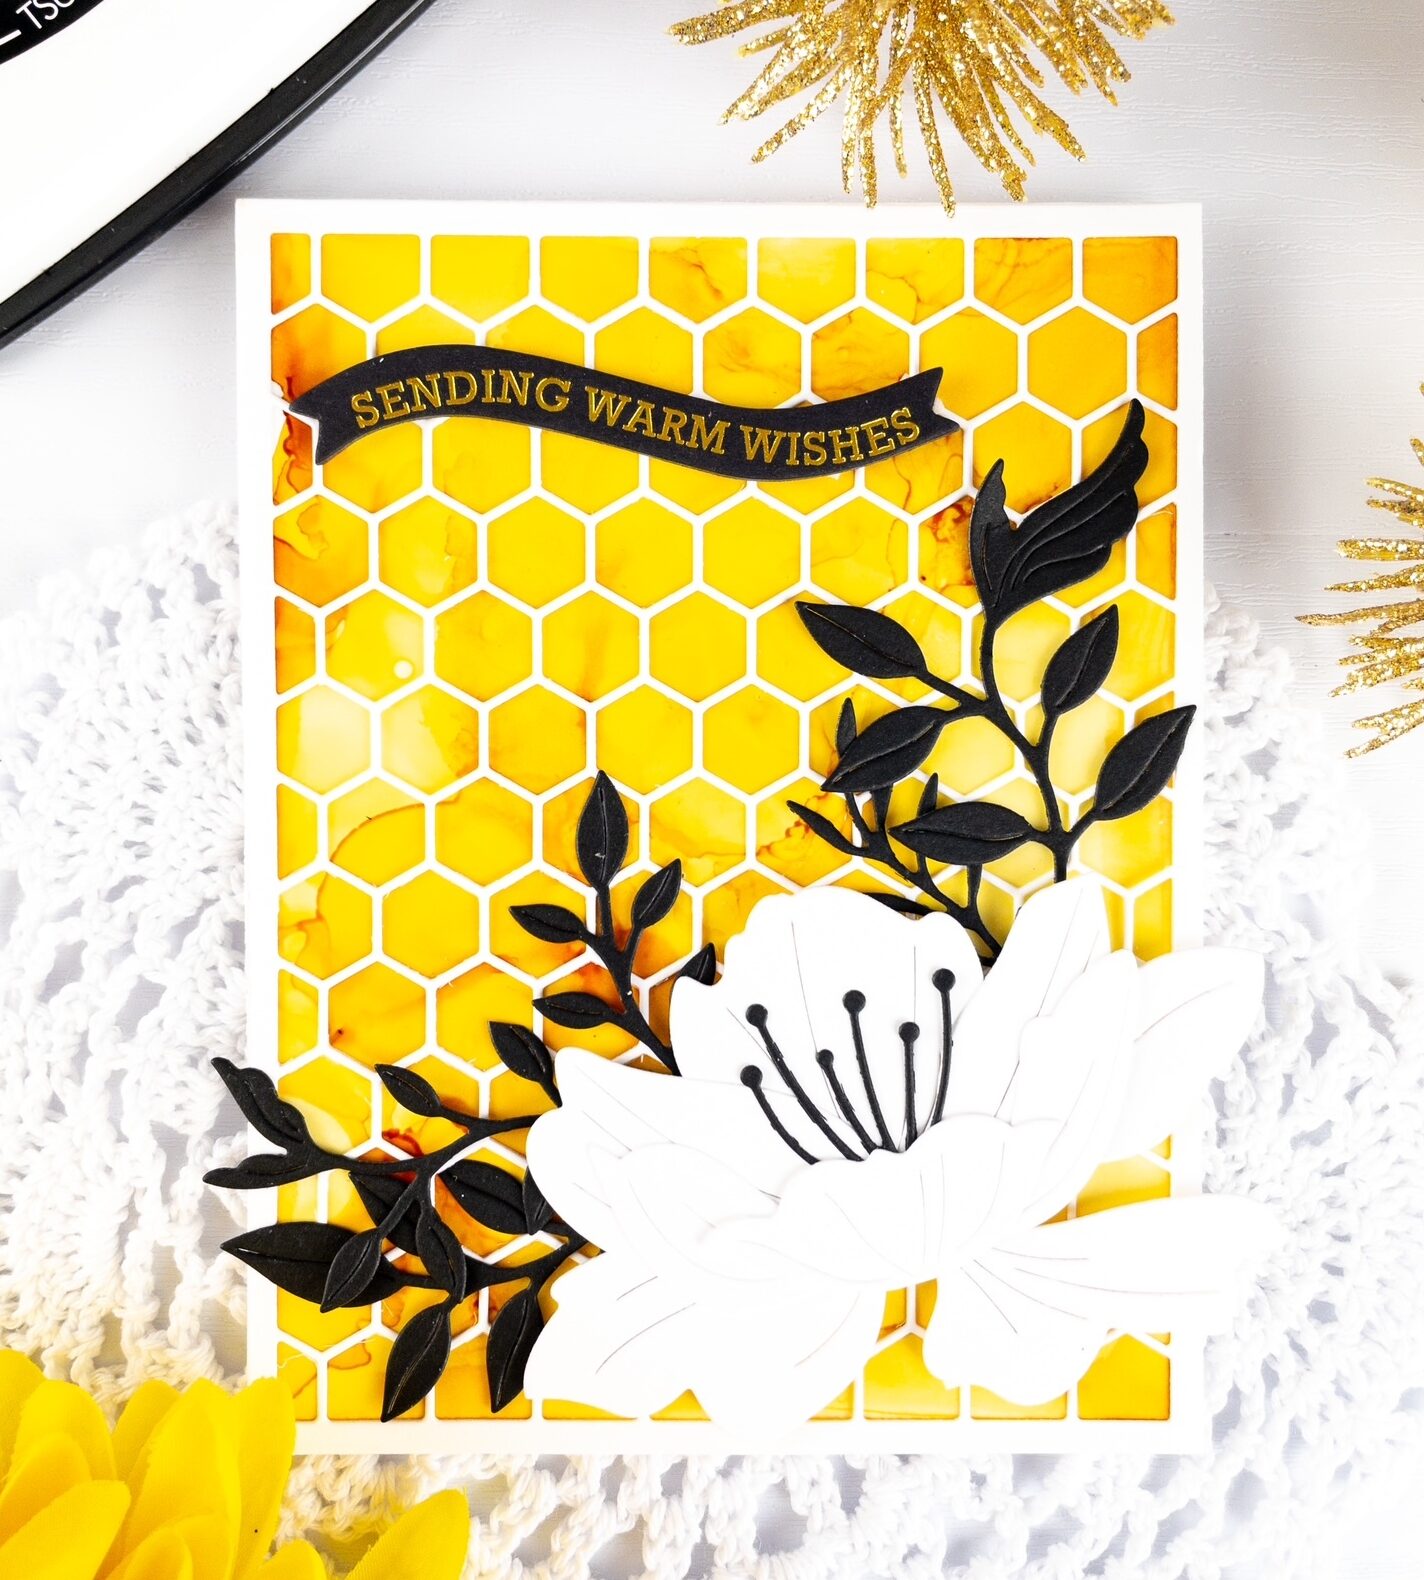
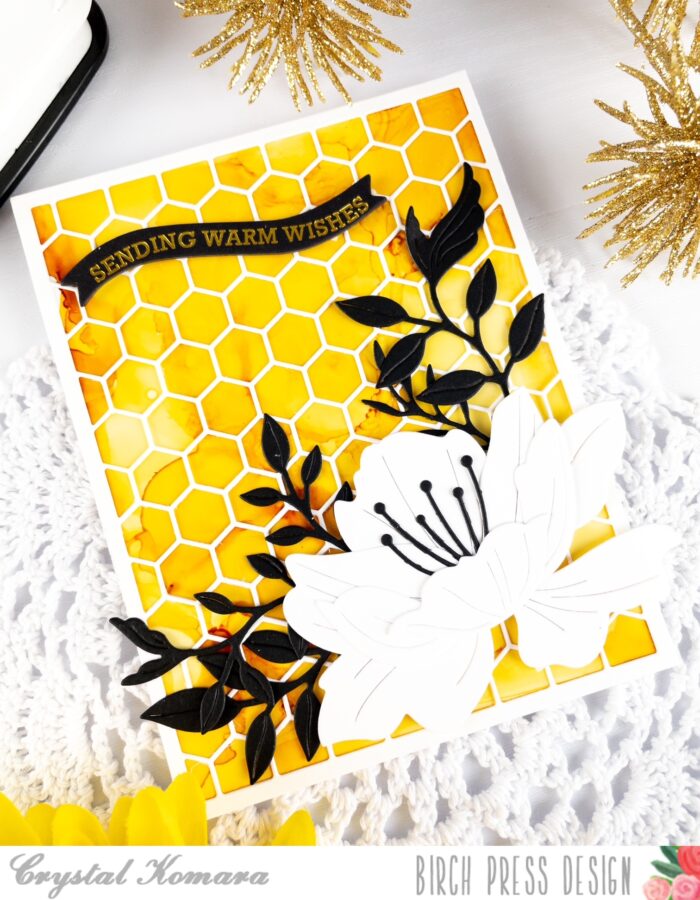
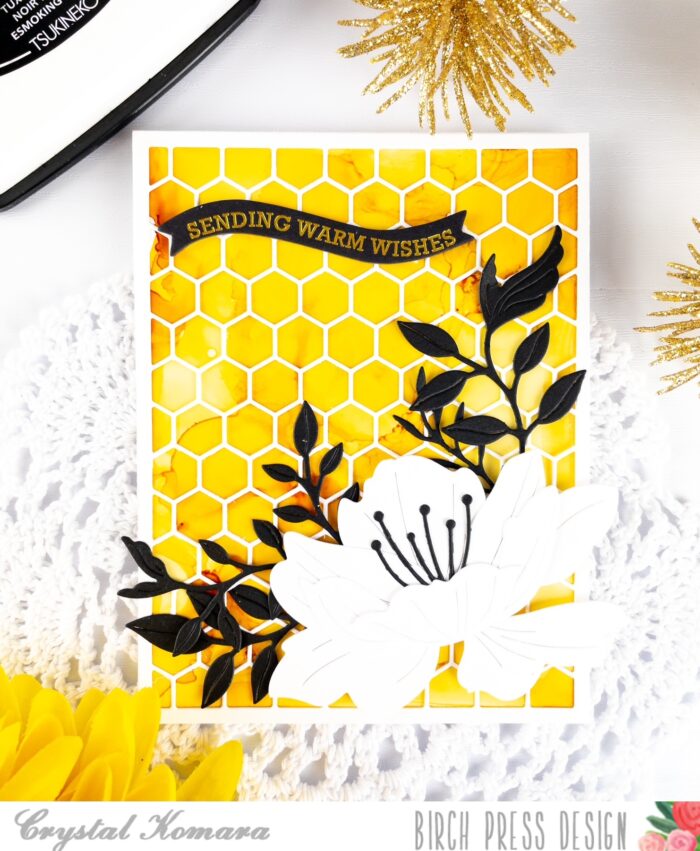
Hello friends and happy Tuesday! I hope you are all having a wonderful day so far. This is Design Team member Crystal Komara here with you today sharing a “warm wishes” card and nothing says warm like the color yellow, right?
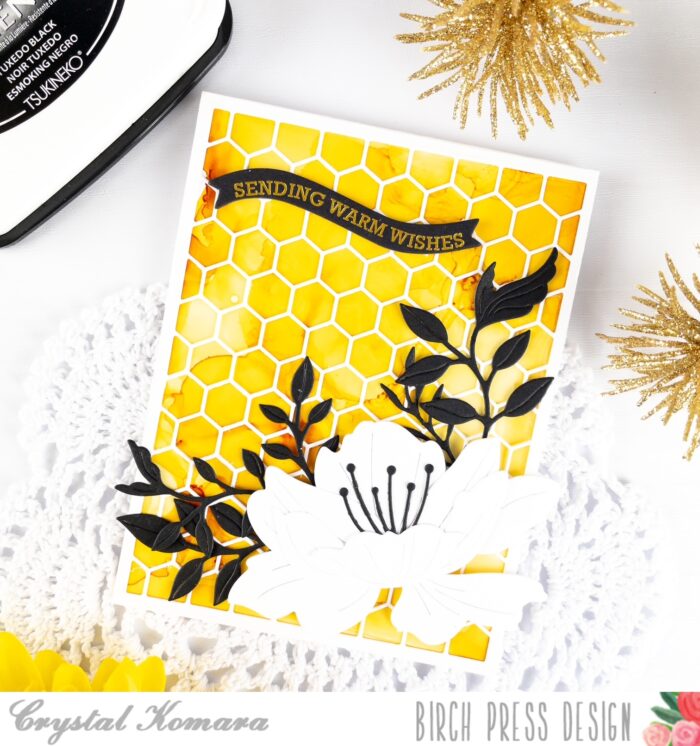
The base of this A2 sized card is made from 100 lb. Neenah Solar White Smooth cardstock. First, I created an alcohol ink background from Butterscotch Ranger Adirondack alcohol ink on Yupo paper. Once that dried, I adhered the background directly to the card base.
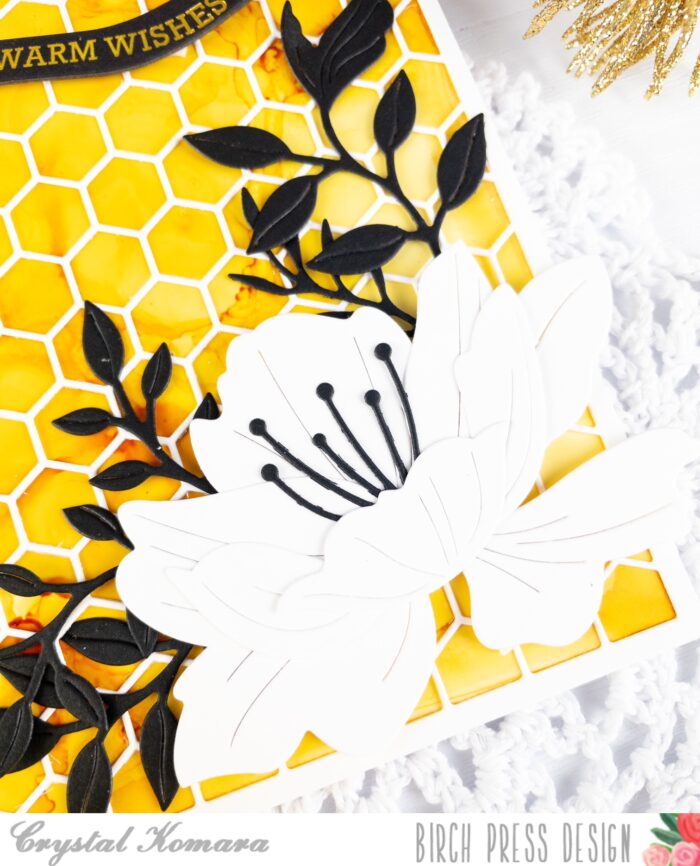
Using the new Honeycomb Plate, I die cut the honeycomb frame from white cardstock. I adhered the frame to the card using a very fine-tip liquid glue. Next, using the Perky Bloom Contour Layers die, I created the flower. I die cut all pieces of the Perky Bloom Contour Layers die from white cardstock to create a solid white flower (minus a black stamen) that would pop against that bold alcohol ink background. I adhered the layers of the flower together and adhered the flower to the lower right corner of the card.
Hello everyone! Rosemary here on the blog today with a sunny card that would brighten up anyone’s day. Let’s have a look at what I made.
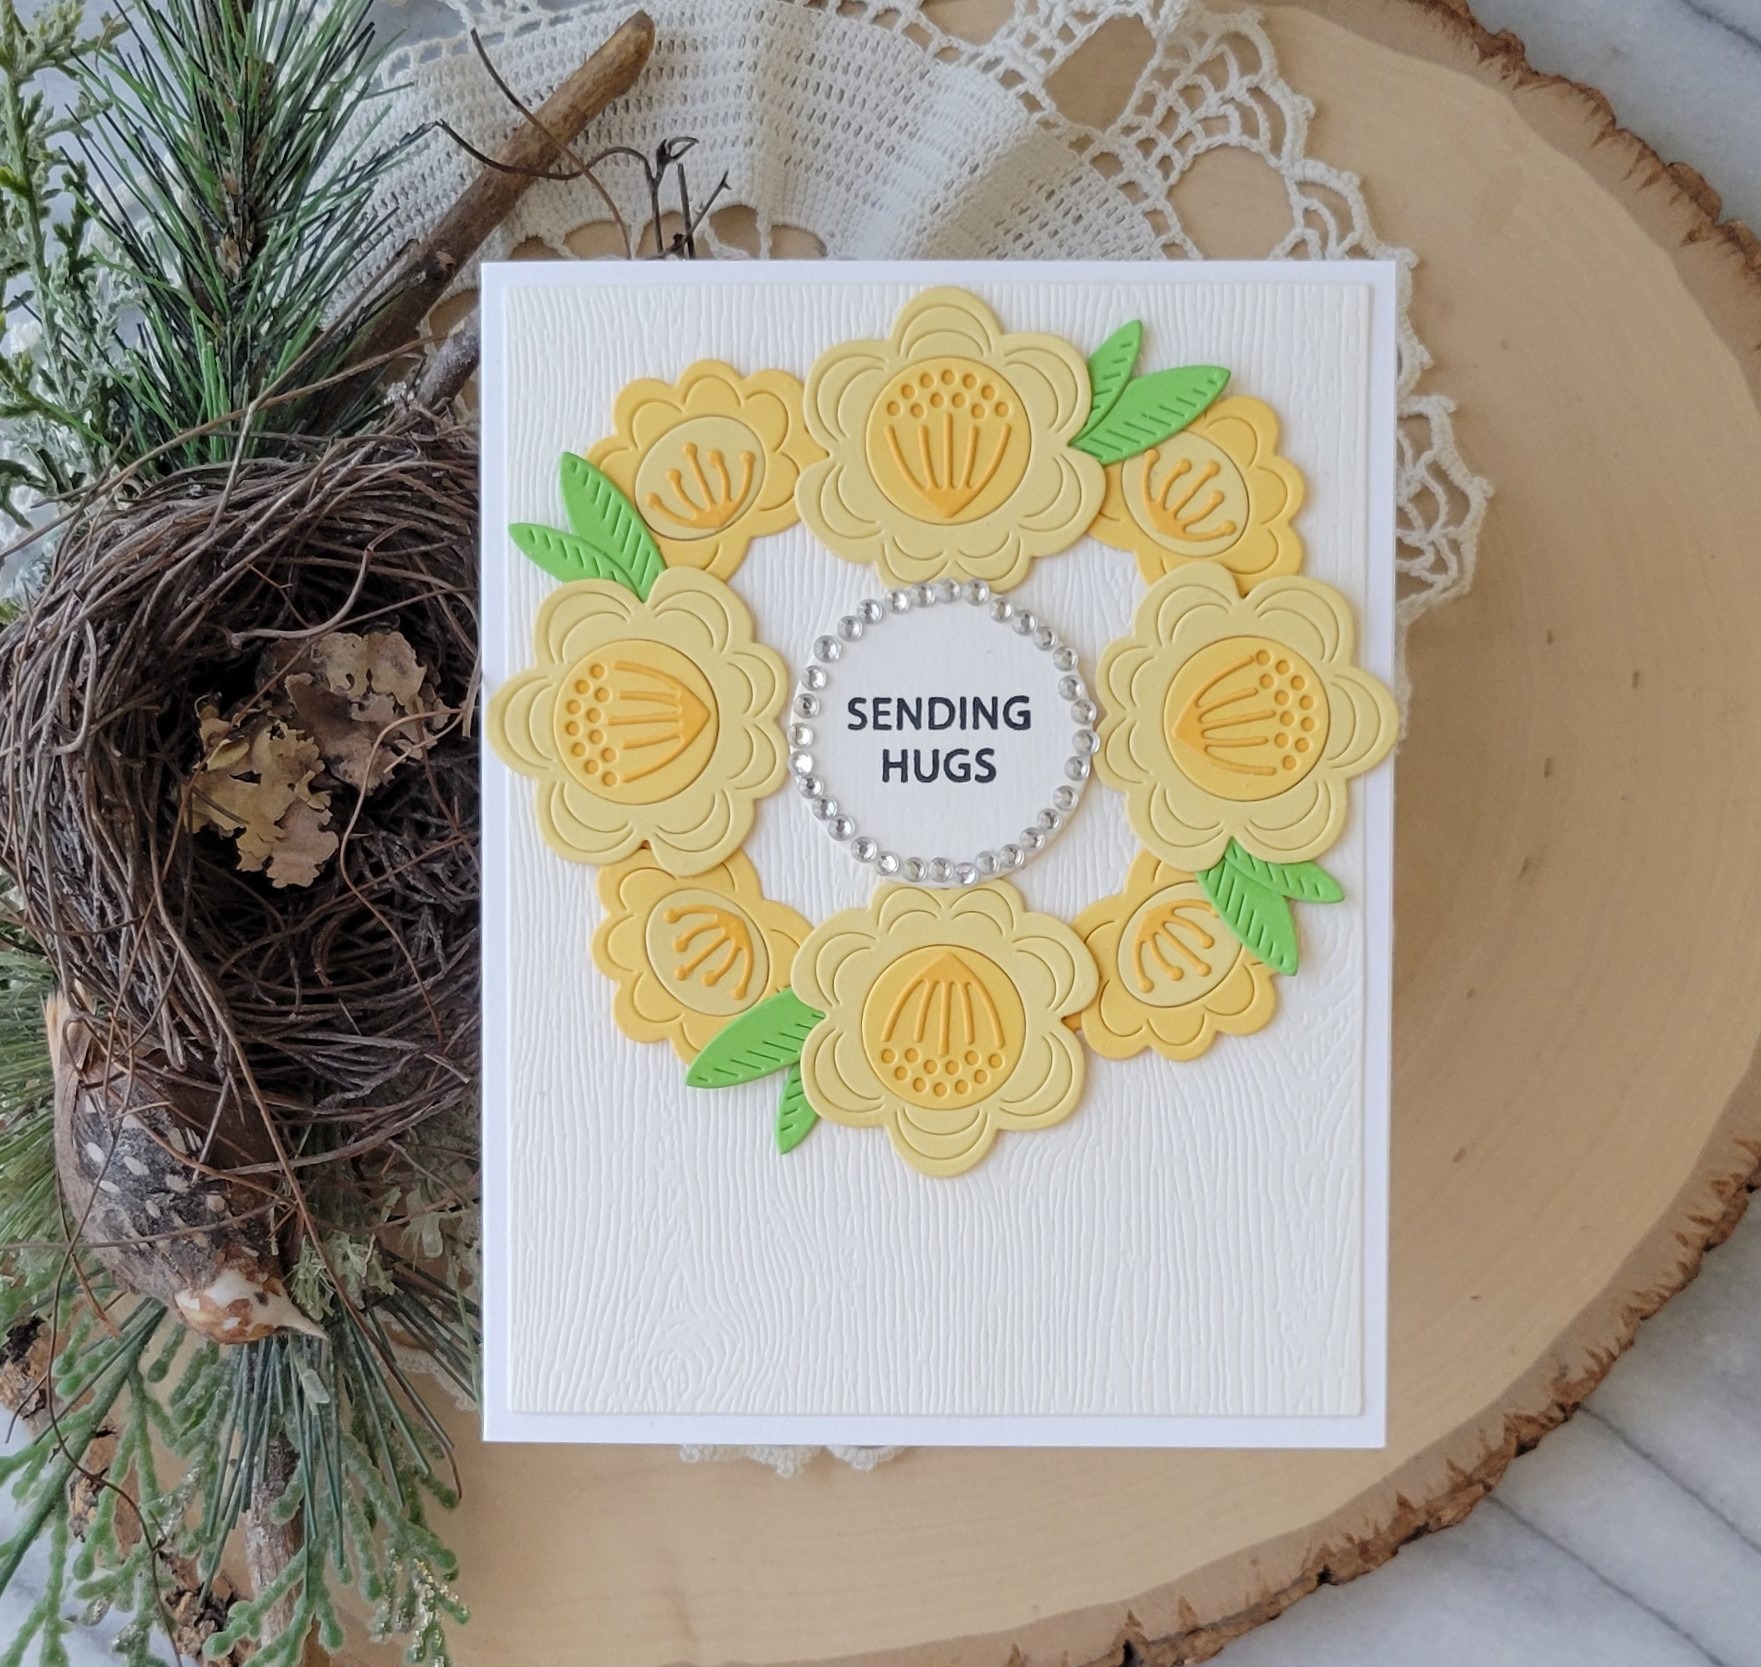
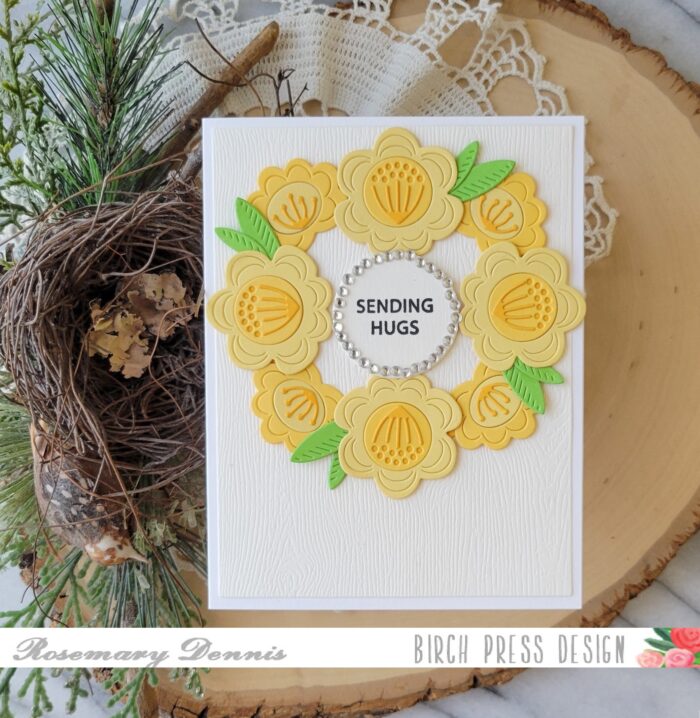
There are so many pretty flowers in the new Block Print line that it is hard to decide which one to use! For this card I decided to use the Block Print Fun Floral die set. One of the things I noticed about this set of dies and the resulting flowers is that they would be perfect for a wreath!
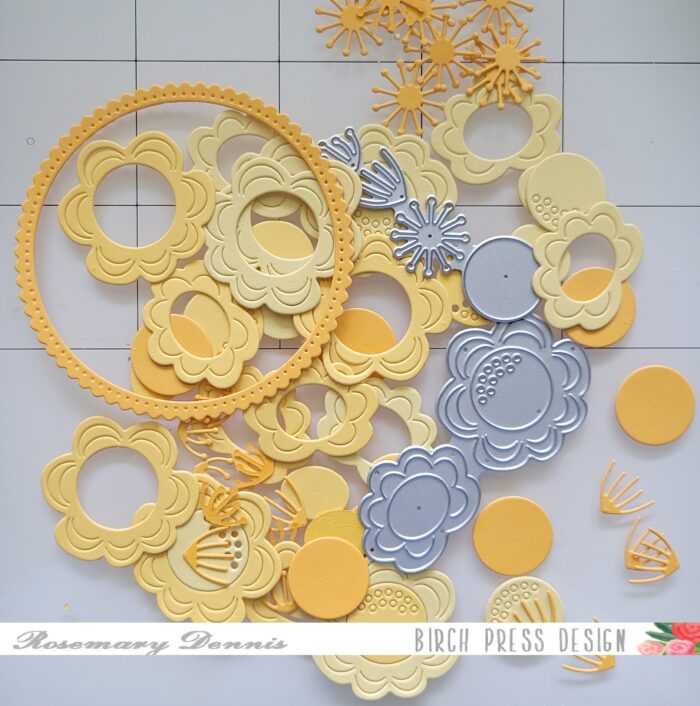
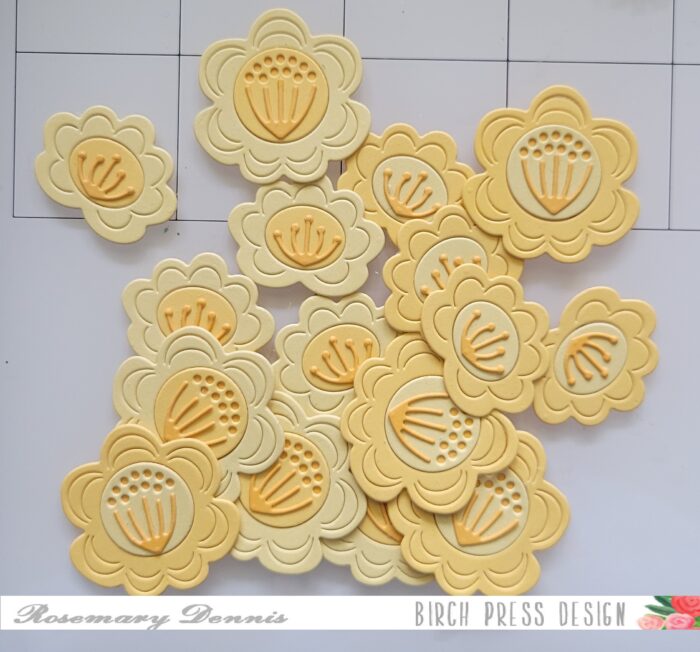
I started by diecutting a circle using a die set from Poppystamps (our sister company) from bright yellow cardstock from the Memory Box Sunshine. The rest of the pieces were die cut from various shades of yellow from the same pad.
I then assembled all the flowers by alternating colors. When I was done I had lots and lots of flowers to use for my wreath. Below is a photo of my pile of flowers.
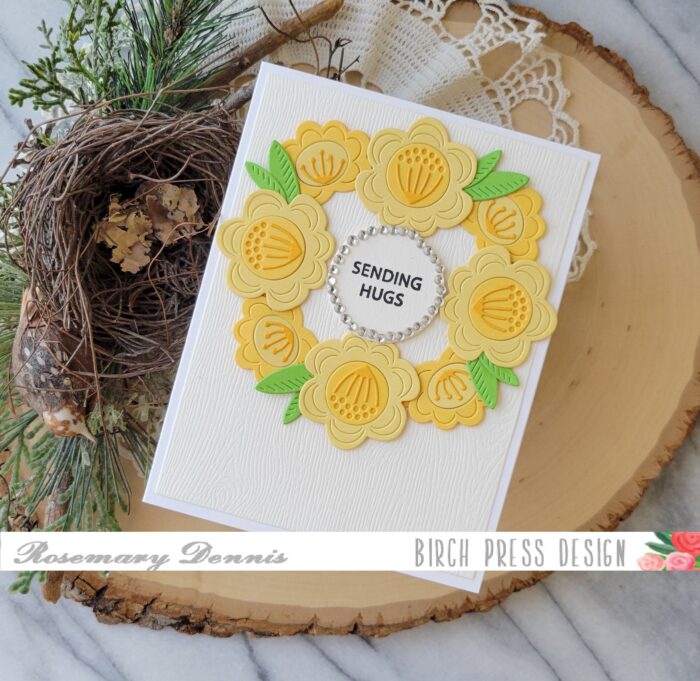
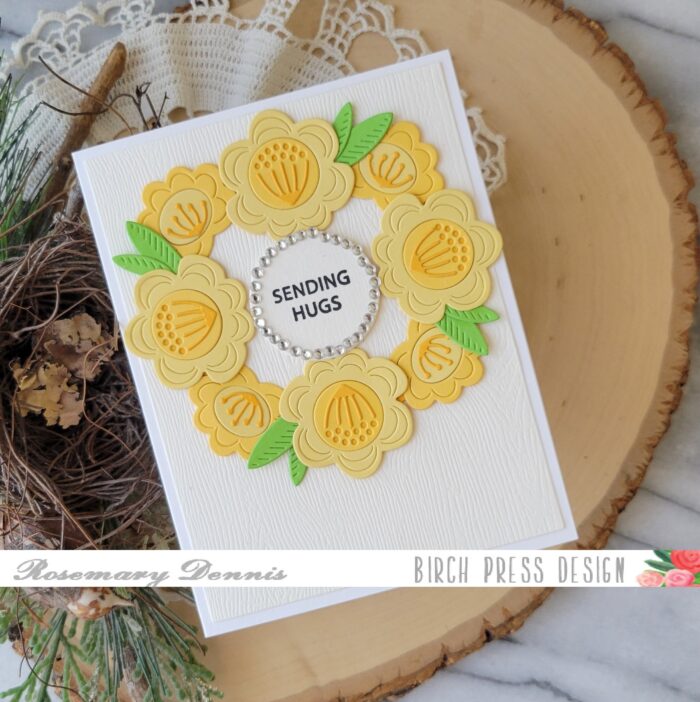
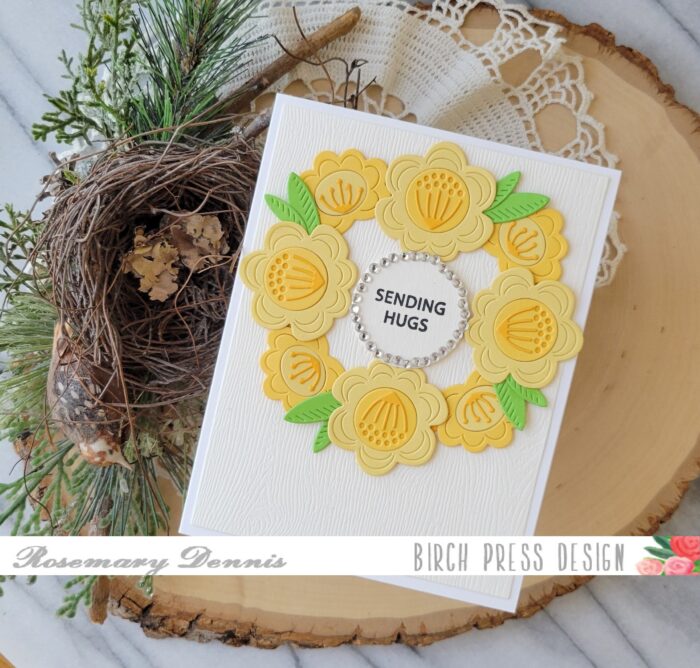
I die cut some cream Memory Box woodgrain cardstock for my background and then adhered the die cut circle to the panel. I flowers were arranged with the large flowers at the top, bottom and sides and the smaller flowers in the gaps that were left.
To break up all the yellow I added some bright green leaves that I cut with the leaf die from the Block Print Stems and Berries die. I finished off the card with the sentiment from the Rainbow Days Lingo Note stamp and die set that I surrounded with lots and lots of clear Fairy Jewels.
I love how my fun and bright wreath turned out! I hope you enjoyed learning how I created it. Thanks for stopping by and have a wonderful day.
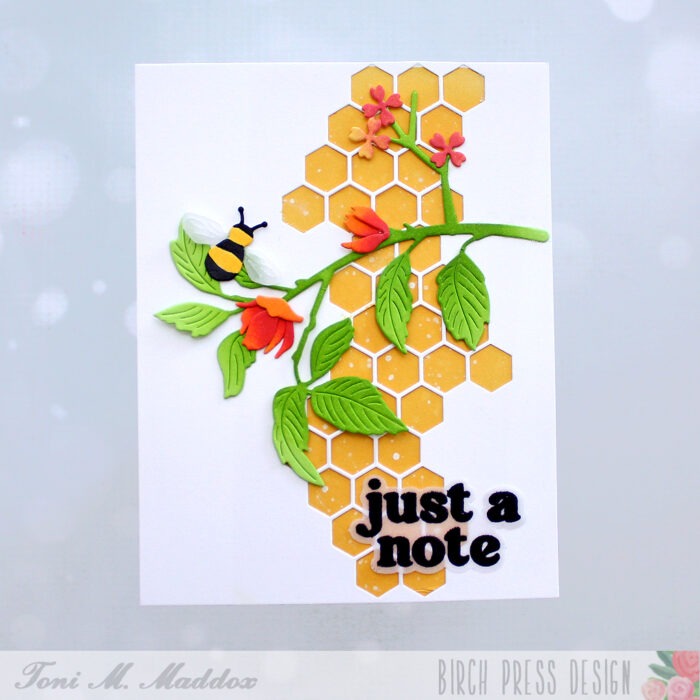
Greetings, friends! I love this time of year when it’s warming up, flowers are blooming and bees are happily buzzing along. Heavenly!
Thus, I was so excited to receive the latest release which is all about the bees!
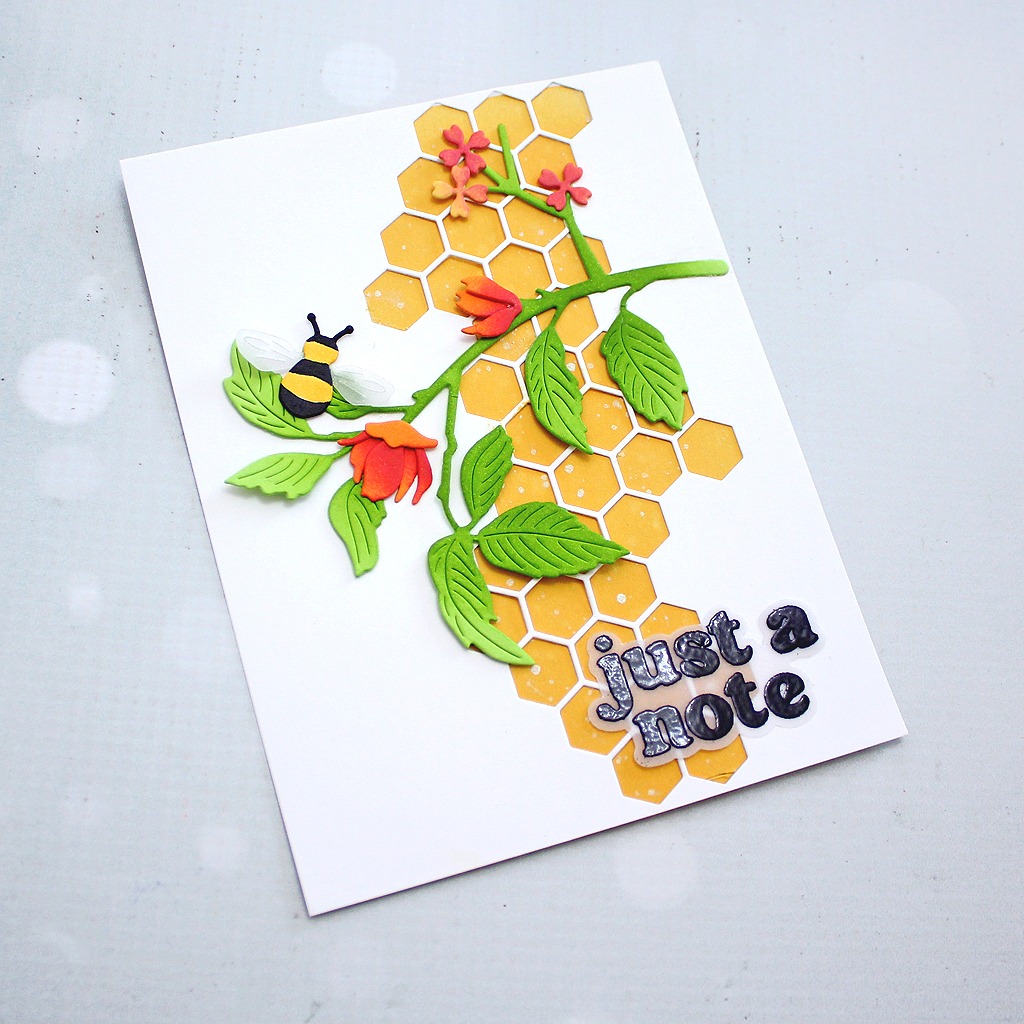
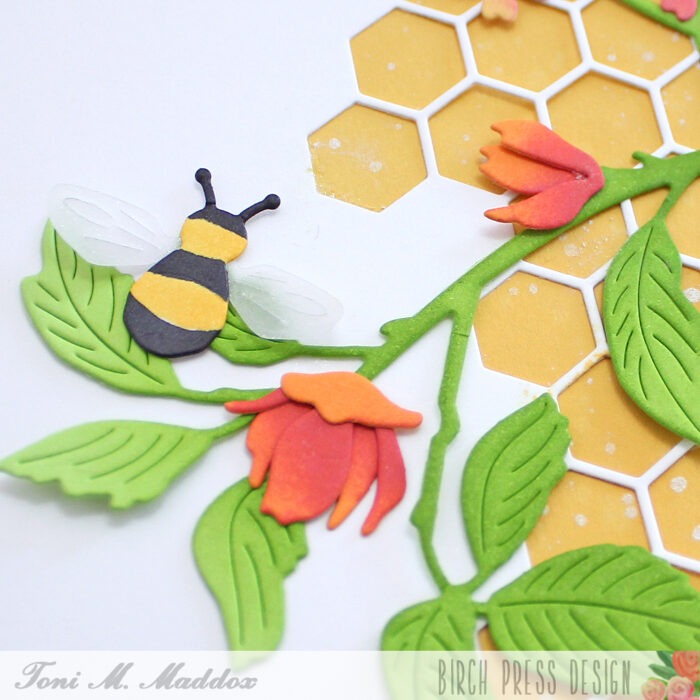
I think my favorite is the Honeycomb Cut Out die. Just imagine patterned paper or sponging different colors–swoon.
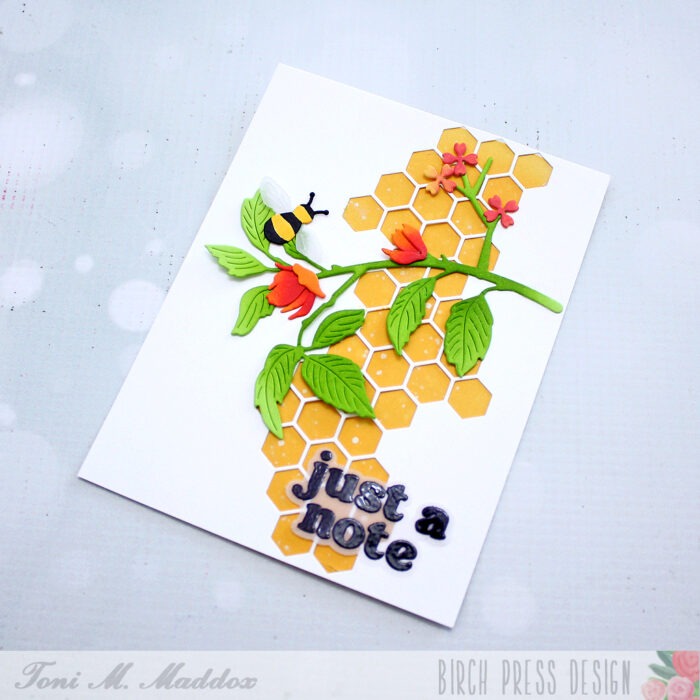
I used Memory Box Golden Wheat cardstock behind the cut out, sponging some Catherine Pooler inks and spattering white for added interest.
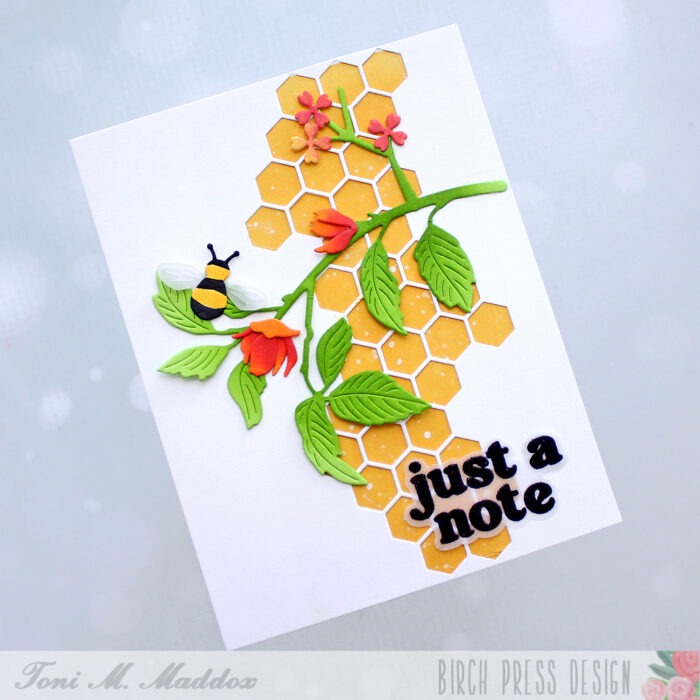
To coordinate with the background honey colors, I used Memory Box Key Lime for the Abundant Branch with sponged Golden Wheat flowers. The way the branch pops is amazing.
I colored up the Block Print Buzzing Bumblebee with Copics. I applied a bit of Clear Wink of Stella to the vellum wings.
I used the same vellum for the backer behind the embossed Vintage Everyday Greeting.
I hope you enjoyed today’s card and have a great rest of your week!
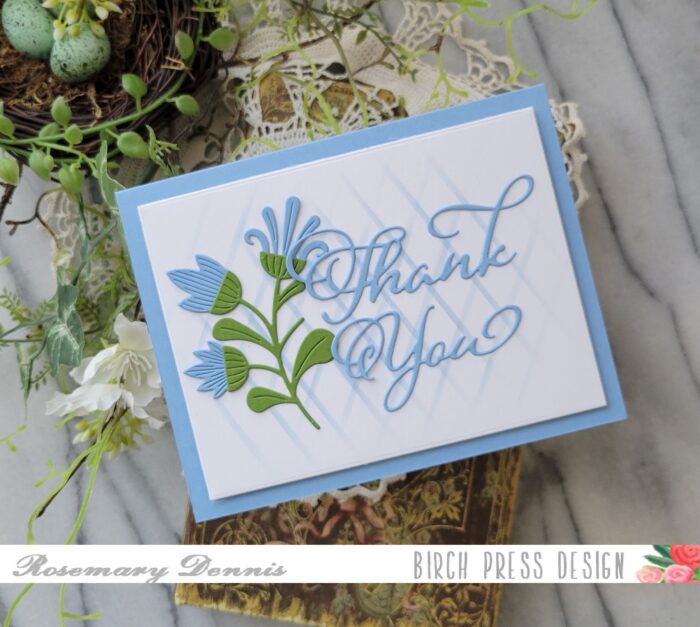
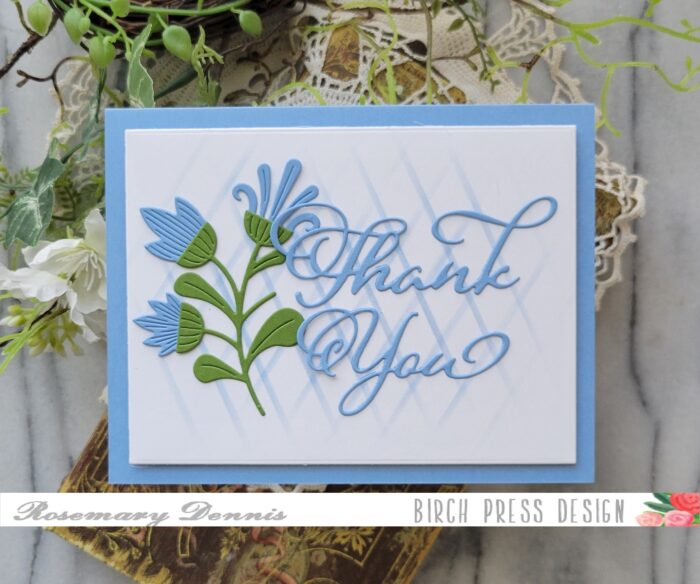
Hello and happy May! Rosemary here on the blog today with a fun and some what elegant thank you card. Let’s have a look at what I made.
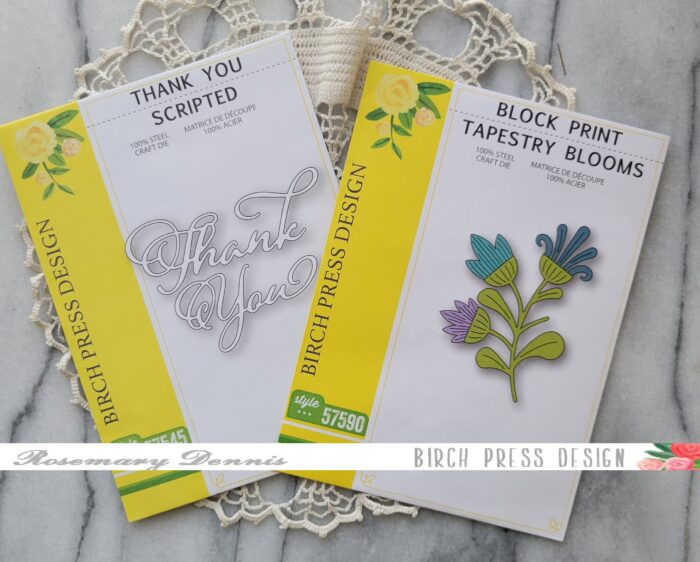
For this card I used the super pretty Block Print Tapestry Blooms die and the elegant Thank You Scripted die set. I went with a light blue and green color combo for this card.
To keep things simple I die cut all the flowers from a light blue Memory Box cardstock and the stem from the dark green. Then I assembled my flower stem. The sentiment was also die cut from the same light blue.
Time to figure out my layout and it was at this point I decided to pull out the Linear Lines stencil and create a simple partial diamond pattern on my white cardstock base. I used a light blue ink that coordinated with the blue cardstock I used for the flowers and the sentiment.
Now it was time to put the card together. I used cardstock in the same blue for my card base and adhered the background panel with thin foam squares. I then adhered the flower stem with liquid adhesive. Finally I added the sentiment. I purposefully only added glue to the main part of the sentiment to allow for some appearance of movement in the swirls on the sentiment.
I really like the slightly monochromatic look of the card and the simplicity. I hope you enjoyed today’s project. Thanks for stopping by and have a wonderful day!
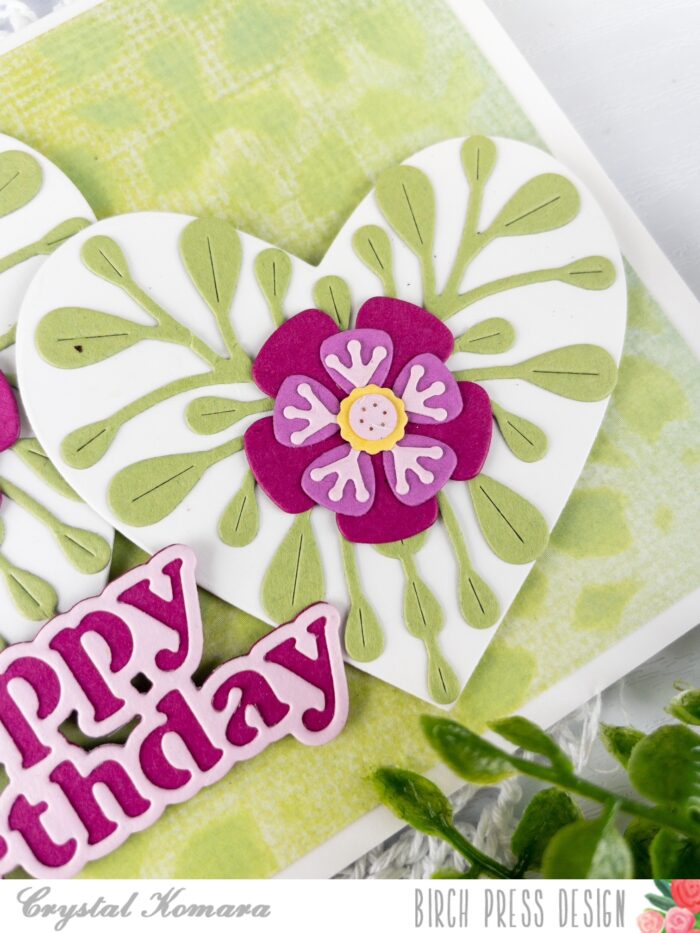
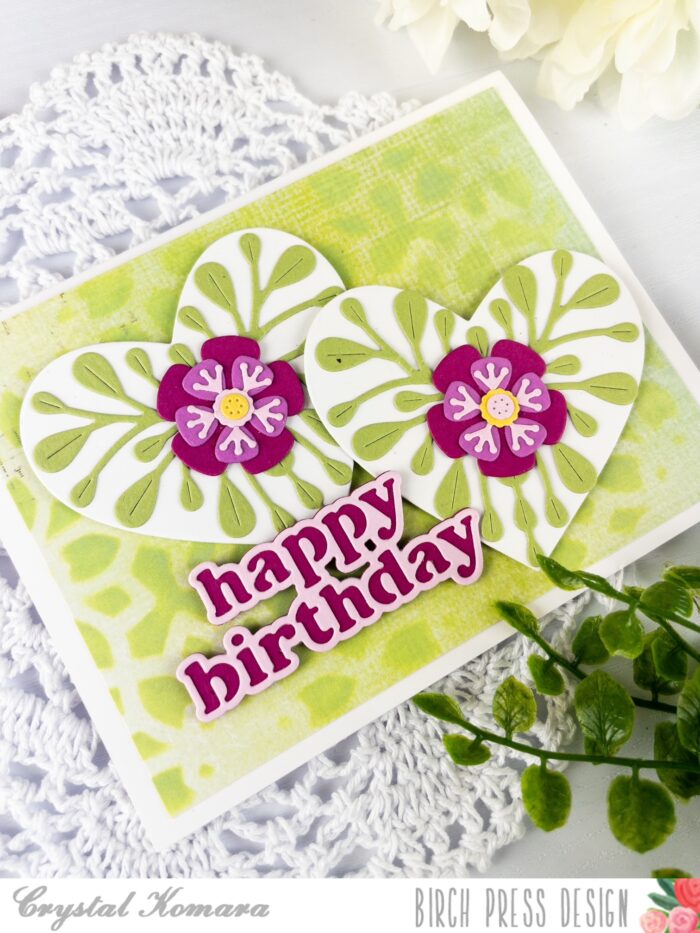
Hello friends and happy Monday! I hope you all enjoyed a wonderful weekend. It has been incredibly rainy here in the Northeast where I live (Massachusetts). This is Design Team member Crystal Komara here with you today sharing my first card made using the new Block Print Garden Heart dies.
The base of this card is made with 110 lb. Neenah Solar White Smooth cardstock.
Let’s make this card:
I cut a 5 1/4″ x 4″ piece of Neenah Solar White Smooth cardstock and used Layer A of the Viola Plate Layering set as a stencil. I stenciled directly over the steel die using Ranger Distress Oxide ink in the color Twisted Citron.
I die cut the Block Print Garden Heart itself from white cardstock. I die cut the leaves of the heart from green cardstock .
I die cut various pieces of the flower from three different colored pink cardstock.
I die cut the center of the flowers from yellow cardstock.
I adhered the flower pieces together using a fine-tip liquid glue.
Once both flower hearts were assembled, I adhered them to the card front using 3M foam adhesive for added dimension.
Lastly to create the sentiment, I die cut the Happy Birthday Vintage Sentiment from two different colored pink yardsticks. I adhered the two layers together with a fine-tip liquid glue. Then I adhered the sentiment to the card using 3M foam adhesive.
I really love this beautiful new Block Print Garden Heart die set and can’t wait to create with it again! Thanks for visiting and have a wonderfully creative day!
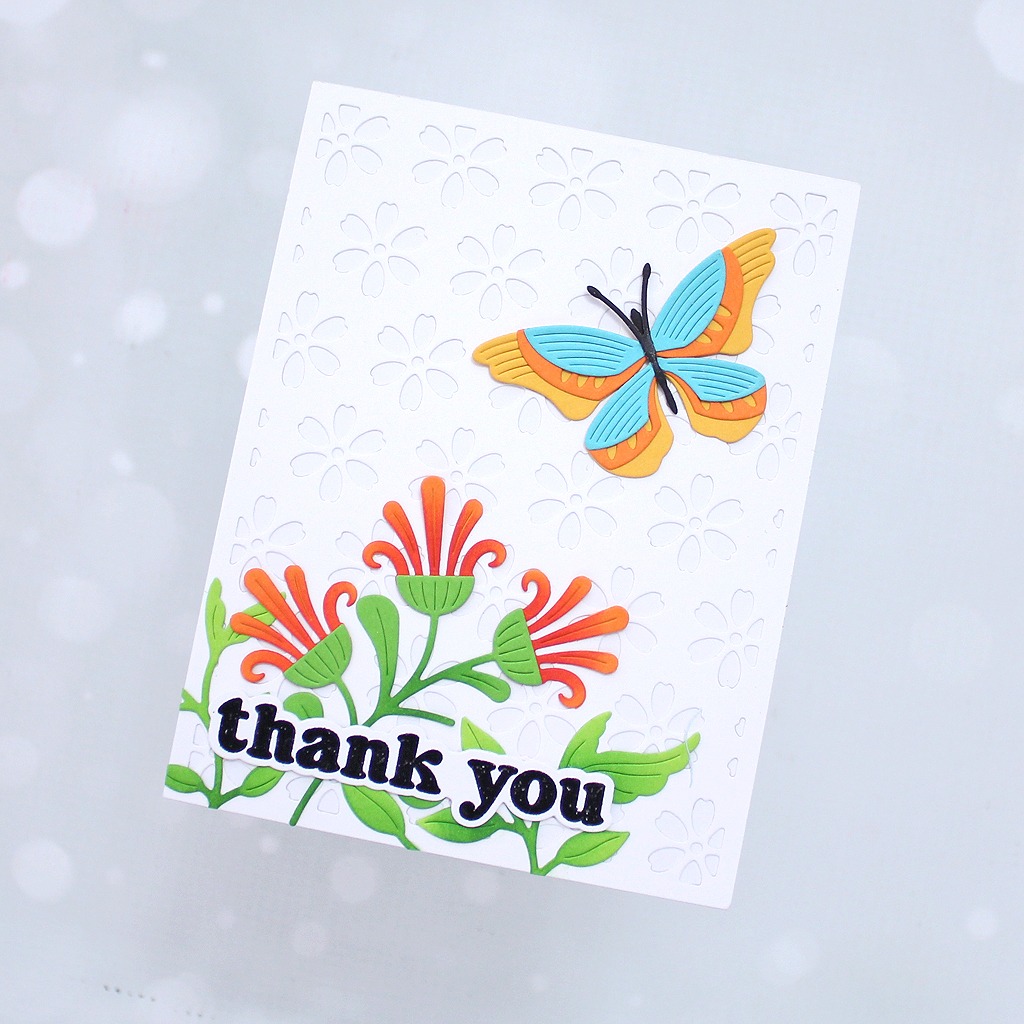
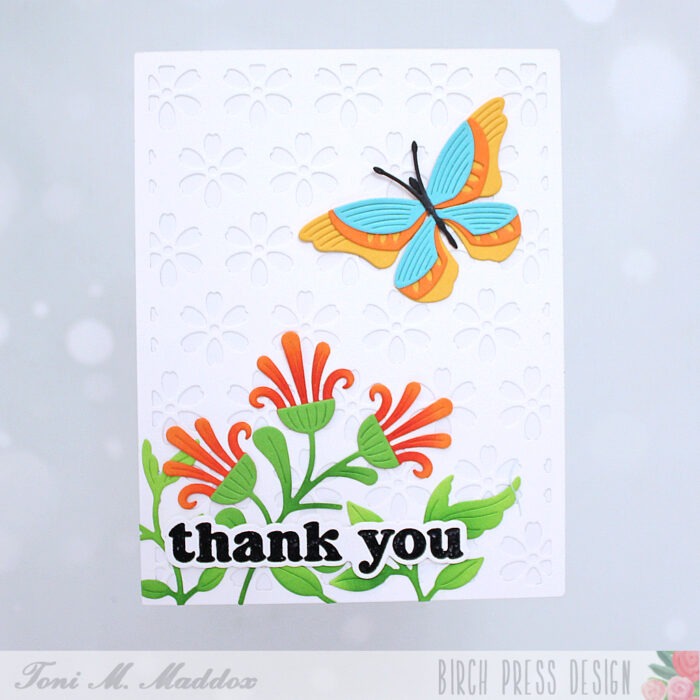
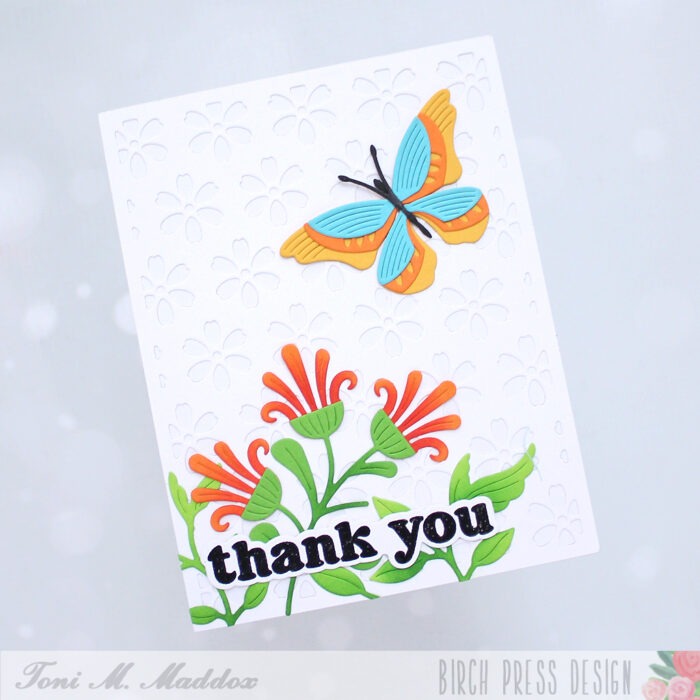
Hello, my friends! Toni here with a heavily layered floral thank you.
I especially enjoyed making today’s card because I used up some leftovers, including the sentiment and the background coverplate, in addition to working with fabulous new dies!
To start, I adhered the Flora Layer Plate to a white card base.
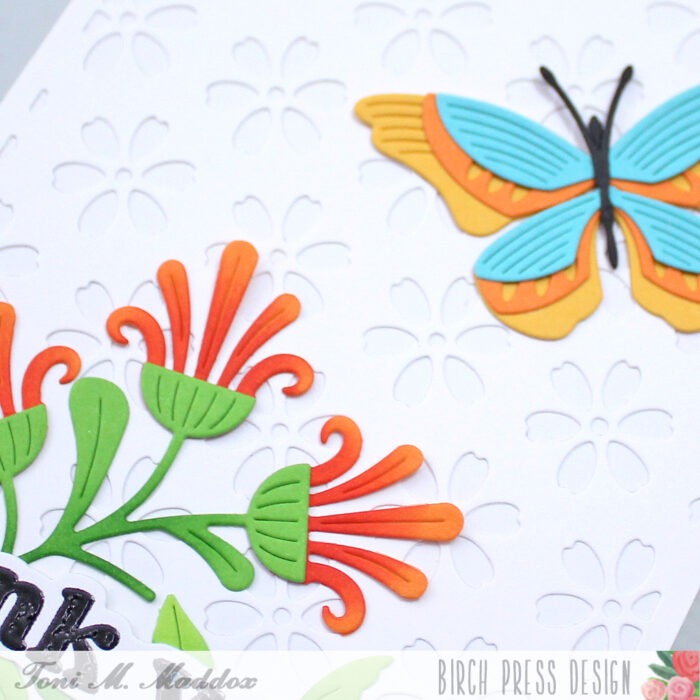
Next, I assembled the Block Print Brilliant Butterfly and Block Print Tapestry Blooms using Memory Box Key Lime, Leaf Sprout, Orange Peel, Pool Party & Summer Squash cardstock with Catherine Pooler Inks.
I decided the bottom of the card needed a bit of filler behind the embossed Vintage Everyday Greetings sentiment. So, I cut out Foliage Bunch from Memory Box Key Lime and sponged it before adhering it to the bottom of the card front.
I hope you enjoyed today’s card and have a great rest of your week!
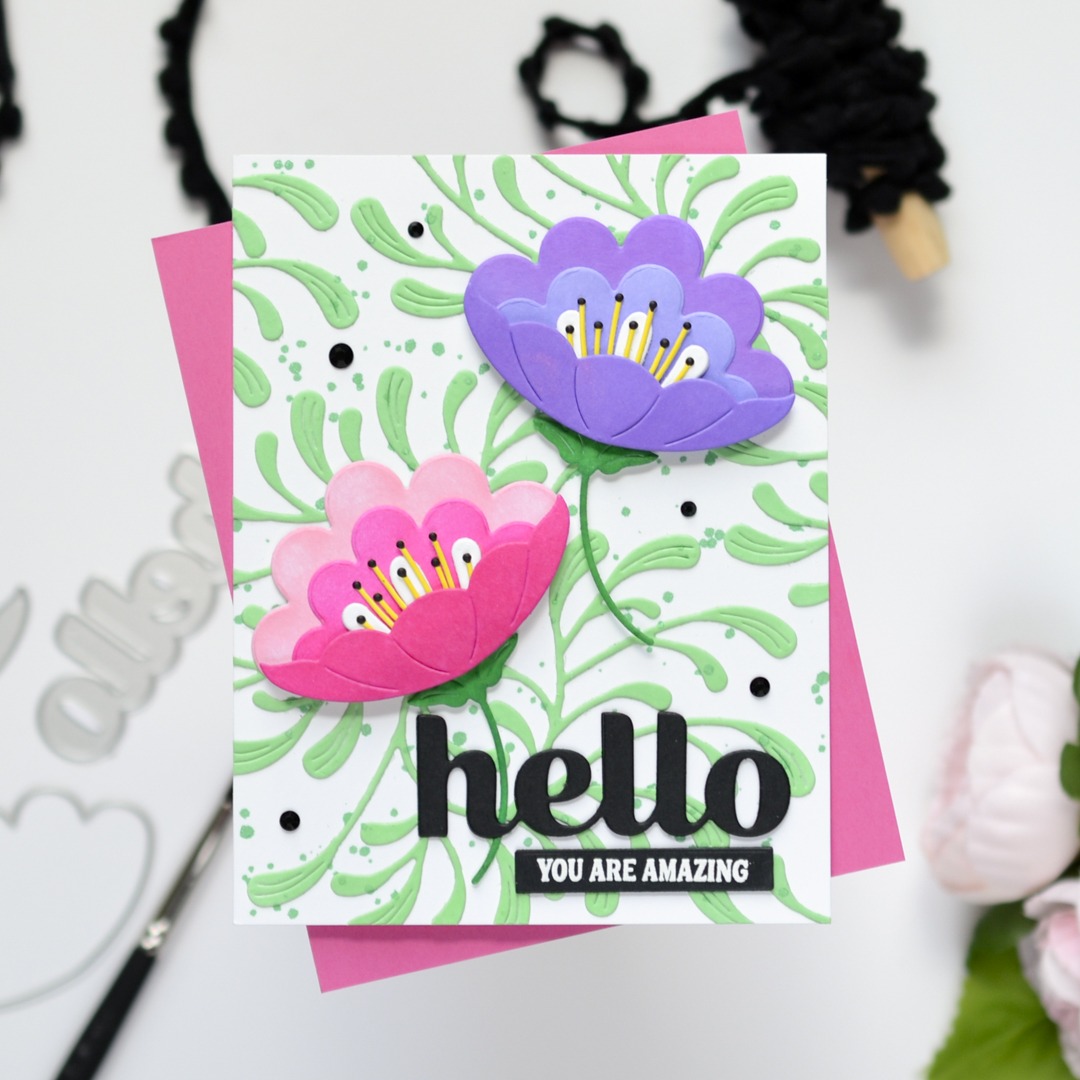
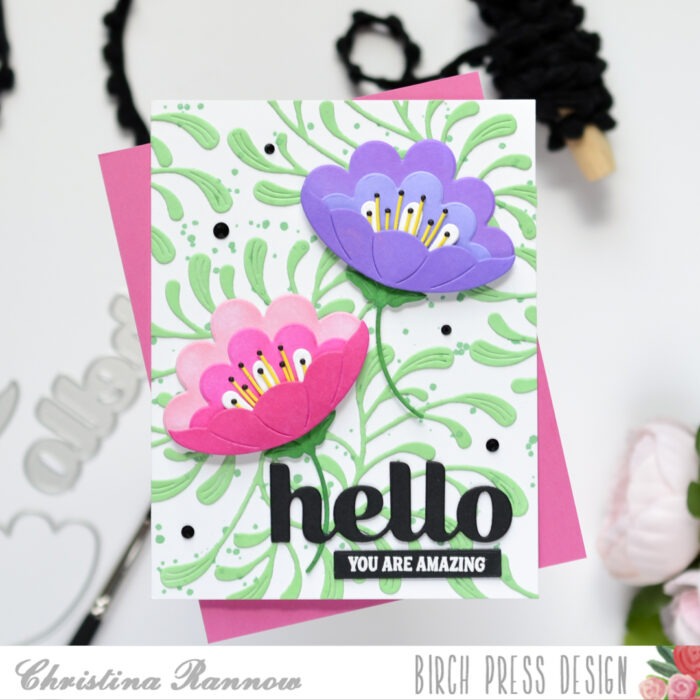
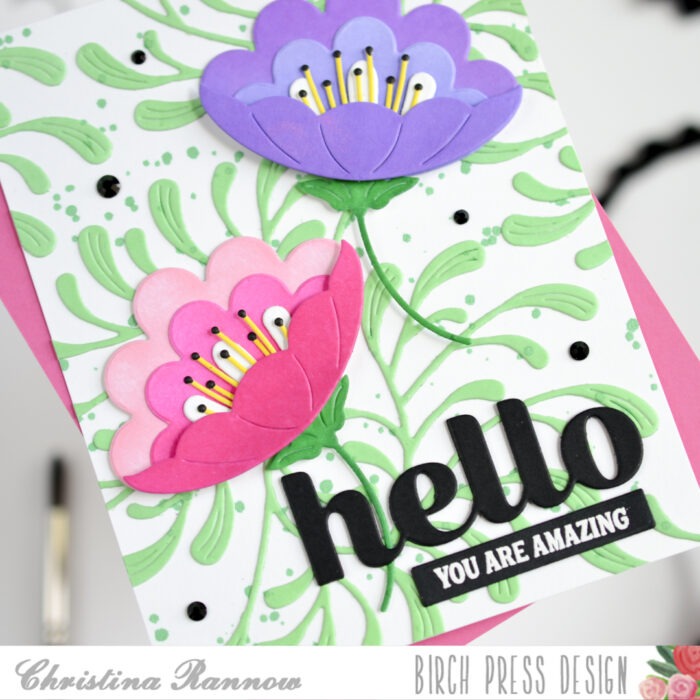
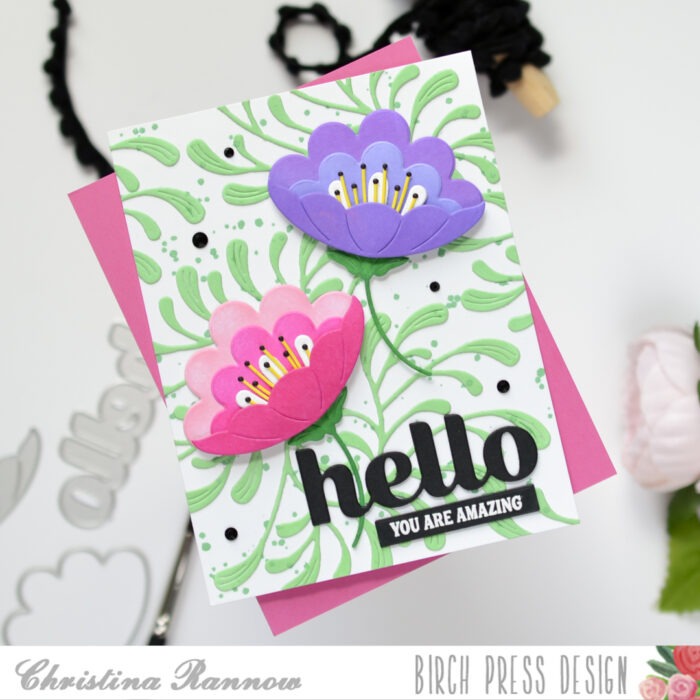
Hi, friends! Christina here to share a vibrant card design showcasing the gorgeous Block Print Passion Fruit Flower dies. These blooms are big and make such an impact all on their own that not much more is needed to create a beautiful card that could be used for any occasion.
To create this vibrant design, I ink blended the Passion Fruit Flower die cuts in bold, bright colors and paired them with a simple background made with multiple Ornamental Branch die cuts. Follow along below as I explain the steps I took to create this card.
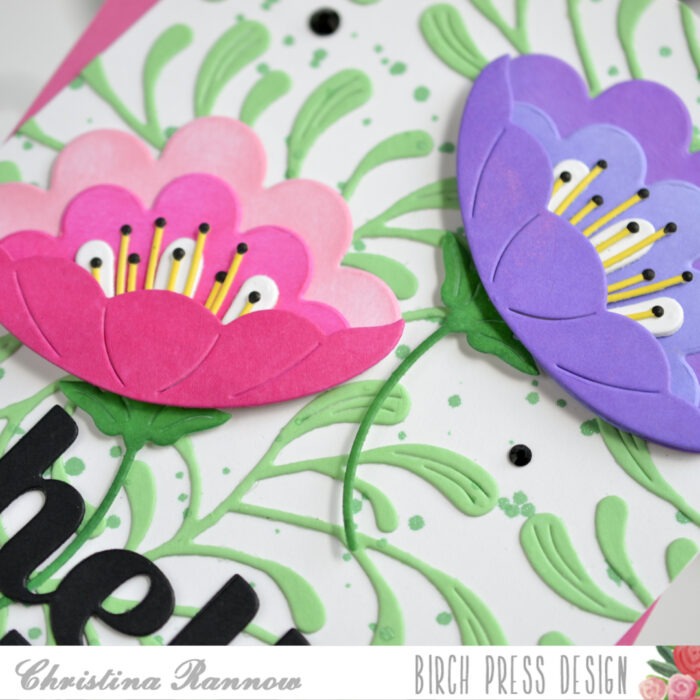
My first step was to die cut, ink, and assemble all the elements for the passion fruit flowers. I die cut everything from white cardstock and then applied ink to each piece with blending brushes. I used Pawsitively Saturated Inks and chose three shades of pink and three shades of purple for the blooms. I wanted a light, medium, and dark shade for both colorways. I left one of the center layering pieces white and then inked the center stamen pieces yellow before coloring the very tips with a black Copic marker. I used a medium green shade for the stems and then moved on to assembling the die cuts. I assembled and secured the flowers using glue for all the layers except the last bottom petal, which I secured with foam squares for extra dimension.
Next I created the background. I die cut the ornamental branch four times and inked each one using a light green ink. I arranged them on a white A2 cardstock panel, cutting them and turning them to fill the panel before gluing them in place. I trimmed anything that overhung the edges of the panel with large shears. Then I spattered the panel with a coordinating Distress Mica Stain, Frosty Mint.
With the background and the flowers completed, I moved on to assembling and finishing the card design. First I attached the flowers with glue. Next, I added a greeting and sentiment. I die cut the Hello greeting from black cardstock twice and stacked them before attaching it to my card design with glue. I heat embossed the small sentiment with white embossing powder on black cardstock and die cut it with a sentiment strip before attaching it under the greeting. Lastly, I added a few black gems across the background panel before attaching everything to an A2 card base.
Thank you so much for reading about this vibrant card design showcasing the gorgeous Block Print Passion Fruit Flower dies. I hope you’re inspired to try inking some die cuts for your next card design. See you soon!
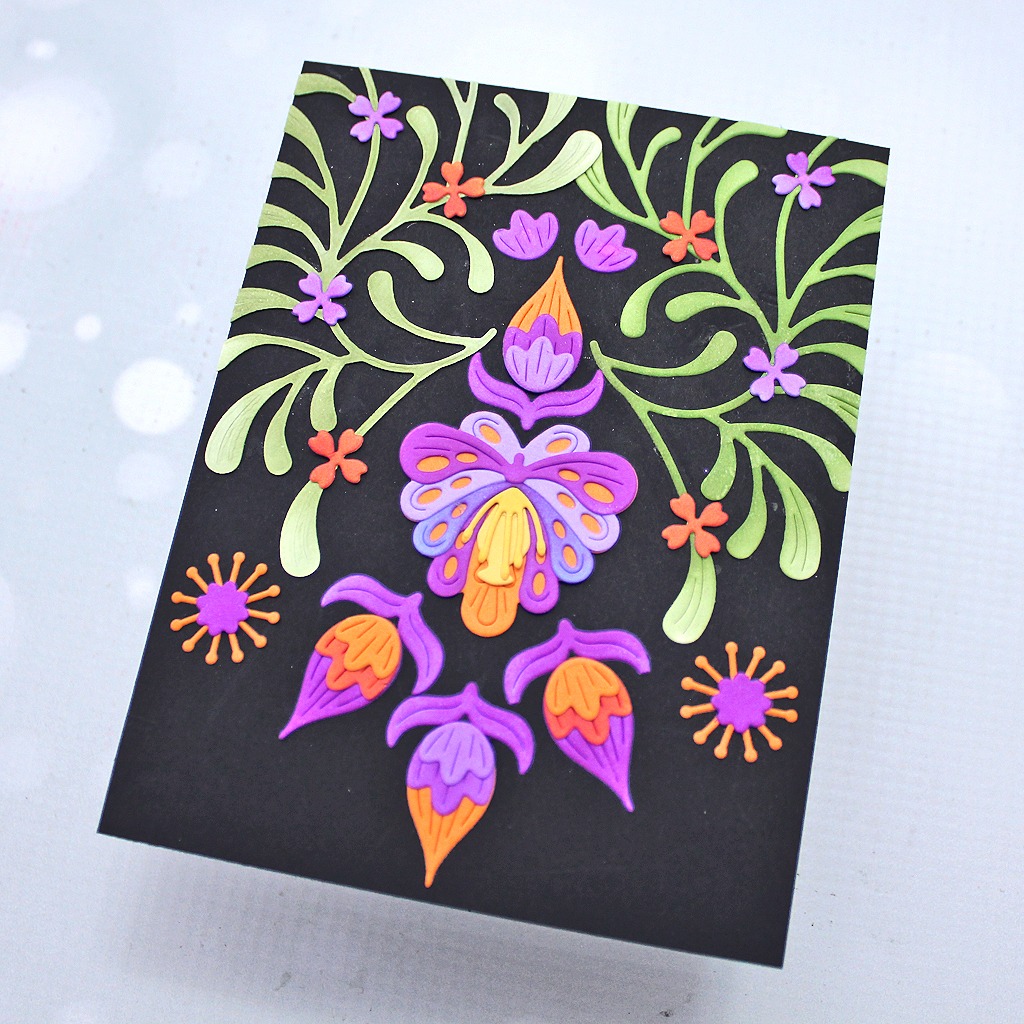
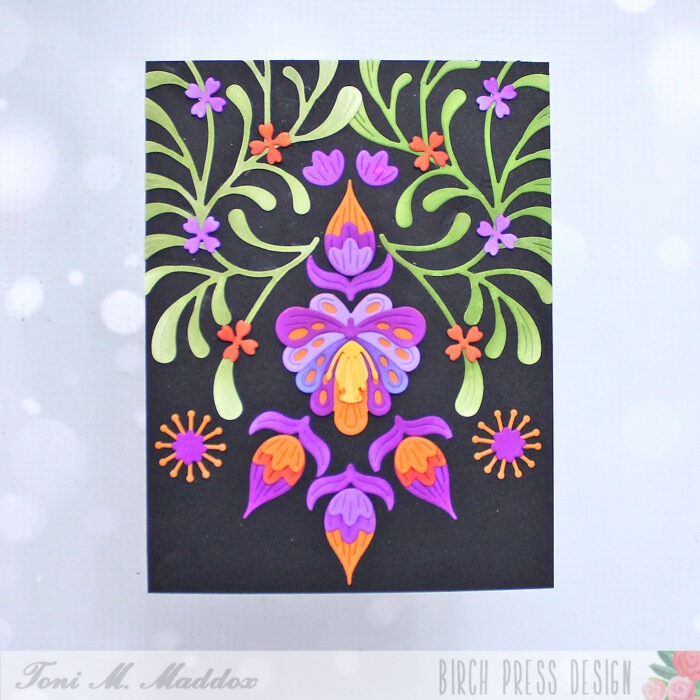
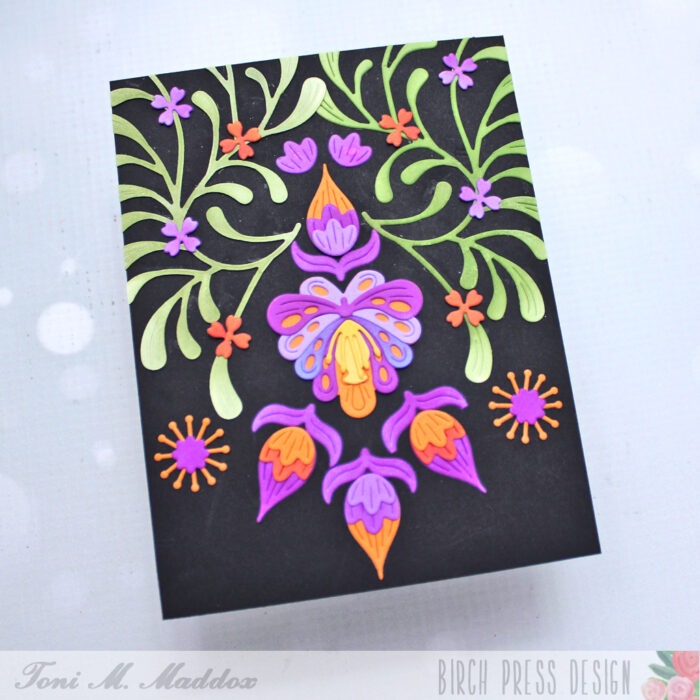
Hello, friends! Toni here again sharing a card inspired by henna tattoos.
I cut out the Ornamental Branch twice and then sponged each, one on the reverse side, with Catherine Pooler inks. I adhered these as mirror images on a black card front.
Next, I cut out elements from:
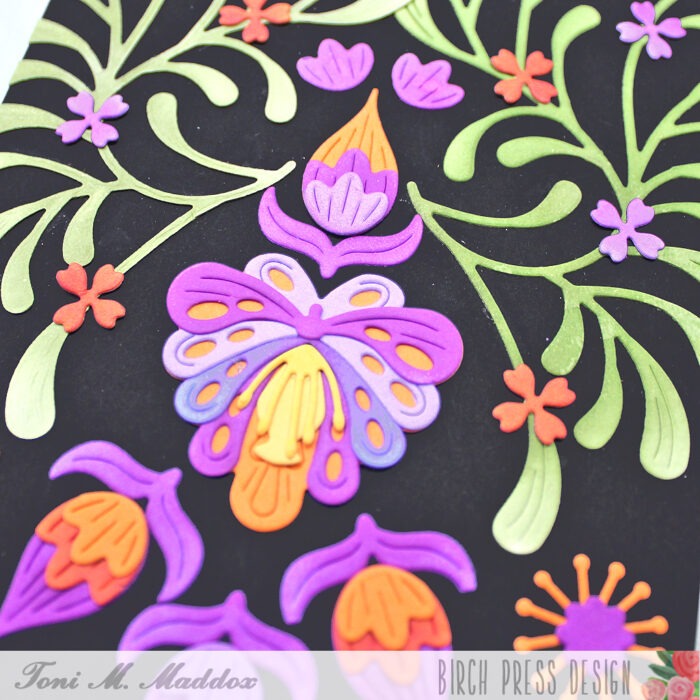
Block Print Lush Flower (central flower)
Block Print Fabulous Flourishes (pointy blossoms)
Block Print Fun Floral (starbursts)
Abundant Branch (tiny 4-petal blossoms), and
Block Print Star Flowers (starburst middles).
I used Memory Box Orange Peel, Lavendar Bloom, and Summer Squash cardstock, sponged with Catherine Pooler inks.
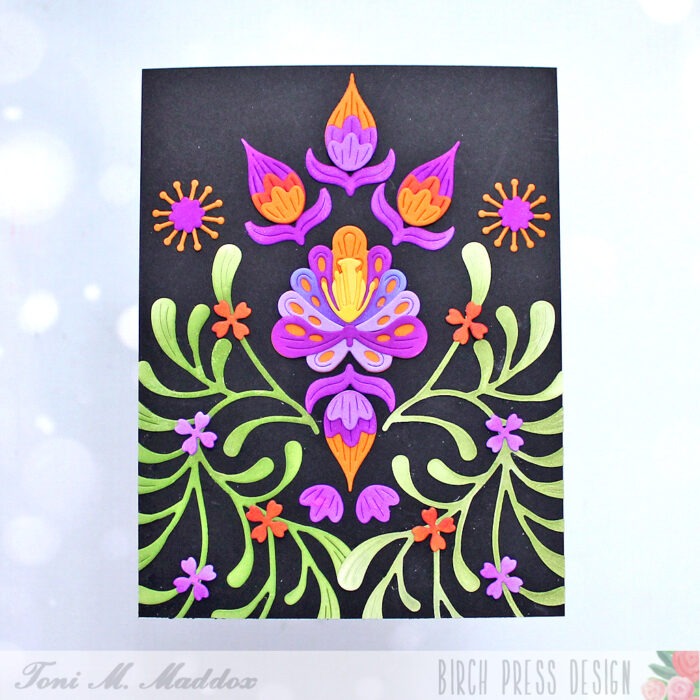
I played around with the layout, a lot, and realized that the card looked great the other way around too. Wow! Just imagine the possibilities!
I hope you enjoyed today’s card and have a great rest of your week!