Category: Foil Papers

  • Be Merry | by Crystal Komara

    Be Merry | by Crystal Komara

    Hello friends! This is Design Team member Crystal Komara here with you today sharing more holiday themed inspiration using products from the latest Birch Press Design Release. Birch Press Design never ceases to amaze me with its elegant layering dies, contour dies and foil plates. Some of my most loved cards have been as a result of these gorgeous and elevated products.

    Card details:

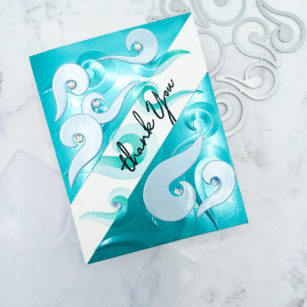
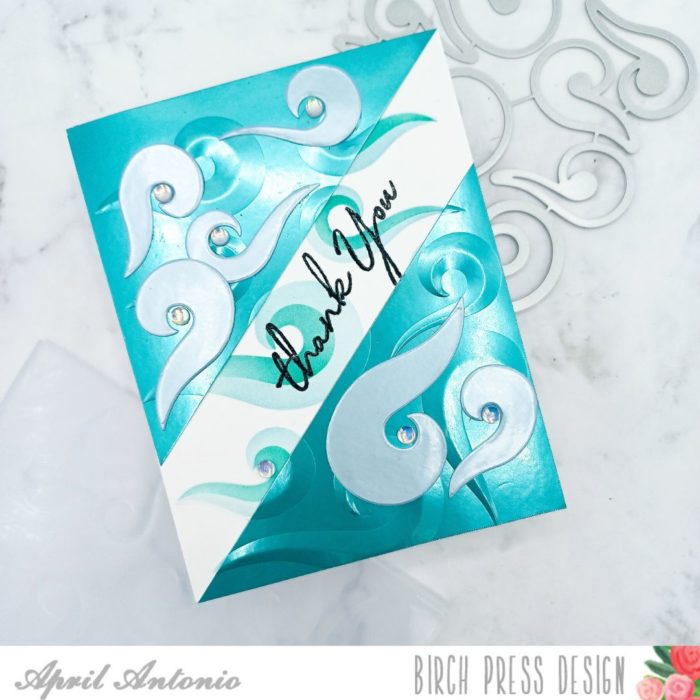
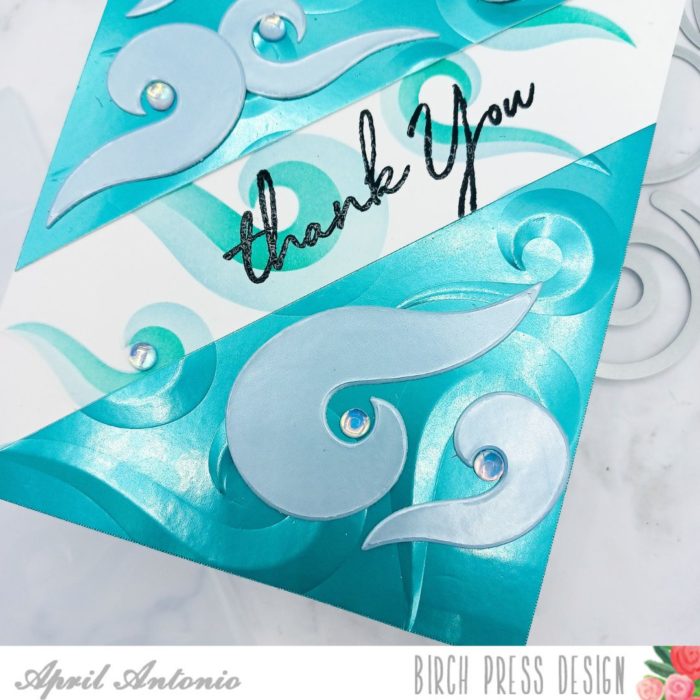
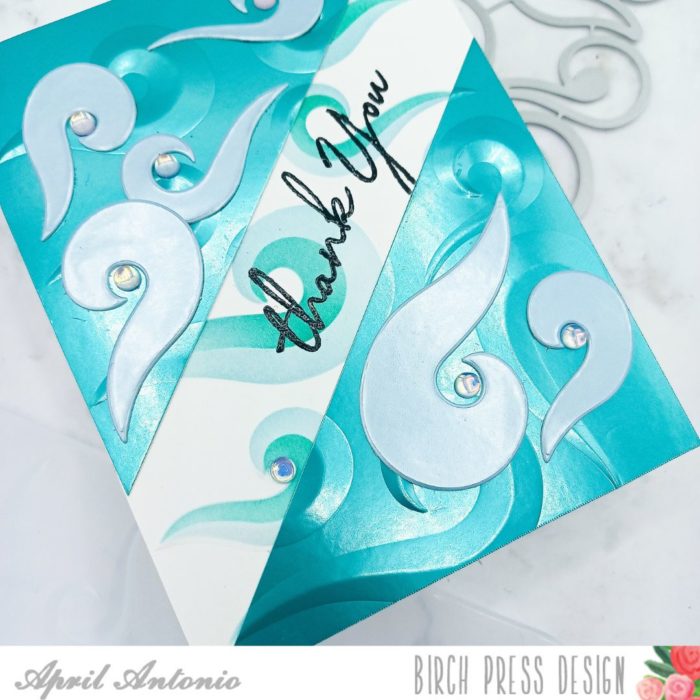
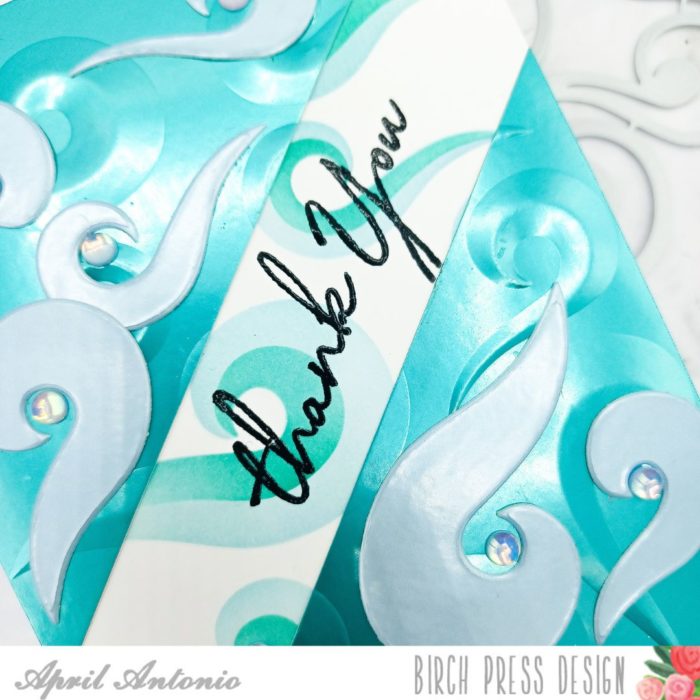
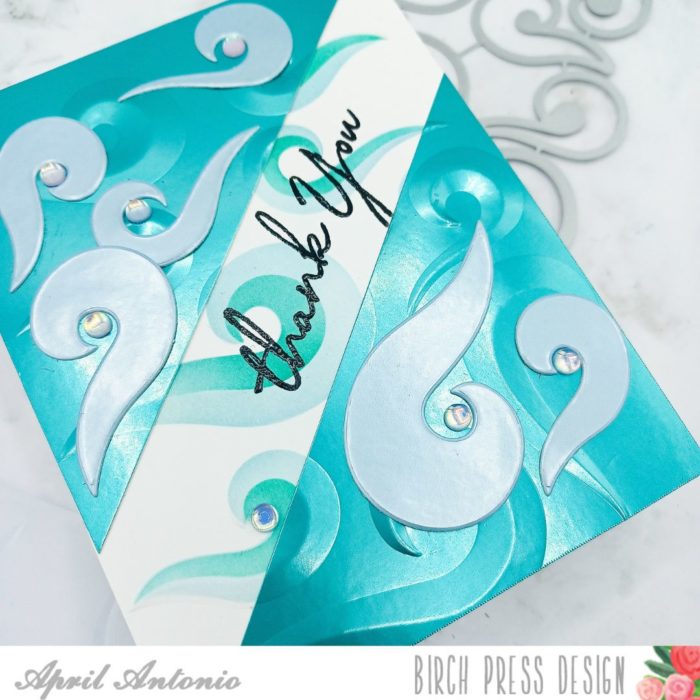
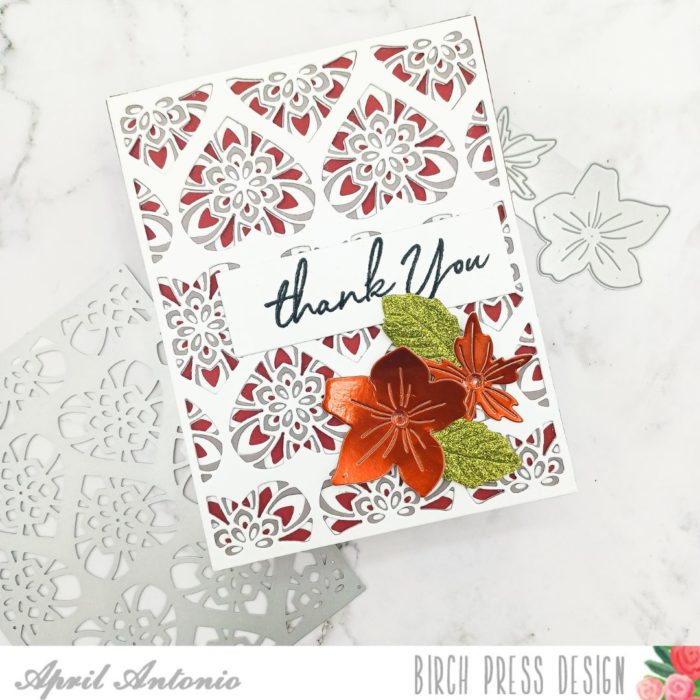
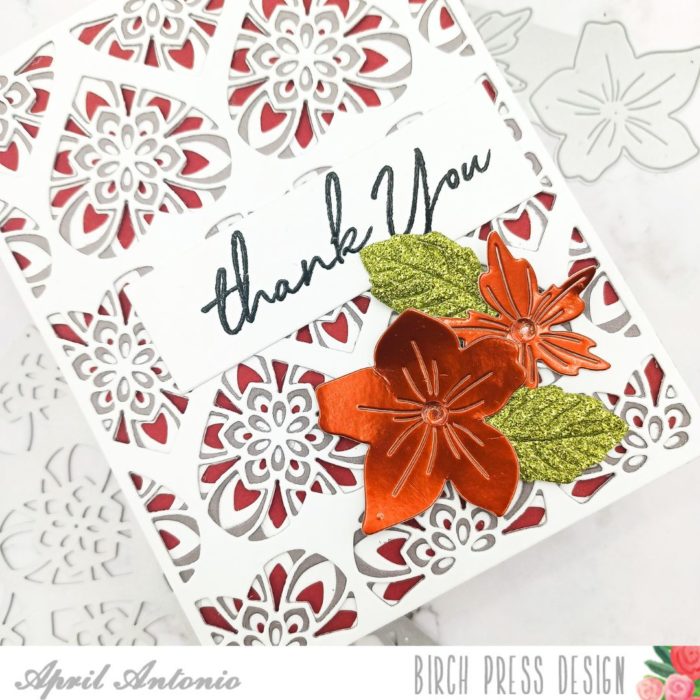
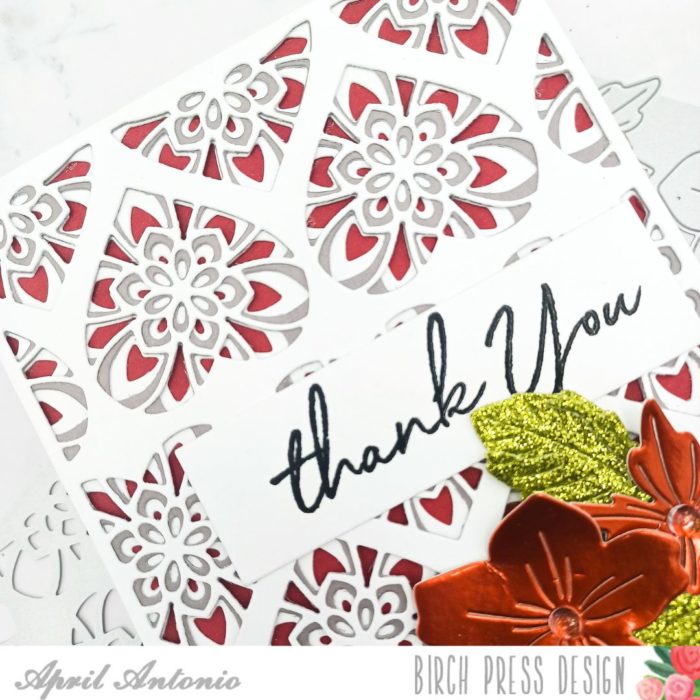
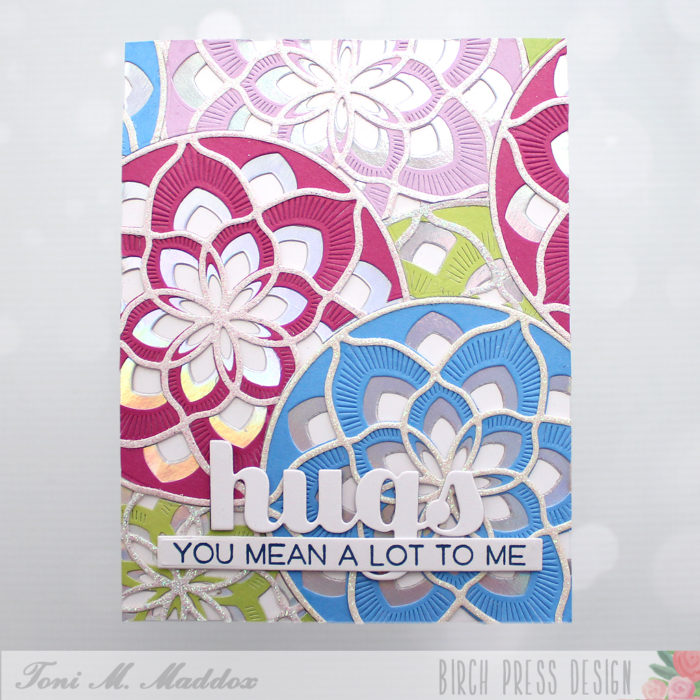
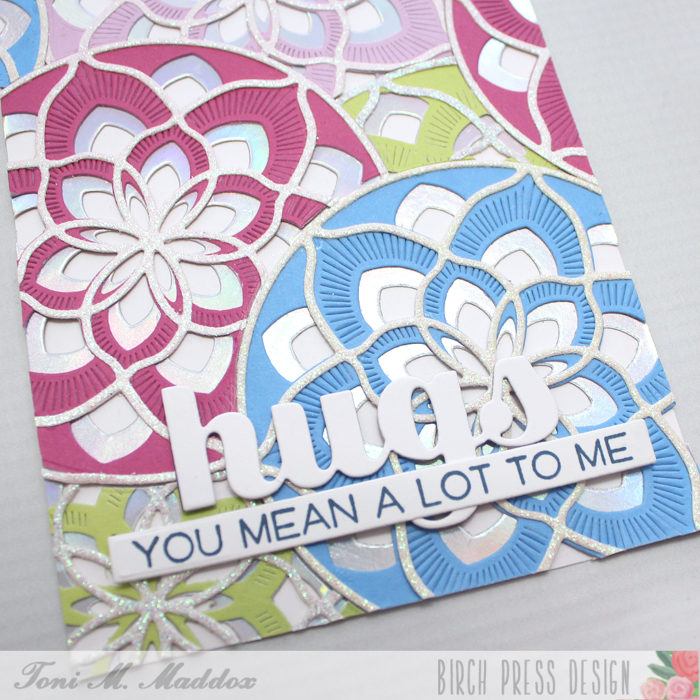
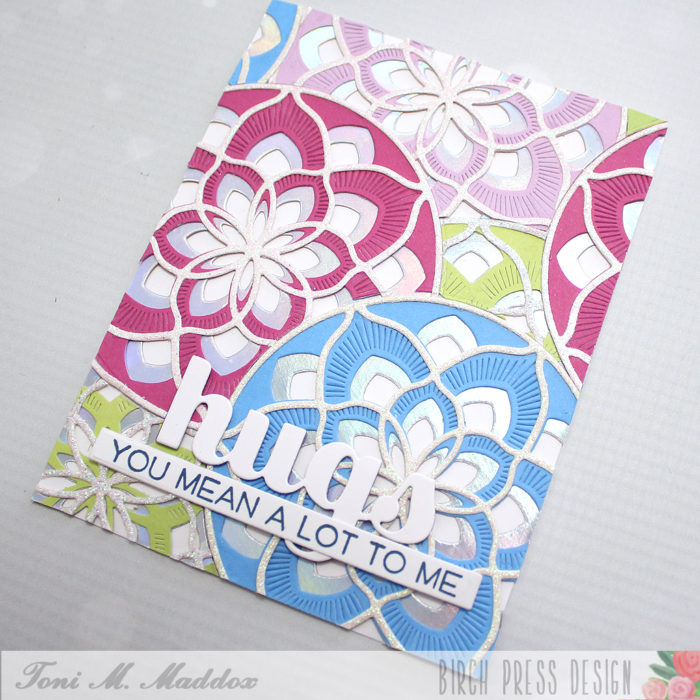
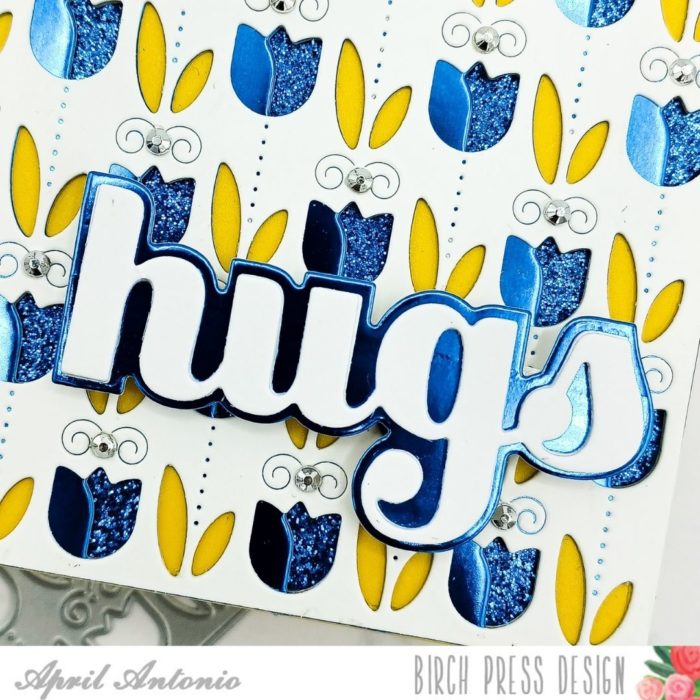
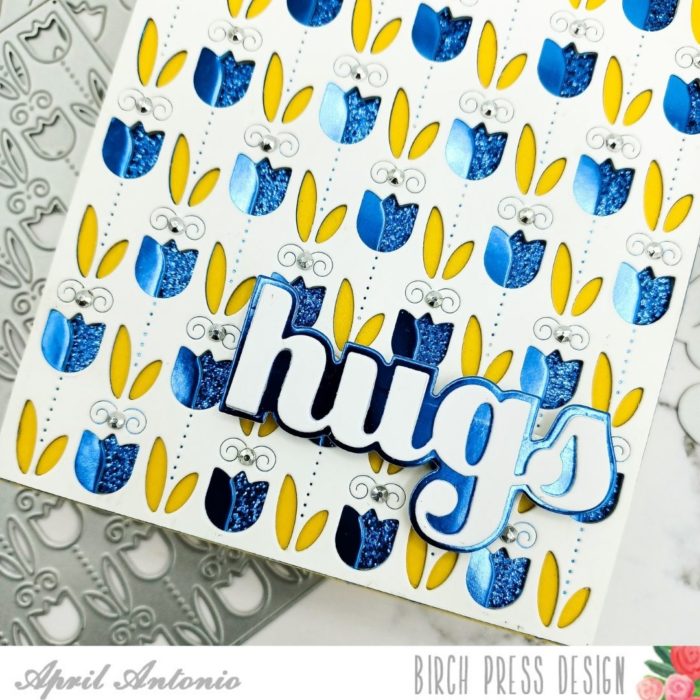
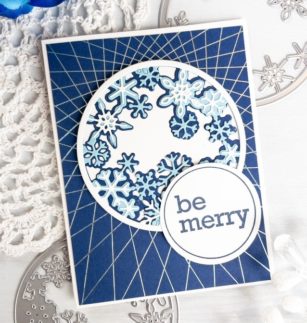
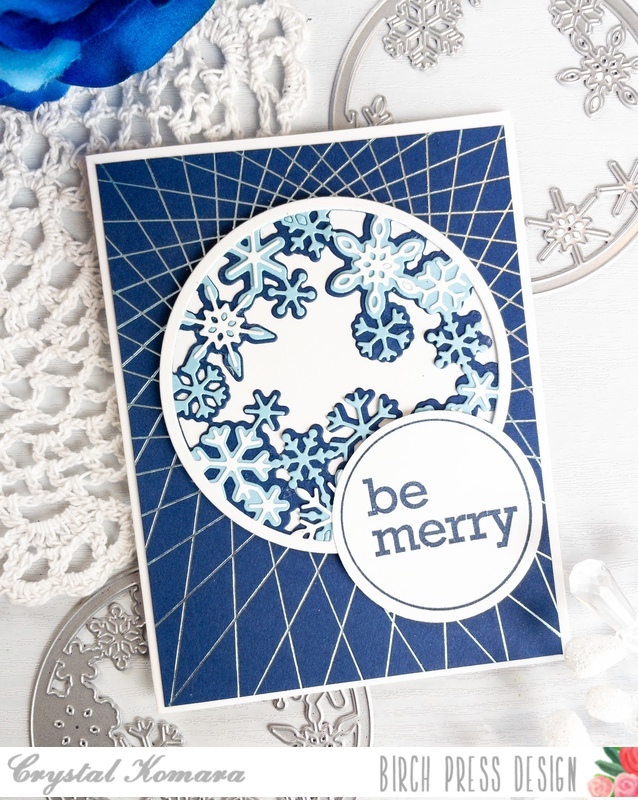
    The base of this A2 sized card is made from 80 lb. Neenah Solar White Smooth cardstock. I cut a 5 1/4″ x 4″ piece of navy cardstock from the 6″ x 6″ Ocean Blue paper pack. Using my Gemini Foilpress machine and the String Art Hot Foil Frame, I heat foiled a cerulean blue foil onto the navy cardstock. I know that it kind of looks like silver foil in these photos, but it is ever-so-slightly more blue tinted in person.

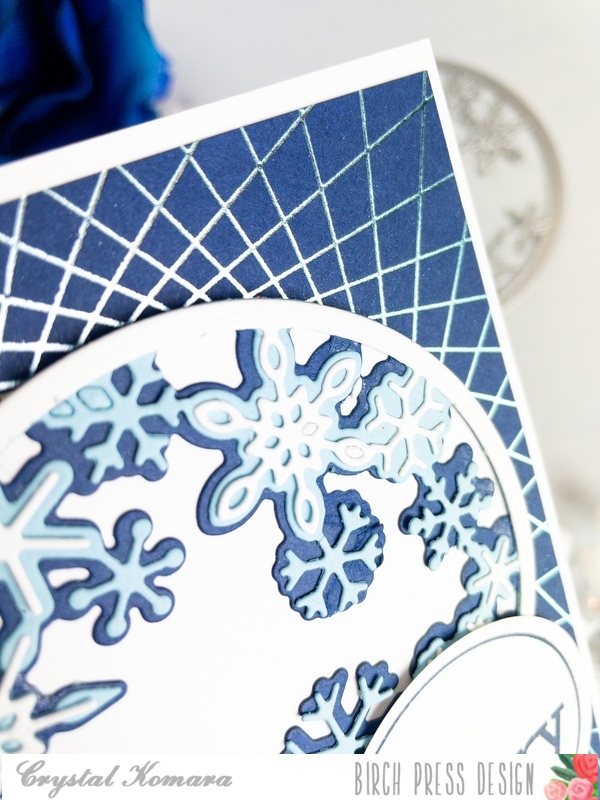
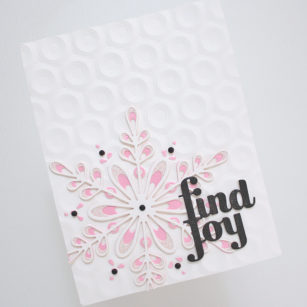
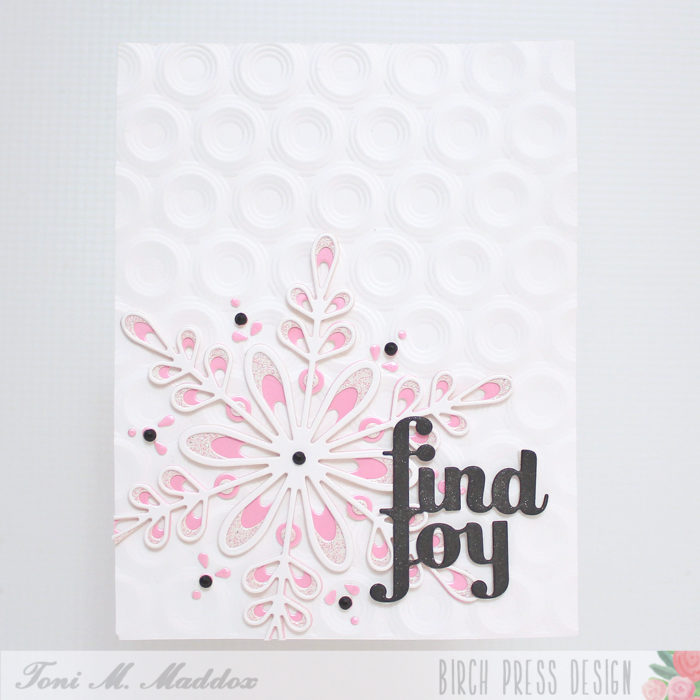
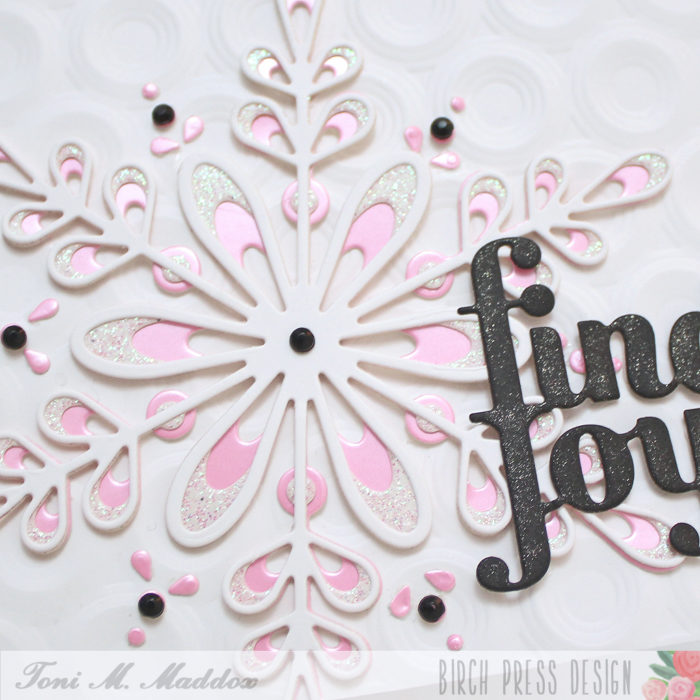
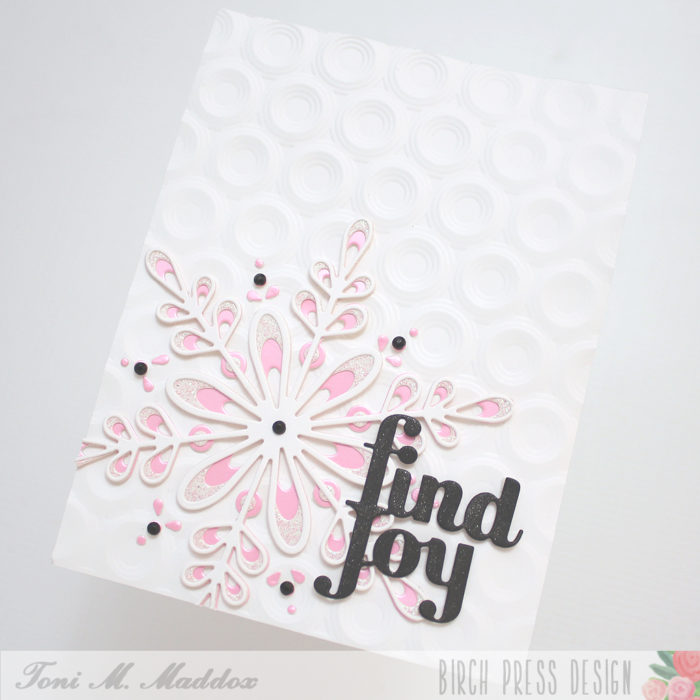
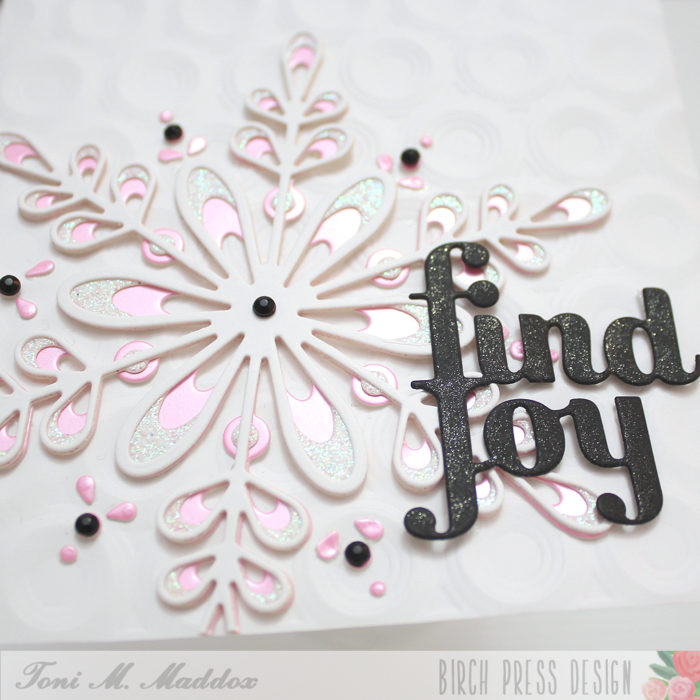
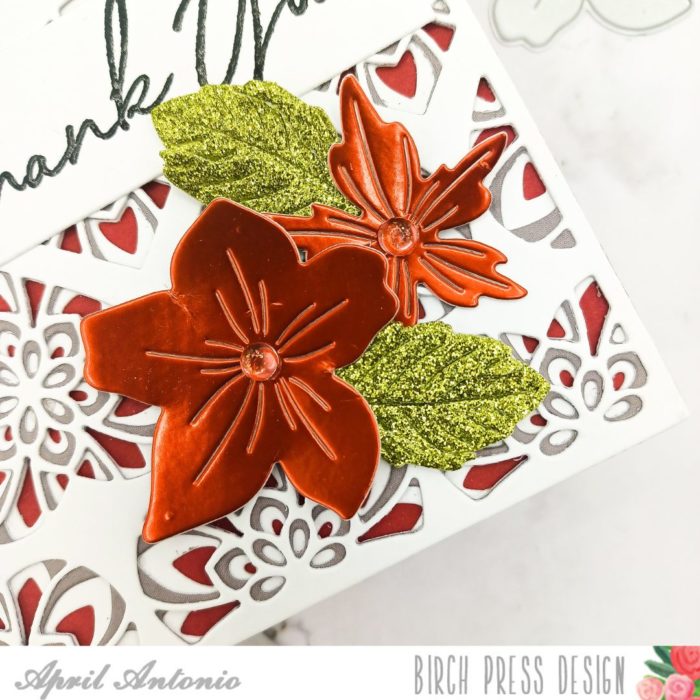
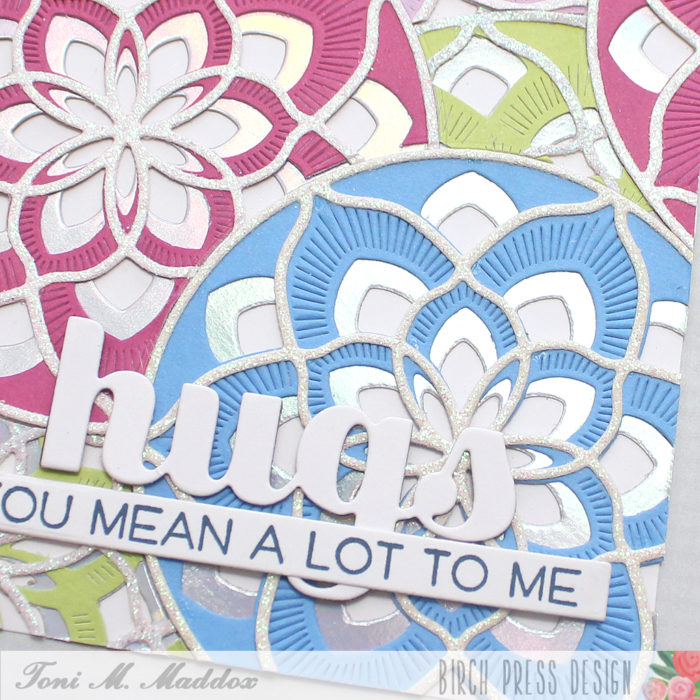
    Using the Snowy Circle Layer Set, I created the center focal piece. I die cut Layer C (bottom layer) from navy cardstock. I die cut Layer B (middle layer) from a sky blue cardstock. I die cut Layer A (top layer) from white cardstock. Again, I used cardstock from the 6″ x 6″ Ocean Blues paper pack. I used a fine-tip liquid adhesive to adhere all three layers together and then I lined the back of the three layers with a solid sheet of white cardstock. I adhered the entire Snowy Circle image to the center of the card using 3M foam adhesive.

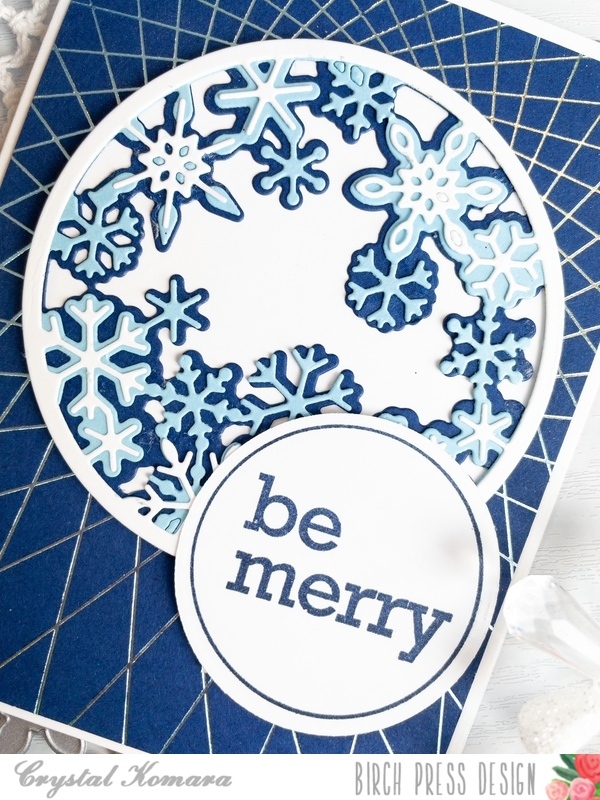
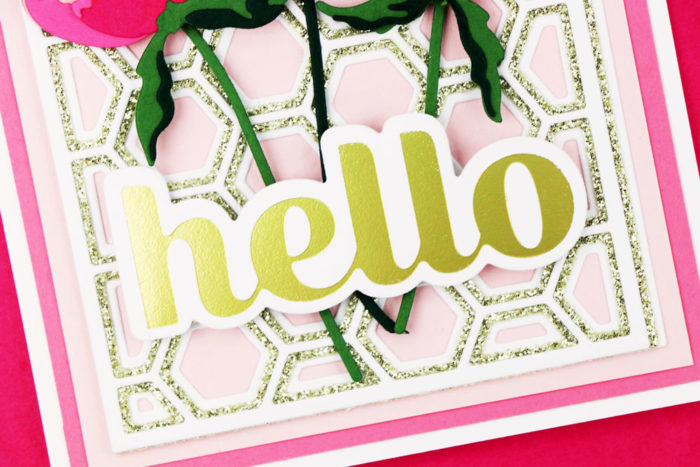
    Lastly, I stamped the sentiment “be merry’ in navy ink on white cardstock. This sentiment is from the Contempo Christmas Greetings stamp set. I used the coordinating circle die to die cut the sentiment out. I adhered the sentiment to the lower right side of the snowflakes with 3M foam adhesive.

    I hope you have enjoyed today’s card. Thank you for visiting and have a wonderfully creative day!

    Supplies

  • Find Joy in Snow | by Toni M Maddox

    Find Joy in Snow | by Toni M Maddox

    Hello, Birch Press fans! Toni here with you today sharing a (relatively) clean and simple holiday/winter card in pink and black. I love that color combination, don’t you?

    I cut out the BPD Crochet Snowflake using the Memory Box Delicate Pastel Glitter and Vintage Pastel Mirror Pads along with white cardstock.

    I adhered that to the card front which I had embossed using the Memory Box Open Studio Ringadings 5 3D Embossing Folder.

    To finish the card, I added a few Memory Box Open Studio Autumn Jewels and the BPD Find Joy that I coated in clear Wink of Stella.

    It would be really easy to mass produce this design, changing out the colors, for a series of unique cards.

    I hope you enjoyed today’s card and have a great rest of your week!

    Supplies

  • Peony Hello by Jeanne Jachna

    Peony Hello by Jeanne Jachna

    I hope you’re having a great weekend doing something that you love. If I get my way I’ll be in the garden seeing what’s new to discover. Maybe some new blooms or perhaps the beginnings of some summer veggies! I love when my hobbies overlap and these gorgeous blooms made from paper are just as beautiful as the real thing.

    The florals are easy to assemble. This is a three layer die so I chose three shades of pink cardstock. To save time I cut all of the layers from each of the three shades. I mixed up the shades when I assembled them to create each bloom. I don’t think you need to always have blooms dark to light or vice versa.

    To add some sparkle I cut the Honeycomb Bevel Layer set from white and gold glitter cardstock. To compliment the flowers I layered the assembled honeycomb panel over shades of pink cardstock.

    The Hello Sugar Script foil die adds even more gold elegance to this floral card. The sentiment die includes an outline die cut so there’s lots of possibilities.

    I hope you’ll enjoy creating with the layered florals in the shop – they’re total eye candy!

    Supplies


  • Swirling Waves of Thanks | by April Antonio

    Swirling Waves of Thanks | by April Antonio

    Hello and happy Wednesday! Welcome back to the Birch Press Design blog — April here bringing you some waves of crafty goodness with a new project.

    Today’s project features the new Curling Waves stencils, embossing folder and matching die set.

    I started today’s project by really wanting to use the new Curling Waves stencils. This was my first time using the stencils and I was intrigued by the two-tone look that could be achieved by using both together. The set comes with two stencils; one has larger waves, and the other smaller waves that fit right on top to give that 3-D wave effect.

    I aligned the first stencil with the larger waves over an A2 sized piece of white cardstock and ink blended using a light blue ink. Next I aligned the stencil with the smaller waves right on top, making sure to line up the waves, and ink blended using a dark teal color ink.

    The next important step I did involved the embossing folder. The stencil design actually matches up to the embossing folder exactly. I took the A2 sized piece of cardstock, carefully aligned it with the embossing folder waves, and used a piece of painter’s tape to keep it in place. Then I ran it through my die cut machine.

    Since this is a 3-D embossing folder, and is thicker than regular embossing folders, I used two plastic shims instead of two cutting plates to run this through. I am using Gemini die cut machine, and it worked beautifully.

    Next, I took a piece of teal colored metallic paper from the Vintage Pastel Mirror Pad and also ran that through my die cut machine with the Curling Waves embossing folder — the results? Wow!

    Now I have two A2 panels with the waves on them. I took the metallic A2 panel and used my paper trimmer to cut it at an angle starting at the bottom left edge. I took one of those pieces and cut a about 1.5″ off from the top.

    Now I had to metallic pieces with the exact same embossed pattern as my white A2 panel that I stenciled on. Using liquid glue, I lined up the metallic pieces in the top left and bottom right corners of the white panel, make sure to line up the curling waves embossed pattern so it would appear to continue on as one seamless pattern.

    Next, I took a piece of light blue metallic cardstock from the same Vintage Pastel cardstock pack and used the matching Curling Waves die cuts to cut out the individual waves. I glued these to the front of the card using liquid glue.

    Next, I adhered the entire panel to an A2 card base and used the ‘thank you’ from the Kind Hearts stamp set to heat emboss the sentiment to the middle portion of the card. In hindsight, I should have stamped the sentiment before dry embossing the white panel, but it worked out okay.

    My final touches were to add some gemstones from the Winter Fantasy Fairy set to the center of the curls.

    This card took a little bit more time, but it turned out great. I’m especially excited about using these new Birch Press 3-D embossing folders. I hope this has inspired you to get out there and craft. Have a great day!

    Supplies

    Supplies

  • Colorful Eucalyptus Stem & Berries | By Natasha Vacca

    Hello Birch Press friends – it is Natasha here and I am excited to be up on the blog today! Today I am using the beautiful Eucalyptus Stem and Berries Contour Layers die set! I love this set and had so much fun creating colorful leaves and berries on today’s card! So let’s get started!

    I started by creating colorful backgrounds using dye based pigment powders. You can create a similar look by using powders, inks, watercolors, whatever you have in your stash! I always work in layers to create texture within my backgrounds! Once I had my backgrounds created, it was time to do the die cutting! I love the Eucalyptus Stem and Berries set and this set was perfect to create some colorful leaves/berries! I die cut 4 leaf stems and 3 berry stems! On the berries I also die cut the “add on” berry layer. I love the added texture this provided! I adhered these to my berry stems using liquid adhesive! I set my leaves and berries aside to work on the background panel of my card!

    Next I looked through my gel print stash! I found a light colored gel print, as well as a page from a book. I used both of these to create a background. I tore the section of the book panel gel print and adhered this to the other gel print. Next I die cut a piece of white card stock using the Viola Plate die set. I chose to use Layer A. I love these layered sets, as you can use all 3, as well as choose only 1 layer for a beautiful look as well! They are truly versatile!

    I glued Layer A of the Viola Plate (White card stock) on top of my gel print backgrounds! I love the subtle touch of texture this provides, as well as the softness of the beautiful die cut!

    Next I adhered the background panel onto an A2 card base. I then decided on the placement of the leaves and berries. Then I adhered them to the card front using both liquid glue and foam tape. I love the added dimension on the leaves and berries!

    To complete my card I chose the Hugs Sugar Script Hot Foil Plate and die set. I foiled the hugs sentiment using a pink foil from my stash and then die cut the sentiment using the included die in the set! I added a few Fairy Drops to complete my card!

    Thanks so much for stopping by today! I had a lot of fun! I hope today’s card inspires you to create! I will be back soon!


    Supplies


  • Heart to Heart Thanks | by April Antonio

    Heart to Heart Thanks | by April Antonio

    Happy Friday! April here sharing an elegant, easy to pull together thank you card.

    To start this card I grabbed on of my favorites, the Kinsley Heart Plate Layering set. I cut out all three layers with Layer A and C cut from white cardstock, and Layer I glued all three layers together using liquid glue.

    I created an A2 card base from a piece of red cardstock, and glued the Kinsley Heart layer onto the card front. This is why the inside of the heart is red — the base is shining through.

    Next, I took the Pimpernel Contour layering set to cut the flowers from red, foil cardstock and the leaves from green, glitter cardstock. I adhered them to the lower right of the card front, ensuring I glued the center of the flowers only, to leave the petals free to bend up a little bit.

    For the sentiment, I used the Kind Hearts Clear Stamp set to heat emboss ‘thank you’ with black pigment ink and clear embossing powder. I cut this out and glued it to the center of the card front.

    Lastly, I added a couple of clear dots from the Christmas Fairy Crystals set to the center of the flowers

    That is it! The layering sets make it super easy and fun to pull together cards. I hope this inspires you to go create and have fun

    Supplies

  • Multi Mandala | by Toni M Maddox

    Multi Mandala | by Toni M Maddox

    Hello, everyone! Toni here with you today sharing a card that turned out amazing but was a lot more time-consuming than I had anticipated. Of course, it’s after the fact that I think of ways to make it easier!

    I wanted to use one of the fabulous BPD mandalas, Arista in this case, over the entire card BUT without adding the bulkiness of layering each mandala on top of the other. This meant I needed to cut the mandalas so they could nest.

    I worked up each mandala first using a combination of foil, Memory Box Pastel Glitter Cardstock and Memory Box Lush Green, Vibrant Violet, and Ocean Blue 6×6 Cardstock. Once I had my layout planned-ish, I adhere first the blue one to my card base followed by the others, diecutting with a circle die from my stash and/or fussy cutting them to nest into each other.

    I could have made it a lot easier on myself doing this with the first layer (foil) to figure out the nesting cuts then once that was done, I could have adhered the other layers down and trimmed away the excess quite easily. Ah, well, lesson so so learned!

    I finished up the card by adding the Sugar Script Big Hugs and the Happy Lingo sentiment stamped in Versafine Clair Twilight. A LOT of work but well worth it!

    I hope you enjoyed today’s card and have a great rest of your week!

    Supplies

  • Blooming Peony Thank You Card | By April Antonio

    Blooming Peony Thank You Card | By April Antonio

    Hola and happy Saturday! April over here on the blog sharing a thank you card featuring the Adornment Peony die set. This set is beautiful and contains four dies: Two peony dies – one detailed, one outline; two leaf dies – one detailed, one outline.

    I started this card by deciding that I really wanted to use the Memory Box black glossy cardstock in a way that was celebrated our current Springtime season.

    1. I cut the Adornment Peony outline die out from heavy weight white cardstock so that I would have two solid peony pieces.

    2. I took a piece of the glossy black cardstock and put a piece of a double sided adhesive sheet (like Stick It) on the back.

    3. I then cut the detailed peony die from this piece of glossy cardstock. Adding the adhesive to the back before cutting made it a lot easier to adhere the delicate pieces later.

    4. I peeled the adhesive backing off from the outline piece of the peony, and put it onto the solid peony piece I cut in step #1. I decided to save the other peony pieces to do a diecut inlay on a future card.

    5. For the leaves, I used the solid leaf die, and cut it from green cardstock I pulled from the Lush Green 6×6 paper pad. I added a little ink blending to the edges of the leaves with some green ink.

    6. One of my favorite paper pads is the Rainbow Reflections Mirror Pad and I used it here to create part of my card background by taking a piece of the red foil paper and cutting about 1.5″ x 5.5″. I glued this to the right edge of the card front.

    7. I added the peony and leaves on the front, popped up with some thin foam tape.

    8. For the sentiment, I wanted it to match the flower, so I used the same glossy black cardstock with the Thanks Honey Script die set. I cut the background from the glossy cardstock, and the actual sentiment from white cardstock and glued them together, then adhered it to the card with the same thin, foam tape.

    9. For final touches I added a few red crystals from the Christmas Fairy Crystals pack. Also, I used my Nuvo shimmer pen to ‘color’ in the white space of the peony.

    I really like how the glossy, black cardstock adds just a little extra shine and interest to the card. Also, I encourage everyone to play around with textures and mix glitter, foil, glossy, and any other types together on a card to see how they look.

    Thank you for joining me today! I hope you enjoyed the tutorial and will have fun in all your crafting adventures.

    -April

    Supplies

  • Sending Hugs Across The Ocean | By April Antonio

    Sending Hugs Across The Ocean | By April Antonio

    Welcome back everyone, and happy Saturday! April here sharing a card in support of #cardsforUkraine.

    This card features the Field of Blooms layering plate set alongside the beautiful, new Memory Box Rainbow Reflections 6×6 mirror cardstock pad.

    I started with the Field of Blooms plate Layer A and cut it from heavyweight white cardstock. I then cut Layer B from a bright blue piece of mirror or foil cardstock I pulled from the Memory Box Rainbow Reflections 6×6 mirror cardstock pack.

    Next, I cut die cut Layer C from a piece of yellow cardstock pulled from the Memory Box Sunny Orange 6×6 cardstock pack.

    I wanted something bright to show through the bottom of all of the layers so the most bottom layer of the card is a piece of blue glitter cardstock I pulled from the Memory Box Twinkling Jewel 6×6 Glitter Pad. I cut the 6×6 piece of cardstock down to A2 size (4.25″ x 5.5″).

    I then adhered Layer C (the die cut yellow piece) to the blue glitter cardstock using doublesided tape since I find this works well on a glitter surface.

    I then used liquid glue to adhere the other two layers (A and B) on top of Layer C, and glued the entire sandwich onto an A2 cardfront created from heavyweight cardstock. In the end I ended up with a nice sandwich made up of four layers: White cardstock (top layer), Mirror cardstock, Yellow cardstock, Glitter cardstock (bottom layer).

    I used the Big Hugs Sugar Script dies for my sentiment, cutting the shadow from the same blue mirror cardstock, and the sentiment from heavyweight white cardstock that I layered a few times.

    Lastly, I used silver jewels from the Memory Box Christams Fairy Jewels set to add some sparkle to each little leaf/swirl impression on the front of the card.

    Thank you for joining me today for this short blog tutorial. I hope everyone has a great weekend and continues to be inspired to create!

    Supplies

  • Layered Star Flowers | By Dilay Nacar

    Layered Star Flowers | By Dilay Nacar

    Welcome, crafty friends! Dee here today sharing this fresh floral card featuring new dies from the recent Birch Press Design release! If you haven’t already done so, be sure to check out the new line of Contour Layers die sets available now in the shop!

    To begin, I cut Layer A of the Petal Triangle twice and adhered them (mirrored) onto a piece of white cardstock that I cut down to 4”x 5.25”. 

    Next, I cut the Star Flowers Contour Layers twice in each size and layered them together, repeating this step three times. I then die-cut the Fuddled Leaf Branches, assembled them, and adhered them onto the center of the panel, adding the flowers last with foam tape for added dimension. 

    For the sentiment, I die cut the Handwritten Thanks in gold foil cardstock and adhered it to the card. As a finishing touch, I added embellishments in coordinating colors to the center of each flower! 

    I hope you liked today’s card! Thanks so much for stopping by, friends!