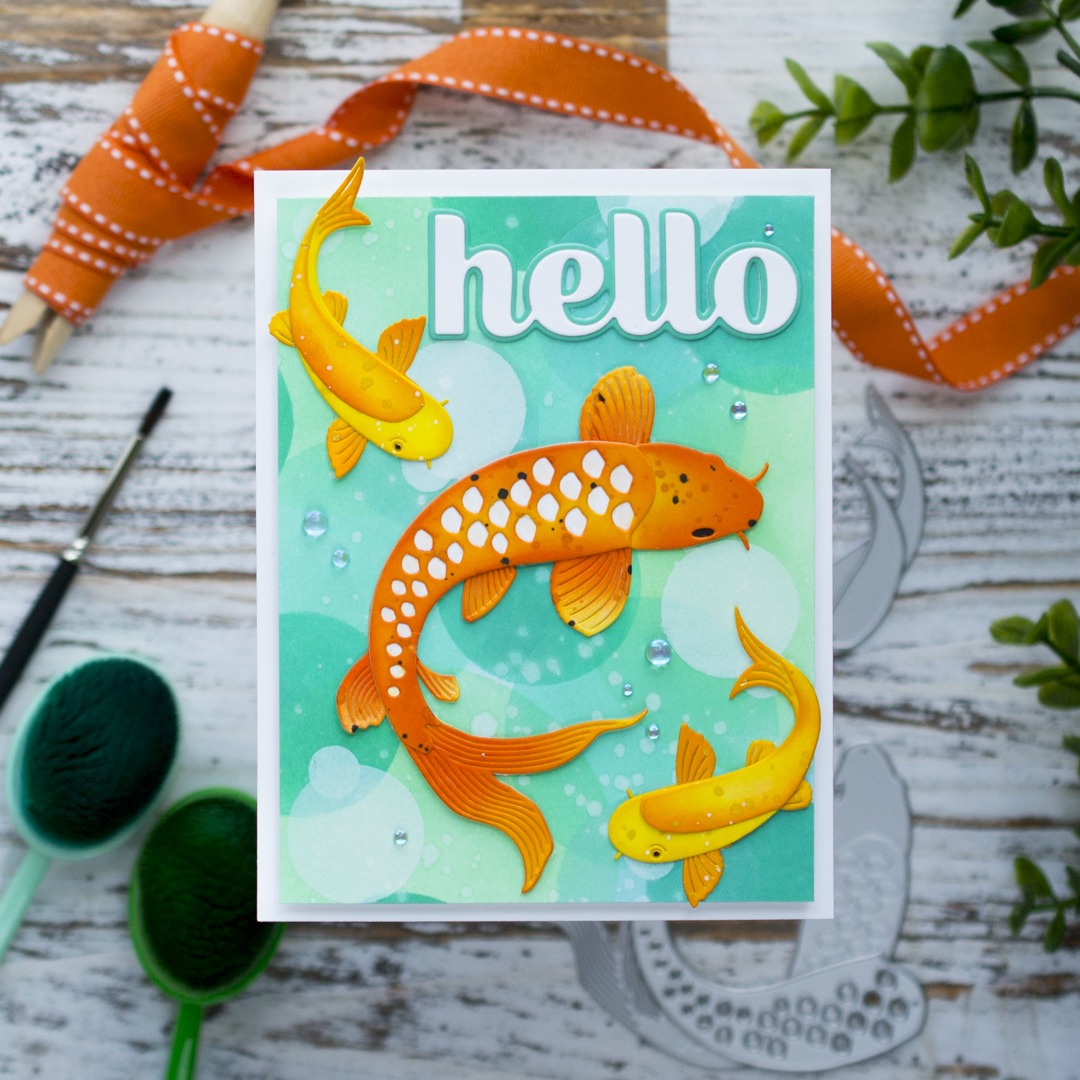
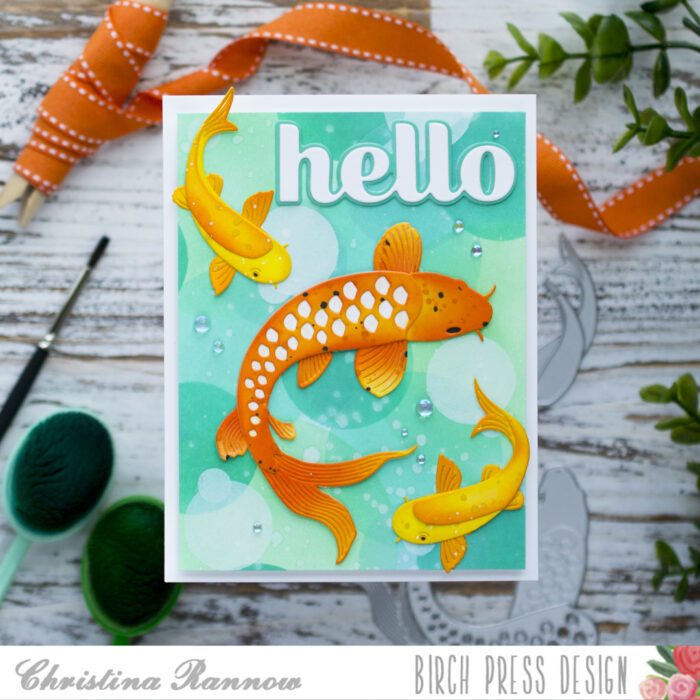
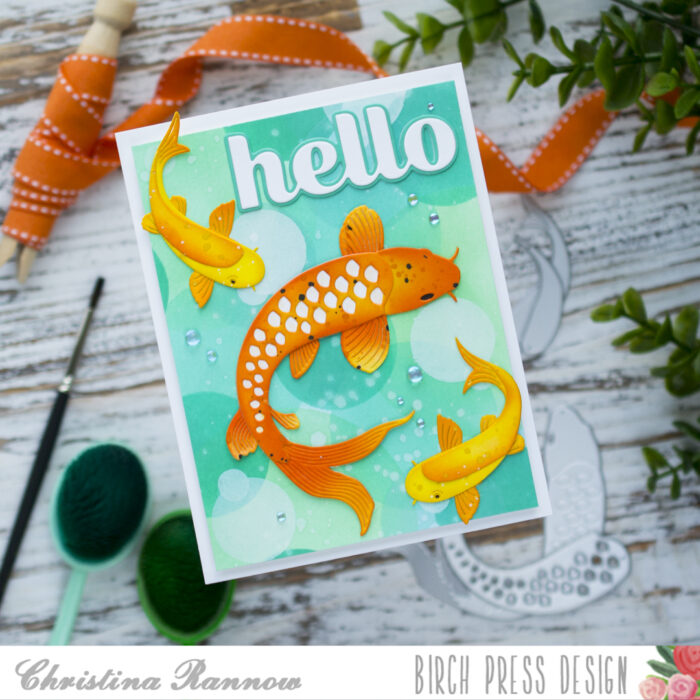
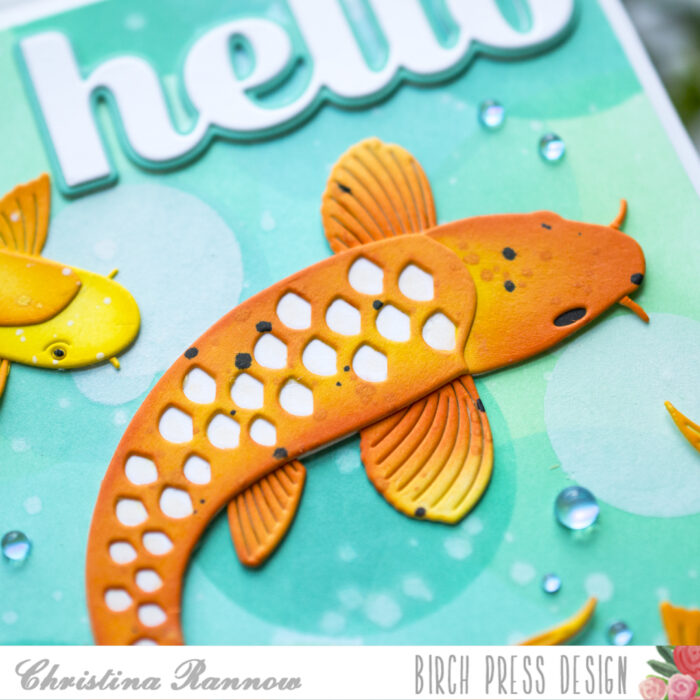
Hi friends! Christina here to share this vibrant pond scene featuring the gorgeous new Block Print Elegant Koi die set. I paired this elegant fish with the Block Print Koi Duo and created a fun bokeh-inspired background using just a few circle stencils. This card is perfect for any occasion and would surely brighten anyone’s day. Keep scrolling to find out how this card design came together!
I started by creating the bokeh-inspired background. This is such a simple technique, and it creates a really versatile background that can be used for many different card designs. Plus, it can easily be customized to coordinate with the color palette of your card design. All you need are circle stencils in different sizes, two to three inks of the same color but different shades, and a white pigment ink! Here’s how I did it:
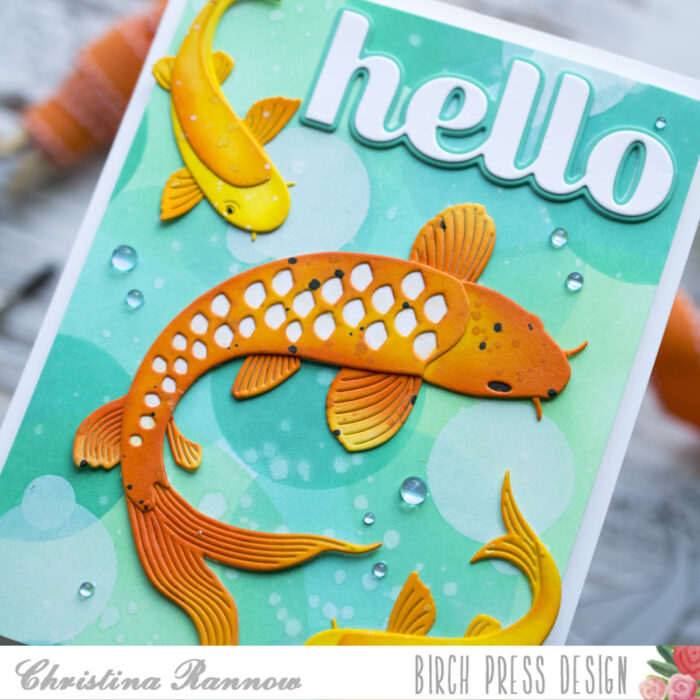
First, I trimmed a white cardstock panel to 4 x 5 ¼ inches. Then, using multiple circle stencils in different sizes and a trio of teal ink colors, I stenciled circles across the panel, overlapping some of them. I started with the lightest color and the biggest circle and then added smaller circles in darker colors, slightly overlapping some as I continued to stencil the entire panel. The inks I used are reactive with water like Distress Inks, so my next step was to splatter the panel with plain water for some texture and interest. Lastly, I used white pigment ink and two smaller circle stencils to add the final bokeh effect.
With the background completed, I got to work on the focal point of my card – the koi fish. First I die-cut all the pieces from white cardstock. Then I inked the pieces using two shades of orange and two shades of yellow ink. Before assembling the fish, I wanted to give them some added texture and interest too. I splattered all of the pieces with coordinating Mica Stains to give them some sparkle. Then I splattered the smaller koi with white spatter and the large koi with black spatter. Finally, I assembled the diecuts and attached them to my background with glue.
The last couple of steps were to add a sentiment and some embellishments. I die-cut the Big Hello Sugar Script from white cardstock and inked just the shadow portion with the darkest ink color that I had used for the background. I attached the sentiment and chose light blue crystal droplets as the finishing touch.
Thank you so much for reading about my vibrant koi pond card design featuring the new Block Print Koi dies with a bokeh-inspired background technique. See you again soon!
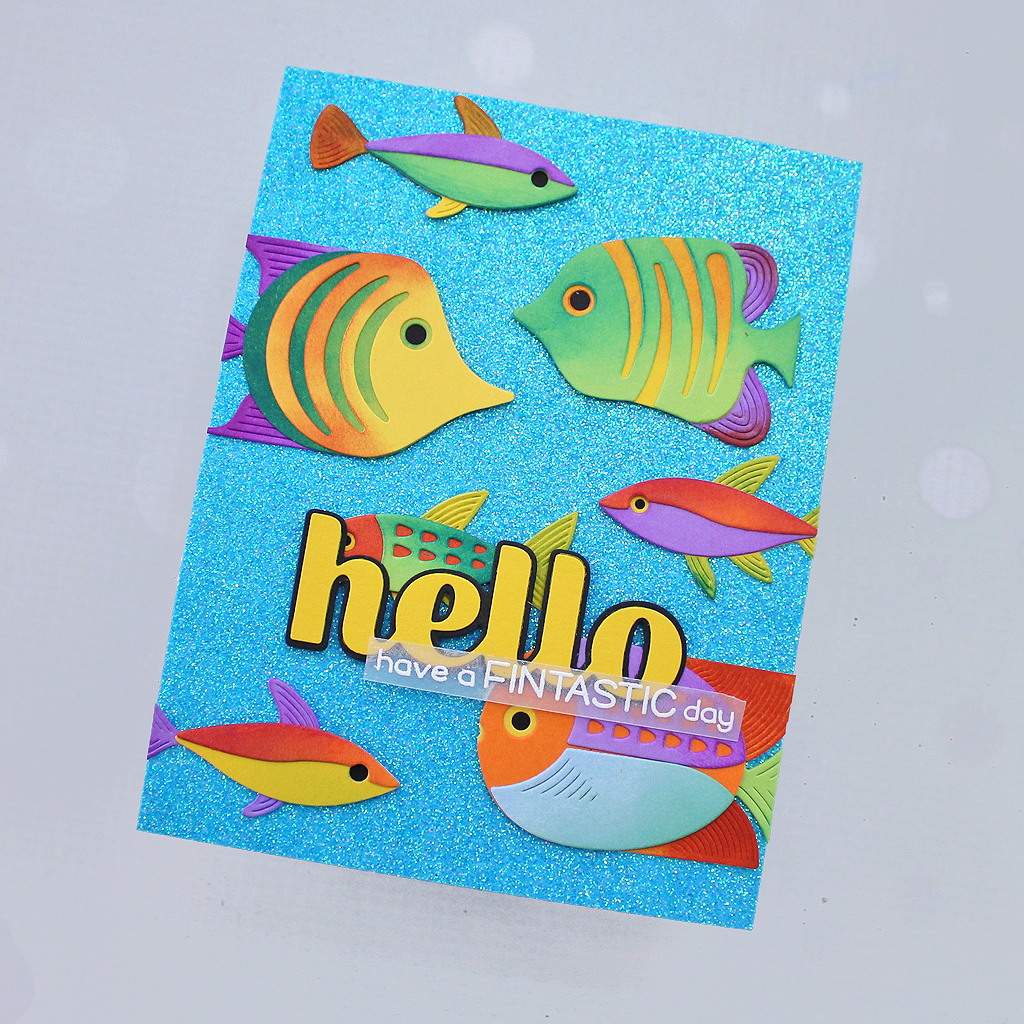
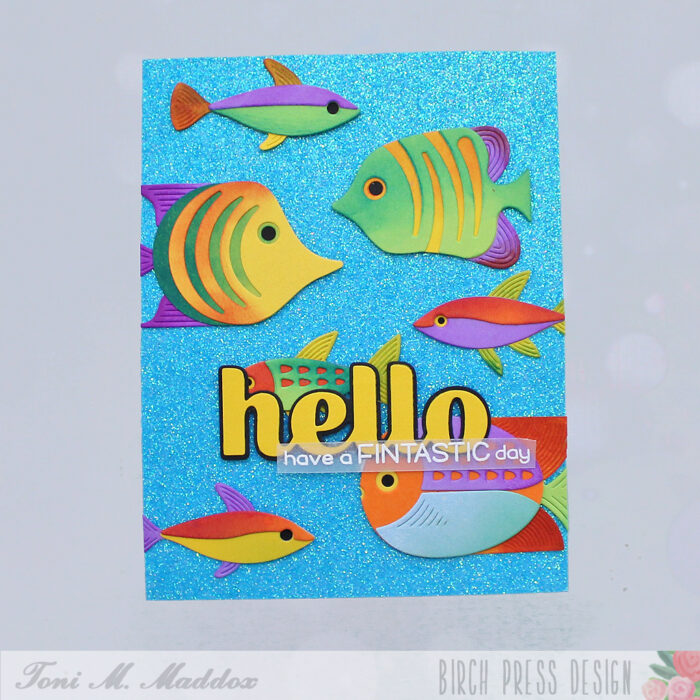
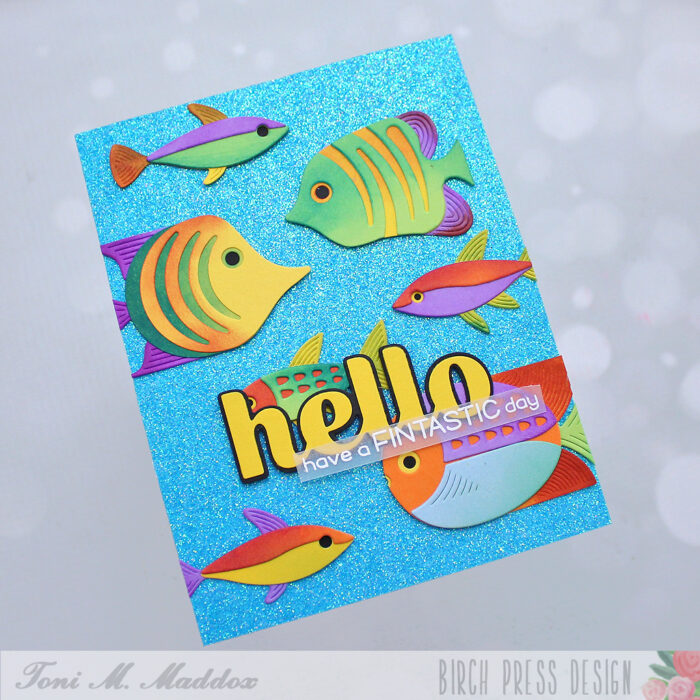
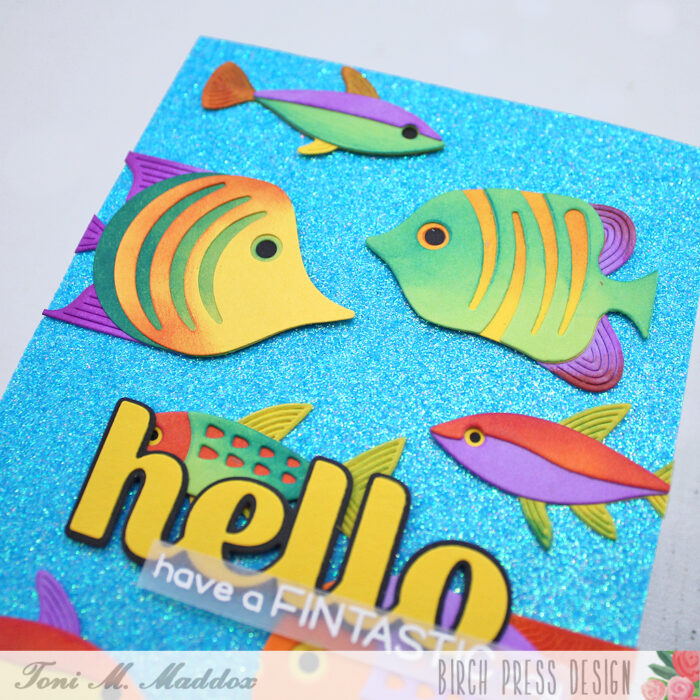
Hello, everyone! It’s summer and the water’s fine! Toni here with you today sharing a card made using some cute fishies from the new release. I love them so so much!
I wanted a school of fish, like what you might see in a giant aquarium. To achieve that I cut out a variety of fish using Memory Box cardstock.
I used Catherine Pooler inks with the cardstock to create variations in color for each fish.
For the sentiment I used the Sugar Script Big Hello die and outline in Summer Squash and sturdy black. The sentiment embossed on vellum is Lawn Fawn which coordinates so perfectly.
I added some glam with a no-shed aqua glitter cardstock as the card front. Swoon!
Feel free to visit my blog, Frankie Helps Craft, for a full list of supplies and to check out my other projects.
I hope you enjoyed today’s card and have a great rest of your week!
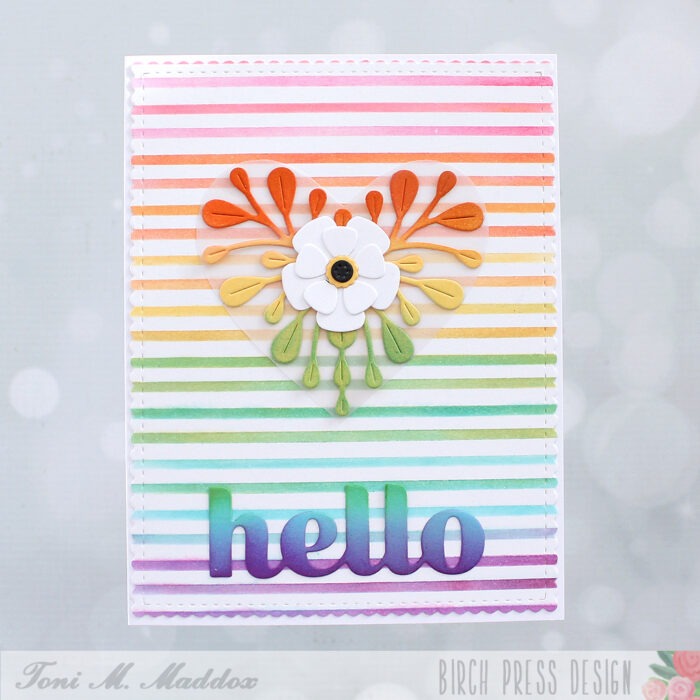
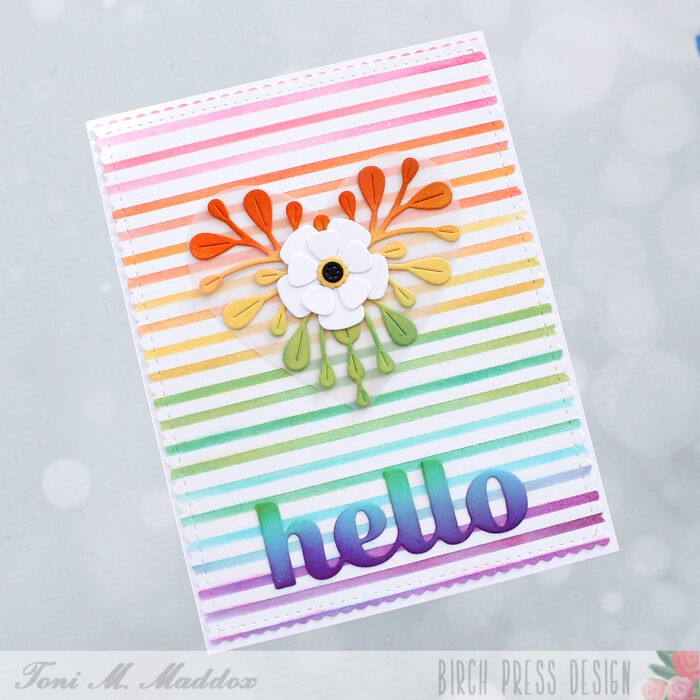
Hello, friends! Toni here with the first of two cards using the Linear Stripes stencil.
For this first card, I used the stencil along with Catherine Pooler inks to color up a white card base. I allowed the inks to blend every few lines to create a rainbow effect.
I then repositioned the stencil so I could repeat the process, creating a gorgeous gradient. I love the blending of the colors so very much!
I applied ink in a gradient pattern on the Block Print Garden Heart leaves as well as the Sugar Script Big Hello to blend in a bit with the stripes behind it.
I used vellum behind as the Block Print Garden Heart base because obviously more rainbow showing the better!
I hope you enjoyed today’s card and have a great rest of your week!
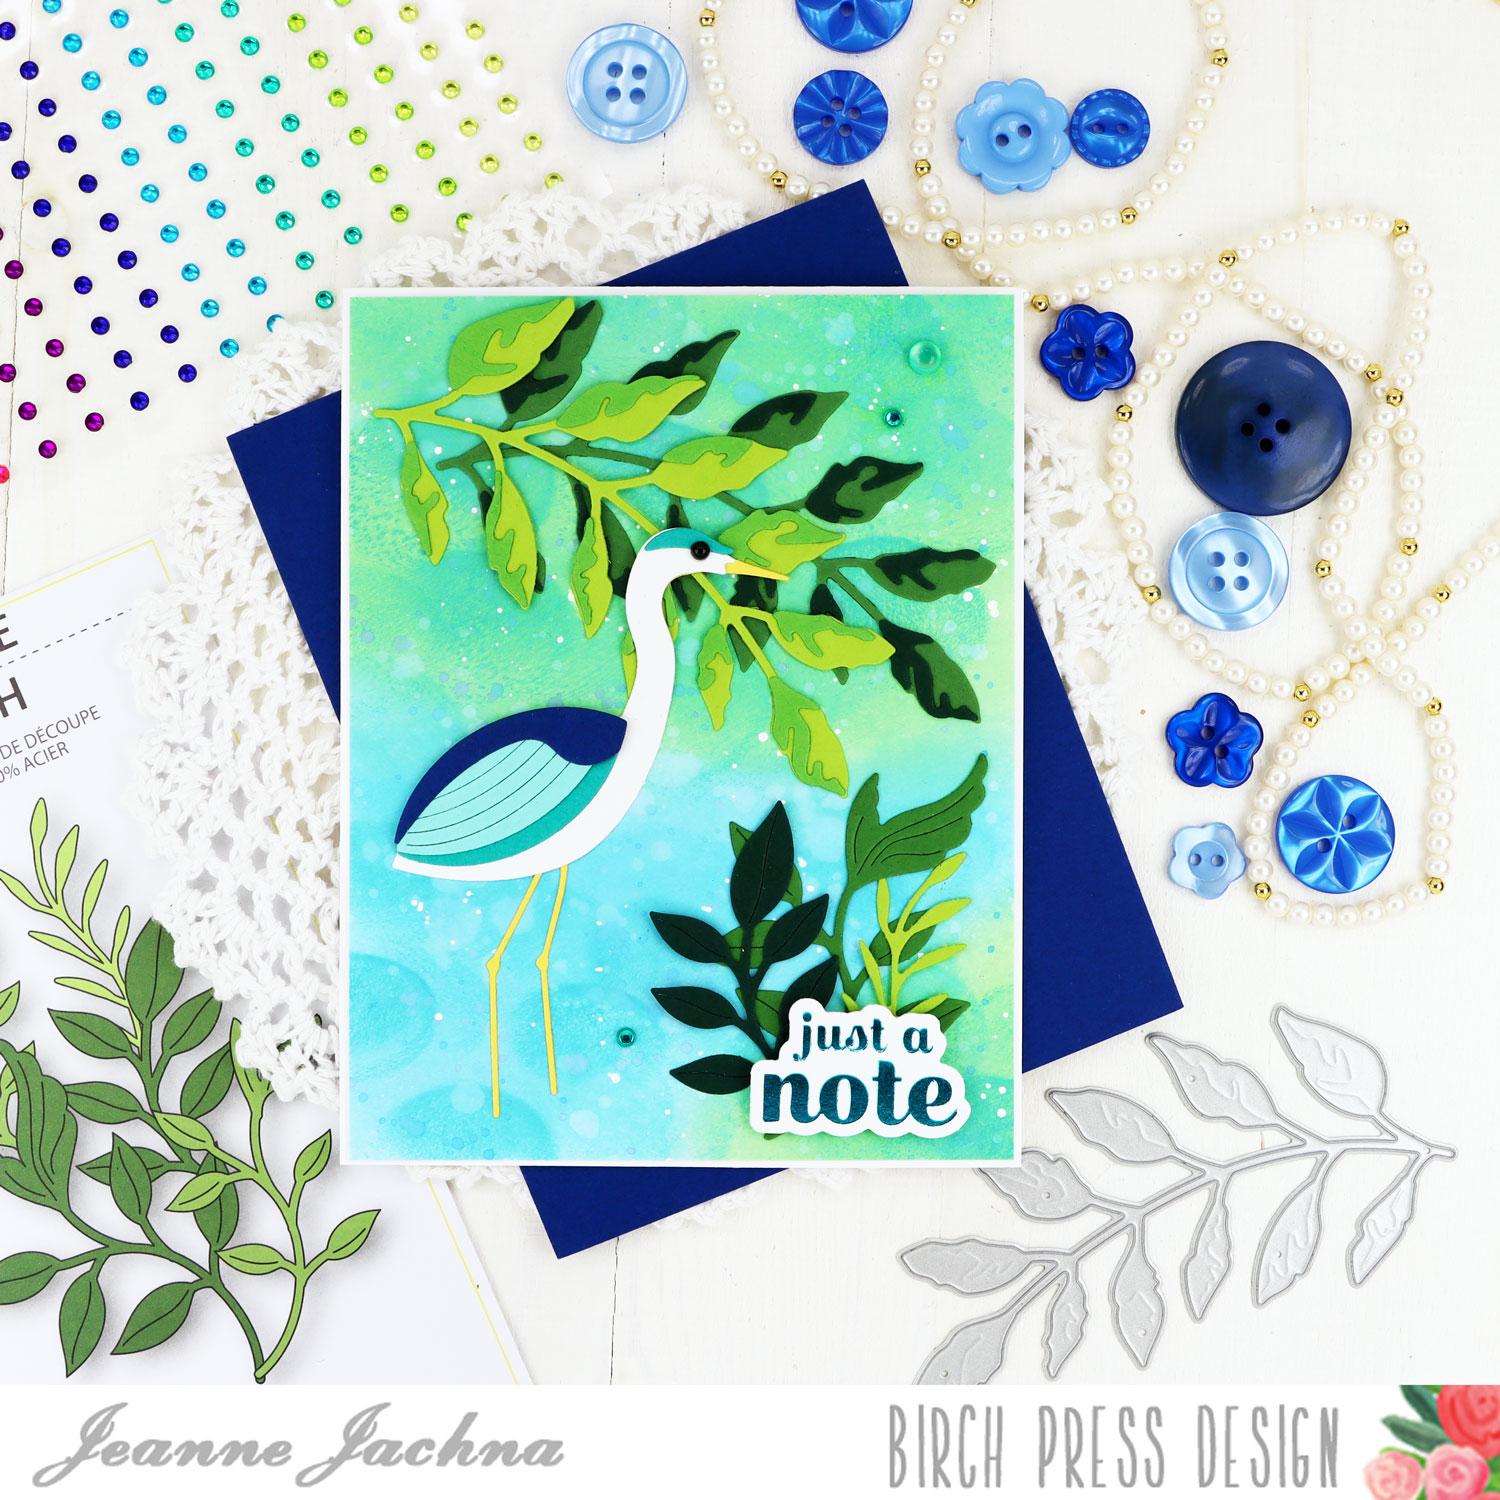
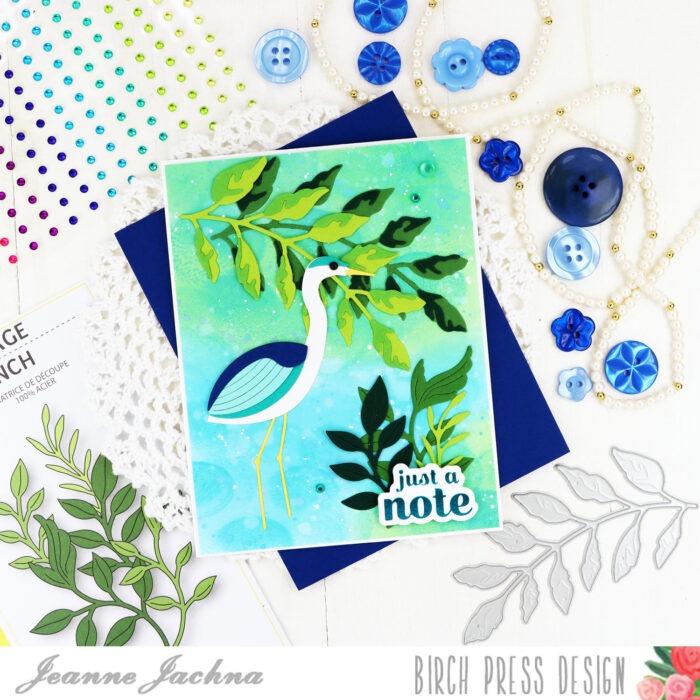
I confess I’m a bird watcher! I keep different feeders in my yard to attract different varieties. So the beautiful birds available at Birch Press Design really speak to me.
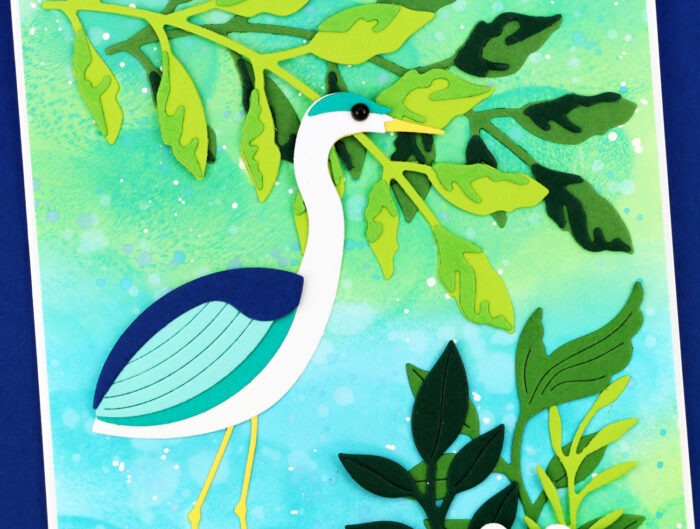
I made a watery lagoon scene to showcase the Block Print Crane on my design. I die cut, assembled and arranged the images on a piece of clear plastic the size of my card base. This helps me decide what to put where before I commit and adhere everything in place.
I love a simple Distress Ink blended background. Deciding where to add the blue “water” and green “foliage” was easy because I could slip the inky sheet under the clear plastic that I have my images arranged on.
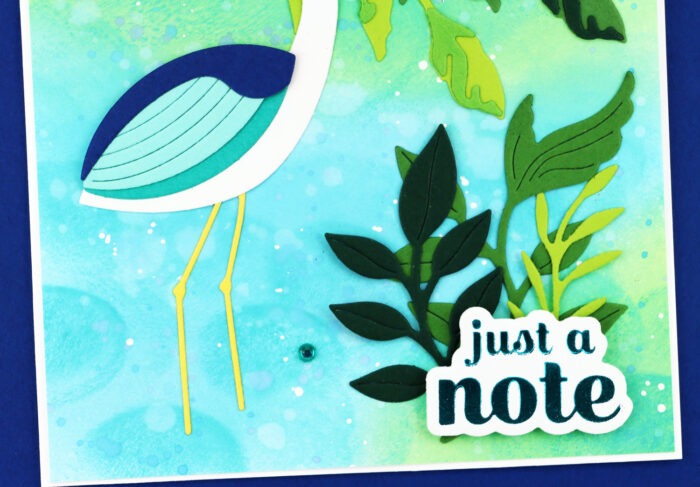
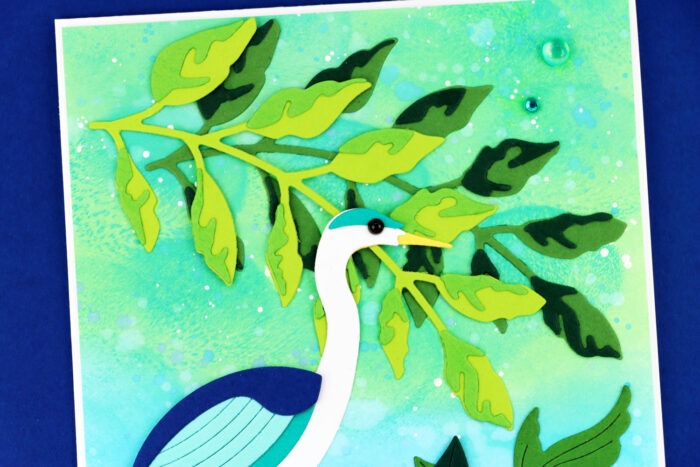
The foliage includes the Fuddled Leaf along the top edge to resemble draping tree branches, and smaller branches from the Foliage Bunch set along the bottom.
A sprinkle of gems is the finishing touch to add a little sparkle and design. I hope you have a beautiful day and find some time to make today!
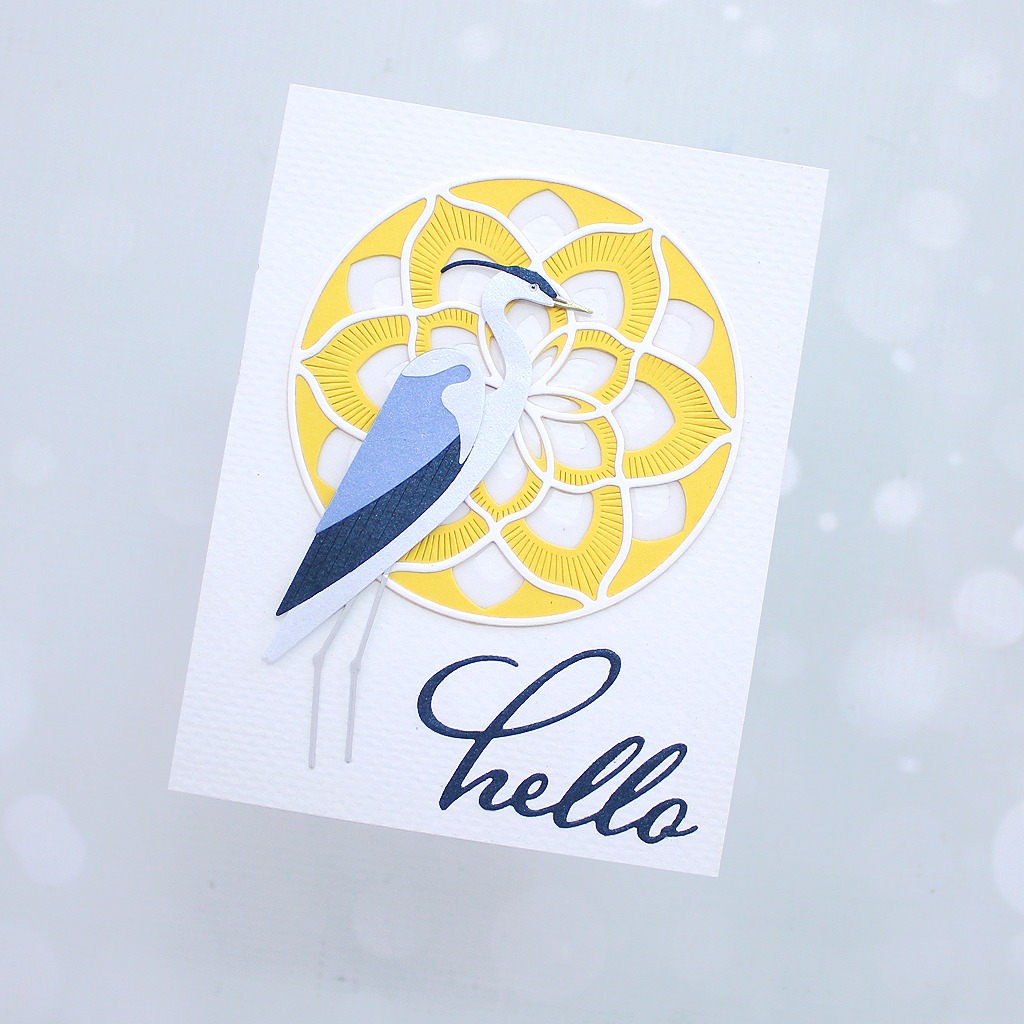
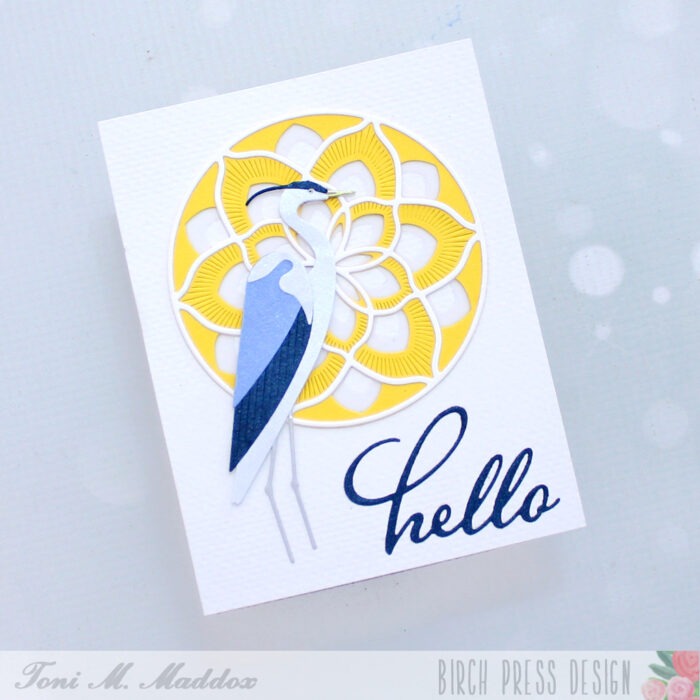
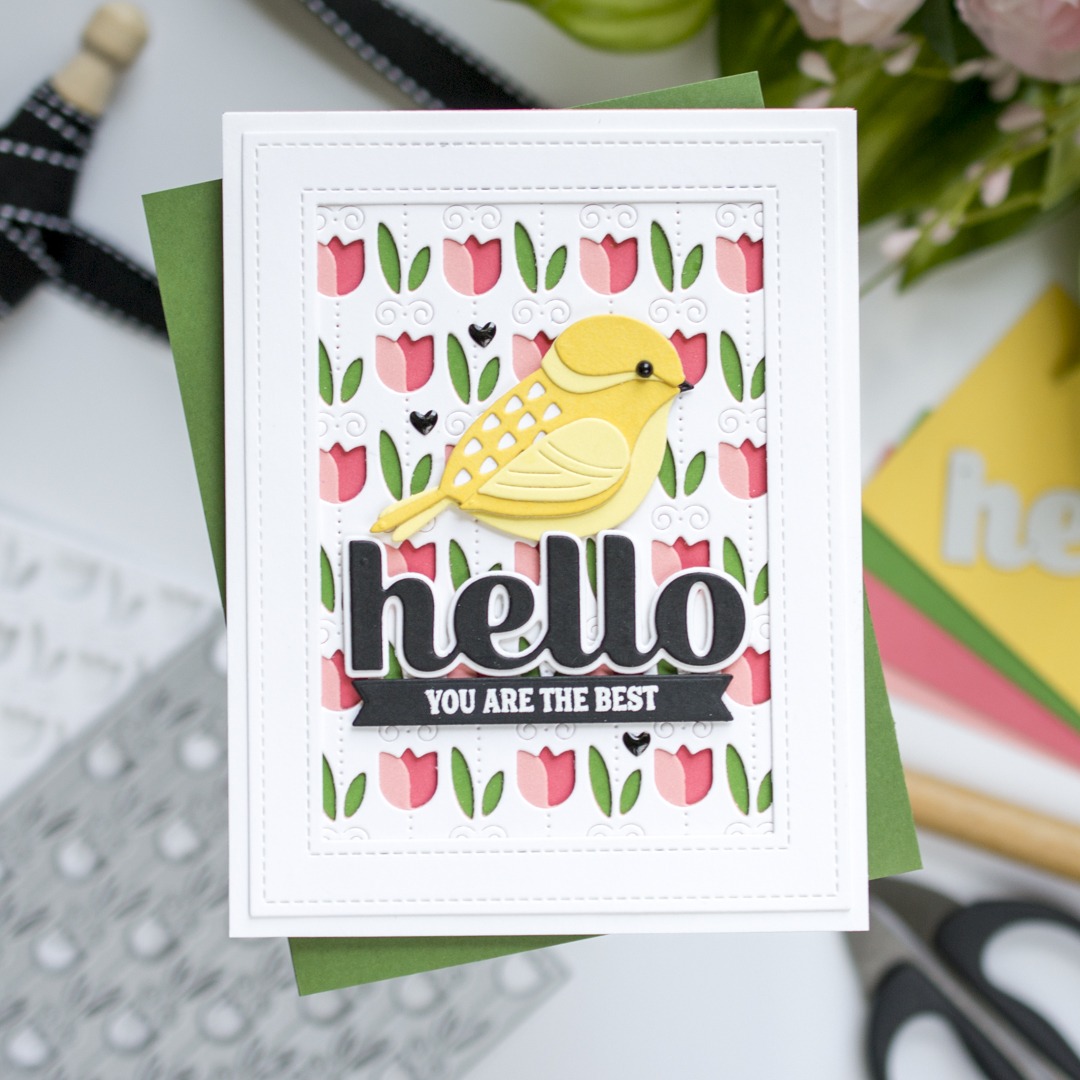
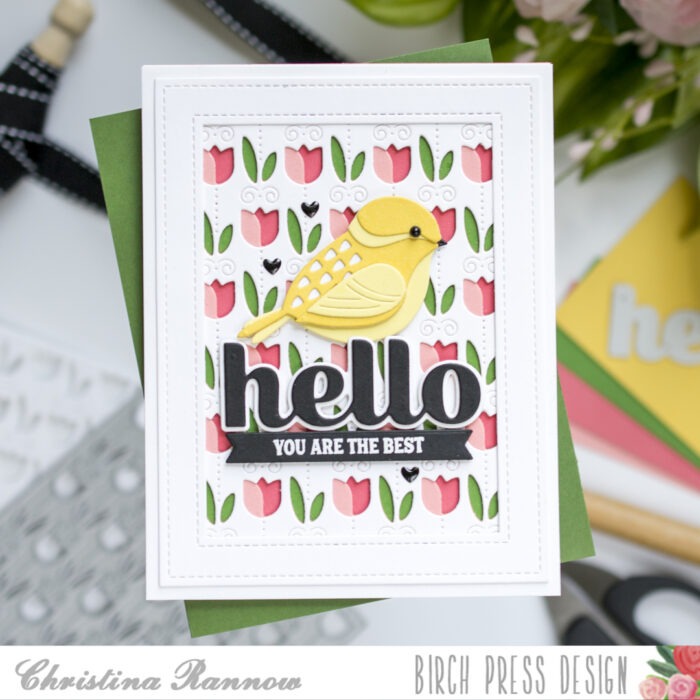
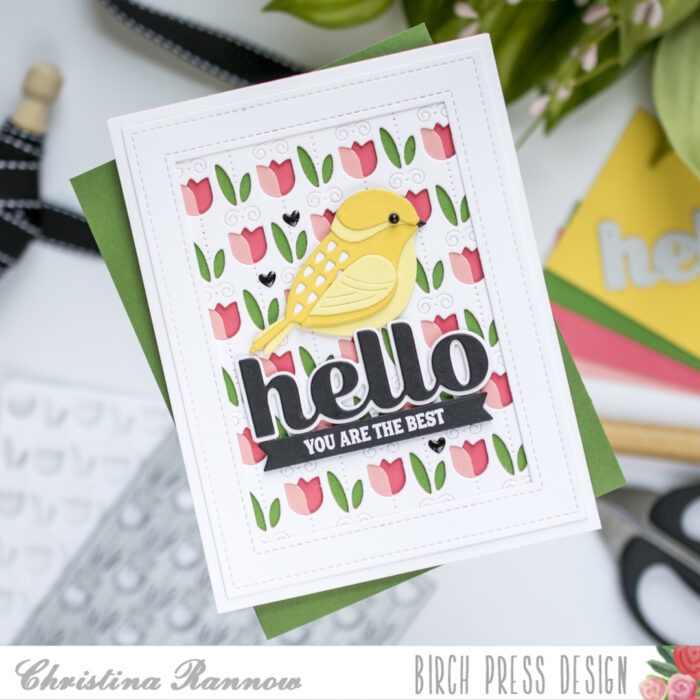
Hello! It’s Christina, and I’m excited to share with you this card featuring a variety of products from past collections. I started with the incredible layered die set, Field of Blooms, and then perched a sweet little bird from the Block Print collection on a big, bold greeting. This is a straightforward die cutting-only card design, except for a little heat embossing! And it’s easily customizable to any occasion by simply changing up the sub-sentiment. So grab your die cutting machine, and let’s get started!
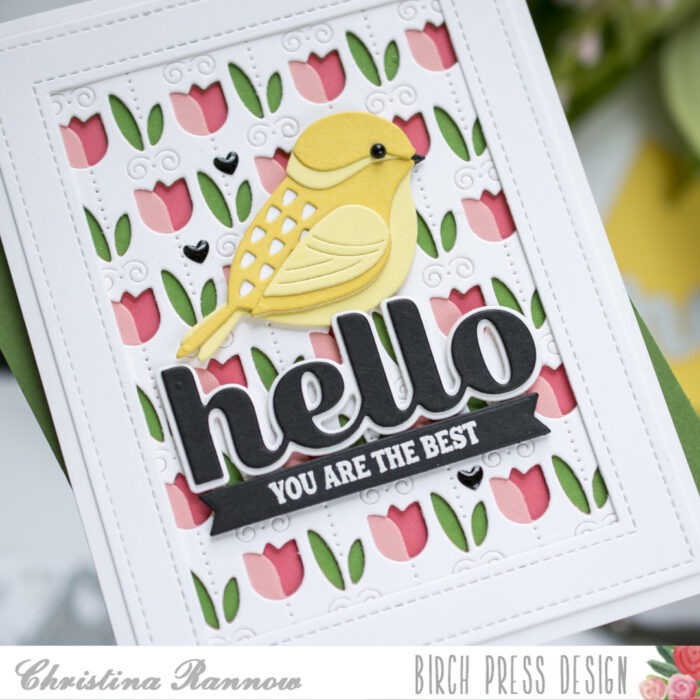
My first step was to create the layered background with the Field of Blooms dies. There are three plates in this set that can be used together or separately with beautiful results. I chose to use all three layers, die cutting them with white cardstock for the first layer, light pink cardstock for the second layer, and green cardstock for the last layer. I secured the layers together and then attached them to a darker pink cardstock panel that peeks through all the layers to be the other half of the flower.
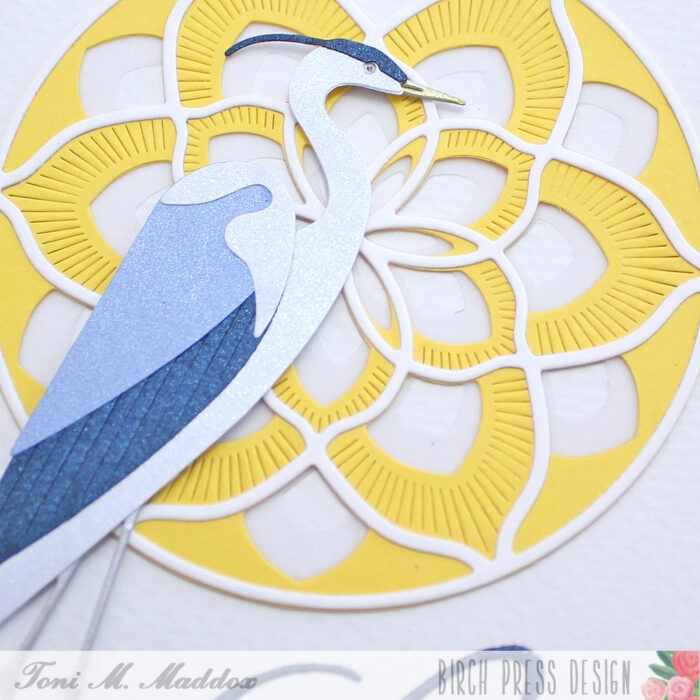
I trimmed down the layered background panel a bit and added a white frame with a stitching detail before mounting everything to a white A2 cardstock panel.
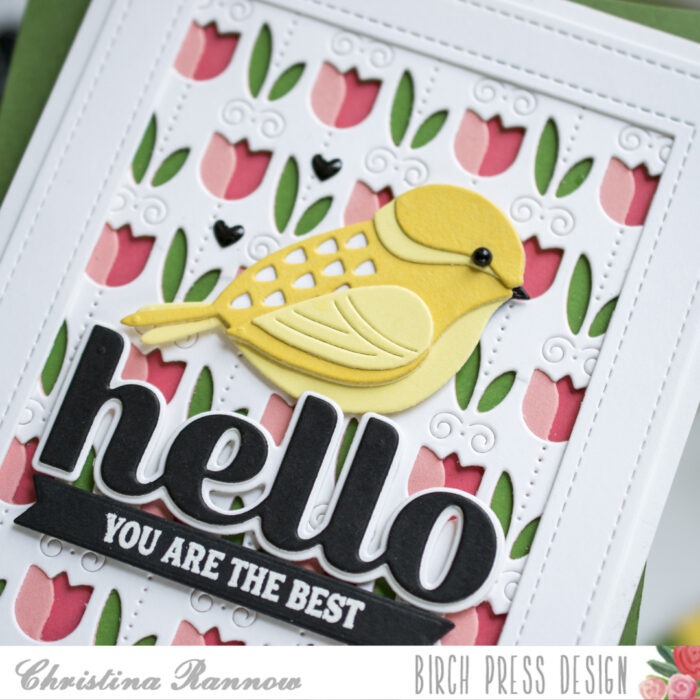
Next, I die cut and assembled the pieces for the perched bird. I chose two shades of yellow, white, and black cardstock for the die cuts and a black pearl for the eye.
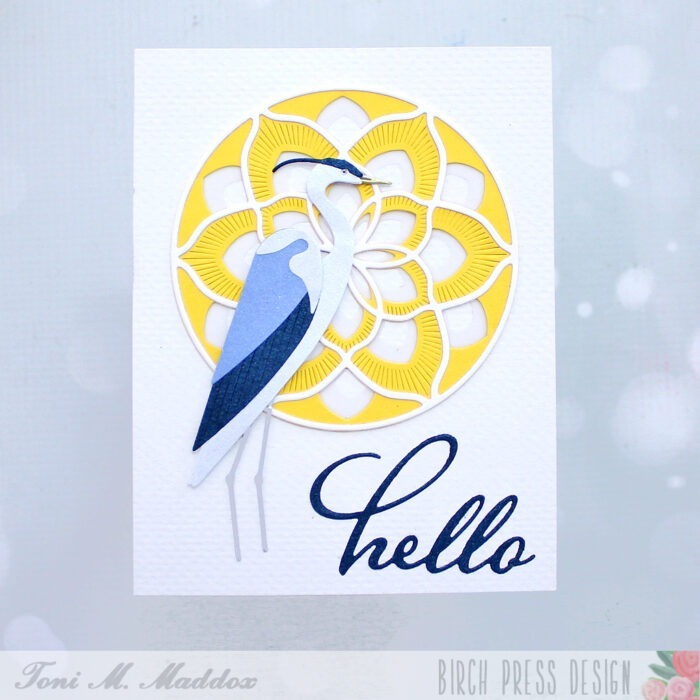
For the sentiments, I die cut the greeting from black cardstock and layered it with a white shadow die cut. Then I heat embossed a sub-sentiment with white embossing powder on a black sentiment strip.
The final step was to attach all the elements to my card design. I used foam squares for added dimensions and finished with a few black enamel hearts for embellishment.
Thank you so much for stopping by and reading about my layered card design featuring products from past Birch Press collections. See you again soon!
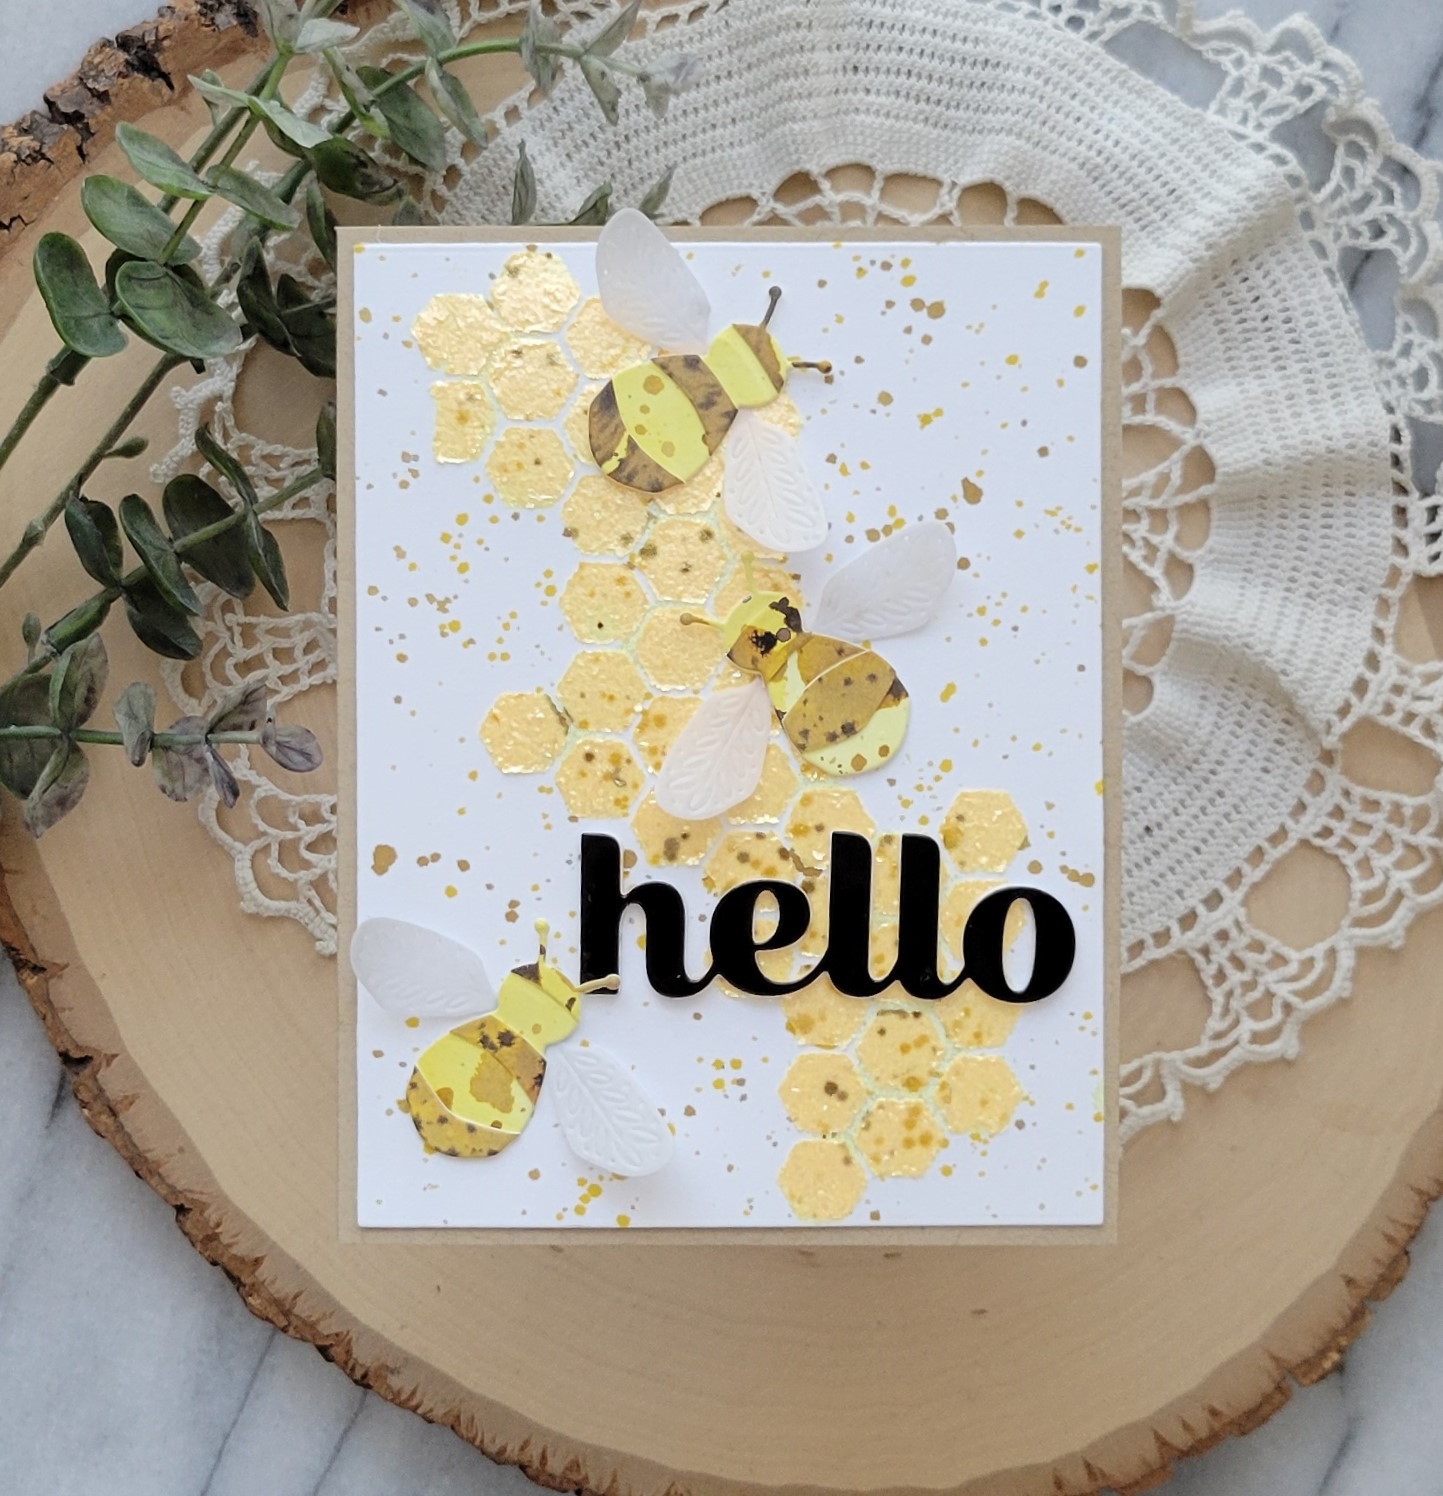
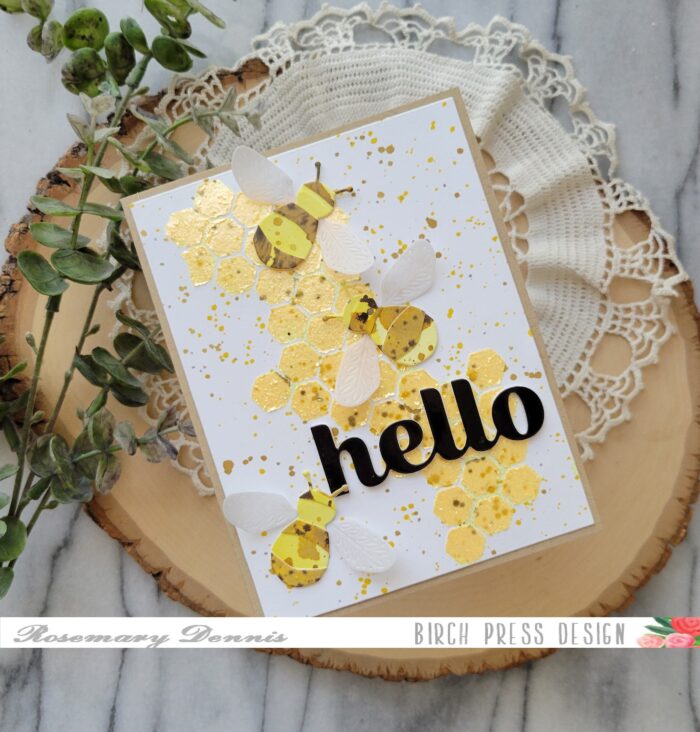
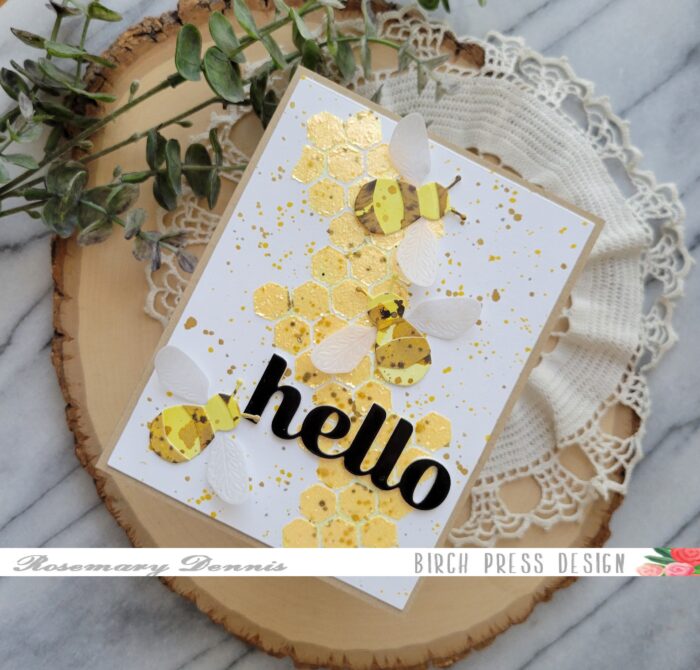
Hello friends! Have you been amazed by the projects the design team has created with the most current release? Well, I have! I have been buzzing with excitement to get something made and today is the day! Let’s have a look at what I made.
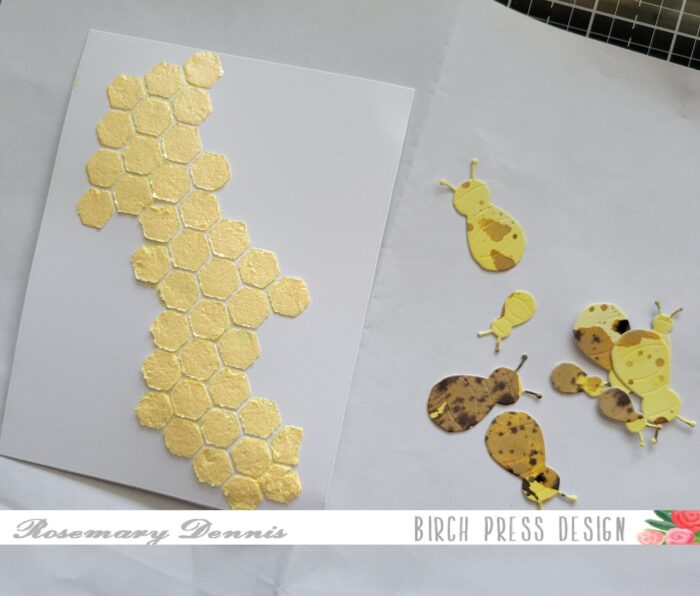
I had several ideas in mind and tried at least one of them, but wasn’t super happy with how it was turning out. I decided to shift gears and use up some yellow glitter paste I had out on my desk. I really wanted to use the Honeycomb Cut Out die and so I used it to create a stencil to use with the glitter paste.
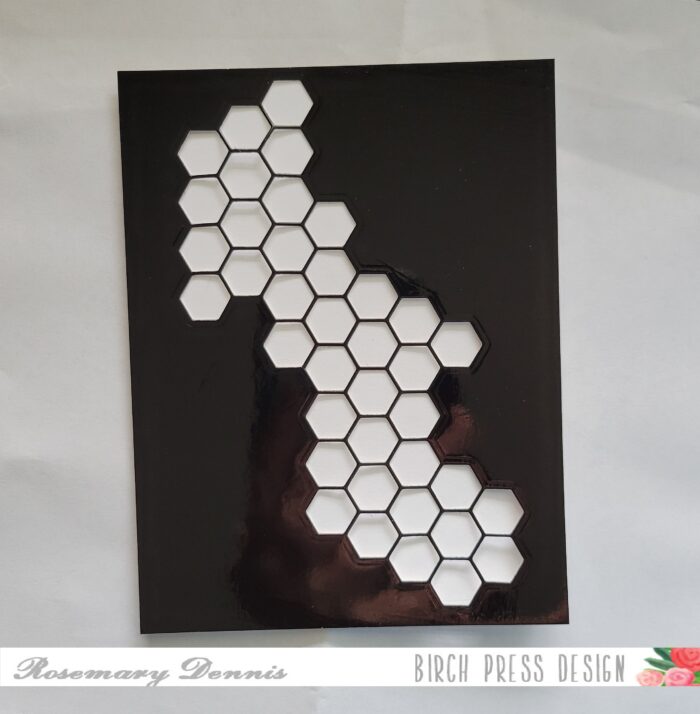
After doing a quick test to see how my DIY stencil would turn out I decided to diecut it from some sturdier cardstock. For this I chose (and sacrificed) a piece of Memory Box glossy black cardstock. As you can see it would have also made a pretty neat background, too. I die cut a piece of heavy white cardstock with a rectangle die and then taped that to the back of my DIY stencil. The stencil worked pretty well with only a small amount of the paste seeping under. I peeled off my stencil and let my panel dry.
While my panel was drying I die cut my bees using the Block Print Buzzing Bumblebee from a piece of watercolor cardstock that I had initially planned to use for my background panel, but it was a bit of a fail. I think the bees I die cut from it are kind of fun and funky!
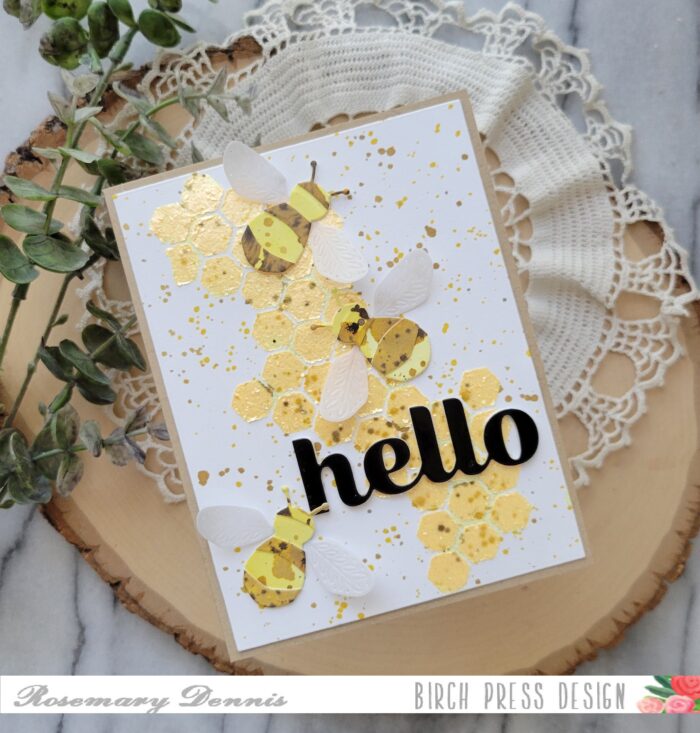
Once the glitter paste was dry and full disclosure that did take a long time because of the amount of paste that was applied using the stencil. I let the panel dry overnight to make sure it was fully dry before assembling my card. I even at one point placed something heavy on top so that it would dry flat.
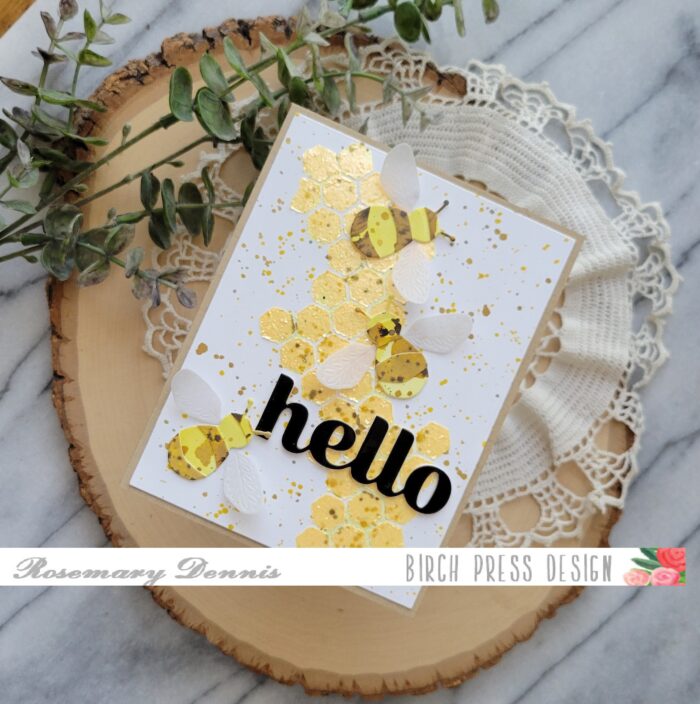
Since I was going for a mixed media vibe. I splattered the fully dry panel with distress ink in Gathered Twigs and appropriately Wild Honey. For the bees I die cut enough so that I could cut some apart to build the bees for my card. The wings were die cut from heavy weight vellum. I assembled my bees and then what kind of sentiment I would use. I settled on the Big Hello Sugar Script. Initially I die cut the hello from heavy weight cardstock and then splattered it, but there was too much splatter. So I used another piece of glossy black cardstock and stacked it on top of the splattered sentiment. Everything was adhered with liquid adhesive and then I added my panel to a kraft cardstock base.
Well, that’s it for me. I hope you enjoyed today’s card. Thanks for stopping by and have a truly lovely day.
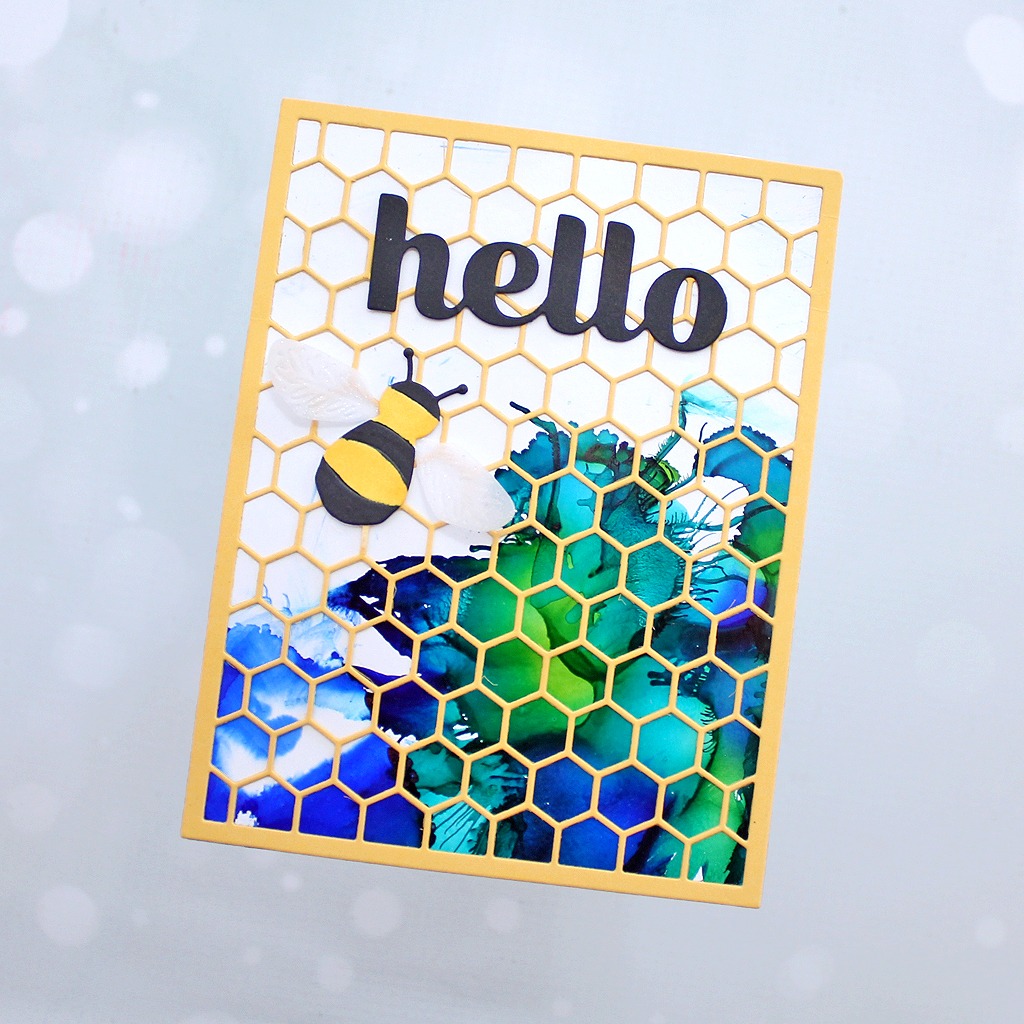
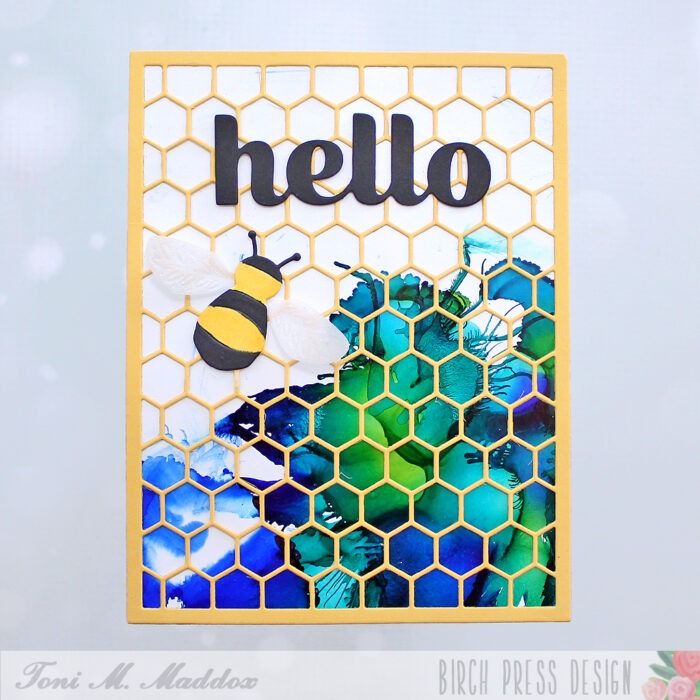
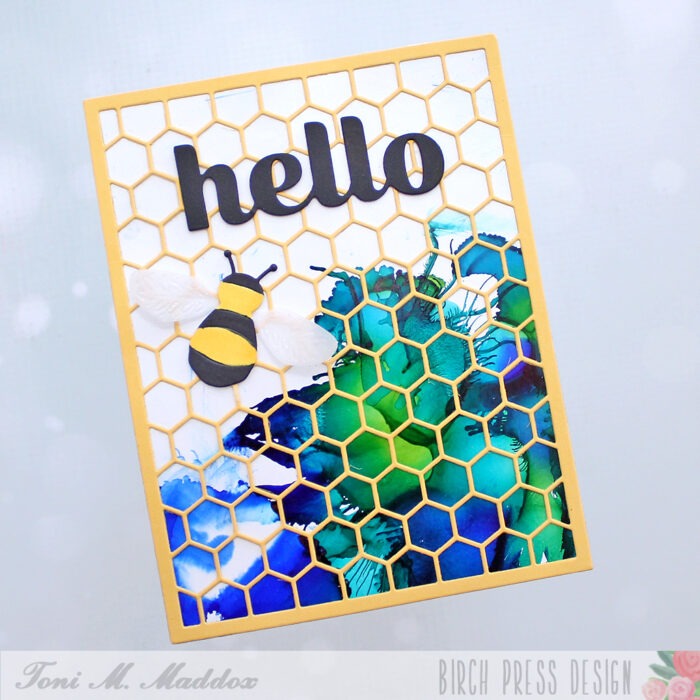
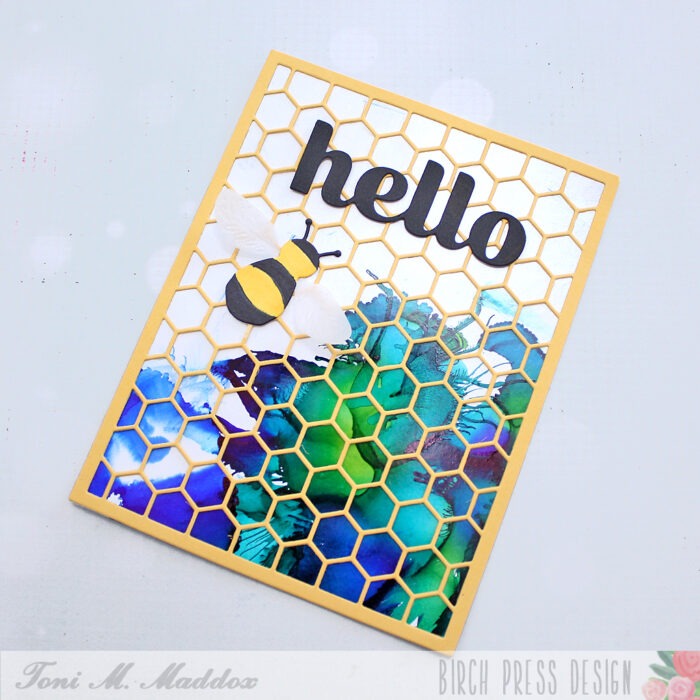
Blue honey? What’s going on here, Toni, you might be thinking to yourself. Well, a few years ago I read an article about some beekeepers who discovered their bees had made blue and green honey. It turns out the hives were just a couple of miles from a candy factory that had inadvertently left some product accessible to bees. Apparently bees gonna eat.
So, I took inspiration from that and used glossy photo paper with Adirondack alcohol inks to create a randomly colored blue-green base panel.
I cut the Honeycomb Plate from Memory Box Summer Squash cardstock, adhering that to the top.
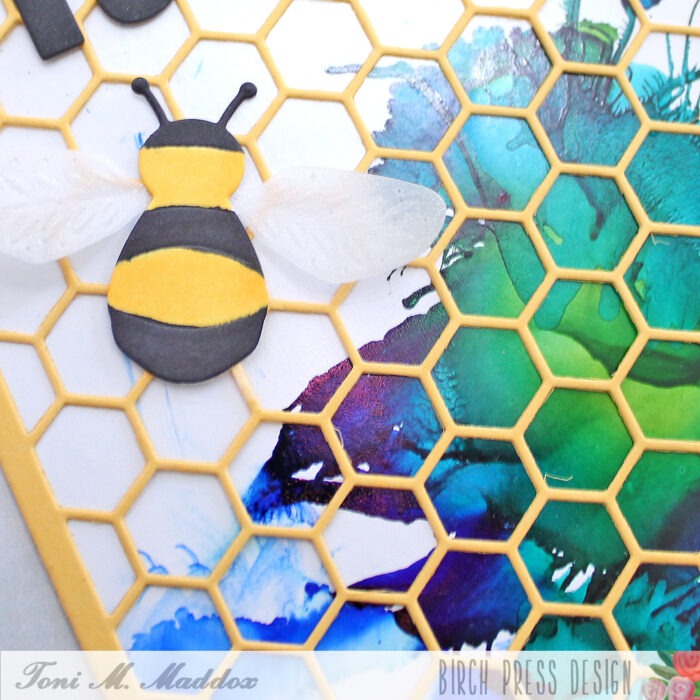
I colored up the large Block Print Buzzing Bumblebee using Copics and applied Clear Wink of Stella to the vellum wings.
I cut the Sugar Script Big Hello from black cardstock and popped it on top.
I hope you enjoyed today’s card and have a great rest of your week!
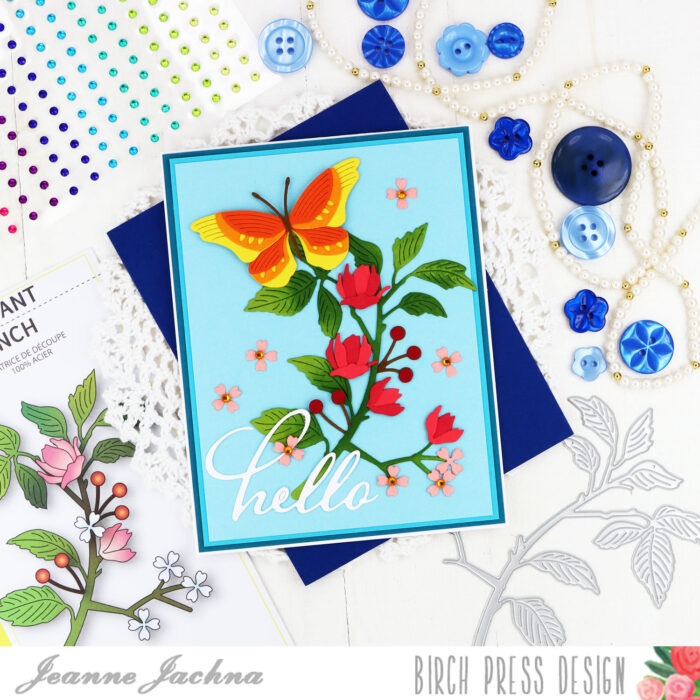
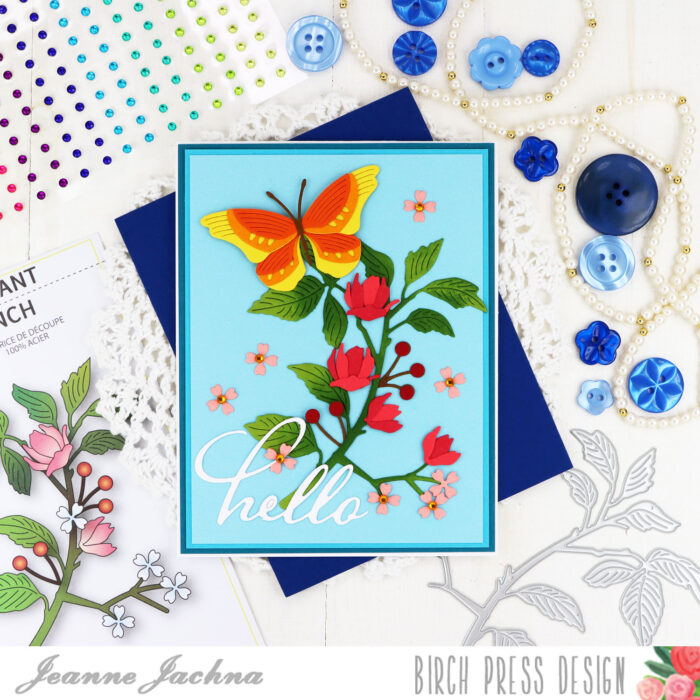
Thanks for stopping by! I hope you’re having a beautiful day! Spring has sprung and I hope you’re seeing beautiful blooms and butterflies in your part of the world!
There is still a chance of frost in my area so I won’t be planting the garden for a little longer. Until then I will satisfy myself with gorgeous die cuts from Birch Press Design.
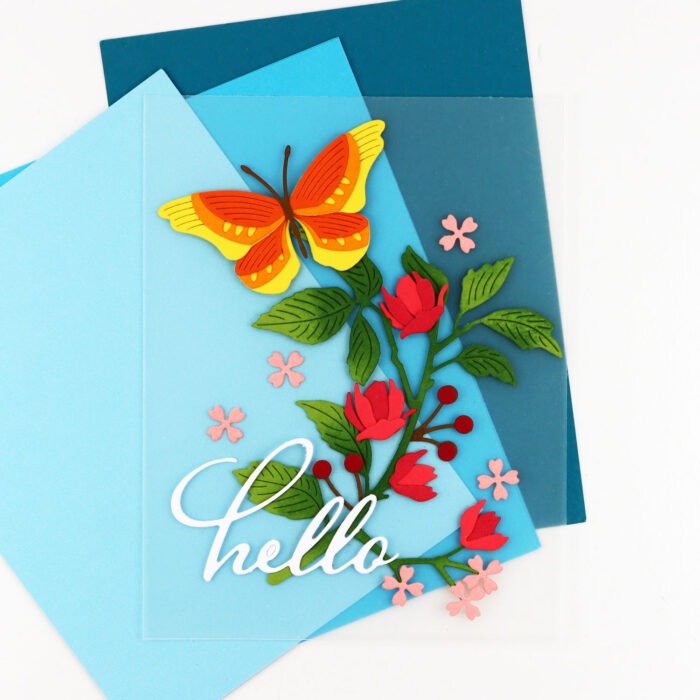
My cards usually start the same way. I arrange images on a piece of clear plastic the size of my card face. It helps me get a sneak peek of the design. I can even lift the entire arrangement and try different backgrounds underneath.
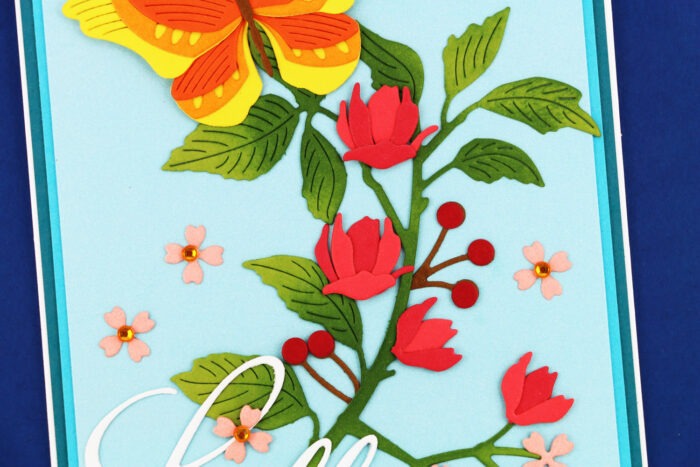
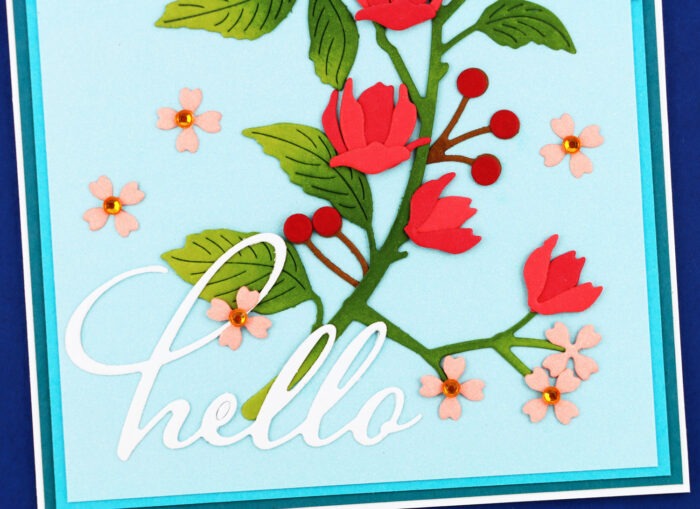
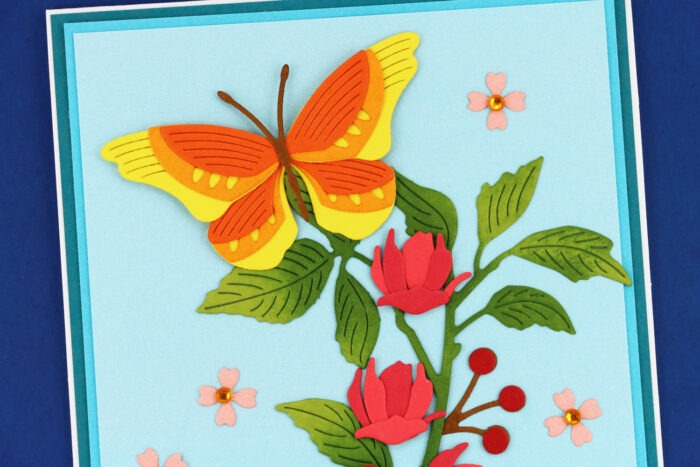
My card features the Abundant Branch die cut. I cut it from green cardstock and then inked the stem and leaf centers with Distress Ink to add some depth and contrast.
A Block Print Brilliant Butterfly can’t resist the pretty blooms. I love how the layers bring the butterfly to life. I used a yellow base and topped it with light and dark orange accents.
I love the look of this card. It reminds me of botanical field guide drawings. Have a beautiful day!
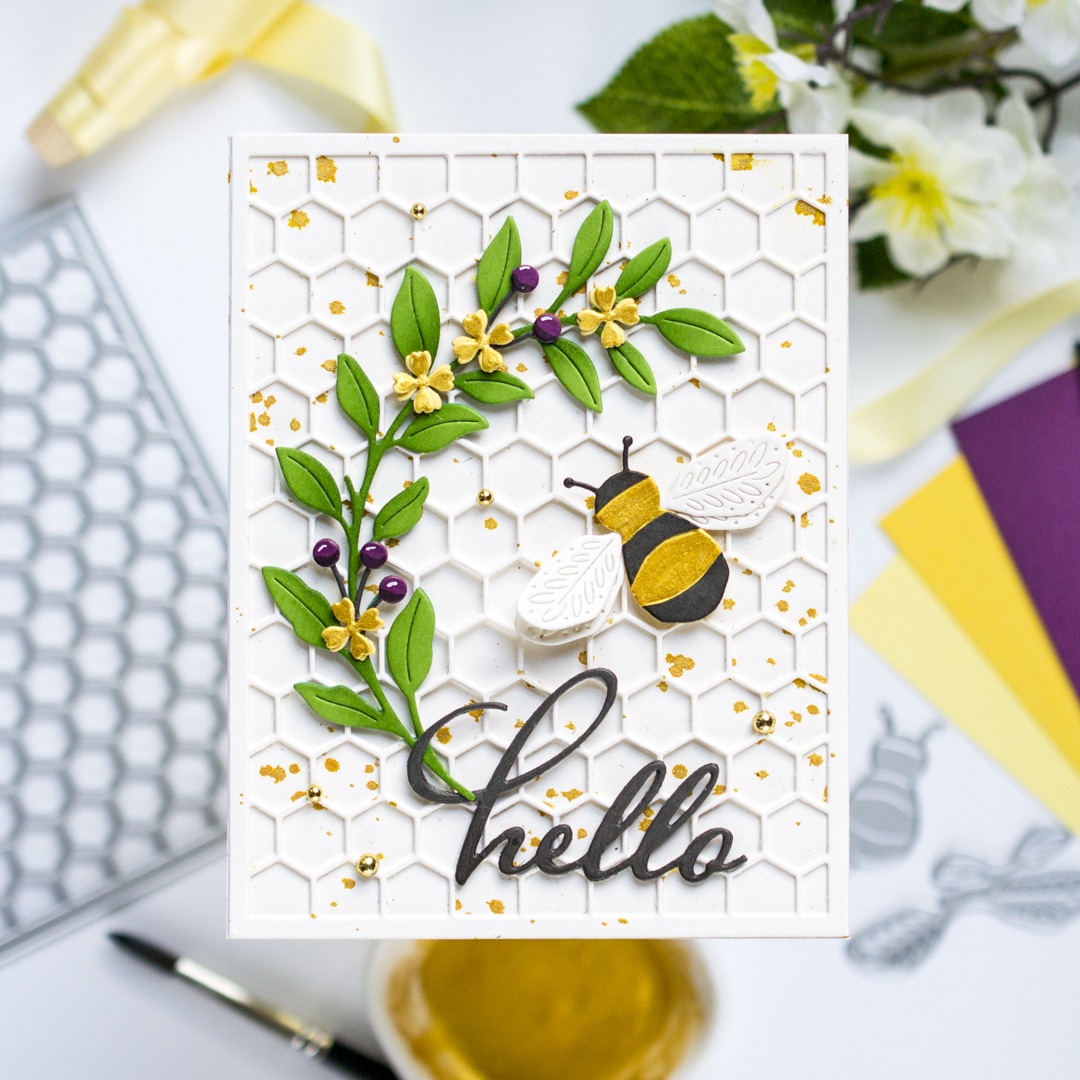
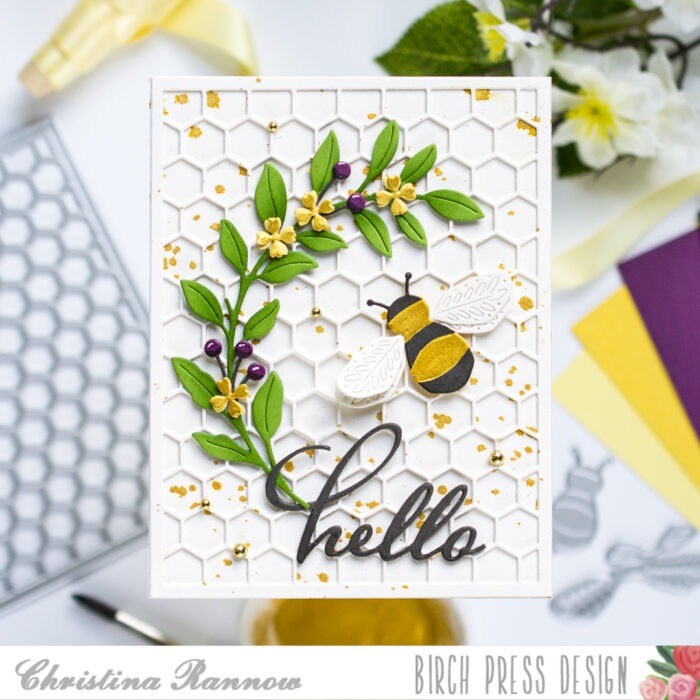
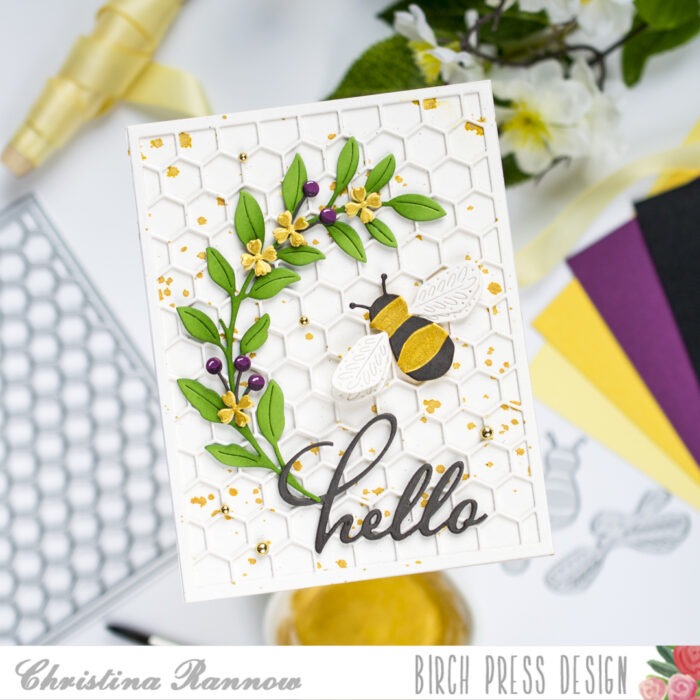
Hello, friends! Christina here to share a card using some new additions to the beautiful Block Print collection. I paired the new Block Print Buzzing Bumblebee with the new Honeycomb Plate and added some shimmery gold accents for a simple but elegant card design. Follow along below to get all the details!
My first step was to create the background panel. I die cut the Honeycomb Plate from ivory cardstock and then attached it to an A2 ivory cardstock panel that I splattered with a mixture of gold Perfect Pearls and a very small amount of water- just enough to get the powder moving. With the background completed, I moved on to die cutting the other elements for my card design.
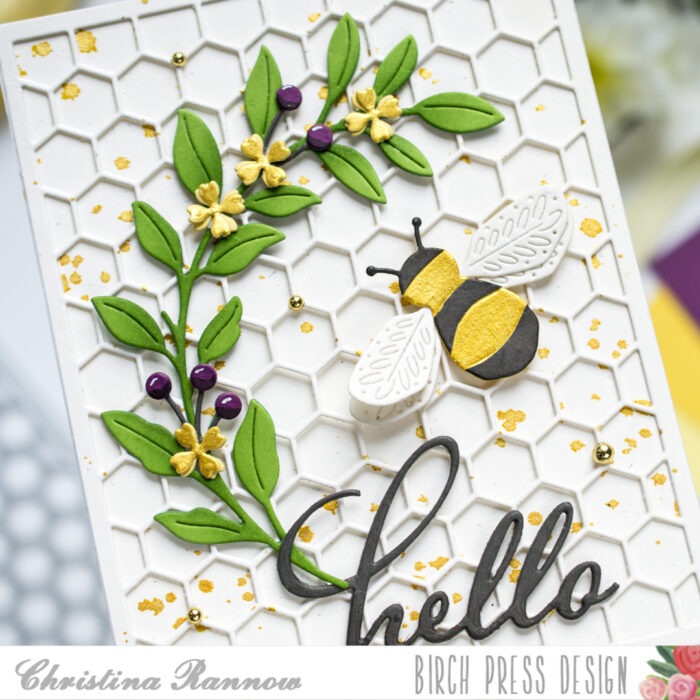
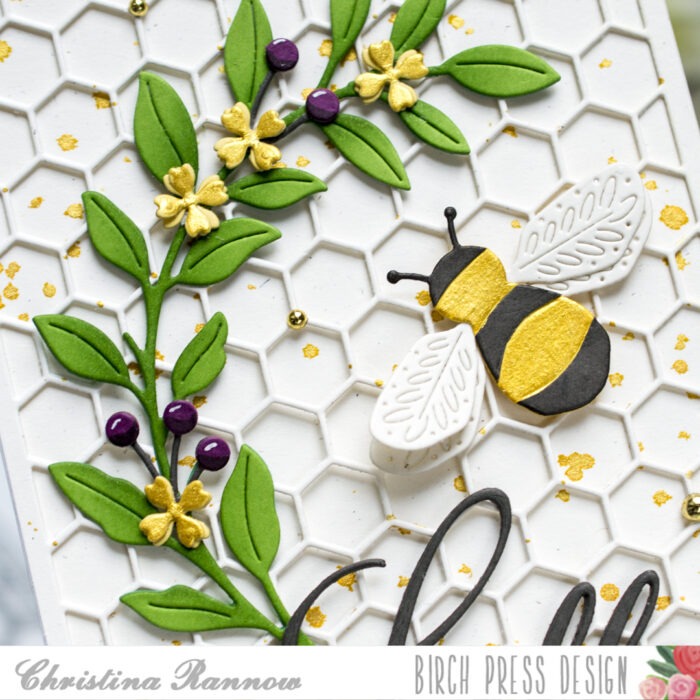
I started with the arched branch from the Rosebud Arch Contour Layers and die cut it from green cardstock. Then I inked the center area with a darker green color for some shading and dimension. Next, I added flowers and berries to the arch. The flowers and berries are from the Abundant Branch die set. I die cut the flowers from ivory cardstock and painted four of them with the same gold Perfect Pearls and water mixture that I used to splatter the background panel. Then I layered the painted flowers with an unpainted flower for extra dimension before attaching all of them to the arch. Then I die cut the berries from eggplant and brown cardstock and added shading to the berries with a Copic marker and highlights with a white gel pen. I tucked these into the arch and then attached everything to the background panel with glue.
Next, I die cut the elements for the bee. I used ivory cardstock for the wings and yellow and dark gray cardstock for the body. The die for the body is one piece, so I snipped apart the stripes so I could alternate the colors on a base layer. Then I painted over the yellow portion with more of the gold Perfect Pearls mixture. Finally, I secured the completed bee to my card design with thin foam squares.
The final details were to add the Hello Scripted greeting that I die cut from more dark gray cardstock three times before stacking them and then securing it with glue to my card design. A scattering of shiny gold pearls for embellishment finishes this simple but elegant card using some of the new additions to the Block Print collection.
Thank you so much for stopping by to read about my latest papercrafting project! See you again soon!