Category: Hugs

  • Dancing Crabs | by Christina Rannow

    Dancing Crabs | by Christina Rannow

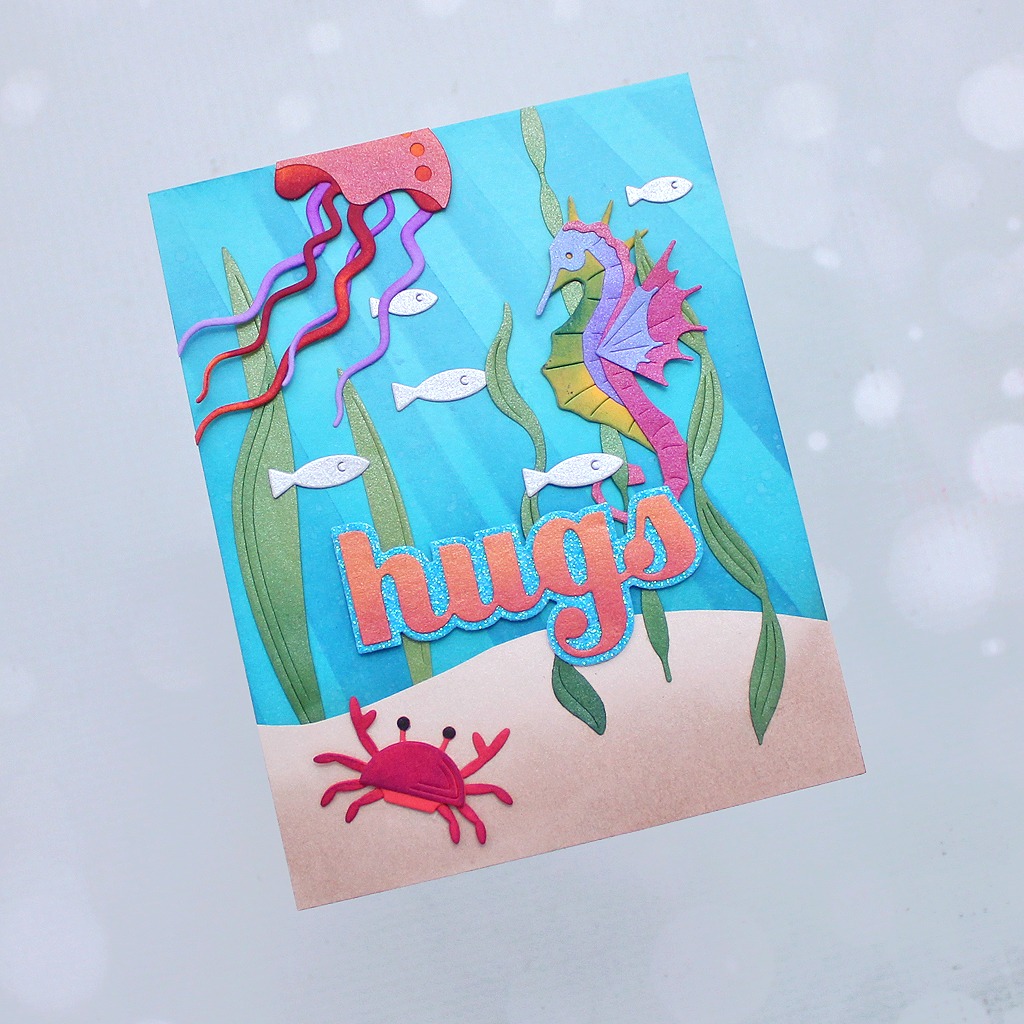
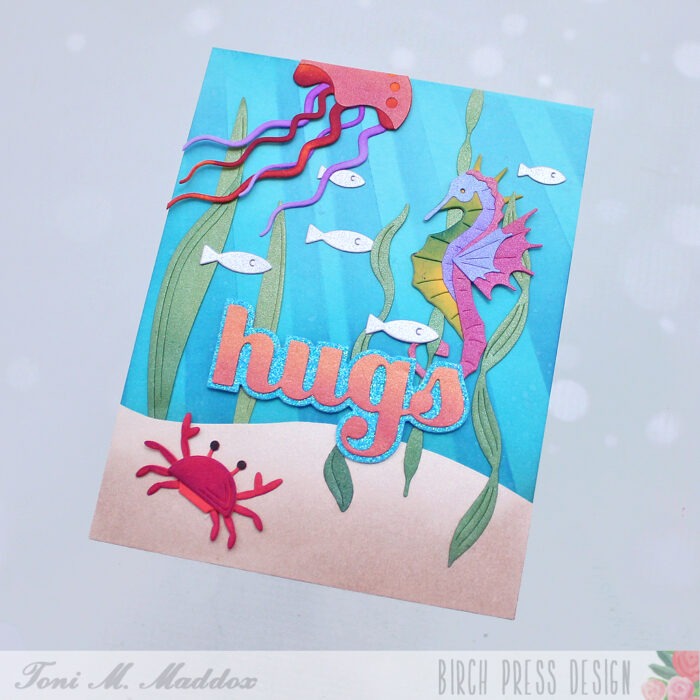
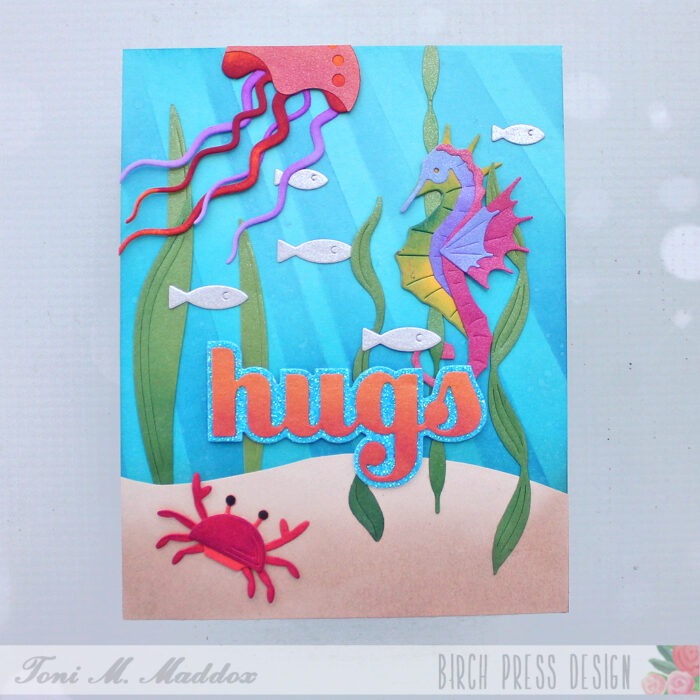
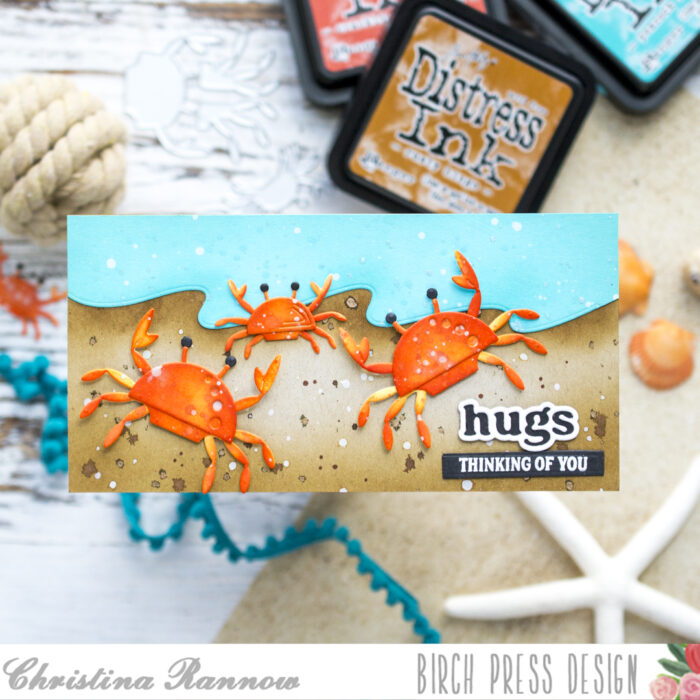
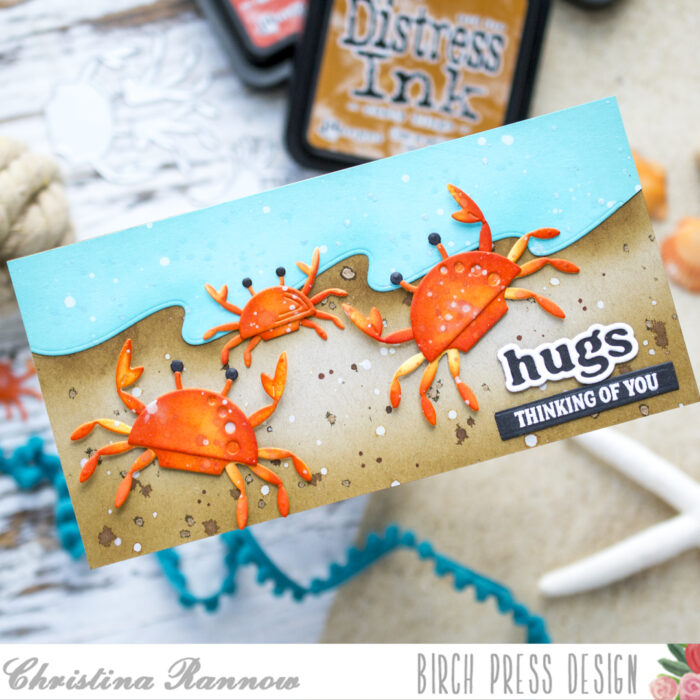
    Hello! Christina here to share one last ocean-themed card with you before we move into some festive holiday cardmaking. For this project, I created a mini slimline card using the Block Print Dancing Crabs dies. These little guys are clawing around on a simple beach background full of sparkle and splatter. Let’s dive into this fun beach scene!

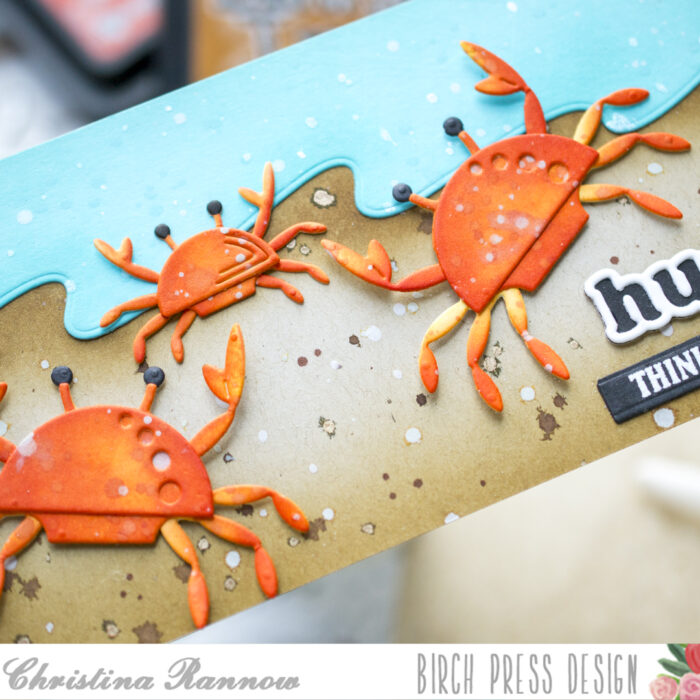
    To start, I trimmed a piece of kraft cardstock to fit my mini slimline card base. The bases I use measure 6 ½ x 3 ⅛ inches, so that’s what I started with. Then I used a simple wave border to die-cut the water from Pool Party cardstock. Next, I pulled out my Distress Inks to blend in some shadows around the edges of both pieces. I also added some ink to the kraft cardstock where the water border will be. After blending in the ink, I also splattered both pieces with more of the Distress Inks as well as some sparkly Mica Stains in coordinating colors and white splatter medium. After a short dry time, I attached the water border to the kraft cardstock and moved on to die-cutting the Dancing Crabs.

    I die-cut the crab pieces from white cardstock and then ink blended each piece with multiple colors before also splattering them with more of the same ink colors. This will bring these little guys to life by adding depth and texture to the pieces. After assembling the crabs, I attached them to my card front with foam squares. 

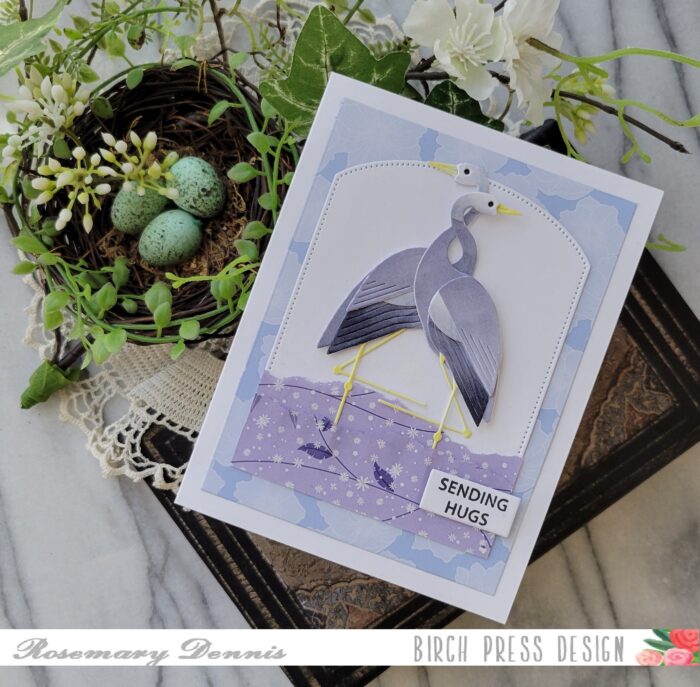
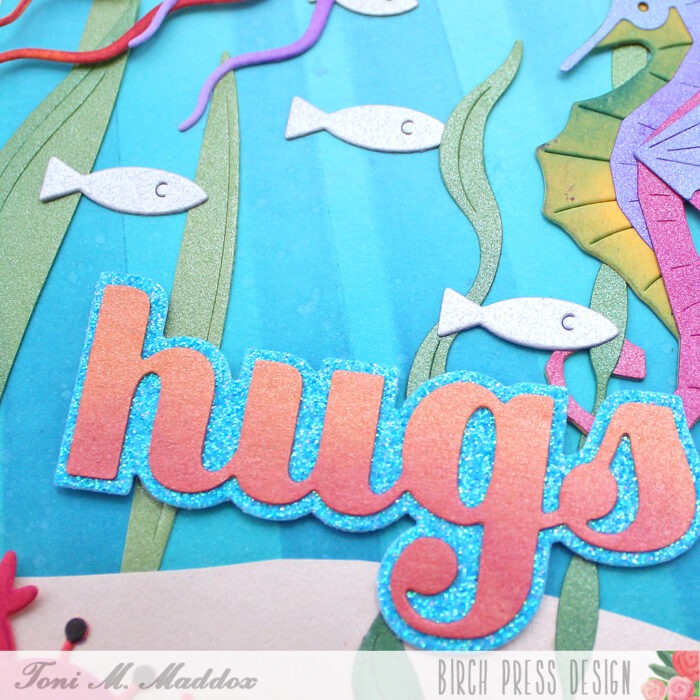
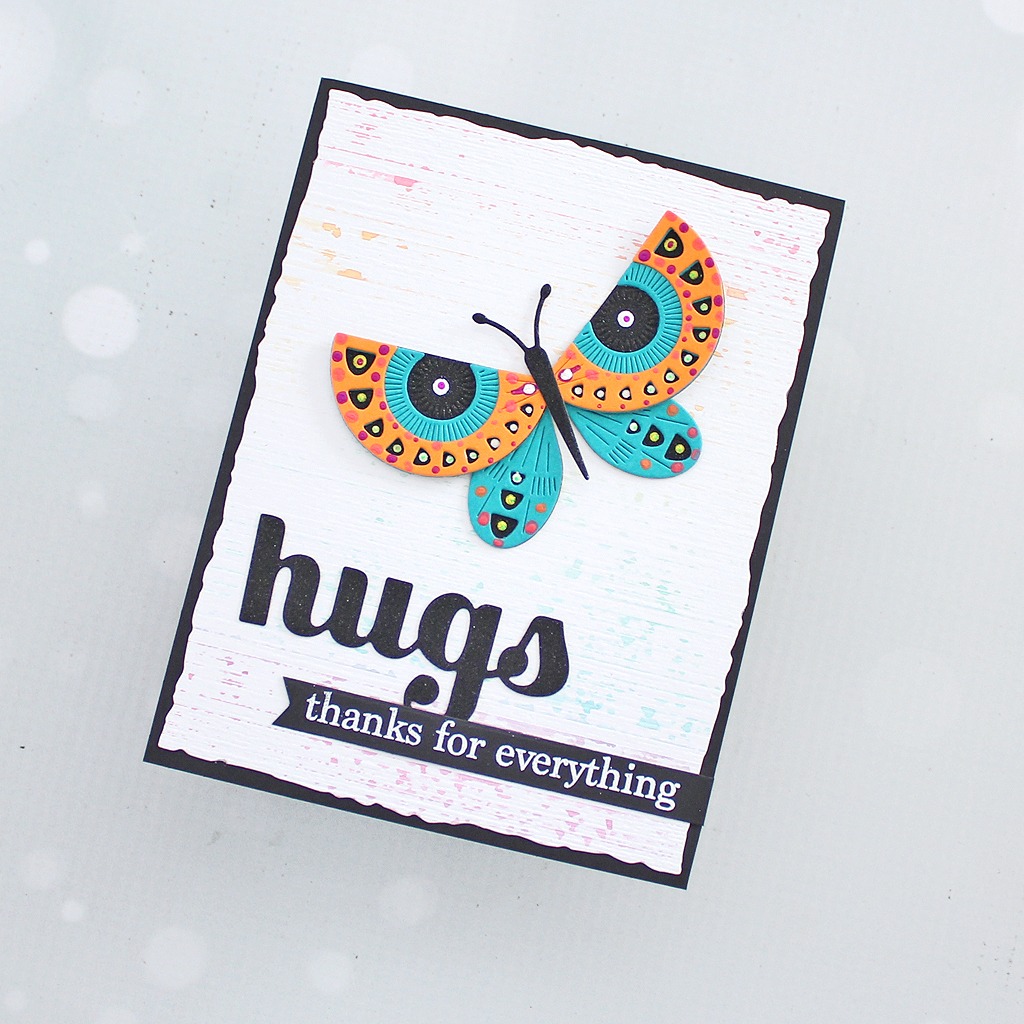
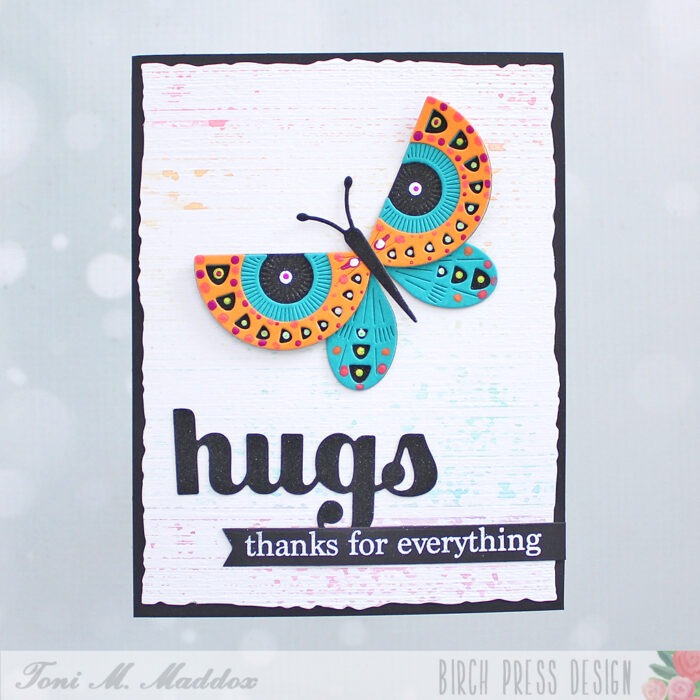
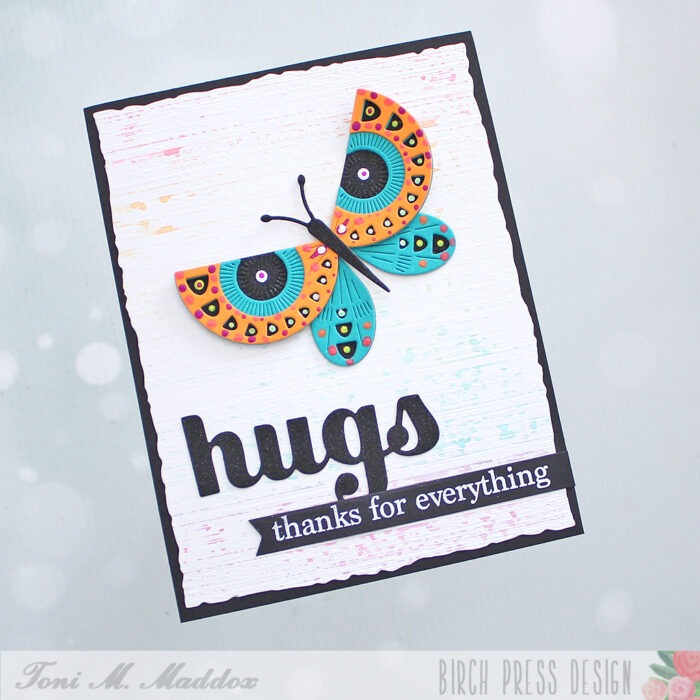
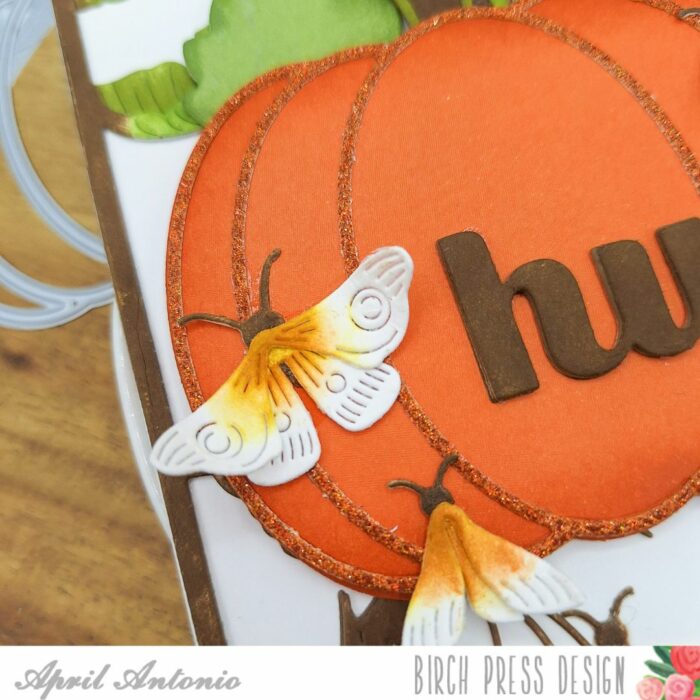
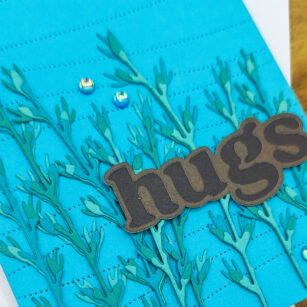
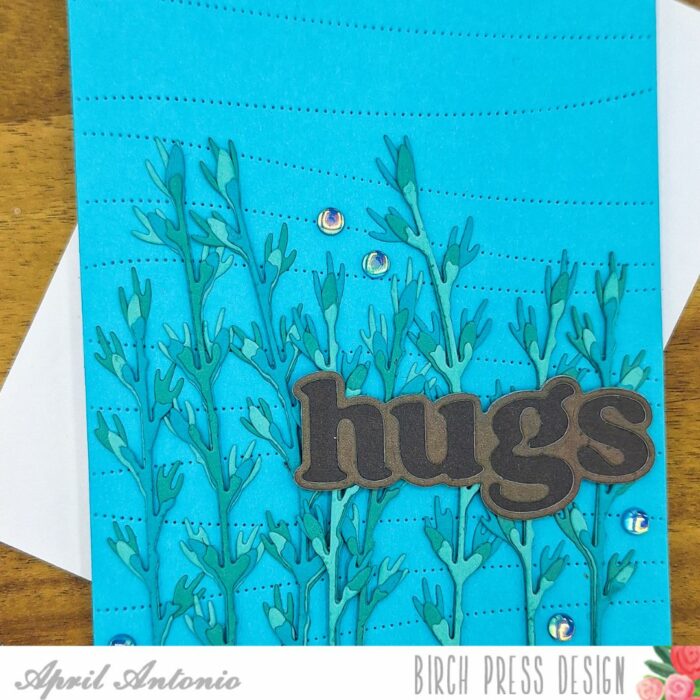
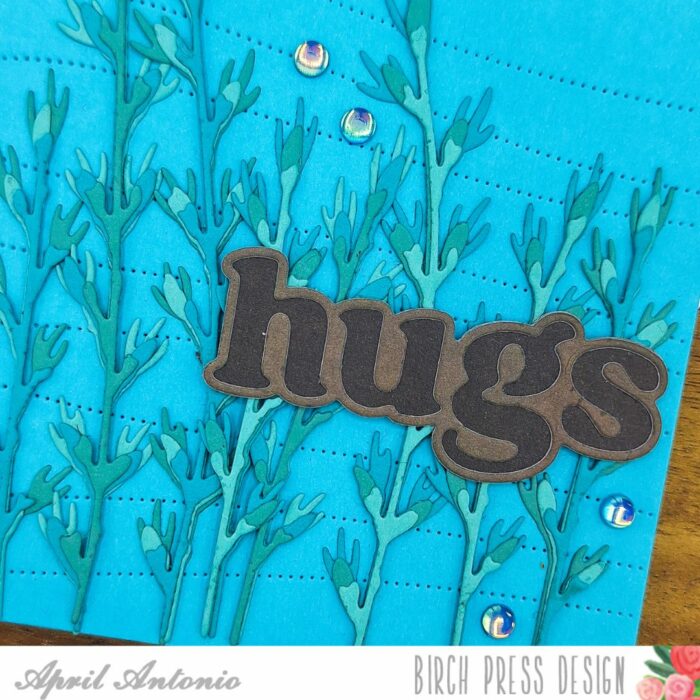
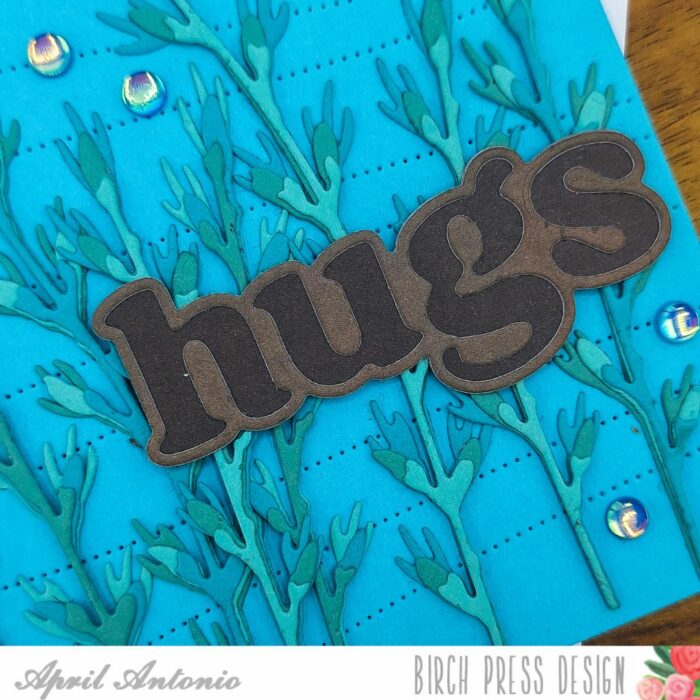
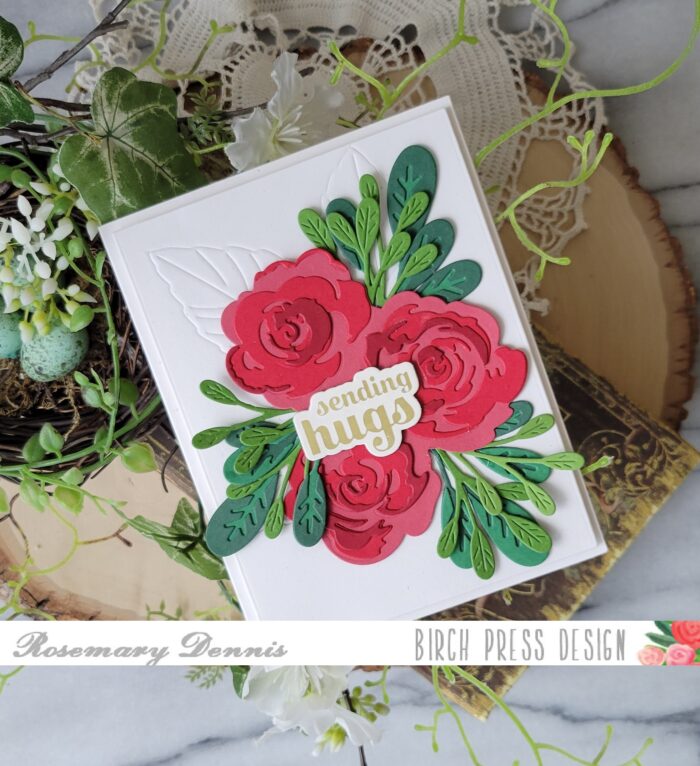
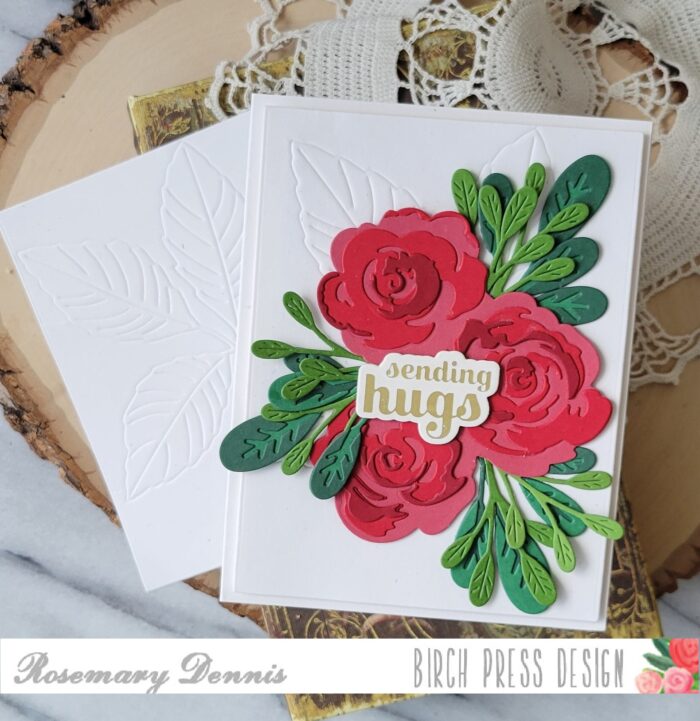
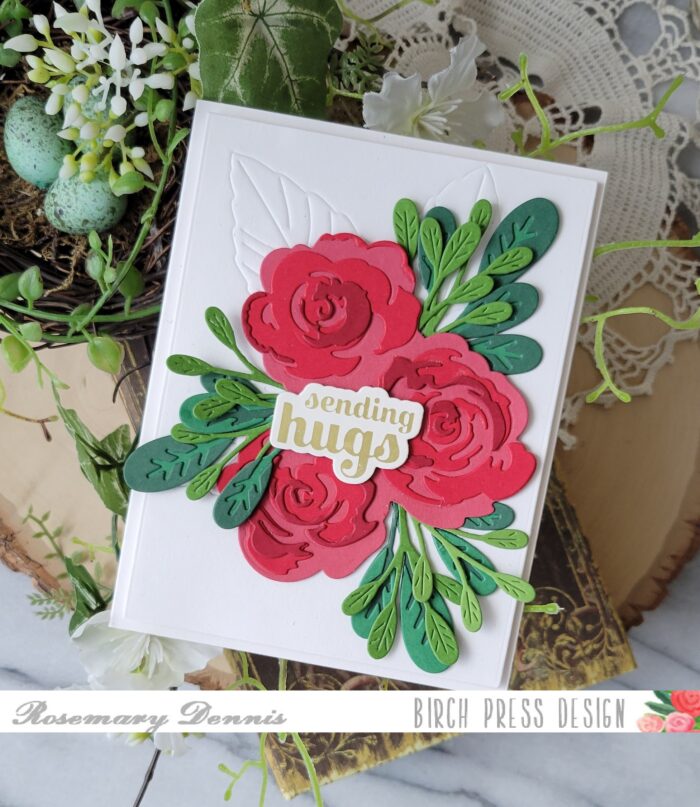
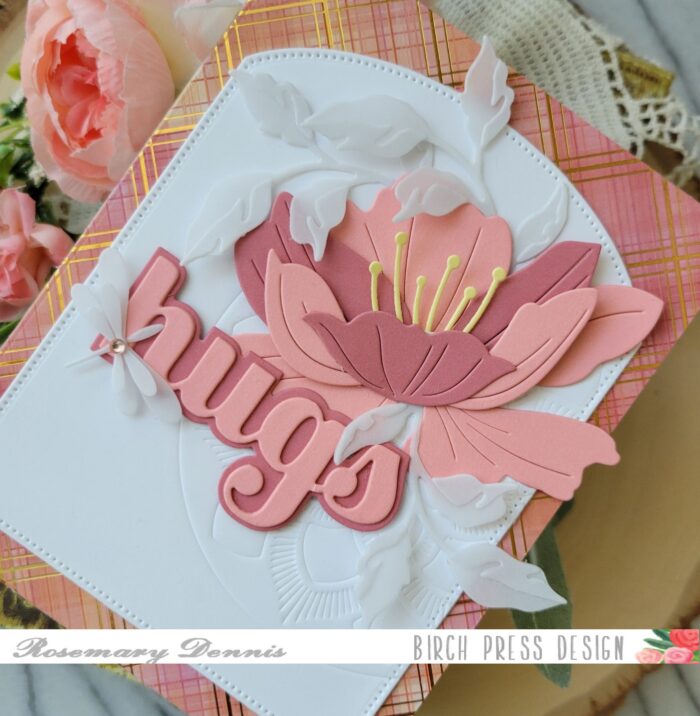
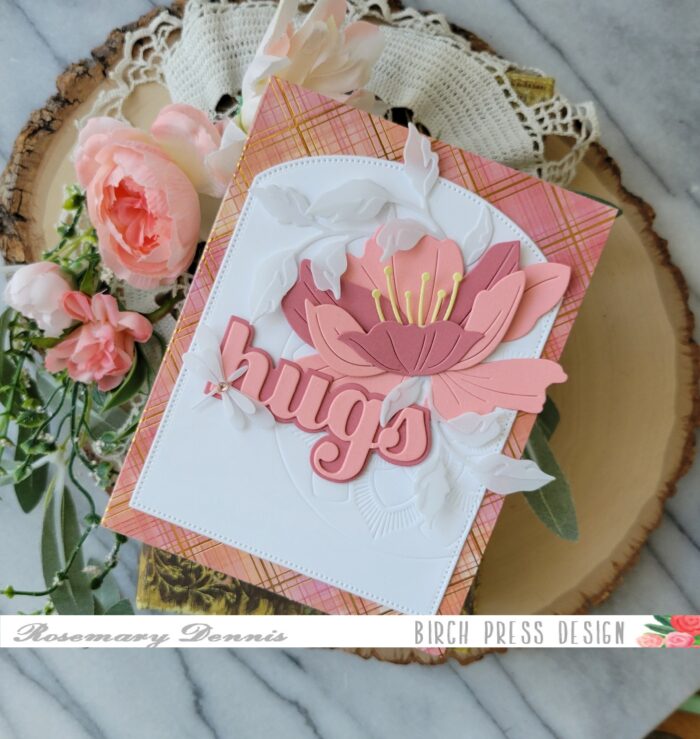
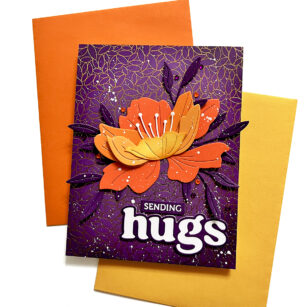
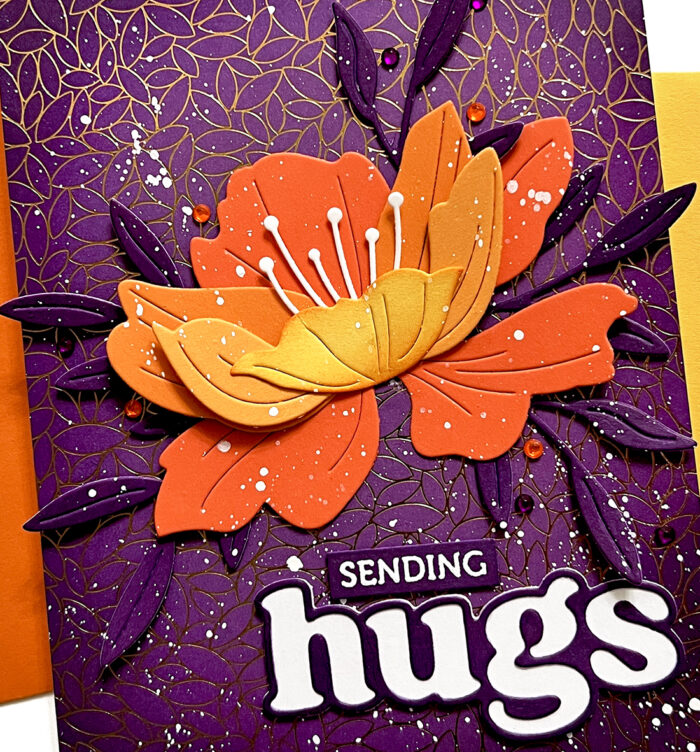
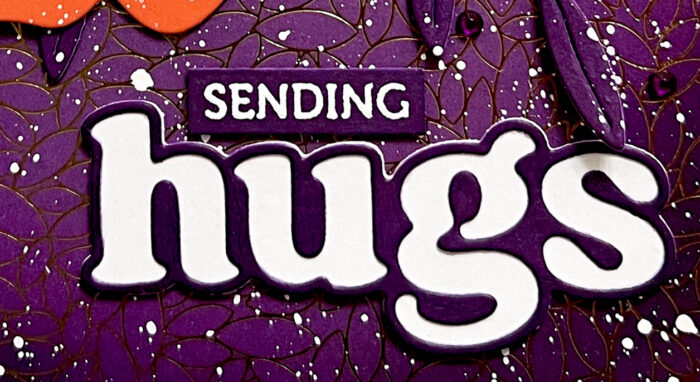
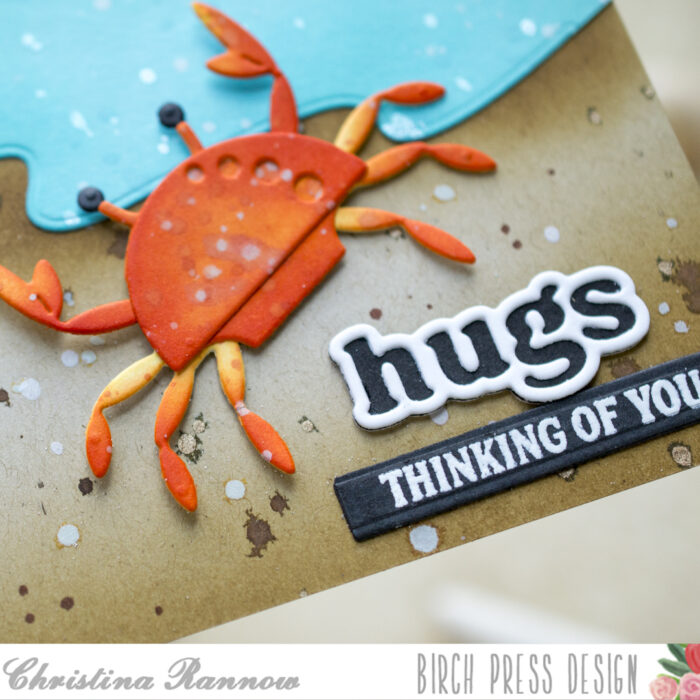
    I finished my card design by adding a Hugs Vintage Sentiment diecut and a heat-embossed sub-sentiment using the Poppy Stamps Sentimental Banners set.

    Thank you for checking out my mini slimline card featuring a fun beach scene I created using the Block Print Dancing Crabs die set. See you again soon!

  • Sending Hugs | by Rosemary Dennis

    Sending Hugs | by Rosemary Dennis

    Hello everyone! Rosemary here on the blog today with a friendship style card made with the beautiful Block Print Standing Crane and Block Print Seaside Crane and patterned papers from the Memory Box Anemone Grove 6×6 pad. Let’s look at what I made.

    I started my card by die cutting all the pieces of the cranes from white cardstock. Then I decided how I was going to color them. This time around I decided to use my Copic markers and went with a group of light blue violet markers for the body and feathers. A light yellow Copic was used for the legs and beak. I used a very dark gray marker for the eye. I let all the pieces dry and then adhered them together with liquid adhesive.

    I wanted to create the look of the cranes standing in water, but decided I wanted to use torn edge patterned paper. I went through all my pads of Memory Box papers and found the Anemone Grove pad fit my design perfectly. I tore the strips from one piece and adhered them to a piece of white cardstock with liquid adhesive. I then die cut the piece with a Memory Box capped pierced die.

    I did make sure to leave an area without glue so I could slide the cranes’ legs in between the layers. I used liquid adhesive and thin foam square to adhere the cranes to the panel. Another flip through the Anemone Grove pad and I found a piece that gave the appearance of clouds in the background. That was die cut with a Memory Box rectangle die and adhered to a white cardstock base. I adhered the main panel on top and then finished with the sentiment from the Birch Press Design Rainbow Days stamp set.

    Well, that’s it for me. I hope you enjoyed today’s card. Thanks for stopping by and have a wonderful day.

  • Underwater Hugs | by Toni M Maddox

    Underwater Hugs | by Toni M Maddox

    Hello, everyone! This underwater scene was so fun to create. I love seahorses. And that jellyfish–look at it!

    My first step was to sponge the blue card base with Catherine Pooler inks and one layer of the two-part Light Ray Stencil. I spattered this with water and set aside.

    Next I fussy cut the sand layer using a piece of scrap kraft cardstock and sponged it with CP Sand Castle ink.

    I cut a few of the Block Print Sea Kelp & Mini Fish from a shimmery green and silver cardstock. I sponged the Sea Kelp with CP ink for a bit of shading.

    I diecut the Block Print Proud Seahorse, Block Print Floating Jellyfish, and Block Print Dancing Crabs from a few Memory Box cardstocks with shimmery cardstock scraps for highlights.

    I sponged the cardstocks, including the Sugar Script Big Hugs sentiment, with CP inks. I assembled the final scene, tucking the creatures in among the greenery. So cute!

    Do visit my blog, Frankie Helps Craft, for a full list of ingredients and to check out my other projects.

    I hope you enjoyed today’s card and have a great rest of your week!

    Supplies

  • Dot Painted Butterfly | by Toni M Maddox

    Dot Painted Butterfly | by Toni M Maddox

    Hello, friends! Toni here with you today. You may recall I said I’d made a second card using the Linear Stripes stencil. Let’s dive right in!

    Once I’d sponged up the card front of my previous card shown below, I noticed I had a LOT of ink left on the stencil. I certainly didn’t want all that inky goodness to go to waste so I spritzed the stencil with a bit of water and used it to smoosh a piece of Strathmore Bristol.

    Once that had dried, leaving me with subtle rainbow lines, I embossed the panel with a textured linen embossing folder. I also cut it out using a deckle edge rectangle die.

    Next I constructed the Block Print Radiant Butterfly using a black glitter cardstock as the base.

    I had recently seen a video about dot painting on canvas and thought I would try it on the butterfly using Art by Marlene neon acrylic paints and a stylus I had from ancient times when you had to emboss by hand (gasp!). Neat!

    I diecut the Sugar Script Big Hugs sentiment from the same black glitter cardstock as the butterfly then topped it with an embossed Vintage Everyday Greeting.

    I hope you enjoyed today’s card and have a great rest of your week!

    Supplies

  • Sending Hugs | by Rosemary Dennis

    Sending Hugs | by Rosemary Dennis

    Hello everyone! Rosemary here on the blog today with a sunny card that would brighten up anyone’s day. Let’s have a look at what I made.

    There are so many pretty flowers in the new Block Print line that it is hard to decide which one to use! For this card I decided to use the Block Print Fun Floral die set. One of the things I noticed about this set of dies and the resulting flowers is that they would be perfect for a wreath!

    I started by diecutting a circle using a die set from Poppystamps (our sister company) from bright yellow cardstock from the Memory Box Sunshine. The rest of the pieces were die cut from various shades of yellow from the same pad.

    I then assembled all the flowers by alternating colors. When I was done I had lots and lots of flowers to use for my wreath. Below is a photo of my pile of flowers.

    I die cut some cream Memory Box woodgrain cardstock for my background and then adhered the die cut circle to the panel. I flowers were arranged with the large flowers at the top, bottom and sides and the smaller flowers in the gaps that were left.

    To break up all the yellow I added some bright green leaves that I cut with the leaf die from the Block Print Stems and Berries die. I finished off the card with the sentiment from the Rainbow Days Lingo Note stamp and die set that I surrounded with lots and lots of clear Fairy Jewels.

    I love how my fun and bright wreath turned out! I hope you enjoyed learning how I created it. Thanks for stopping by and have a wonderful day.


    Supplies


  • It’s Fall, Ya’ll | by April Antonio

    It’s Fall, Ya’ll | by April Antonio

    Hello friends! Design Team member April here today sharing a card in honor of the first day of Fall. Time to light some cozy candles, grab a warm blanket, and sink into a fun afternoon of crafting.

    Here’s how I pulled this card together:

    I used layer A and B from the Forest Canopy Layer set and ink blended on the leaves and branches with green and brown inks. I glued both layers together, and then used a tape runner to attach them to an A2 card front.

    I then used a sheet of orange cardstock from the Sunny Orange cardstock pack to cut the background of the Adornment Pumpkin die set. I cut this out twice and used foam tape to glue the two pieces together.

    I cut the outline part from a piece of orange cardstock from the Glitzy Glitter pad. I finished off the pumpkin by ink blending the stem and leaves and adding them to the top.

    For my sentiment I used the Big Hugs Sugar Script die, cutting it out three times and ink blending brown onto the layers, and gluing them together.

    Lastly, I cut out all the dies from the Evening Moths die set from white cardstock.

    Supplies

    Supplies

  • Summer Ocean Blues | by April Antonio

    Summer Ocean Blues | by April Antonio

    Hello friends! Design Team member April here today sharing a beautiful, bright, blue ocean inspired card using the Budding Twigs Contour Layers die set. I visited the beach last month and was inspired to create something ocean-y.

    Here’s how I pulled this card together:

    I cut a piece of heavy-weight white cardstock down to A2 card size. is made from 80 lb. I used on of my favorites, the Pinpoint Contour Plate to cut a background from the Memory Box Lagoon 6×6 cardstock pack and layered that onto the card base.

    Next I cut the three layers of the Budding Twigs Contour Layers die set from three different colors from the same Lagoon cardstock pack. I glued the layers together following the included guide, making sure to alternate colors, and adhered each finished twig onto the card front. The blue background with the budding twigs reminded me of seeing coral underwater!

    I used the Big Hugs Vintage Sentiment die and shadow die to cut the ‘HUGS’ and adhered it to the front of the card. I used two different shades of brown I found in the Memory Box Earth Neutral 6×6 cardstock pack.

    I finished off the card with some fun gemstones from the Winter Fantasy Fairy gemstone set. I really enjoy paper-piecing and this card was fun to pull together! I hope you are able to have fun and do something creative this weekend.

    Supplies

    Supplies

  • Hugs & Roses | by Rosemary Dennis

    Hugs & Roses | by Rosemary Dennis

    Hello friends! Rosemary here on the blog today with another card full of layers and texture. This time I used multiple tried and true Birch Press Design dies and one hot foil plate set for my card. Let’s have a look at what I created.

    Quite sometime ago I pulled out multiple Birch Press Design floral die sets that I had not used in awhile (or never!) to use on future cards. I went to this pile and pulled out the Rose Bunch Contour Layers die set as I had actually never used it on a project before. I then pulled out my Memory Box 6×6 cardstock pads and chose the Greenery and Blush pads to use for the flowers. Three darker shades of red and three shades of green were pulled from the pads to use for all the die cutting.

    Once I had those items selected I selected the die set I wanted to use for the foliage to go with the roses. I decided to go with the Oval Leaf Branches Contour Layers die set because of the variety of little leafy branches in the set. I used the lightest shade of green for the smaller branches and then the two darker colors for the larger branches. I die cut everything and then assembled all the various pieces.

    As I indicated I’m kind of into adding more texture to my projects and one way is with embossing. Birch Press has so many different dies that can be use for embossing on cardstock. For this card I decided to use the Wiegela Leaf Contour Layer die set. I used the main die to emboss my off white cardstock panel. I then layered on the roses and all the little branches. Layering the branches did require me to cut some of the branches apart to get the look I wanted, but that is one of the things I like about die cuts. The ability to modify them as needed!

    The embossed panel shown with the card was my first impression. It turned out okay with a little bit of cracking, but I decided to do a second one and this time I spritzed the panel with a little water before embossing it. The second one turned out perfect! Unfortunately I covered up most of the embossing, but the embossing was more there to just add another element.

    I finished off the card with a foiled sentiment from the Sugar Script Sentiments 1 hot foil plate and die set. I love the little touch of gold that it adds to the card. Well, that’s it for me. I hope you enjoyed today’s project. Thanks for stopping by and have a great day!

    Supplies

  • Monochromatic Hugs | by Rosemary Dennis

    Monochromatic Hugs | by Rosemary Dennis

    Hello everyone! Rosemary here today with a sweet monochromatic card that I had so much fun creating! I used lots and lots of different Birch Press Design products, as well as some products from Birch Press Design’s companion company, Memory Box. Let’s have a look at what I made.

    I recently did a little bit of organizing of my Birch Press Design products and as I went through them several items I hadn’t used in a while (or maybe I hadn’t even used them yet!) kind of popped to the forefront as items I could use to make the card for today’s post. I started with the Big Hugs Sugar Script die set and the Perky Bloom Contour Layers die set. Then I started looking through all my Memory Box cardstock pads and realized that I had not used the pad called Blush. Now that I had my starting point things really got going!

    I went with a light coral pink and a dark coral pink from the Blush pad. I die cut all the pieces from the Perky Bloom from both sheets and then alternated the colors. This resulted in two flowers. I decided to go with the one that has the light coral pink bottom layer for this card. I had a previously die cut stamen piece that I had cut from yellow cardstock. I like the little pop of yellow. I also die cut the Big Hugs from the sheets. Since I had used the light coral pink for the first layer of the flower I decided to use the dark coral pink for the shadow layer of my sentiment.

    When I layered the flower I used a combination of liquid adhesive and thin foam squares to give the various petals additional lift. Once I had the flower finished my creative juices really got flowing! I decided to die cut a piece of paper from the Memory Box Gladiola Plaid 6×6 pad to cover the front of my card base. I went with a piece that has a hint of yellow in it to tie in the yellow stamen in the flower. Then I die cut white cardstock using a Curved Cap Pinpoint Layers die. At this point I decided that I wanted to add some texture to the white panel so I looked through my background layering dies and landed on the Arista Layer B die. I love the detailing in this layer of the die set. So I embossed it using my die cutting maching. I offset the die to the right side of the panel for additional interest.

    I layered this panel on the card front using thin foam squares. I liked the look of the flower on top of the embossed image, but I wanted even more texture! So I pulled out the Fuddle Leaf Branches die set and die cut the smaller branch and layering pieces from thick vellum. The layering pieces were adhered with liquid adhesive. Then I arranged the flower and the little branches on the white embossed panel.

    At this point I thought I was finished, but nope, lol! I wanted to add one more thing! A sweet little vellum dragonfly! I used the smaller dragonfly from the Simple Dragonfly Contour Layers die set and cut all the pieces from the heavy weight vellum I used for the little leafy branches. A tiny coral jewel was added to the body for the final touch!

    I absolutely love how this card turned out. I started with a simple idea and just let my creativity go! It is so fun to do that and something I need to do more often. I hope you enjoyed today’s card. Thanks for stopping by!

    Supplies

  • Vintage Hugs | by Allison Frazier

    Vintage Hugs | by Allison Frazier

    Hello, Birch Press friends. I am excited to be back on the blog today sharing this bold card featuring some new products! There are some great new word dies that just came out, and I chose one of my favorite sentiments of all time – hugs.

    I really was in the mood for a different and bold color palette, and the new Glimmering Gladiola paper pack from Memory Box was just what I needed as a jumping-off point. I chose some purple paper with a gold foil leaf design as my background. I took some darker purple ink and blended that around the edges of the panel before glueing it onto an A2 card base.

    Next, I used the new Sunrise Cardstock pack to pick four different colors of orange/yellow to create the layers for the Perky Bloom. This flower is so easy to assemble, and I love it in these colors! Instead of choosing large leaves to complement the flower, I chose some smaller leaves from the Tiny Tuft Flowers and Leaves die set. I cut these out of purple card stock and adhered them to the card base underneath the flower.

    The Big Hugs Vintage Sentiment is fun because you can assemble it in different ways. For my card today, I used the base layer die to cut purple card stock. I then took that base layer and die cut it with the detail layer die in order to create the purple outline. Finally, I glued that outline onto a white base layer. I stamped the subsentiment “sending” with VersaMark ink onto purple cardstock and then heat embossed it with white embossing powder. I splattered the card with white paint before adhering both of the sentiments with liquid glue.

    To finish the card, I added some purple and orange fairy jewels around the design. I hope this card brings a smile to your face! Thank you so much for joining us today.


    Supplies


    Supplies