Hello, Birch Press Friends! I am thrilled to be back with you today sharing a few of Birch Press Design’s new products. Are you ready for some sparkle and shine?
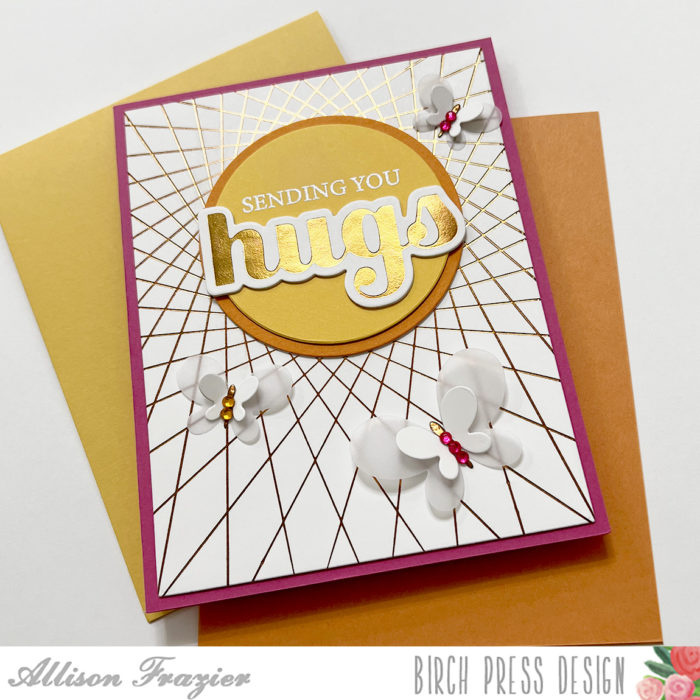
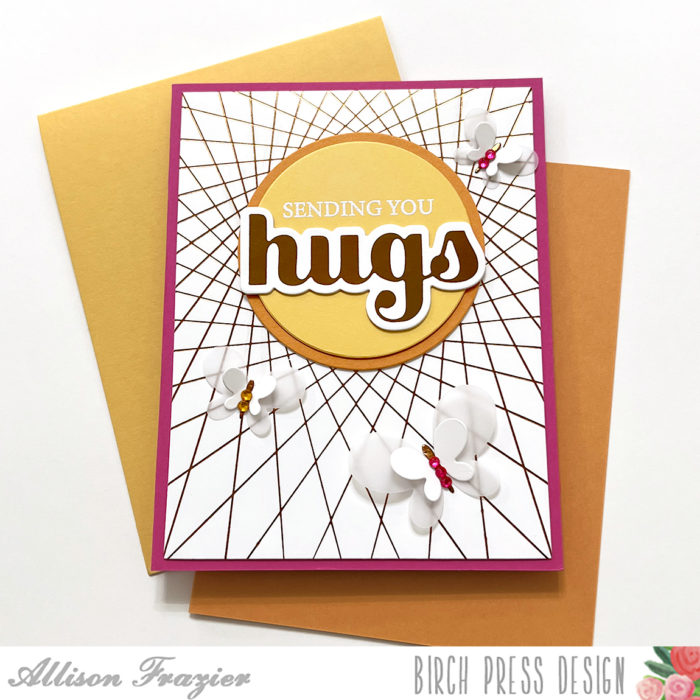
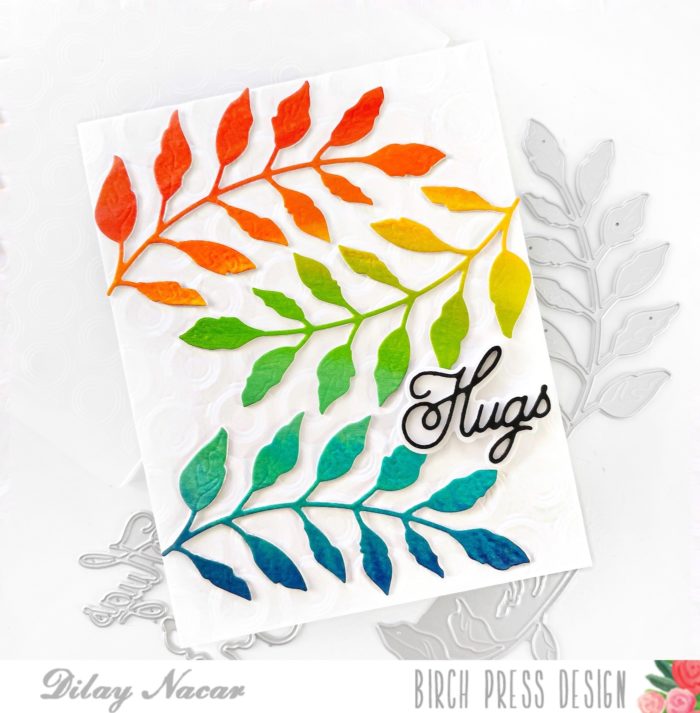
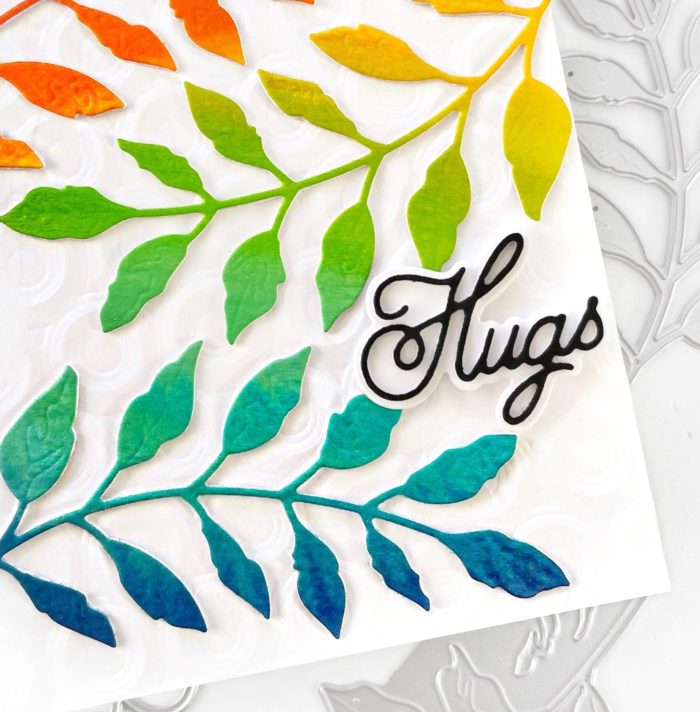
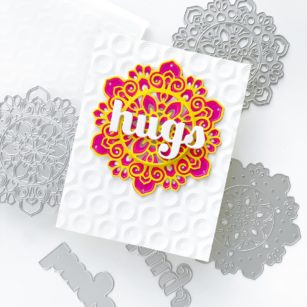
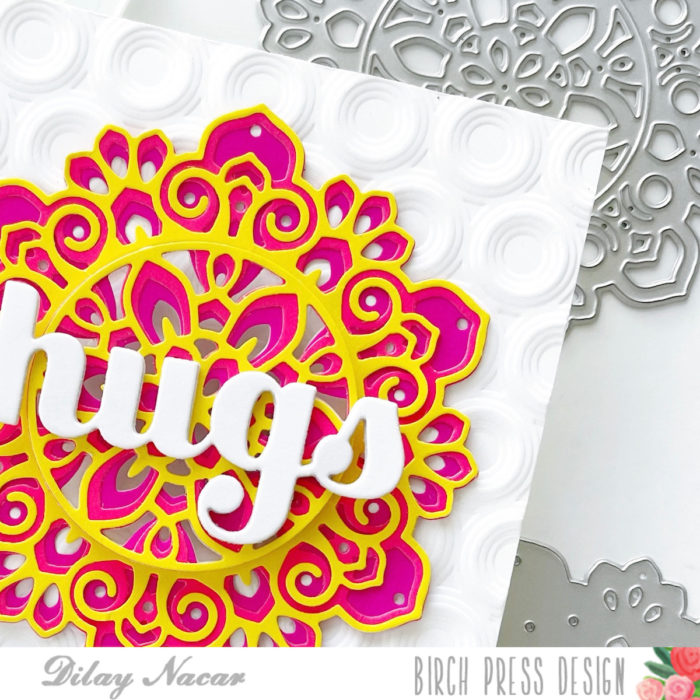
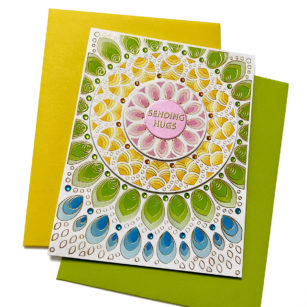
I started with the gorgeous Gilded Grace Hot Foil Plate set. There are actually two plates in this set, along with a die that cuts the bigger circle. I foiled both plates onto smooth white card stock with gold foil using my hot foil machine. The results, even before coloring, are just gorgeous! But, there are matching stencil sets that help you color the design. There is one set of stencils for the “outside” design (what you see in blue and green on my card) and another set of stencils for the “inside” design (what you see in yellow and pink on my card). These stencils line up with the two different hot plates that come in the set. I used both for my card.
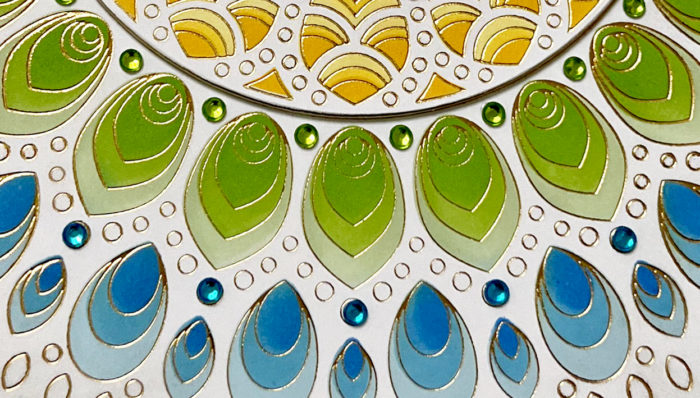
I started by planning which colors would go where. I wanted a rainbow design, so working my way out, I determined that green and blue would be the “outside” colors. So, I used that stencil set to color the main panel. I did have to be a little careful towards the bottom when I was working on the two different colors, but it was fairly easy to keep them separate by using small blending brushes. I used three different shades of each color, as there are three layering stencils in each set.
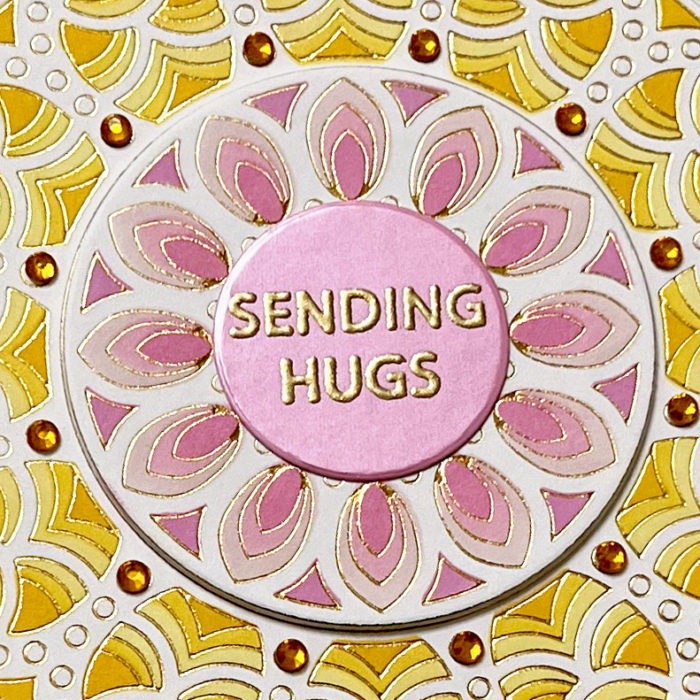
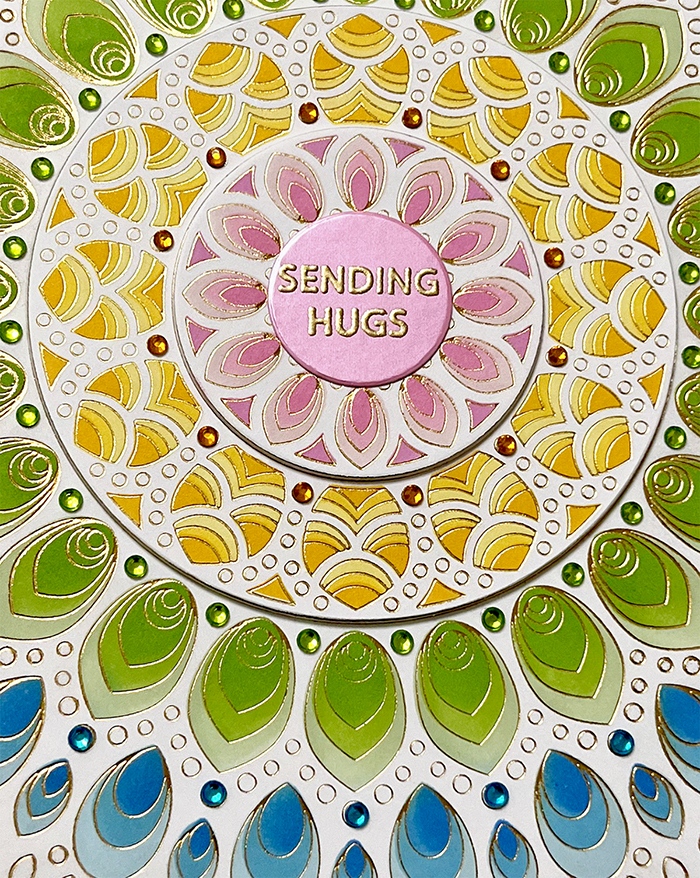
Before coloring the “inside” colors on the panel that I foiled the big circle on, I used a circle die to cut out the inner circle (where you see pink on my card). This made it easier to keep the pinks and yellows separate while ink blending. When I was finished ink blending the yellow piece, I also cut that out with a circle die. I was then able to give dimension to both of these circles by stacking additional circle dies behind them before glueing them onto the main panel. I just love the results of adding that dimension!

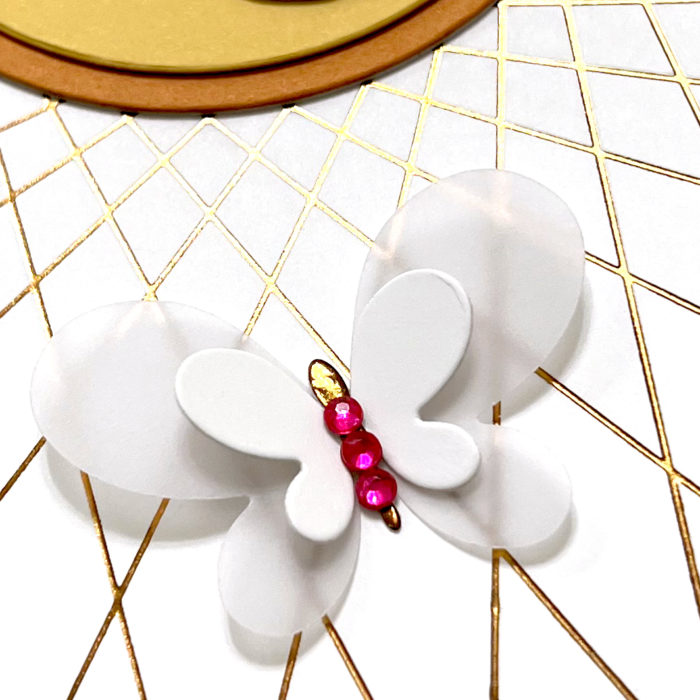
I used some pink paper from the Vintage Pastel Mirror Pad to gold heat emboss the sentiment, which comes from the Rainbow Days Lingo Notes stamp set. I then cut it out with a small circle die and glued it to the center of the pink blended design. I finished the card by adding some fairy jewels in matching colors to tiny circles in the foiled design.
Thank you so much for joining us today. I hope this card inspires you and brings a smile to your face!
Wishing you a crafty day,
Allison

Supplies


Supplies