Category: Hugs

  • Hugs and Hearts | By Amanda Wilcox

    Hugs and Hearts | By Amanda Wilcox

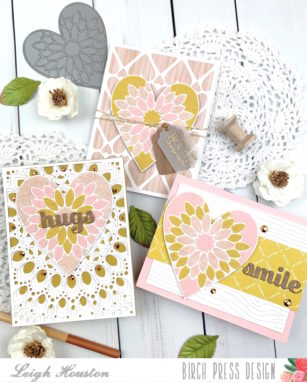
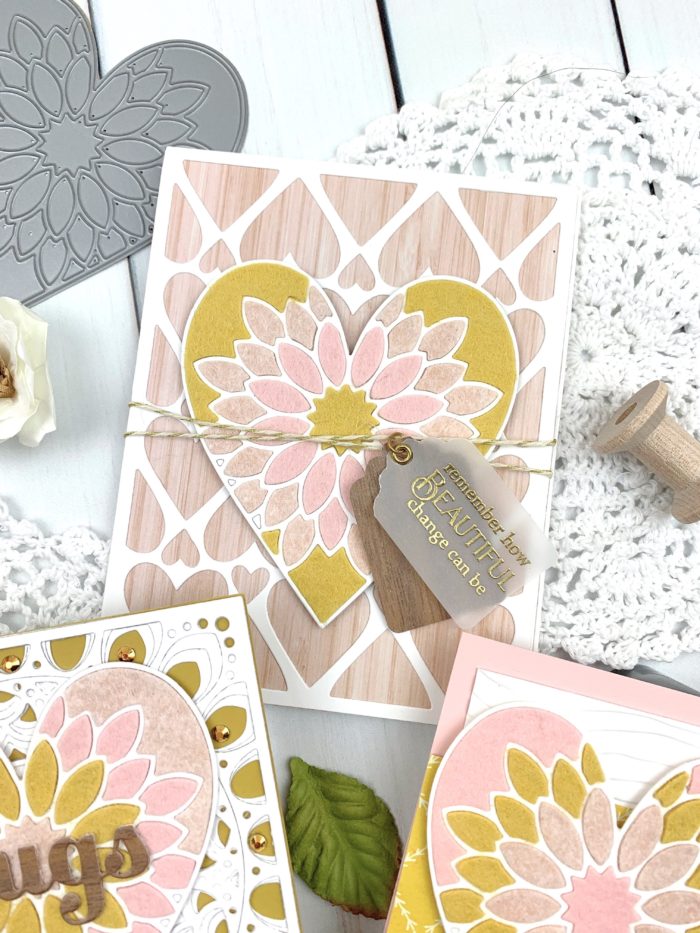
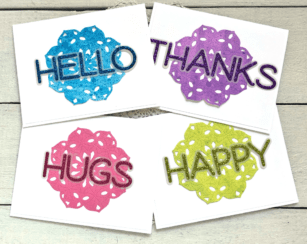
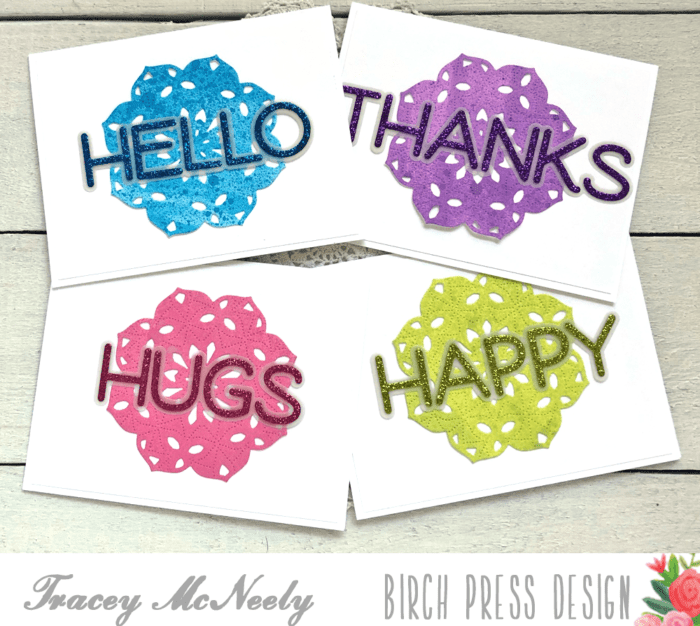
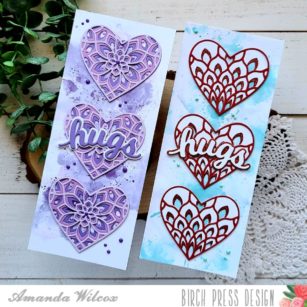
    Hi everyone! It’s Amanda from Twiddler’s Nook joining you for the first time this year! Happy New Year and I hope 2021 is starting off well for you all. I pretty much dove in head first to love and heart themed cards since the new year and I’m loving it all! I have a pair of slimline cards to share with you today and I hope you enjoy them.

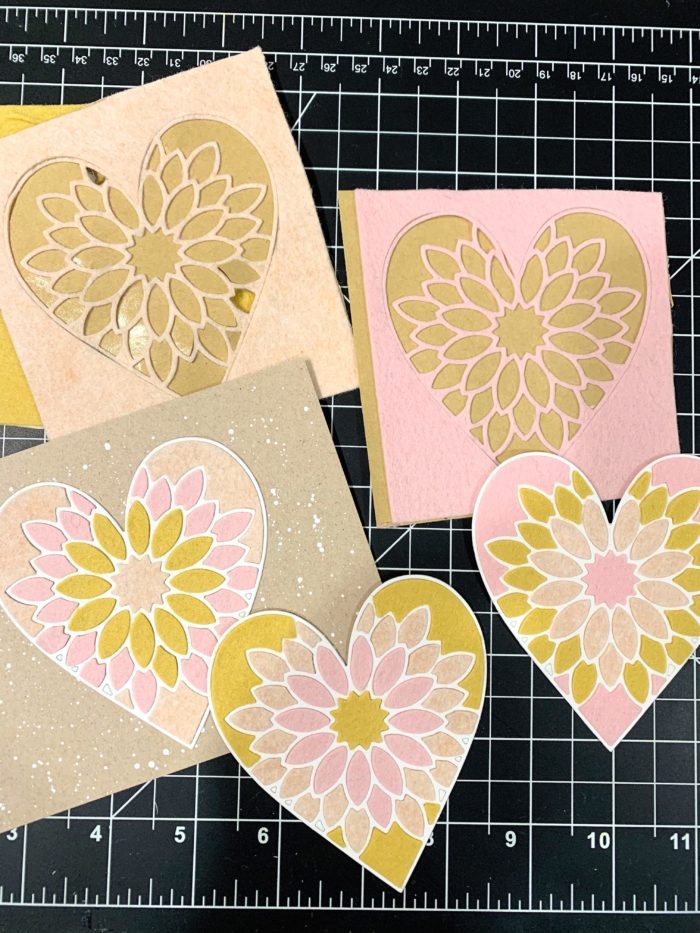
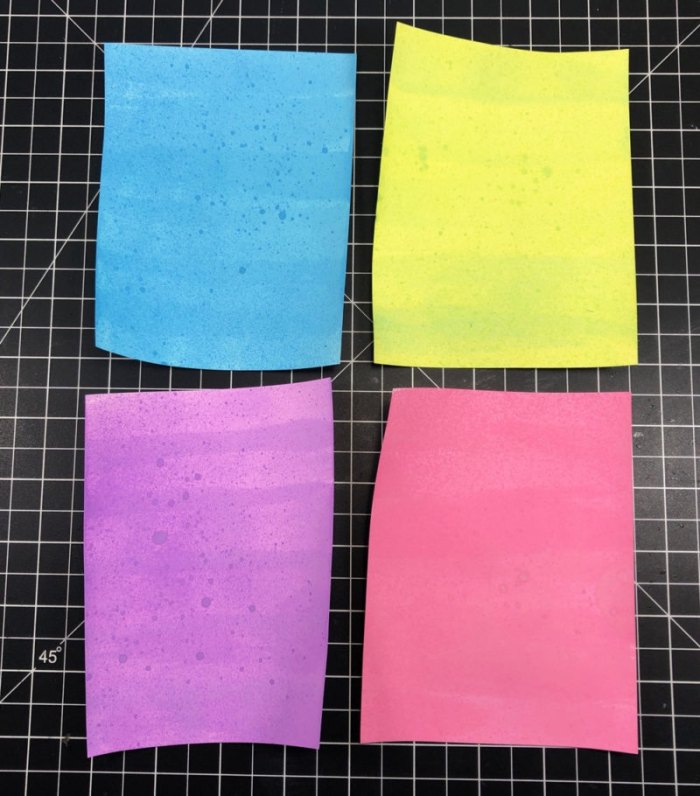
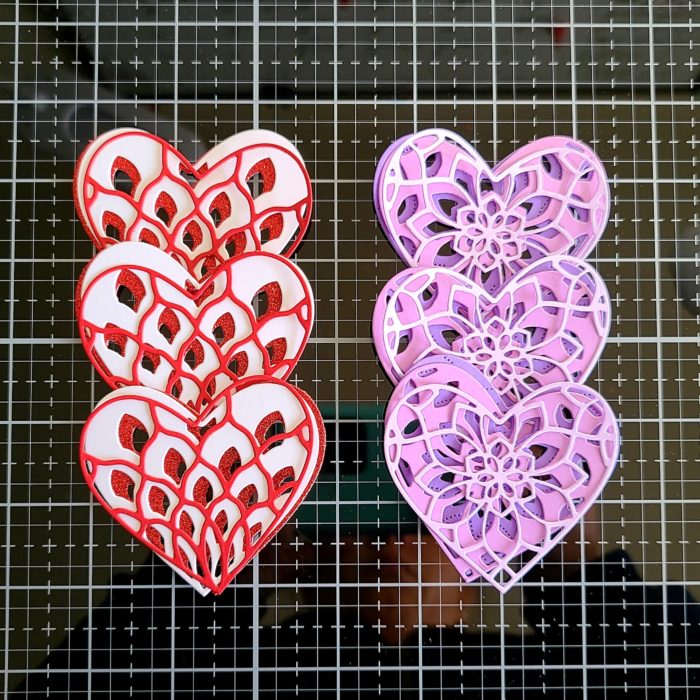
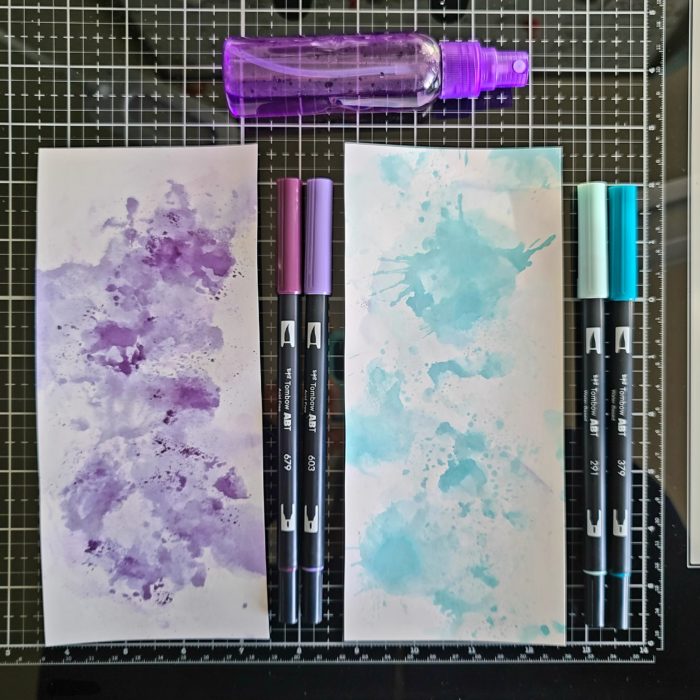
    When I can’t make decisions in the craft room, it either leads to making multiple cards or creating a rainbow of something. Today, it led to two cards which were really fun to create! I started by choosing colors and die cutting my hearts.

    Then I moved on to backgrounds. I settled on making an inky mess with the ink smooshing technique using my Tombow Dual Brush markers. I colored on my acrylic block, spritzed with water and smooshed it on my paper. When I do this, I use a heat gun to dry each layer so they don’t blend together.

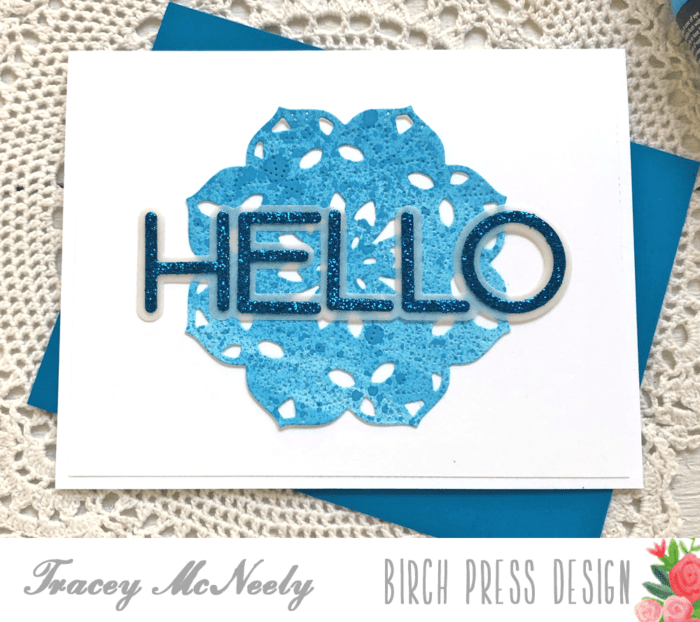
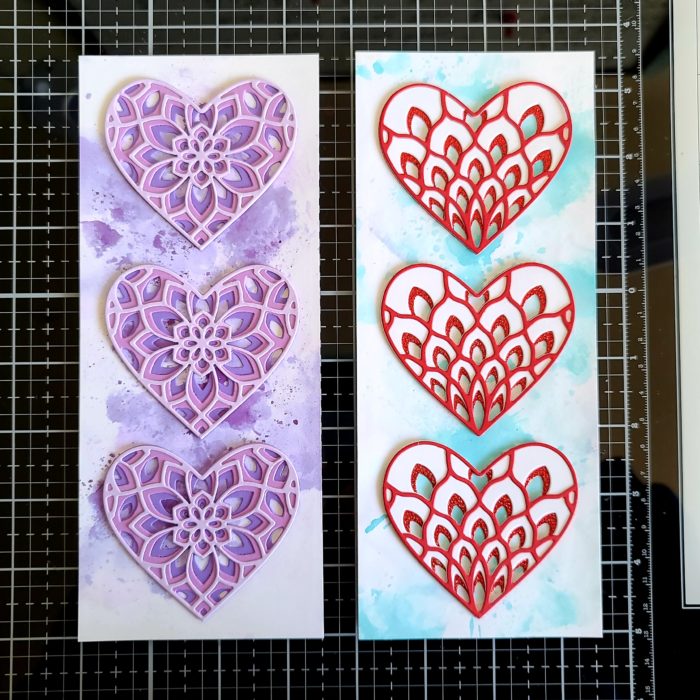
    After these were done I used liquid glue to adhere them to card bases and also glued my hearts together at the same time. I put acrylic blocks on top of everything while it dried to help it flatten out.

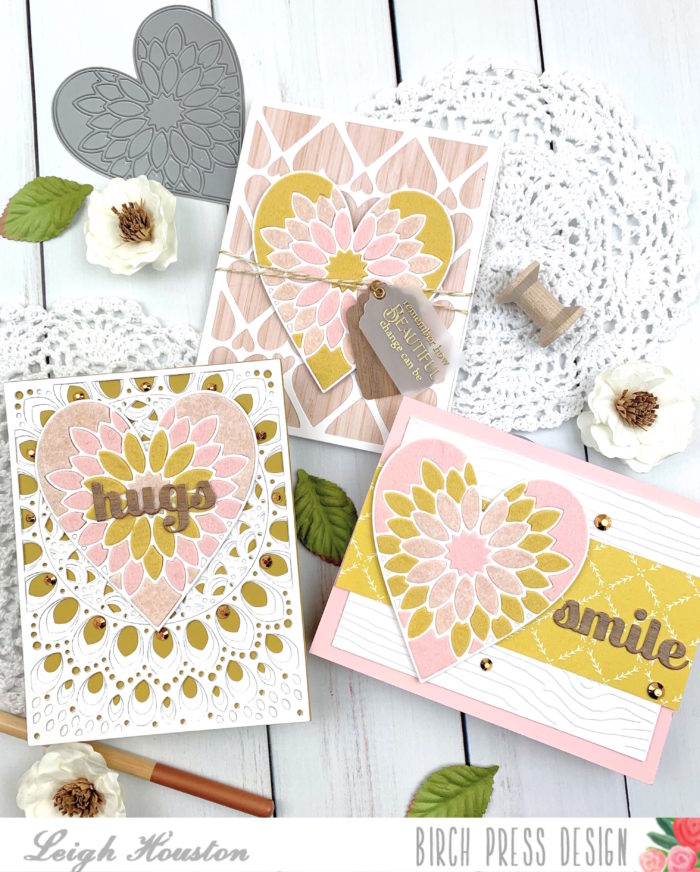
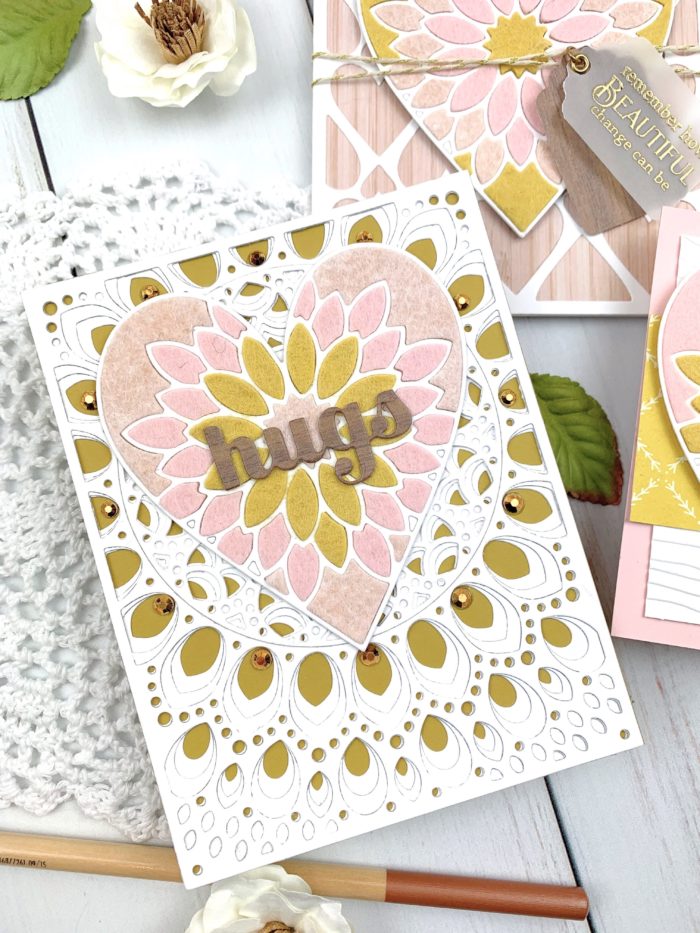
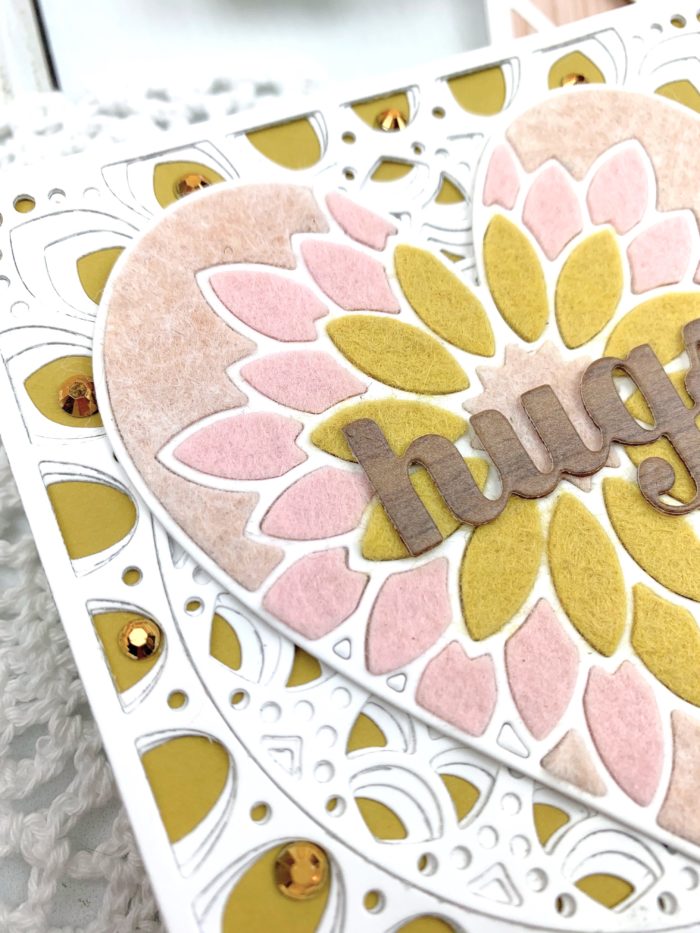
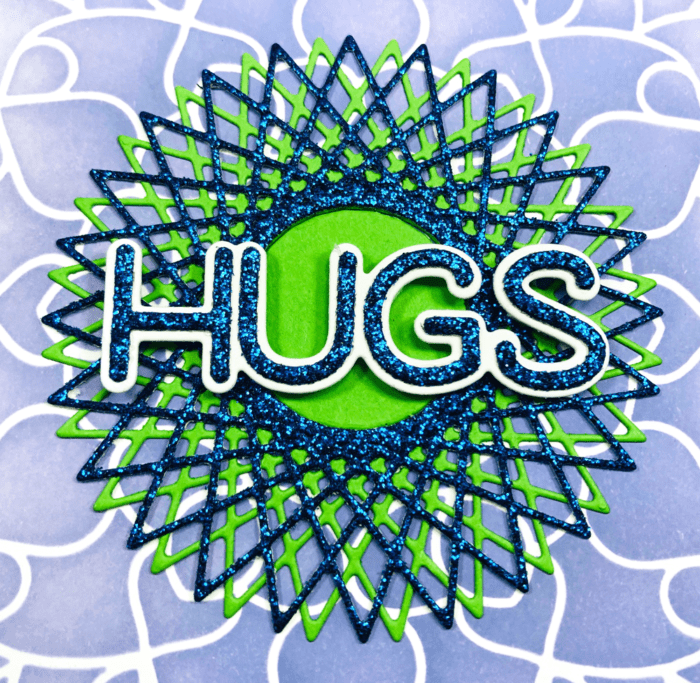
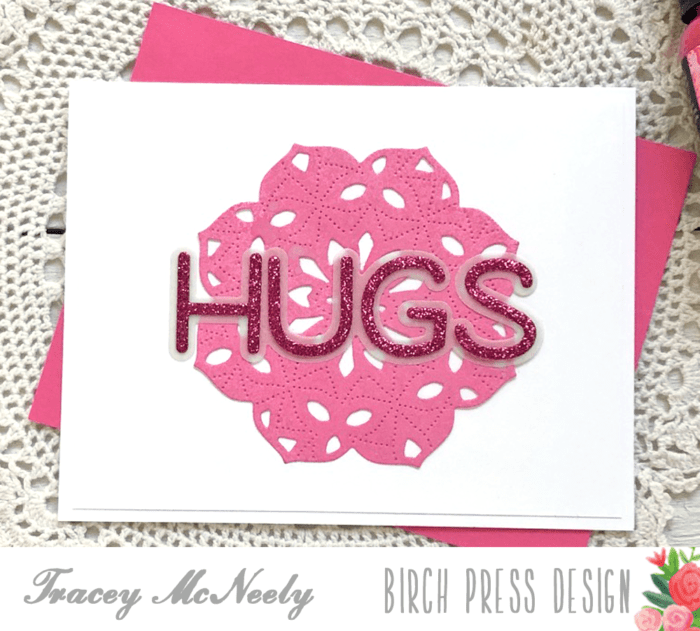
    For my sentiment, I kept it simple using the hugs honey script dies. I love this font and it fits just perfectly across these hearts!

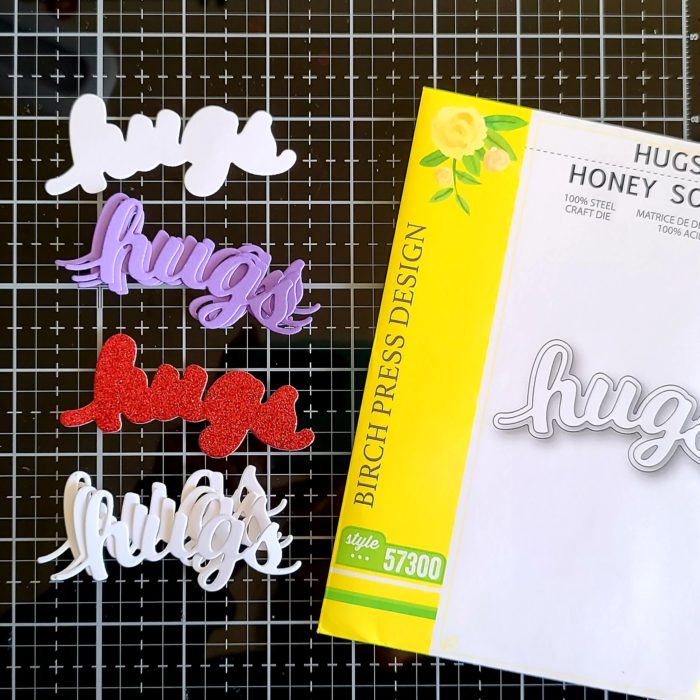
    I cut the shadows once and the words 4 times each and used liquid glue to adhere them all together. After they were glued to the middle heart I moved on to finishing touches.

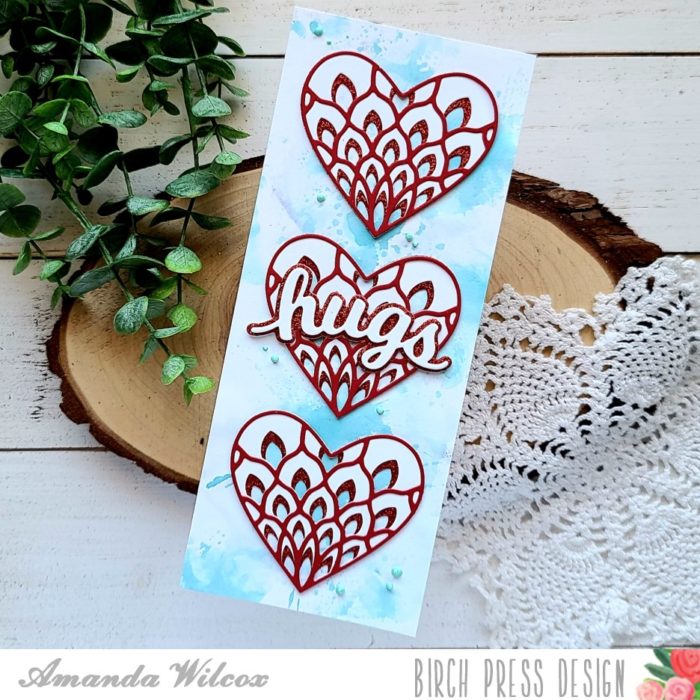
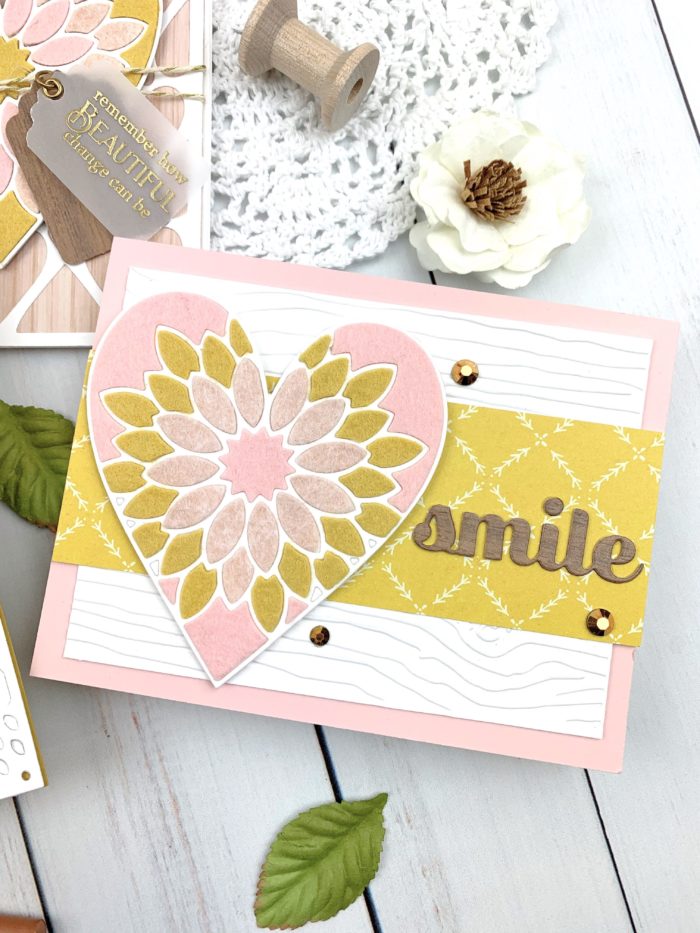
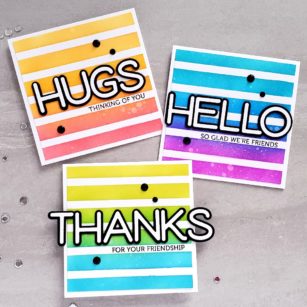
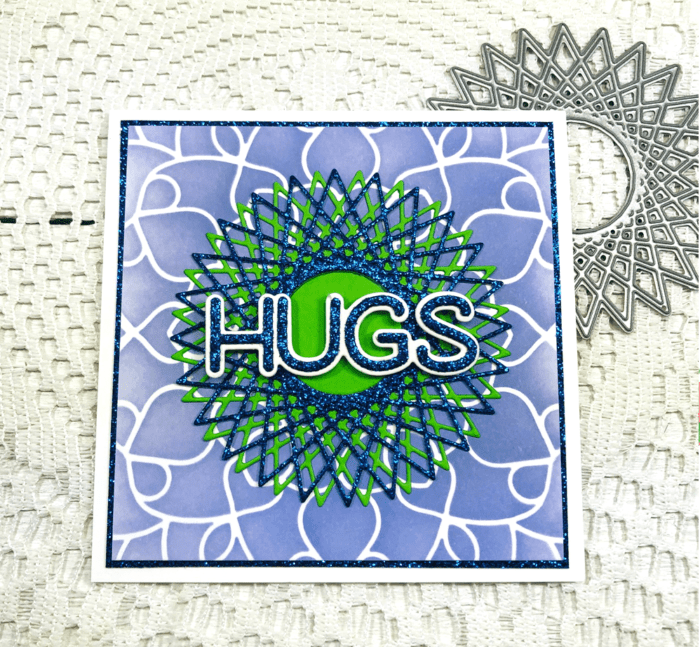
    I used Nuvo Crystal Drops in a coordinating color for each card. On this one, I just used a like teal scattered across the background of my card.

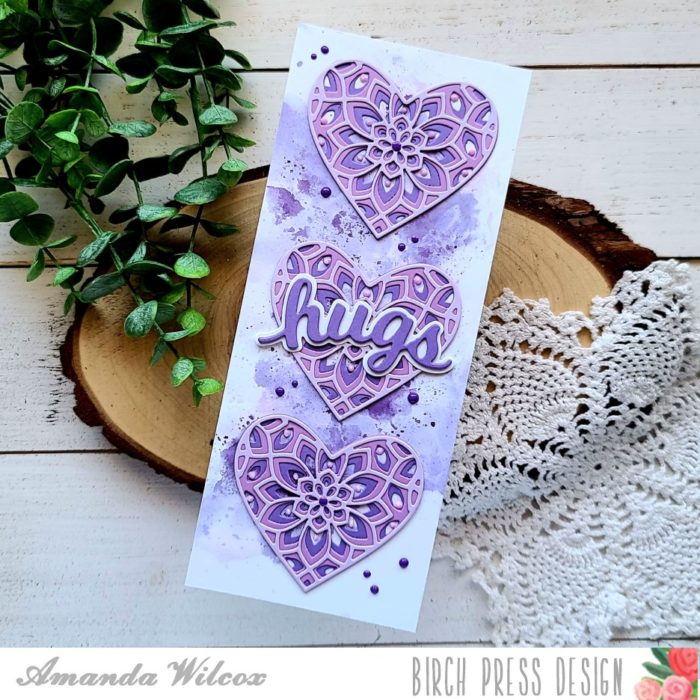
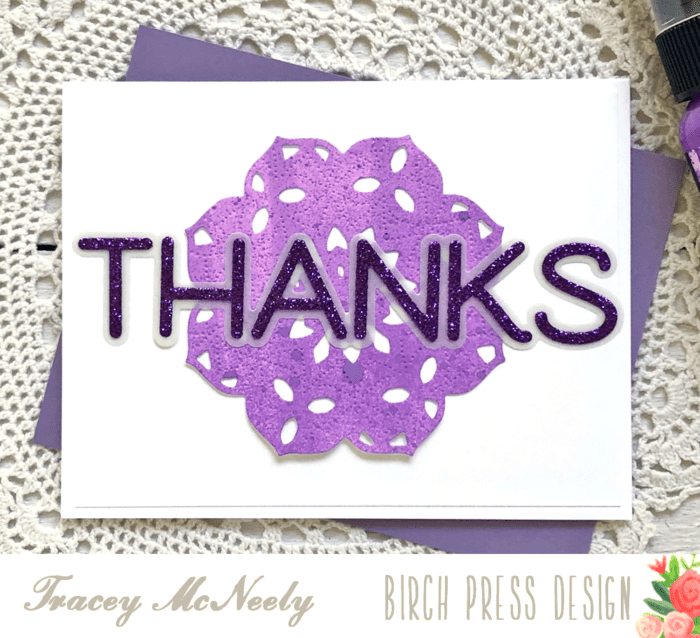
    For the purple one, I decided to also add them to a few select spots on the hearts as well. This was totally new to me and I like how it turned out. Just a little extra interest.

    I appreciate you sharing your time with me. Have a fabulous day!

    Supplies

  • Boho-Inspired Cards with Felt Die Cut Inlay | By Leigh Houston

    Boho-Inspired Cards with Felt Die Cut Inlay | By Leigh Houston

    Hello, friends! I am so excited to be sharing these cards made with Birch Press Designs’s Dahlia Heart Layering Die set. Keep reading to see how easy it was to create these die cut cards with felt!

    Over the past months where we’ve been spending more time at home than normal, my daughter has re-discovered her crafty side and the joy of making and giving handmade gifts. She is into all things boho, and I was inspired by her favorite color palette in making this trio of cards made with wool felt so she could give these cards to her friends.

    I started my cards by selecting three shades of wool felt in pink, peach and yellow (I recommend using a good quality wool felt for this). I adhered a sheet of double-sided adhesive to the back of each piece, and ran them through my die cut machine with Birch Press Designs’s Dahlia Heart Layer A die. I ran each piece through twice to make sure I got a nice clean cut through my felt (a precision base plate is also helpful when die cutting wool felt). I then die cut the same shape out of heavy 110# white cardstock three times and adhered each one to a base. After that, I took individual pieces of felt and inlaid them into the cardstock bases. This went quicker than you’d think (about the length of one bad TV show LOL), and how great is it that you get three different hearts out of this one process? Not to mention that the soft texture of the die cuts lends such a unique and special touch to the cards.

    After finishing my die cut inlay, I wanted to create three distinctive card designs to showcase these soft and pretty hearts. For the first, I adhered a strip of coordinating patterned paper to white woodgrain-embossed cardstock and attached the heart to the left of the panel. I cut my sentiment from Birch Press’s Smile Sugar Script die from woodgrain patterned paper and added a few gold gems to finish the card.

    For my second card, I cut a white panel from Birch Press’s Amour Layer A die and adhered it to a base I cut from woodgrain paper. I adhered my card on top, wrapping it with twine for some more texture. I stamped my sentiment from Poppystamps’s Greeting Basics stamp set onto vellum, embossing it in gold and cutting it out in a tag shape (and cutting out an identical tag shape from dark woodgrain cardstock as a base). I hung the tags from the twine to finish the card.

    For my third card, I die cut all three layers from Birch Press’s Grace Layering Die set and adhered them to a deep yellow card base. I then simply adhered the heart, die cut my sentiment from the Hugs Sugar Script die, and added some gems for a little added sparkle.

    I can’t tell you how much fun I had making these cards! They have already been confiscated by my daughter to give to her friends, and I can’t wait to try this technique with more dies. I hope this inspired you to try some felt in your die cut designs. Thanks so much for stopping by today, and I’ll see you again soon with more Birch Press Designs projects!


    Supplies


  • Over the Edge with Jumbo Lingo Type dies | by Ardyth Percy-Robb

    Over the Edge with Jumbo Lingo Type dies | by Ardyth Percy-Robb

    Good morning! It’s Ardyth here this morning with 3 bright happy cards that focus on some new sentiment dies.

    This simple 4.25″ square design starts with the Bold Stripes stencil and two colours of ink, blended to create an ombre effect.

    Then I added the die cut Hugs sentiment, and stamped a sentiment from the Lingo Thanks stamp set.

    Then I did it again, with the Hello die cut and different colours on my background.

    And when it came time to do the third card with the Thanks die cut, it didn’t fit. It’s designed to fit on a full A2 card base. But because my square cards fit in an A2 envelope, it’s fine (and really fun!) to have the thanks hanging over the edge of this card!


    Supplies


  • String Art Hugs | by Tracey McNeely

    String Art Hugs | by Tracey McNeely

    Hi there, it’s Tracey here with you this morning. Today I might be using the wrong design principles to create a sparkly card that looks right in my eyes.

    I started by ink blending the Midnight Mandala Stencil with Shaded Lilac Distress Oxide Ink over a panel of Bristol Smooth cardstock. I cut the panel down to a 3 7/8″ x 3 7/8″ square making sure the flower in the centre of the stencil was right in the centre of my ink blended panel. I had to do a little math and use my T-square to move out 1 15/16″ from the centre point of the flower.

    I cut of piece of royal blue cardstock from the Twinkling Jewel Glitter Pad to a 4″ square. I adhered this panel to a a 4 1/4″ card base. Next I adhered the ink blended panel over the glitter panel. This leaves a tiny 1/16″ border around the ink blended panel.

    The String Art Circle was cut twice, once with a bright green cardstock and once with the same royal blue glitter cardstock. I adhered the green string art circle to the centre of the ink blended panel and then I inlay the green centre. Next I adhered the royal blue string art circle over top slightly offset.

    The sentiment is from the Big Lingo Type Hugs die set. I cut the shadow using white cardstock and the inner letters from the royal blue glitter cardstock. I glued the letters over the shadow. Before adding it to the card I added tiny pieces of foam tape to the back of the word hugs and then placed it over the centre of the string art circle.

    So much glitter and sparkle! The best is that the glitter on the Twinkling Jewel Glitter papers stays put, no getting all over your hands and workspace or recipient!

    You could use any of the Birch Press Design stencils to create magnificent backgrounds to use along with any of the stand alone die cuts. Add in some of the beautiful glitter paper and you have a gorgeous card whether you used sound design principles or not! Thank you so much for creating with me today and have a great weekend!

    Supplies

  • Creating Multiple Cards with One Design | by Tracey McNeely

    Creating Multiple Cards with One Design | by Tracey McNeely

    Hi there it’s Tracey. Today I am going to show you how easy it is to use one basic card design and by changing just one element you can make multiple cards each with a different theme.

    Each one of my four cards uses the newly released Kinsley Layer Set. The background paper for each of the die cuts was custom made using Distress Oxide Spray Inks. I sprayed some ink on my glass media mat and then sprayed some water onto the ink. I picked up the water with a foam blending tool and ran it back and forth across a panel of white cardstock until the whole panel was covered. I left some time so the first coat dry and then gave each of the panels a spritz of the same colour Distress Oxide Spray Ink direct to paper to add some subtle interest. I let the panels dry completely and then I cut four of the Kinsley Layer Dies Layer C from each panel. I chose to use only Layer C because on its own it creates a beautiful stitched pattern.

    Next I used the new Jumbo Lingo word dies to create glittery sentiments from the Twinkling Jewel Glitter Pad to co-ordinate with each of the die cuts. I used Jumbo Lingo Hello, Jumbo Lingo Thanks, Jumbo Lingo Hugs and Jumbo Lingo Happy. I cut the shadow from vellum cardstock and the individual letters from the glitter cardstock.

    Each white A2 sized card has a 5 1/4″ x 4″ mat that I adhered the Kinsley Layer die directly to and the sentiments added to the top with liquid glue. The mat was then adhered to the card base directly making the card nice and flat for mailing.

    Thanks so much for stopping in today. Give it a try, choose a simple background and change up your sentiments to make a collection of cards to have at the ready. You never know…

    Supplies

  • Adding Dimension with Simple Stitching with Birch Press Designs’s Viola Dies | By Leigh Houston

    Adding Dimension with Simple Stitching with Birch Press Designs’s Viola Dies | By Leigh Houston

    Hello, friends! I’m so thrilled you’ve joined me today for this cheery, summery card. I added some texture and dimension to the gorgeous Birch Press Designs Viola die set and I’m excited to share the process with you!

    I started my card by die cutting Layer A from the Viola Layering Die Set twice: once from inexpensive cardstock, and once from Neenah Classic Crest Solar White #110 cardstock. I used my inexpensive die cut panel as a stencil, using alcohol markers to color in the negative spaces. When I was finished, I discarded the stencil and adhered the clean 110# layer on top of my colored card base using a strong liquid adhesive.

    After the adhesive had dried, it was time for the stitching. I used a paper piercer to poke holes inside the die cut lines. I then used coordinating embroidery floss (I used 4 strands) and a simple backstitch to stitch inside these spaces. This went surprisingly quickly… a couple of episodes of bad TV and I was finished!

    To finish my card, I die cut my sentiments from the Sending and Hugs Sugar Script dies from gold mirror cardstock. A few sparkly gold sequins and this card was finished!

    I hope you enjoyed this project! Links to the products I used are below. Thanks again for stopping by today, and I’ll see you again soon with another card project!


    Supplies


  • So Glad We’re Friends by Jeanne Jachna

    So Glad We’re Friends
    by Jeanne Jachna

    Thanks for stopping by! Have you seen the newest release in the store? You’ll love the new layered dies and stamp sets. You can see them all here.

    My card features the new Viola Plate Layer Set over a rainbow distress ink background. I used only the A Layer from the set because I wanted to show you the intricate and delicate design.

    I inked the rainbow colors with a cosmetic brush. You can find different sizes at Amazon. The smaller brushes make coloring thinner areas easier.

    Do you see the glittery sparkle in the distress inking? I mixed ultra fine glitter with Ranger Glossy Accents and spread it with a spatula over the inked background. While it was still wet I placed the Viola die cut over it. When it was dry I added a Pierced Rectangle Frame for a more finished look and a JUMBO Lingo Hugs die cut.

    I hope the happy colors make you smile!

    Finished Size 4.25 x  5.5″

    Supplies


  • Rainbow Roundabout Hugs by Jeanne Jachna

    Rainbow Roundabout Hugs
    by Jeanne Jachna

    Hi Friends! I hope you’re having a great day! Now that many of us are having elective medical procedures again, I thought a get well card was in order.

    I’m sending big hugs and a rainbow of colors for a quick recovery.

    I cut the Roundabout Layer C from white card stock leaving the cut outs in place. If you put packing tape on the back of your card stock before you run it through your machine it will keep all the pieces in place. I colored the chevrons with Copic Markers – much faster than inlaying the pieces!

    I cut the Layer B from gold glitter card stock – did you know Memory Box has added papers to their offerings? The glitter paper comes in a 6″ pad and lots of colors!

    If you love the Lingo Hugs die you’ll NEED the JUMBO Lingo Hugs die! It’s a nice big size to make your message is clear!

    Hugs and good health to you as we move forward!

    Supplies


  • Sprayed Midnight Mandalas | by Tracey McNeely

    Sprayed Midnight Mandalas | by Tracey McNeely

    Hi there, it’s Tracey back again today. You’re getting a double dose of me this week. I am a big fan of adding colour to my projects with Distress Oxide Inks and today I have a special treat for you. I have five cards that were created with the Birch Press Design Midnight Mandala Stencil and Distress Oxide Spray Inks!

    I used only two colours and one stencil and no two cards are the same. The process can be a bit messy so I use a homemade spray box. It is a 12 x 12 x 5 1/2″ priority mail box that I use whenever I splatter, flick or spray ink or watercolours inside the house. NOTE: I NEVER spray anything toxic inside the house such as spray paints or adhesive

    The first two cards are very simple, I put a piece of white cardstock inside the box and laid the Midnight Mandala Stencil over top. The first card uses Picked Raspberry Distress Oxide Spray. The bottle was primed and just sprayed a few times over the stencil. Then I lifted the stencil to reveal to design on the white cardstock panel. The stencil got a quick wipe off with a baby wipe and then the process was repeated with Peacock Feather Distress Oxide Spray. I set the two panels aside to dry.

    For the next two cards I sprayed the entire background of the white cardstock panels with each colour of Distress Oxide Ink. One card was sprayed pink first and the other blue first. Once they were dry I laid the stencil over top of the coloured panel and then sprayed the other colour over top.

    The last card was a combination of both colours of Distress Oxide Spray Ink. The difference with this card is that I did not wait for the first colour to dry before spraying the second colour. I sprayed the pink at the top of the card front and the blue at the bottom. What ended up happening as they met in the middle was a beautiful shade of purple. TIP: Do a bit of trial and error with the colours you choose when wet colour mixing. You don’t want to end up with a muddied panel.

    All the panels were trimmed down to 5 1/4″ x 4″ and adhered to a white card base. The Honey Script Hello, Honey Script Thanks and Honey Script Hugs dies were used for the sentiments. All the shadows were cut from vellum and all the words were cut from white cardstock and glued together. They were attached to the card fronts with foam tape.

    This was a fun project to put together, really easy and I ended up with five unique cards.

    Thank you so much for stopping in today and I hope you are staying well. See you next time here at Birch Press Design.

    Supplies

  • Highlighting Sentiments | By Leigh Houston

    Highlighting Sentiments | By Leigh Houston

    Hello, friends! I am so happy to be here today to share this card I made featuring my favorite Birch Press Designs sentiments. I really wanted the sentiments to take center stage on this clean and simple card!

    To start my card, I made a card base using the Birch Press Designs Amour Layering Set. I cut the base using Amour Layer A, then layered smaller hearts mounted with foam tape from Amour Layers B and C. I colored in the smallest hearts using an aqua alcohol marker. This provided the perfect simple but pretty card base for the sentiments.

    I then die cut my sentiments from heavy 110# cardstock. I used small sponge daubers and my favorite shades of Distress Oxide Inks to ink blend a rainbow gradient onto the sentiments. I stamped the “and” from Birch Press’s You Are Awesome stamp set, which has such a wonderful array of sentiments (this one definitely makes my “most used” list of stamp sets!) A few sparkly sequins and this clean and simple card was finished!

    I hope you enjoyed this project! Products used are listed below. I’ll see you soon with another card project. Thanks so much for stopping by and have a wonderful day!


    Supplies