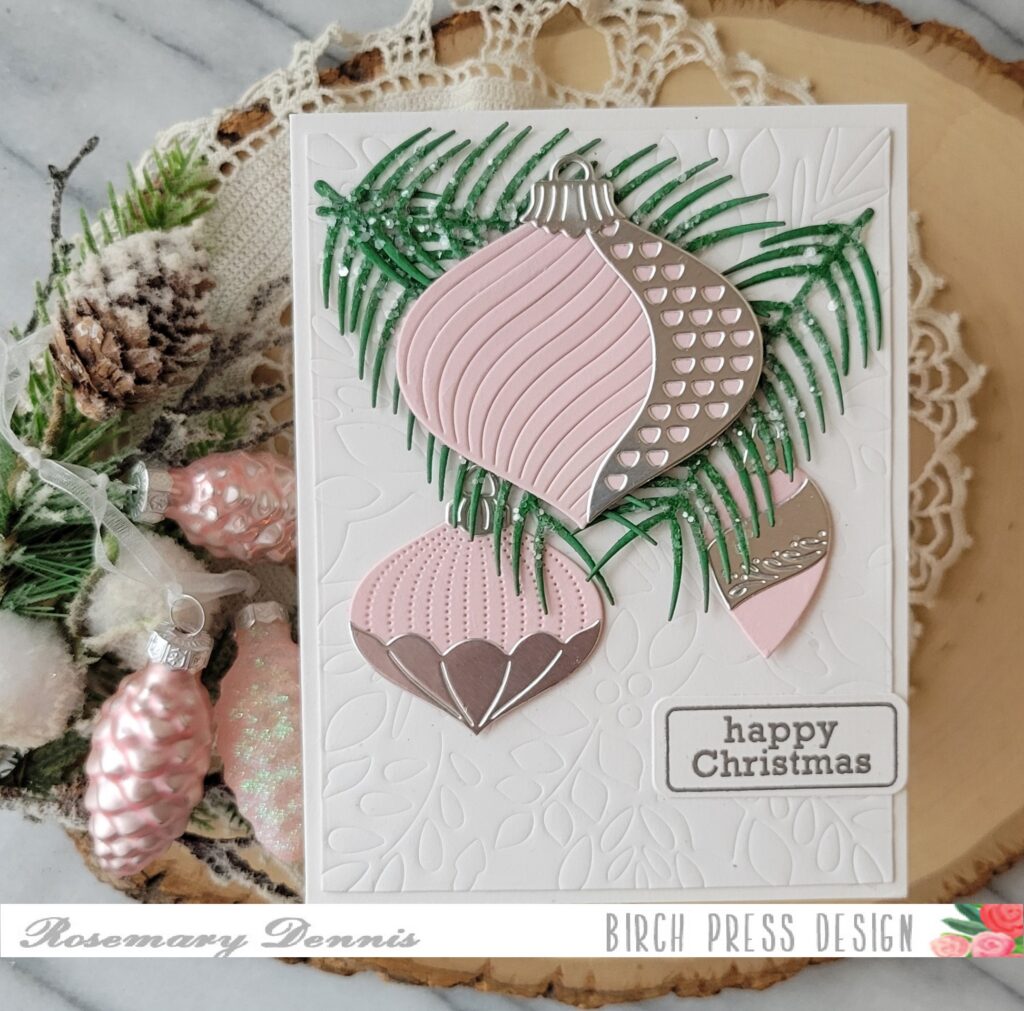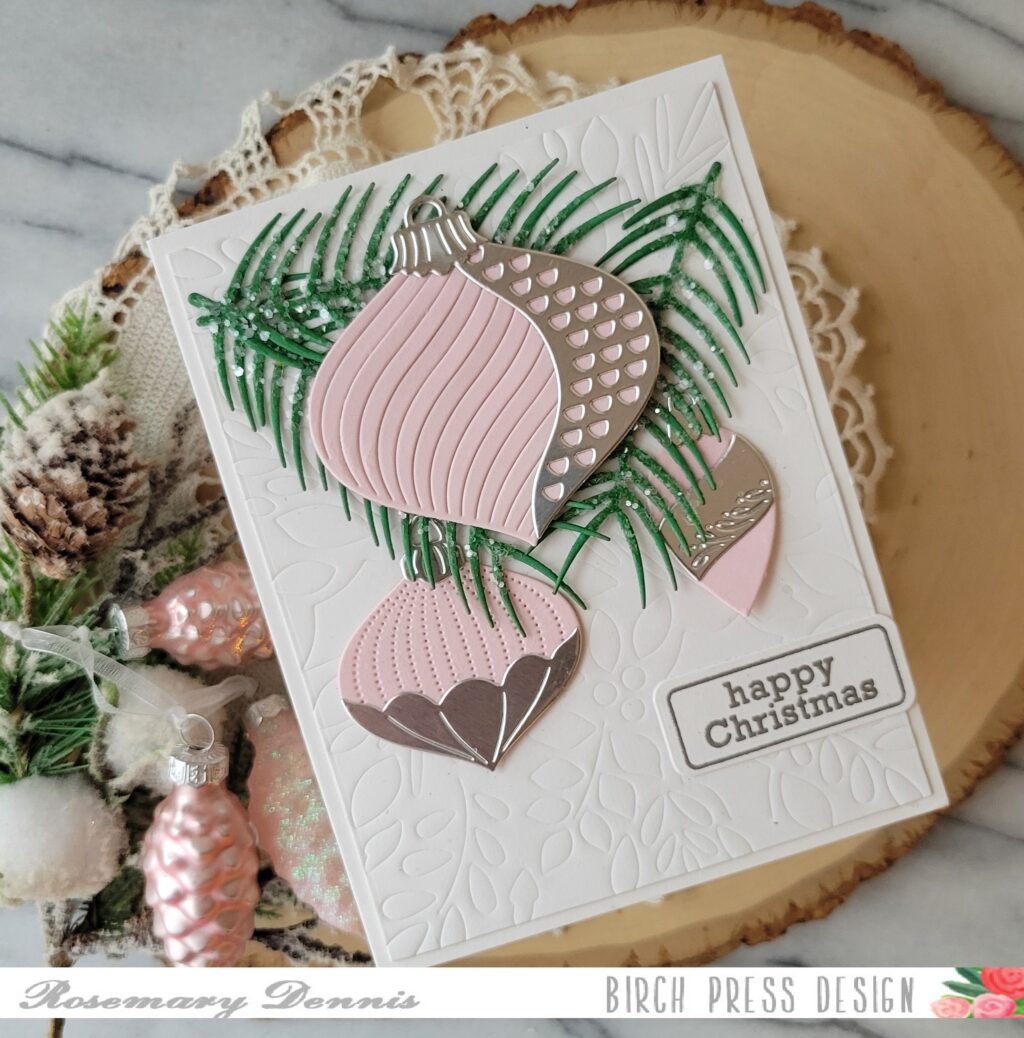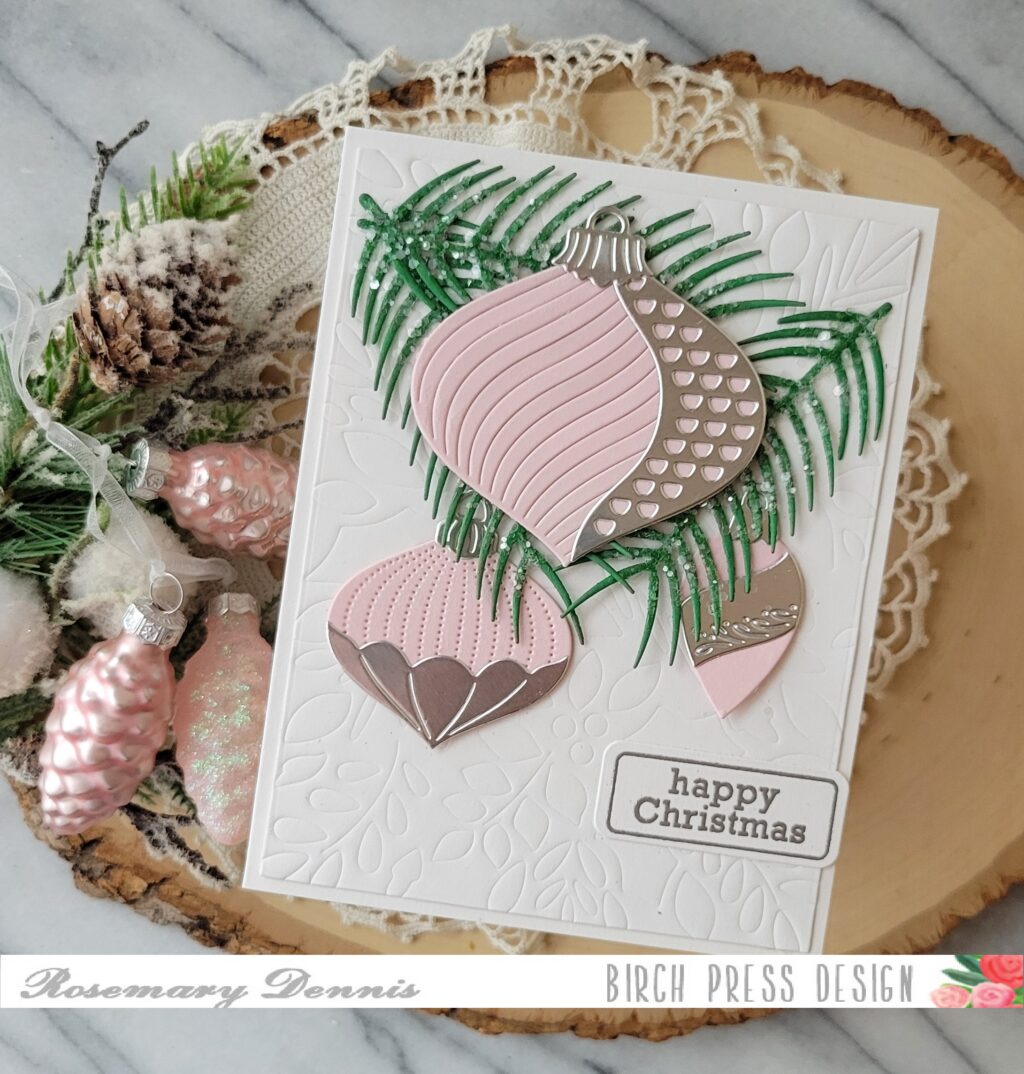
Hello everyone! Rosemary here with a sweet birthday card and tag made with the Linear Boho Butterflies dies and pretty papers from the Memory Box Anemone Grove 6×6 pad. Let’s look at what I created:
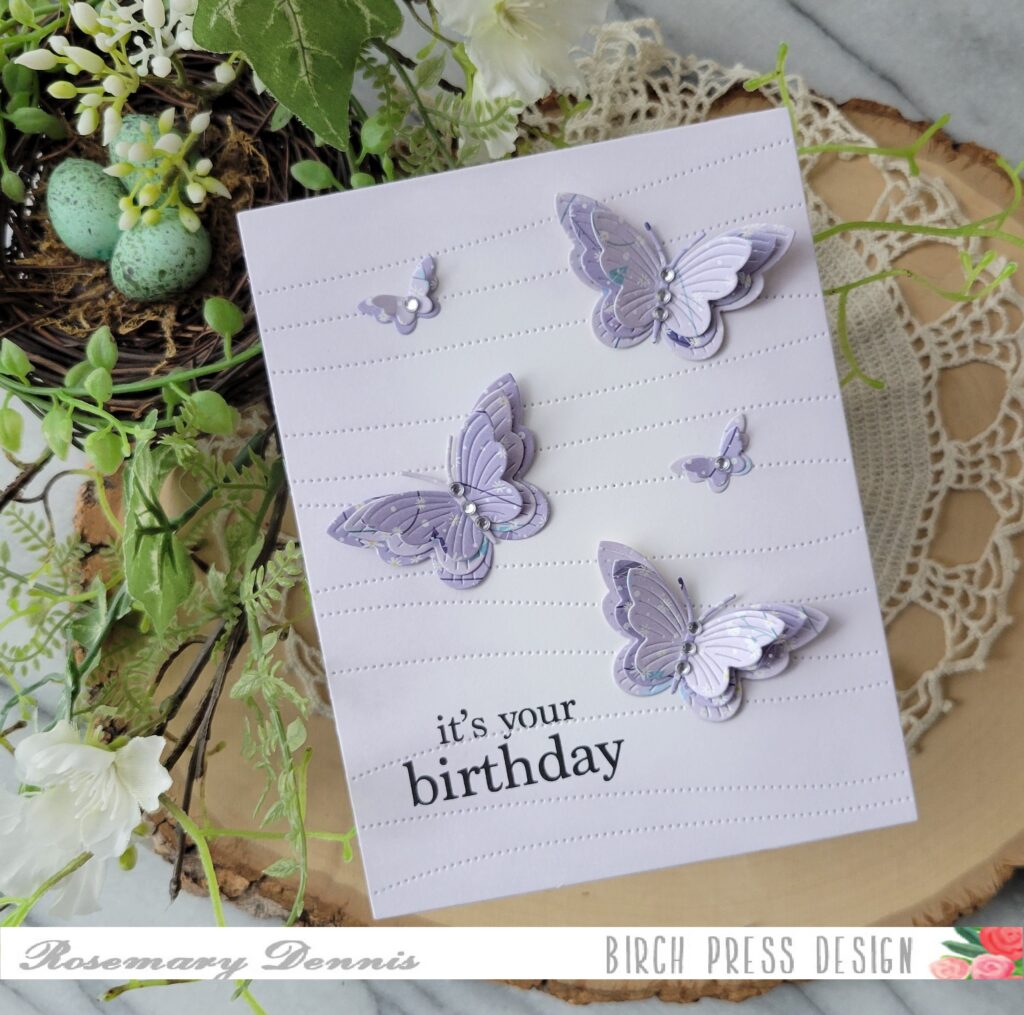
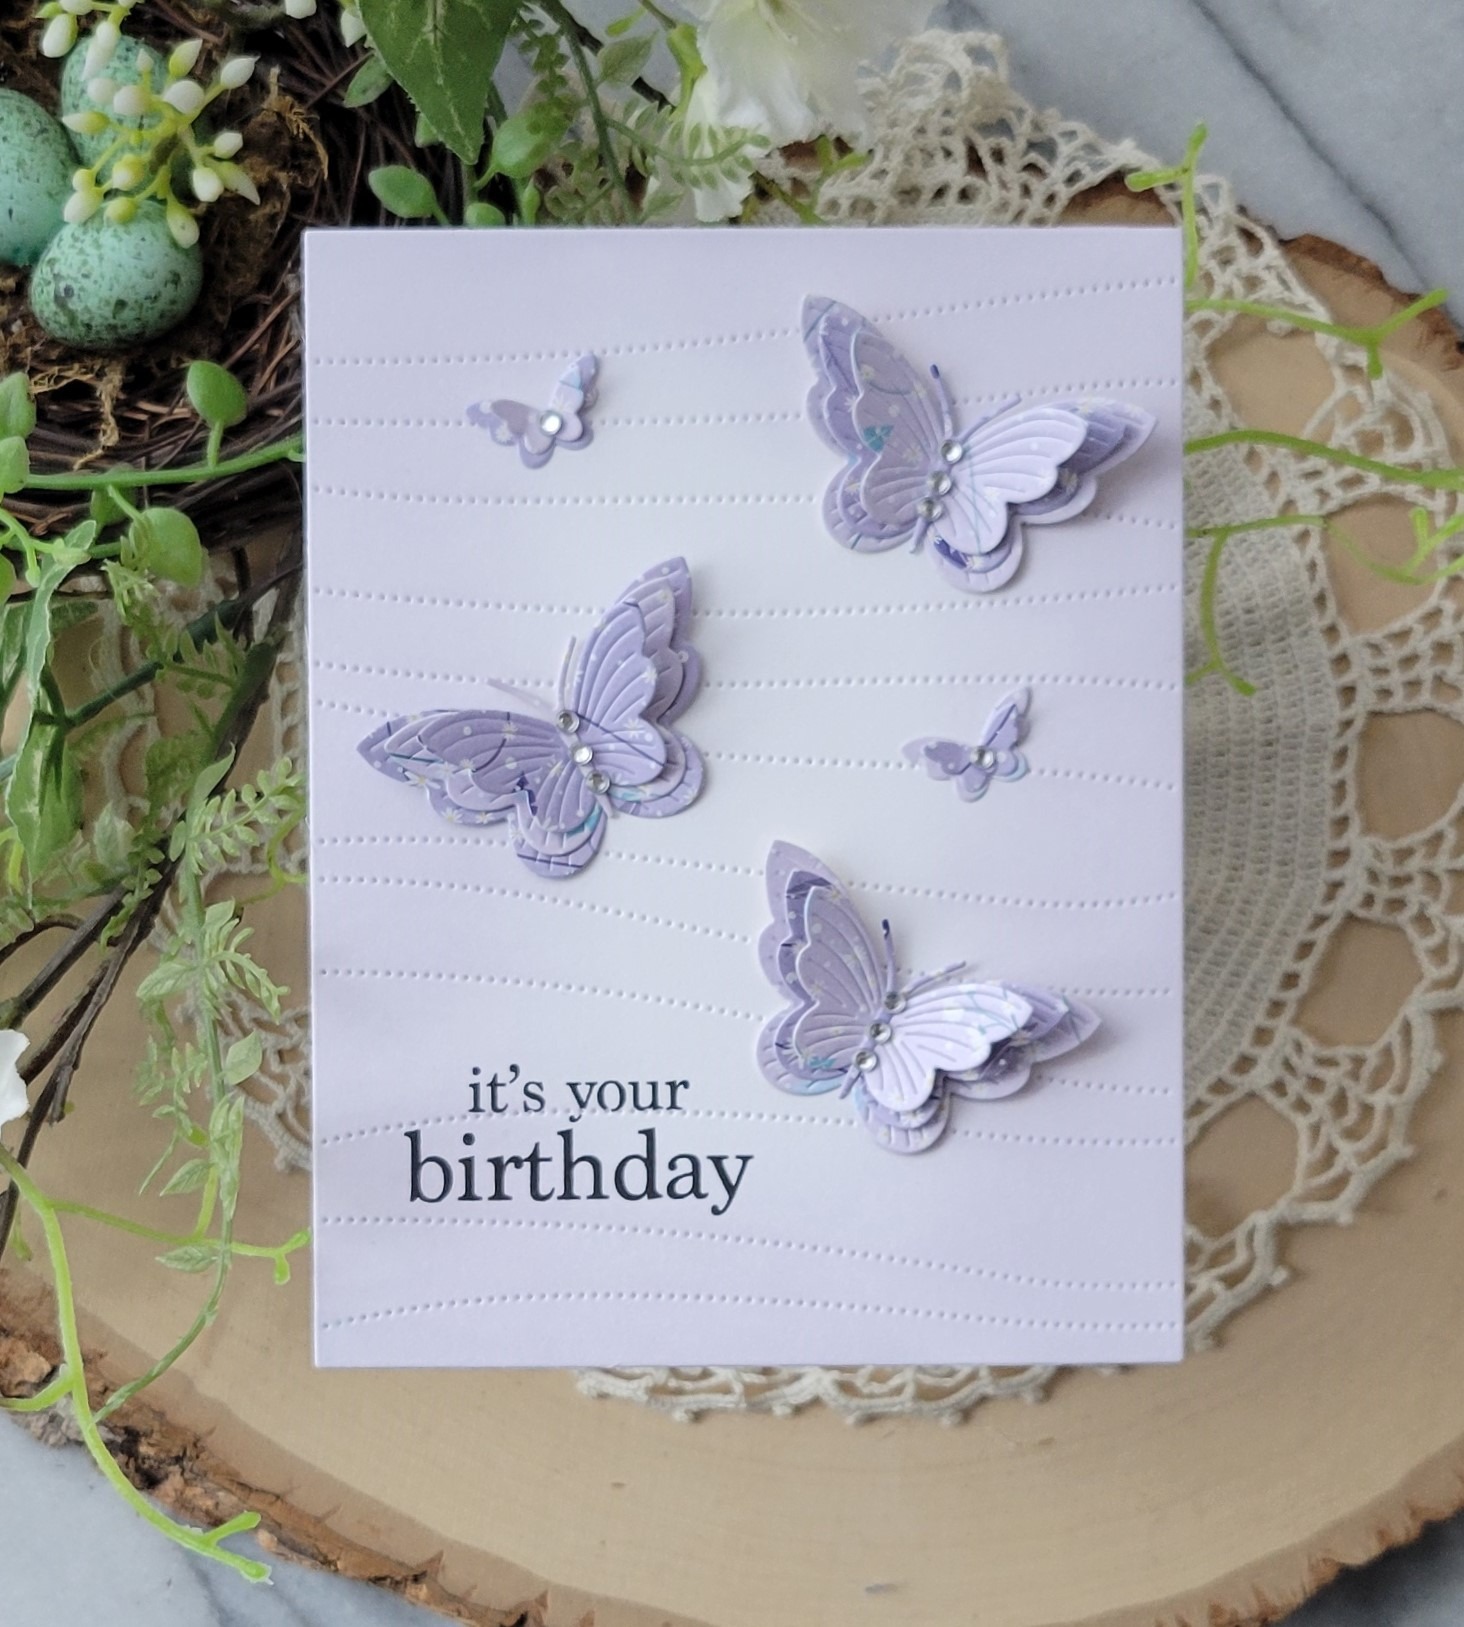
As I started thinking about how I wanted to use the Linear Boho Butterflies dies I thought it would be fun to use some patterned paper. I looked through my Memory Box 6×6 pads and settled on the Anenome Grove pad. I went with papers that both had a light purple hue to them and a subtle pattern.
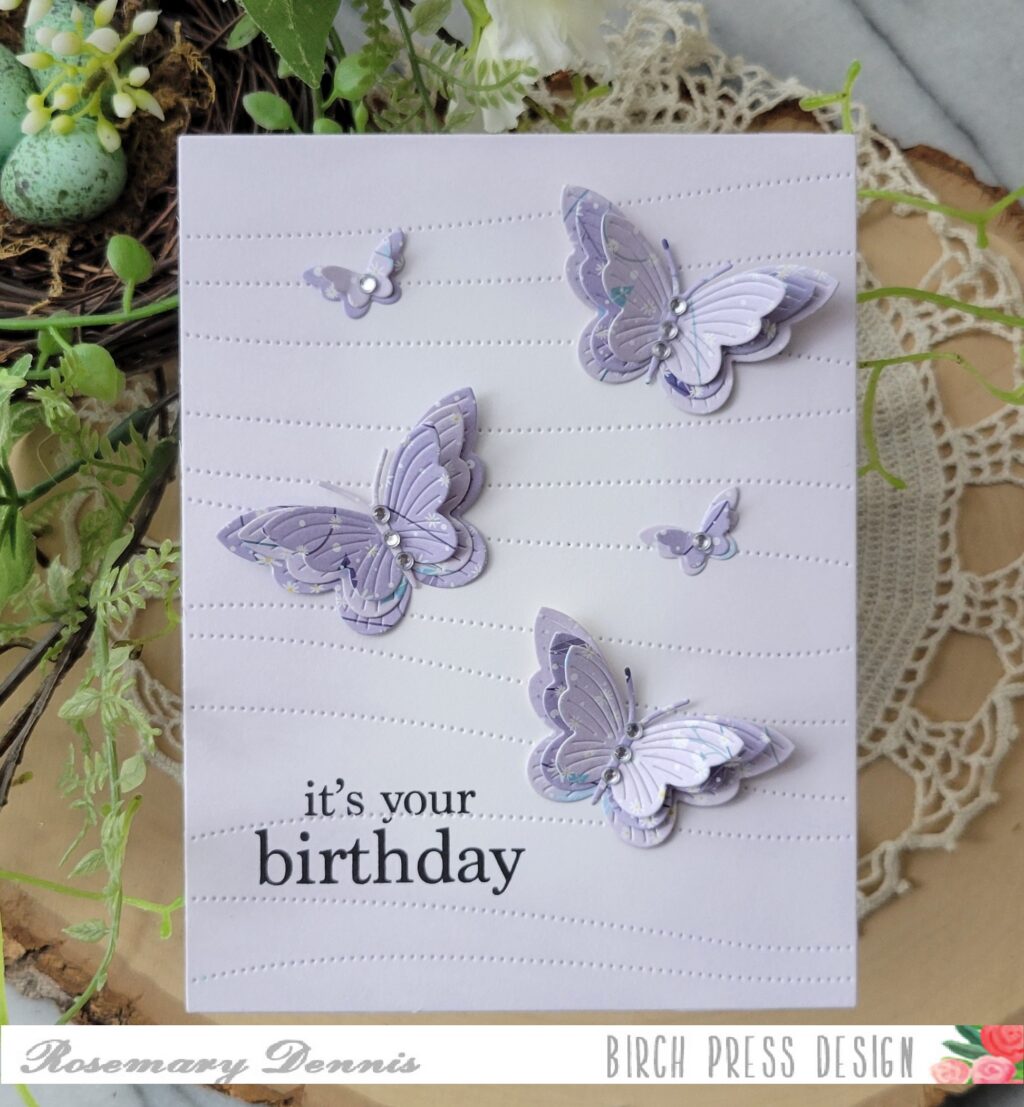
I wasn’t exactly sure how I was going to use the butterflies so I decided to die cut multiples from each piece of patterned paper. The bodies of the butterflies were also die cut from the same papers. As I played around with ideas I thought it would be fun to use the Pinpoint Contour Plate to provide some movement on the background. The panel was die cut from white cardstock and set aside.
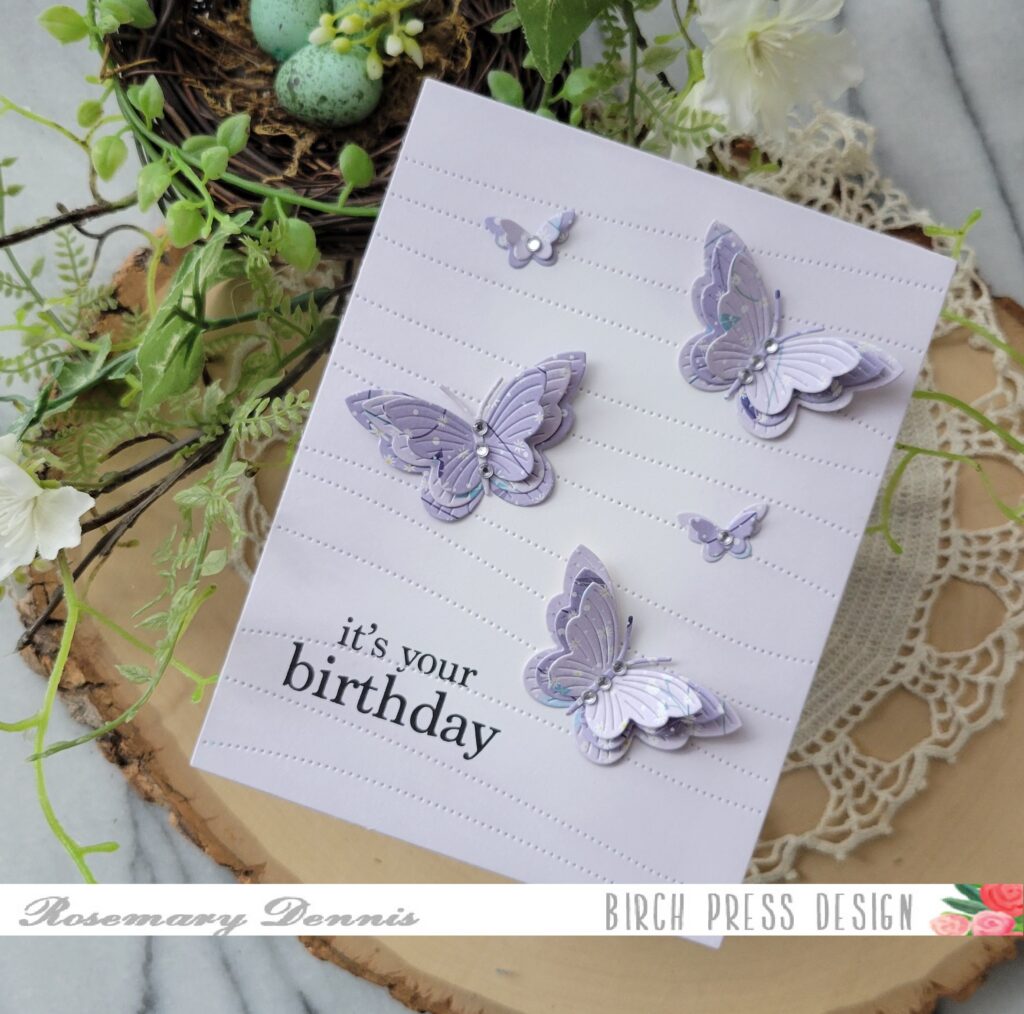
There are three large butterflies and two tiny butterflies in the die set. I decided to layer all three of the larger butterflies together by alternating the different patterned papers. The look is very subtle, but pretty. I also layered the two tiny butterflies in the same manner. To finish off the butterflies I added clear Memory Box fairy jewels to the bodies of all the butterflies. To keep the subtle purple going I ink blended a light purple ink around the edges of the background panel and then added the butterflies and sentiment to the card.
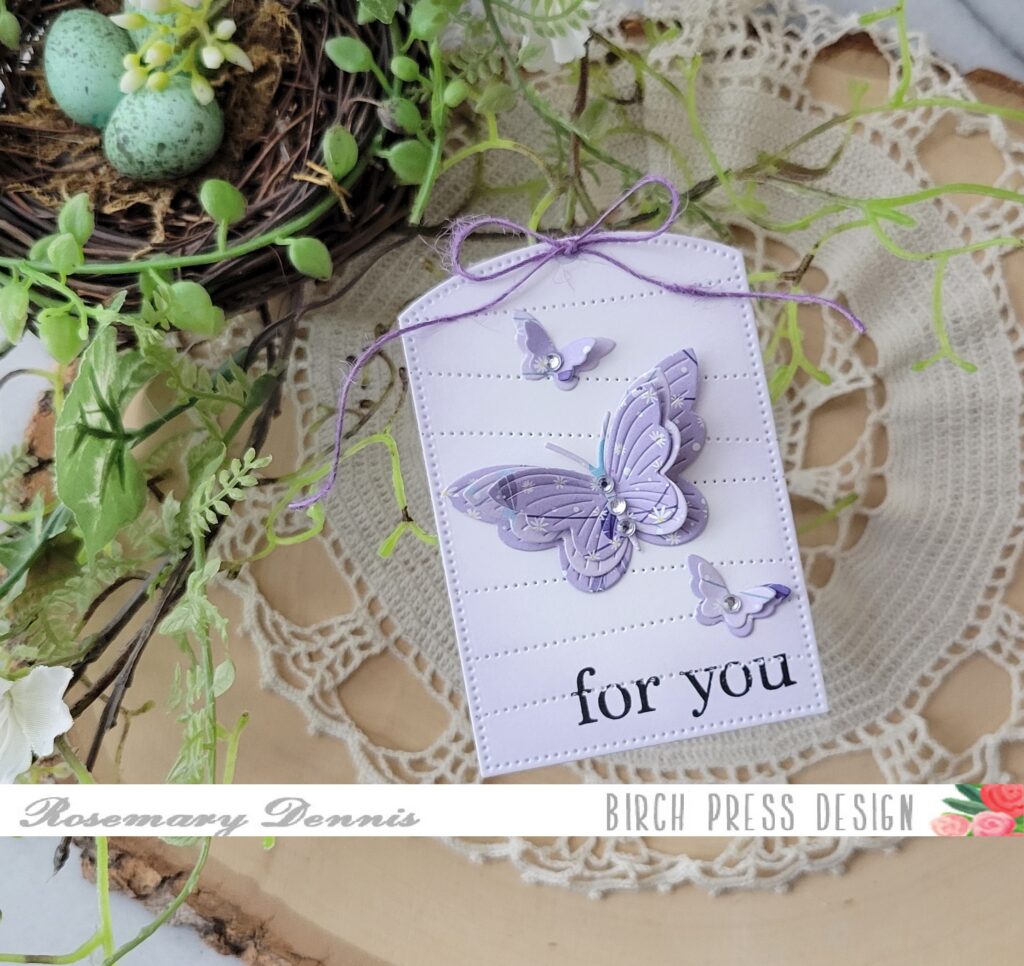
After I finished the card I still had one large layered butterfly and two tiny layered butterflies left. So I thought it would be fun to make a little tag. I used a scrap of white cardstock and die cut it with the Pinpoint Contour Plate and then die cut it further with a Memory Box Curved Cap Pinpoint Layers die. I added the same light purple ink around the edges and stamped the sentiment. Both sentiments are from the Plain and Simple Birthday Greetings. I finished with a little bow made with purple twine.
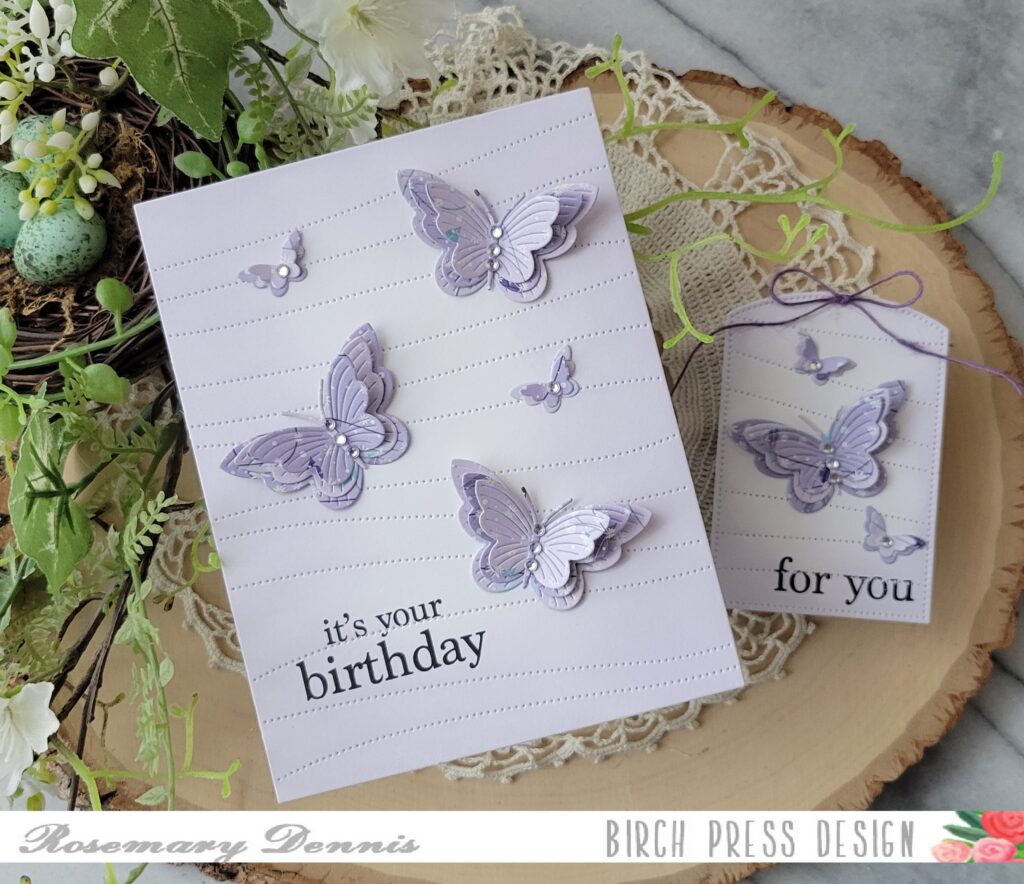
I love how both the card and the tag turned out. I hope you enjoyed today’s project. I had a lot of fun creating them.
Thanks for stopping by and have a wonderful day.