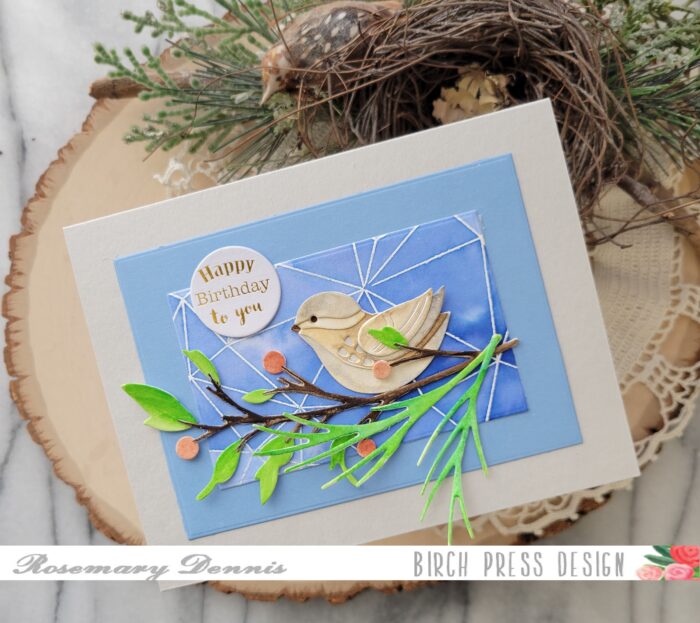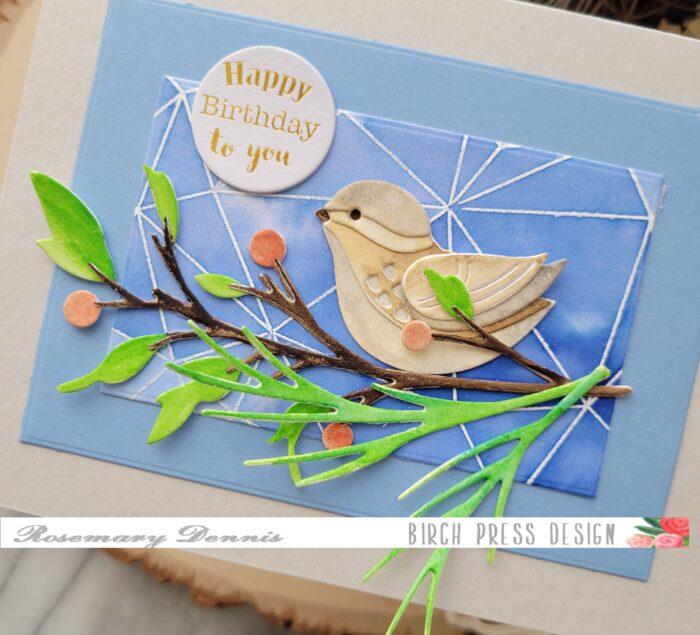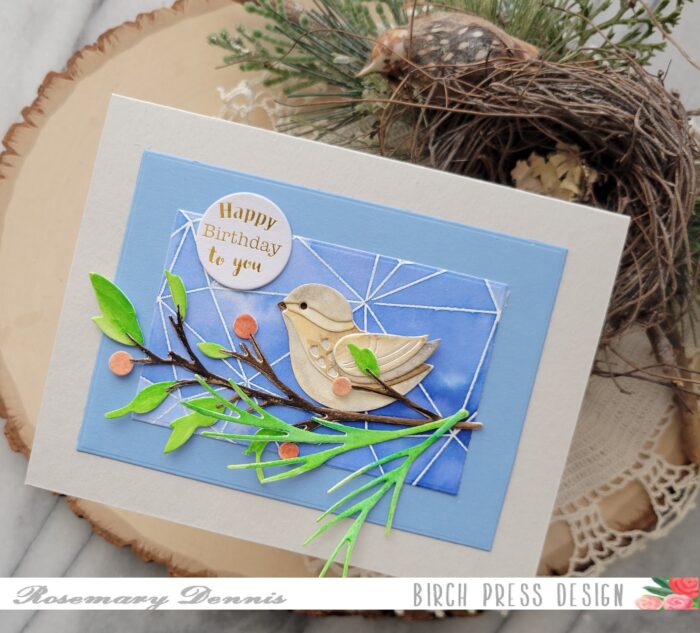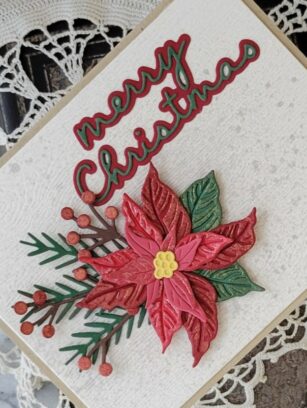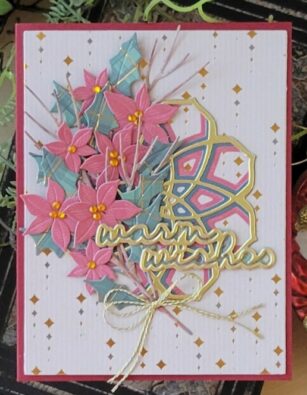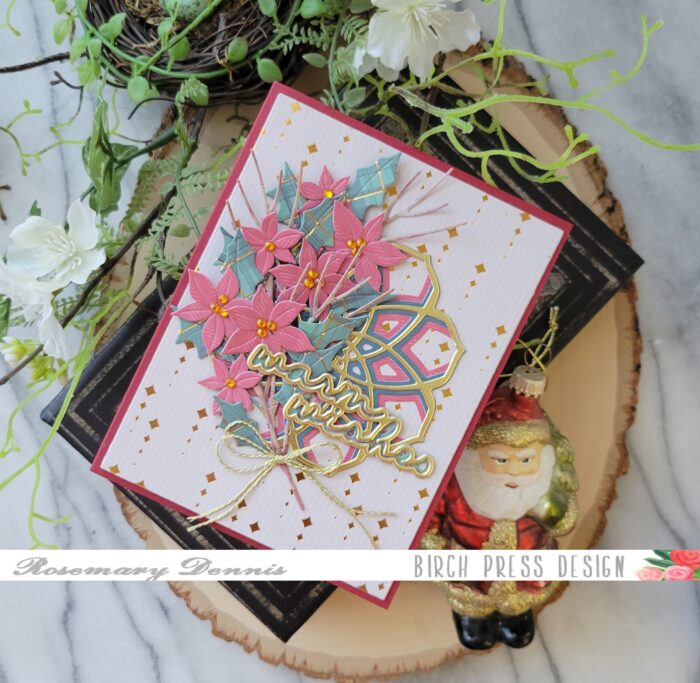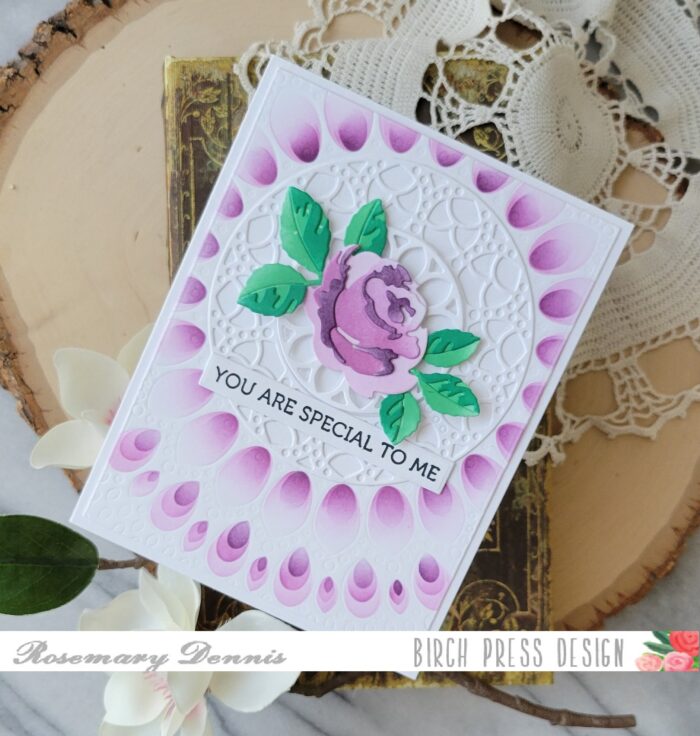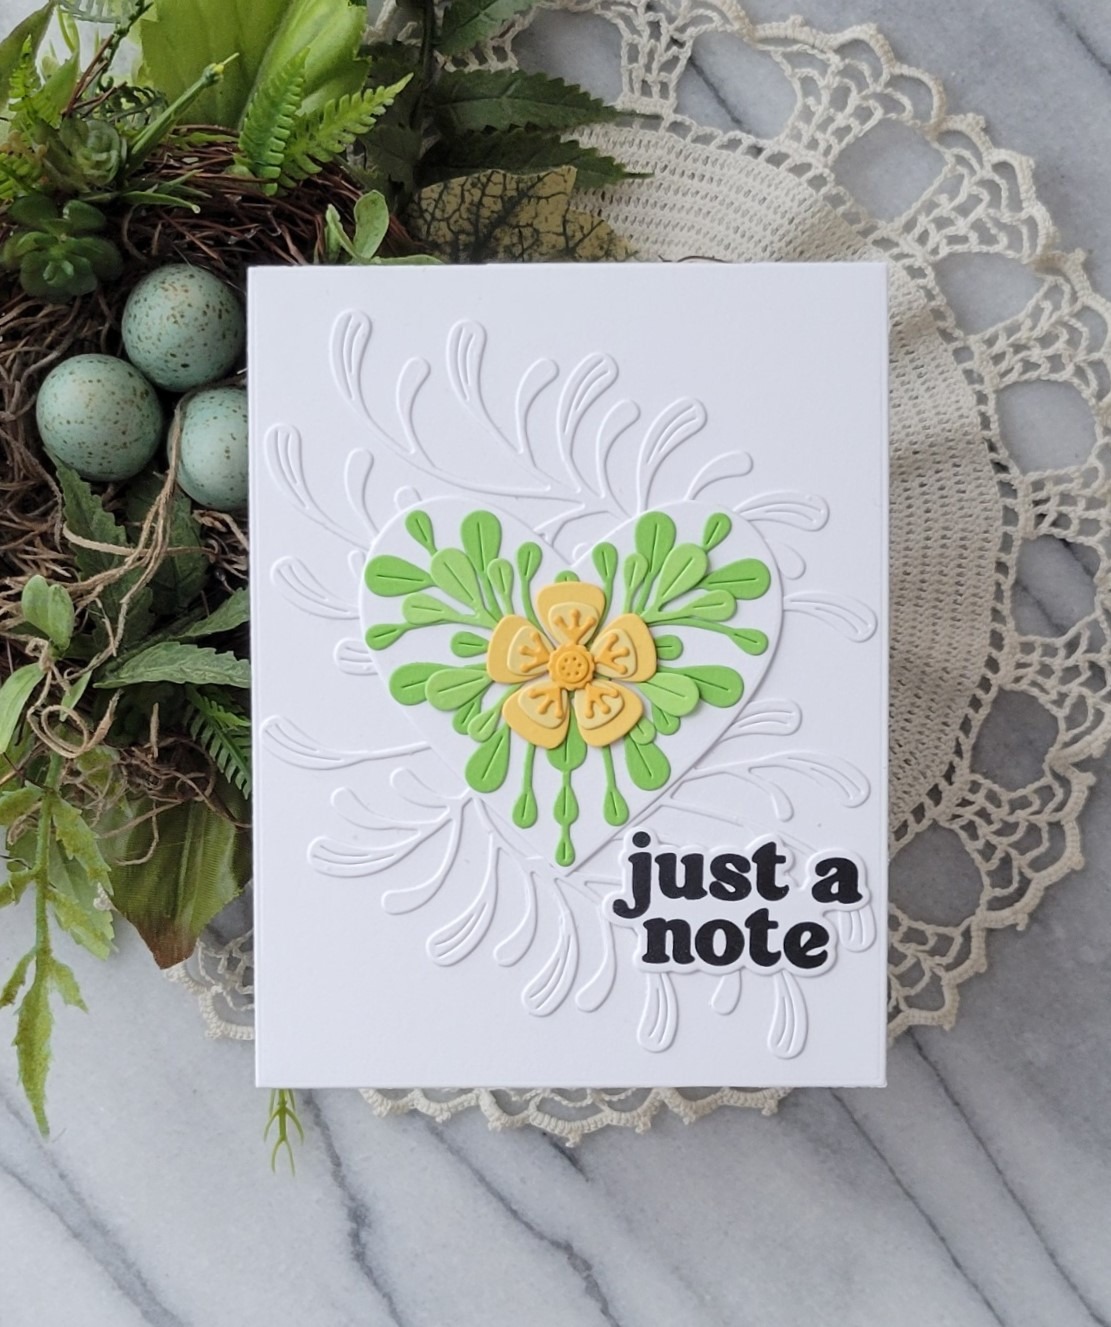
Hello everyone! Rosemary here on the blog today with a card I created using the new Block Print Garden Heart and Ornamental Branch dies. The Block Print Garden Heart die set is now a new favorite of mine! Let’s have a look at what I made.
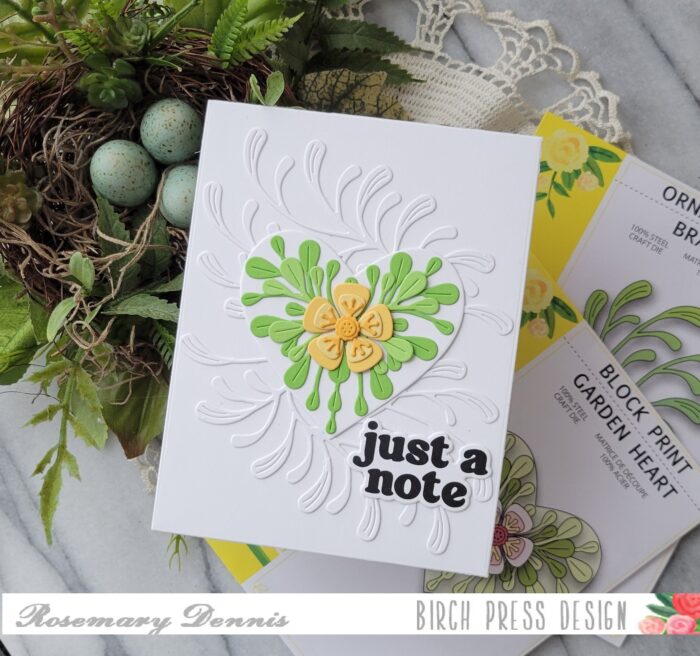
I went with two bright and sunny yellows from the Memory Box Sunrise 6×6 cardstock pad and two light greens from the Greenery 6×6 pad. I know it is hard to tell that there are two shades of green, but there are! Because I used two shades of yellow and green and alternated them for the layers of the bloom and leaves I had leftover pieces that I kept to use for another project.
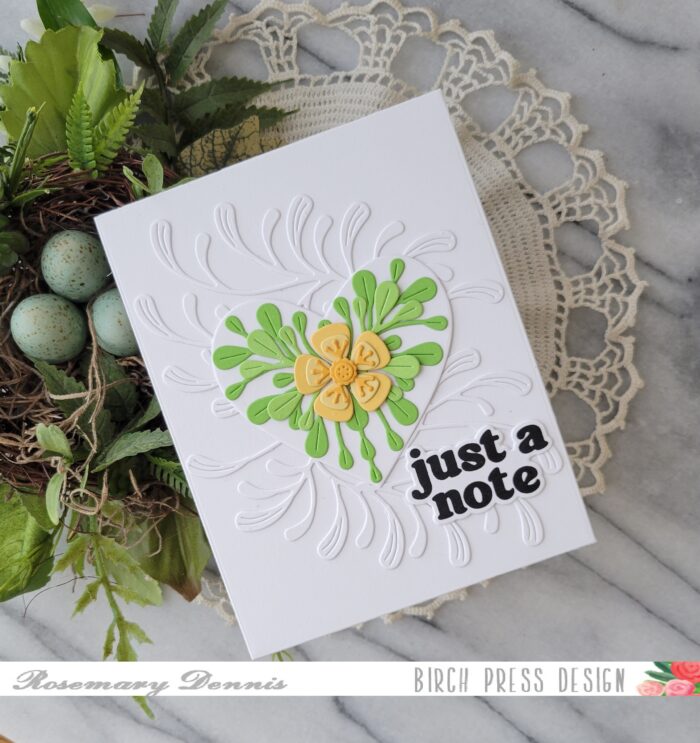
Once I got all the floral and leaf piece die cut I became a little stumped as to what to do next. Originally, I thought a solid heart die cut from heavy weight vellum would be nice, but after die cutting the heart from the vellum I really didn’t like it. I also thought about using a darker shade of green, but eventually settled on a white heart. Kept the vellum heart for another time, though.
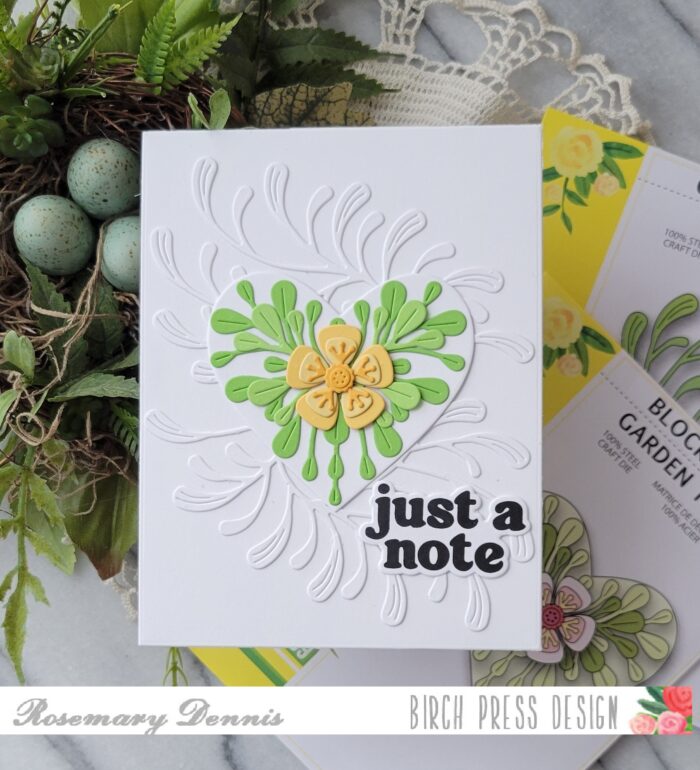
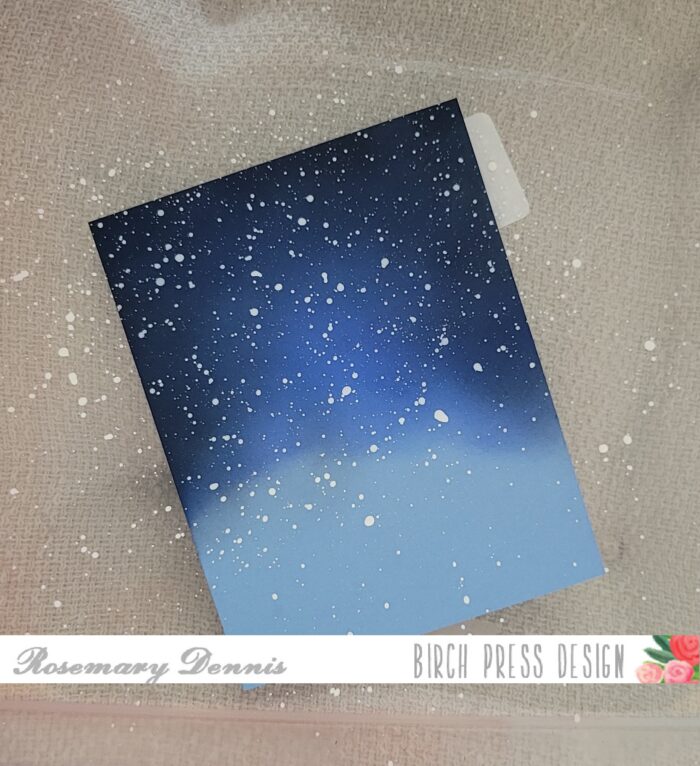
Now it was time to figure out a background. Again, I thought of going with a darker green background, but decided to die cut the Ornamental Branch die from white cardstock and layer the pieces on a white cardstock panel. I really like how all the white makes the floral center of the heart pop.
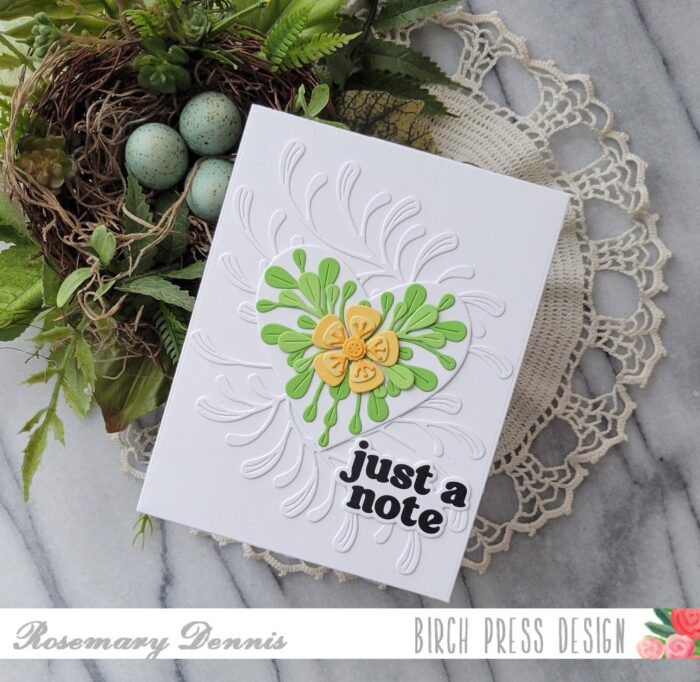
Now that I had everything figured out, I adhered the large leafy die cut to the heart, added the flower and then tucked the smaller leaf stems behind the flower. The two Ornamental Branch pieces were adhered to the white panel and then I added the heart. I adhered everything using liquid adhesive. The final piece was the sentiment.
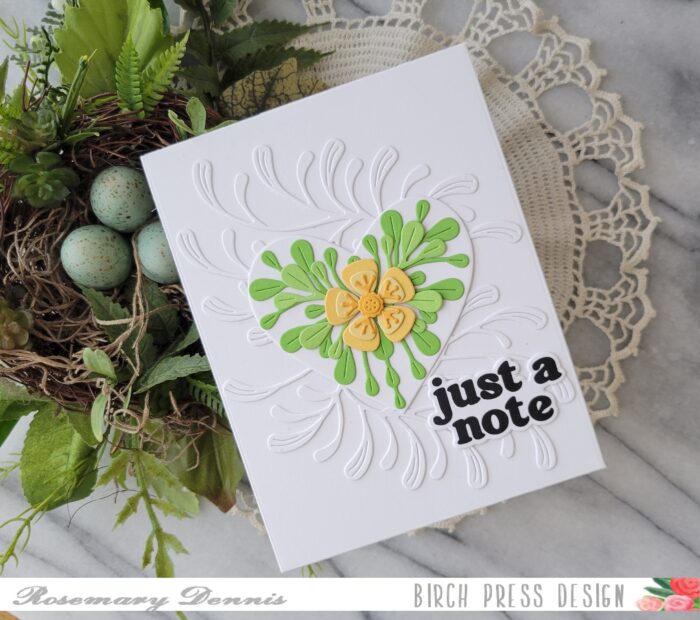
I chose a sentiment from the Vintage Everyday Greetings stamp and die set, stamped it in black ink and then die cut it with the matching die. The sentiment was adhered with liquid adhesive and a few thin foam squares. Well, that’s it for me. Thanks for stopping by and have a wonderful day!