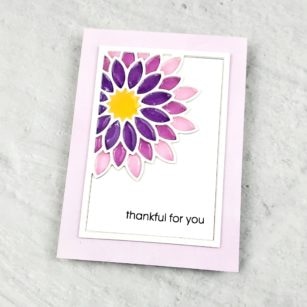

Hi crafty friends, thanks for coming by! Today I’m sharing a clean and simple card with an unexpected detail, a faux stained glass effect. This card features the Dahlia Mini Frame Layer A die, and a sentiment from the You Are Awesome stamp set.

I started by using the die to cut a piece of 80# white cardstock. Instead of letting all of the little pieces fall out, I kept all of the pieces together by adding several strips of paper tape across the back of the panel. Then, using Copic markers V12, V15, V17, and Y18, I quickly and messily (!) colored in the petals and the center of the dahlia. I also stamped the sentiment in black pigment ink.

Next, I used the die three more times on heavier 100# cardstock. I stacked and adhered the three layers together with a Zig 2-way Glue Pen and then adhered the stacked piece over my Copic-colored layer.

For my background, I used a foam blending tool to blend Milled Lavender Distress Oxide ink around the edges of a 4-bar sized piece of bristol smooth cardstock. I adhered the dahlia frame to the background and adhered the card front to an 4-bar card base. For the last touch, I added Ranger Glossy Accents to each petal and the center of the dahlia, using a craft pick to help push the Glossy Accents into nooks and crannies.

Thank you so much for visiting!

Supplies