Category: Snowflake

  • A Rustic Snowflake Greeting | By Natasha Vacca

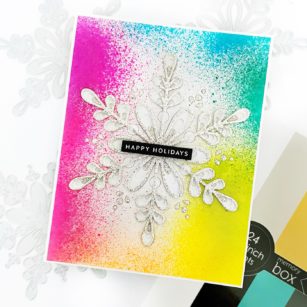
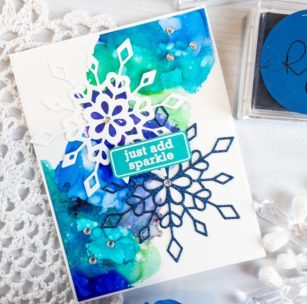
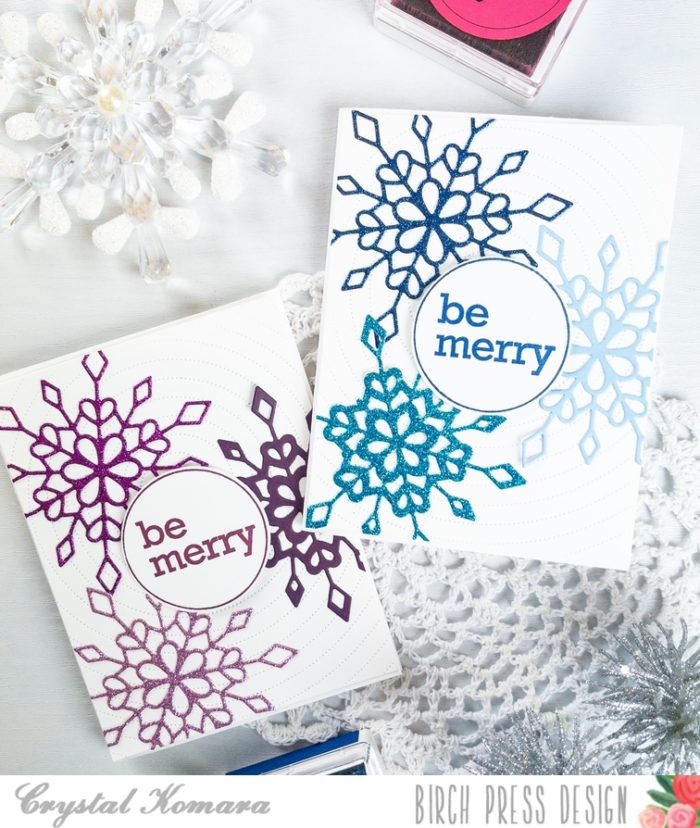
    Hello crafters! I am excited to be back on the blog today sharing the beautiful new Crochet Snowflake layering die set! Let’s get started!

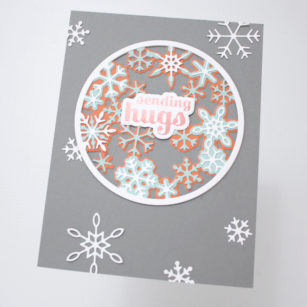
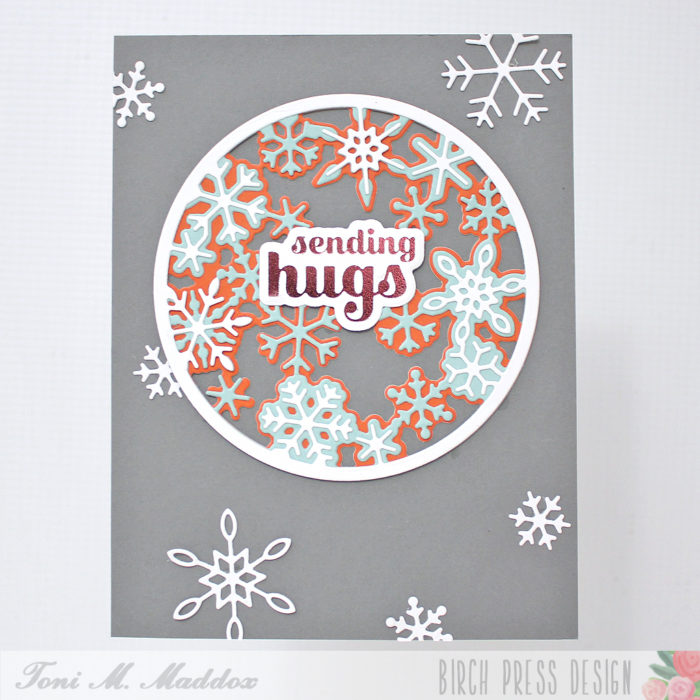
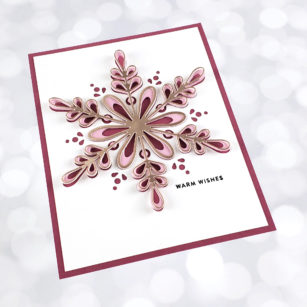
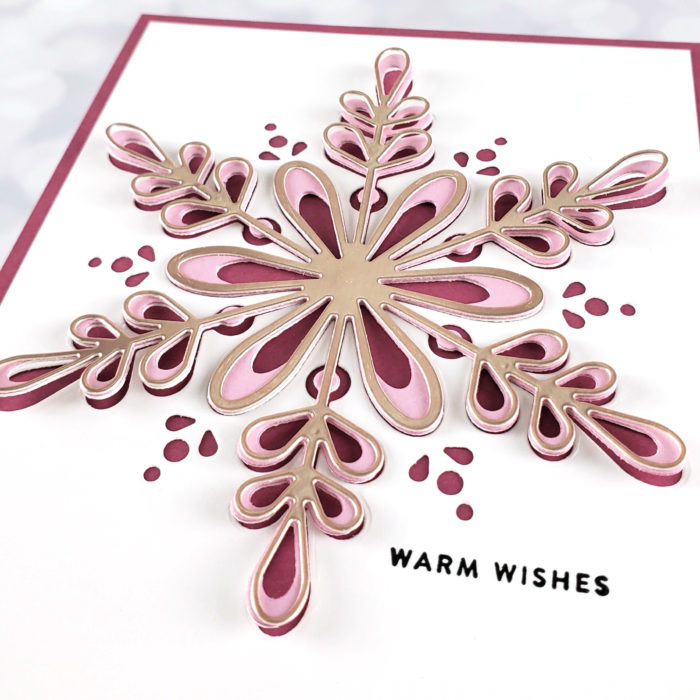
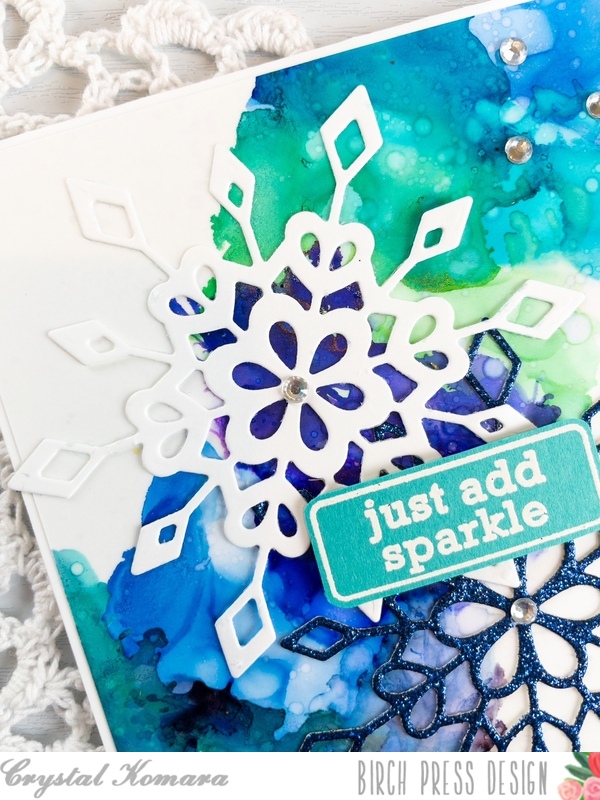
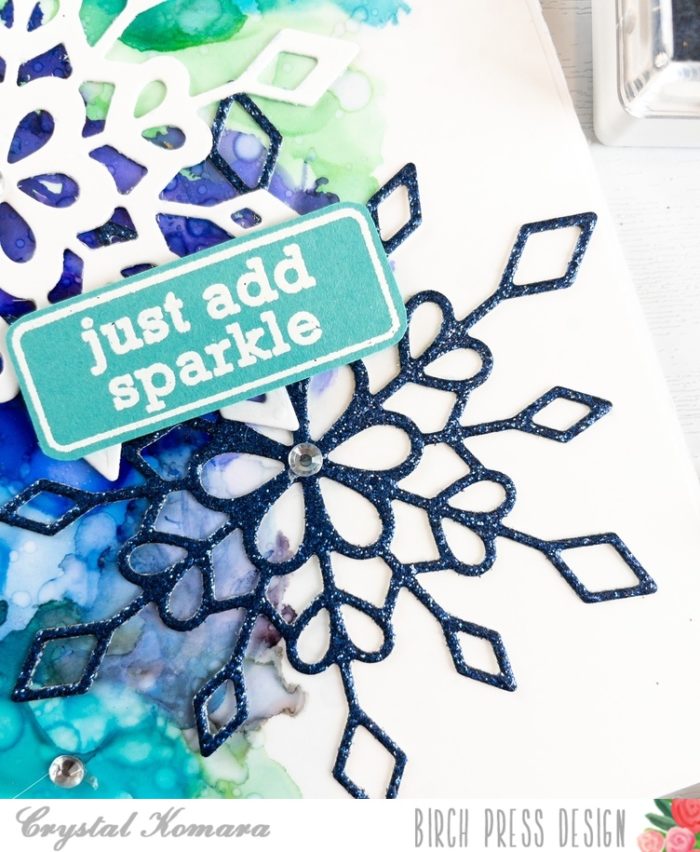
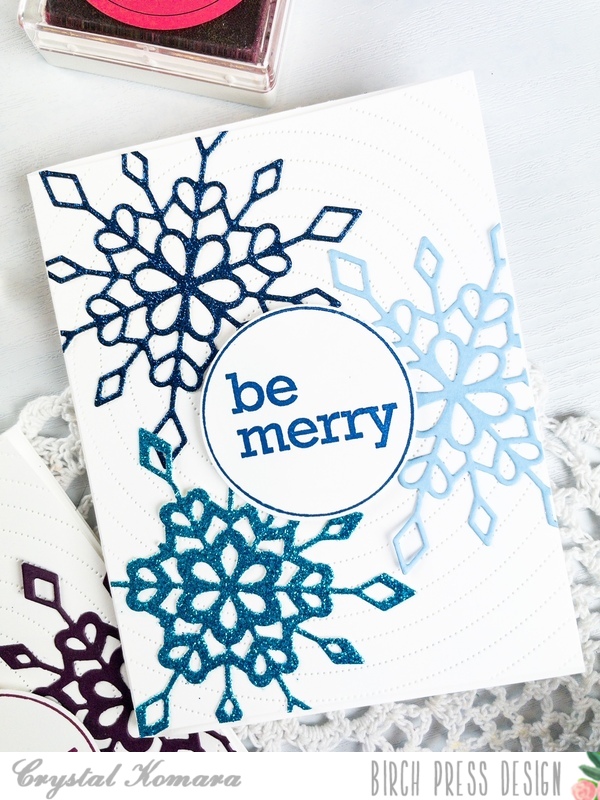
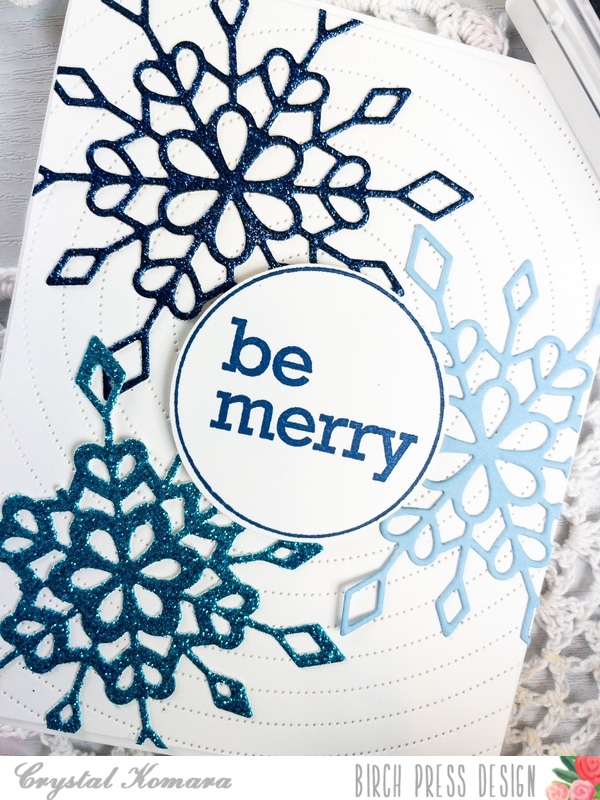
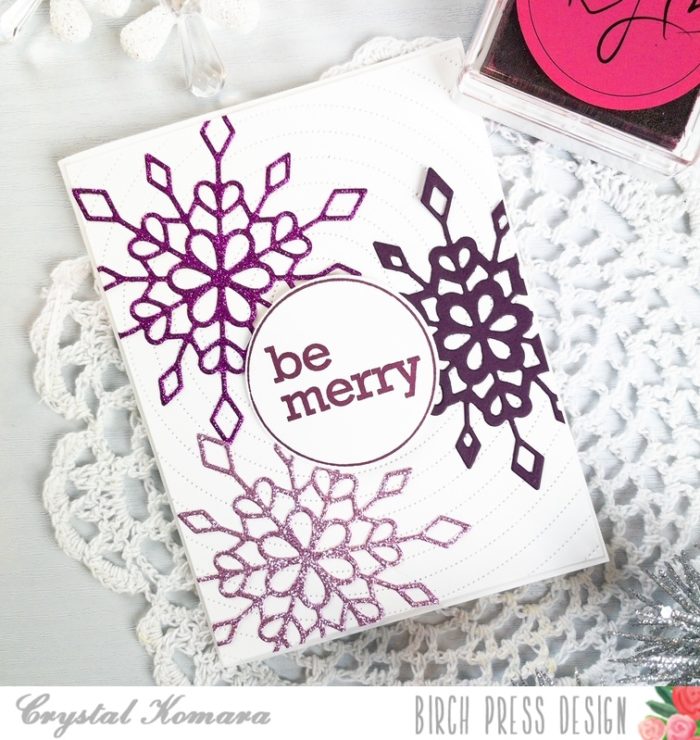
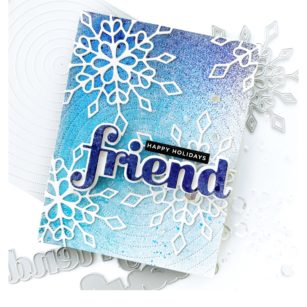
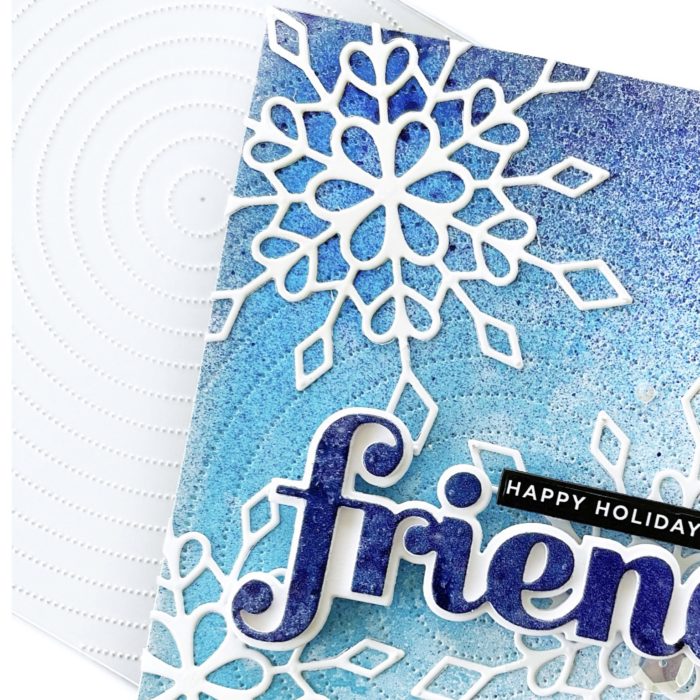
    For today’s card I am using the beautiful Crochet Snowflake layering die set. This is truly beautiful and has many possibilities! I started by die cutting all 3 layers. I die cut each layer 3 times for added dimension. I die cut Layer B and C using white card stock. I die cut layer A, 2 times using white card stock and one time using a glitter card stock from the Glitzy Glitter paper pad. Once all my layers were die cut I adhered them together with liquid glue.

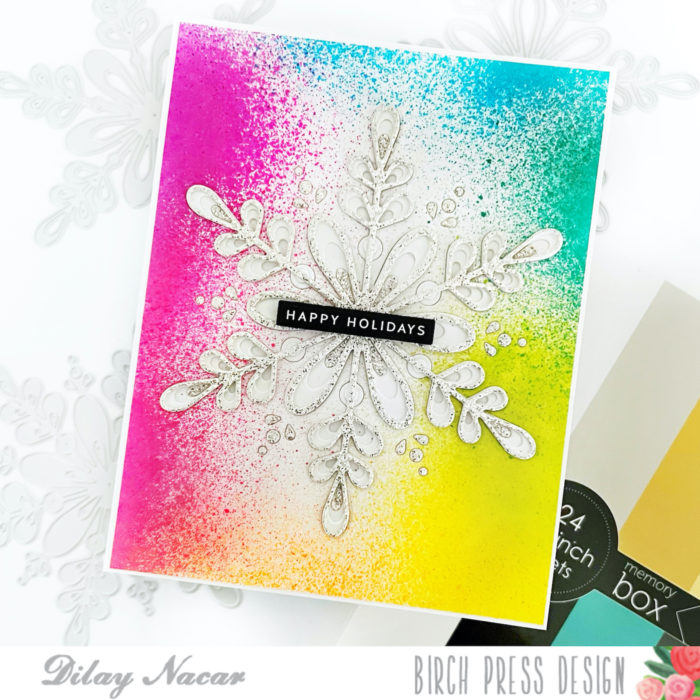
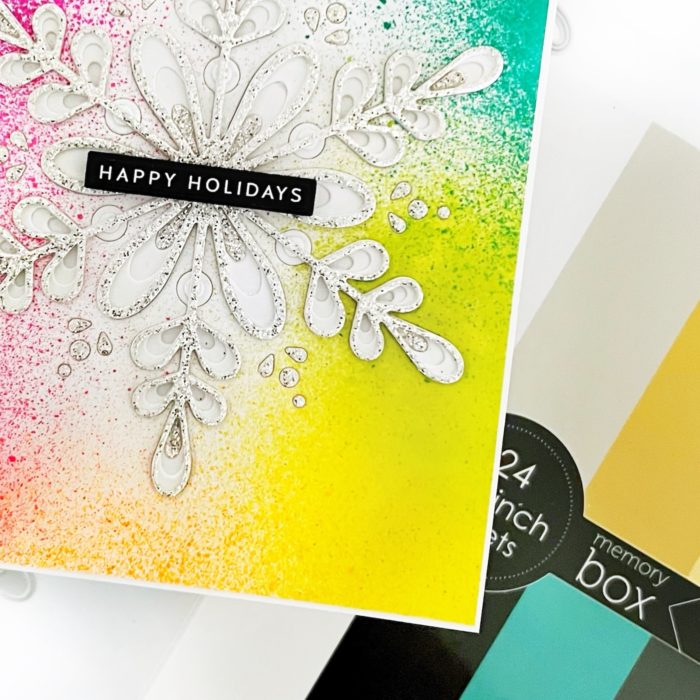
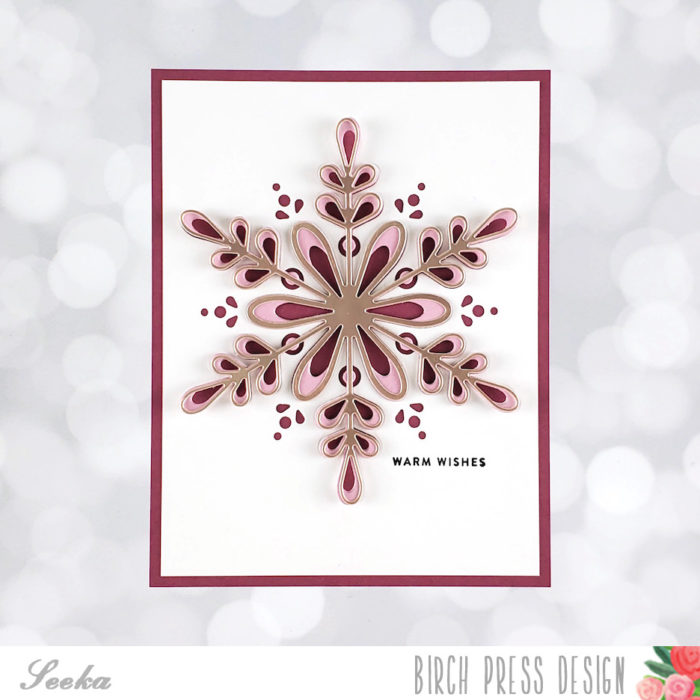
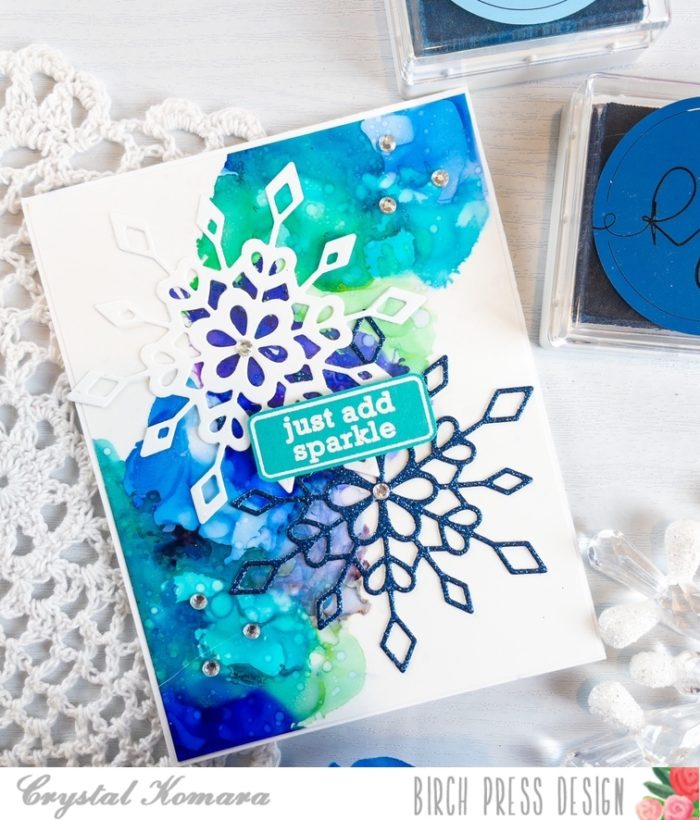
    I set my snowflake aside and started to work on the card panel background. As I shared in my title I wanted to create a rustic feel for today’s card. I used a gelli print from my stash for the card panel. I also used a distress tool and distressed the edges of the panel. I love the added feel this provides.

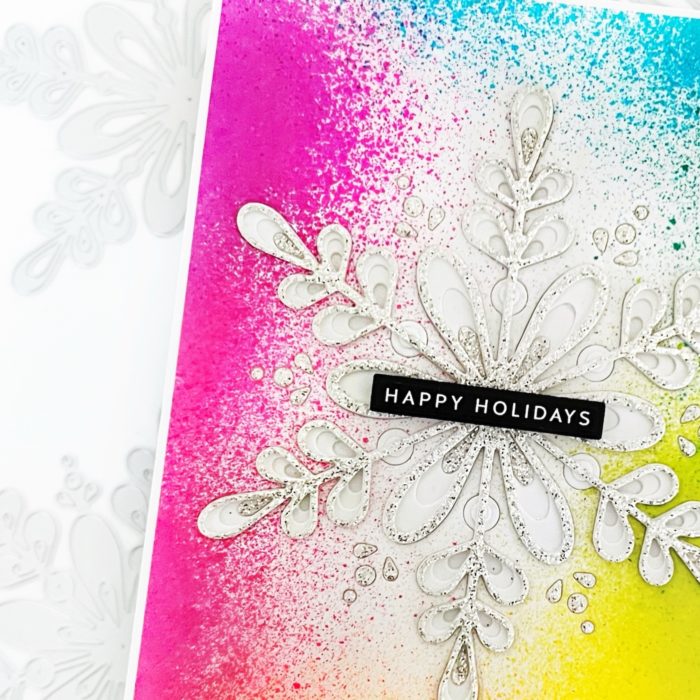
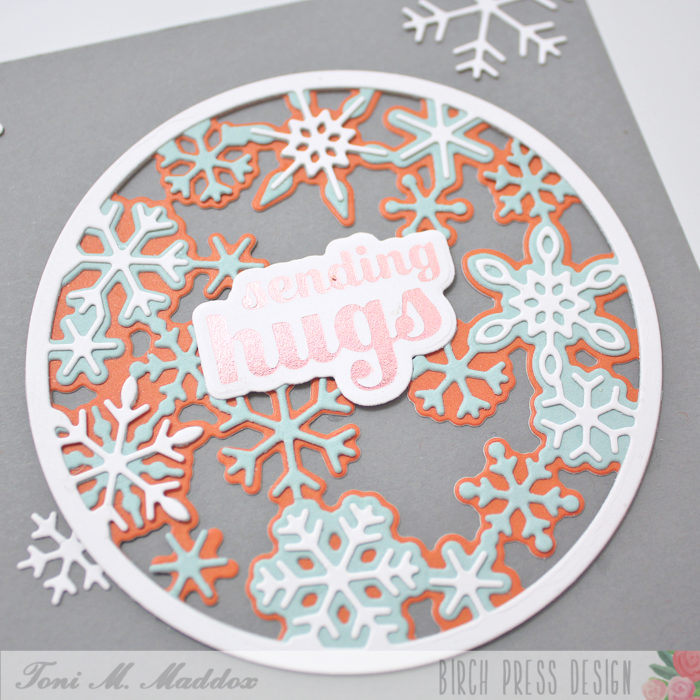
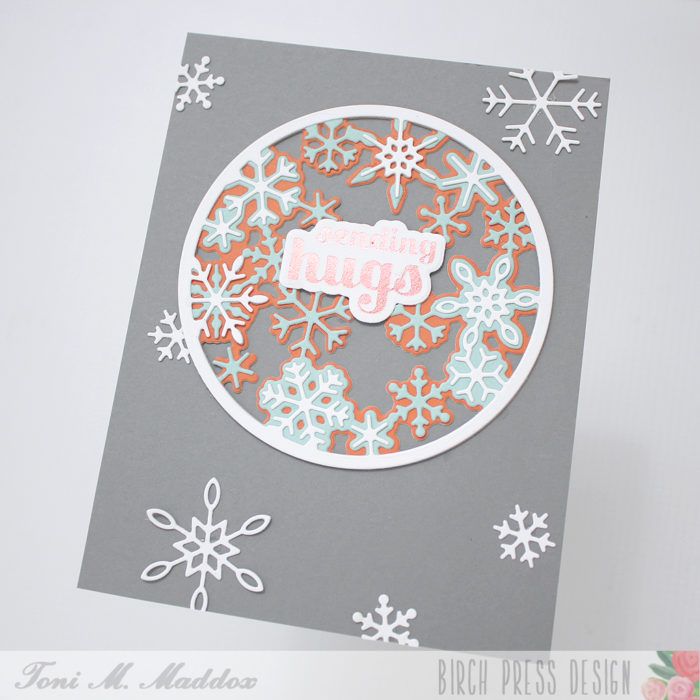
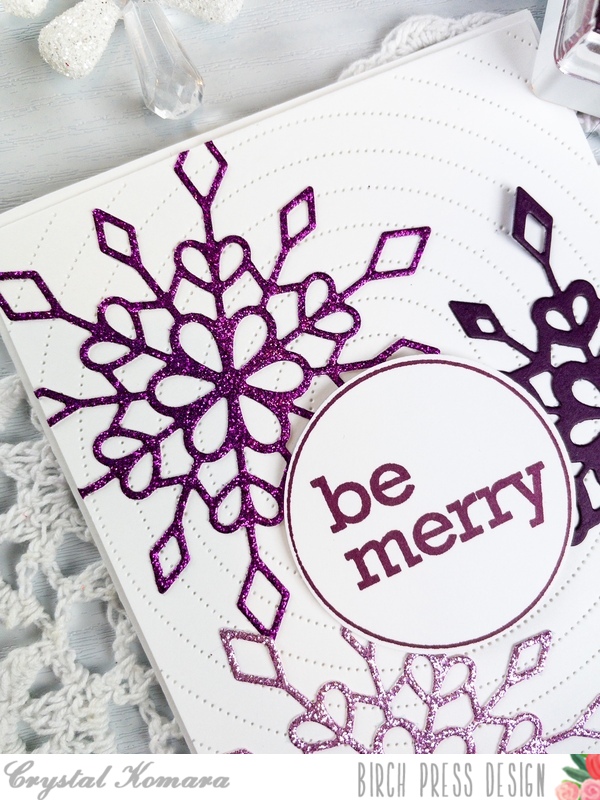
    I added additional texture by adding distress ink, as well as embossing glaze to a couple corners of the card panel. Next I added a piece of twine from my stash. I wrapped this around the card panel twice and tied the twine. Next I adhered the card panel to a brown card base. I then added foam tape behind the Crochet Snowflake for additional dimension. I adhered this on top and then added a sentiment strip from my stash to the center of the snowflake!

    Today’s card was a lot of fun! I love layering dies! They are truly beautiful and the Crochet Snowflake has so many possibilities! Thank you for stopping by! I will be back soon!


    Supplies


  • Rainbow Crochet Snowflake | By Dilay Nacar

    Rainbow Crochet Snowflake | By Dilay Nacar

    Welcome, crafty friends! Dee here today, sharing this fun and vibrant holiday card featuring the beautiful new Crochet Snowflake layer dies! 

    To begin, I cut the Crochet Snowflake layers A and B twice, once in white and once in silver glitter cardstock, and adhered them together.

    Next, I sprayed white heavyweight cardstock with acrylic spray paint in vibrant multi-colors. Once dry, I die-cut the center with the Crochet Snowflake layer C. I adhered the panel onto a piece of white card stock and adhered the white and silver glitter layers on top of all. To finish, I added a sentiment strip from my stash and mounted the panel onto a top-folding card base. 

    I hope you enjoyed today’s card and are inspired to create something new! Thank you so much for joining me.


    Supplies


  • Holiday Tags | By Natasha Vacca

    Hello crafty friends! I am excited to be back up on the Birch Press blog with you today! In today’s post I am going to share how I used several of the new holiday products to create Holiday gift tags! So let’s get started!

    For today’s tags I am using 2 of the snowflake dies: Adornment Snowflake and Felicity Snowflakes. I started by die cutting each of these sets using white card stock and a blue from the Stormy Blue Collection ( Memory Box Paper Pad). I started with a lighter blue from the Stormy Blue collection for the base layer of each of the snowflakes. I then die cut the inner snowflake die using white card stock, as well as a darker shade of blue. Once everything was die cut, I adhered the inner layers of each snowflake together. For some I left white on the top, others were blue on top.

    Next I embossed each of the inner snowflakes. I used a blue and a gold embossing powder. Once these were heat set, I adhered the embossed snowflakes to the shadow layer of each set (Adornment Snowflake and Felicity Snowflakes).

    Next I created a watercolor background using mixed media paper, Lindy’s Magicals, as well as sprays. Once my backgrounds were dry, I die cut them into tags. Next I splattered the tags with both white and gold paint. I allowed these to dry. Once they were dry, I distressed the edges with a distress ink and then added embossing glaze to a few areas of the tags.

    Once my tags and snowflakes were complete I chose 2 sentiments, both are from the latest Birch Press Designs release. For the larger tag, I die cut the Handwritten Merry Christmas and Outline sentiment. For the shadow layer, I die cut this using vellum. For the script I die cut it two times using white card stock, then a 3rd time using the Vintage Pastel Mirror Pad collection. I adhered the layers together using liquid glue. For the smaller tag, I used the beautiful Find Joy and Outline die set. I followed the same process as the previous sentiment. To complete the tags, I adhered the snowflakes and sentiments to the tag base and added twine from my stash. I added a few Fairy Drops as well to complete by tags.

    Thank you for stopping by today and I hope you enjoyed these! I will see you soon!


    Supplies


  • Fall Colored Snowflakes | by Toni M Maddox

    Fall Colored Snowflakes | by Toni M Maddox

    Hello, everyone! Toni here with you today sharing a modern holiday/winter card using fall colors. Say what?!

    I cut out the BPD Snowy Circle Layer Set in Memory Box Sunny Orange and Fresh Aqua 6×6 cardstock, and the top layer in white.

    I also cut out a few Felicity Snowflakes in white.

    I adhered the Snowy Circle to the card front, arranging the Felicity Snowflakes as though they were falling from the sky.

    I hot foiled the Sugar Script Sentiments 1 with copper foil and diecut it with the coordinating outline die and popped it on top.

    I hope you enjoyed today’s card and have a great rest of your week!


    Supplies


  • A Sparkly Merry Christmas | By Natasha Vacca

    Hello friends! I am excited to be back on the blog today to share a sparkly Merry Christmas design with you! Today’s card uses several new products from Birch Press Designs latest release! I had a lot of fun, so let’s get started!

    I started with a pre-made background for today’s card. I liked the subtle layer of pink and was excited to pair this with blues, white, and lots of sparkle! I started by die cutting the Meridian Ornament Layers set using white card stock, as well as the Festive Glitter paper pad set. I cut layer A and C using white card stock, then layer B was die cut using the Festive Glitter pad. Once these were die cut, I adhered these together using liquid glue. For the ornament topper, I used the Christmas Ornament Pop Up Easel die set. I die cut the topper with white card stock, then added sparkle using embossing powder. I adhered this to the top, then set the ornament aside.

    Next I knew I wanted to create a bit of dimension behind my ornament for added texture and interest. I used 2 die sets, Eucalyptus Stems and Berries Contour Layers and Fuddled Leaf Branches Contour Layers. I die cut several of each of these using the Stormy Blue paper pad from Memory Box. Once they were die cut, I added a bit of oxide ink to the fuddled leaves, as well as some embossing powder for added texture. On the berries I die cut an extra set of the berries and added embossing powder as well. I then adhered the top layer of the berries onto the stems.

    Next I die cut a few snowflakes using the Felicity Snowflakes die set using the Festive Glitter pad. I used the same color of glitter card stock as I used in my ornament. I then die cut my sentiment using the Handwritten Merry Christmas die set. I die cut the shadow layer using vellum and then the Handwritten sentiment using 2 paper pads: Vintage pastel Mirror Pad and the Festive Glitter Pad. I adhered these together using liquid glue.

    Next I trimmed down my pink background panel and added a bit of embossing powder to the edges. I then added a bit of ink to darken the edges a bit to add a vintage look. I then prepared all my die cuts by adding foam tape for added dimension. I then adhered these down to my card panel using a combination of adhesive (liquid glue and foam tape). I added my sentiment to the ornament to complete my card!

    I had so much fun creating today’s sparkly Christmas card! Be sure to check out the amazing new holiday items! I know you will love them! I will be back soon with more inspiration!


    Supplies


  • Rosy Crochet Snowflake | By Seeka

    Rosy Crochet Snowflake | By Seeka

    Hello and welcome! Seeka here and today I’m sharing a snowflake card using the brand new Crochet Snowflake Layer Die set. This die set is gorgeous and each of the three layers can be used together or separately for different looks!

    I started off by positioning Layer C, the base layer, just above the center of a 4″ x 5.25″ panel of white cardstock. I ran the piece through my die cutting machine and then set aside the resulting snowflake for another time; for this card I wanted to use the negative space which includes the small cut out out details between the snowflake’s “arms.”

    Next, I used Layer B to cut once from a light rosy mauve cardstock (some similar options can be found in the Memory Box Berry Red 6×6 Paper Pack) and once from a scrap piece of heavy white cardstock. I adhered these two layers together with the rosy mauve layer on top.

    Next, I used the Layer A die to cut from a rose gold metallic cardstock (a similar color can be found in the Memory Box Vintage Pastel Mirror Pad 6×6 pack).

    To assemble the card, I first glued the white panel (with Layer C cut out of it) to the center of a 4.25″ x 5.5″ panel of dark mauve cardstock. Next, I used a glue dot behind the center of Layer B to adhere it to the background panel. Then I used another glue dot behind the center of Layer A to adhere it to Layer B.

    Finally, to finish the card, I stamped a small holiday sentiment from my stash in black ink and then glued the card front to a card base.

    Thank you so much for visiting!

    Supplies

  • Just Add Sparkle | by Crystal Komara

    Just Add Sparkle | by Crystal Komara

    Hello Birch Press Design friends and Happy New Year! This is Design Team member Crystal Komara here. I live in Massachusetts (and grew up in Northern Maine) and January is essentially the “dead of winter” here with cold temperatures and typically measurable amounts of snow. So, clearly winter is on my mind with today’s card!

    Card details:

    The base of this A2 sized card is made from 80 lb. Neenah Solar White Smooth cardstock. On a 5 1/4″ x 4″ piece of Yupo paper, I created a background using Ranger Adirondack Alcohol inks in the colors Glacier Blue, Sailboat Blue and Limeade. Once the alcohol ink background dried, I adhered it directly to the card base. I die cut two snowflakes from the Frosty Flake Layer Set. I cut Layer A from a piece of blue glitter cardstock in the Twinkling Jewel Paper Pack. I cut Layer B from white cardstock. I adhered both snowflakes directly to the alcohol ink background using a fine tip liquid glue.

    I stamped the sentiment “just add sparkle” on teal cardstock (from the Fresh Aqua Paper Pack) in Versamark ink. This sentiment is from the Contempo Christmas Greetings stamp set. I heat embossed the sentiment with white embossing powder and then die cut the sentiment using the coordinating Contempo Christmas Greetings dies. I adhered the sentiment to the center of the card using 3M foam adhesive for added dimension. Lastly, I added a couple clear rhinestones to the snowflakes for more sparkle.

    I love working with alcohol inks! They can provide a beautiful background for the most simple of elements. Thanks for visiting and have a wonderfully creative day!

    Supplies

  • Be Merry | by Crystal Komara

    Be Merry | by Crystal Komara

    Hello readers! I can’t believe we are only 11 days away from Christmas! I am proud of myself for getting all 121 of my handmade Christmas cards out (and on time) this year! Although, my friends in Austria and Germany may see their cards around Valentine’s Day. . . I tried. Today I am sharing two cards made using the Frosty Snowflake Layering dies and while the sentiment on these cards says, “be merry,” they could easily be made into winter birthday cards or holiday thank you cards by simply changing out the stamped sentiment.

    Card details:

    *Note – both of these cards were made the same way, I just changed out the color combinations.

    The base of this A2 sized card was made from 80 lb. Neenah Solar White Smooth cardstock. Using the Pinpoint Radial Plate die, I cut the background from the same white cardstock. Using Layer A and Layer B of the Frosty Flakes Layering Dies I cut the snowflakes from the 6″ x 6″ Twinkling Jewel Glitter pad. I adhered the snowflakes directly to the background. Using the Contempo Christmas Greetings stamp set and coordinating die, I stamped the sentiment “be merry” in either blue ink or purple ink and then I used the coordinating circle die to cut the sentiment out. I adhered the sentiment to the center of each card using 3M foam adhesive for added dimension.

    Here is the same card made in an alternate color combination:

    I hope you have enjoyed these beautiful cards. Thank you for visiting and have a wonderfully creative day!

    Supplies

  • Jolly | by Crystal Komara

    Jolly | by Crystal Komara

    Hello Birch Press Design friends! This is DT member Crystal Komara here with you and it’s a mad dash to the finish line to create those holiday cards and get them out in time! Today I’m sharing a fun and festive way to use a simple holiday shadow word die as the focal point of your card.

    Card details:

    The base of this A2 sized card is made from 80 lb. Neenah Solar White Smooth cardstock. I cut a 5″ x 3 3/4″ piece of white cardstock for the first layer and matted that with a 5 1/4″ x 4″ piece of red cardstock. Using Layer B of the Frosty Flake Layering Set, I cut four snowflakes from white cardstock. I adhered these four snowflakes onto the white cardstock to create my background. It’s a very subtle look to allow the colorful words to POP! I die cut the word “Jolly” three times using the Jolly Honey Script Word Die. I die cut one word from gold glitter cardstock, one from red glitter cardstock and one from green glitter cardstock. All of the glitter cardstock was from the 6″ x 6″ Frosted Glitter pad. I cut the thinner shadow portion of the “jolly” from white cardstock. I layered the two “jolly” layers together with a fine-tip liquid adhesive. I then placed the three “jolly” sentiments going down the middle of the card using 3M foam adhesive for added dimension.

    I hope you have joined this fun way to use your shadow word dies to create holiday cards, no stamping required! Thanks for visiting and have a wonderfully creative day!

    Supplies

  • Frosty Flake | By Dilay Nacar

    Frosty Flake | By Dilay Nacar

    Hi, friends and happy Friday! 

    Dee (@dilaynacar) here today sharing a fun snowflake card featuring one of my favorite layering dies and a background that I created using acrylic sprays and die cuts! Let’s get started!

    To begin, I took an extra background that I had previously created and cut it with the Pinpoint Radial background die (you can use any background that you like!) Next, I die cut three of the Frosty Flake snowflake die (only Layer A), adhered them to the background, and trimmed off the excess.

    Next, I cut the Big Friends Sugar Script die with the leftover acrylic-sprayed cardstock and the shadow  die in white, then adhered them to the card using foam tape. To finish, I added a sub-sentiment from my stash and some clear sequins for a little extra sparkle!

    Thank you so much for joining me today!