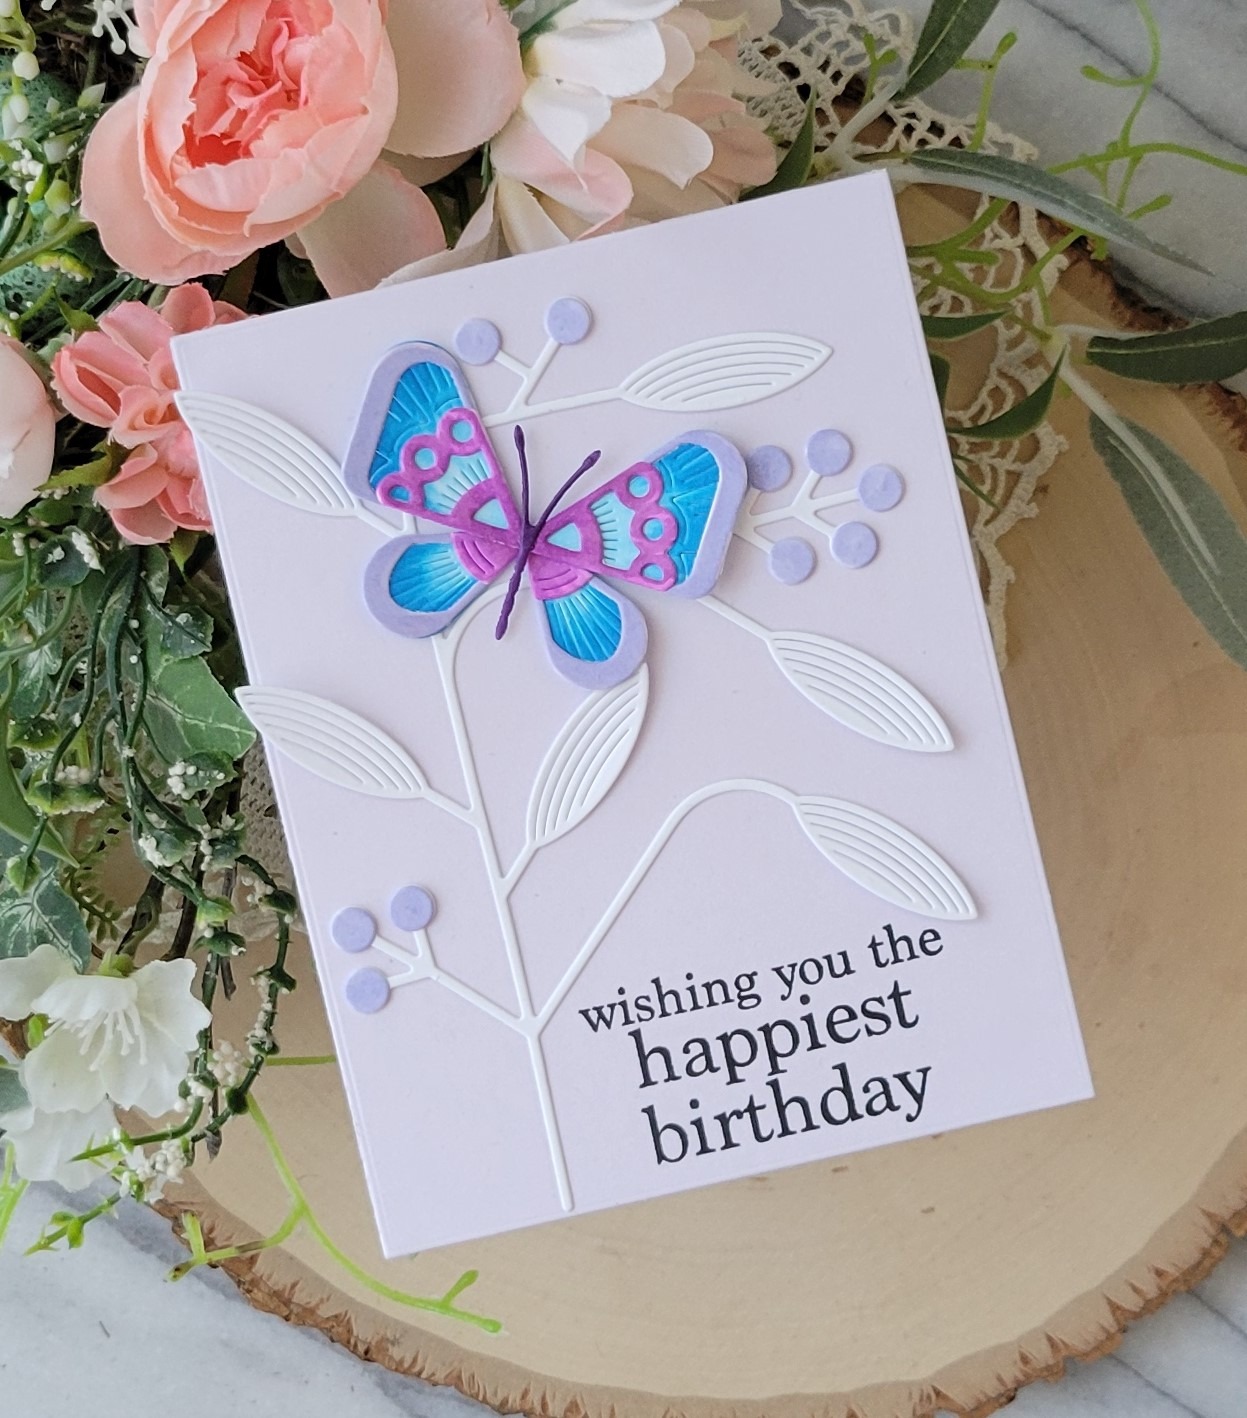
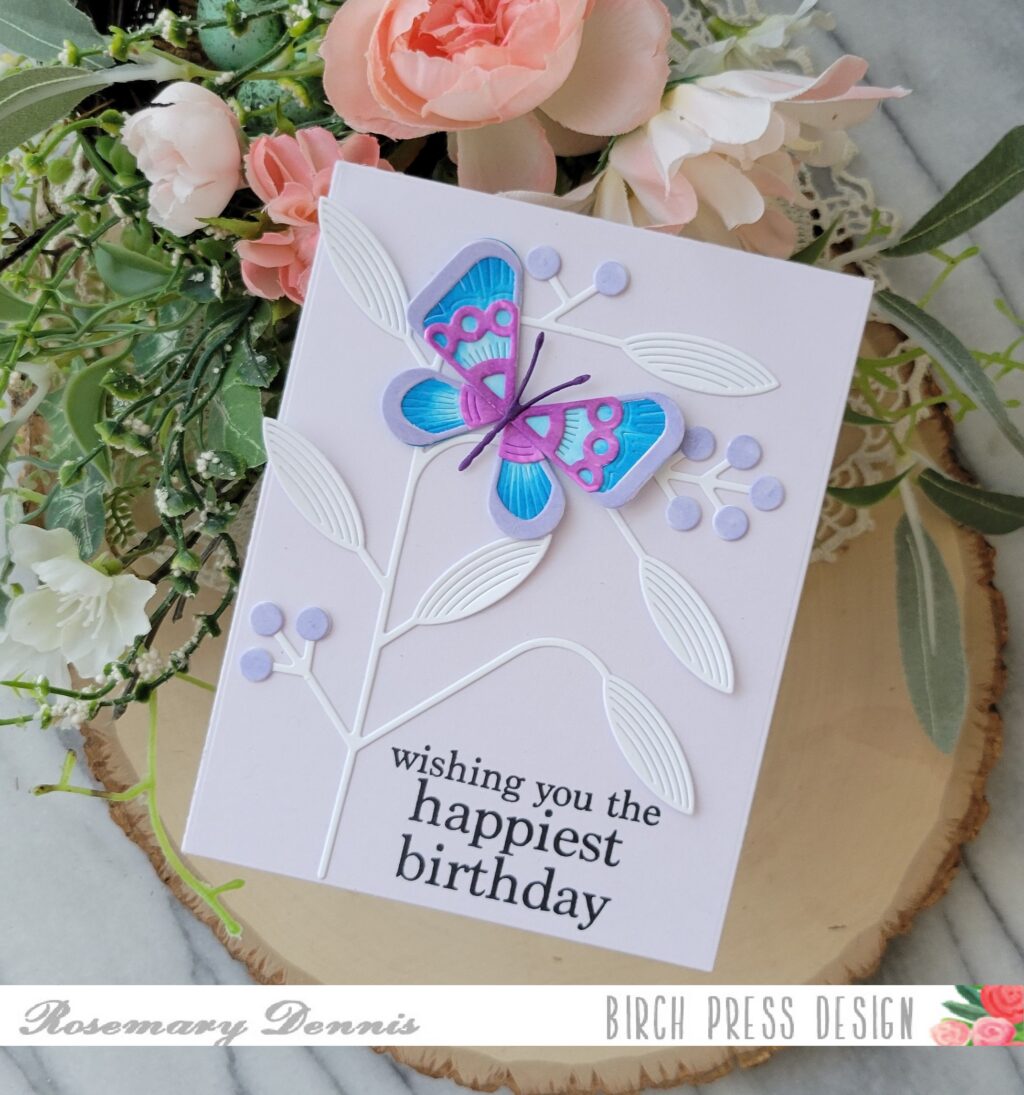
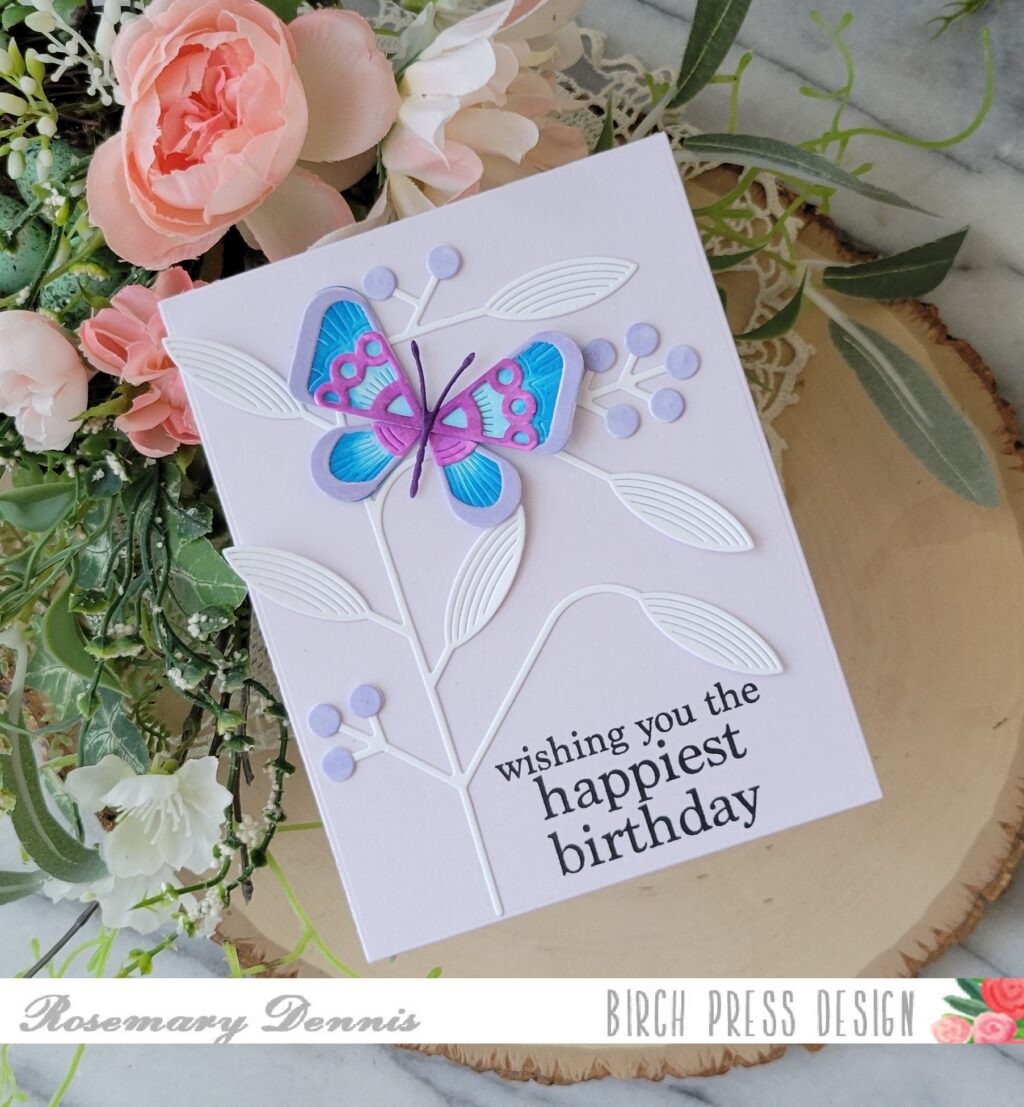
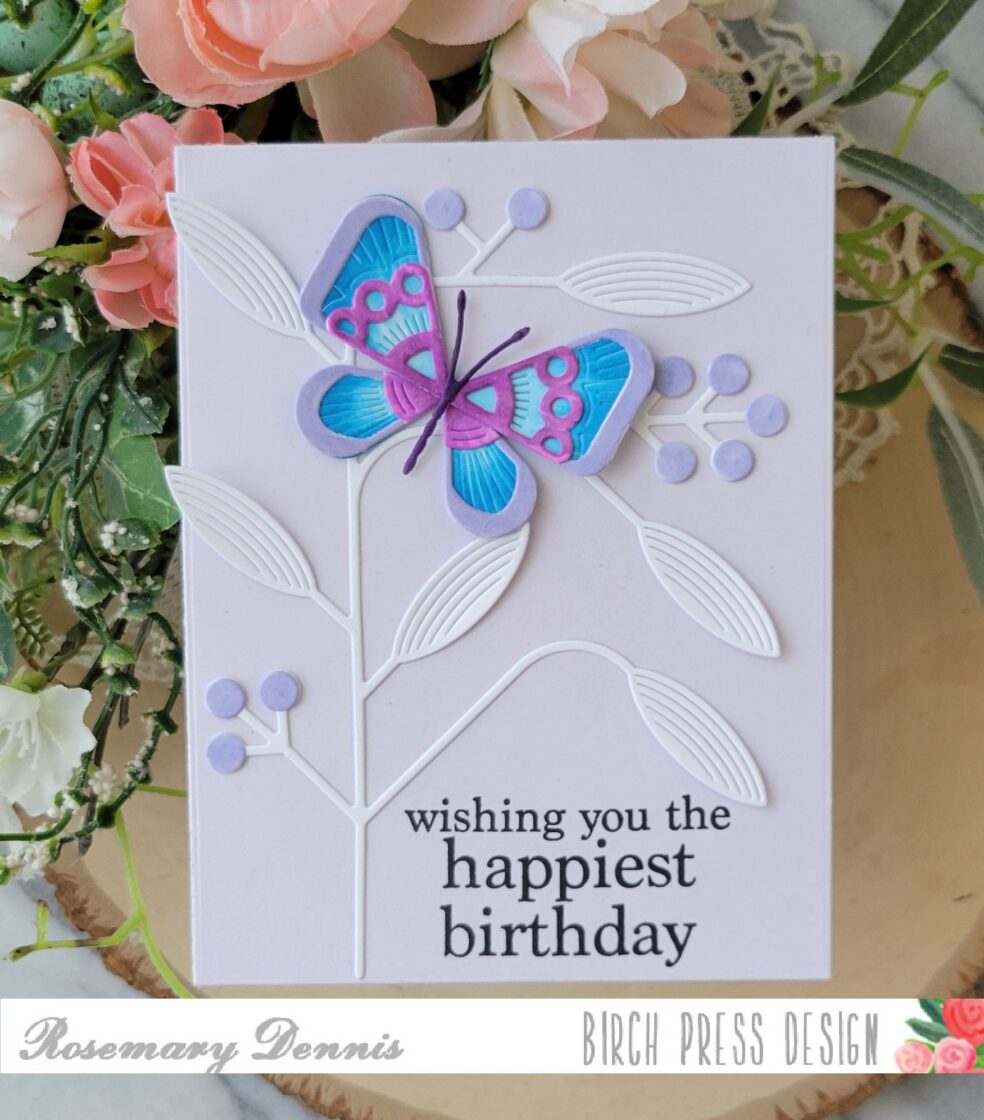
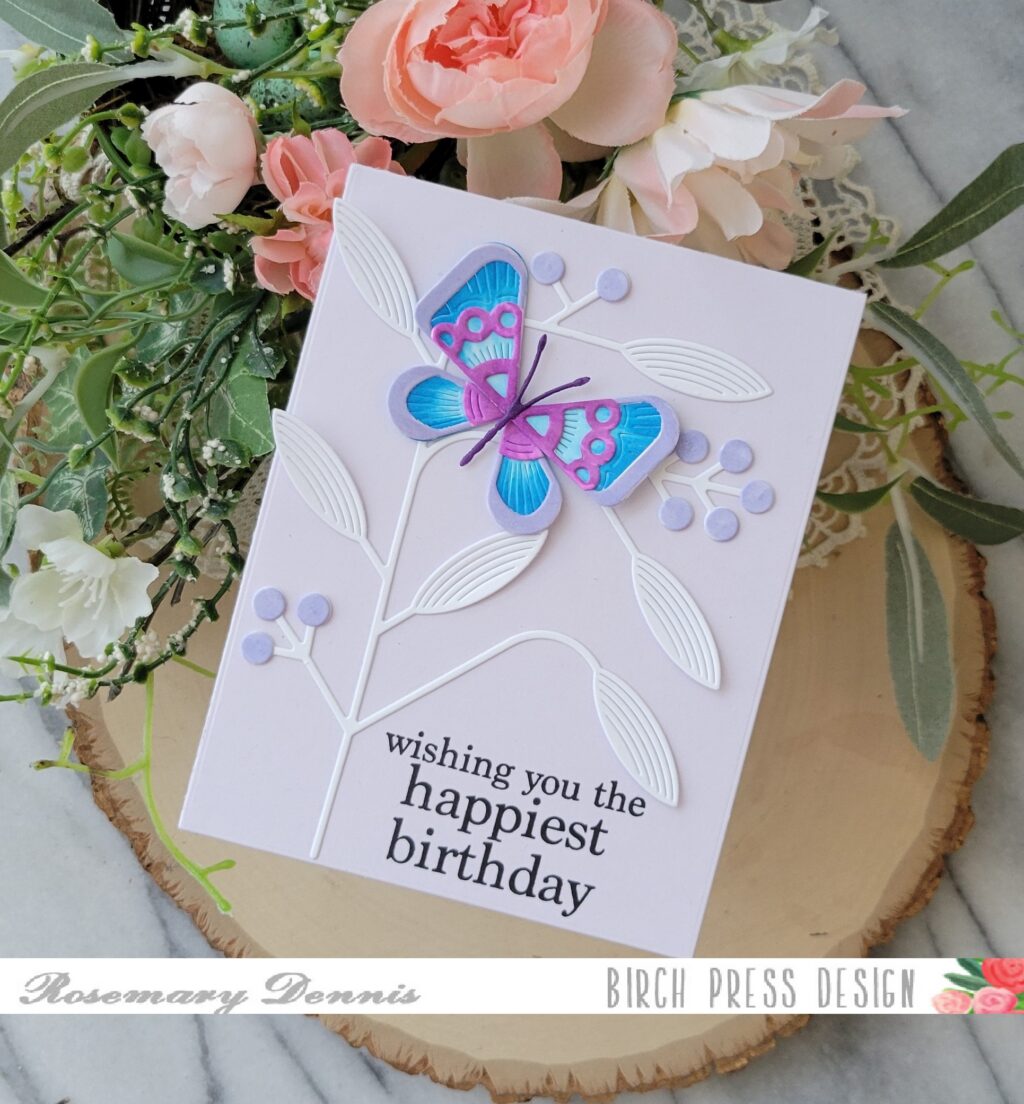
Hello friends! Rosemary here on the blog today with a sweet birthday card made with the new Block Print Deco Butterfly, Block Print Mod Branches and a sentiment from the Plain and Simple Birthday Greetings stamp set. Let’s take a look at what I made.
I started by die cutting all of the pieces of the butterfly and the mod branch from white cardstock. Then I decided to color the pieces using Copic markers. For this card I used a blue and purple color combo.
Once I had everything colored I let the pieces dry for a bit before assembling my butterfly with glue. I did use a dark gray marker to color the body.
For the mod branch I decided to die cut the berries, as well, and then colored them with a light purple Copic marker. The berries were then attached to the branch with glue. I die cut a light purple cardstock with a rectangle die for the background.
I don’t know if you do this or not, but it happens alot to me, but sometimes I get going on finishing a card and forget to stamp the sentiment before adding the images. That happened with this card. I added the mod branch using glue and then realized I needed to stamp the sentiment. Thankfully there was room for the sentiment and it stamped perfectly! The butterfly was added and the card was complete.
I hope you enjoyed today’s project. Thanks for stopping by the blog and have a wonderful day.
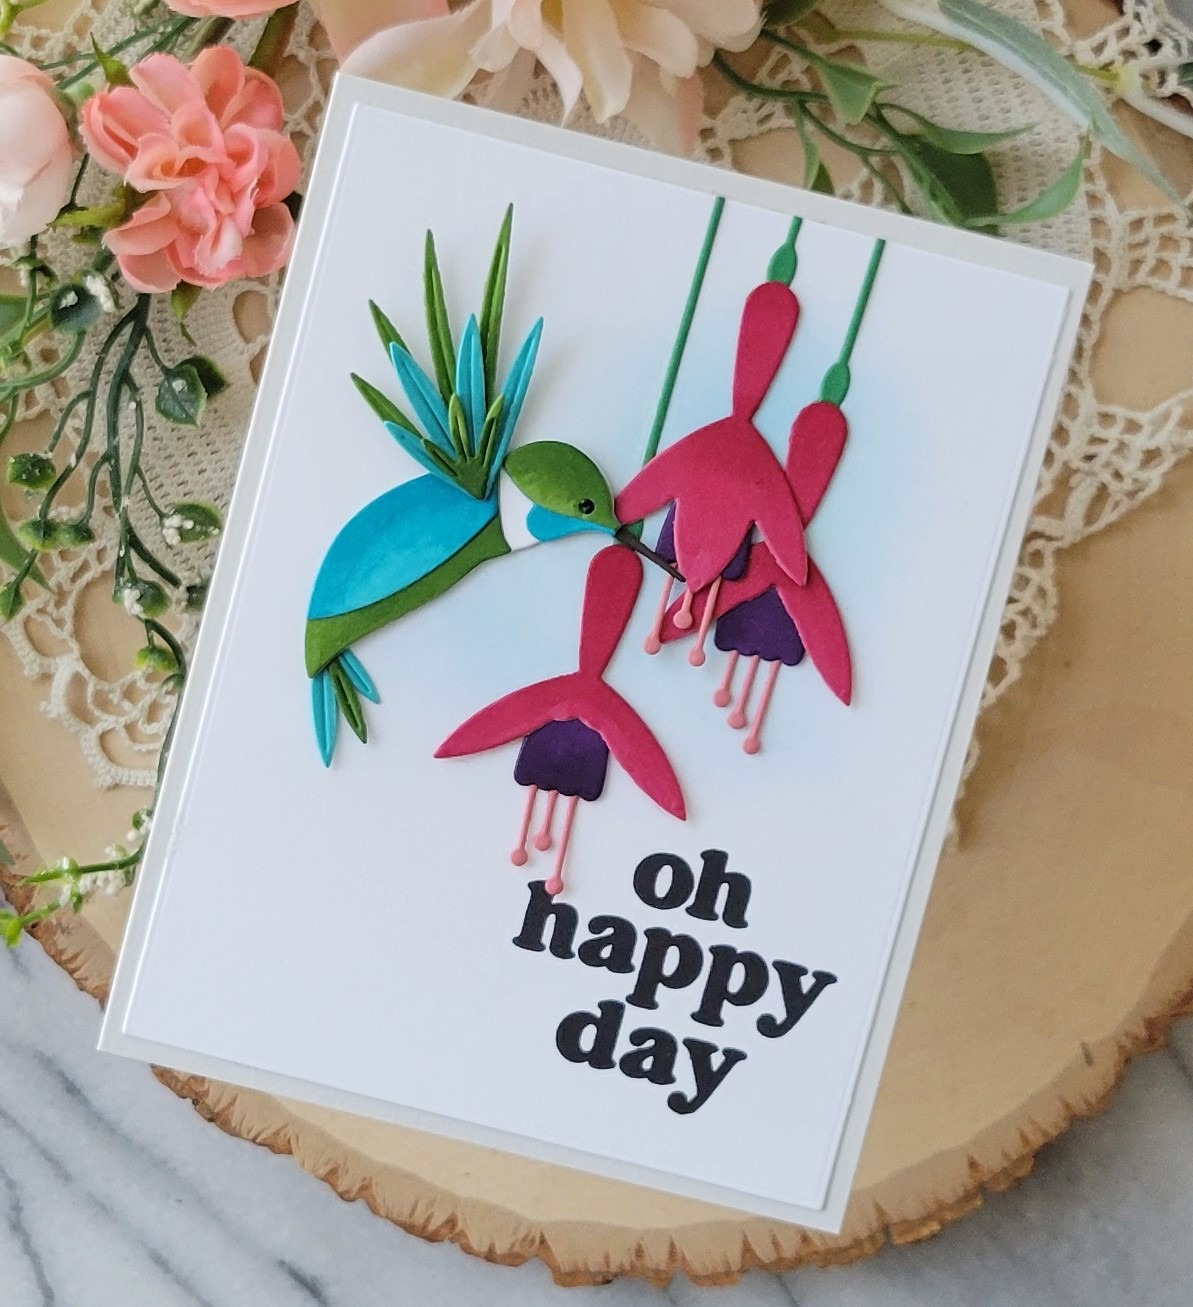
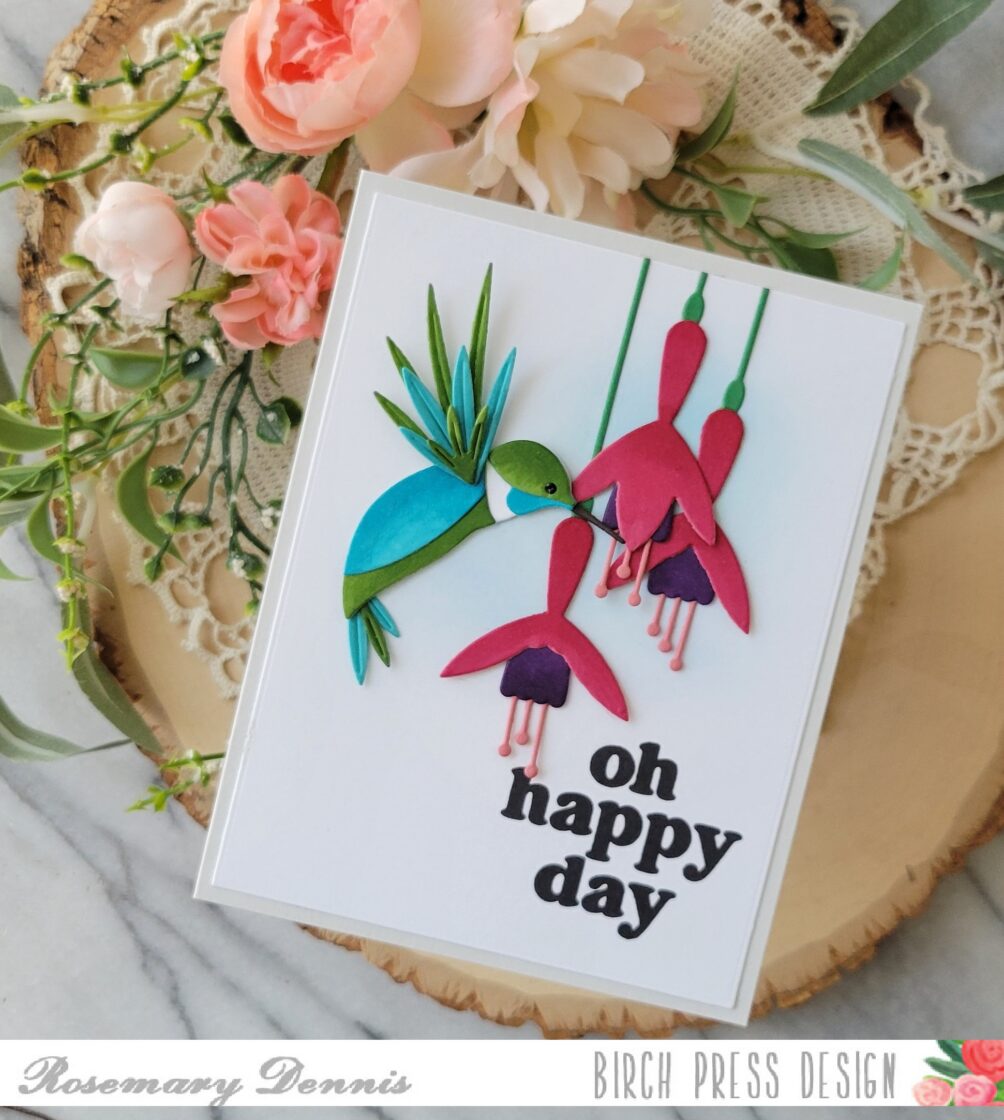
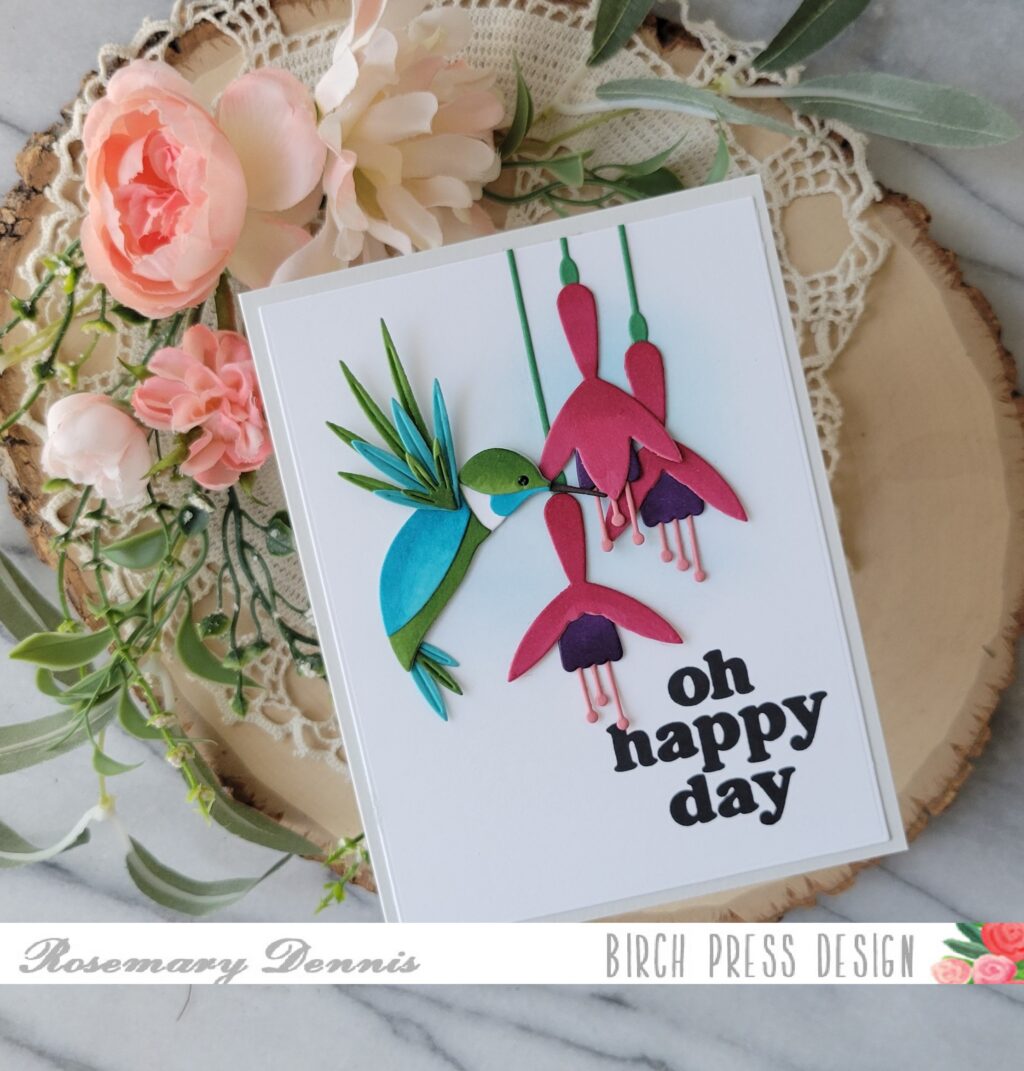
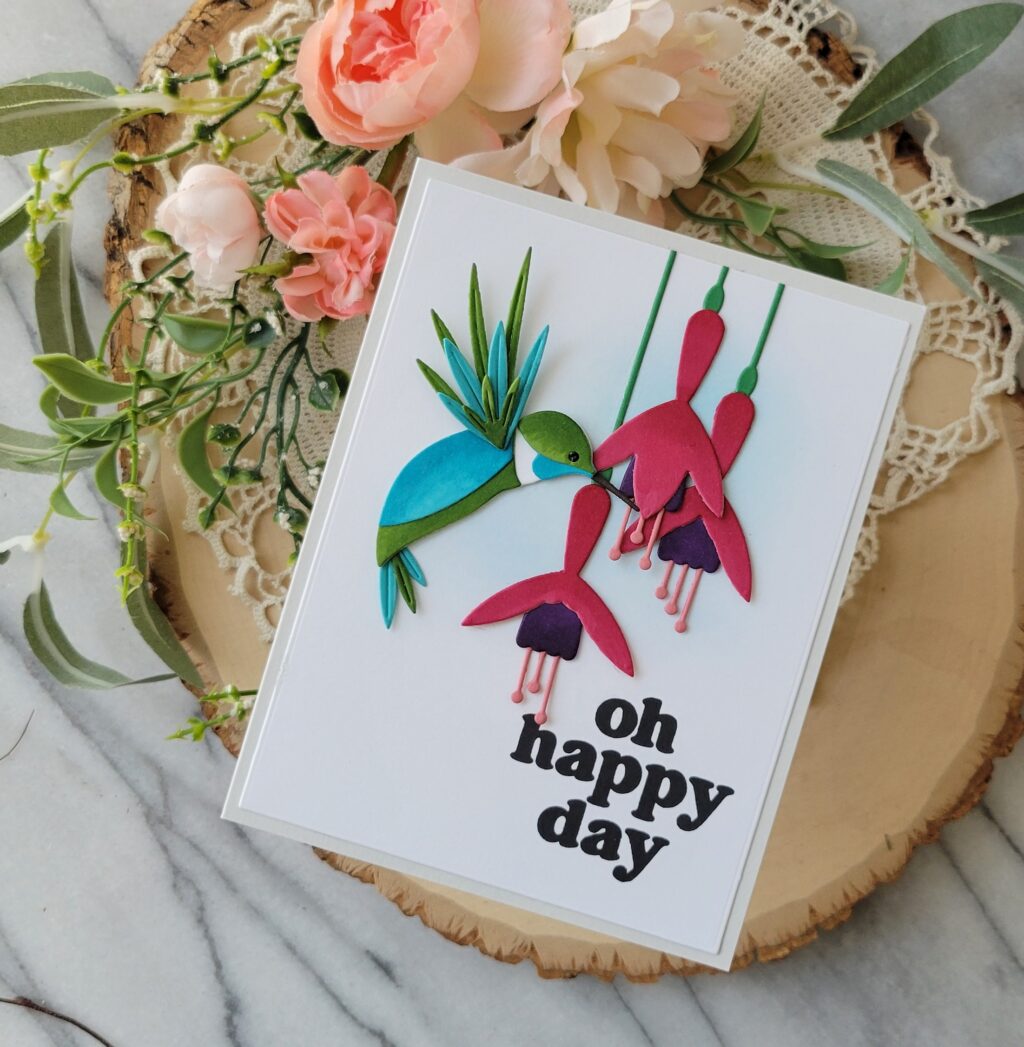
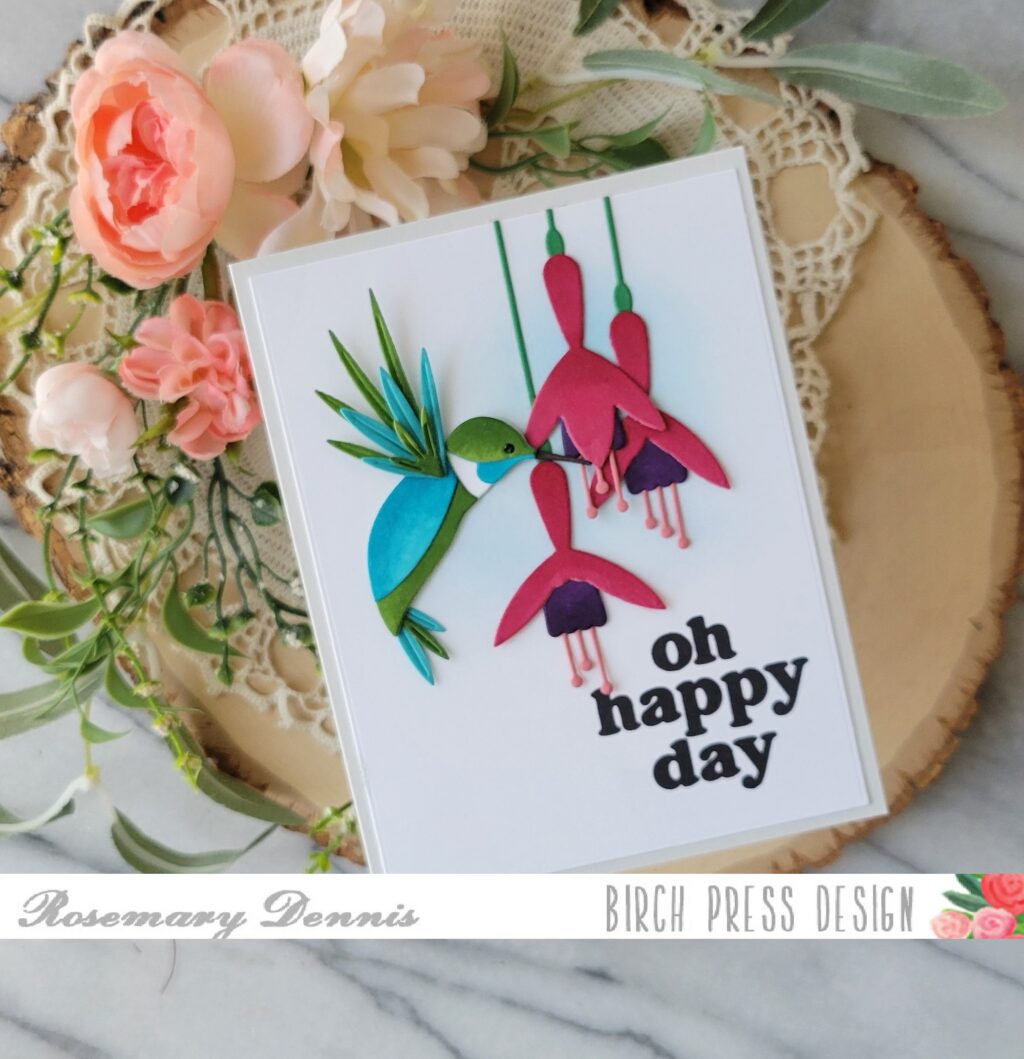
Hello, hello! Rosemary here on the blog today sharing a card made with the new Block Print Fuchsia Flowers and Block Print Flashy Hummingbird. I love all the hummingbird dies that Birch Press Design has released, but this one just might be my favorite. Fuchsias are one of my favorite flowers and so I was super excited when I saw the new fuchia related dies! Let’s look at what I made.
Growing up we always had a fuchsia hanging basket on our front porch as both my parents liked fuchsias. I remember being fascinated by the little bell shaped flowers that hung down amongst the green leaves. When I saw the new Block Print fuchsia dies I was in heaven! I went with a similar color palette as the one on the front of the packaging as it is a classic fuchsia color way and still one of my favorites!
I die cut the majority of the pieces for the hummingbird and fuchsias from colored cardstock. I only used white for the body of the hummingbird that all the other pieces get layered on. I then used Copic markers to color the pieces allowing me to change the colors and provide contrast.
For the bird I started with a light aqua colored cardstock and then added color using Copics in shades of teal. Additional pieces were cut from a medium green and then shades of green Copics added to deepen the color. The pieces were set aside to dry before glueing together.
The same process was done for the fuchsia except for the stems and the little stamens that hang down. I let them dry and then adhered together with glue. White cardstock was die cut, stamped with the sentiment from the Vintage Everyday Greetings stamp set and then I added a little bit of distress oxide ink in blue to the area where the fuchsia and hummingbird would be placed. They were then adhered with a combination of thin foam squares and glue. Added the panel to my light gray cardstock base and finished with a tiny dot of black Nuvo jewel drops for the bird’s eye.
I just love how this turned out. Clean and simple yet a little on the bold side. I hope you enjoyed today’s project. Thanks for taking the time to visit the blog. Have a wonderful day!
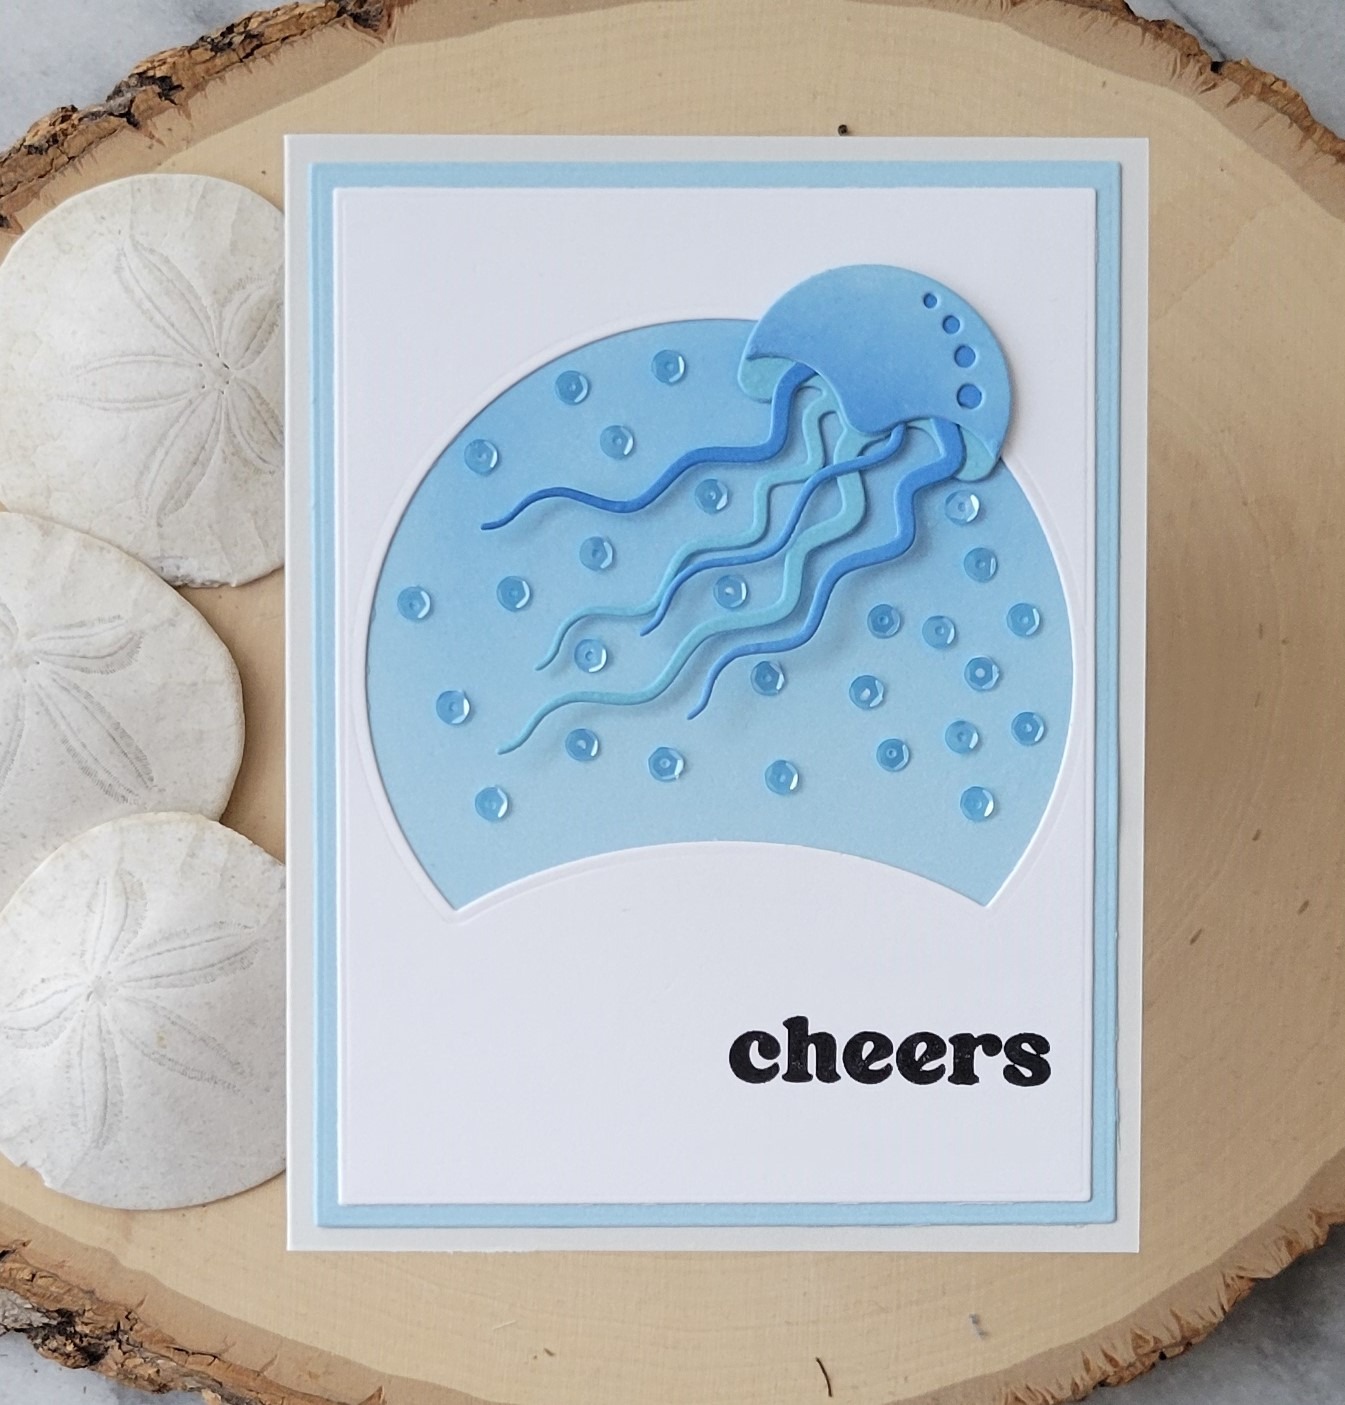
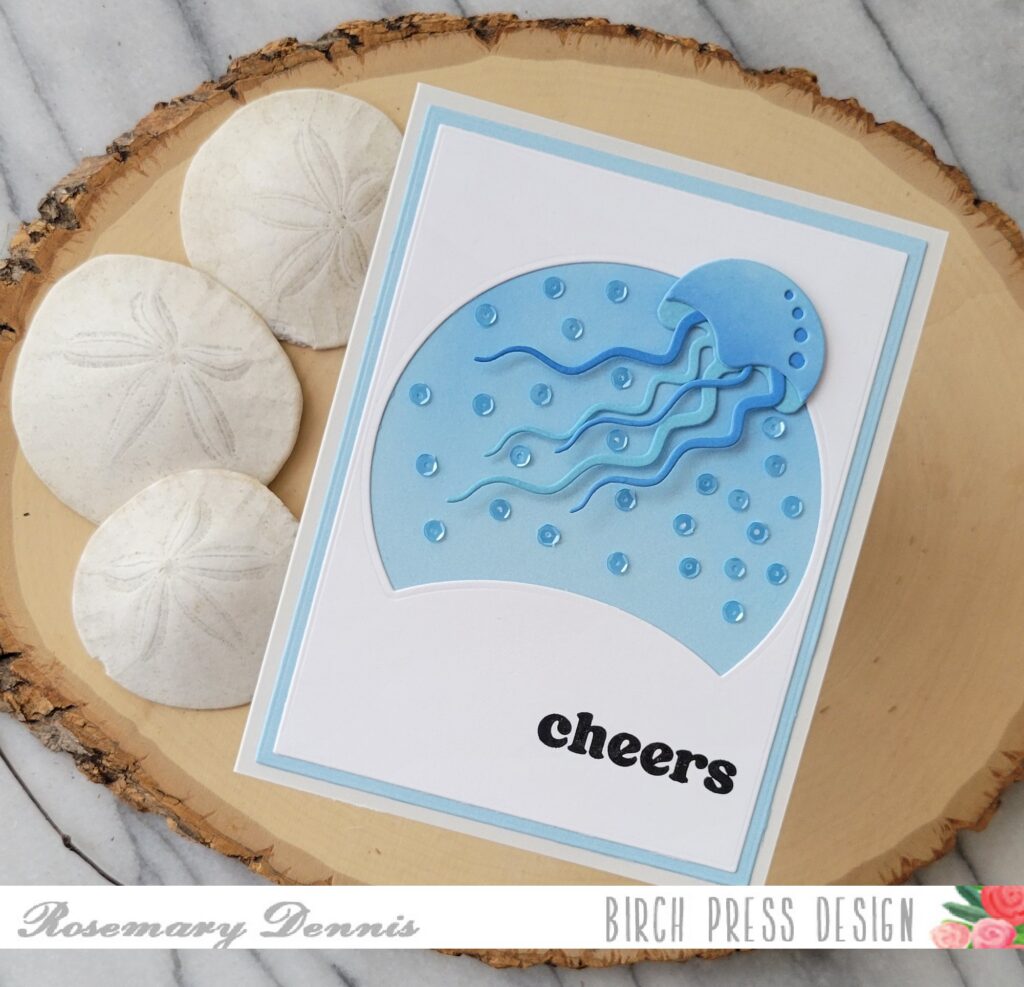
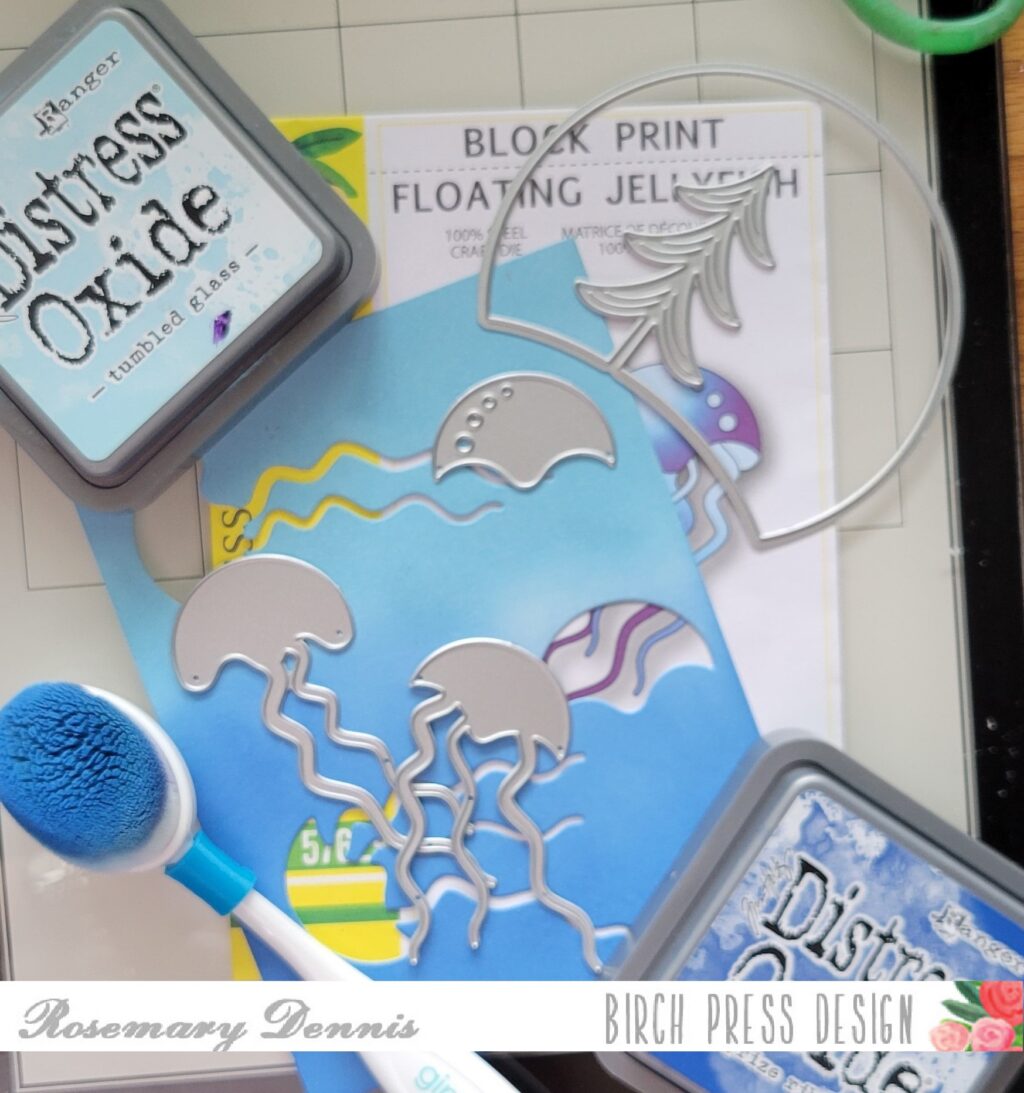
Hello everyone! Rosemary here on the blog today with a fun card created with the super cool Block Print Floating Jellyfish die set, as well as the Block Print Forest Scene die set. Let’s look at what I made.
I just love the Block Print Floating Jellyfish and wanted to make another card with it. I also thought it would be fun to use the Block Print Forest Scene die set to help create the background for my jelly.
I started by cutting down a piece of light blue Memory Box cardstock and then ink blending on some distress oxide inks in tumbled glass and prize ribbon. Once that was done I die cut out the pieces and assembled the octopus using glue.
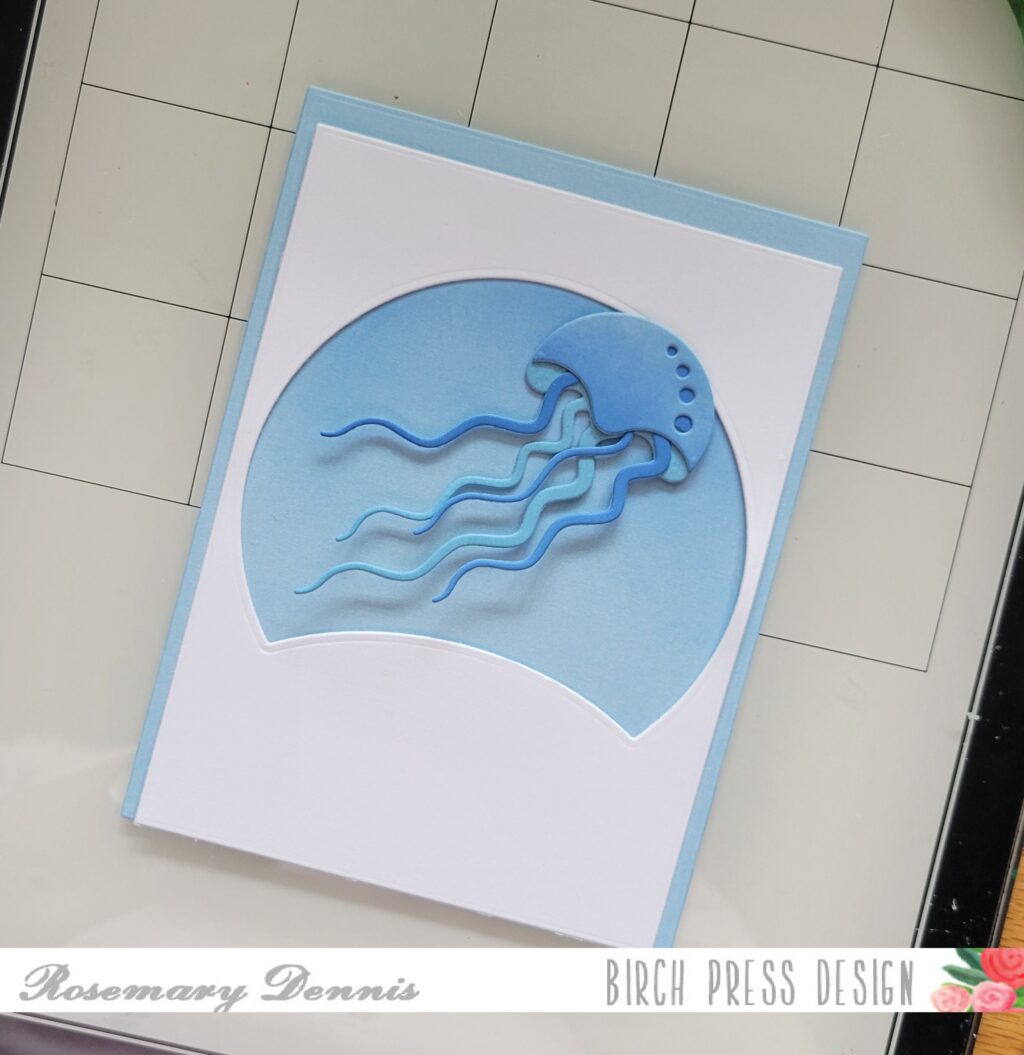
The I die cut a piece of the same light blue cardstock with a rectangle die that was slightly larger that the rectangle that I would be cutting the Forest Scene from. The Forest Scene was die cut and then I trimmed off the tree.
Then I added a little bit of ink blending to the top portion of the light blue rectangle that would show through the cut out area. The top piece was then adhered to the light blue rectangle.
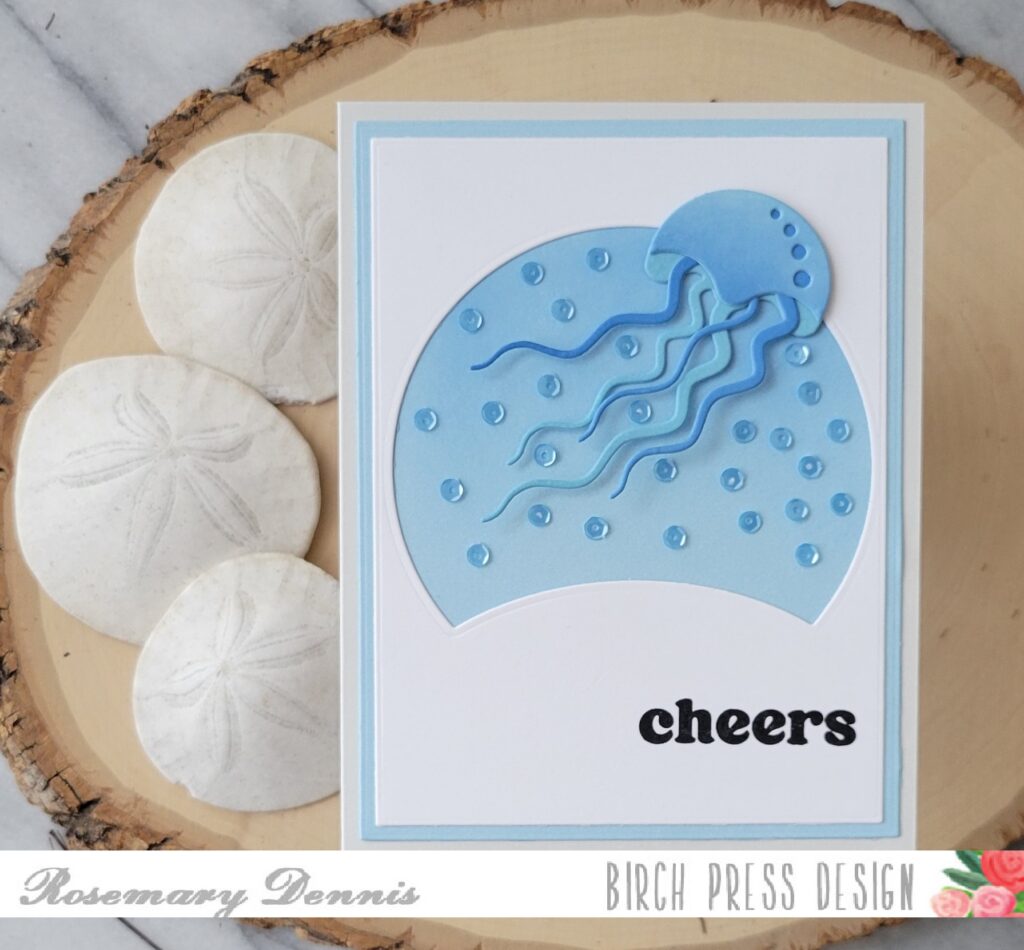
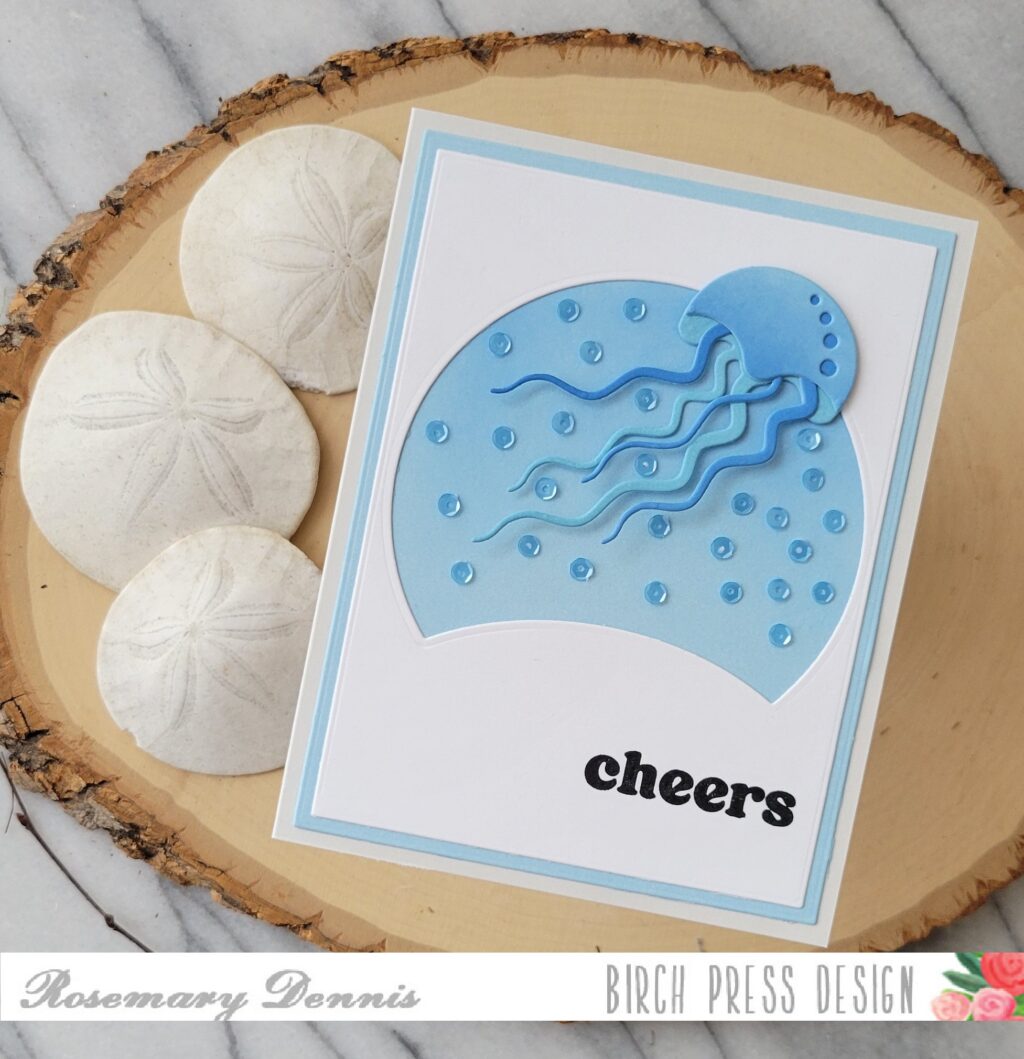
Then I added the panel to a light gray cardstock base, added the jellyfish and lots of small blue sequins to look like bubbles. It was at that point I realized I need to put a sentiment on the panel. Honestly, that happens to me alot because I can get so focused on other elements on the card that I often forget I need to make sure a sentiment fits. Thankfully I had all the open space at the bottom and the sentiment stamped cleanly!
I love the clean monochromatic look of this card and that really fun jelly! I hope you enjoy my card, too! Thanks for stopping by and have a wonderful day.
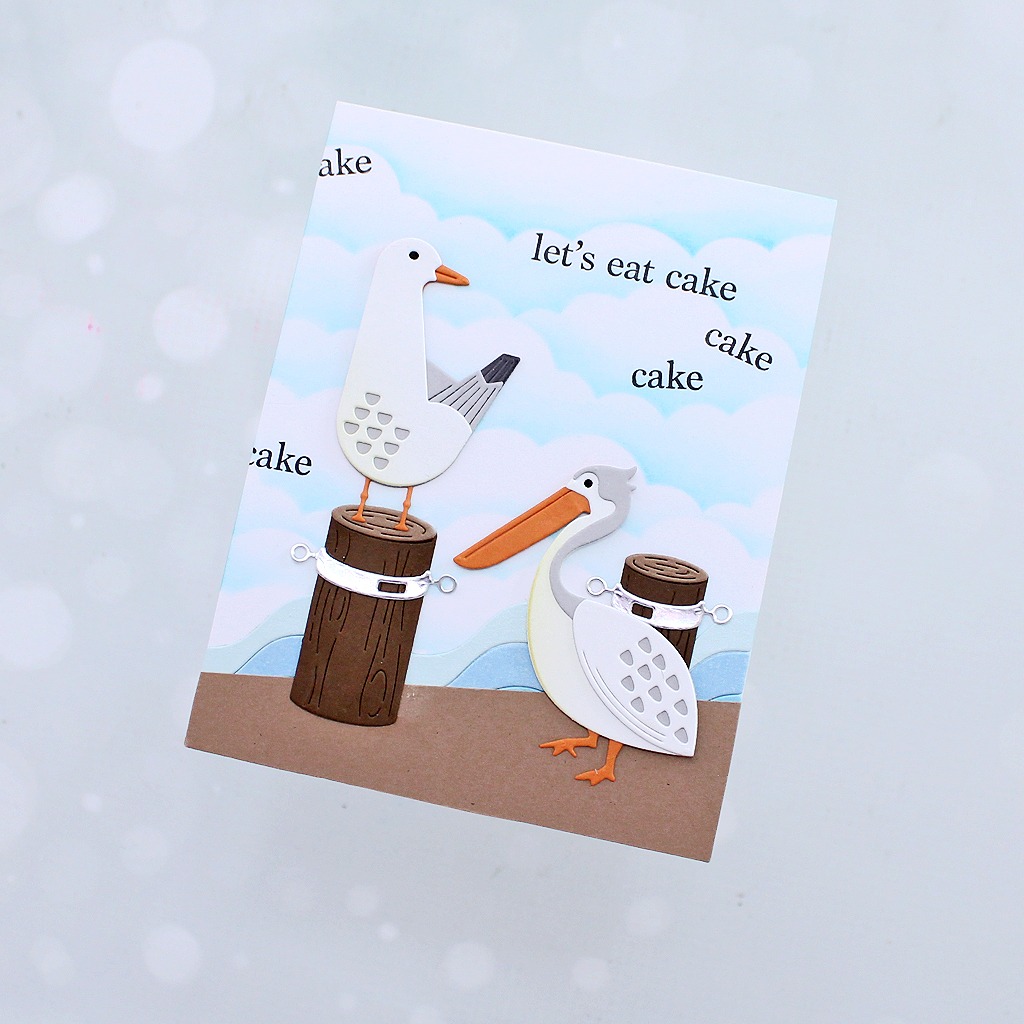
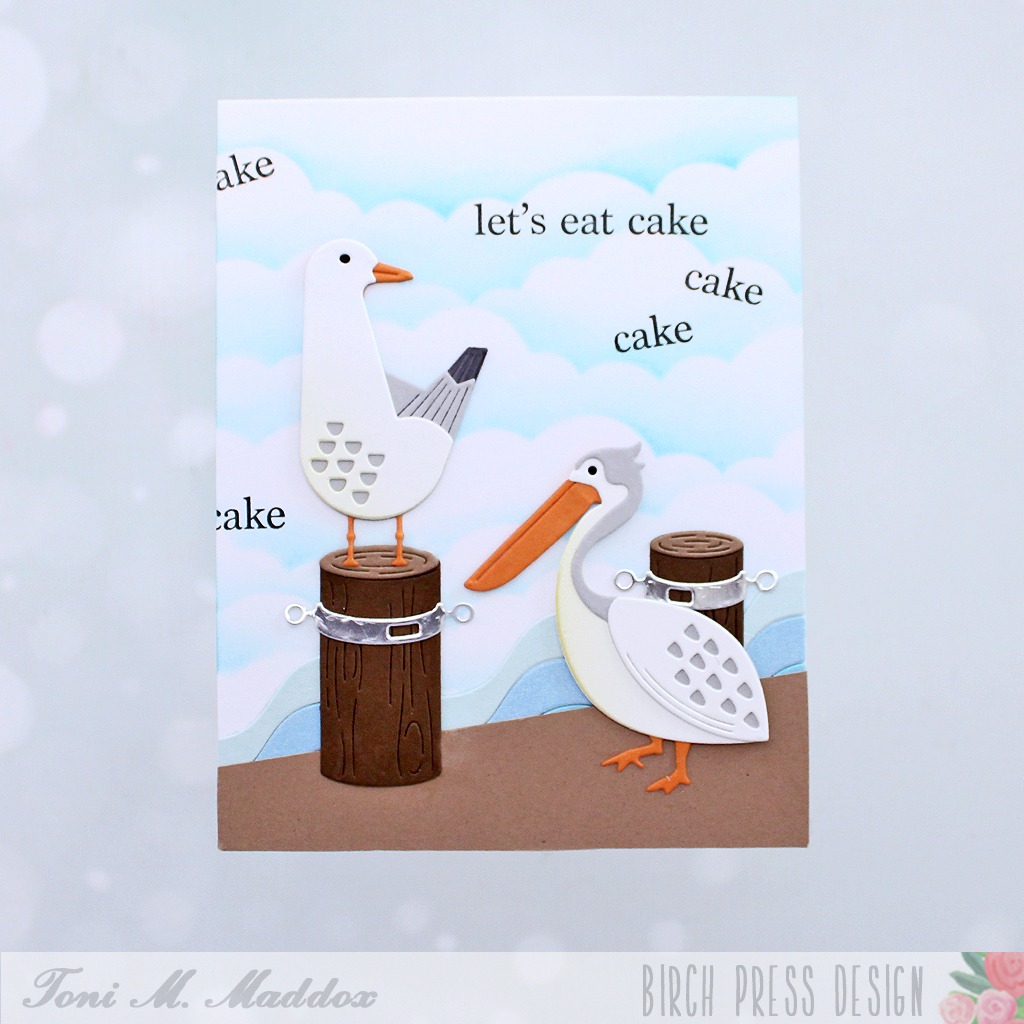
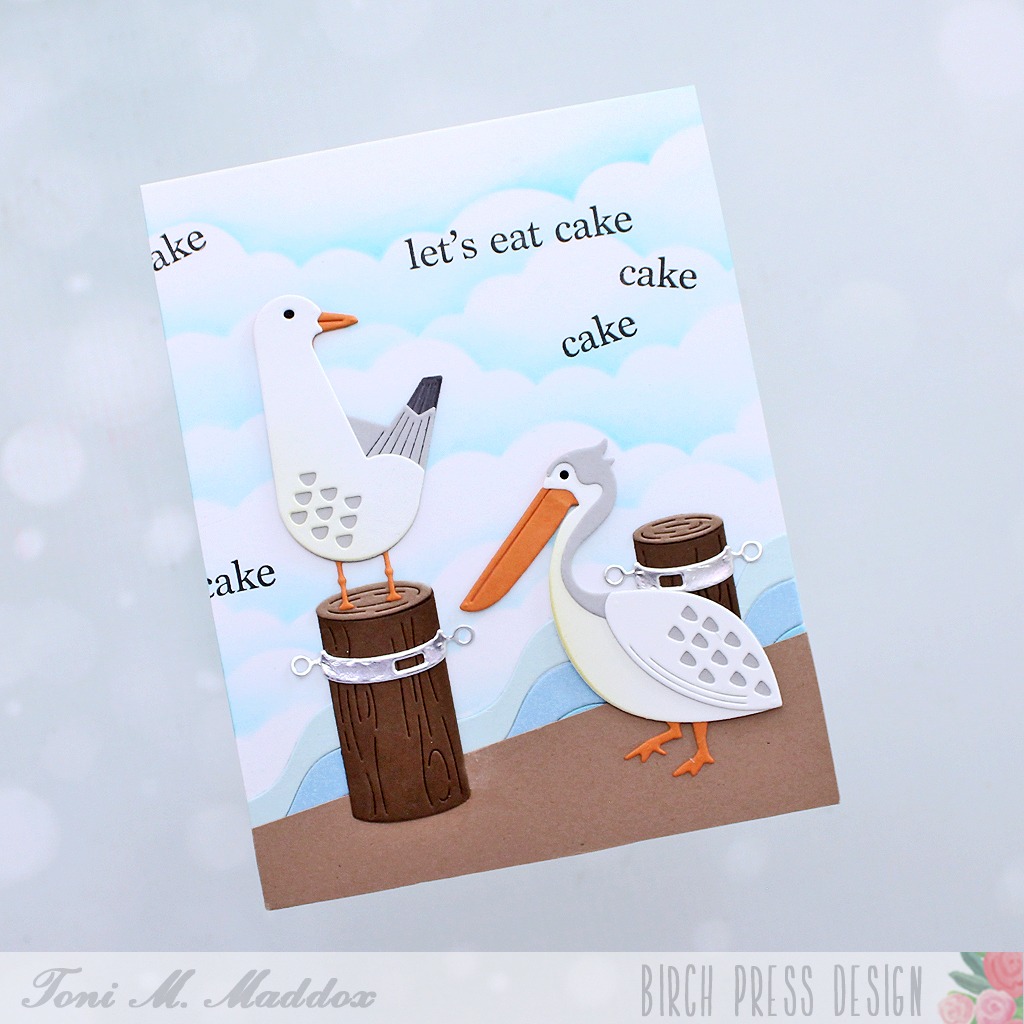
Ahoy, friends! Toni with you today sharing a nautical birthday card that’s sure to get a chuckle from the recipient.
I started the card by sponging the background with a cloud stencil and Catherine Pooler ink.
Next, I added the Birch Press Design Corner Waves cut from a few shades of scrap blue cardstocks beneath an angle-cut piece of kraft cardstock with the Birch Press Design Waterfront Pilings to represent a pier.
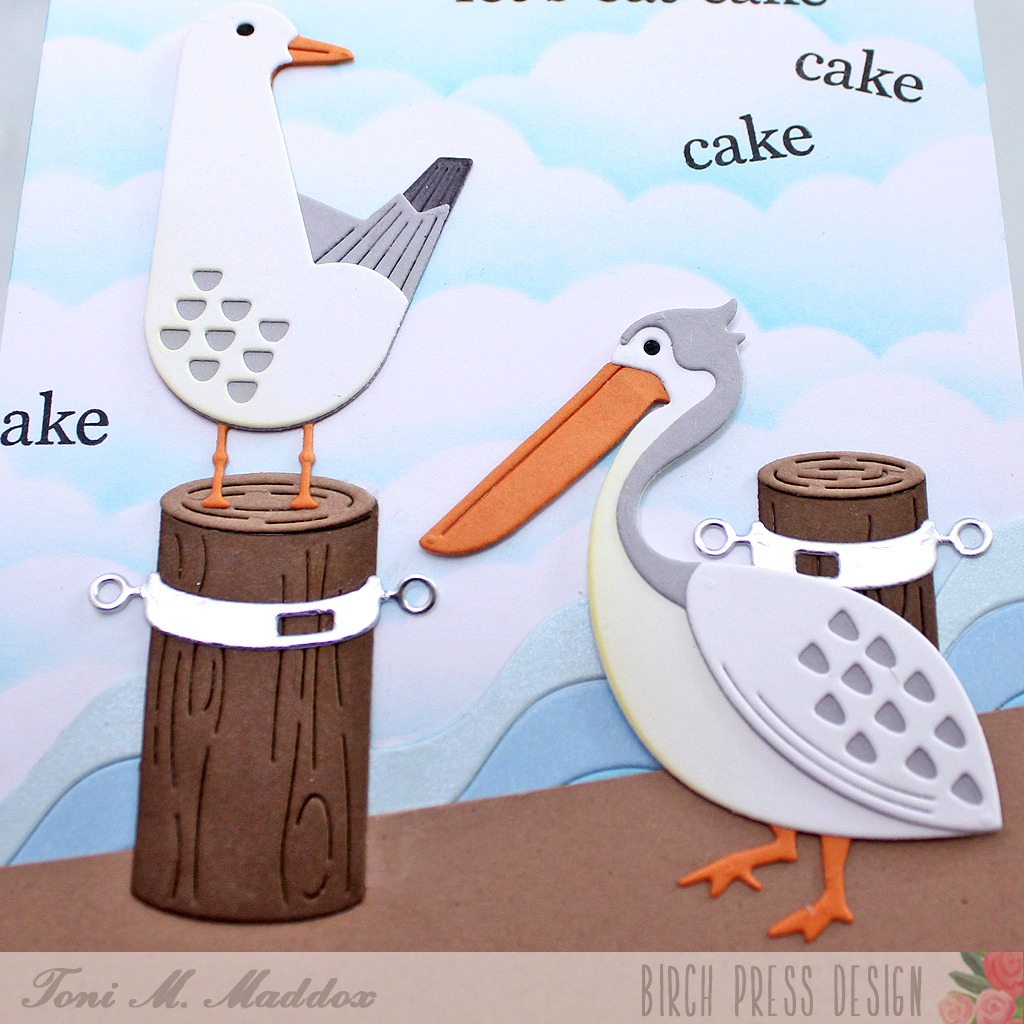
The birds, Birch Press Design Block Print Curious Seagull and Block Print Pelican, were fun to assemble and ever so cute. Notice how I sponged just a touch of yellow on their bellies for a bit of shading.
My final step was to add the Birch Press Design Plain & Simple Birthday Greetings stamped in Versafine Clair Nocturne. I can totally hear the seagulls overhead!
I hope you enjoyed today’s card and have a great rest of your week!
Feel free to visit my blog, Frankie Helps Craft, for a full list of supplies used and to check out my other creations.
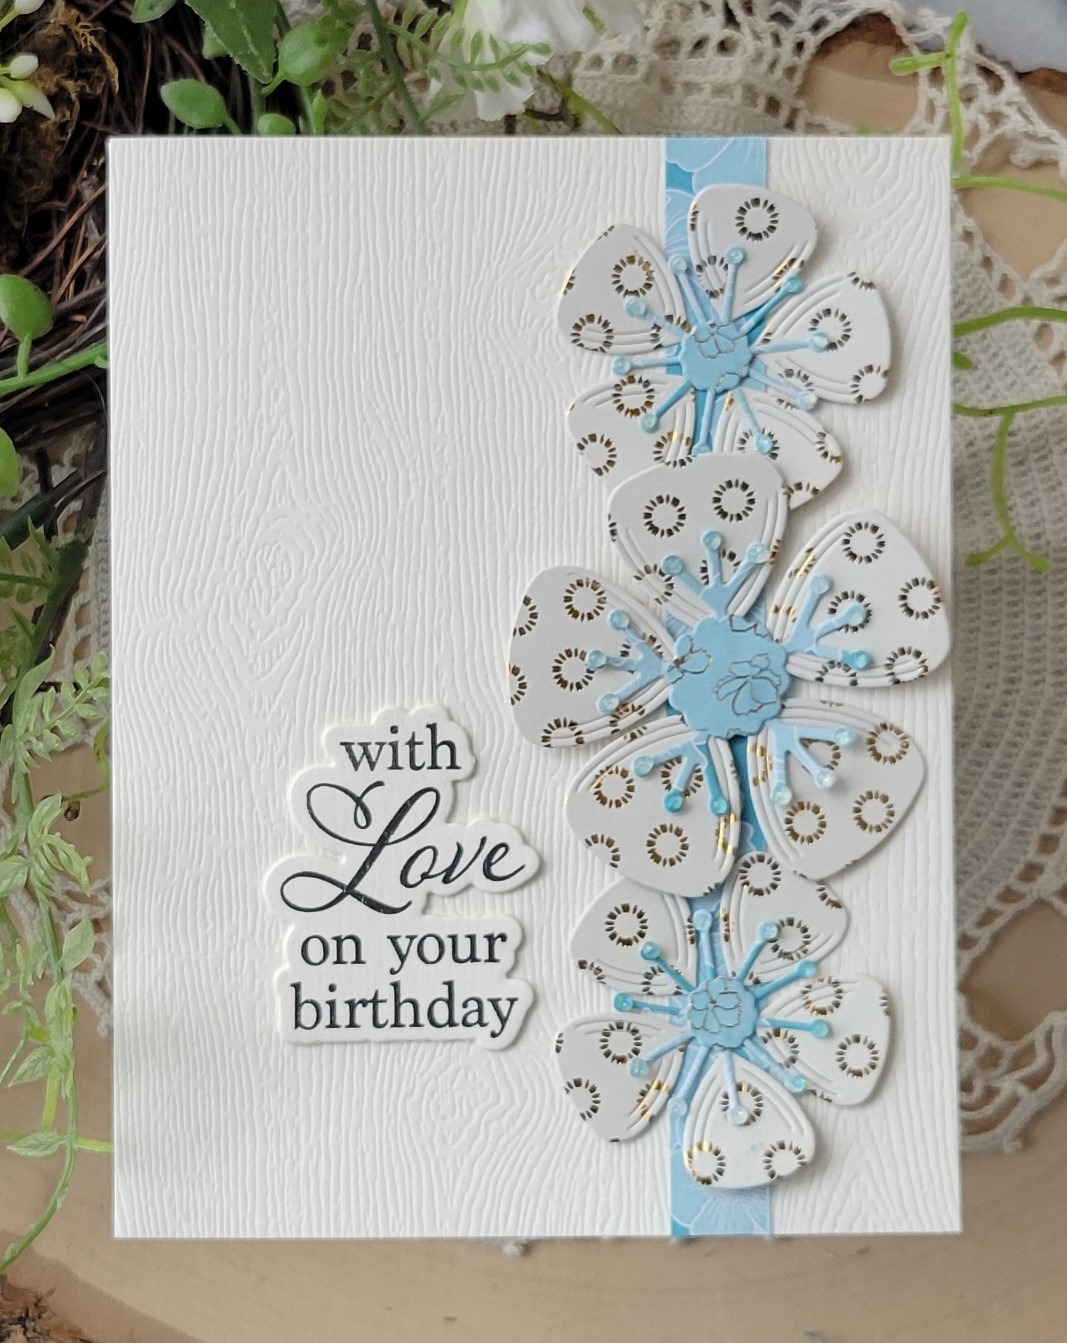
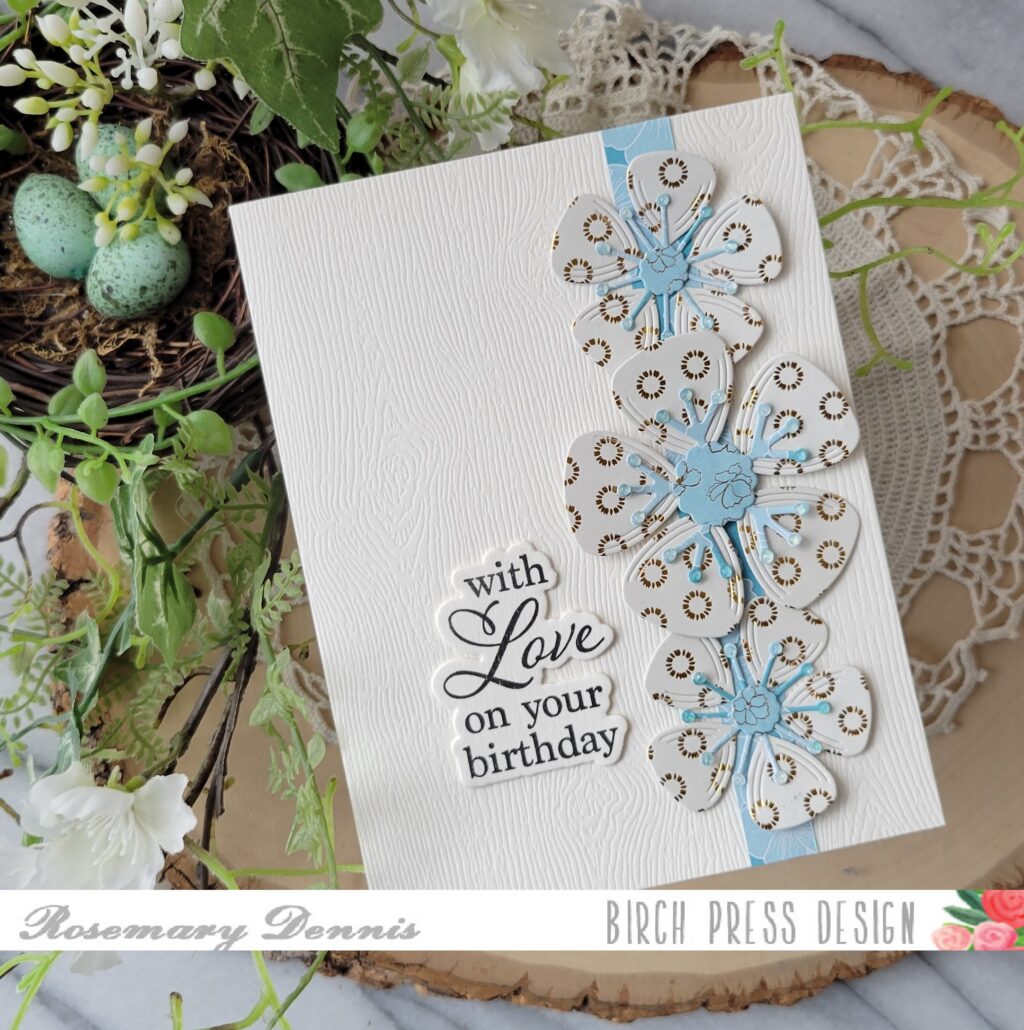
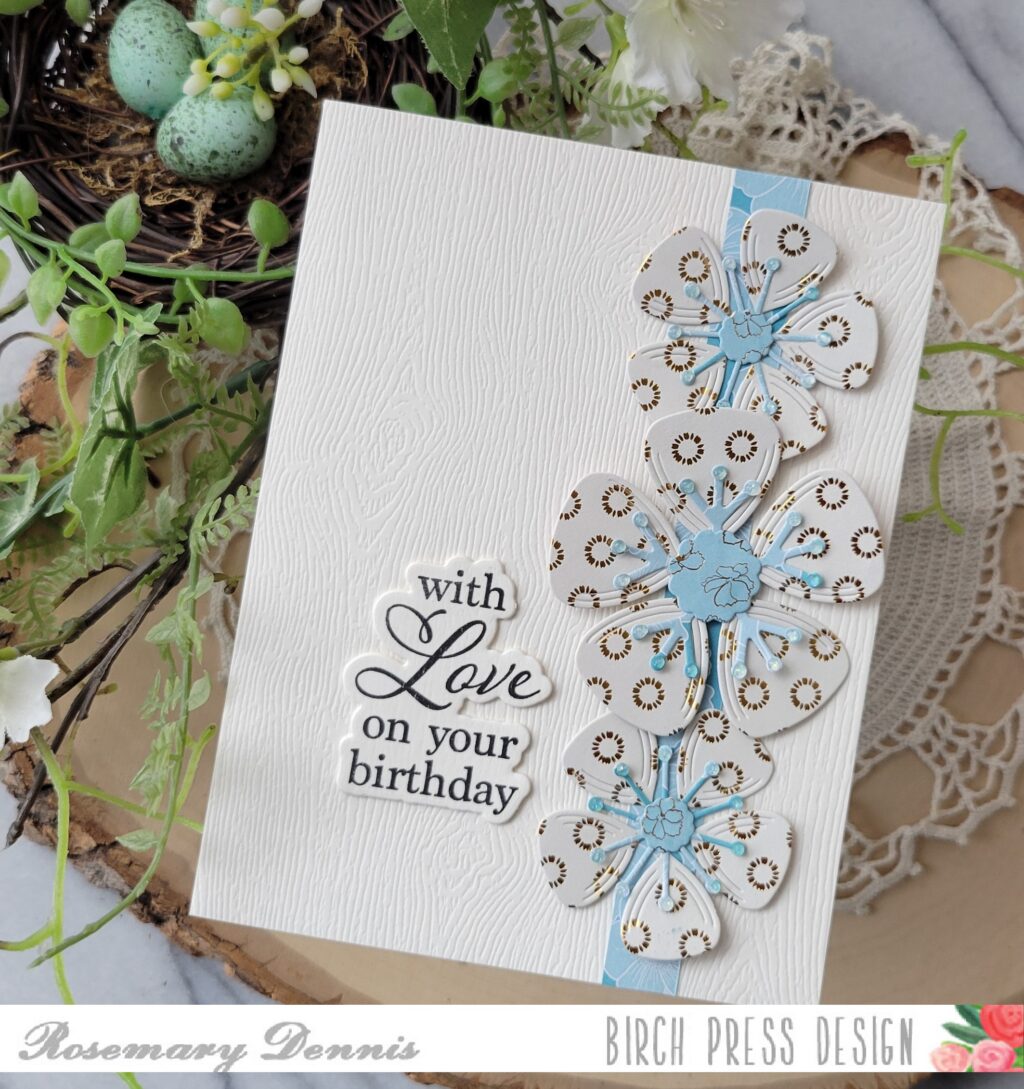
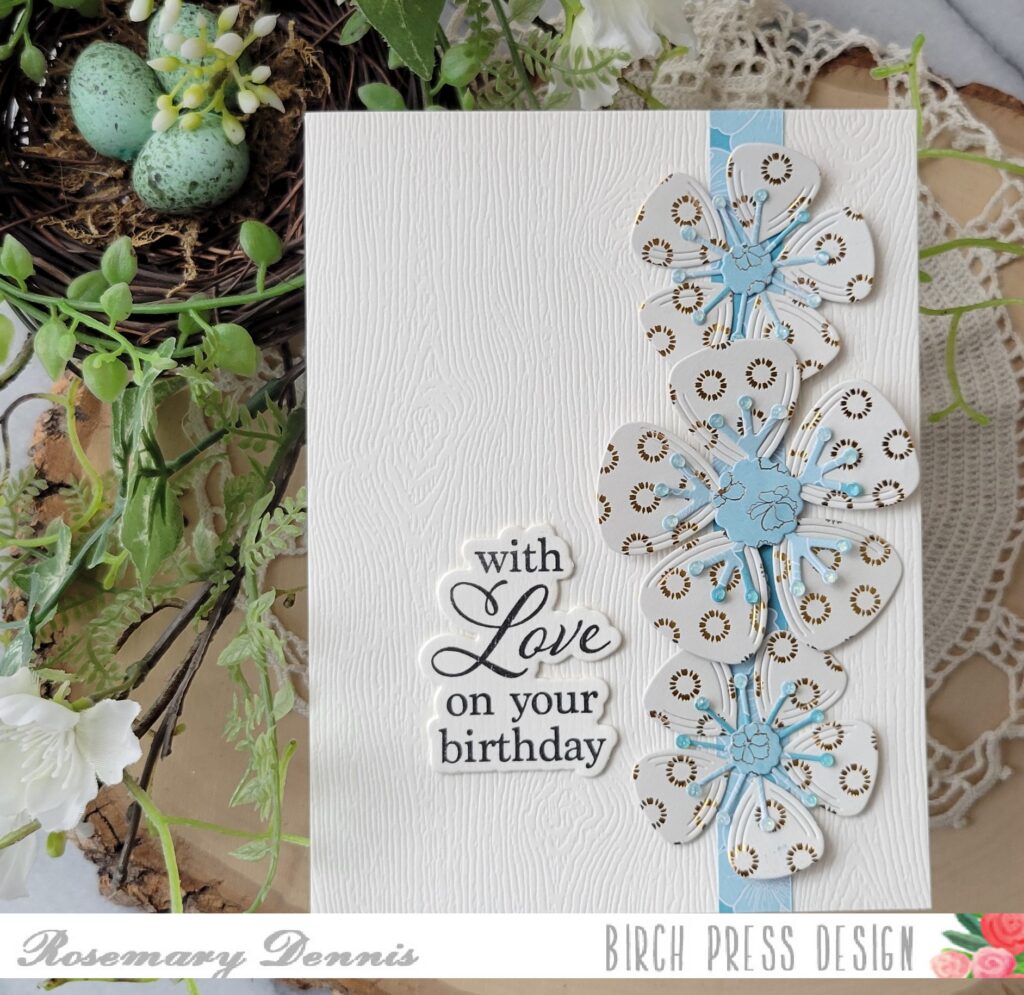
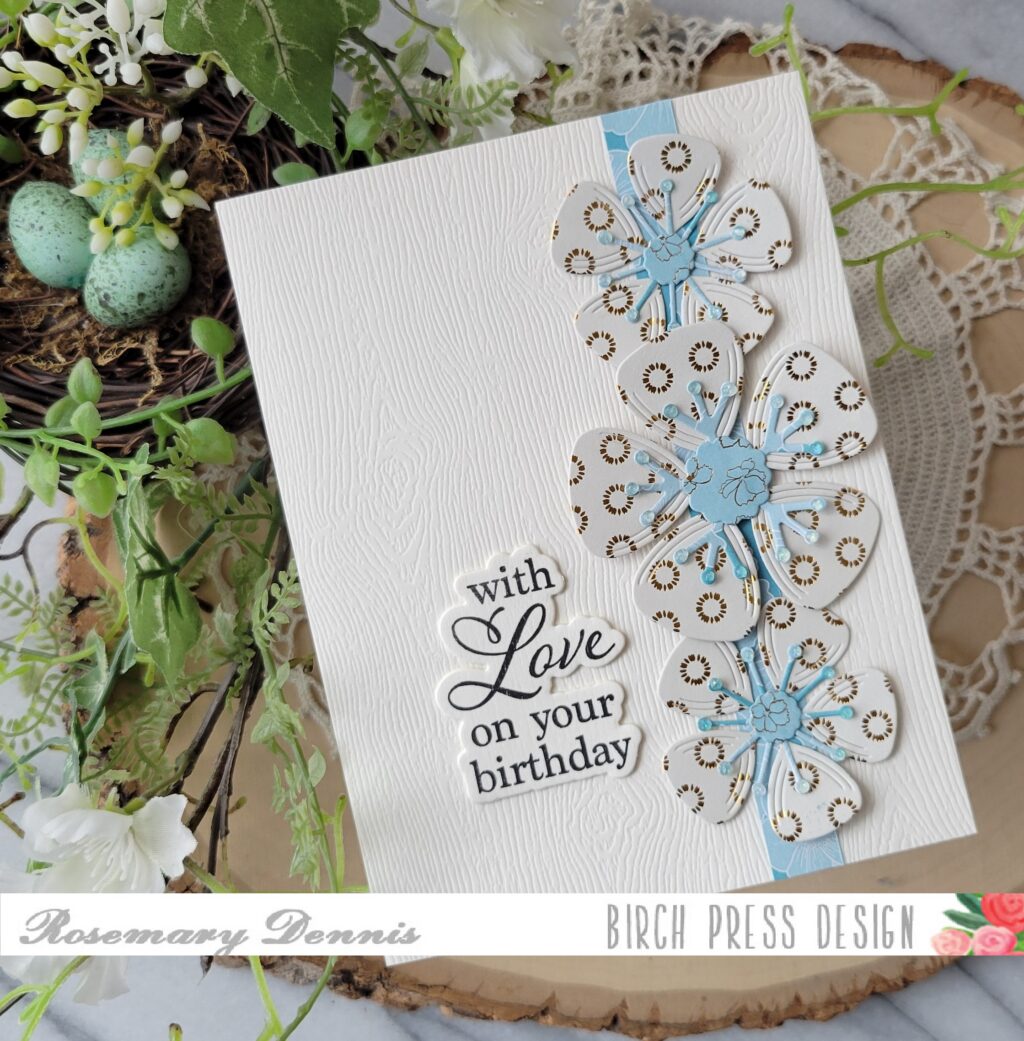
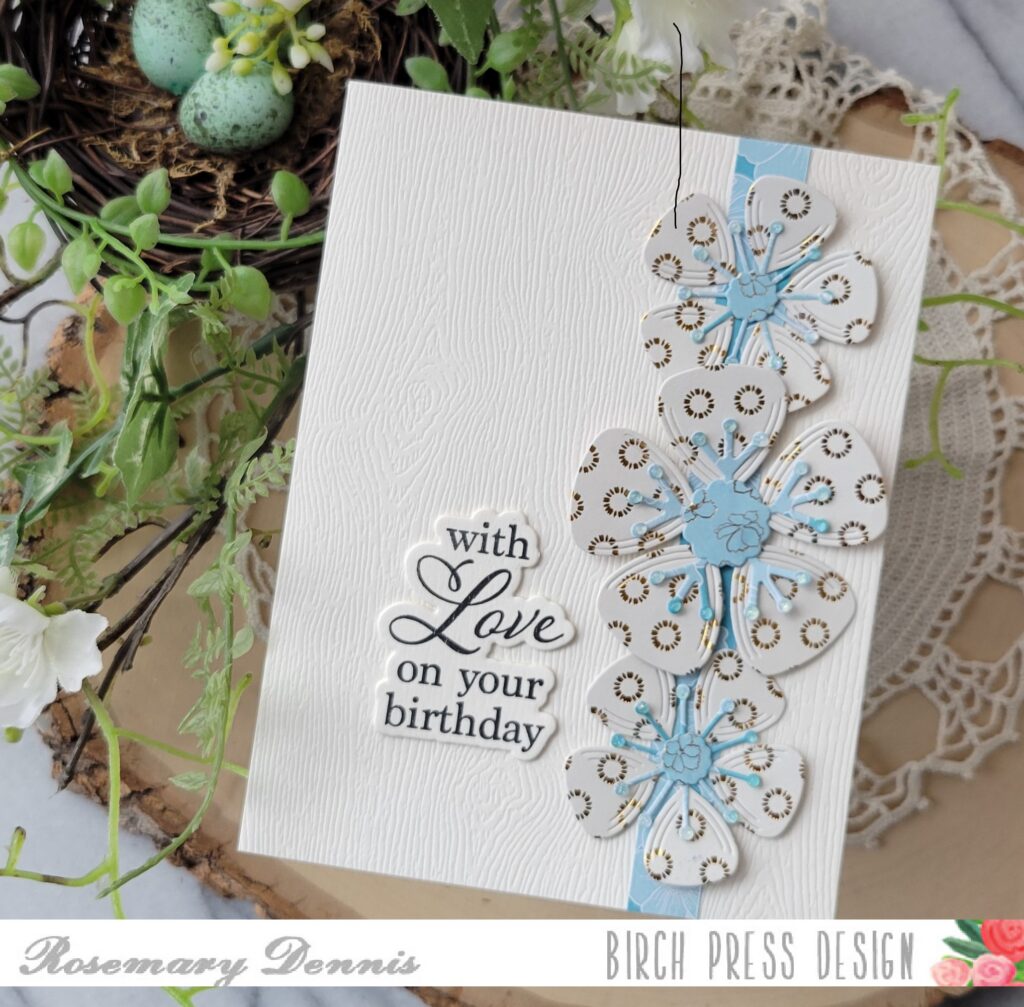
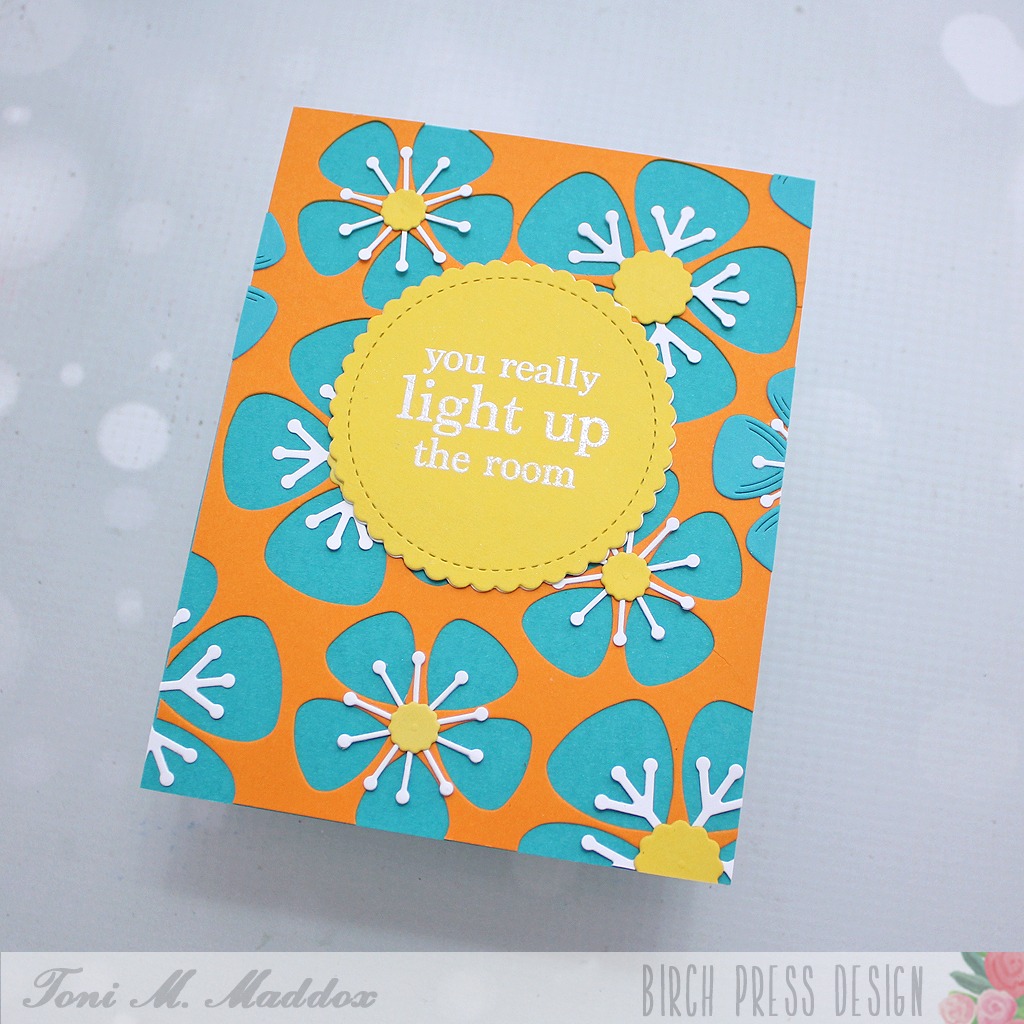
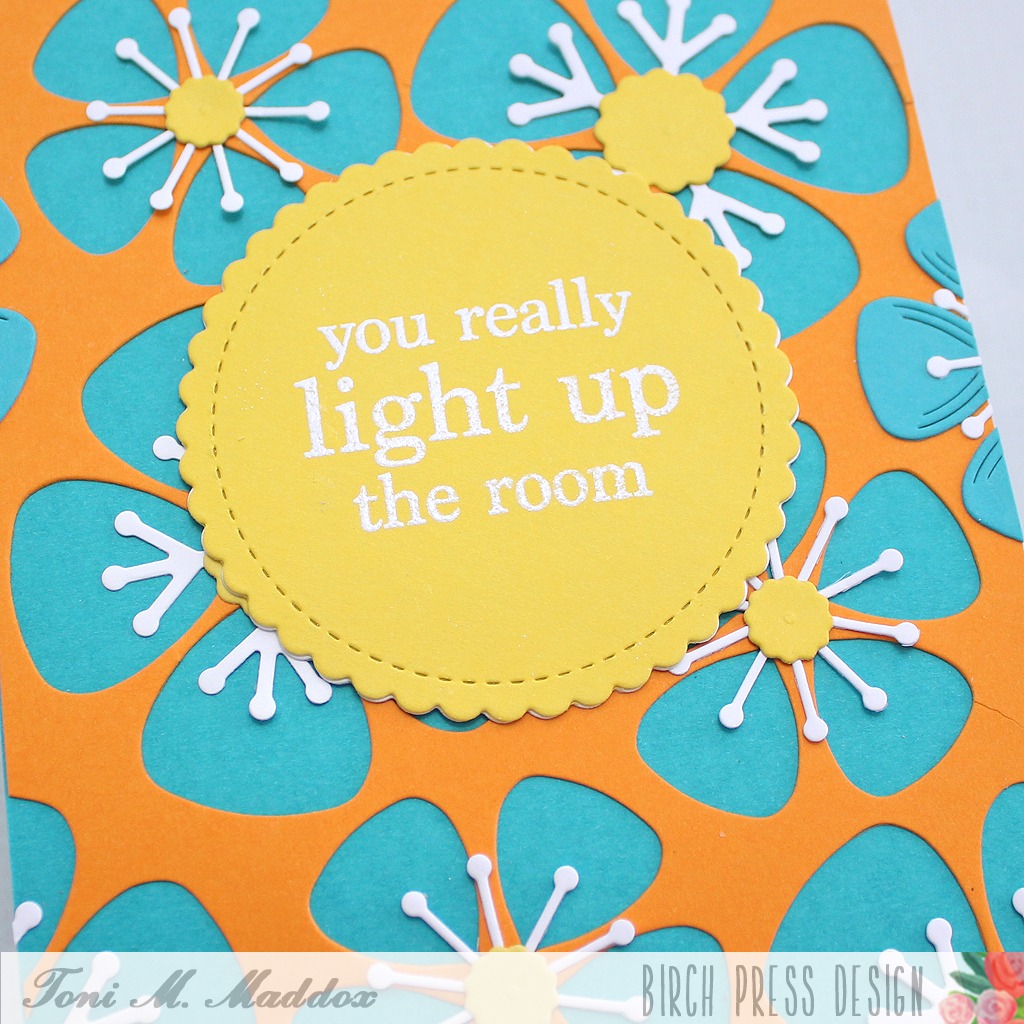
Hello everyone! Rosemary here on the blog today with a simple design using the Block Print Lovely Flower and Elegant Birthday Sentiments stamp and die set. I also used some papers from the Memory Box Anemone Grove 6×6 paper pad. Let’s look at what I made.
I guess this month I have a theme of using patterned paper, lol! I’m often hesitant to use patterned paper for die cutting, but decided that I would give it a try, again. For this card I decided to make sure that I used a more neutral pattern for the flowers. For that I chose a cream paper with gold foiling.
I chose a light blue paper with gold foiled flowers to use for the flower centers. A strip of the flip side for the blue paper was used as an accent as well.
I adhered all the pieces of the flowers together and set them aside to dry. I love the Memory Box woodgrain cardstock for backgrounds as it adds a nice subtle look. I trimmed down a piece of cream woodgrain and then added the strip of patterned paper.
The flowers were then adhered to the paper strip. I used a thin foam square for the large flower and then glue for the two smaller flowers. A dot of a crystal lacquer was added to each of the little stymens and I set aside the panel to dry.
I finished with the sentiment that I stamped in black on the reverse side of a piece of the cream woodgrain cardstock thus achieving a nice cohesive look. I hope you enjoyed today’s project. Thanks for stopping by and have a wonderful day.
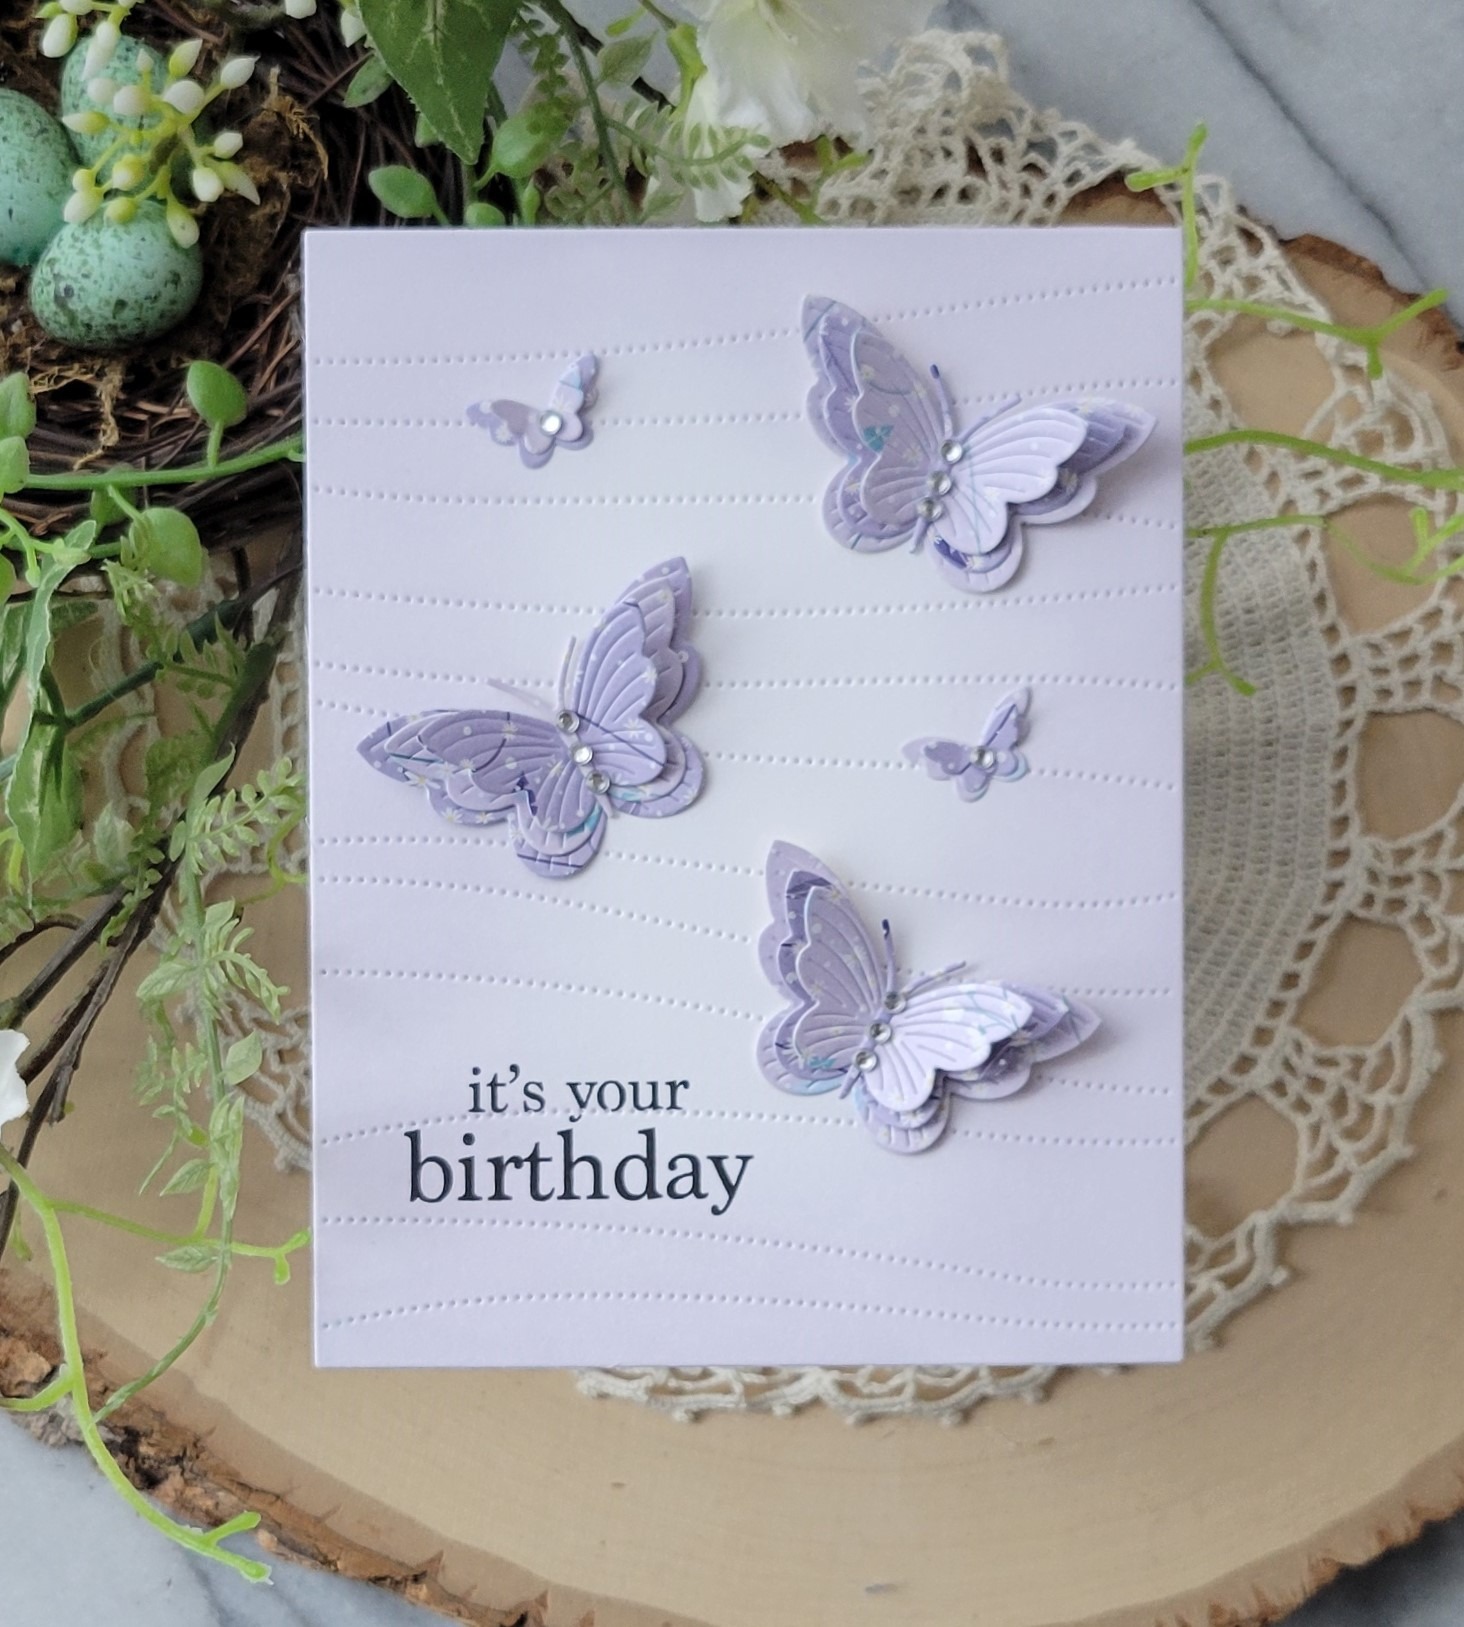
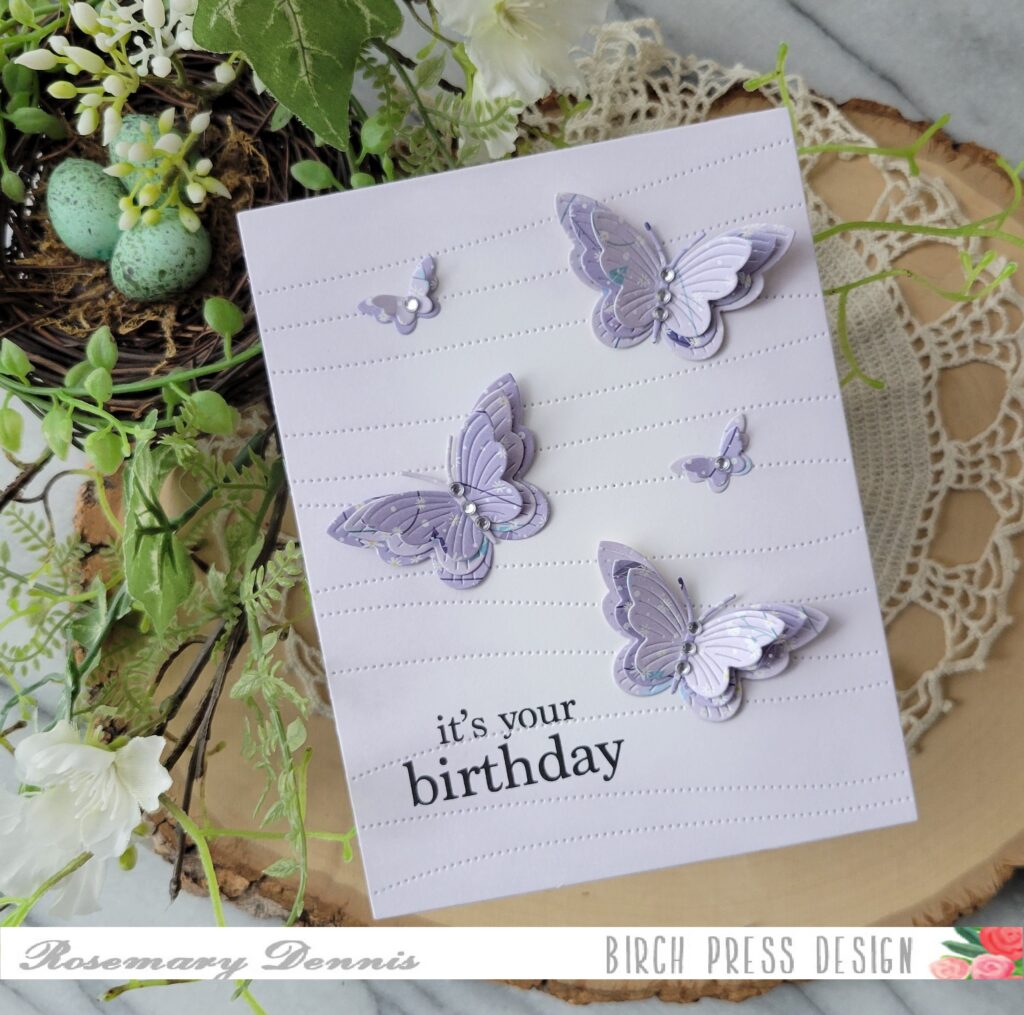
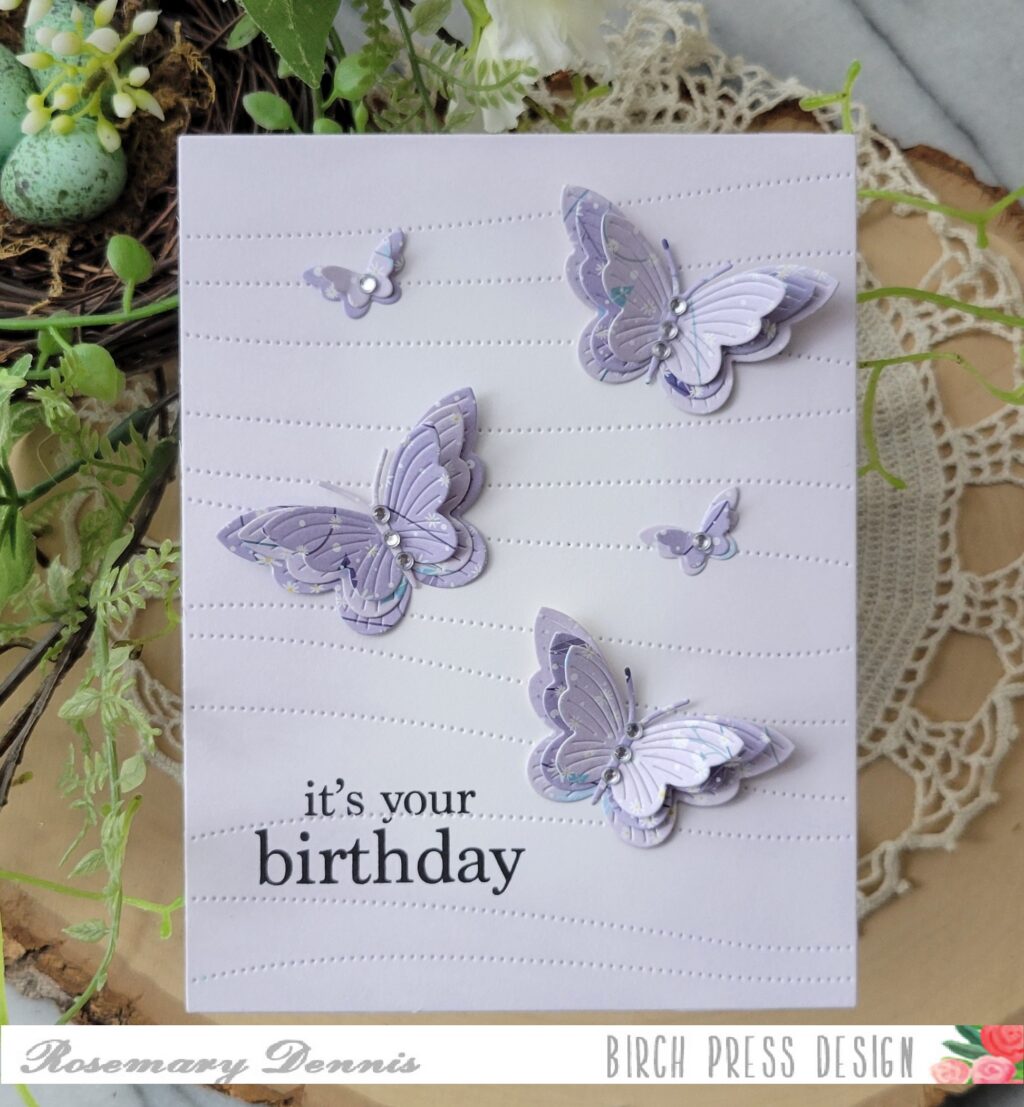
Hello everyone! Rosemary here with a sweet birthday card and tag made with the Linear Boho Butterflies dies and pretty papers from the Memory Box Anemone Grove 6×6 pad. Let’s look at what I created:
As I started thinking about how I wanted to use the Linear Boho Butterflies dies I thought it would be fun to use some patterned paper. I looked through my Memory Box 6×6 pads and settled on the Anenome Grove pad. I went with papers that both had a light purple hue to them and a subtle pattern.
I wasn’t exactly sure how I was going to use the butterflies so I decided to die cut multiples from each piece of patterned paper. The bodies of the butterflies were also die cut from the same papers. As I played around with ideas I thought it would be fun to use the Pinpoint Contour Plate to provide some movement on the background. The panel was die cut from white cardstock and set aside.
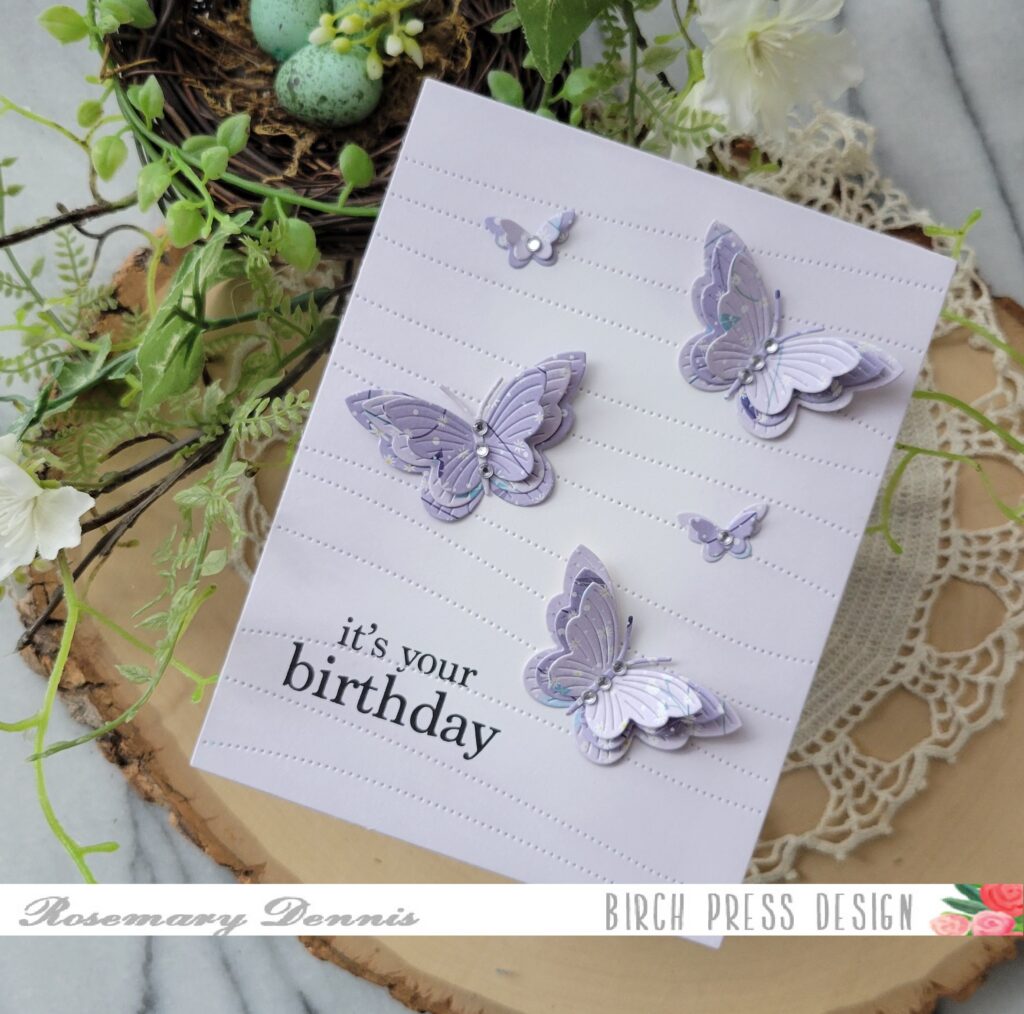
There are three large butterflies and two tiny butterflies in the die set. I decided to layer all three of the larger butterflies together by alternating the different patterned papers. The look is very subtle, but pretty. I also layered the two tiny butterflies in the same manner. To finish off the butterflies I added clear Memory Box fairy jewels to the bodies of all the butterflies. To keep the subtle purple going I ink blended a light purple ink around the edges of the background panel and then added the butterflies and sentiment to the card.
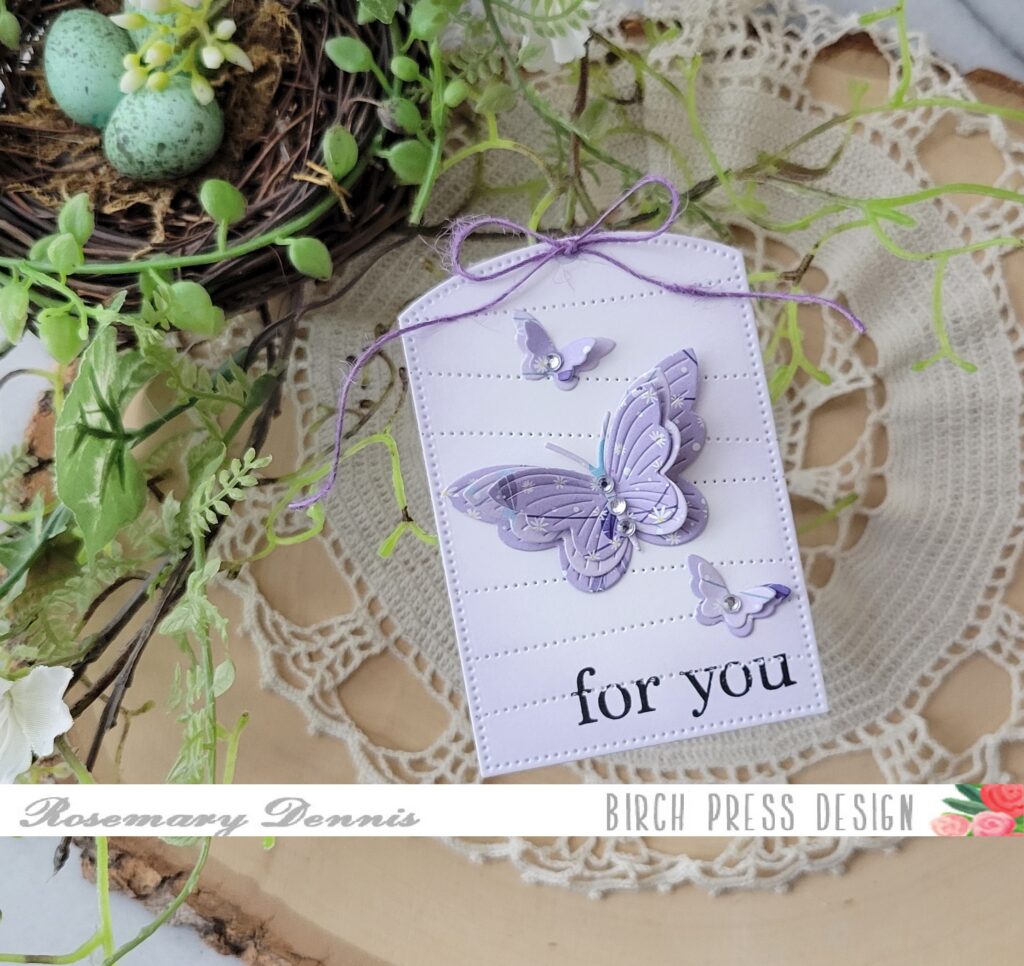
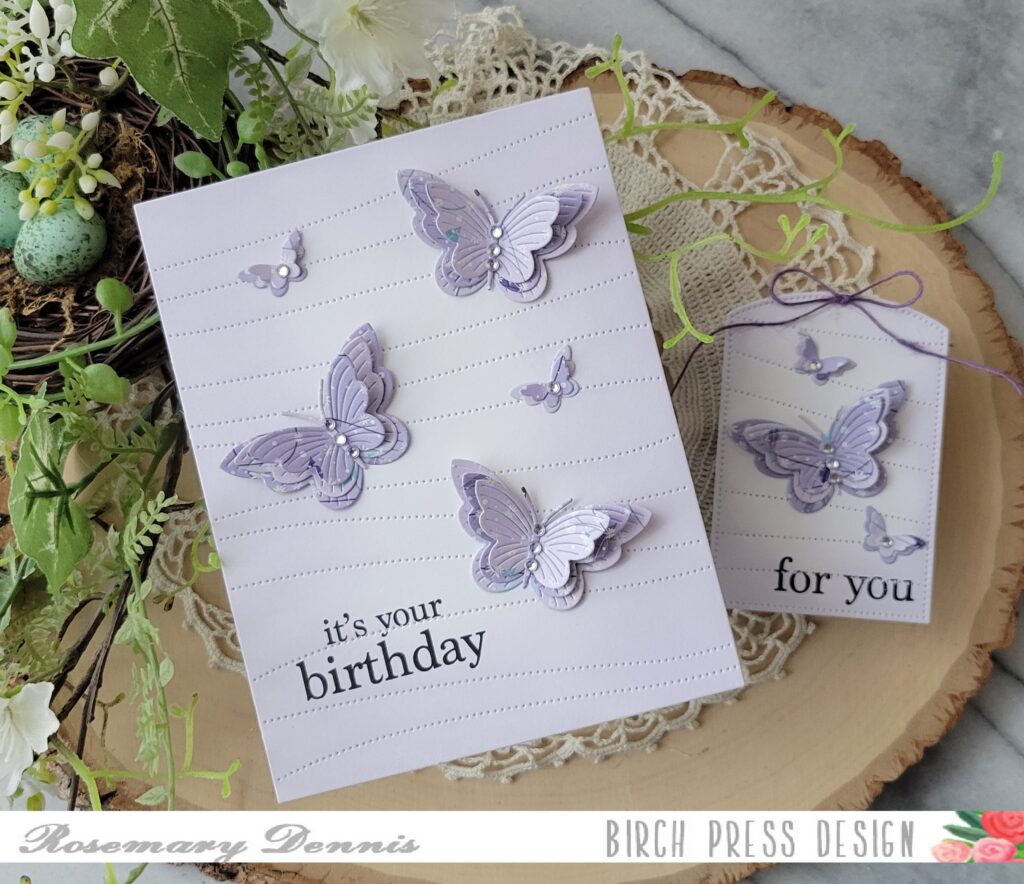
After I finished the card I still had one large layered butterfly and two tiny layered butterflies left. So I thought it would be fun to make a little tag. I used a scrap of white cardstock and die cut it with the Pinpoint Contour Plate and then die cut it further with a Memory Box Curved Cap Pinpoint Layers die. I added the same light purple ink around the edges and stamped the sentiment. Both sentiments are from the Plain and Simple Birthday Greetings. I finished with a little bow made with purple twine.
I love how both the card and the tag turned out. I hope you enjoyed today’s project. I had a lot of fun creating them.
Welcome Birch Press Design friends, Annette Allen (myclevercreations) here with you today and I am sharing my first post as one of the newest design team members. YAY! So let’s get started…
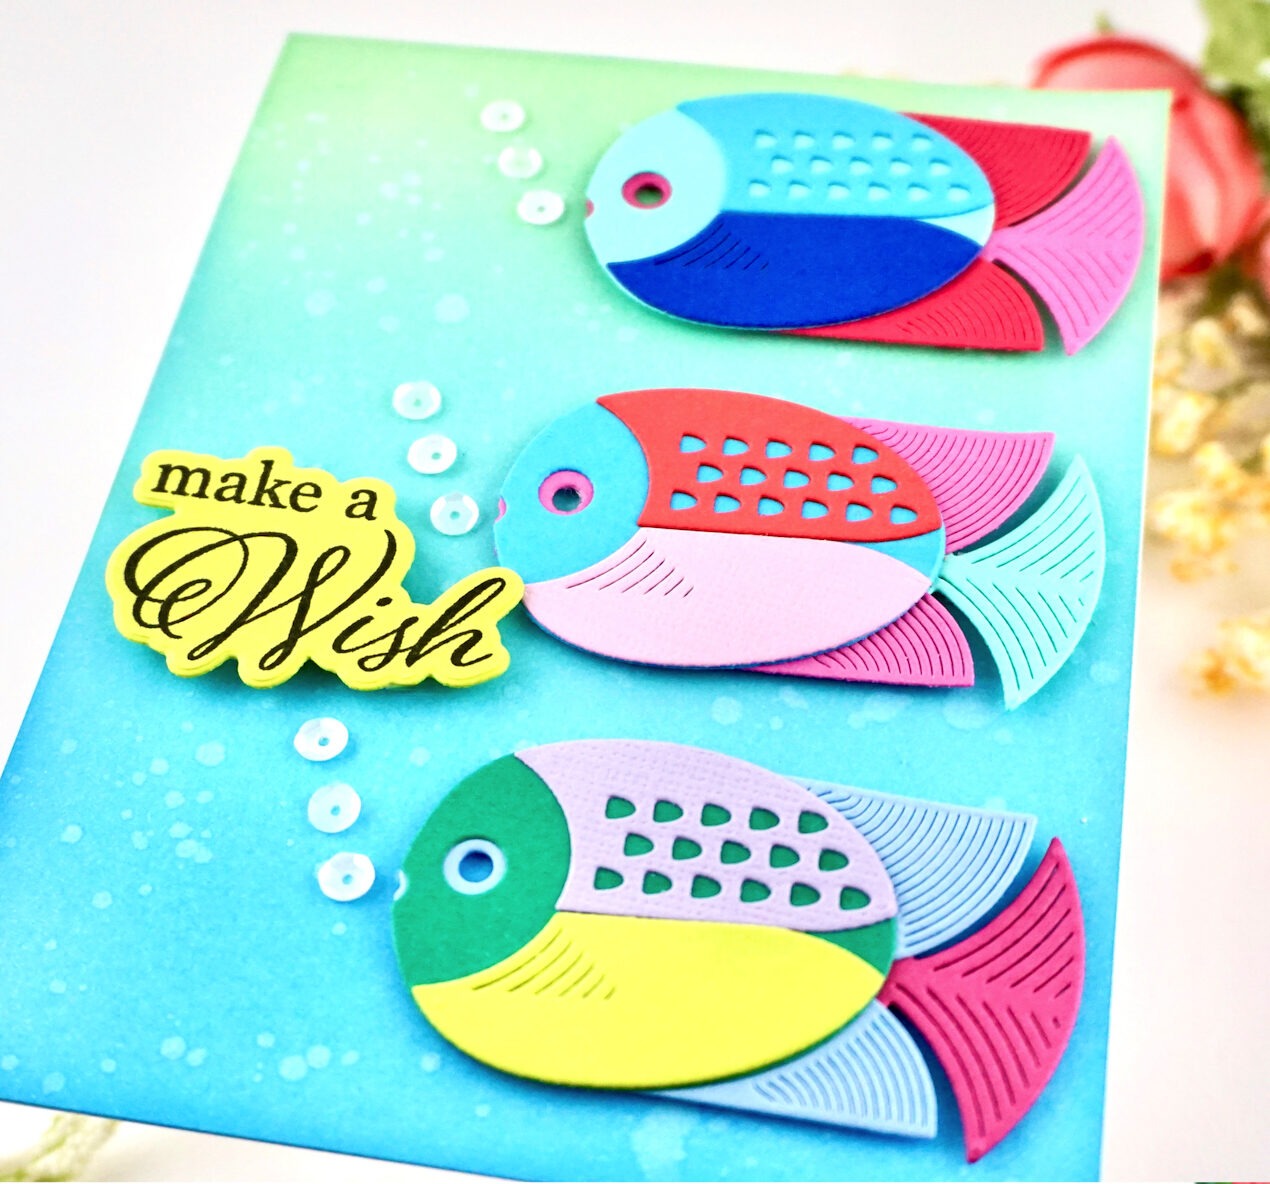
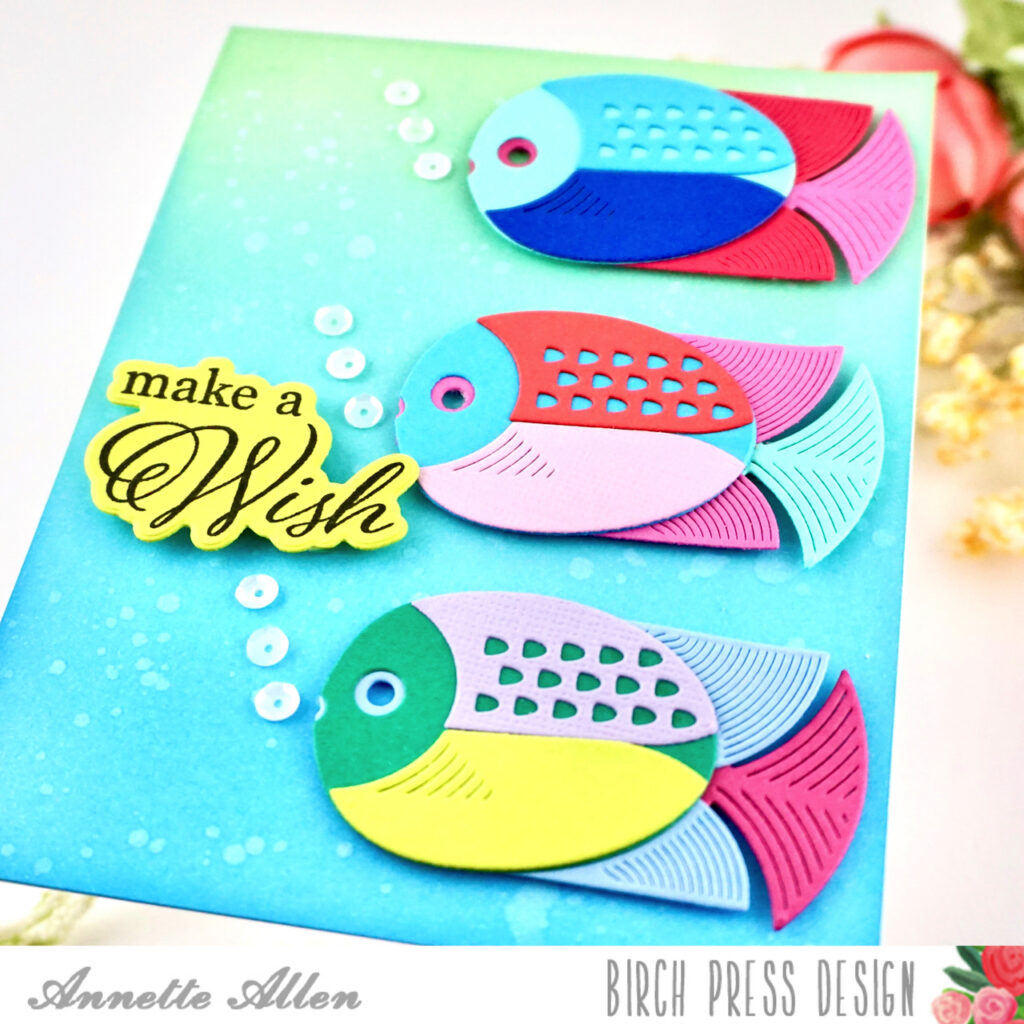
I first started with die cutting the Block Print Glider Fish three times on colored cardstock. I did not plan the colors I just picked out some scraps and started die cutting. Adhere all the pieces together using liquid glue.
Don’t worry about how the colors go because as you can see, you can mix and match most colors and they just look fun. I might add that the Block Print Glider Fish is very easy to piece together.
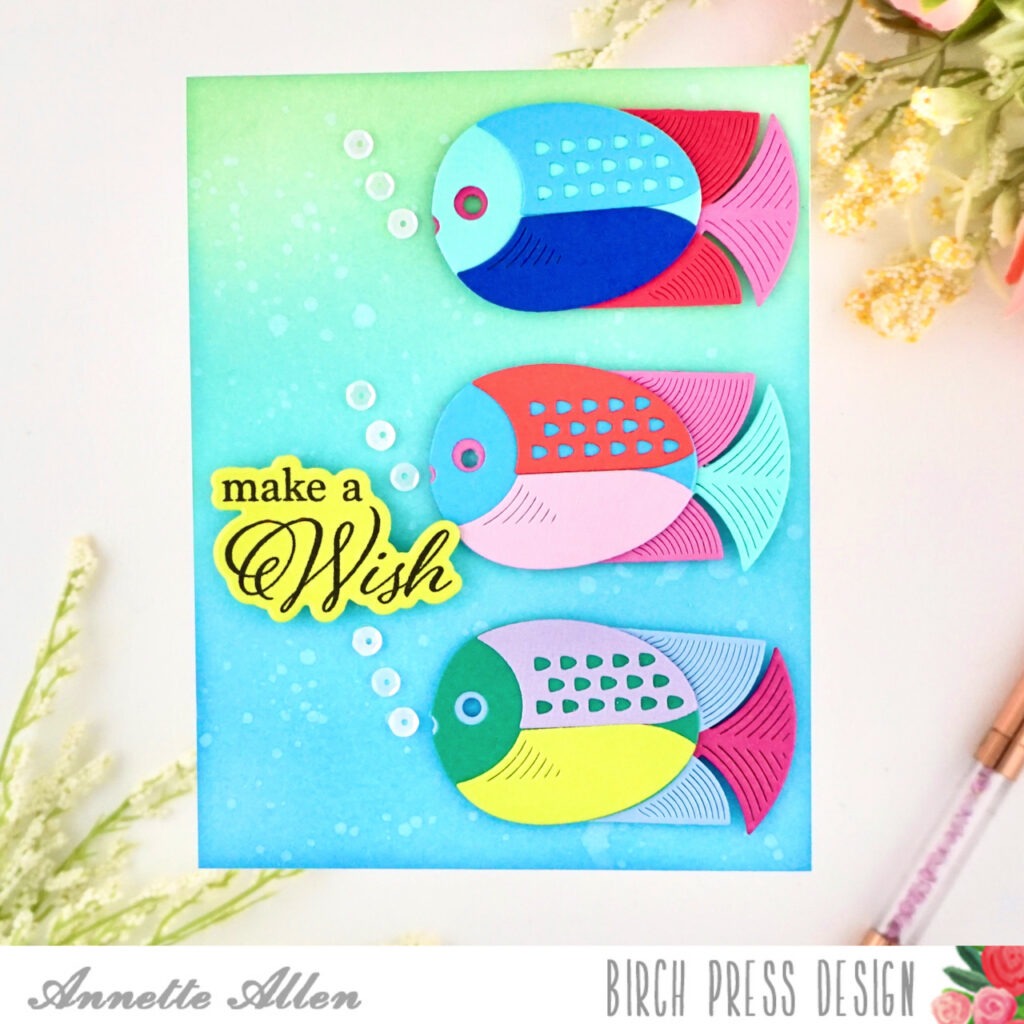
Create a card, A2 size on white cardstock.
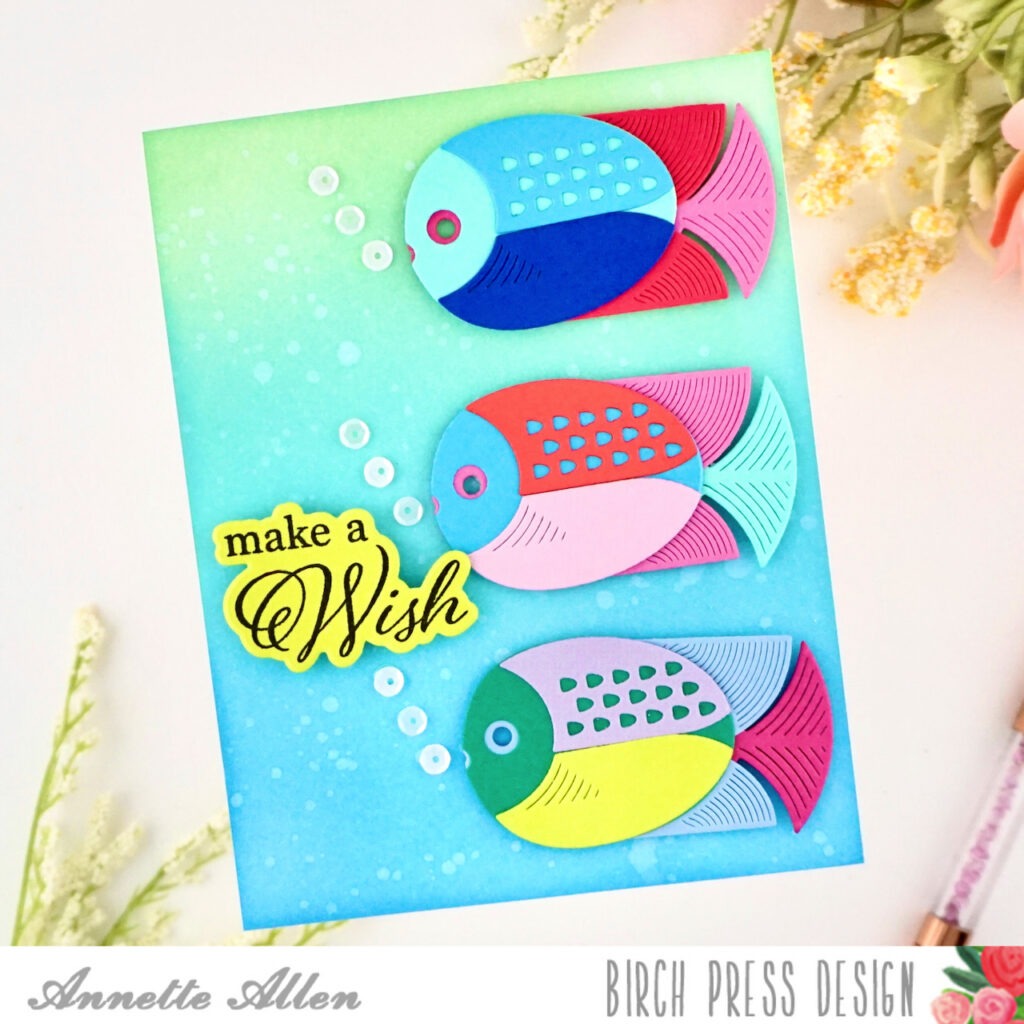
Cut a A2 panel on white cardstock and ink blend three colors. I went more with the traditional colors of the sea. Pick colors that you love to ink blend together. I used Oxide inks, so I am going to sprinkle a little water. If you use this technique, make sure to let your panel dry completely before adhering it to your card base.
Once dry, adhere to card base.
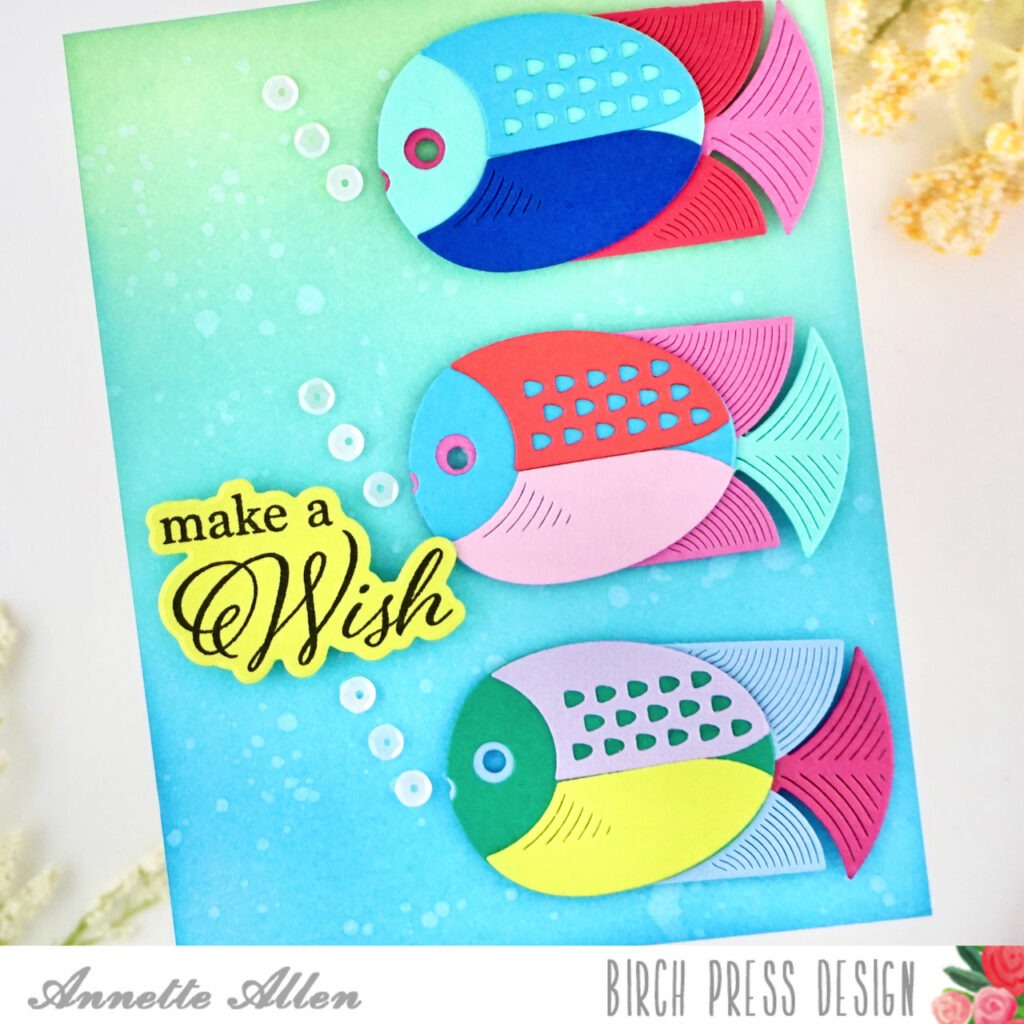
Add some foam tape to the back of our cute Block Print Glider Fish and add them to the right side of the card. Try and leave an even amount of space between them.
Adhere some small white sequins in front of each fish. Gives the appearance of bubbles.
Stamp the sentiment from the Elegant Birthday Sentiments clear stamp on one of the colors of cardstock you used on the fish using black ink and die cut using the coordinating dies. Add foam tape to the back and adhere to the left side of the card.
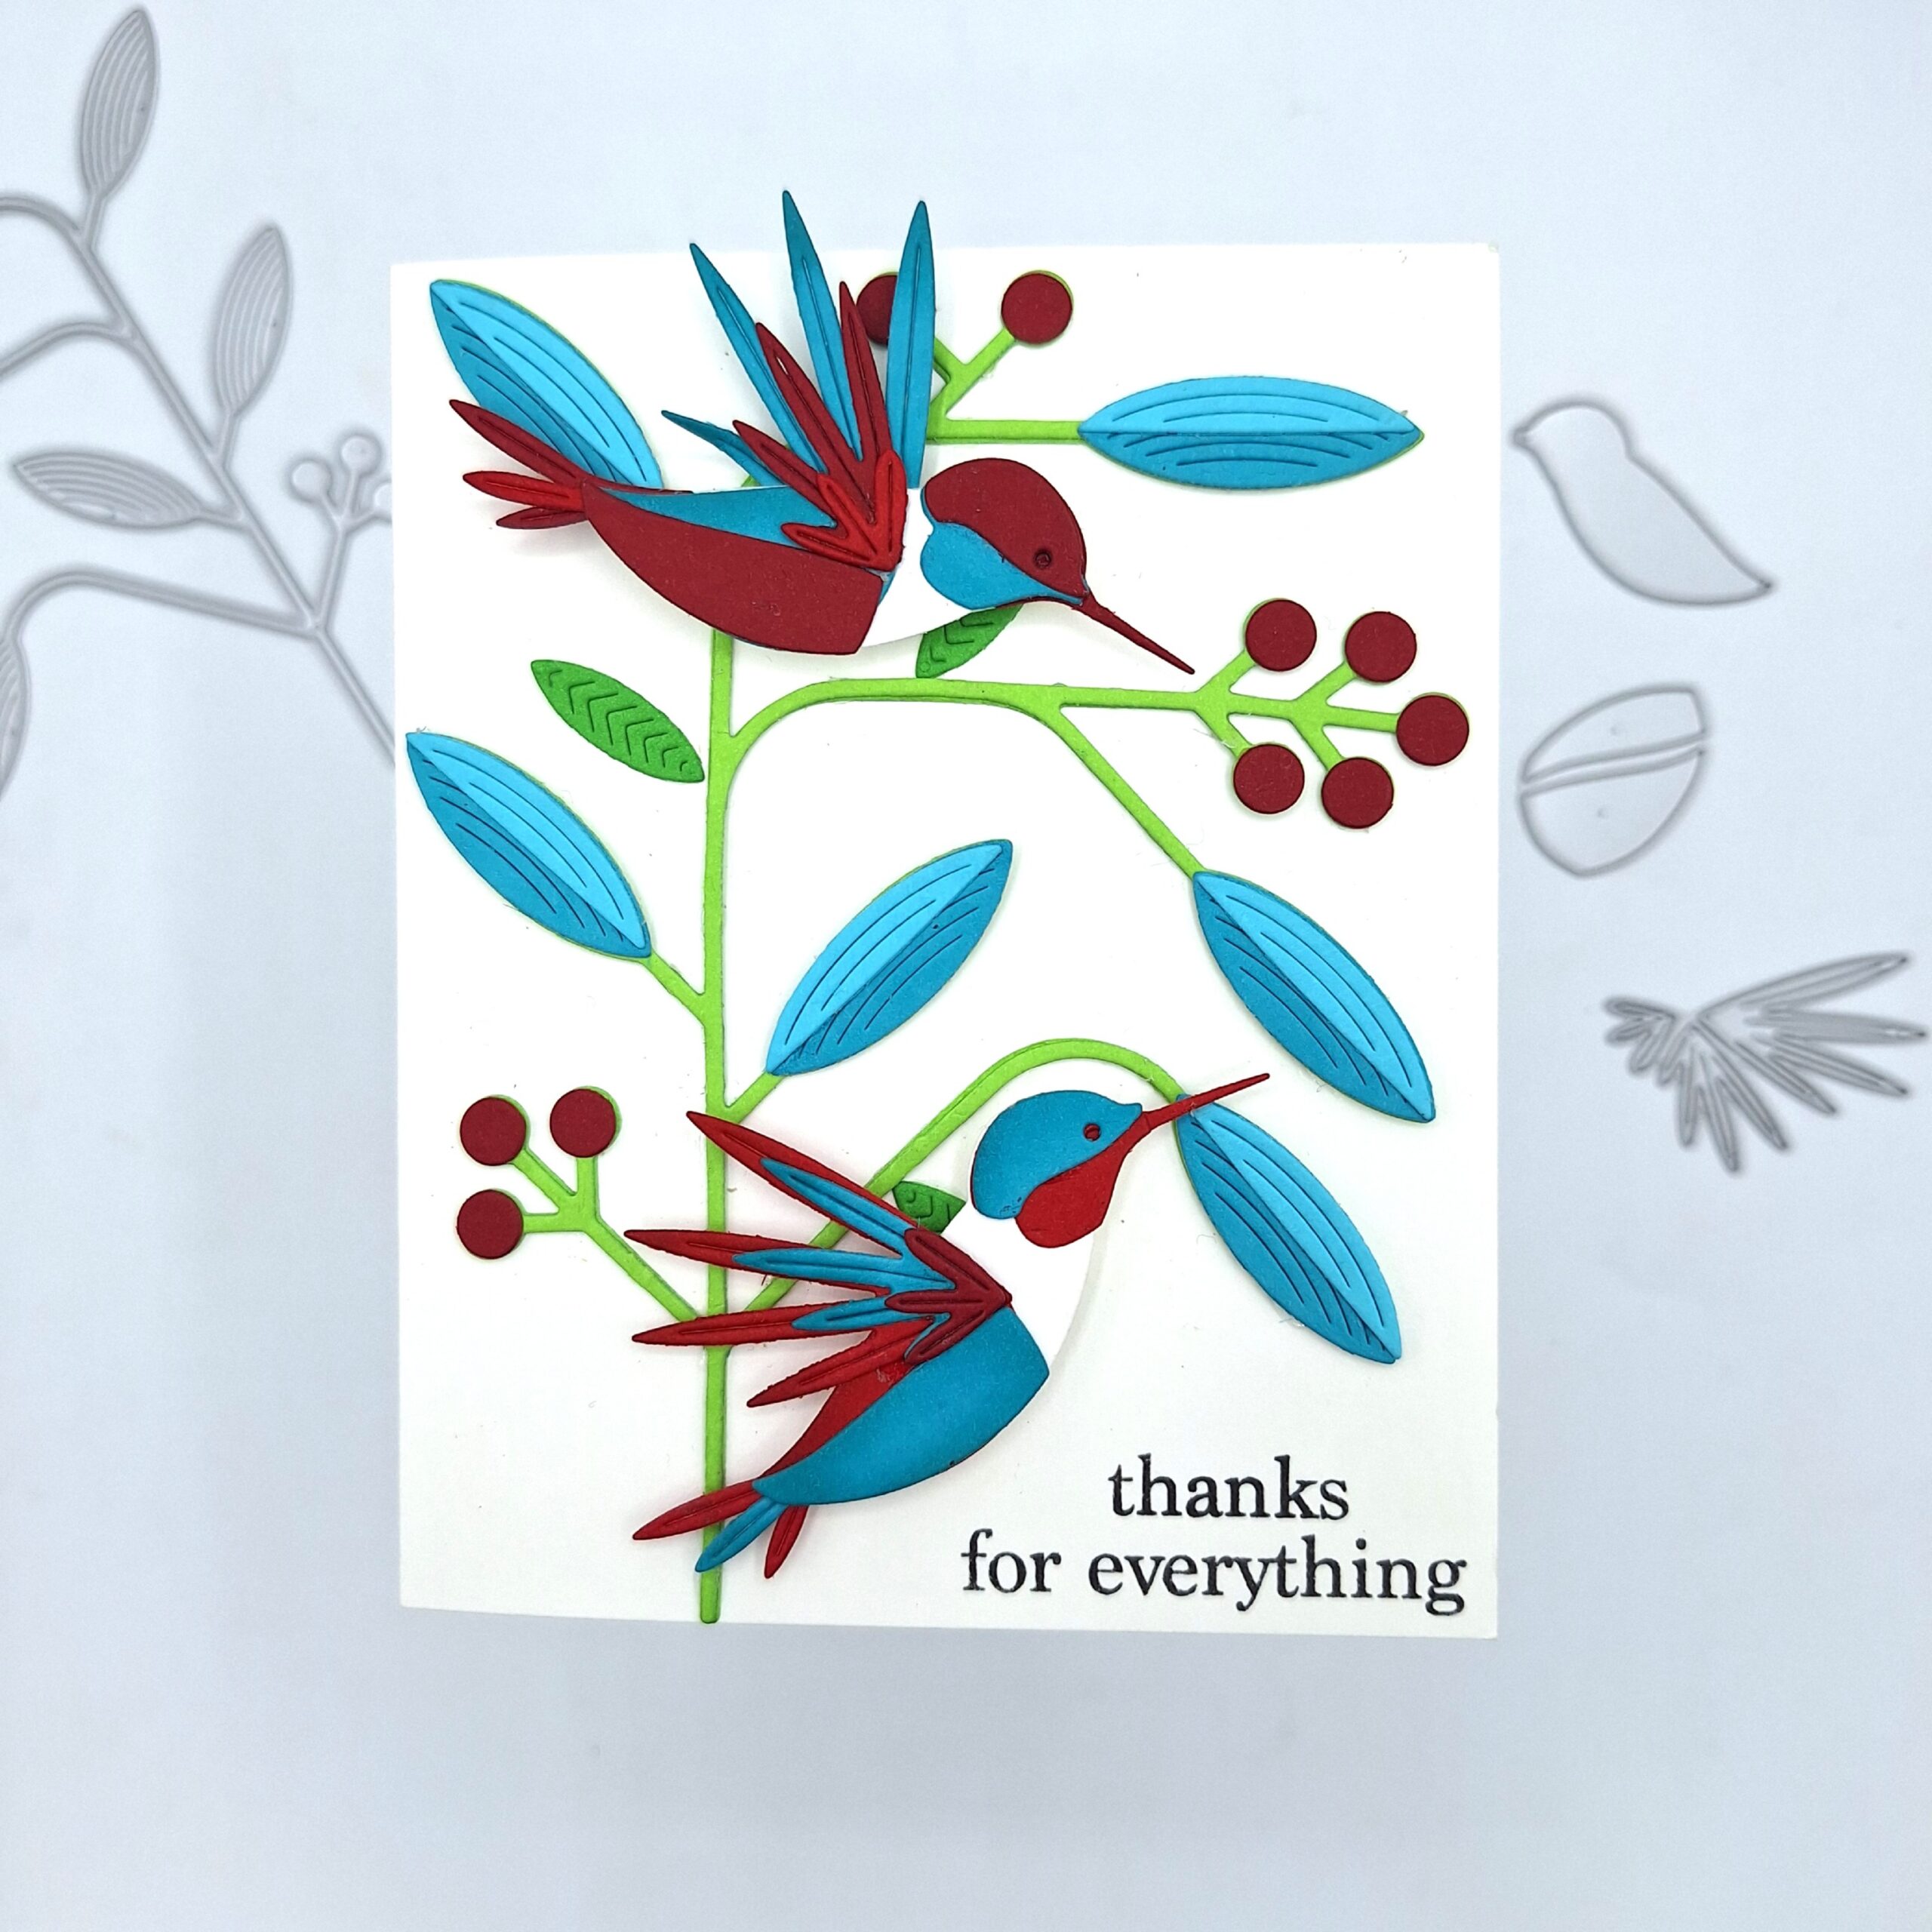
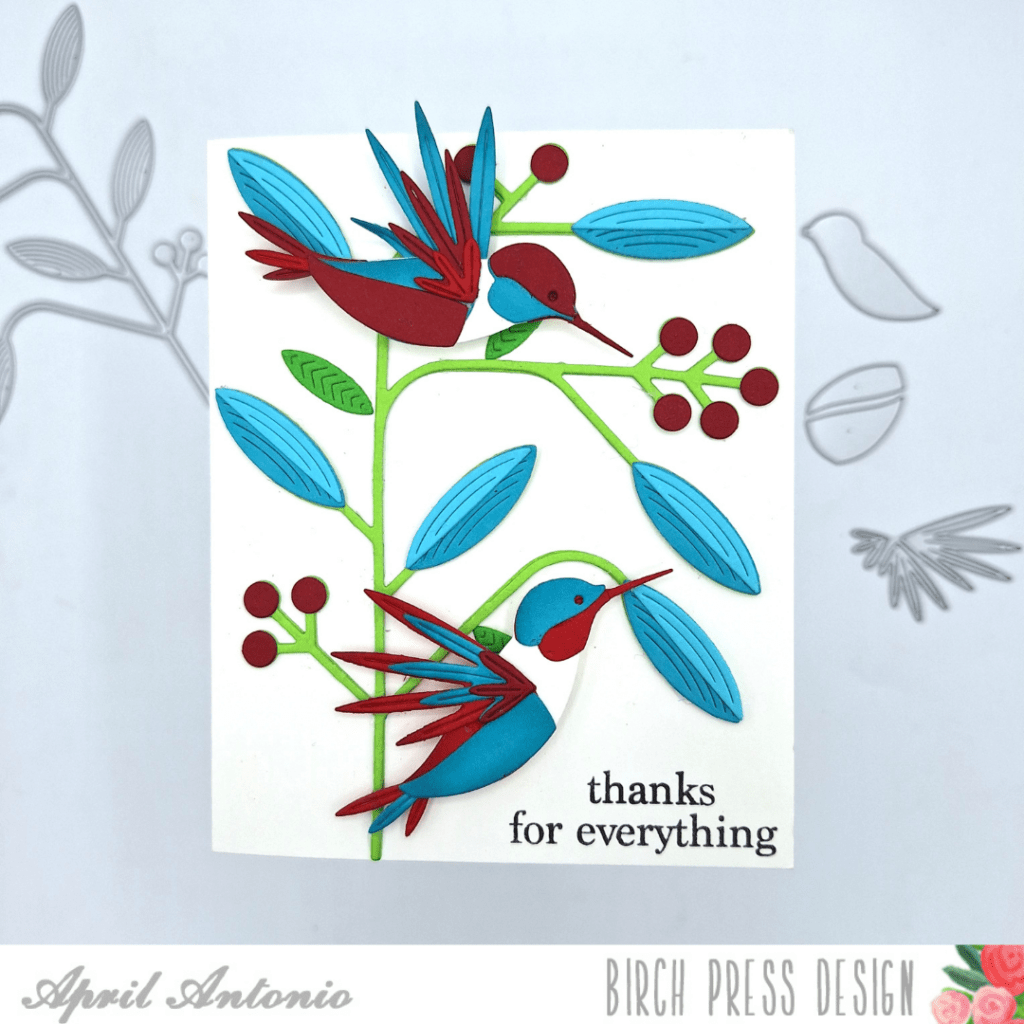
If you’ve been wanting to try the Block Print Soaring Hummingbird from Birch Press Design — consider this your sign. This die set is one of those that looks incredibly intricate but is so satisfying to put together once you understand how all the pieces work. Pair it with the Block Print Mod Branches and you’ve got a card that feels lush, layered, and alive. Let me walk you through how this “Thanks for Everything” card came together!
Starting with the base
My card base is Neenah Solar White 110lb cardstock — my go-to for any card where I want the colors to really pop. White was the right call here because the color palette on this card is doing a lot of beautiful work and I didn’t want anything competing with it.
Building the branches
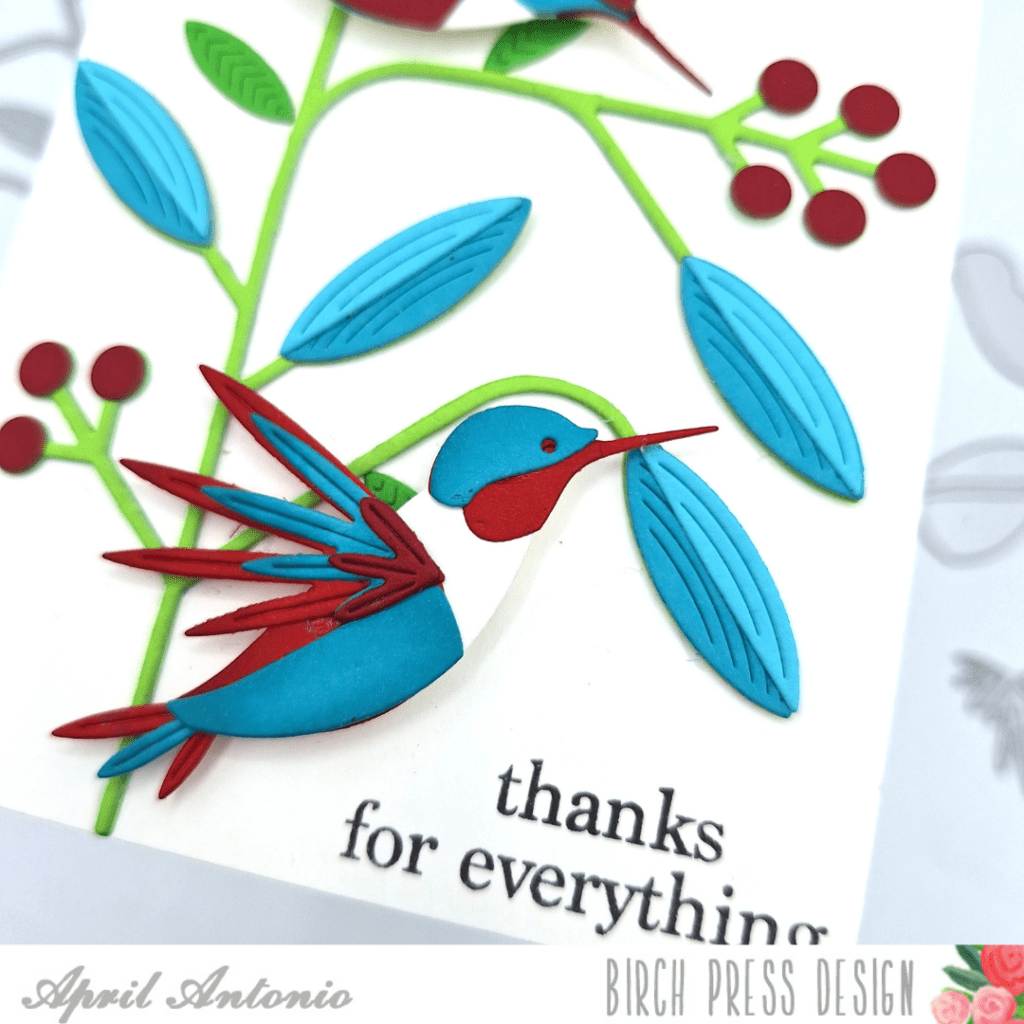
Before the hummingbirds even come into play, the Block Print Mod Branches die sets the whole scene. I die cut the branches from Birch Press Leaf Sprout cardstock — that bright, fresh lime green is such a perfect backdrop for everything that gets layered on top. The branches arc across the card and give the whole design that botanical, nature-forward feeling I was going for.
I added the leaves in Birch Press Pool Party and Deep Turquoise, and the little berry clusters in Cranberry. Before assembling everything I did some light ink blending on many of the individual pieces to add depth and dimension — it’s a small step that makes a big difference in how finished and rich the final card looks.
Die cutting the hummingbirds
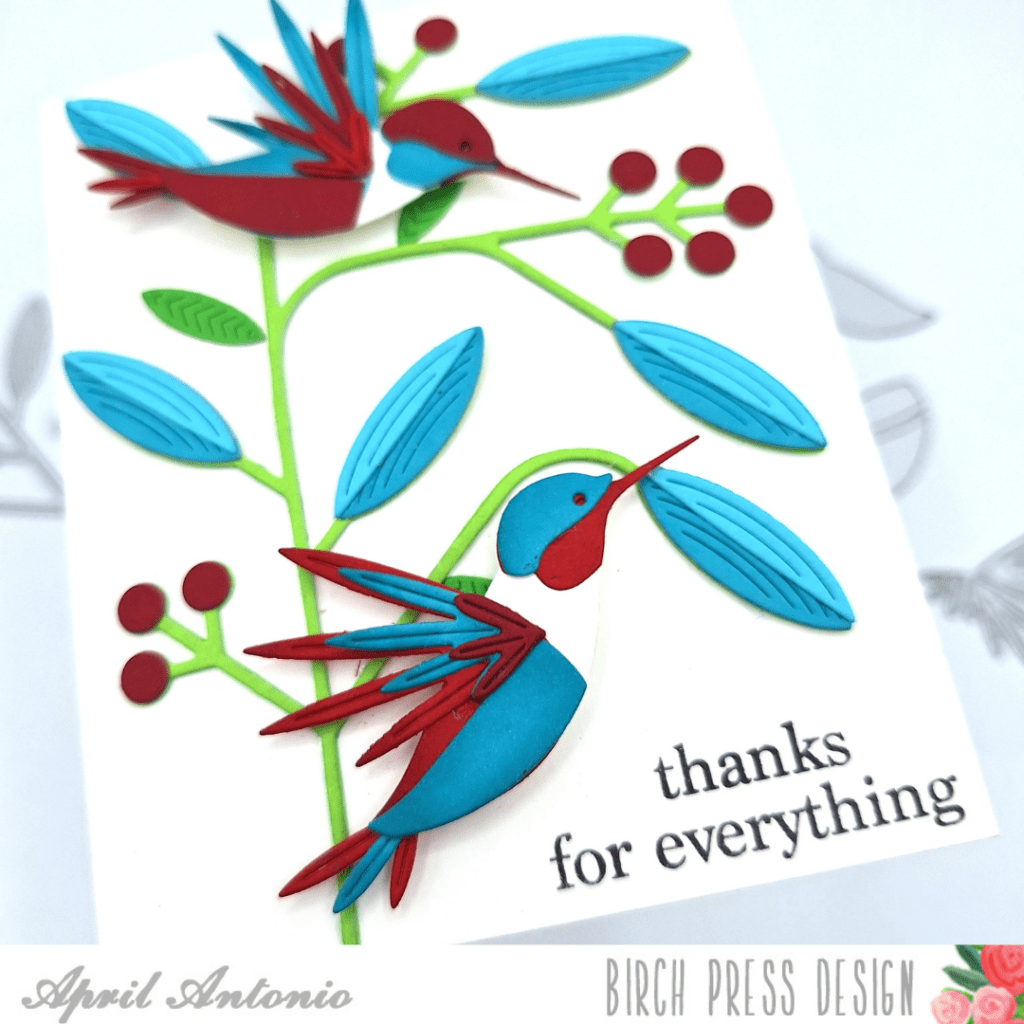
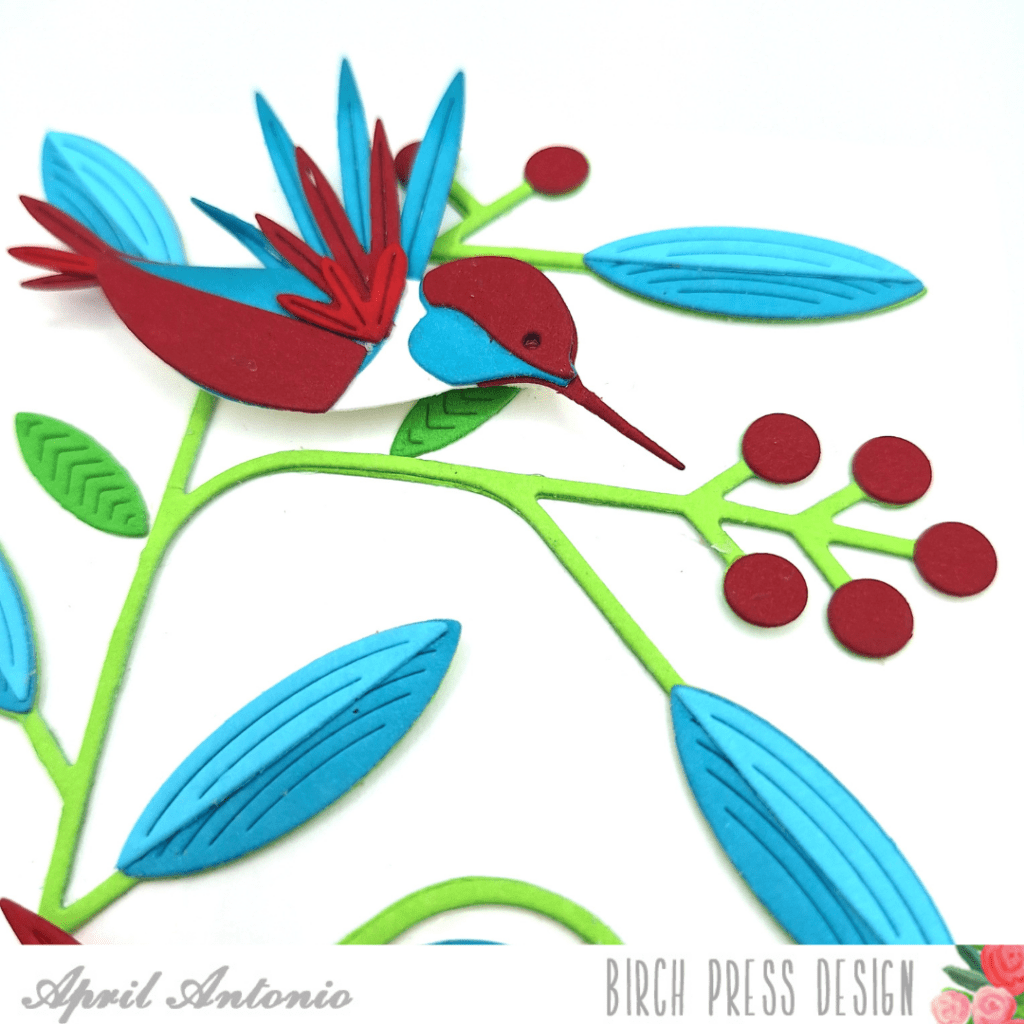
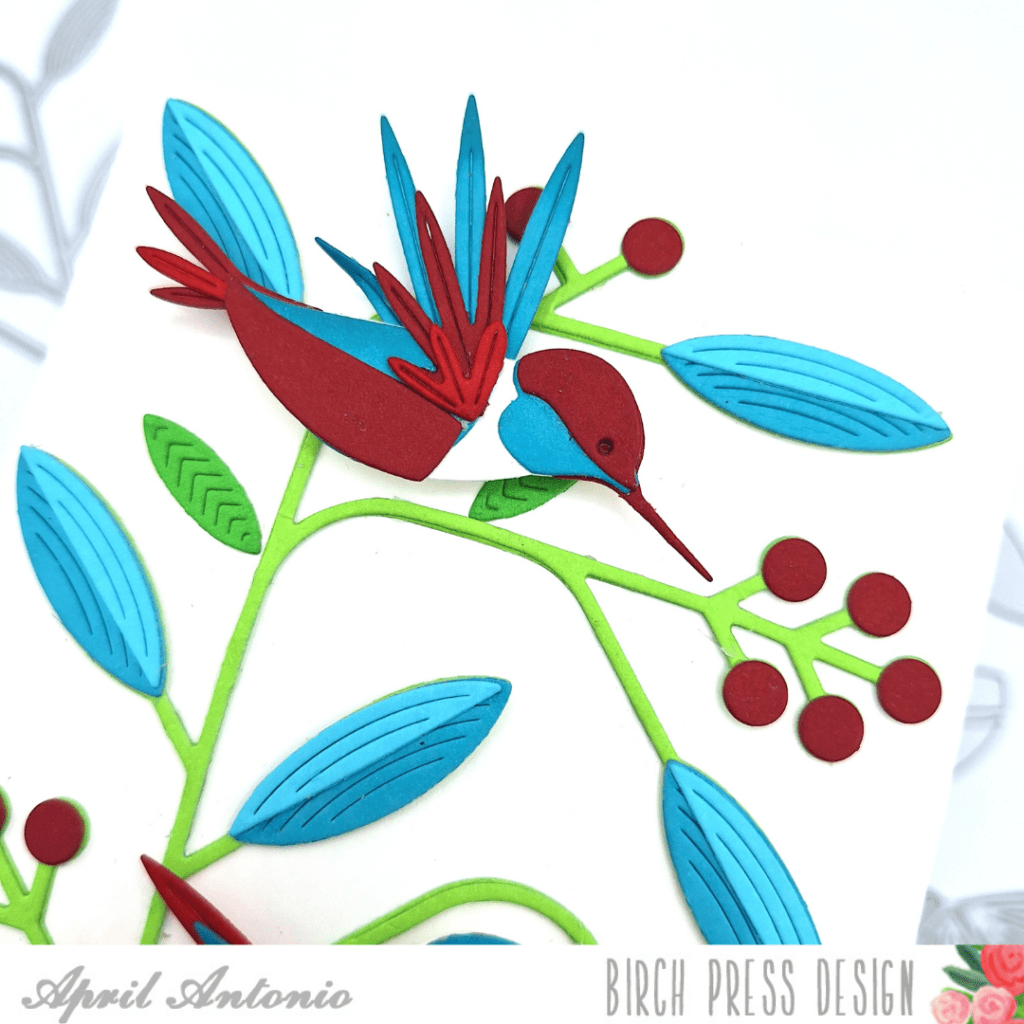
Now for the stars of the show. The Block Print Soaring Hummingbird die produces the most beautifully detailed little birds — the layered wing feathers, the delicate tail, the sweet little beak. I made two hummingbirds for this card, which felt right for the branching composition — one perched toward the top and one hovering near the bottom, both facing inward toward the center of the card.
For the coloring I used a mix of Birch Press cardstock — Cranberry and Cherry Red for the wing feathers and tail detail, Pool Party and Deep Turquoise for the body and larger wing layers. The contrast between the deep cranberry reds and those cool aqua blues is what gives this card its energy. Both hummingbirds are foam mounted onto the branch for a lovely dimensional lift — that little bit of elevation really makes them feel like they’re in motion.
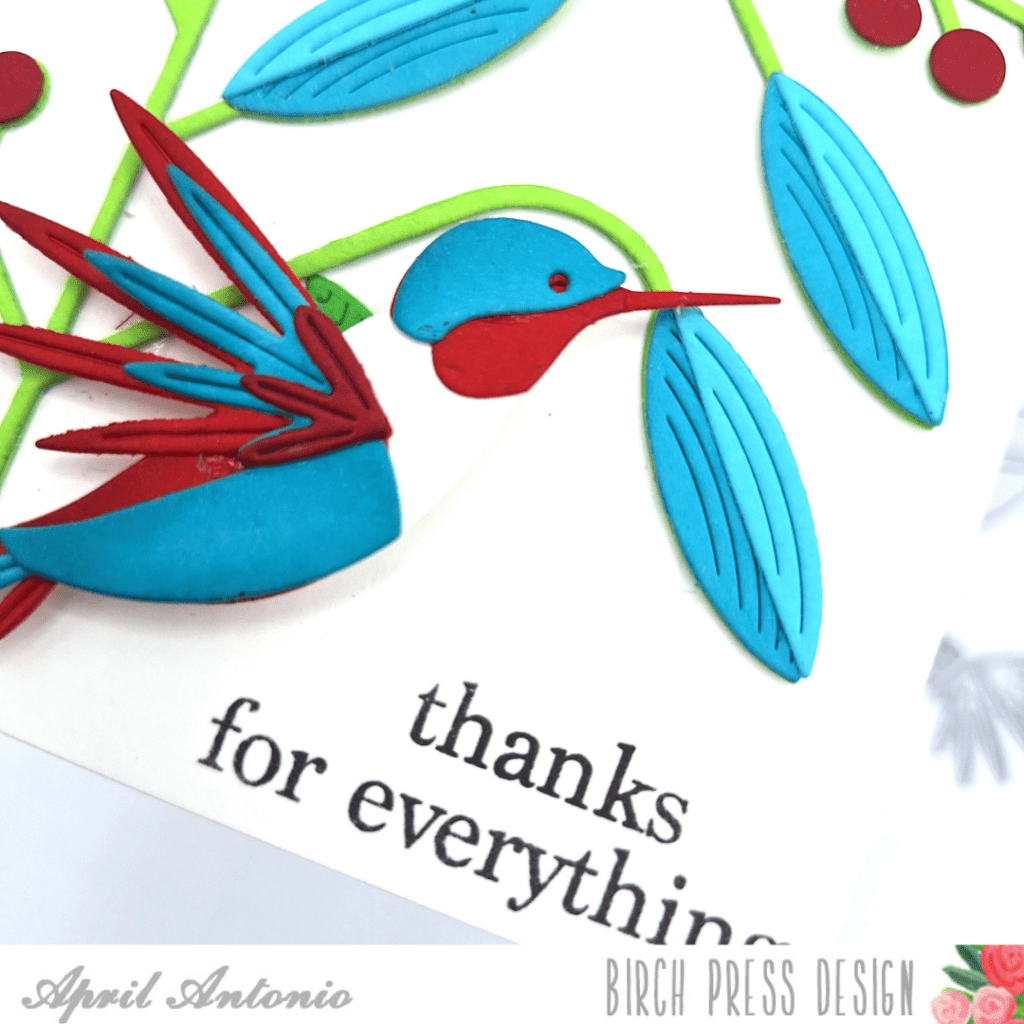
Adding the sentiment
For the sentiment I used the Vintage Everyday Greetings stamp set. The phrase “thanks for everything” stamped directly onto the card base in black dye ink — clean and simple, which felt right given how much is happening visually with the birds and branches. Because of the space available in the lower right corner, I stamped “thanks” on one line and “for everything” just below it, which actually turned into a really nice little layout moment.
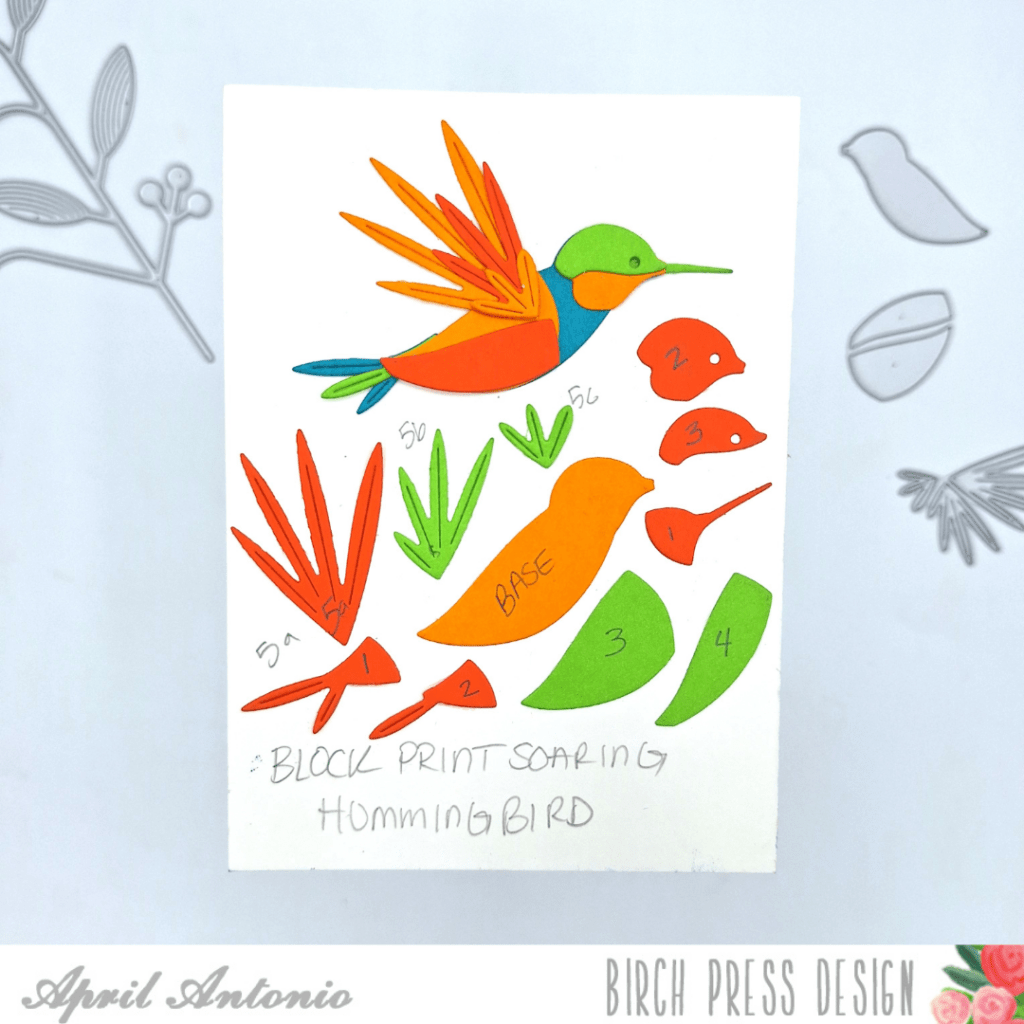
A little sneak peek for the curious
I’ll be honest — this die set has a lot of pieces, and figuring out the layering order is half the fun. I’ve been working on cut maps for my Birch Press dies to help me keep track of exactly how everything goes together, and I made one for the Block Print Soaring Hummingbird. I’m not going to say too much about it just yet — but if you look closely at the photo below, you might get a little preview of what’s coming. 😉
Stay tuned — there’s more to come on this one.
The finished card
The end result is a card that feels like a little piece of botanical art. The white card base lets all those rich, saturated colors breathe, the two hummingbirds bring movement and life to the design, and the Mod Branches tie everything together into one cohesive scene. It’s one of my favorite cards I’ve made with these dies so far — and I have a feeling it won’t be the last version of this one.
Have you made a card with the Block Print Soaring Hummingbird? I’d love to see what you’ve created — tag Birch Press and share your version!
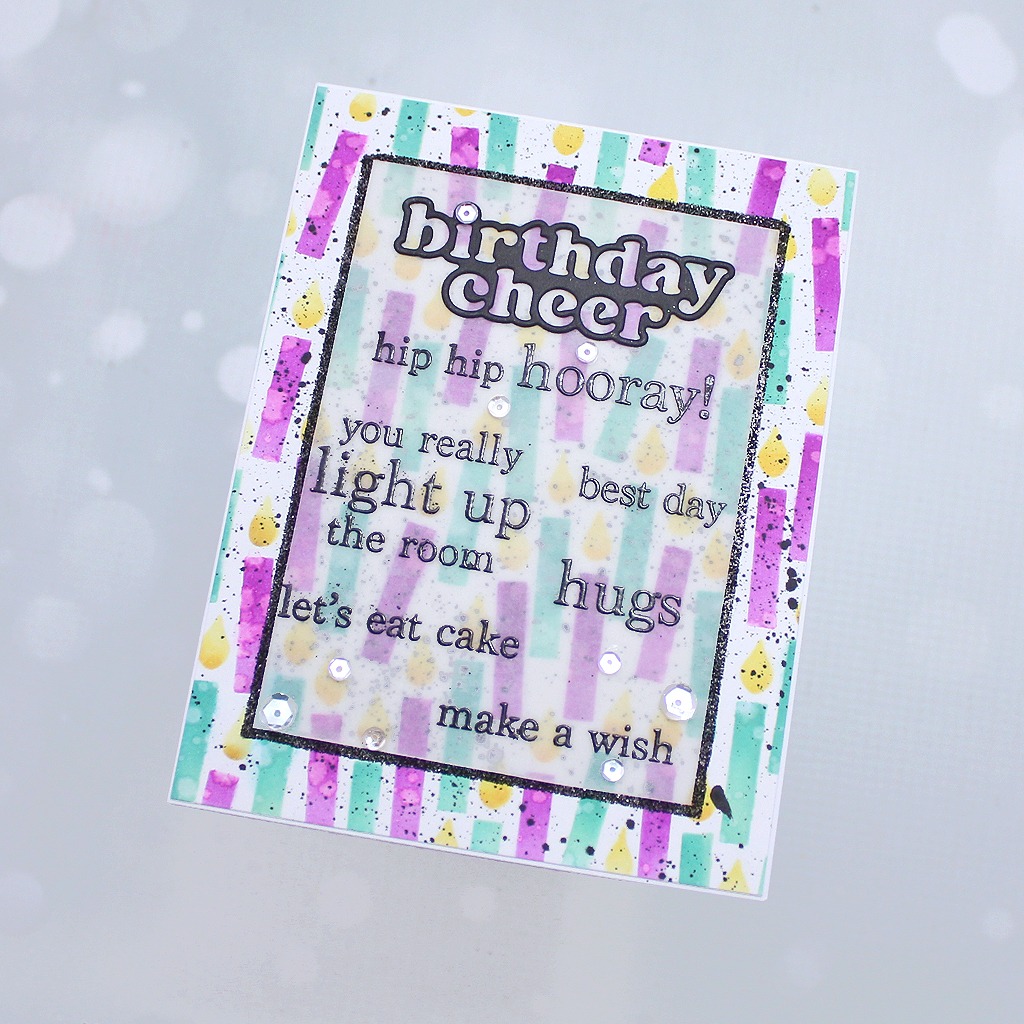
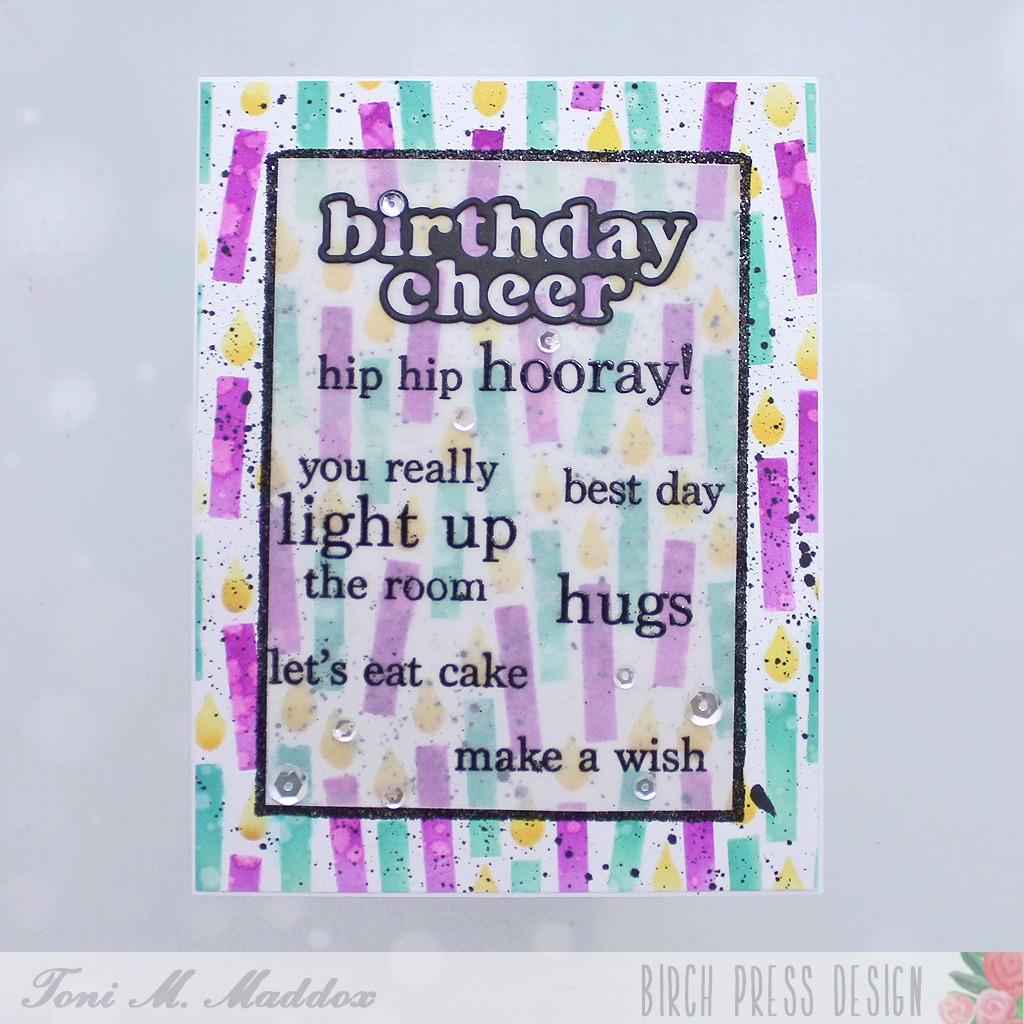
Greetings, friends! We can never have too many birthday cards on hand, right? Toni here sharing two birthday cards, one quite feminine and the other cheerfully unisex.
I created the background of my first card using the Birthday Candle Blowout Stencils. I spattered that with ink for a funky vibe.
Next, I arrange some of the Plain & Simple Birthday Greetings on my MISTI and embossed them on sturdy vellum. I left a space at the top to add the Plain & Simple Birthday Greetings sentiment diecut.
I covered the back of the vellum panel with double-sided tape, leaving a small margin that I burnished with black glitter.
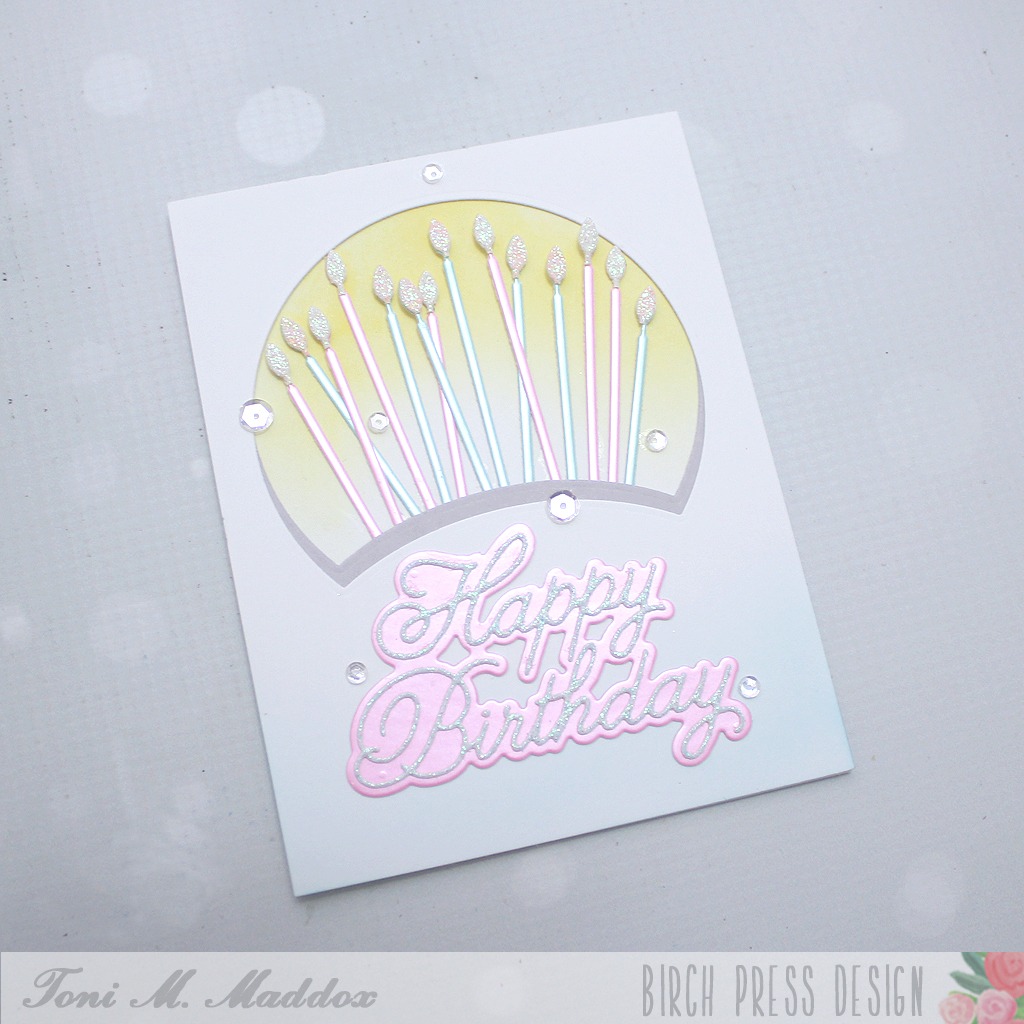
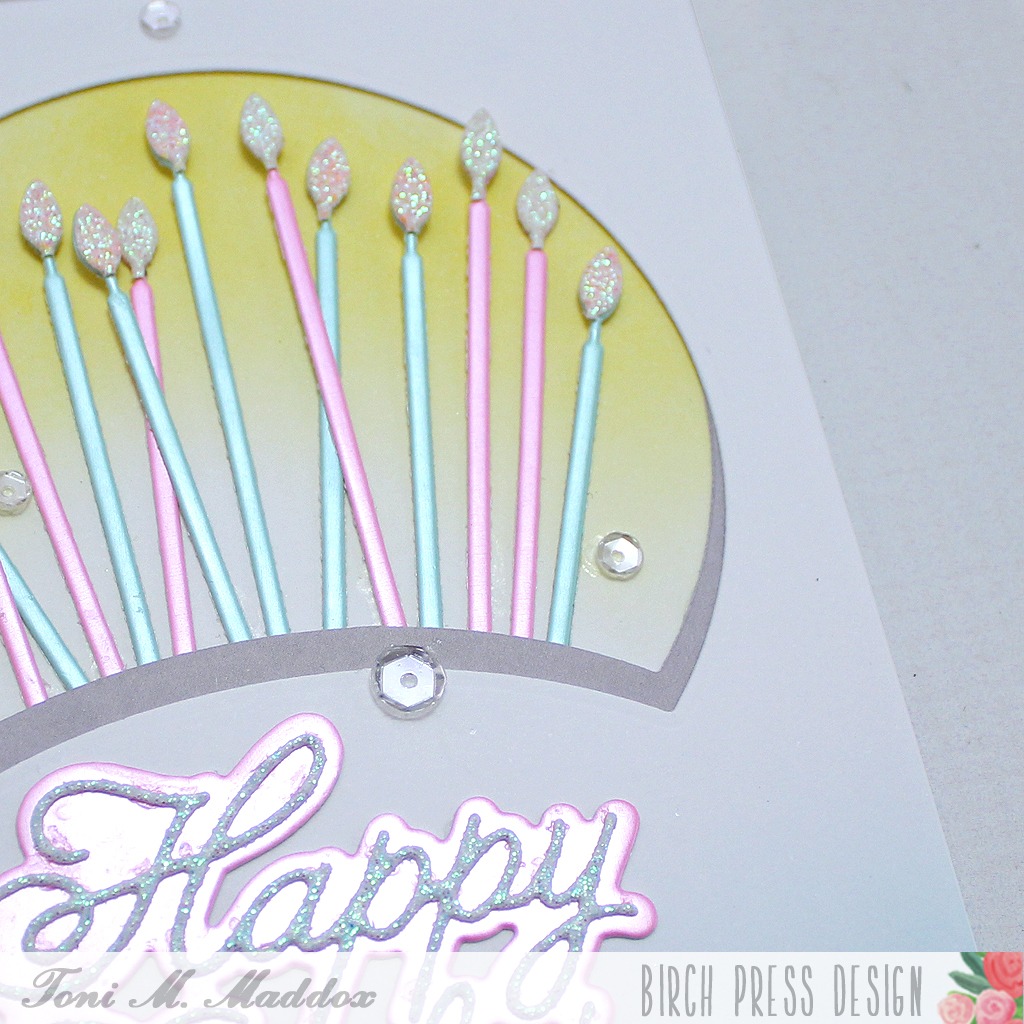
My second card definitely has a more feminine feel to it, don’t you agree?
I created an aperture and shadow with the Block Print Forest Scene die. A random assortment of Tall Party Candles cut from mirror and glitter cardstocks fill the space.
Finally, I sponged a bit of blue at the bottom of the card front before adding the Handwritten Happy Birthday & Outline. Pretty!
I hope you enjoyed today’s card and have a great rest of your week!
Feel free to visit my blog, Frankie Helps Craft, for a full list of supplies used and to check out my other creations.