Category: Stamps

  • Grandma’s Ornaments | by Toni M Maddox

    Grandma’s Ornaments | by Toni M Maddox

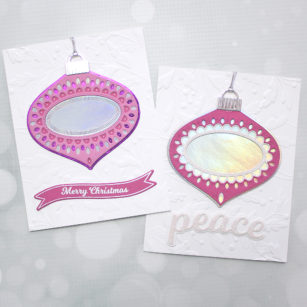
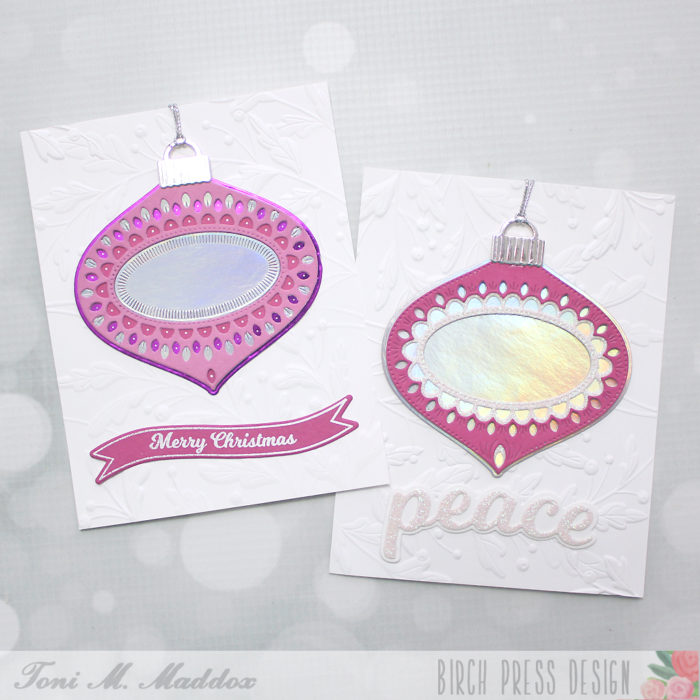
    Hello, everyone! Toni here with you today with a couple of cards inspired by ornaments found on my grandma’s Christmas tree back in the day.

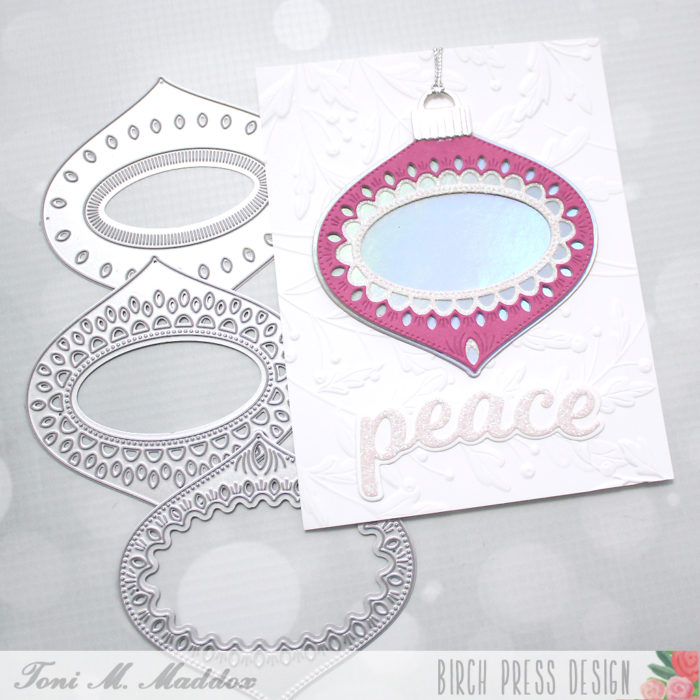
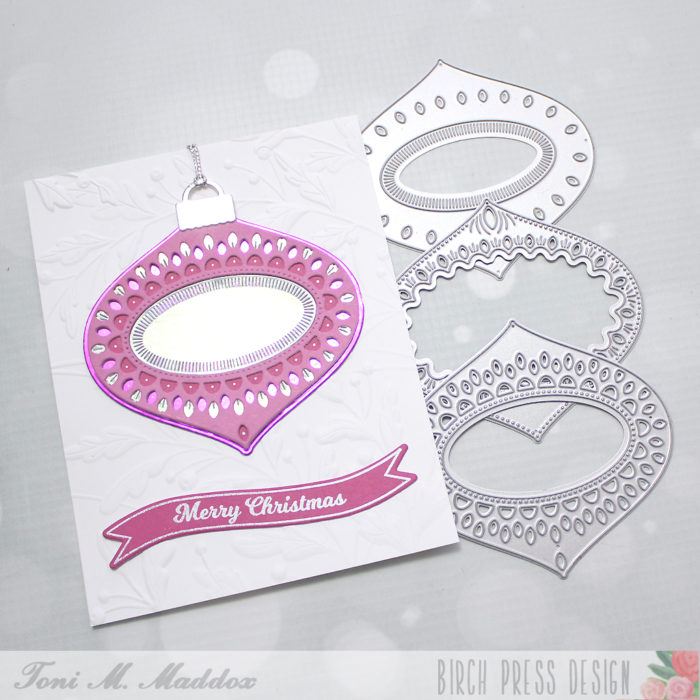
    For the first card, I used the Marisol Ornament Layering Dies cut from Memory Box Delicate Pastel Glitter 6×6 paper and Cottage Stripes & Dots 6×6 paper.

    I embossed the Christmas Ornament and Labels sentiment in white on kraft and cut it out with the coordinating label die.

    For the second card, I used the Belle Ornament Layering Dies along with Memory Box Delicate Pastel Glitter 6×6 paper and foil paper from my stash (a great substitute would be Memory Box Polished Foil). I particularly love the patterned center of this ornament.

    I embossed and cut the Christmas Ornament and Labels sentiment for this card as well, this time using Memory Box Fresh Aqua 6×6 paper.

    On both cards I embossed the front with the Memory Box Gracious Leaves 3D embossing folder as the design reminded me of mistletoe. The texture is amazing!

    Fun tip: I attached both ornaments to the card front with removable adhesive dots and included a silver hanging loop in case the receipient wants to hang the ornament in years to come.

    Thanks for visiting and have a wonderful rest of your day!

    Supplies
  • Hello Autumn | by Crystal Komara

    Hello Autumn | by Crystal Komara

    Hello friends, it’s almost the last day of September and we are officially in the midst of PSL season! That’s Pumpkin Spice Latte for anyone unfamiliar with the popular influencer inspired lingo. This is Design Team member Crystal Komara here today inspiring you to embrace fall (while dreading winter) and I’m sharing a simple, yet elegant card made using my favorite Birch Press Design stamp set called Pumpkin Lacework.

    Card details:

    The base of this A2 sized card is made from 80 lb. Neenah Solar White smooth cardstock. Using Layer B of the Autumn Breeze Layering Plates, I cut the background from white cardstock. I adhered this leafy imprinted background directly to the card base.

    Using the Pumpkin Lacework stamp set, I stamped the large pumpkin in Versamark ink on orange cardstock. I heat embossed the pumpkin with white embossing powder. I used the coordinating Pumpkin Lacework die to cut the pumpkin out. I adhered the pumpkin to the lower right side of the card using 3M foam adhesive. I stamped the pumpkin stem in Versamark ink on brown cardstock and heat embossed it with white embossing powder. I also stamped a variety of the leaves in Versamark ink on white cardstock and heat embossed the leaves with gold embossing powder. I used the Pumpkin Lacework dies to cut all the small images out before adhering them to the pumpkin using a Tombow adhesive runner.

    I stamped the “hello autumn” sentiment from the same Pumpkin Lacework stamp set in Versamark ink on white cardstock. I heat embossed the sentiment with gold embossing powder and used the coordinating die to cut the sentiment out. I adhered the sentiment to the left side of the pumpkin using 3M foam adhesive.

    I hope today’s card will inspire YOU to create some beautiful fall things! Thanks for visiting and have a wonderfully creative day.

  • Follow That Star | by Toni M Maddox

    Follow That Star | by Toni M Maddox

    Hello again! Toni here with you today. I was playing along with a card challenge and went ahead and expanded on that to create a couple more cards to post here as well.

    The challenge involved using 3 shades of blue so I sponged Distress Oxide Salty Tumbled Glass, Salty Ocean and Prize Ribbon onto the card base. I spattered that with water, Copic Opaque White and Peerless Silver Transparent Metallic liquid watercolor.

    I then added the BPD String Art Nativity Star cut from silver foil cardstock. Swoon! Btw, I used a wet wipe to remove some of the color around the star so it “glows.”

    Now I had part of the silver star leftover so I experimented with using the coverplate itself as a mask with my Copic airbrush (RV04, RV09, Y08). So dreamy! I love the unexpected holiday colors.

    Note I remove the spray from the coverplate with a bit of denatured alcohol (don’t know that the type matters; it’s just what we had on hand).

    And in another experiment, really more an attempt not to waste a diecut that got mangled when my electric diecutter went haywire, I used the star from BPD String Art Nativity Star over the BPD Dazzle Mini Frame Layer A cut from Memory Box Pastel Glitter Paper. Talk about a perfect fit.

    For the background on this one I used Lindy’s Magicals (Sassy Sapphire, Hydrangea Blue, Stormy Sky) ombre style with a spritz of Dylusions White Linen Spray on top for a nebula effect then another sprinkle of the Sassy Sapphire Magical. The shimmer and opalescence is amazing!

    I’m always amazed at how just a little sprinkling of powder becomes such a magical thing.

    I also used a bit too much of the darkest blue so blotted that off with a paper towel before spritzing with additional water and all that. A little powder goes a LONG way.

    Btw, I used my heat gun to dry this. If I had patiently waited for it to air dry, it likely would have maintained more of the speckled effect.

    I hope you were inspired by today’s creations. Have a great rest of your day!

    Supplies
  • Grunge Thanksgiving | By Toni M Maddox

    Grunge Thanksgiving | By Toni M Maddox

    Hello, everyone! Toni here with you. Today is my first post with Birch Press Design and I’m so excited to be joining the design team!! My style is eclectic so you never know what you’re going to get with me–grunge today, CAS tomorrow, and the next who knows!

    For today’s mixed media card I’m using the Delight Plates A & B. I cut the mandala from cardstock from the Memory Box Sunny Orange & Earth Neutral 6×6 pads.

    To create the background I sprinkled Brushos on Open Studio Watercolor Paper and lightly spritzed with water. After dry, I applied a light coat of gesso then more Brushos and water. I then spattered with a bit of Distress Crackling Campire paint, Distress Oxide Mustard Seed spray, Dylusions Black Marble Shimmer spray and a bit of Posca White Pigment Ink.

    To finish the card I added a sentiment from the Brush Sentiments set with Versafine Onyx Black. I also brush Clear Wink of Stella over the Delight layers–how could I not?!

    I’m so glad you stopped by today and hope you have a wonderful rest of your day!

    Supplies
  • Fall is in the Air | By Amanda Wilcox

    Fall is in the Air | By Amanda Wilcox

    Hello crafty friends! It’s Amanda from Twiddler’s Nook popping in with a festively, fun fall-themed card for you today. We got a little taste of fall at home this week and I’m so ready for pumpkins and leaves changing and all the things!

    I knew that I was using the awesome Autumn Breeze layering set so I started looking at what I wanted my layers to be. Since the bottom layer shows mostly leaves I did some ink smooshing on watercolor paper with a green tombow marker and lots of layering.

    Remember, if you heat your paper in bewteen layers, you will get those cool imperfections and lines. If it’s still wet, it just flows together smoothly. Both can be beautiful, it’s all about what you are trying to achieve.

    Then for my middle layer, I chose a plaid paper from the Memory Box Madras Plaid paper pad. I love the gold foil lines in this plaid paper. It’s just gorgeous!

    Next, I die cut the top layer from kraft cardstock and used a blending brush with brown dye ink to ink up all the pumpkin openings. It just gives it some depth and interest. I really love the effect it had on the whole card.

    Last, I pulled out the Pumpkin Lacework stamp set and stamped a sentiment on the same kraft cardstock with brown ink. Now it’s time to assemble everything!

    Sometime the watercolor paper can ripple so I heated up my laminator and ran it through a few times. This always helps flatten it out and makes it easier to adhere to other elements.

    I used liquid glue to adhere the layers together and to a white card base. Then I plopped a few acrylic blocks on top and left it to dry for a bit.

    Once they were dry, I added foam squares to the back of my sentiment and popped it in place on the lower right side. I really love these pumpkins so I chose a space that would cover up the least of those.

    I hope you enjoyed today’s card and found some inspiration to create something wonderful!

    I appreciate you sharing your time with me. Have a fabulous day!

    Supplies
  • Sending Rainbow Wishes | By Amanda Wilcox

    Sending Rainbow Wishes | By Amanda Wilcox

    Happy Saturday everyone! It’s Amanda from Twiddler’s Nook popping in today. I hope your day is starting off splendidly! I have been itching to watercolor this gorgeous rainbow image since it released and I finally made it happen.

    To create my card today, I started by pulling my stamps out and playing around with images and sentiments. I found that the rainbow and clouds from Rainbow Days Lingo Notes worked fabulous with the extra large sentiments in the Happy Lingo set!

    I stamped and heat embossed the images on Bristol smooth cardstock with clear embossing powder. Then I watercolored them with Zig Clean Color Real Brush markers and a water brush pen.

    I used the coordinating dies to cut the images out and moved on to my background. For that I blended distress oxide ink in tumbled glass and mermaid lagoon on a white panel. I spritzed it with water and flicked some pearl watercolor on it.

    When I ink blend I tend to use a larger panel so I can choose how to cut it down. After everything was dry, I trimmed it down to A2 size and adhered it to a white card base.

    I added foam squares to the back of my rainbow and some clouds and adhered them to the background. Then I added the HUGS sentiment the same way. I adhered the clouds in the background with liquid glue next.

    At that point I thought there was something missing so I took a look at the sentiments in the Rainbow Days Lingo Notes and was so excited to see “sending rainbow wishes!” I stamped and heat embossed it on a strip of black cardstock and adhered it with a foam strip.

    I love adding general purpose cards to my stash and this one will be amazing for a huge variety of occasions, or just because, which is my very favorite to send!

    I appreciate you sharing your time with me. Have a fabulous day!

    Supplies
  • Sending Rainbow Wishes | by Crystal Komara

    Sending Rainbow Wishes | by Crystal Komara

    Hello crafty readers! This is Crystal here with you today sharing a colorful card using the Dahlia Heart Layering Dies and some fun rainbow colored paper.

    Card details:

    The base of this A2 sized card is made from 80 lb. Neenah Solar White Smooth cardstock. For the first 5 1/4″ x 4″ paper, I dry embossed a piece of white cardstock using a basket weave embossing folder. I adhered this embossed paper directly to the card base.

    To create the two hearts, I die cut Layer A (the top layer) of the Dahlia Heart Layering Dies from white cardstock. I die cut two of these pieces as I have two hearts. I layered the Dahlia Heart outline over some scrap pieces of rainbow paper and fussy cut around the hearts:

    I adhered the two hearts to the card using 3M foam adhesive for added dimension. Lastly, I stamped the sentiment “sending rainbow wishes” in Tuxedo Memento Black ink. This sentiment is from the Rainbow Days Lingo stamp set. I adhered the sentiment to the front of both heart using a Tombow adhesive runner.

    I hope you have enjoyed this cheerful card. Thanks for visiting and have a wonderfully creative day!

    Supplies
  • Missing You | by Tracey McNeely

    Missing You | by Tracey McNeely

    Hi There, it’s Tracey back today with a couple of cards that are perfect to send out to someone that you have been missing throughout the pandemic!

    I began by cutting two each of the Tranquility Layers die set using white heavyweight cardstock. I usually save this cardstock for my card bases. However when I want the main die cut image or sentiment to really stand out I do use the heavier weight cardstock.

    I cut one die from the Tranquility Layers die set through a 5 1/2″ x 4 1/4″ panel of white cardstock. Then I taped the panel to another panel of the same size with low tack tape. This creates a well for the die cuts for blending colour on to them.

    I glued each layer together before I added colour to them, I usually do the gluing after but I am trying something different. Starting with Layer A, the one with the largest openings, I set the die cut into the well so that it doesn’t move around while I blend colour on to it. I kept the centre in place when blending my colours. You could do the centres in a completely different colour but for today I am treating it as a whole. I started with a very light hand blending a rainbow of pink, red, peach, yellow and green on a diagonal. I used Distress Oxide inks.

    Next I moved Layer B into the well and did the same colours this time putting more colour down but still not heavy handed.

    Finally I put Layer C into the well, this is the die cut that has the smallest size of holes. I used the same colours but I put these on with a heavy hand to really show the depth of the colours.

    This is what my stencil well looked like after blending. then after I removed the top panel! To pretty to toss away. Can you see that while I was blending over the layers that it created another image on the bottom panel under the well. We will get to that later on. I will set it aside for now.

    To finish out this card I glued the three thick layers together and the results are gorgeous. The double thick die cuts add so much more dimension. Thanks Jennifer McGuire for the tip!

    I cut a 5 1/4″ x 4 1/4″ panel using Radial Pinpoint cover die as a background for my mandala. Next I cut the Hello Honey Script die three times with heavyweight while cardstock and glued it together. I did not use the shadow, only the word. This will sit in the centre of the mandala. Before gluing everything down I stamped the sentiment “I miss seeing you’ from the Brush Sentiments clear stamp set on the bottom right corner of the Radial Pinpoint cover die. I added a few Pastel Fairy Jewels to finish it off.

    I didn’t think I was going to use the panel that underneath my well, but it was too pretty not to use. what happened next was an embossing mistake I think all of us have made at one time or another. I had my plates mixed up in my sandwich and instead of embossing over the image I cut it with the Layer A die and all the teeny tiny pieces! I was too far into it now to back out, so I put a piece of double sided adhesive paper on to the back of the die cut to pick all the pieces up together. That worked great but now the front of my die cut was surrounded by adhesive. Out came the scissors and I fussy cut around the outside of the die to get rid of it. Then I put the mandala onto a panel of cardstock that was a bit smaller than the card base, added a sentiment also from the Brush Sentiments clear stamp set and added some Bright Fairy Jewels.

    So the process yielded two beautiful and yet similar cards. Thank you so much for joining me today and crafting with me. Have a fabulous day.

    Supplies
  • All the Happiness | by Crystal Komara

    All the Happiness | by Crystal Komara

    Hello friends and happy Monday! Welcome back from the weekend. This is Crystal here with you and I’m excited to be sharing STAMPED projects with you today and not the usual beautiful layering dies that Birch Press Design is known for. Do you even know that Birch Press Design also sells stamps?! Surprise, they do!

    Card details:

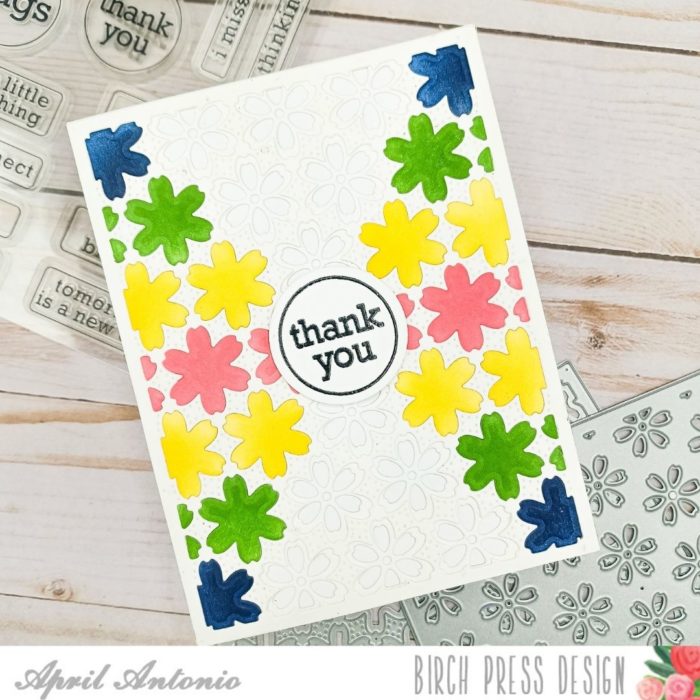
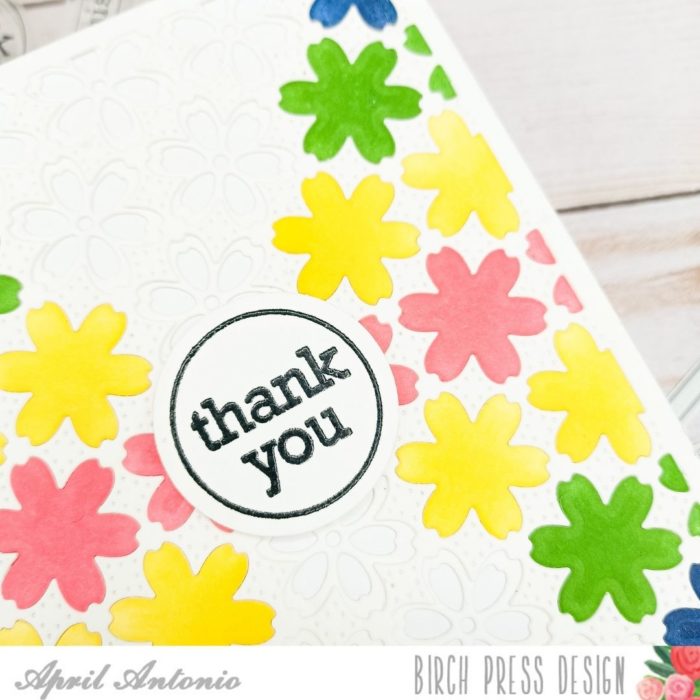
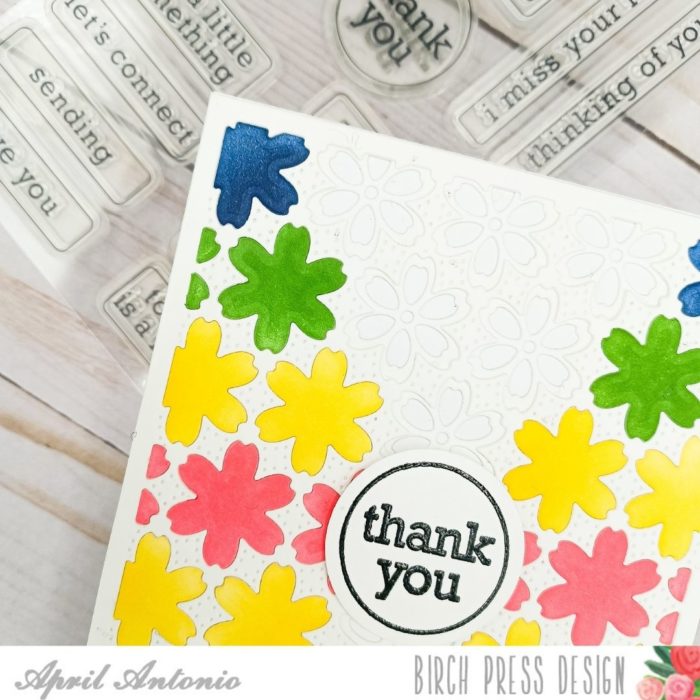
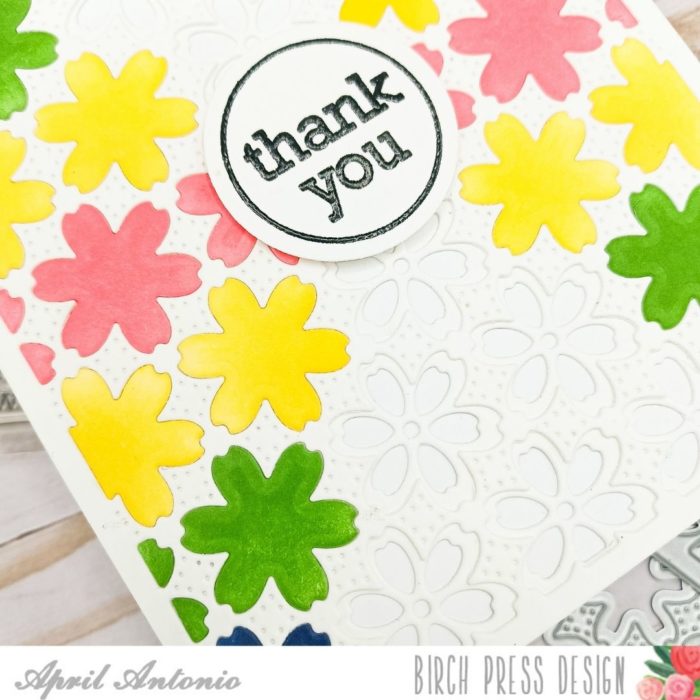
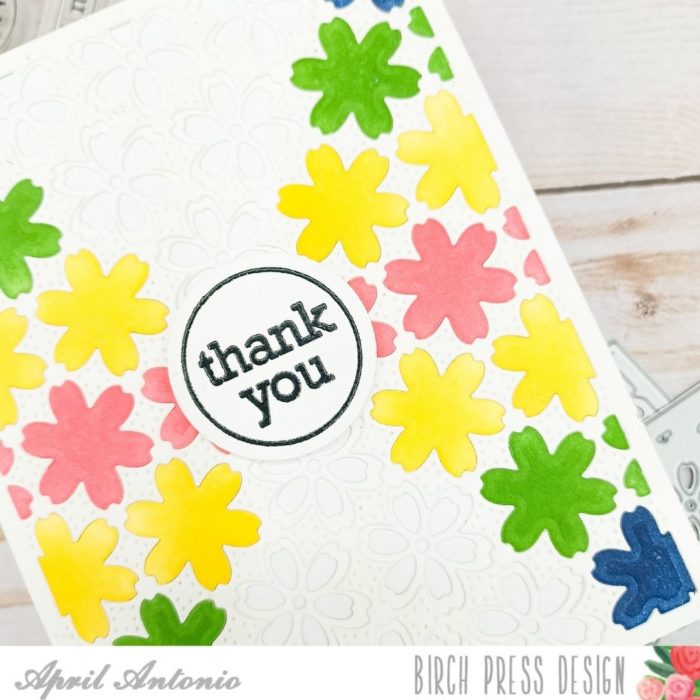
    The base of this A2 sized card is made from 80 lb. Neenah Solar White Smooth cardstock. This is my go-to white cardstock for everything. Using the Delfina Layer A die, I die cut the lattice background from white cardstock. I adhered this directly to the card base. I stamped the flowers from the All the Happiness stamp set in Versamark ink on Distress Watercolor cardstock and heat embossed the image with gold embossing powder. I then watercolored the flowers using Zig Clean Color Real Brush markers in Scarlett Red, Bright Yellow, Persian Blue, Pale Green and Light Green.

    Once the watercolor was dry, I die cut the image using the coordinating All the Happiness dies. I adhered the flowers in the lower right corner of the card using 3M foam adhesive. I stamped the sentiment “celebrate today” from the Classic Sentimental Wreath stamp set. I punched the sentiment out using a label punch and adhered it to the card with 3M foam adhesive.

    I also created a second card using the same stamp set and watercolor colors:

    The base of this A2 sized card is made from 80 lb. Neenah Solar White Smooth cardstock. Using Layer A from the Delfina Layering Dies, I die cut the lattice background from white cardstock. I adhered the lattice background directly to the card. I stamped the flowers from the All the Happiness stamp set in Versamark ink on Distress Watercolor cardstock. I heat embossed the image with gold embossing powder and then I watercolored the image using Zig Clean Color Real Brush markers (the same colors are listed above).

    I die cut the flowers using the coordinating die and adhered the flowers to the card using 3M foam adhesive. I stamped the sentiment “celebrate today” from the Classic Sentimental Wreath stamp set in blue ink on white cardstock. I punched the sentiment out with a 2″ circle punch. I also adhered the punch to the card using 3M foam adhesive.

    I hope you have enjoyed seeing products OTHER than dies that Birch Press Design has to offer. Thanks for visiting and have a wonderfully creative day!

    Supplies

  • The Best Things In Life | By Amanda Wilcox

    The Best Things In Life | By Amanda Wilcox

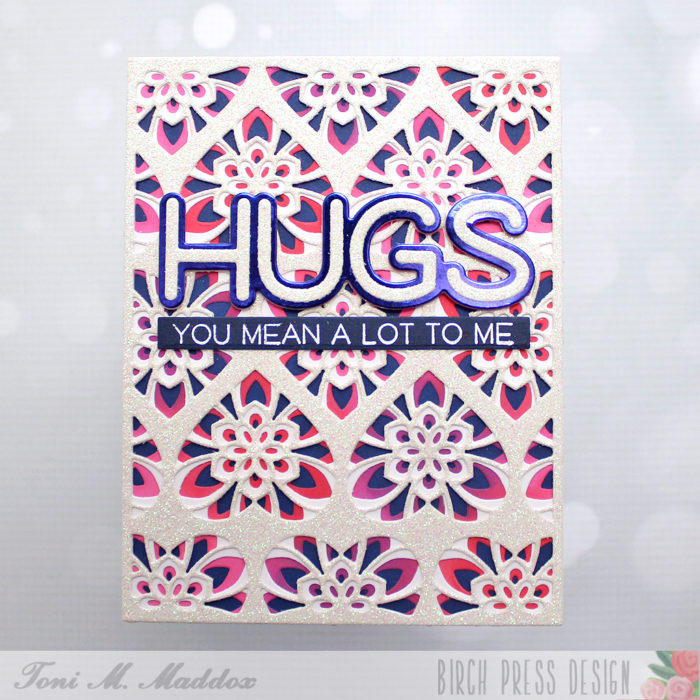
    Welcome everyone! It’s Amanda from Twiddler’s Nook stopping by today with this beautiful Arista Layering card featuring some simple ink blending to get a custom look.

    To start my card, I die cut all three layers from the Arista layering set from white cardstock. Then I chose 3 dye inks and the coordinating blending brushes to ink them up with.

    Next, I took a white panel measuring 4×5.25 inches and inked it up with different colors at an angle, from one corner fading out. Then I smooshed the ink pad on my glass mat, spritzed it with water and used a paintbrush to flick color across the panel. That wasn’t giving the amount of impact I wanted so I came back in with gold watercolor and boy am I glad I did! The shimmer and texture this gives is fabulous!

    I chose a sentiment from the Sentimental Wreath stamp set and stamped it in the lower right corner of my inked panel.

    Then I used liquid glue to adhere the Arista layers together and then onto my panel. I covered it with a clear block for a few minutes while it dried and then trimmed of anything hanging over the edge.

    I added foam tape to the back of the panel and placed it on a white card base. Then I finished the card off with one green gem from the fairy jewels pack.

    The Arista layering dies might be one of my very favorite sets! It’s just beautiful and I haven’t seen it used in a way that didn’t look amazing!
    I hope you found some inspiration today to create something wonderful and share it with someone.

    Thank you for sharing your time with me. Have a fabulous day!

    Supplies