Category: Stamps

  • Brushed Birthday | By Tracey McNeely

    Brushed Birthday | By Tracey McNeely

    tracey_brushed
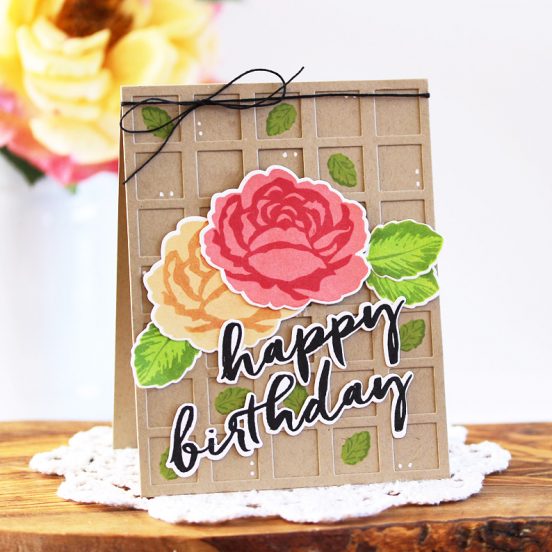
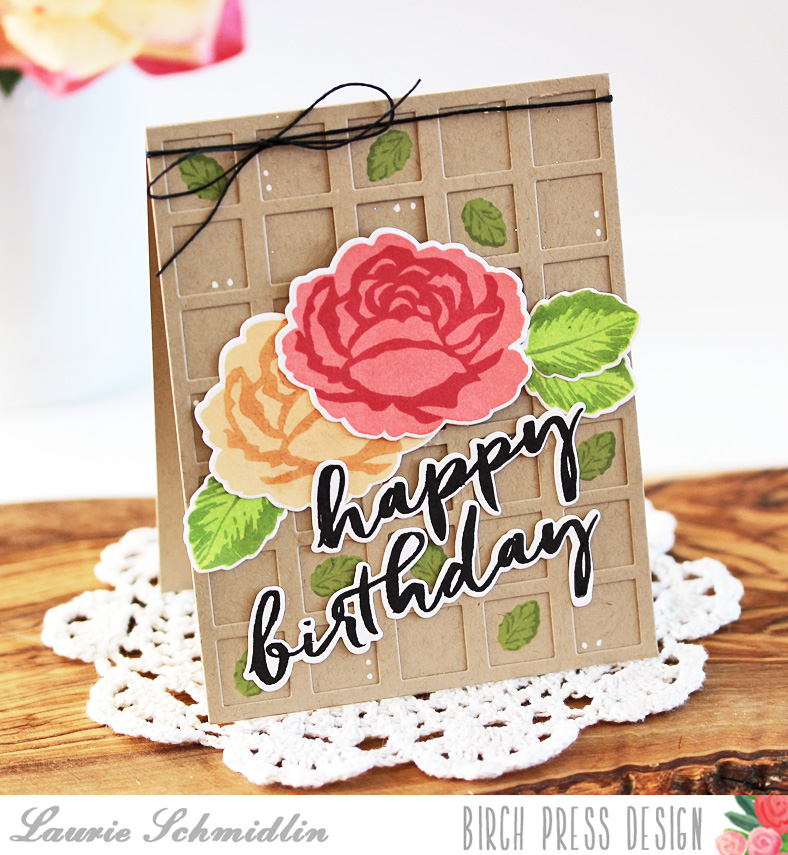
    Another look at a new stamp and die set from the Birch Press Design store. There are so many stamps and dies that are perfect for holiday crafting but also for everyday crafting. The Brushed Birthday Greetings stamp set is one set that can be used all year round and perfect that there is a set of co-ordinating dies also available. The large rose image is a 2-step image that gives the bloom depth and dimension.
    tracey_fullcard
    To recreate this card the first thing you will need to do is orient yourself with the two layers and how to position the top detail layer correctly. Start by choosing two ink colors and stamp the base flower in the lighter of the two shades as seen in the image below.
    tracey_brushedbase
    The following image shows the five points you will want to line up to add the detail layer in the darker of the two inks. Once you line the stamp up you will get a perfect placement each time.
    tracey_brushedx
    tracey_sidebyside
    The layered leaves are easy to line up as the base images and the detail layer are basically the same shape. Line the detail layer up at the top of the stem where it meets the leaf. Next stamp and die cut the ‘Happy’ and ‘Birthday’ sentiments. All the dies are open window dies which makes die cutting easy as you just place the dies over the images. Secure the dies with some low tac tape and run it through your die cutting machine.

    The background panel was watercolored on watercolor paper with Distress Ink.  Adhere the sentiments to the panel and then stamp the ‘TO YOU’ directly onto the panel nestled into the sentiment. The flower is adhered with double sided adhesive foam tape. Add some adhesive to the backs of the leaves and tuck them in behind the flowers. The completed watercolor panel was adhered to the card base with more double sided adhesive foam tape for added dimension. Finish the scene off by adding a few carefully placed clear sequins.
    tracey_closeupangle
    It is easy to create a beautiful card with just this one stamp and die set.
    tracey_sideview
    Thanks for joining us again this week! We hope to see you again next Tuesday for more crafting inspiration!
    _tracey-signature


    Save

    Save

    Save

    Save

    Save


    Save

    Save

    Save

    Save

    Save

    Save

  • Warmest Wishes | By Laurie Schmidlin

    Warmest Wishes | By Laurie Schmidlin

    warmest-wishes-detail-2-by-laurie-schmidlin
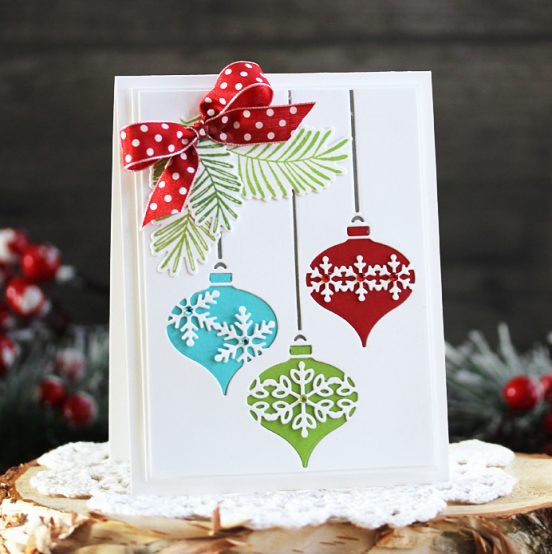
    One of my favorite tricks to cut down on the Holiday rush (and subsequent stress) is to prepare early!  I usually start my Christmas cards in September, making several different kinds each month making sure to finish by the end of November.  I love that there are so many different Holiday stamp sets and dies in the Birch Press store, making my goal of getting a head start on Holiday crafting so easy!

    warmest-wishes-by-laurie-schmidlin
    I wanted to create a card that is both lovely with a layered look as well as easy to mass produce.  I started by die cutting the Delfina c Craft Die.  You could use this die cut and layer it on your card for a very easy and elegant background.  I wanted just a bit more texture on my card, so I used that die cut as a stencil.  This is such a great way to get more use out of these wonderful background dies!

    delfina-stencil
    I placed the die cut over a piece of light blue cardstock and gently secured the edges with removable tape.  Using white texture paste, I filled in all of the negative space.  I then gently lifted the die cut up from my cardstock and then set it aside to dry.
    warmest-wishes-detail-1-by-laurie-schmidlin

    For the focal images and sentiment, I used the Brushed Christmas Greetings clear stamp set and coordinating Brushed Christmas Greetings die set.  I embossed the sentiment on a strip of vellum.  I really love the way the bold, modern script looks in white!  To create the foliage, I stamped and die cut the largest sprig twice and the medium sized sprig once.  I tucked the stamped and die cut foliage into the top of of the vellum strip.  For the final touch, I added a stamped a die cut berry cluster.  I think the little pop of red sets off the pastel colors perfectly!

    Thanks so much for stopping by!  Please join us next Tuesday for some more paper crafting inspiration!

    bpd_laurie-signature

    Save

    Save

    Save

    Save

  • Delicate Peony | by Jeanne Jachna

    Delicate Peony | by Jeanne Jachna

    Birthday Peony FourIf you’re a paper crafter you’re going to love all the latest additions to the craft section of the store.  There’s lots of new dies and stamp sets perfect for Holiday crafting!  There are a few for every day makes too including this Delicate Peony stamp set with coordinating dies.    This is a 3-step image that has lots of depth and dimension.
    Birthday Peony copy
    Making this card is fun and easy. The floral arrangements and colors are up to you, but first let’s look at the stamping.  You’ll need three shades of the same color ink.  Here’s a step by step reference to make it easy.
    Birthday Peony Step By StepThe first layer is of course the easiest.  Stamp it in your lightest shade of ink.
    Birthday Peony Step OneNext stamp the outline layer in the darkest color ink.    For me this was an easier way to define the different areas of the image making the last step (the shading) easier.   I used a Stamp-a-ma-jig to help line up the layers.
    Birthday Peony Step By StepFor the shading detail use your middle shade of ink.  Placement of this stamp should be easy using the outline as a reference for stamp placement.
    Birthday Peony Step ThreeA beautiful bloom right?  The dies for the set are all open window dies so they are easy to line up over the image.  Just tape the die in place and run it through your die cut machine.
    Birthday Peony SixI stamped the bitty flower (also a 3 step image) on a sheet of white card stock several times to create a background for my card.  Next I stamped and die cut the flower, leaves and “Happy Birthday” sentiment  and adhered them to the card.  To add dimension I adhered the flower and leaves with adhesive foam tape.
    Birthday Peony FiveThe sentiment is a fun script – very clean and contemporary!
    Birthday Peony Two copy
    Thanks for stopping by!  I hope you’ll join us every Tuesday for more craft inspiration from our design team!
    Jeanne-Signature


  • Introducing Birch Press Design Team

    Introducing Birch Press Design Team

    The craft section of the store is growing!  Have you seen all the latest additions?  There’s lots of amazing detailed dies and stamp sets to choose from perfect for Holiday card making and layouts!  We’ve added a new design team too and we’ll be featuring craft projects from them every Tuesday here on the blog!  We hope you’ll be inspired to create a little magic of your own.
    Birch Press Design Team Badge
    We’re so excited to announce the new team!

    AngelAngel Rivera

    Hi, my name is Angel Rivera. I’ve been a card maker since 2006 but started scrap booking before that, back when it was all about the stickers and decorative-edged scissors! Lol!  I live in Oklahoma with my hubby of almost 22 years and our 3 boys (18, 15 and 13).  I also work full time, so crafting helps keep me sane with such a busy household!  I couldn’t be more excited to be a part of the Birch Press Design team!

    Laurie - Winter2015copyLaurie Schmidlin

    Hi!  I’m Laurie, a wife to my Swiss husband, mother to our five children, and lover of all things crafty!  We live on a cattle ranch in rural Montana, an hour away from the nearest small town.  When I am not in my craft room, you will most likely find me spending time with my family, enjoying the gorgeous Montana “Big Sky”, hiking, riding horses, helping out on the ranch, or with my nose buried in a book.  I was introduced to the world of card making and stamping about 20 years ago and I have been smitten ever since!  I am absolutely thrilled to be a part of the Birch Press design team and can’t wait to share my creations with you!

    Tracey
    Tracey McNeely

    Hi, I’m Tracey McNeely! I’m a Canadian girl that lives in the beautiful Muskoka’s of Ontario . I taught high school for 18 years before my MS made it too difficult for me to continue, so I left my job and became a stay at home mom . I have been married to my high school sweetheart for 25 years  and we have two fabulous kids Ben who is 21 and Brooklyn, 19. We are empty nesters now as both kids are away at University. I have always enjoyed crafts and I have been making handmade cards and scrapbooking since I was in my teens. My craft of choice now is playing with paper, stamps and dies! I am so excited to start my journey with the new Birch Press Design Team and I hope that I am able to inspire you to try something new along the way.

    Bio-Pic
    Jeanne Jachna

    Hi! I’m Jeanne!  I’m a married, stay at home mom of two young adults and one very active Akita puppy.  I live in Northwest Indiana near Chicago.  I like to read, garden, and cook, but I have been completely captivated with paper crafting.  I can’t resist a new set of stamps, dies for every occasion, bling and colorful inks and paper!  My time crafting is a sweet escape and a fun way to express myself.  I’m so excited to share my creations with you!