Category: Stamps

  • A Country Christmas / by Colleen Balija

    A Country Christmas / by Colleen Balija

    Hi everyone, this is my first blog post with Birch Press Designs, and I just couldn’t be any more excited! I hope that you will enjoy my cards and find inspiration to create your own version! This card reminds me of A Country Christmas with the ever-so popular black and white gingham and pastel colors. Let’s get started on how I was inspired to create this holiday delight!

    The first step was to choose my colors. I always choose colors first because it inspires the rest of the card when I take this first step. Recently I was shopping at a craft store and saw beautiful holiday table wear in black and white. I took a picture of it so that I would remember to use those colors on my next card, which turns out to be this one!

    Once my colors were selected, I chose my Birch Press Design elements to use, which were the Herbarium Layering Plates (A only) and the Holly Wreath Layering Plates. Since most of the card was going to be in black and white, I wanted the wreath to pop with a bit of color, so I used pastel shades of green, coral, and black from the Memory Box Vintage Pastel patterned paper pack. I also grabbed a black and white gingham ribbon that I had on hand and a few embellishments. Now that I had inspiration and all my design elements ready, it was time to put everything together!

    Step one was to create the background. Starting with a 5.5×4.25 white card panel, I die cut Layer A from Herbarium Layering Plates, punched out the positive pieces, and adhered it using liquid glue to a 5.5×4.25 white card base. NOTE: I use liquid glue because it gives me a little wiggle room to place my design element where I want it before it adheres permanently! When my background was finished, I set it aside to work on the wreath.

    Next step was to die the 3 layers from Holly Wreath Layering Plates using the pastel paper I had set aside earlier. The darkest color (black) was the bottom layer. I find that going from dark to light helps to add dimension because the darkest colors look furthest away from your eyes. When I was finished die cutting all 3 layers, I placed the die cuts over the images on the packaging to guide me in aligning all the layers properly. And once again, I used liquid glue to help me adhere each layer perfectly! Then I glued my finished holly wreath over the background panel I created earlier.

    Next, it was time to work on my sentiment. As you can see in the photo below, the word “Noel” is placed over the wreath! There’s a secret to helping these little guys stand out from the wreath – read on to find out!

    Using Mod Alphabet die set and Felicity Snowflake, I die cut the word Noel, minus the ‘o’, in black and pastel green. I did the same for one of the larger and rounder snowflakes. I adhered foam tape onto the back of each letter and snowflake to help it stand out from the wreath, and then I adhered it to the top of the wreath. And by the way, that’s my secret to helping the sentiment pop off the page! Foam tape is a miracle worker because it lifts the image off the page. Going back to the sentiment, the snowflake replaced the letter ‘o’ because it looks like an ‘o’. These are the details that take your card from average to WOW!

    Next, I added the Merry Christmas sentiment to the middle of the wreath using Contempo Christmas Greetings stamp and coordinating die set. I created a bow using the gingham black and white ribbon and adhered that to the bottom of the wreath, trimming the ends at an angle. I finished with embellishments that look like red berries!

    This card was so much fun to create, and I just adore the black and white touches to it! Black and white is a color combo that can never go wrong. Start with that and then add your pop of color to your own card! Thanks so much for joining me today!

    Supplies

  • Be Merry | by Crystal Komara

    Be Merry | by Crystal Komara

    Hello friends! This is Design Team member Crystal Komara here with you today sharing more holiday themed inspiration using products from the latest Birch Press Design Release. Birch Press Design never ceases to amaze me with its elegant layering dies, contour dies and foil plates. Some of my most loved cards have been as a result of these gorgeous and elevated products.

    Card details:

    The base of this A2 sized card is made from 80 lb. Neenah Solar White Smooth cardstock. I cut a 5 1/4″ x 4″ piece of navy cardstock from the 6″ x 6″ Ocean Blue paper pack. Using my Gemini Foilpress machine and the String Art Hot Foil Frame, I heat foiled a cerulean blue foil onto the navy cardstock. I know that it kind of looks like silver foil in these photos, but it is ever-so-slightly more blue tinted in person.

    Using the Snowy Circle Layer Set, I created the center focal piece. I die cut Layer C (bottom layer) from navy cardstock. I die cut Layer B (middle layer) from a sky blue cardstock. I die cut Layer A (top layer) from white cardstock. Again, I used cardstock from the 6″ x 6″ Ocean Blues paper pack. I used a fine-tip liquid adhesive to adhere all three layers together and then I lined the back of the three layers with a solid sheet of white cardstock. I adhered the entire Snowy Circle image to the center of the card using 3M foam adhesive.

    Lastly, I stamped the sentiment “be merry’ in navy ink on white cardstock. This sentiment is from the Contempo Christmas Greetings stamp set. I used the coordinating circle die to die cut the sentiment out. I adhered the sentiment to the lower right side of the snowflakes with 3M foam adhesive.

    I hope you have enjoyed today’s card. Thank you for visiting and have a wonderfully creative day!

    Supplies

  • Tropical Sympathy | by Toni M Maddox

    Tropical Sympathy | by Toni M Maddox

    Hello, Birch Press fans! Toni here with you today sharing a rather non-traditional mixed media sympathy card.

    I cut out the leaves using the Memory Box Open Studio Tropical Leaves 3D Embossing Folder & Dies. Have you tried these before? Just amazing. Cutting the leaves out then embossing was super easy–look at these results!

    I added a touch of color to them using Distress Oxide Peacock Feathers and Carved Pumpkin.

    My entire idea for this card started with the Memory Box Open Studio Tropical Leaves 3D Embossing Folder. The leaf in the back reminded me of a feather so I used a gelli print I had pulled a few years ago (yes, years!) for which I had used Liquitex acrylic paints and a Feathers stencil by TCW.

    I embossed the large BPD Kind Hearts sentiment using a Wow! Embossing Pad and Ranger Detail Fine White Embossing Powder.

    I hope you enjoyed today’s card and have a great rest of your week!

    Supplies

  • Masculine Snowflake

    Masculine Snowflake

    Hello again, Birch Press friends! Allison here, and today I’m sharing a masculine holiday card. It seems like many of us often struggle when it comes to making masculine cards. My solution is usually to find a good plaid, or to pick some darker colors and go with a clean and simple design. In this case, I did both!

    I started with the gorgeous new Adornment Snowflake die. I cut the shadow/solid layer from gold foil card stock. I cut the detailed layer from a grayish-blue color (twice to give it a bit of dimension), and then I offset it when I adhered it to the gold layer so that it gave my snowflake twelve points instead of six. There are so many ways that you could adorn this snowflake, but I chose to keep it simple for this card.

    This plaid paper is so gorgeous – it has very thin gold foil stripes in the design. I cut the panel down so that I could leave a little margin of my Kraft card base showing, and then I glued the snowflake to the center. I only glued the center of the snowflake – that way, the points can lift up for dimension. I gold heat embossed the sentiment onto navy card stock and cut it out with the matching die.

    Thank you so much for joining us today. I hope this card inspires you and brings a smile to your face!

    Wishing you a crafty day,
    Allison


    Supplies


    Supplies

  • Holly Wreath | by Crystal Komara

    Holly Wreath | by Crystal Komara

    Hello crafty readers! This is Design Team member Crystal Komara here with you today sharing a holiday card with you featuring the beautiful new Holly Wreath Plate Layer set. But, there’s a lot more going on with this card than just a dimensional wreath, there is also a heat foiled background and heat embossed sentiment too, so read on for all the fun details!

    Card details:

    The base of this A2 sized card is made from 80 lb. Neenah Solar White Smooth cardstock. This is my go-to white cardstock for e-v-e-r-y-t-h-i-n-g! Using the Gilded Grace Hot Foil Plate, I foiled the first layer of the card. I use a Gemini Foilpress machine for my foiling. I used the Crafter’s Companion Foil Press paper in brass. I adhered this foiled layer directly to the card base.

    I did not foil the inner circle of the Gilded Grace Plate, so instead I stamped the sentiment “wishing you peace” in the center of the circle. Next, I created the wreath. I die cut Layer C (bottom layer) of the Holly Wreath from dark green cardstock. I die cut Layer B (middle layer) of the Holly Wreath Plate from green glitter cardstock. Finally, I cut Layer A (top layer) of the Holly Wreath Plate from light green cardstock. The green cardstock is from the 6″ x 6″ Lush Green paper pack and the 6″ x 6″ Glitzy Glitter paper pack. I adhered all three layers of the wreath together with a fine-tip liquid glue.

    I adhered the wreath to the center of the card using 3M foam adhesive for added dimension. I stamped the sentiment “joy” in Versamark ink on a piece of red cardstock. I heat embossed the sentiment with the Red Robin embossing powder from WOW! I used the coordinating circular die to die cut the sentiment out. The “joy” sentiment and die is from the Contempo Christmas Greetings stamp set and coordinating dies.

    Lastly, I adhered a small piece of gold ribbon underneath the “joy” circular sentiment. I also added a couple red rhinestones to the wreath to resemble berries.

    This card has it all – gold foil, sparkly glitter paper and heat embossing! It sparkles AND it shines!

    I hope you have enjoyed today’s card! You can visit me on my website, Instagram and YouTube! Thanks for visiting and have a wonderfully creative day!

    Supplies

  • Jolly Herbarium Layer Plate | by Crystal Komara

    Jolly Herbarium Layer Plate | by Crystal Komara

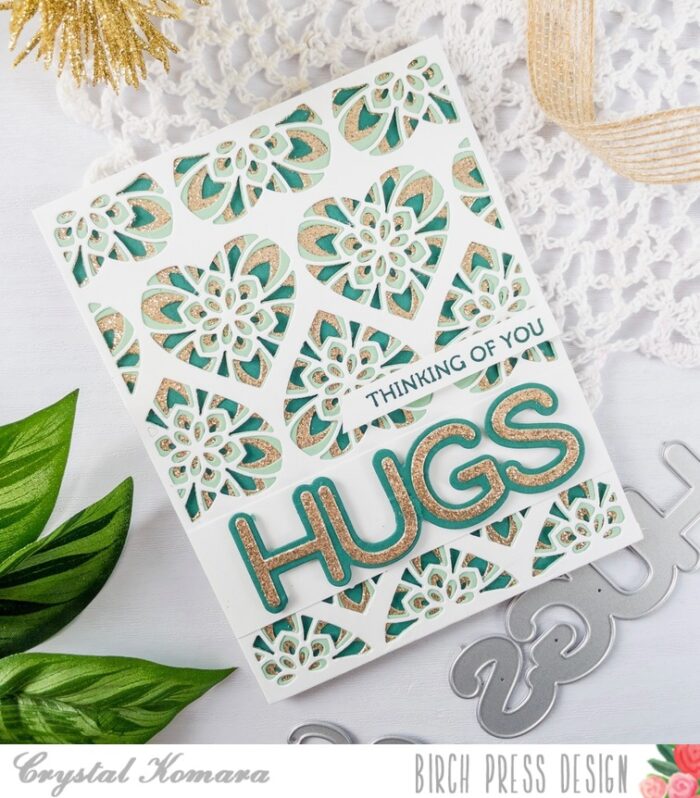
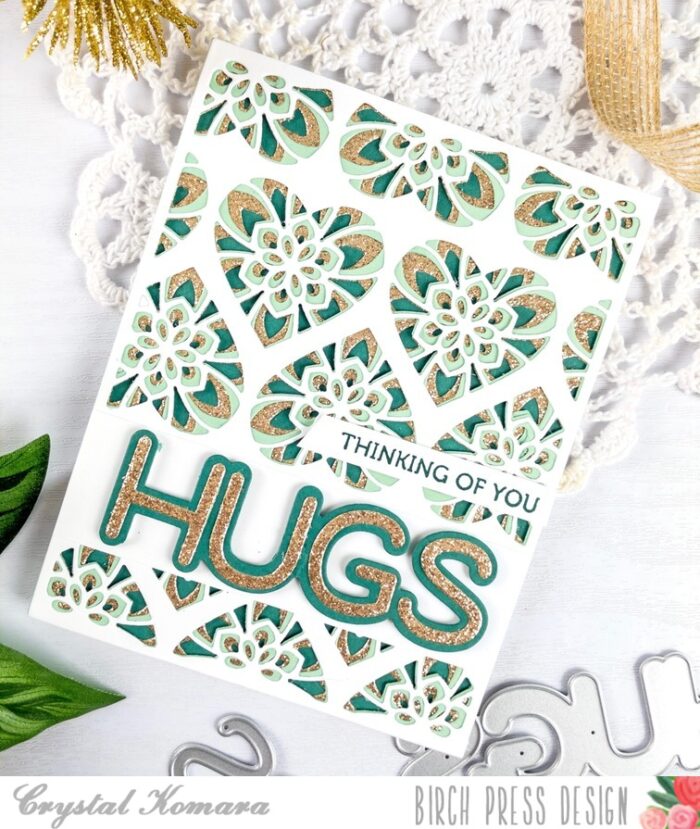
    Hello crafty readers! This is Design Team member Crystal Komara here with you today. I am so excited to be sharing a card made using the beautiful new Herbarium Layering Plates. This 3-piece full cover layering plate set is my favorite from this latest holiday release from Birch Press Design!

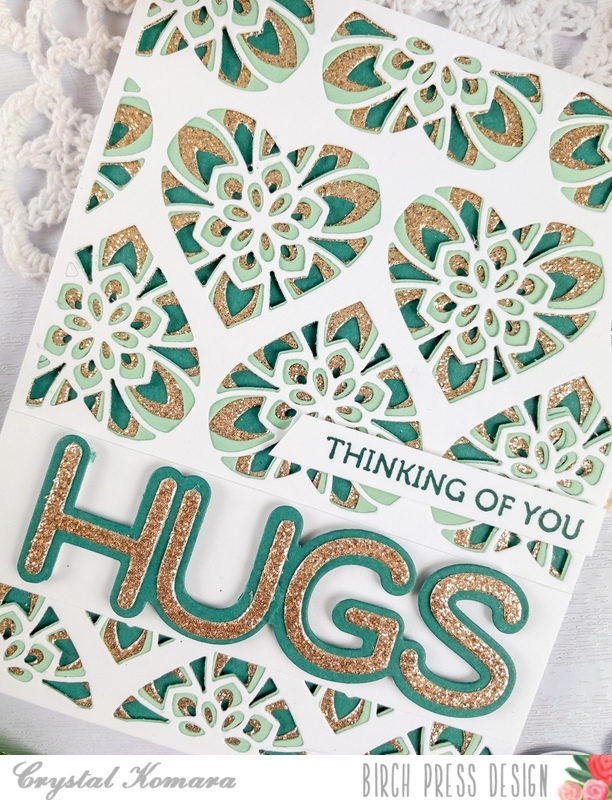
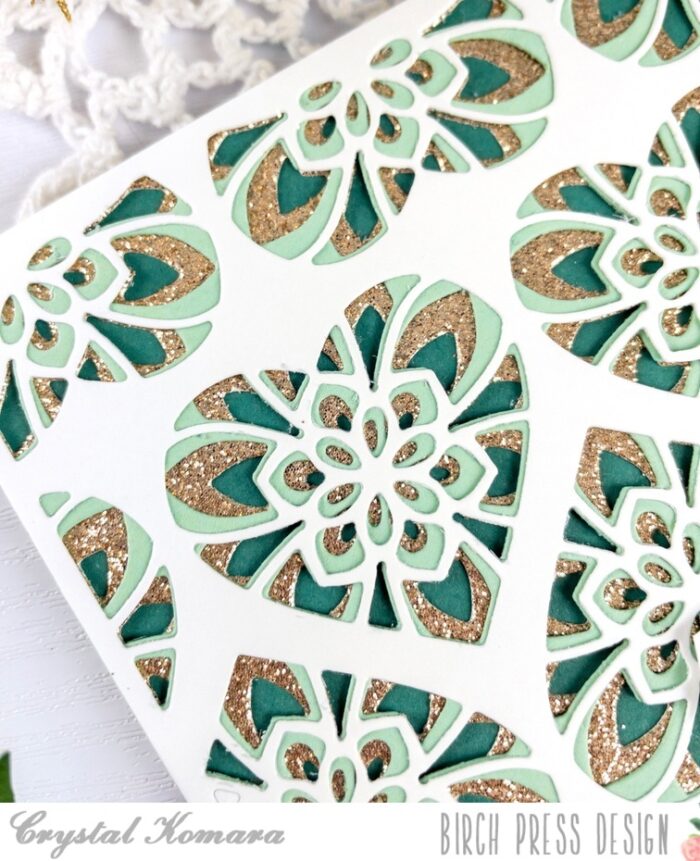
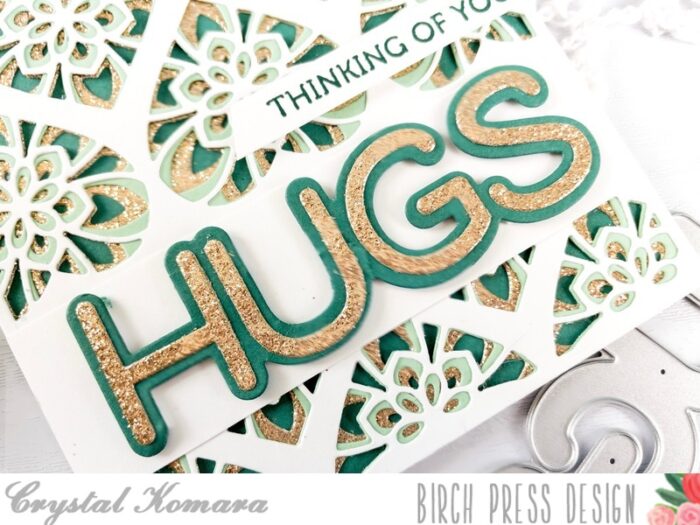
    Swoon! Honestly, it’s just gorgeous if I do say so myself! With a mixture of mint green and teal cardstocks with a splash of gold glitter paper in the sentiment, it’s just pure holiday elegance!

    Card details:

    The base of this A2 sized card is made from 80 lb. Neenah Solar White Smooth cardstock. I die cut Layer A of the Herbarium Layering Plate from white cardstock. I die cut Layer B from mint cardstock and Layer C from a darker teal green cardstock. These beautiful colors are from the 6″ x 6″ Fresh Aqua paper pack. I layered all three layers together with a fine-tip liquid glue. I placed the layers underneath a heavy book to let them dry well and dry flat.

    I die cut the word “jolly” from the Jolly Honey Script word die. I die cut the bottom shadow layer from the same darker teal green cardstock and the top outline layer from gold glitter cardstock. I adhered the two layers of the sentiment together and then adhered them to the card using Scotch 3M foam adhesive for added dimension. Lastly, I added a couple red rhinestones as the berries on the card.

    I really, really, love how this card came out. In fact, I know that I’ll be trying to recreate it in a variety of color combinations.

    Thanks for visiting and have a wonderfully creative day!

    Supplies

  • Fall Classic Sentimental Wreath | by Crystal Komara

    Fall Classic Sentimental Wreath | by Crystal Komara

    Hello Birch Press Design fans! This is DT member Crystal Komara here with you today sharing some fall themed cards using the Classic Sentimental Wreath stamp set and coordinating dies.

    I created all three of these A2 sized cards the exact same way, I simply alternated some of the background papers and ink colors. All of the beautiful plaid background papers are from the Madras Plaid Coral 6″ x 6″ paper pack from Memory Box Co, a sister-organization of Birch Press Design.

    The base of each A2 sized card was made from 80 lb. Neenah Solar White Smooth cardstock. I then cut a 5 1/4″ x 4″ piece of the plaid paper and adhered it directly to the card base. I die cut a rectangular piece of white cardstock and stamped my sentiment at the bottom in orange, brown or olive ink. All of the sentiments came from the same Classic Sentimental Wreath stamp set.

    I heat embossed the leaves of the wreath with gold embossing powder and then used the coordinating die to cut the wreath out. I adhered the wreath to the card using Scotch 3M adhesive for added dimension. I tied a little bit of gold baker’s twine to the corner of each wreath for added texture. Lastly, I added a couple clear rhinestones for sparkle.

    I hope you have enjoyed these cards and are inspired to create some of your own using this Classic Sentimental Wreath stamp set, or any of the other wonderful products from Birch Press Design!

    Thanks for visiting and have a wonderfully creative day!

    Supplies

  • Autumn Breeze Twist | by Crystal Komara

    Autumn Breeze Twist | by Crystal Komara

    Hello Birch Press Design readers! Happy September, and welcome to the beginning of fall, my favorite time of the year. This is Design Team member Crystal Komara here with you today sharing a unique way to use the Autumn Breeze Layer Plate.

    The base of this A2 sized card is made from 80 lb. Neenah Solar White Smooth cardstock. I cut a 5 1/4″ x 4″ piece of the same white cardstock and ran it through my Big Shot using the Memory Box Blooming 3D embossing folder. I adhered this to the card base. I cut a 5 1/2″ x 1″ strip of decorative Madras Plaid coral paper for the bottom of the card. I cut a 5 1/2″ x 1/2″ strip of gold glitter paper above the plaid paper for contrast.

    Using Layer Plate B of the Autumn Breeze Layering Plates, I ran the plate through my Big Shot multiple using white cardstock, burgundy cardstock, rust cardstock and the same Madras Coral plaid cardstock. Using the stitched leaf cutout pieces only, I adhered them in a line across the center of the card.

    I stamped the sentiment “you inspire kindness” in cherry ink on white cardstock. This stamp is from the Awesome Ticker Tape clear stamp set. I adhered the sentiment to the card using 3M foam adhesive for added dimension.

    Ooh, I just can’t wait to create more fall themed cards. I’m here for all the cozy sweater vibes and yes, even the PSL (pumpkin spiced lattes) too! ; )

    Thanks for visiting and have a wonderfully creative day!

    Supplies

  • More Monochrome | by Crystal Komara

    More Monochrome | by Crystal Komara

    Hello friends, this is Design Team member Crystal Komara back again for another monochomatic card! Apparently sticking to one color when creating seems to be “m.o.” : ) If you missed any of my monochromatic posts, please check out this trio of thank you cards, the Christmas mandala trees or these monochromatic torus rings (a personal favorite of mine)!

    What’s great about working with monochrome colors is that if blue isn’t your color, try recreating it in red, or purple or green. The options are endless!

    Card details:

    The base of this A2 sized card is made from 80 lb. Neenah Solar White smooth cardstock. I cut a 5 1/4″ x 4″ piece of the same white cardstock and ran it through my Big Shot using the Blooming 3D embossing folder from Memory Box. This embossed cardstock is the first layer of the card. I then used alternating pieces of cardstock from the 6″ x 6″ Ocean Blue paper pack. These strips measure 5 1/2″ x 1/4″. I used the same color cardstock to create the three layer Floral Star. I also added in a piece of glitter cardstock from the Twinkling Jewel Paper pack. I die cut Layer B from this glitter cardstock. I adhered all three layers of the Floral Star layering dies together with liquid glue.

    I took a chance and cut the finished Floral Star in half hoping to make it the focal point of the card. I stamped “hello” in turquoise ink on a thin white strip of cardstock and placed it between the two halves of the Floral Star. I think it pulled the two halves together more cohesively.

    I really like how this card came out, in fact, I think I’ll try it in a few other colors too!

    Thanks for visiting and have a wonderfully creative day!

    Supplies
  • Rainbow Gilded Grace

    Rainbow Gilded Grace

    Hello, Birch Press Friends! I am thrilled to be back with you today sharing a few of Birch Press Design’s new products. Are you ready for some sparkle and shine?

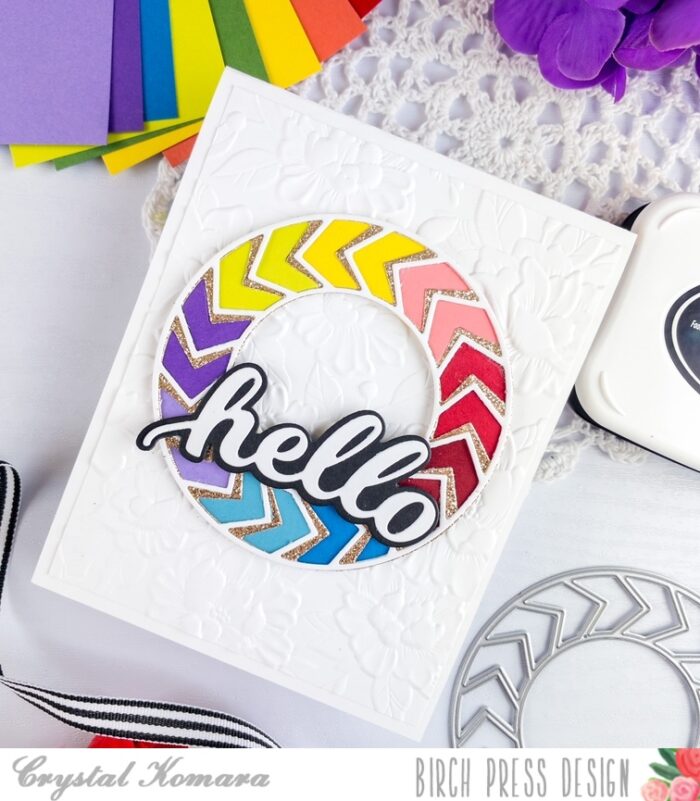
    I started with the gorgeous Gilded Grace Hot Foil Plate set. There are actually two plates in this set, along with a die that cuts the bigger circle. I foiled both plates onto smooth white card stock with gold foil using my hot foil machine. The results, even before coloring, are just gorgeous! But, there are matching stencil sets that help you color the design. There is one set of stencils for the “outside” design (what you see in blue and green on my card) and another set of stencils for the “inside” design (what you see in yellow and pink on my card). These stencils line up with the two different hot plates that come in the set. I used both for my card.

    I started by planning which colors would go where. I wanted a rainbow design, so working my way out, I determined that green and blue would be the “outside” colors. So, I used that stencil set to color the main panel. I did have to be a little careful towards the bottom when I was working on the two different colors, but it was fairly easy to keep them separate by using small blending brushes. I used three different shades of each color, as there are three layering stencils in each set.

    Before coloring the “inside” colors on the panel that I foiled the big circle on, I used a circle die to cut out the inner circle (where you see pink on my card). This made it easier to keep the pinks and yellows separate while ink blending. When I was finished ink blending the yellow piece, I also cut that out with a circle die. I was then able to give dimension to both of these circles by stacking additional circle dies behind them before glueing them onto the main panel. I just love the results of adding that dimension!

    I used some pink paper from the Vintage Pastel Mirror Pad to gold heat emboss the sentiment, which comes from the Rainbow Days Lingo Notes stamp set. I then cut it out with a small circle die and glued it to the center of the pink blended design. I finished the card by adding some fairy jewels in matching colors to tiny circles in the foiled design.

    Thank you so much for joining us today. I hope this card inspires you and brings a smile to your face!

    Wishing you a crafty day,
    Allison


    Supplies


    Supplies