Hello Birch Press Friends! I am super excited to be back today to share a holiday card with you using several AMAZING and beautiful new products from Birch Press Designs latest release! So let’s get started!

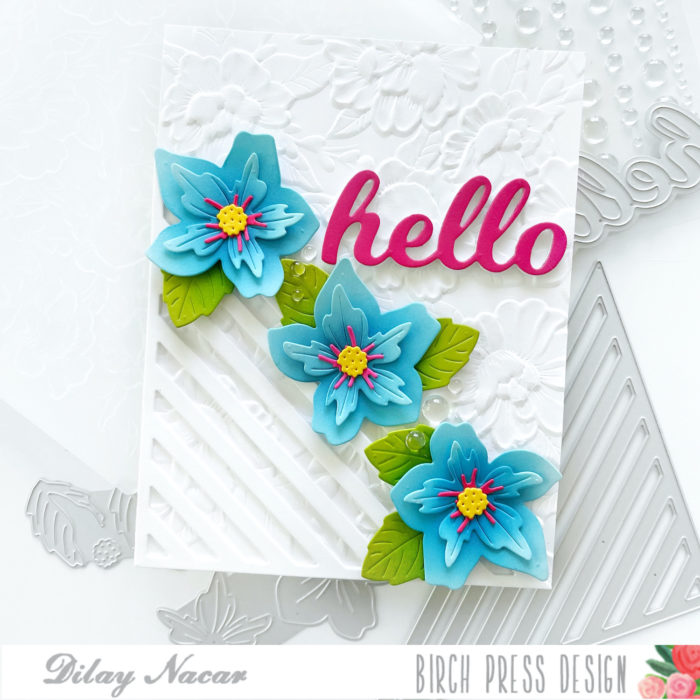
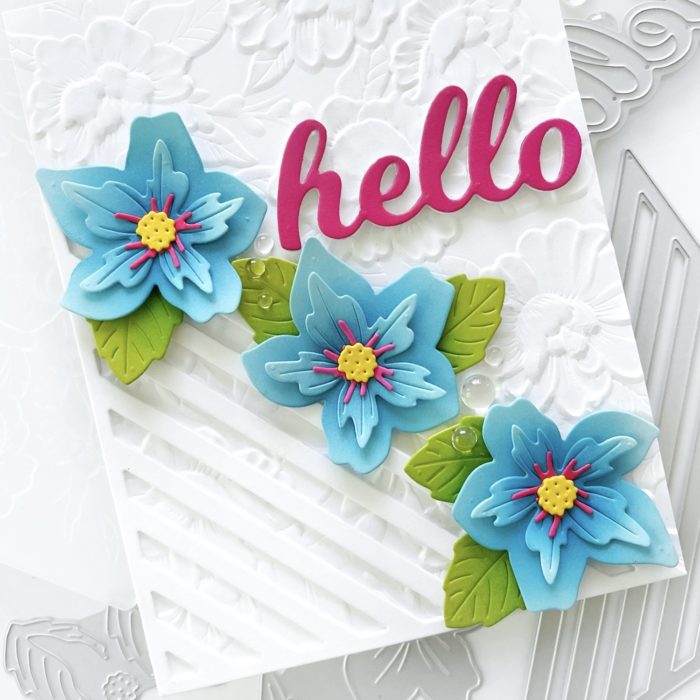
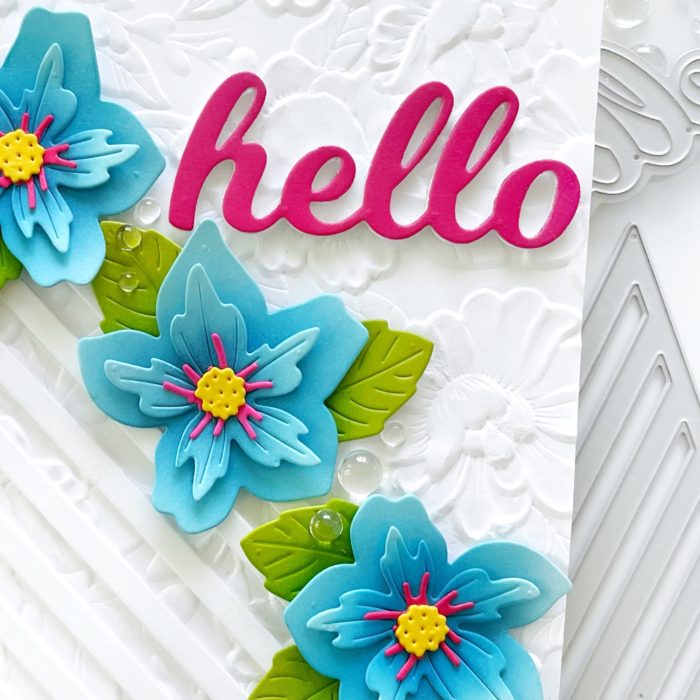
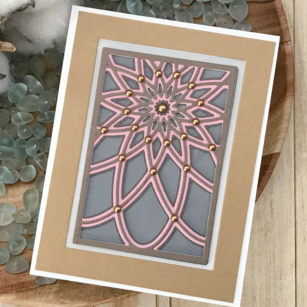
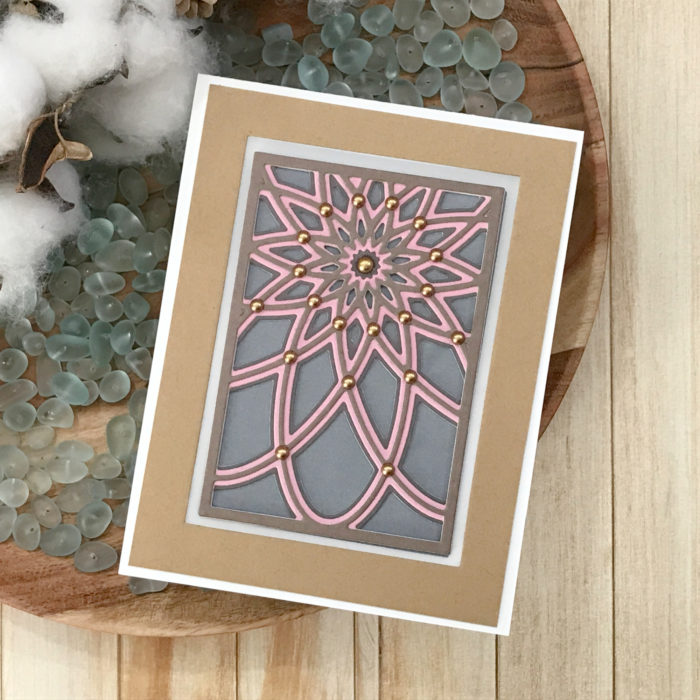
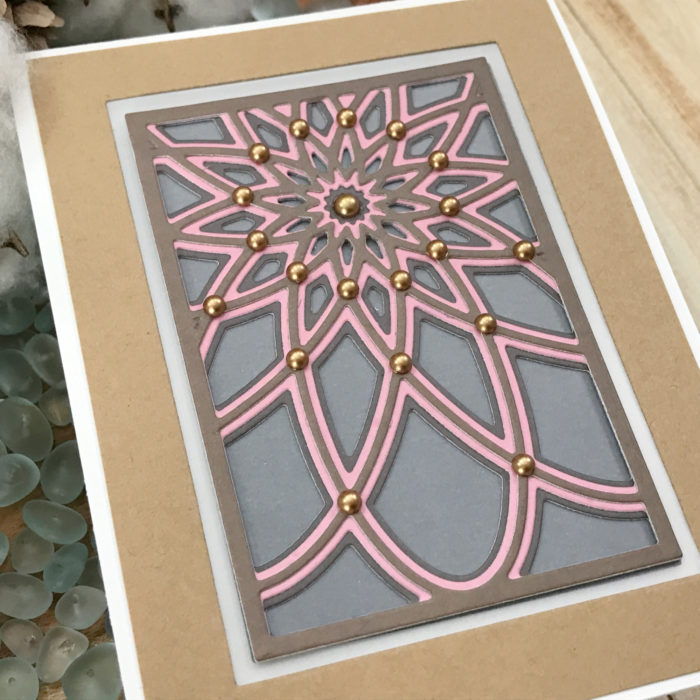
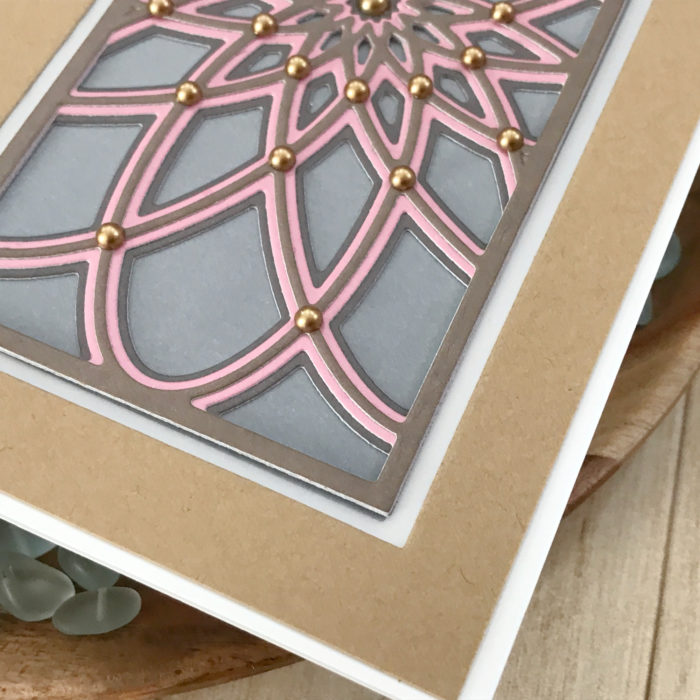
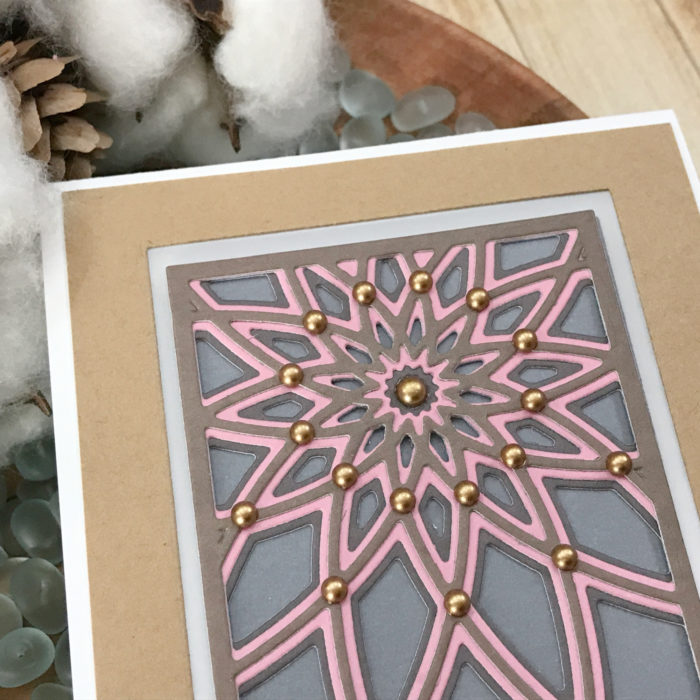
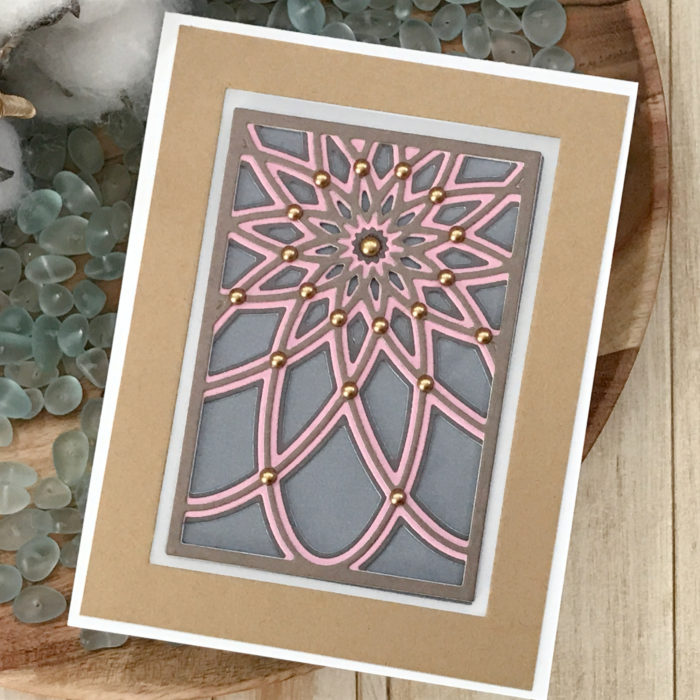
I had so much fun creating today’s card and couldn’t wait to create a sparkly holiday card using several new products! I started with the beautiful new Gilded Grace Hot Foil Plate and Die set! I used my hot foil system and followed the instructions per my machine. I foiled the Gilded Grace plate using a deep brown/gold foil. This foil/die set also has a middle circle you can foil/cut separately as well (I did not use this on today’s project). I wanted to mention this as this provides you with so many options with this set. Next I used the new coordinating/layering stencil. I used the Gilded Grace Outside Stencil set and chose 3 shades of blue ink. I started with the largest layer in the stencil set and the lightest shade of blue. I then continued with the next 2 stencils, using a medium shade and then my darkest shade last.

Once I had the background panel foiled and ink blended, I set this aside. For the middle of my panel I used the new Snowy Circle die set! This is a gorgeous 3 piece die set. I die cut the bottom layer using white card stock, the middle and top layer were die cut using the Memory Box Ocean Blue Collection paper pad. To add more texture on the middle layer I added some oxide inks to darken the middle layer a bit. Next I added embossing powder to both the middle and top layers. Once these layers were complete, I adhered them together using liquid glue. I then added foam tape to the back of the Snowy Circle layered set.

I then added a bit of ink blending to my center of the Gilded Grace background panel using Oxide Ink. Next I adhered the Snowy Circle onto the Gilded Grace panel with foam tape. To complete my card I chose the Handwritten Merry Christmas and Outline die set. I die cut the shadow layer using vellum and then die cut the inner script using white cardstock, as well as blue from the Ocean Blue paper pad collection (same blue as layer 2 in the Snowy Circle). I then adhered these layers together using liquid glue and added a bit of Foundry wax for added texture and interest. This completes my card today using several new products from the beautiful new release! Be sure to check out all of the beautiful new dies! I know you will love them!

Thanks so much for stopping by – I will be back next week!

Supplies