Hello everyone. It’s Amanda from Twiddler’s Nook sharing a card using some new goodies that are available in the shop!

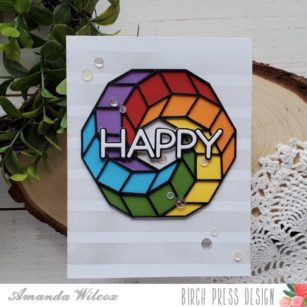
As soon as I saw this new Torus Ring, I just had to try it in rainbow before anything else. So I pulled out some cardstock and started cutting!

I cut the frame 3 times from black cardstock and the filler piece from 6 different rainbow colors of cardstock. I used my liquid glue to adhere all the frames together and put some clear blocks on top while it dried.

Then I took a white card base and the bold stripes stencil. I used a blending brush with some light gray ink for a subtle background.
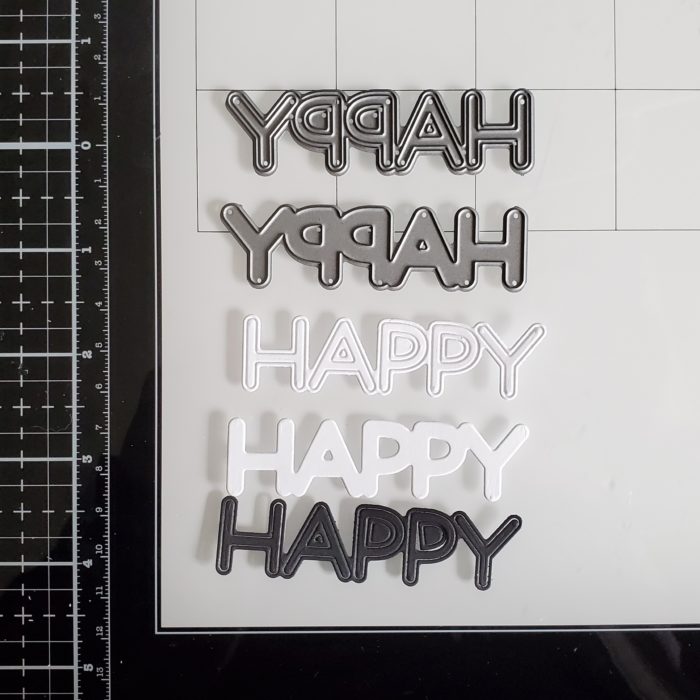
Next, I chose the Big Lingo Happy dies for a sentiment. I cut the shadow from white and then letters from white and black and used liquid glue to adhere all the pieces. I used the outline from the black and the actual letter pieces from the white.
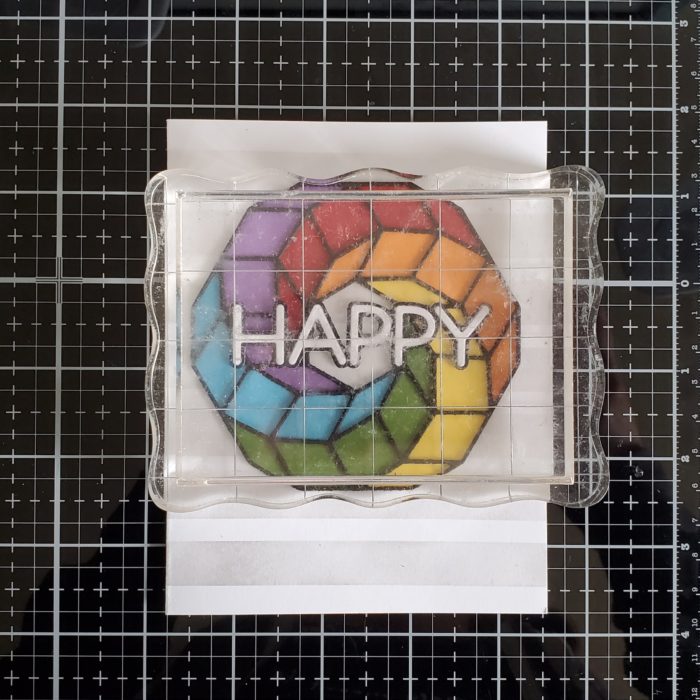
I adhered the colored pieces of the Torus Ring to the back of the frames and glued the whole thing to my card front. Then I added HAPPY on top and put clear blocks on it all while it dried.

Finally I moved on to finishing touches for my card. I added some flat confetti pieces scattered across and Wink of Stella glitter brush pen to the HAPPY.

I feel like this card is great for any occasion. It’s just waiting for you to write what there is to be happy about on the inside.

Happy Everything! Happy Birthday! Happy Day! Happy You! The possibilities are endless. I always need cards like this in my stash because it’s fun to celebrate all kind of things at the drop of a hat.
I appreciate you sharing your time with me. Have a fabulous day!

Supplies