
Hello friends, Eloise here and today I have a simple Thank You card using the Make A Statement Stamp Set as well as the Stitched Heart Dies.

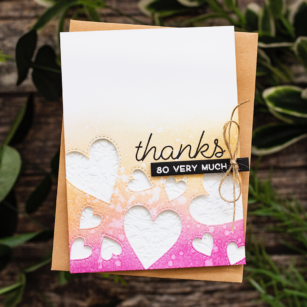
I started off with ink blending some Picked Raspberry, Spun Sugar and Scattered Straw at the bottom of my watercolour panel. I flicked on some water and dried it off with a heat tool.

I then stamped the ‘Thanks’ sentiment from Make A Statement onto the bottom of the panel and then die cut the two smallest hearts dies from Stitched Hearts from the bottom of the panel as well.

I then decided to use the Grace Layer A Dies as an embossing folder onto my white card base. I did this by using rubber mats through my die cutting machine. Once it was embossed I added foam tape onto the back of my coloured panel and adhered it on top of the card base.

Lastly, I white heat embossed the ‘So Very Much’ onto a thin black strip, adhered it onto the card base and added a hemp cord bow on the side.
The video is linked down below if you’d like to watch.
Thanks so much for stopping by today and I’ll see you next time.
– Eloise
Supplies


Comments
One response to “Thanks So Very Much | By Eloise Blue”
WOW!!! GORGEOUS! I love the embossed white background!