
Hi there it’s Tracey and I’m so excited to share a really colourful card with you today using the new Regal Peacock Layers dies! Before I got started I looked online for photos of Peacocks to help me out in making colour selections for each layer of the tail.

Here is a look at the supplies that I used for my card today–cardstock, craft dies and Distress Oxide inks.

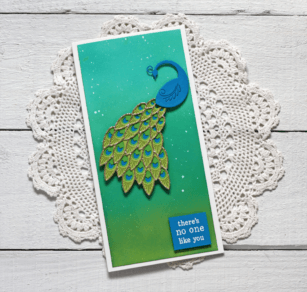
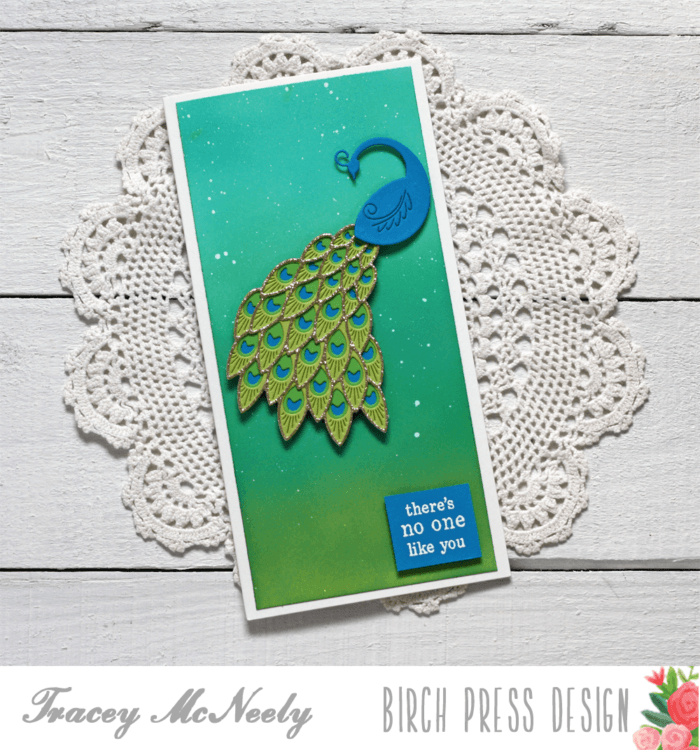
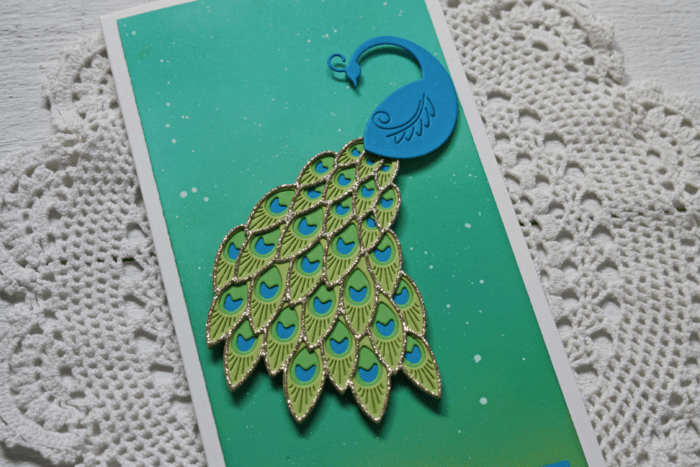
The peacock will fit on a standard A2 size card base but I decided it would be fun to create a slimline card so that the peacock would really stand out! My slimline card is 3 ¾” x 7 ¾” and the inside panel is 3 ½” x 7 ½”. I began my card by creating an ink blended background using Mowed Lawn, Lucky Clover and Peacock Feathers Distress Oxide inks along with my blending brushes. Once I finished blending the panel I flicked some watered down white acrylic paint on to it. Below is a link to the video I created to show you how I created my card.
Layer A which is the body of the peacock and the full shape of the tail are all cut from a bright royal blue cardstock. This way the once all the layers are adhered together you will see the tiny dots of blue like you would on a peacock’s tail when it’s fanned out.

I used two shades of green cardstock for Layers D and C and then layer B which is the top layer I die cut from gold sparkle cardstock which looks just gorgeous!
The blended ink panel was adhered to the 3 ¾” x 7 ¾” slimline card base. The peacock was attached to the blended card panel with foam squares to give it a bit of dimension. The sentiment is from the No One Like You stamp set as it was white embossed on the bright royal blue cardstock and added to the bottom of the card with foam tape.

Thank you so much for coming by today and I hope I inspired you to create something with the Regal Peacock Layer set. Come back again on Friday for more Birch Press Design inspiration!

Supplies


Comments
2 responses to “Regal Peacock Slimline | by Tracey McNeely”
Beautifully done Tracey and the colors are magnificent!
Wow, this is stunning!!