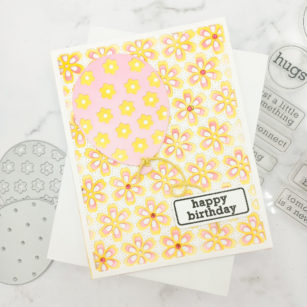
Happy Saturday and welcome back to the blog! Today I am sharing another very easy card using the awesome Floral Balloon die set.
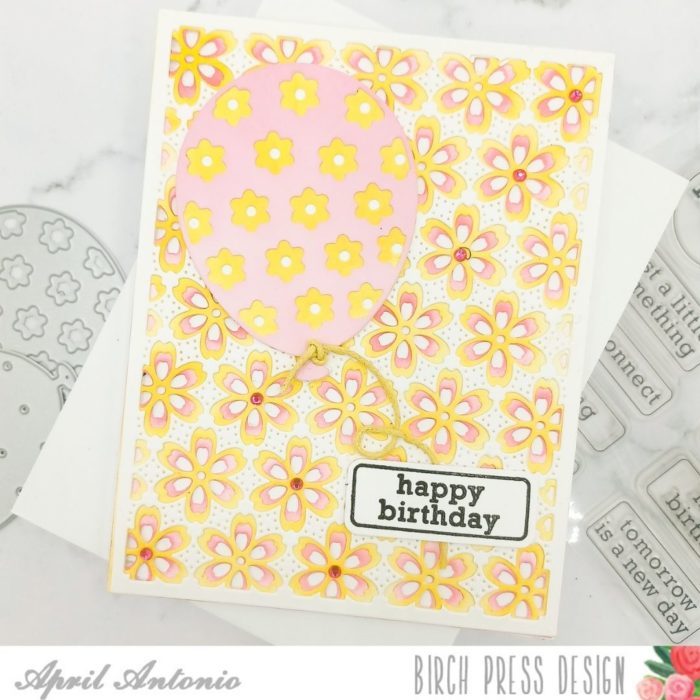
Sometimes I feel like getting inky, and that’s how I felt when preparing this card. I didn’t want to choose cardstock colors, so I diecut all the pieces from white cardstock and did ink blending to add color.
I started by die cutting layers A, B and C of the Flora Plate set. I ink blended with pink onto Layer B, and with yellow onto Layer C. Then I adhered all of them to an A2 card front.
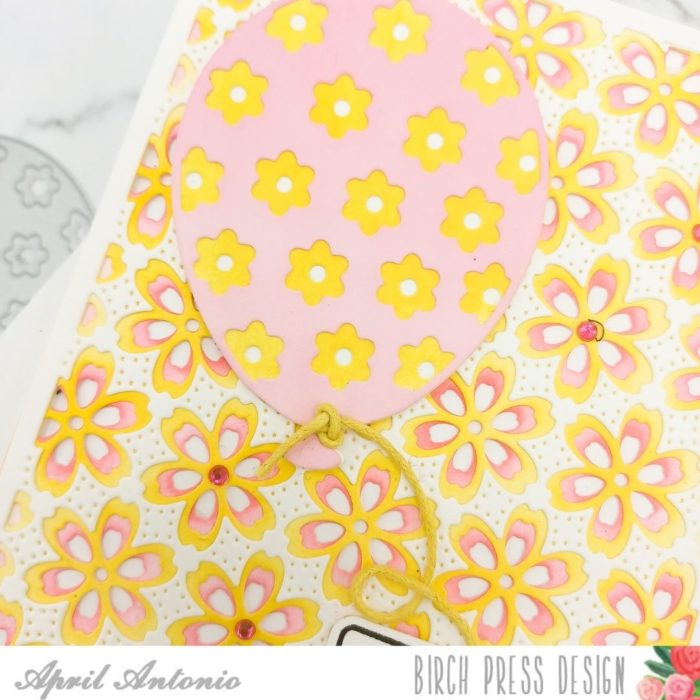
Next I die cut Layers A, B and C of the Floral Balloon die set from white cardstock. Similar to above, I ink blended on the layers, but this time using yellow for Layer B and pink for Layer C. I then adhered those together in order — placing the white Layer A on the bottom, then stacking layers B and C on top of that.

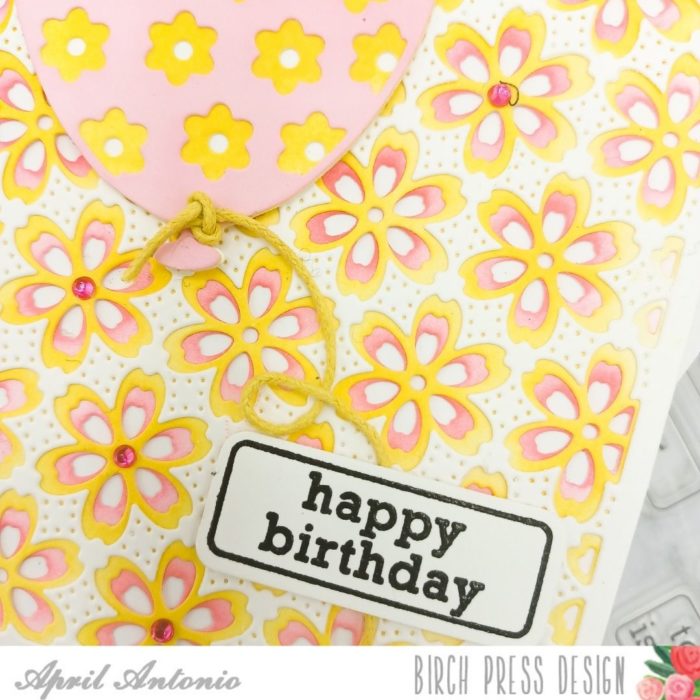
I assembled the card by gluing my ink-blended balloon die cut in the upper left corner of the card, and tying yellow cord around the end.

For the sentiment, I used my new favorite — the Contempo Greetings set, to heat emboss ‘happy birthday’ onto white cardstock, and then die cut it out using the coordinating dies.
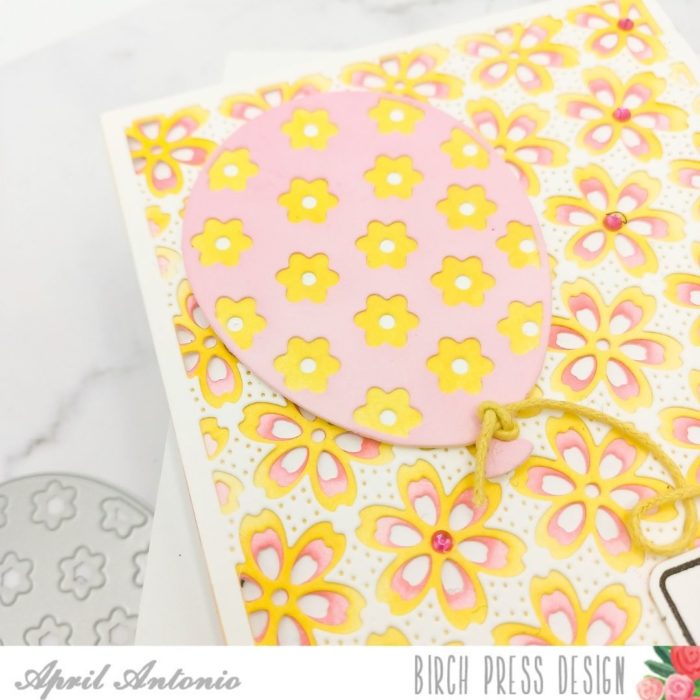
The final touch was to add a few well placed pink jewels for some sparkle.

Supplies


