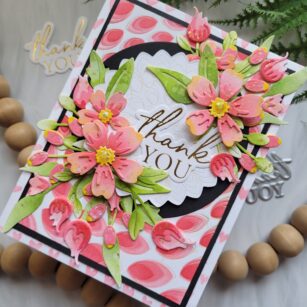
Hi friends! I’m here on the blog today sharing a pretty monochromatic Springtime Thank You card using several of the February new release products! This new release is amazing with hot foil plates and lovely spring foliage die cuts!
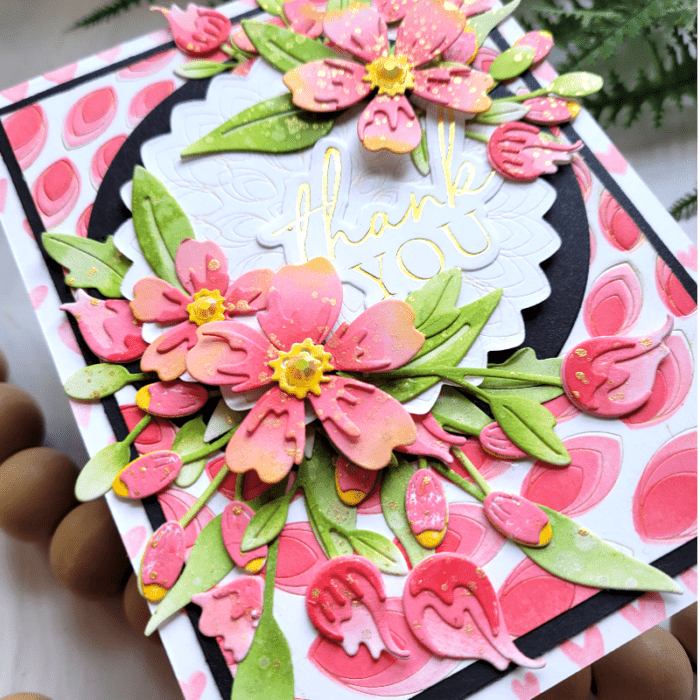
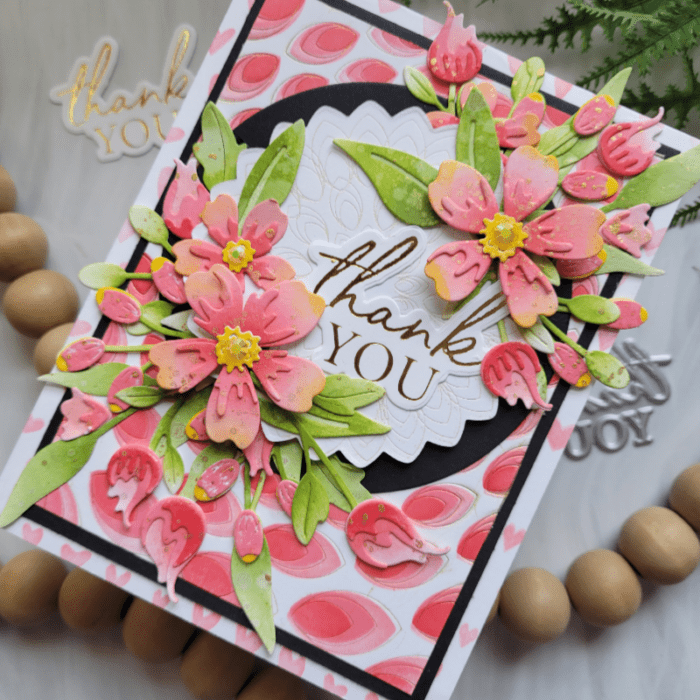
For this monochromatic Springtime Thank You card, I created a background using Gilded Petalpoint hot foil plate and die set as well as the coordinating 3-layer stencil. I dry embossed the Petalpoint image onto white cardstock to create an impression, and then ink blended the layers using shades of coral – pink inks and the stencil. I trimmed the image down and placed it over a slightly larger black card panel. Then I placed both over a white 5.5×4.25 card base that was stenciled with some hearts that I had on hand. I just wanted a tiny piece of color to peek out from the white card base. The black card panel adds a level of contrasting interest that helps the card pop.
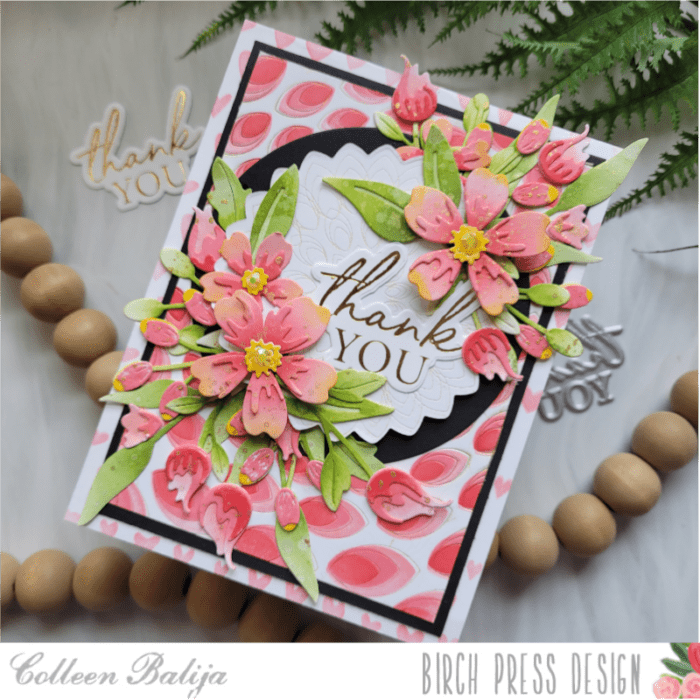
Next, I die cut and dry embossed the center scalloped-shape circle from the Gilded Petalpoint hot foil plate. For a bit of interest, I added gold ink directly onto the die plate before die cutting it, so you can see gold embedded in the impression! This is another option to hot foiling! I also die cut a black circle slightly larger than the scalloped circle. I adhered the black circle to the card panel, but not the white scalloped one. You’ll see why in a bit!
Now it was time to work on the flowers, and there are plenty of them on this card! I love a good spring floral bouquet! And I wanted to use as many of the floral pieces from the new release as I could so you can see how well they play together! Also, this is a busy card, so going with a monochromatic look (one color family) really helps all the elements come together.
I did some bit time die cutting of several flowers on white cardstock using Phlox Blooms and Leaves Contour Layers, Sylvan Berries and Leaves contour Layers, and Delicate Floral Buds Contour Layers. Then I ink blended each piece in the same coral-pink shades that are on the background panel. I sprayed the inked flowers and leaves with water and then splattered gold metallic watercolor over everything. I love how a simple technique like this can add so much detail and interest. It takes your ink blending to a new level! Can you see the details in the photo above?
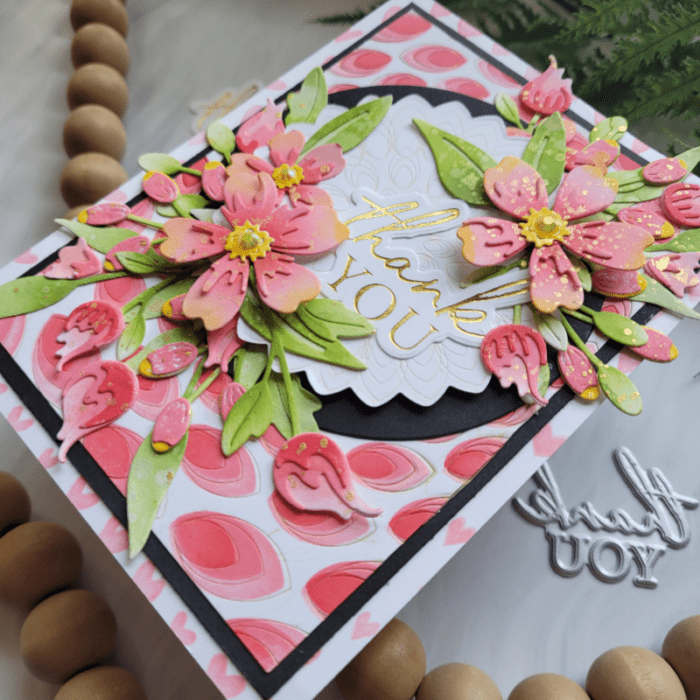
When the flowers and leaves were colored and dried, I placed them around the scalloped circle. Now, as I mentioned earlier, I didn’t adhere the scalloped circle down because I wanted to tuck a few pieces behind it. This clever little trick adds depth and dimension but without the need for foam tape!
I adhered the pieces that were tucked behind the scalloped circle first, next I adhered the circle with foam tape, then I placed the remaining flowers that were on top of the circle. I used foam tape on two of the flowers for even more dimension. Then I went back in and added a few more floral details until I was satisfied with my floral arrangement. I feel like a florist!!! I finished with a few sequins on the flowers for extra shine! Every little detail matters!
The last step was to hot foil the Thank You Noted script hot foil plate and die cut it. I tucked the sentiment between the flowers.
I had so much fun with the flowers and that stunning Gilded Pinpoint plate. I hope that I was able to show you how well the flowers work together and also the various ways that you can use the hot foil plates beyond just hot foiling! Thanks for stopping by today!

Supplies


