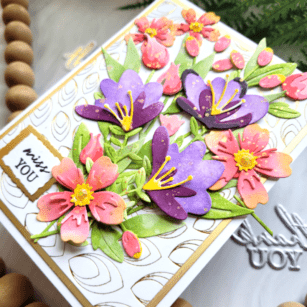
Hi everyone! I’m back today sharing a Miss You Spring Bouquet featuring products from the February new release!
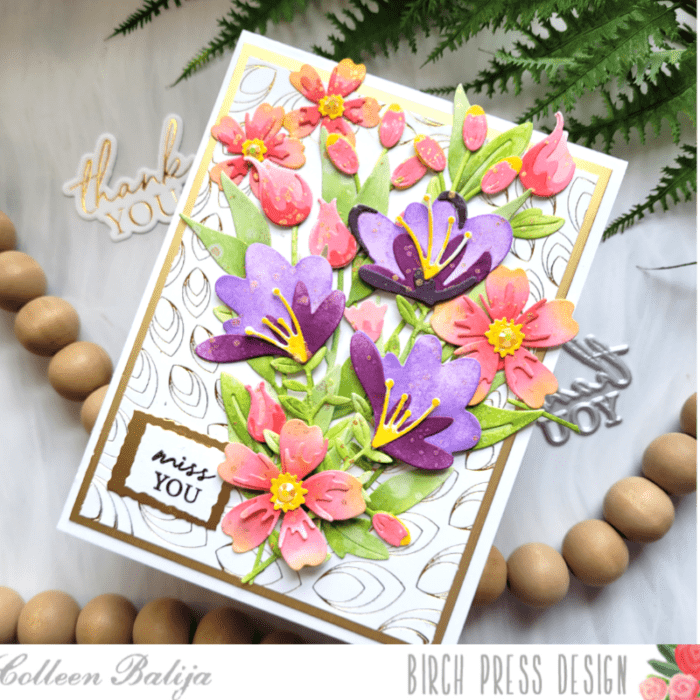
First step, as usual, is to create the background that my focal point will sit upon. I hot foiled in gold the Gilded Petalpoint plate, trimmed it down and placed it over a piece of gold cardstock just slightly larger. Then I adhered both layers onto a 5.5×4.25 white card base. I love the gold and white combination!
Next, it was time to play with my spring floral bouquet using Phlox Blooms and Leaves Contour Layers, Sylvan Berries and Leaves Contour Layers, Delicate Floral Buds Contour Layers, and Jovial Blooms and Leaves Contour Layers (featured in purple).

With my previous card that I shared with you on the 16th, I mentioned that I had die cut a bunch of flowers and leaves, and ink blended all of them using shades of coral – pink and purple. Then I sprayed them all with water to get a blotchy look and finished with gold metallic splatters. I just love how that simple step takes your ink blending to the next level!
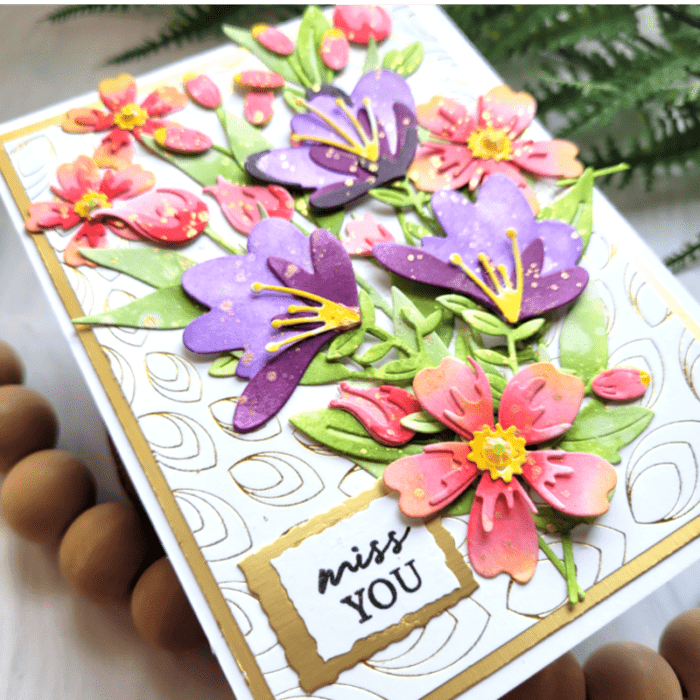
I created a bouquet with all the lovely flowers from this release over my hot foiled background card panel. Keep in mind, I haven’t adhered the flowers down yet. I’m just staging them for now! When I was happy with the placement of my bouquet, I picked up the entire bouquet using Press n Seal. Press n Seal has a sticky side on it that acts like adhesive, allowing me to “pick up” the entire bouquet in one piece! Then, flipped the bouquet over carefully with the Press n Seal, added my adhesive to the back of the bouquet, and then flipped it over again and adhered it over the background panel. This is an AMAZING trick to use for larger bouquets like this one! It keeps everything in one place and saves you time! If you don’t have Press n Seal, you can use washi tape strips.
My final step was to create a sentiment to go along with this springtime delight! I chose the Miss You one from an older stamp set called Classic Sentiment Wreath. I thought that sentiment actually fit my feelings about missing spring weather. I used my deckled edge paper trimmer to trim the sentiment along with a larger piece of gold behind it.
That was it for this card! The hardest work was in the design of the flowers and leaves, but it was relaxing to do this, and then I had them ready to go for this card! Thanks for stopping by today!

Supplies


