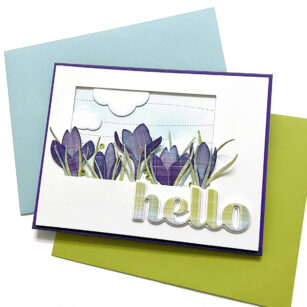
Hello, Birch Press friends! Today, I am sharing a card featuring the new Sprouting Crocus Contour Layers set. But, I did something unconventional. I used patterned paper for all of my die cuts! It’s a really fun way to add texture and color variation.
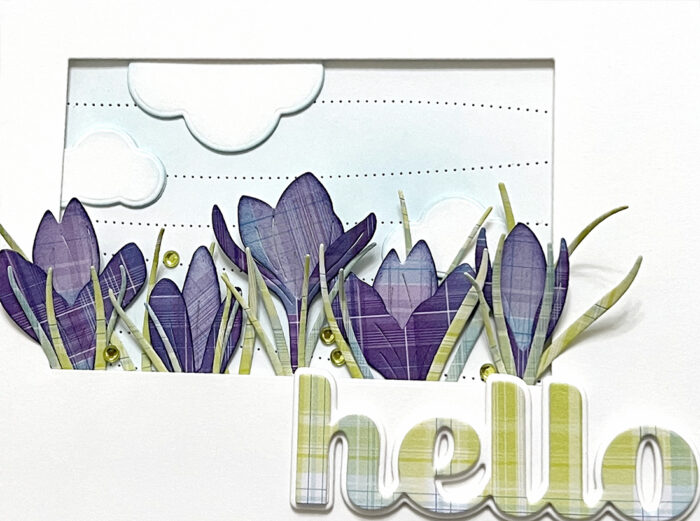
I started by cutting my flowers. I used the Madras Plaid Blue and Violet paper pad from Memory Box, which I believe is now retired. I chose a darker plaid pattern for the layers that go in front and a lighter pattern for the layers in back. I blended all the edges of each layer with a dark purple ink. I adhered all of the layers of my flowers together with glue.
I then took a similar pad of paper, the Madras Plaid Coral and Green pad, and I cut the stems from two different green plaid patterns. I only adhered one stem to each of my flowers, but I kept some extra ones to fill in later.
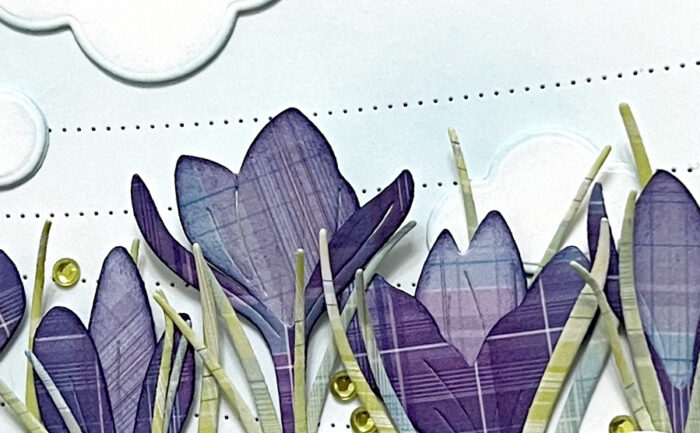
After completing my flowers, it was time to set the scene. First, I took a panel of white card stock and cut it with the Pinpoint Contour Plate. I blended some light blue ink onto the panel. I then used a rectangle die to cut an opening into a second panel of white card stock, slightly offsetting it into the upper left corner. I added foam tape to the back of this panel and attached it to the ink blended panel. Before attaching them together, I made sure that I had cut them both down to be slightly smaller than an A2 card base.
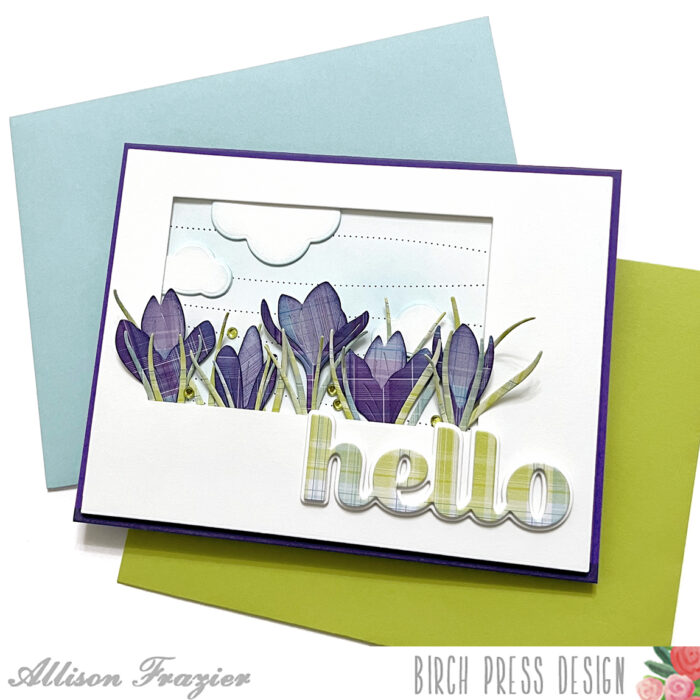
I cut a few clouds from white card stock using dies from the Rainbow Days Lingo Notes set. I inked up the edges of the clouds with light blue ink, and then I added them to the sky background. I tucked two of them under the edges of the framed opening. I then took my five flowers and tucked those into the bottom edges of the frame. I had left enough room between the edge of the framed opening and my foam tape so that I could achieve this look for the clouds and flowers. I used the extra stems/leaves that I had cut and filled in some of the gaps. I adhered this card panel to a dark purple A2 card base.
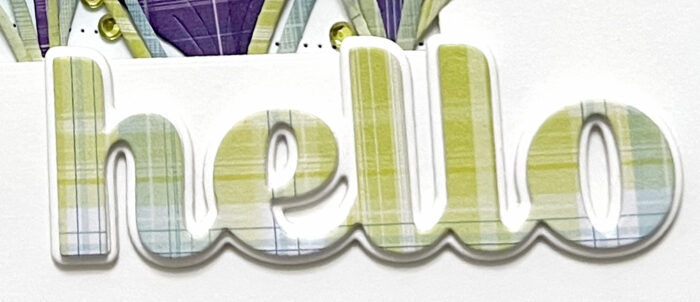
I used some more of the green plaid paper to cut the main layer of the Big Hello Sugar Script Die. I adhered this to two layers that I had cut from plain white card stock. I then adhered that stack to the shadow layer, which I also made from three layers of white card stock. I adhered that to the card, and then I finished everything off with a few green fairy jewels.
Thank you so much for joining us today. I hope this card inspires you and brings a smile to your face!
Wishing you a crafty day,
Allison

Supplies


Supplies

