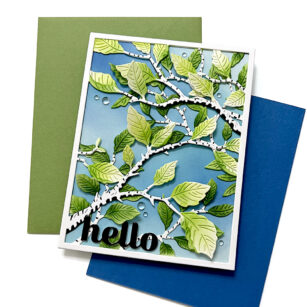
Hello, Birch Press friends. Today, I am excited to share this brand new layering set called Forest Canopy! This is a set of three A2 sized layering plates, along with some individual dies that create berries. When I first saw how Layer A layers on top of Layer B, I immediately thought of the birch trees at my childhood summer camp. So, I just had to attempt to create this birch tree forest.
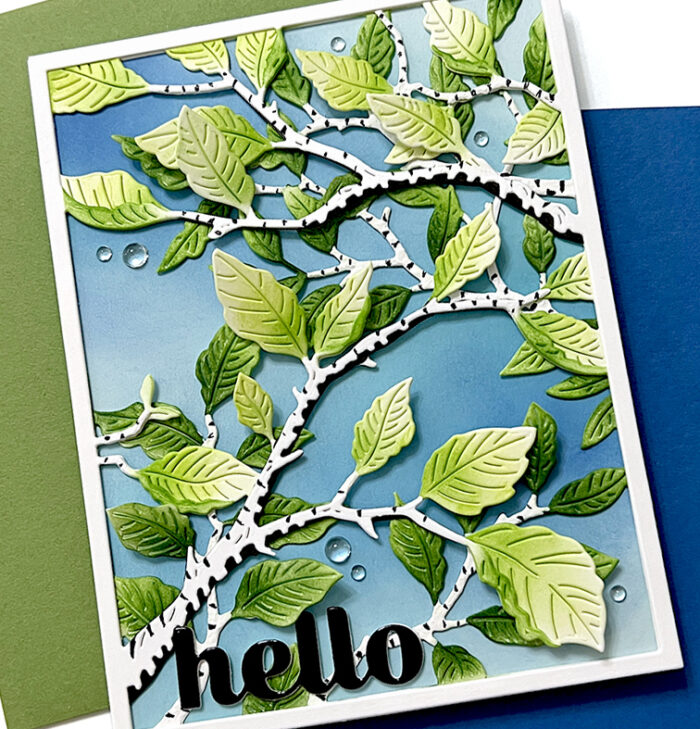
I started by cutting all three layering plates out of white card stock. I then got to work on Layer B. I first cut off all of the little branches that were meant for the berries. I then took a black marker and colored the branches black. I mainly focused on the parts of the branches that would partially be covered up when Layer A went on top. Any branches that would not be covered by Layer A were left white.
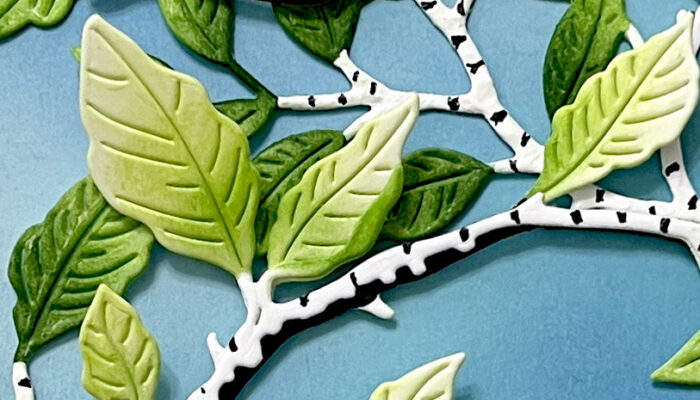
Next, I took a small blending brush and colored the leaves on Layer B with Twisted Citron and Mowed Lawn Distress Ink. I wasn’t being very careful, so some of the green ink did end up on the white branches. In order to fix that, I took some white craft paint and a small paint brush, and I painted over the parts that I wanted to remain white. If I were to do it again, I would maybe not use Distress Ink. Since Distress Ink reacts with water/liquid, my white paint kept turning green. Because I had to keep dabbing white paint on, it started creating more texture on the branches. I liked the added texture, so I even added dabs of paint where I didn’t even need it.
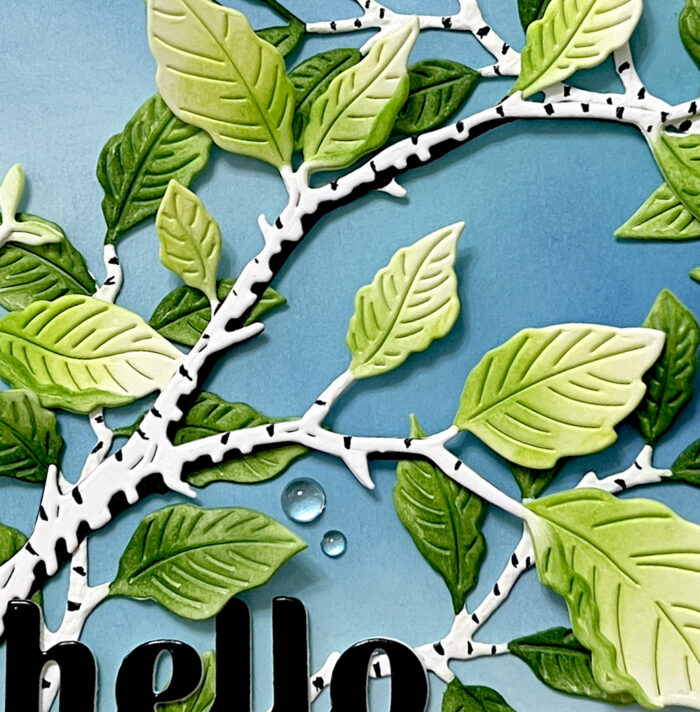
For Layer A, I also colored the leaves with Twisted Citron and Mowed Lawn. For Layer C, I colored the leaves darker – this time using Mowed Lawn and Rustic Wilderness. I then glued the layers together. Between Layer C and Layer B, I only glued the outside frames together. Between Layer B and Layer A, I glued the outside frames, as well as any of the Layer A branches that would cover the Layer B branches. Because I love dimension, I purposely did not glue any leaves down or any of the branches that would not be covered by other layers.
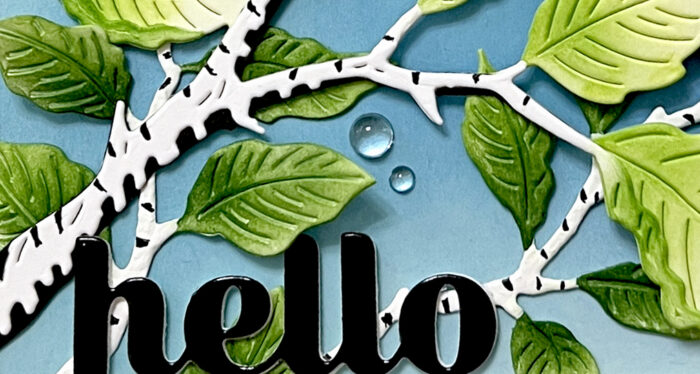
Once all of my layers were glued together, I took a thin black marker and added all of the little details to the branches to try and make them look like birch trees. Once I was finished with that, I created my background. I used light blue card stock, and then I did some loose ink blending with Broken China and Prize Ribbon Distress Oxide Ink. I then glued everything down to an A2 card base.

For the sentiment, I chose the small Hello Sugar Script die, which I believe is now retired. I used my favorite black glossy card stock. To finish the card, I added some clear fairy drops. I hope this card puts a smile on your face and inspires you to try customizing your die cuts, as well! Thank you so much for joining us today.
Wishing you a crafty day,
Allison

Supplies


Supplies
