Author: birch press
-
Spring Sale!
Happy Spring!Shop all our new arrivals – including handmade paper, washi tapes and more. Use sale code SPRING to save 10% off your entire purchase on everything, including sale items!Hurry! Offer expires March 19, 2018 at midnight PST. -
Watercolor Birds | by Jeanne Jachna
It’s easy to make your own hand made cards to share with family and friends. One of my favorite techniques is water coloring. You don’t have to be a pro when you are coloring stamped images.
I stamped the two birds and sentiment from A Little Birdie Clear Stamp Set with Versafine Onyx Black Ink on watercolor paper.
I used the Essence watercolor palette available in the store. It contains 12 half pans of watercolor in a metal tin. The set includes a printed sheet to paint samples of each color. The tin is a tri fold so there is plenty of room to mix colors and there is even a ring on the outside of the case to hold the palette with your thumb if you’re in the field.
I colored the birds first – the hardest part is allowing the paint to dry between colors so they don’t blend. Next I added the soft green “Serenity” background.
I love this sentiment from the stamp set – it reminds me to take chances….. to splatter or not splatter! LOL! I didn’t want to start all over again if I didn’t like how it turned out! But I took a chance. I was careful not to splatter the birds! And YES! I’m so glad I took a chance!
Water coloring is very relaxing! I hope you’ll give it a try on your next project!
Finished Size 4.25 x 5.5″
Birch Press Design A Little Birdie Clear Stamp SetBPD
Birch Press Design Essence Watercolor PaletteBPD -
Miss You | By Laurie Schmidlin
Hello there crafty friends! Laurie here with you today sharing a bright and cheerful peony card.
Some of my favorite Birch Press Design dies to date are the Peony Bloom Cover Plates! With these dies, it is so easy to create beautifully detailed cards in no time at all!
To create my card, I started by die cutting the Peony Bloom Layer A die out of red cardstock and Peony Bloom Layer B die out of a coral cardstock. For the background, I sponged some Fossilized Amber Distress Oxide ink onto two of the corners of a white cardstock layer. I then spritzed it with water, lifting off some of the ink to leave white splatters. For the final touch, I splattered on some gold paint.
I adhered the two Peony layers together and then attached to the sponged background layer.
I really love that the Peony Layer dies come with separate leaf dies, making it easy to customize the flowers. I chose to die cut the leaves out of a shiny gold cardstock.
I didn’t want to add a sentiment to the front of the card as I didn’t want to cover up any of those lovely flowers. I chose to carry the design over to the inside of the card and add my sentiment there. I die cut another Peony Bloom Layer A out of red cardstock. I trimmed off one of the flowers and adhered it to the upper right corner. I stamped the Miss You sentiment from the Love and Miss You stamp set in black ink. I also wanted to carry over a little bit of the gold from the front design so I added a gold die cut butterfly (from the Butterfly Cluster die set).
Thanks so much for joining me here today!
Supplies
-
Coloring Easter Eggs | by Tracey McNeely
Hi it’s Tracey here today for another Birch Press Design inspiration post. Today we are colouring some Easter eggs! Not the hard boiled kind, but gorgeous jeweled paper kind.
I used the newly released Stitched Egg craft dies along with alcohol inks to create some gorgeous gold embellished Easter eggs. .
The video below will show you how I created the jeweled and gold embellished eggs.
The card base has a white Tilter Layer A Stackable die cut on top which acts as a basket for our eggs.
One thing with colouring your eggs this way is that no two eggs will ever be the same. With alcohol inks the results are always unexpected. Lets have a closer look at the elegant jeweled finishes on these eggs.
These were cut out from three separate alcohol inked panels. They eggs end up with a glossy finish and every egg has a vibrant blend of colours and no two are the same.
Each egg has either a little or a lot of shimmery gold detail on them. When gold Mixatives are added to the alcohol inked panels and moved around with the Alcohol Blending Solution you can never tell where the gold will settle. When you cut your egg shapes using the Stitched Egg craft dies you can place the die wherever you want to cut the egg giving each one it’s own unique look.
The card was finished off with sentiments from the Sending Love clear stamps and dies. I hope you enjoyed seeing another way to add colour to your Birch Press Design craft die cut shapes. Join us again on Wednesday as we have another inspiration post for you. You can now find inspiration on the Birch Press Design blog Monday’s, Wednesday’s and Friday’s!
-
Filigree Egg | By Olga Direktorenko
Hi there paper crafters,
Today I have a special project to showcase – it’s an Easter card that doubles up as “congrats on your pregnancy” card.I have used Fiori Egg layering set to create the focal image and the top layer of Fiori Background set for the background. Other materials include watercolor paper, vellum plus some embellishments.
Although the card might look really intricate it is in fact really easy to assemble. Watch the video tutorial to learn how to put it together!
Thanks for joining me today! Enjoy your weekend and please come back soon for more inspiration!
Supplies
-
Fiori Thank You Card | Jennifer Svare
Hello! Today I’ve made a thank you card using the center of the Fiori Layer Egg Layer C for a background, framed in with Double Stitch Circle Frames by Poppystamps. I love thinking about ways to get the most out of dies, and this is a great way to stretch the Fiori Egg way beyond Easter!
The “thank you” sentiment is from the beautiful Little Birdie stamp set, and the top panel rests beautifully on top of a Pool notecard. In the video, I’ll show how this design looks on many of the new colors of notecards available.
A single sequin from Mermaid Tale has been added to the center for just a tiny-yet-effective bit of sparkle.
These cards are so fast and simple to make, which also makes for a great bulk project for those spur-of-the-moment thank-you’s to have on hand. In the video, I’ll also show this against a black background, which makes it a great thank you card for more formal occasions, such as a graduation thank you card.
Thanks for stopping by, and I hope you enjoy the video below:
Supplies
-
Emerald and Teal Fiori Layered Egg | by Jeanne Jachna
Hi it’s Jeanne posting on the blog today! And wow! Have I got a gorgeous project to share with you today! I made this beautiful emerald and teal Easter Egg card.
The Birch Press Design Layered dies have a rich expensive look when layered together. The Fiori Egg is no exception. With the new hand made papers in the shop this will impress everyone on your greeting card list.
I’ve never worked with hand made paper before. I was surprised by the thickness and soft cottony feel. This paper is gorgeous and you’re not going to want to waste even the tiniest scrap! The Cabbage Rose Ivory has deep embossing, and the Diamond Dot has metallic gold accents. All the hand made papers in the shop are “tree free” meaning that they are made from 100% recycled material. I would have never guessed that these thick and rich elegant, hand made papers are eco friendly! You can see them all here.
I cut the Fiori Egg plates in colors that coordinate with the Diamond Dot handmade paper ; teal, emerald, lime and GOLD.
The gold solid egg was cut with the largest egg from the Stitched Egg die set. This is a set of three eggs with a stitched outline detail.
The finishing touch was a gem in the egg center, and some gold sequins to repeat the gold in the background paper, and egg layer. The sequins are from the Not So Heavy Metal tin in the store.
I wish you could see this beauty in person – all that gold is total eye candy!
Birch Press Design Fiori Egg Layer A
Shop at:
BPD
Birch Press Design Fiori Egg Layer B
Shop at:
BPD
Birch Press Design Fiori Egg Layer C
Shop at:
BPD
Birch Press Deisgn Stitched Egg Set
Shop at:
BPD
Birch Press Design A Little Birdie Stamps
Shop at:
BPD
Birch Press Design Cabbage Rose Ivory Handmade Paper
Shop at:
BPD
Birch Press Design Diamond Dot Handmade Paper
Shop at:
BPD
Birch Press Design Not So Heavy Metal Sequins
Shop at:
BPD -
Easter Brunch Table Decoration | Jennifer Svare
Hello! For today’s project, I used the gorgeous new Fiori Egg set (layers B and C) to create an Easter Brunch table decoration. I used a holographic paper for the sparkly outside layer, and a variation of two types of gold card stock in the base layers. The largest egg from the Stitched Egg Set created a backing, so it is also beautiful from the back (although, two fronts could be put back-to-back).
The gold is just soft enough to create a very simple texture with any sharp pointed tool, so I couldn’t resist turning the flower petals into leaves. The negative space pieces from the marquees and dots from Layer C were overlaid onto the front layer so they would be visible, but the layers would be gorgeous just as they are. I went into some extra inlaying and overlaying steps for this project, but those details are definitely not necessary!
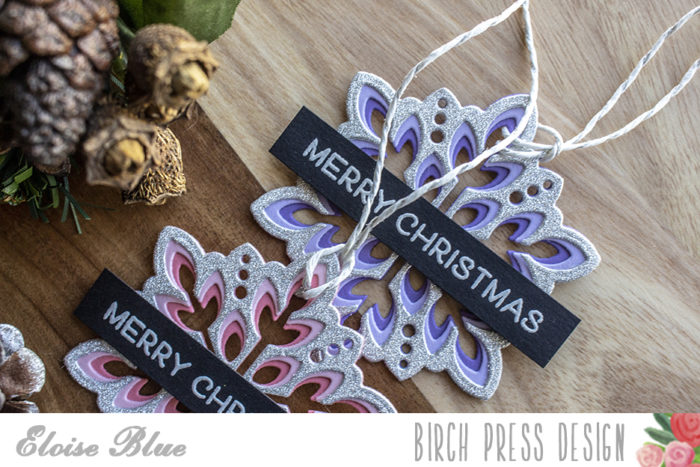
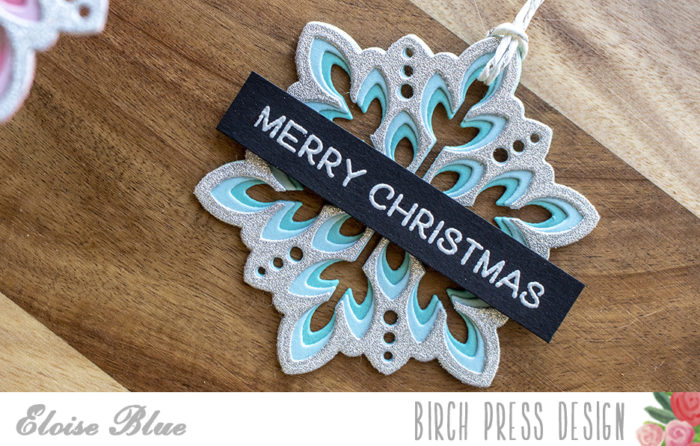
Spring and Easter are right around the corner, but don’t put away those snowflake dies just yet… at least not Layer B from the Glitz collection.
In the video below, I’ll show how the Glitz Snowflake Layer B created the base for the egg, and it works great and is very stable!
The dies and paper work together beautifully and do all the work to create this gorgeous egg decoration. It really is simple with a big “Wow!” factor.
What a fun project! Here’s a video of what I did to create this:
Supplies
-
Faux Fabergé Egg | by Tracey McNeely
Have you seen the new spring release at Birch Press Design? The Fiori Egg Layer Set craft dies have all the beautiful stitched details you have come to expect from Birch Press Design. Today I have a short video tutorial showing you how I used the Fiori Egg Layer A, Fiori Egg Layer B and the Fiori Egg Layer C up with some of the gorgeous new Shizan handmade papers also now available in the shop to create a lovely faux Fabergé egg.
All of these new handmade screen printed papers are ‘tree free’ and almost feel like fabric. The paterns I chose to use were the Green Folia, Diamond Dot and Wedge. To make the Faux Fabergé egg I die cut one of each layer using three different green handmade papers. They cut really well but I did do a double pass to make sure I got all the tiny cuts. You will see in my video that I had one piece on Layer B that didn’t quite cut through, I am pretty sure that was caused by a warp on my bottom cutting mat. So I carefully set the die cut back into the die and ran it through once again and it came right out.
Aren’t these papers and dies magnificient? I hope that you are inspired to create a faux Fabergé egg of your own. All the new products are in the shop at Birch Press Design. Join each week on Mondays, Wednesdays and Fridays for more Birch Press inspiration.
-
Wishing You The Very Best | By Eloise Blue
Hi friends, Eloise here and today I have a Best Wishes card to share with you all using the Flutter Plate Layering Die Set as well as the Wishing You The Best stamp set and the Double Stitch Scalloped Rectangle Frames Dies from Poppy Stamps.
To begin, I first pulled out nine colours of cardstock from my stash, three shades of yellow, three shades of pink and three shades of blue. This is because I want three colours of butterflies, all layered up in different colours to stretch this layering plate set die to create a smaller scaled design. Once I chose all my cardstock I die cut each of my layers out. I used the A plate on the lightest shade, the B plate on the medium shade and the C plate on the darkest shade. Once they were all cut out, I layered them up and could cut them apart.
I cut out each butterfly using an exacto knife, making sure I used a different butterfly for each colour. If you had one of the layering butterfly dies that were individual, you could use that and save this step, but I love stretching my supplies so that’s why I’m using the plate dies. Once I cut out all my butterflies, I adhered them together using a glue pen. Next, I used the Scalloped Rectangle Dies and cut out a frame using some cream cardstock and also cut down a card base that fits the frame perfectly. Once they were cut, I went adhered and adhered my butterflies down onto card base, making sure to over lap to cover up the cuts I made on each of the butterflies to get them apart from one another.
Once I adhered all my butterflies down, I adhered over my frame as well. Next I used the Wishing sentiment from Wishing You The Best onto some white cardstock, then cut it out using the coordinating dies. I added foam tape onto the back and adhered it down onto my panel. Next, I white heat embossed the ‘You The Very Best’ sentiment onto a strip of black cardstock that I cut down earlier and adhered that underneath my sentiment. To finish it up I added a brown and white twine bow onto the right hand side of my black strip and also decided I didn’t like the cream frame, so I changed it over to white.
The video is linked down below for you to watch.
That finishes up my card for today, I hope you enjoyed and felt inspired to use your cover plate dies in a different way. Thanks so much for stopping by today and I’ll catch you all next time.
Supplies: