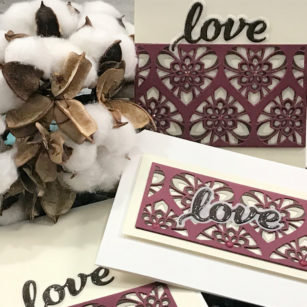
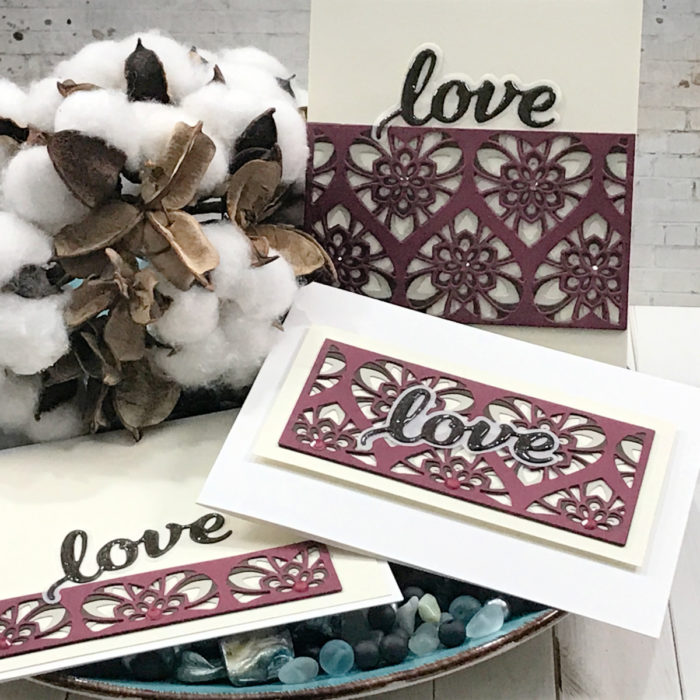
For today, let’s stretch our layering plate die sets! This project will feature the Kinsley Layering Plate die set and we will create 3 different looks for our card fronts!
Chose your colors and die cut your plate pieces. Once all is die cut you will find that perfect spot to cut apart the top layer in your die set! For me this is layer A!
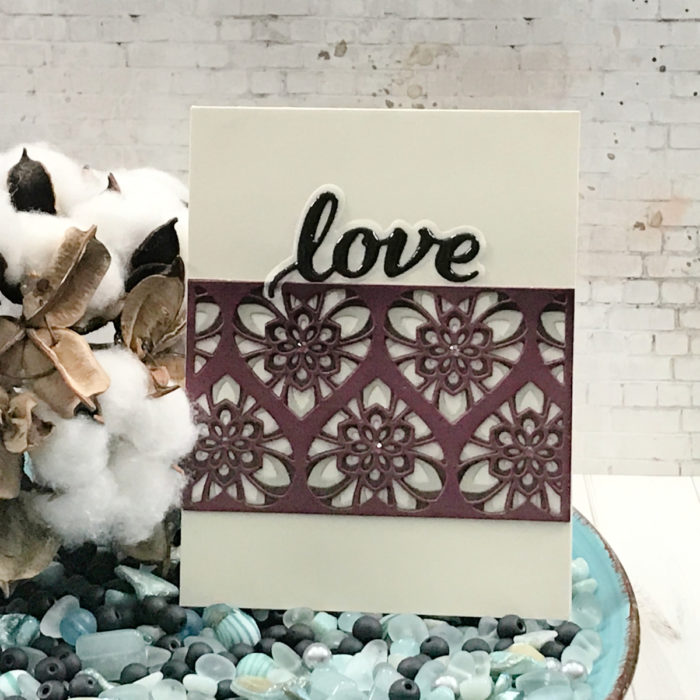
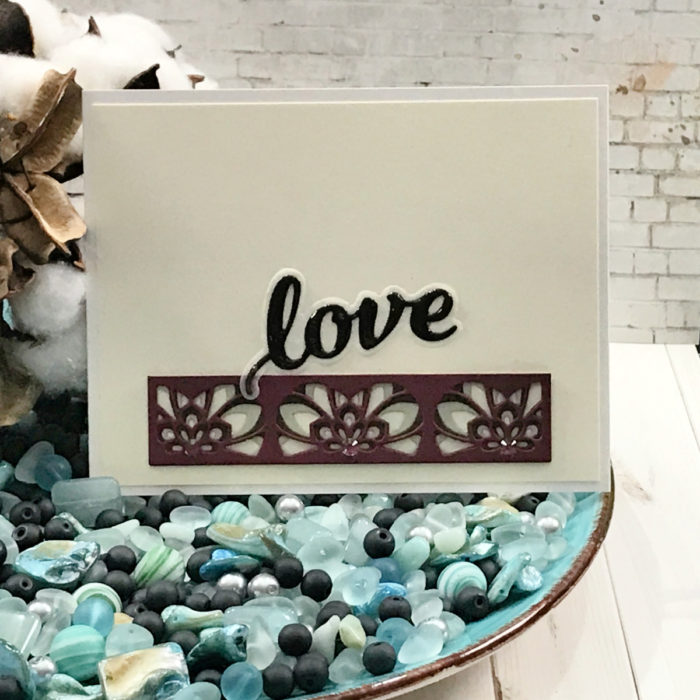
Glue together the second and third layer, when you add your top layer from the pieces you have created you will cut along those lines. You will now have three different panels!
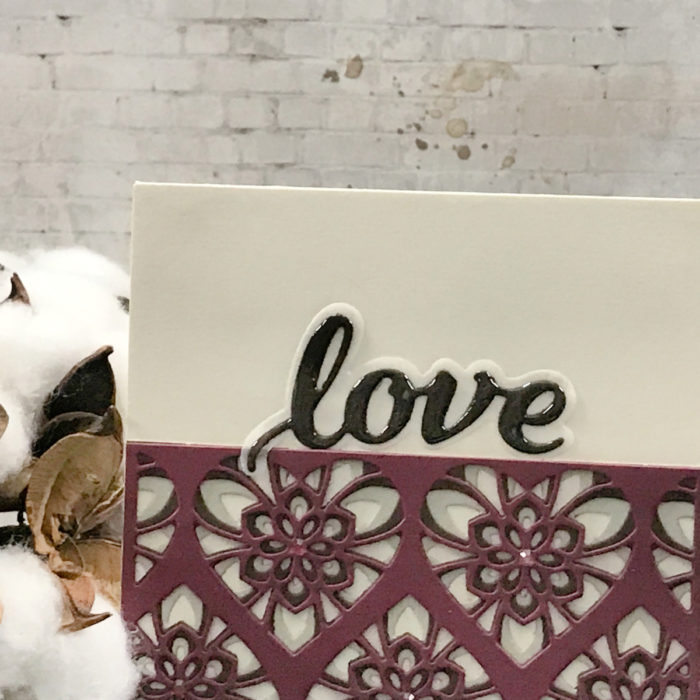
Take your layered panels and add them to the fornt of your cards and add that perfect sentiment. I chose the Love Honey Script die set using solid card stock and vellum!
As always, I hope you enjoyed today’s project… and if you want to see more details just click on the video below and see how these projects come together step by step!
Make sure you stay tuned for more wonderful projects coming soon! Have a great day and always remember… Be Creative!
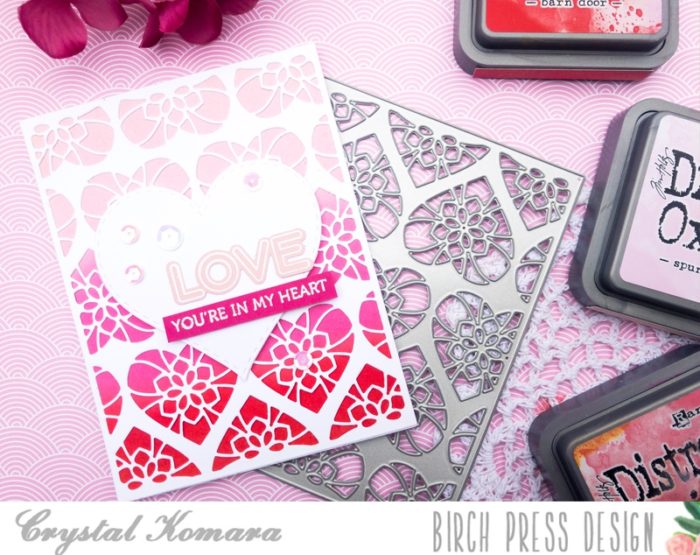
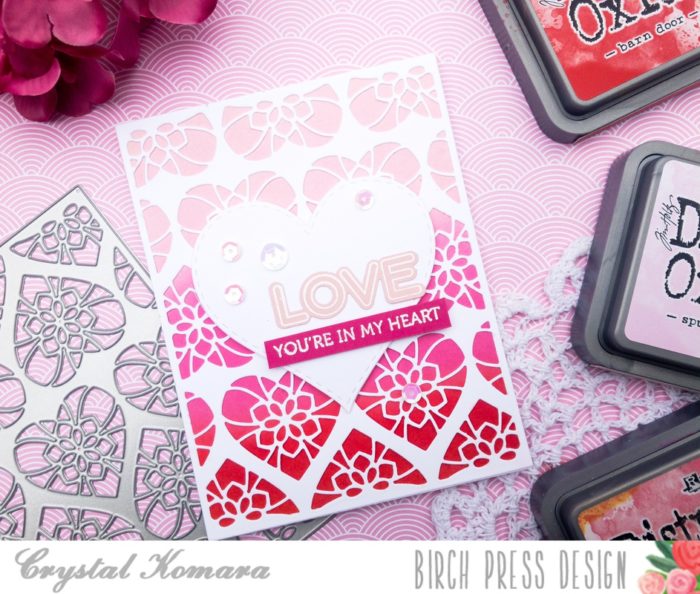
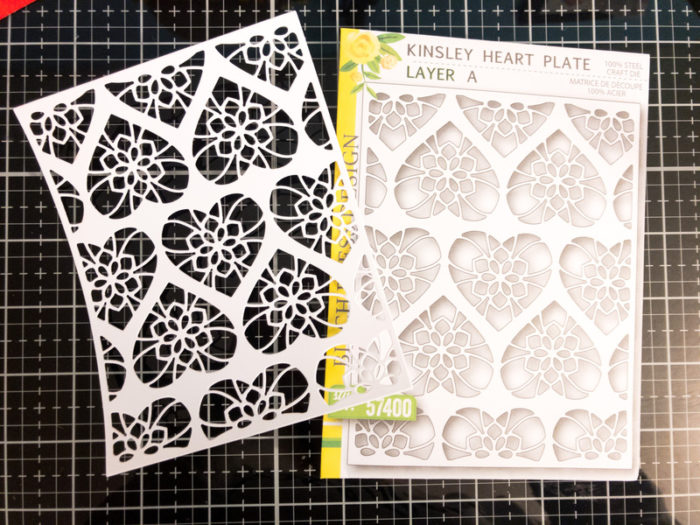
Hello crafty friends! This is Design Team member Crystal Komara here with you today sharing a beautiful Valentine’s Day card featuring the latest new release products from Birch Press Design. The focal point of this pink ombre card is the ink blended background peeking through the Kinsley Heart Layering Plate.
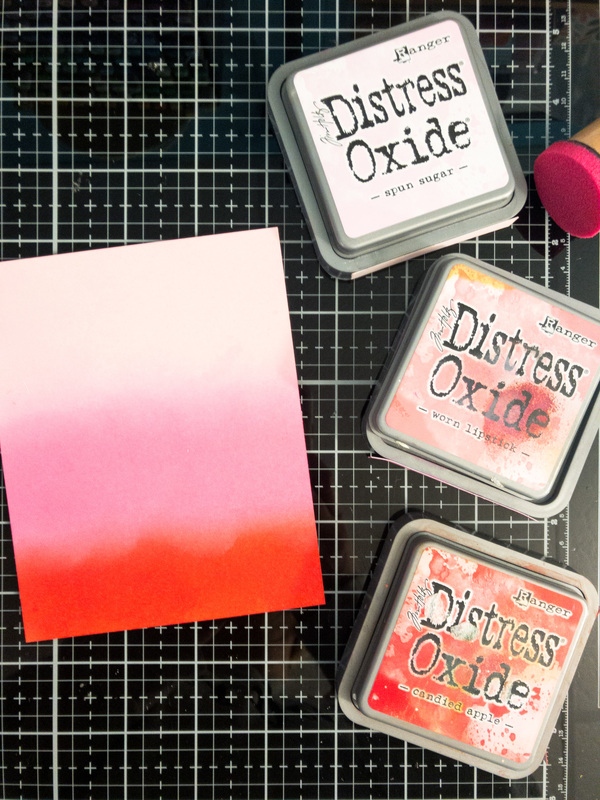
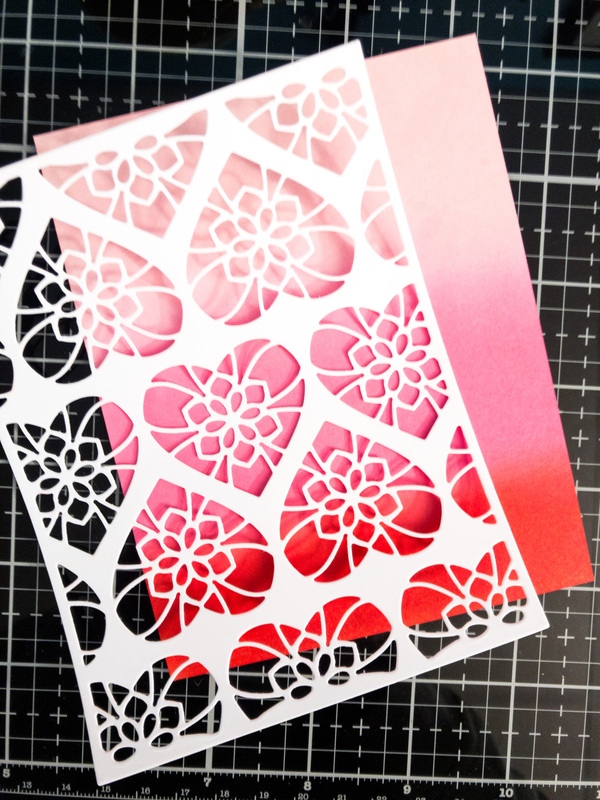
On a 5 1/4″ x 4 1/4″ piece of Bristol smooth cardstock I ink blended Distress Oxide inks in the colors Spun Sugar, Worn Lipstick and Candied Apple. I began with the lightest color (Spun Sugar) at the top of the cardstock and the richest color (Candied Apple) at the bottom.
Using 80 lb. Neenah Solar White Crest cardstock, I die cut the top layer (Layer A) from the Kinsley Heart Plate.
I placed this intricate heart layer directly over the ombre background adhering it with LineCo ph neutral bookbinding glue (my go-to liquid adhesive).
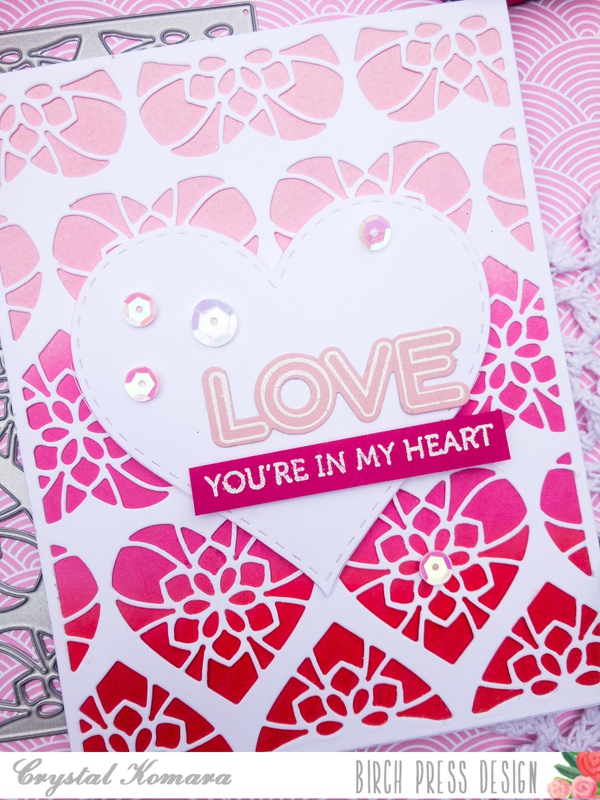
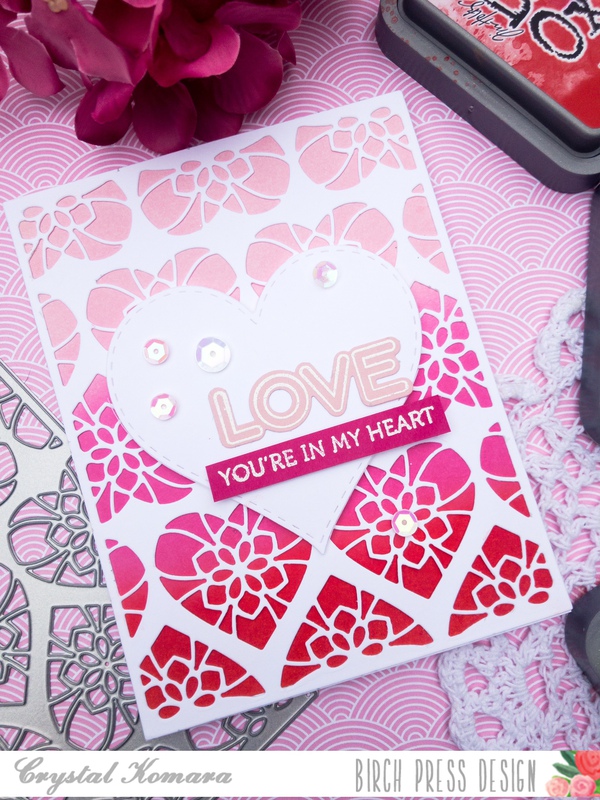
Using the Lingo Thanks stamp set, I stamped the word “love” in Versamark ink on ballet pink cardstock and heat embossed it with white embossing powder. I used the coordinating Lingo Thanks die set to cut it out. I also stamped the sentiment “you’re in my heart” in Versamark ink on fuschia pink cardstock and heat embossed it with white embossing powder as well. I die cut one large white heart to serve as the center focal point of the card. I adhered the sentiments to the lower right corner of the heart using 3M foam adhesive. Lastly, I added a few iridescent sequins with glue dots to the card for added dimension and sparkle.
I hope you will enjoy these beautiful new products from Birch Press Design! Thanks for visiting and have a wonderfully creative day!
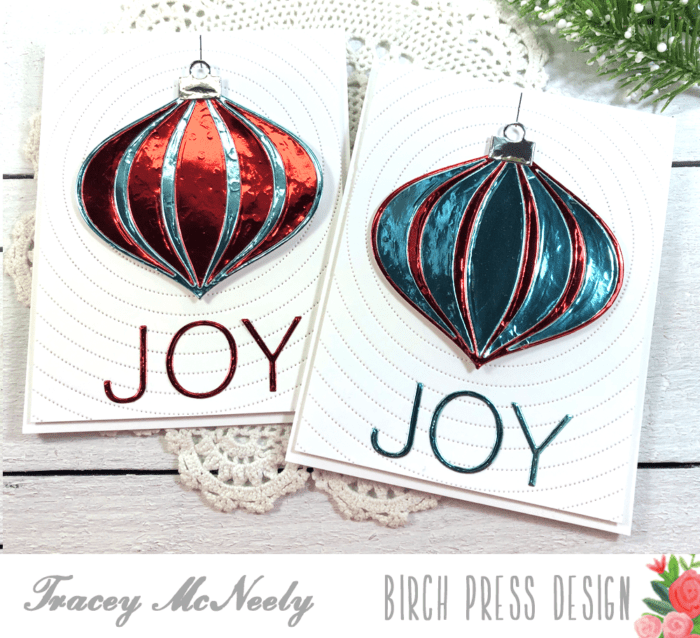
Hi crafty friends, it’s Tracey here today and Happy New Year! Before putting Christmas stamps and dies away for next year, make a few cards while you still feel the holiday spirit. Life in quarantine doesn’t always mean that your ahead of the game and then Christmas shows up. So it’s always good to have a bit of a head start.
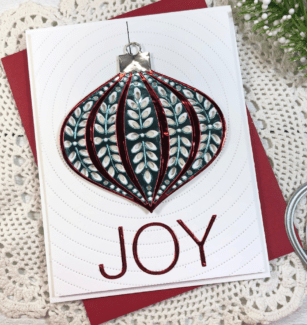
I wanted to make some of the Birch Press Design Ornaments using foil paper. I chose to make all of my ornaments primarily using the Marisol Ornament Layer Set. I chose red, light aqua and silver foil from the Memory Box Polished Foil Pad and made three cards all using the same three colours each with a different outcome.
To start off I prepared three top folding card bases. I die cut the Pinpoint Radial Plate from white cardstock then trimmed them down to 5 1/4″ x 4″. I adhered the panels to card bases using foam tape and set them aside.
TIP: If you get any glue onto your foil die cuts while assembling, set it aside to allow the glue to dry slightly. Then gently use a microfibre cloth to wipe the marks away.
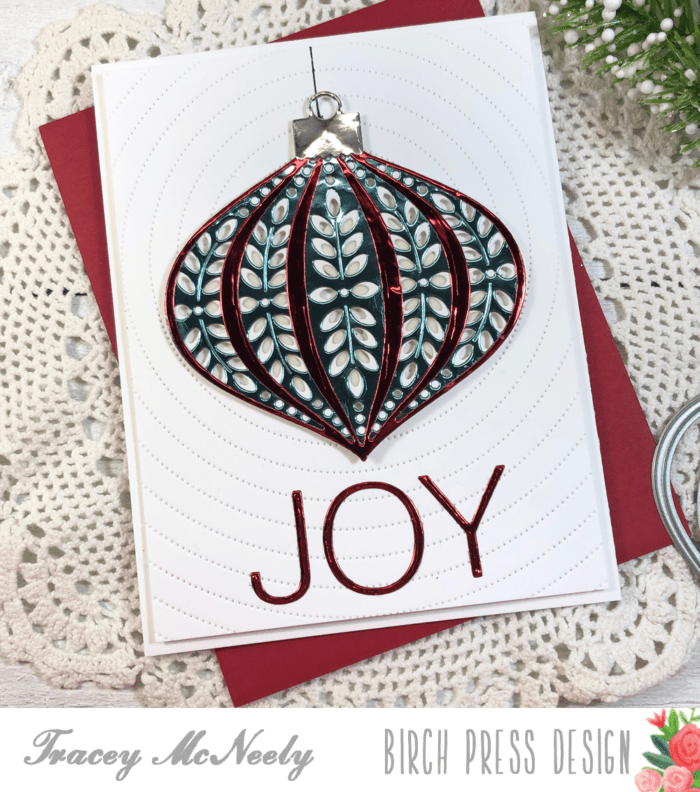
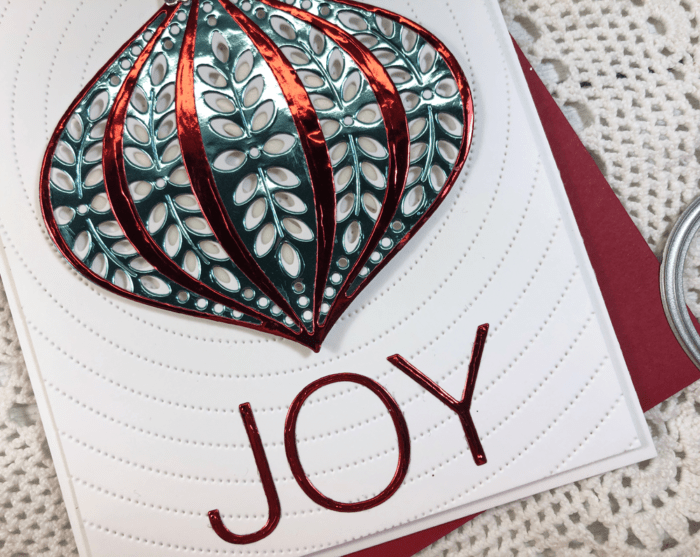
I drew a string for the ornament onto the Pinpoint Radial panel with a Copic Mutiliner and adhered the ornament with foam tape. The word ‘Joy’ was die cut in red foil using the Simple Joy die set.
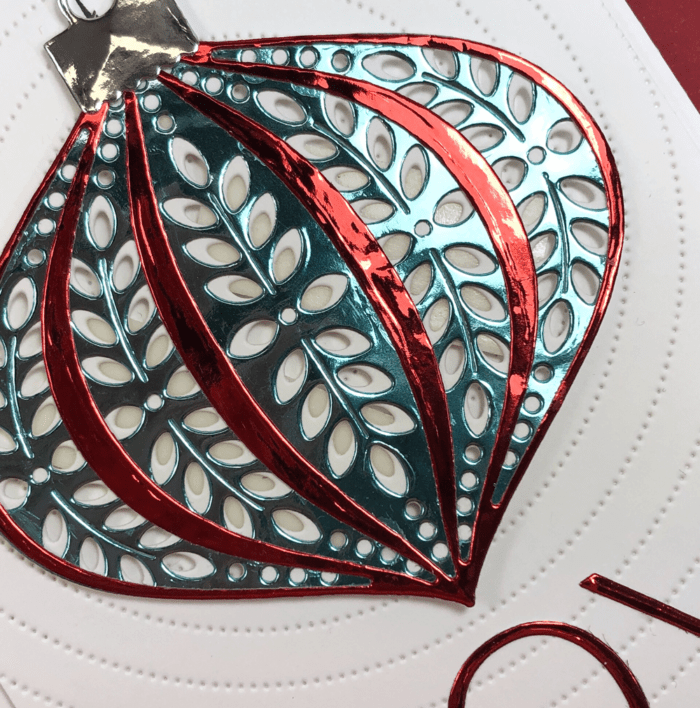
The foil papers work just beautifully with the layered ornaments.
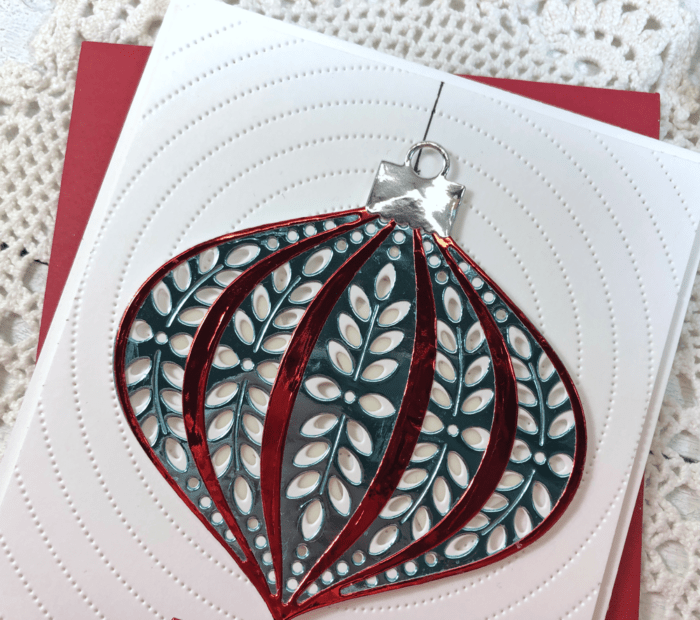
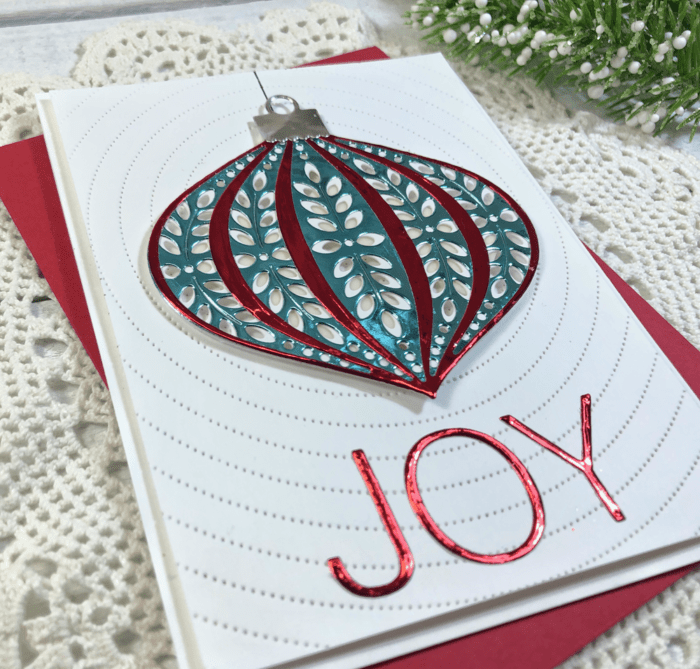
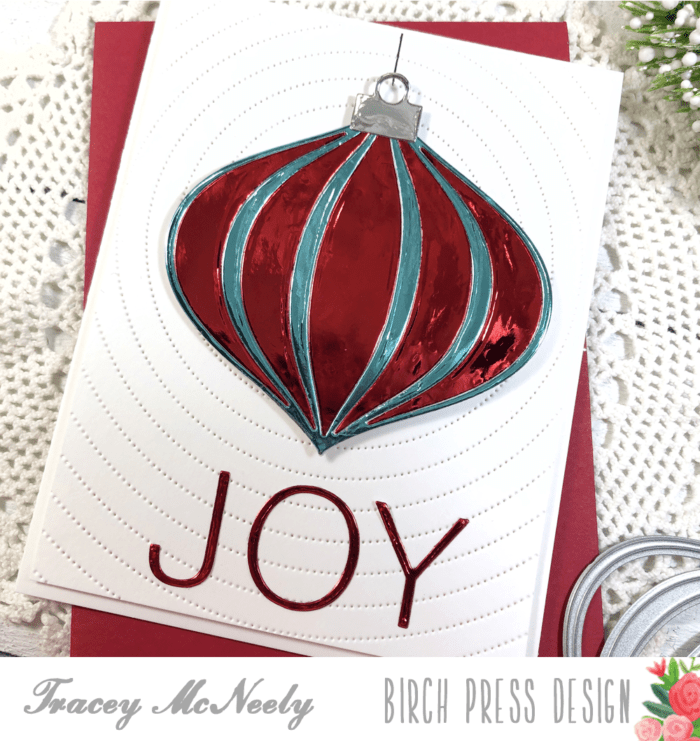
For the next two cards I cut the ornament shape from the Ornament Basics die set in white carstock. I cut the Marisol Ornament Layer A in both light aqua and red saving the interior pieces so I could inlay the red pieces into the light aqua bauble and the light aqua pieces into the red bauble.
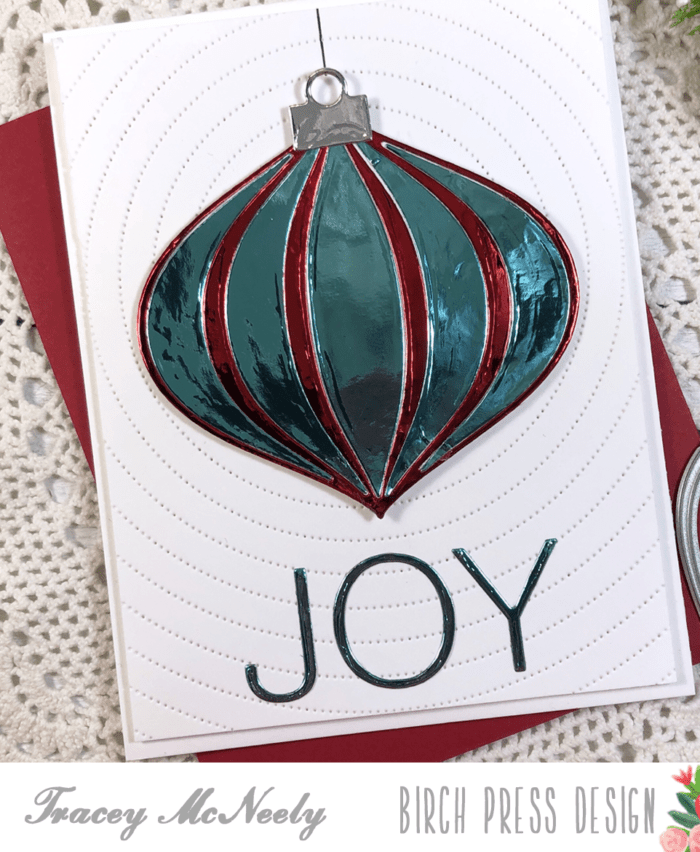
The ornament caps were die cut in silver foil using the Ornament Basics die set. I drew the ornament strings with a Copic Mutiliner and adhered the ornaments with foam tape. The word ‘Joy’ was die cut in red foil using the Simple Joy die set for the red inlay card and the light aqua for the light aqua inlay card.
These cards turned out even more elegant than I thought they would. There is something so beautiful about cardmaking with foil.
Thank you for stopping in today to craft with me. I hope I have inspired you to make a few more cards before for close the door on Christmas for 2020. Come back again for more inspiration here on the Birch Press Design blog!
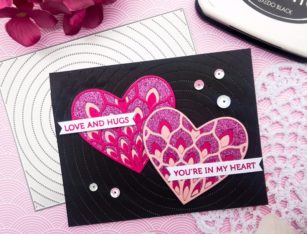
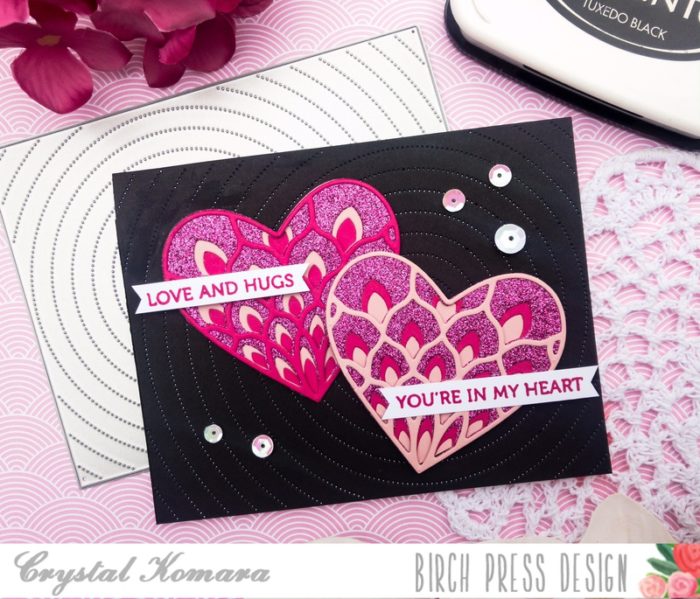
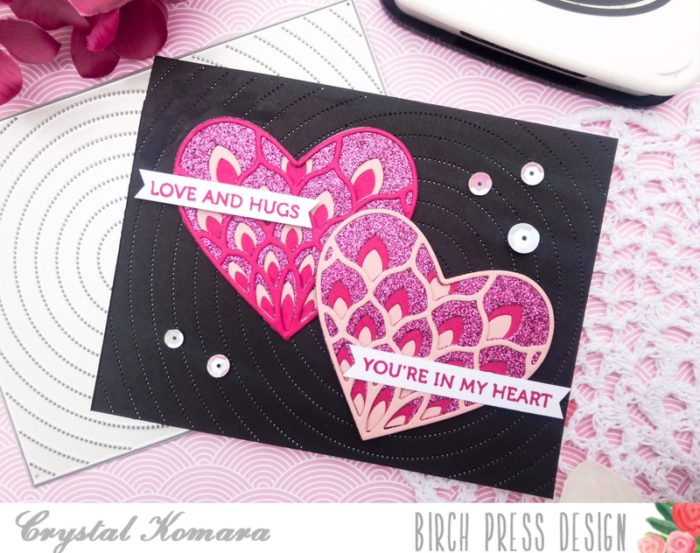
Hello friends and happy New Year! This is Crystal here with you today sharing some beautiful new Valentine’s themed products with you and I absolutely love this new Petal Heart die!
Card details:
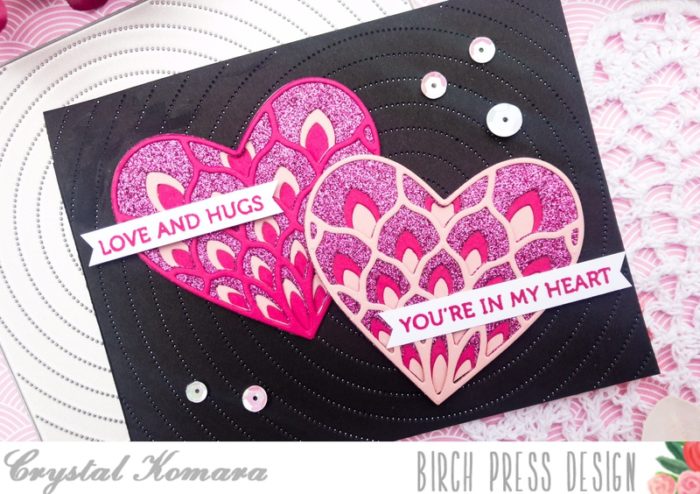
The base of this A2 sized card is made from 80 lb. black cardstock. Using the Pinpoint Radial Plate die, I cut the background from black cardstock. I adhered this stitched background directly to the cardstock base using Lineco PH neutral bookbinding glue (my go-to liquid adhesive).
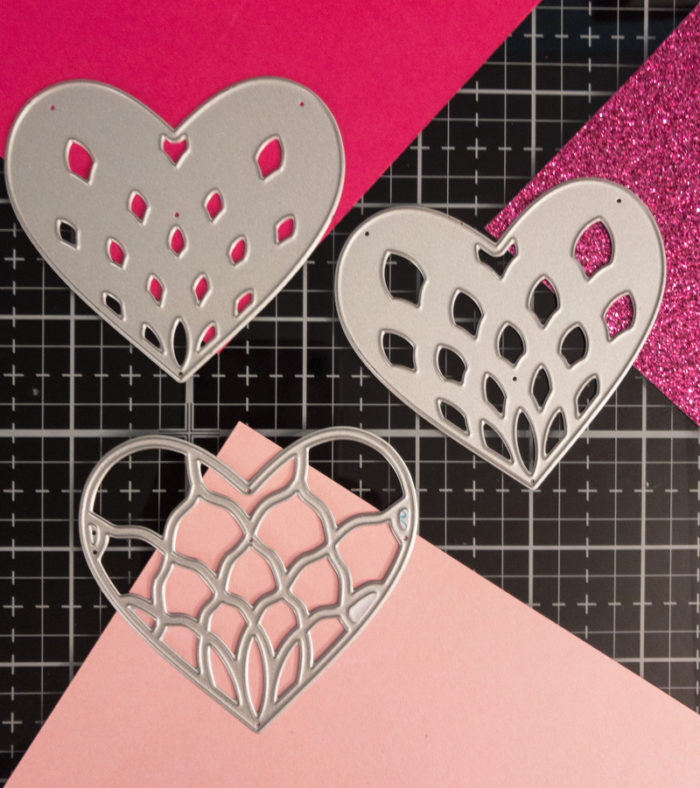
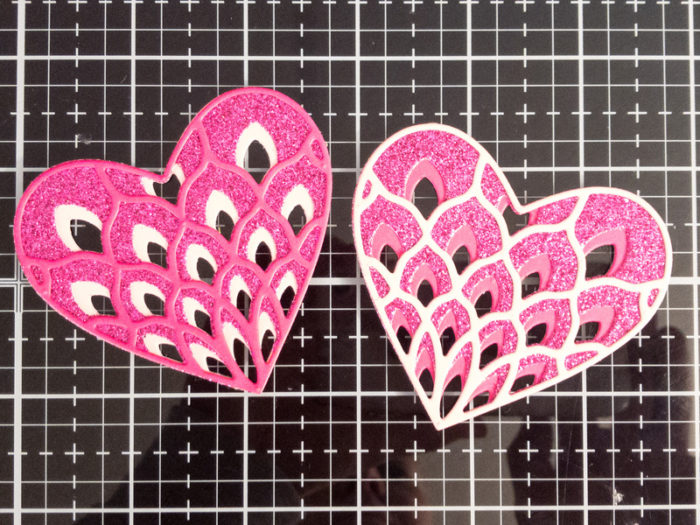
Using the new Petal Heart Layering dies, I cut Layer C (the bottom layer) from a fuschia pink cardstock. Layer B (the middle layer) from flamingo pink glitter paper and Layer A (the top layer) from a blushing bride pink cardstock. Since I made two hearts for this one card, I then reversed the colors and cut Layer C in blushing bride pink cardstock, Layer B in flamingto pink glitter paper and Layer A in fuschia pink cardstock. For both hearts, I adhered all three layers together with Lineco glue.
I adhered both layered hearts to the card using 3M foam adhesive for added dimension. I used two sentiments from the Lingo Thanks stamp set. I stamped each sentiment in fuschia ink on thin strips of white cardstock. I notched both ends of each sentiment strip before adhering each sentiment strip over one heart. Lastly, I added a couple iridescent sequins to the card using glue dots for added dimension and sparkle.
I hope you have enjoyed a sneak peak of some of the new Valentine’s products! Thanks for visiting and have a wonderfully creative day!
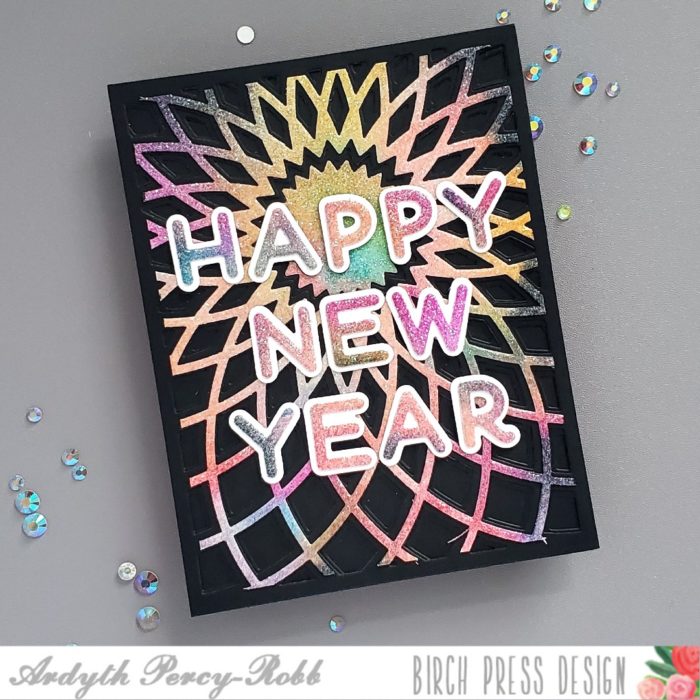
If there’s one thing we can probably all agree on, it’s that we’re happy that 2021 is almost here!
I created a colourful New Year’s card with a fun technique using alcohol inks and the Delicate Pastels Glitter Card pack.
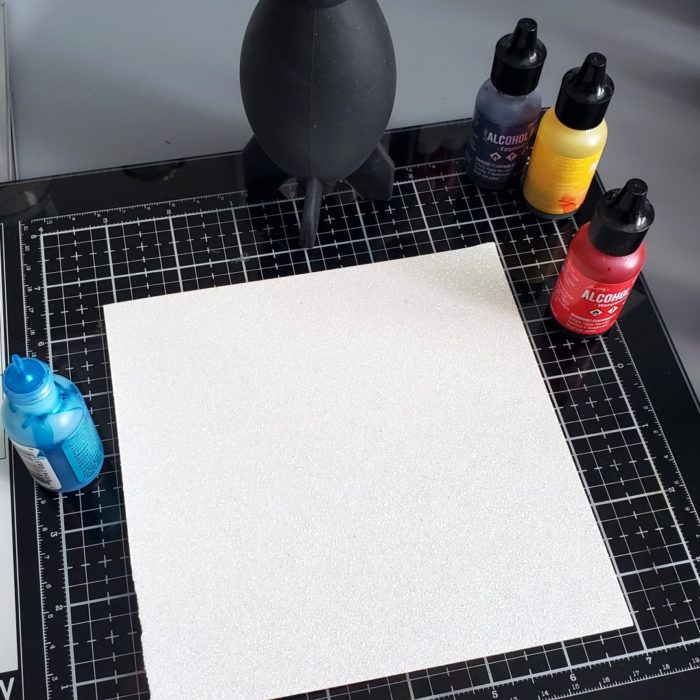
I started with a 6×6 inch piece of white glitter cardstock:
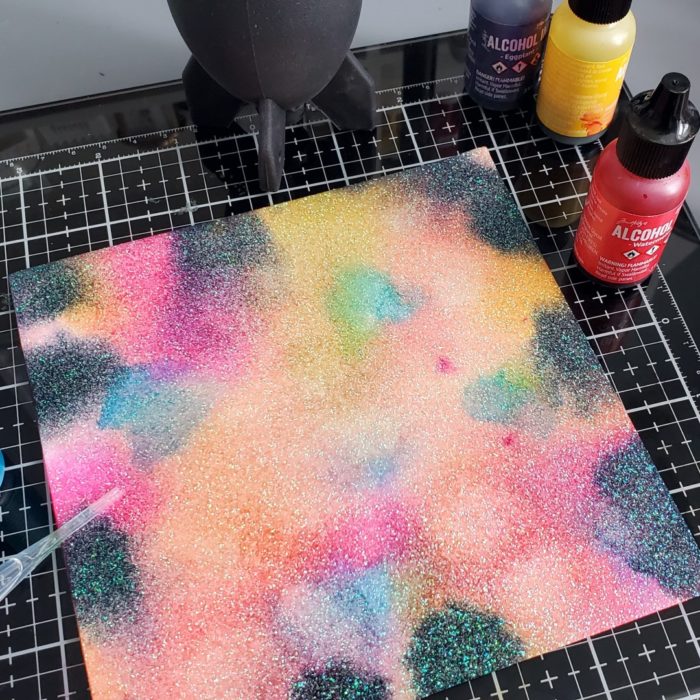
I liberally spread rubbing alcohol (you can use blender solution) over the cardstock and dropped in lots of colours of alcohol ink. I used my lens cleaner (air pump) to spread the colours around and then left it to dry.
I used mostly bright colours and I added some darker (Eggplant) ink around the edge to see how I liked it. I preferred the bright colours for this card, but I wonder about creating a ‘galaxy’ sky with more of this darker ink…..
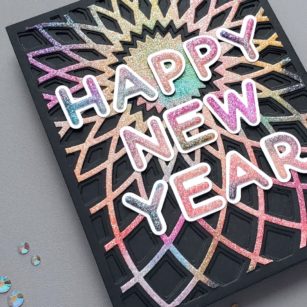
When it was dry, I used the top layer of the Dazzle set to cut it. This gave me a sparkly circle from the centre which I used a little later.
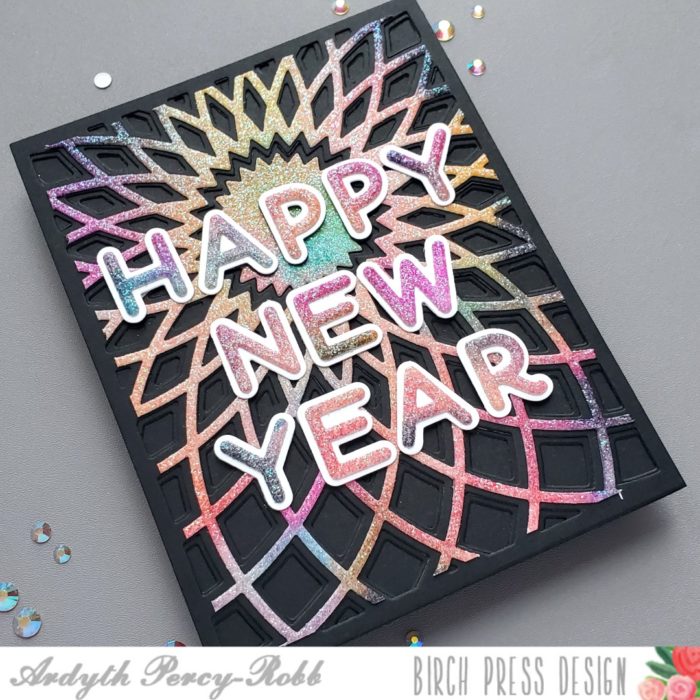
I cut the bottom 2 layers from black cardstock, as well as a black cardbase, to really let the glittery colours stand out!
I used the sparkly circle from the centre of my top layer, and placed it over the bottom layer die to cut a smaller circle. I glued it in and that created a black pointy frame around it, which has a really energetic look!
For my sentiment, I used the rest of my glittery alcohol ink panel and the Mod Alphabet, using white cardstock for the shadow layers to try and make sure that the visibility was high.
Wishing you all a very happy and healthy New Year!
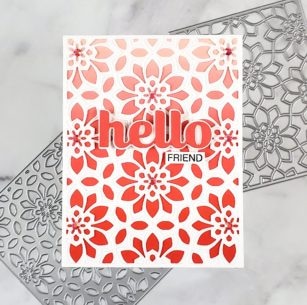
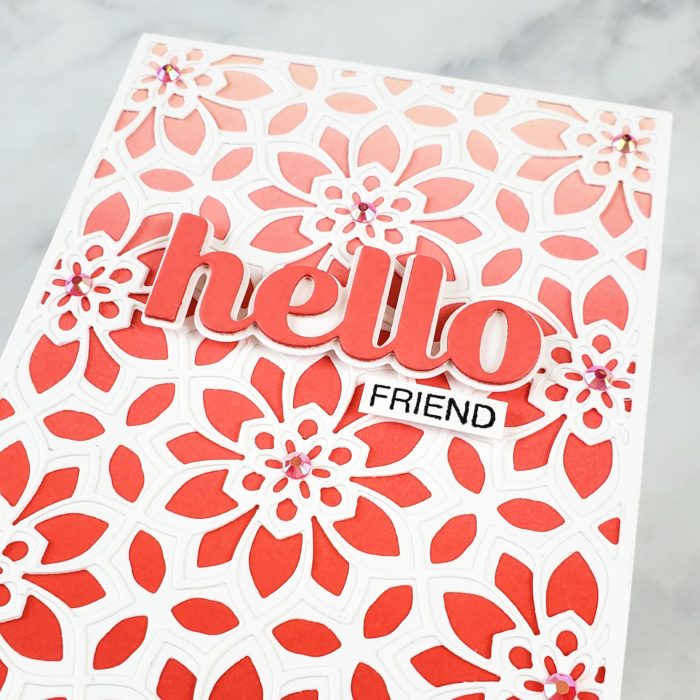
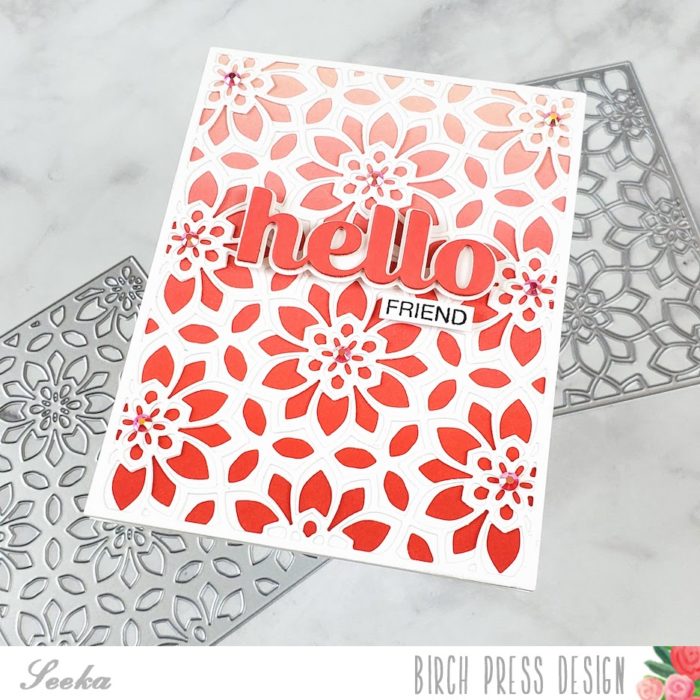
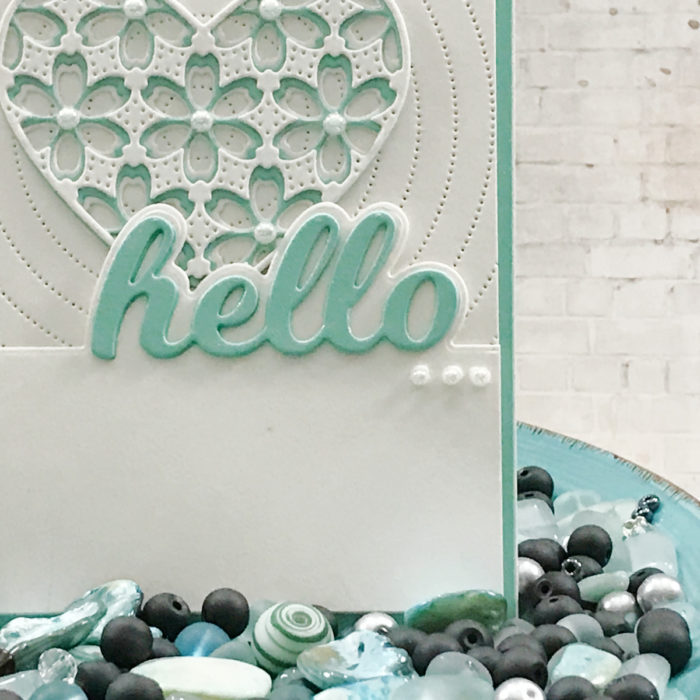
Hello there, it’s Seeka here and today I have a card featuring the Viola Plate Layer die set over an ink-blended background. I picked a pink and red color scheme, fitting for Valentine’s Day; what colors would you choose?
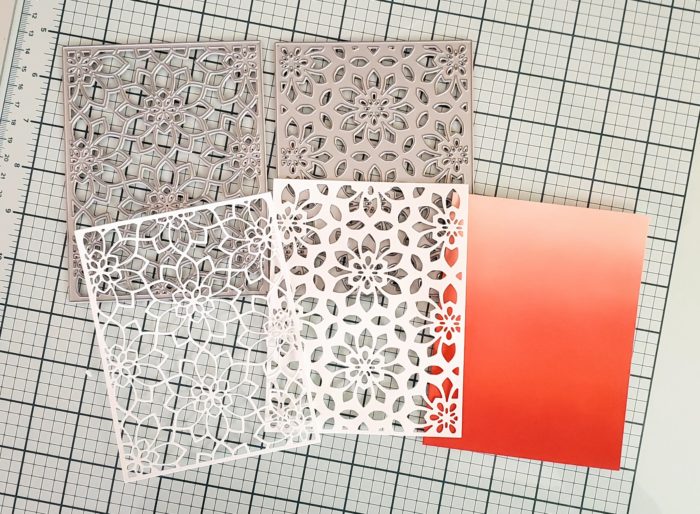
I began by creating the ink-blended background. I used foam blending tools to blend Candied Apple, Abandoned Coral, and Tattered Rose Distress Oxide inks onto a 4.25” x 5.5” panel of Bristol smooth cardstock. Next, I used the Viola Plate layers A and B dies to cut pieces of white cardstock. I layered and adhered the two die-cut pieces together and then adhered them to the ink-blended panel.
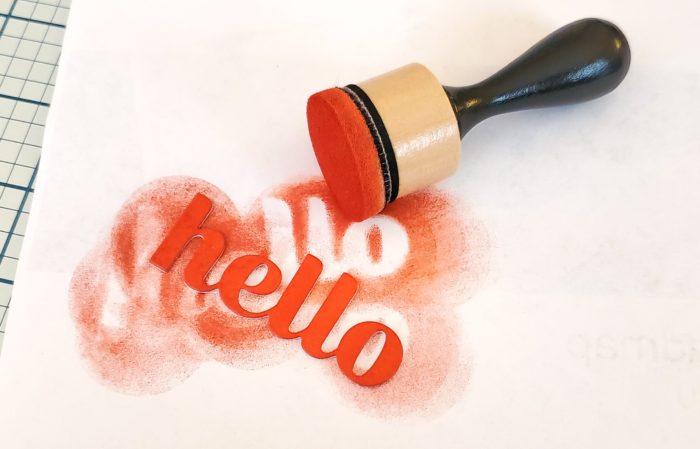
Using the Big Hello die set, I die cut “hello” three times from white cardstock. I used a foam-blending tool to color one piece with Abandoned Coral Distress Oxide ink, and then I stacked and adhered all three layers together, with the pink piece on top. I adhered the piece to the shadow layer, which I had cut from white cardstock, and then used foam tape to adhere the sentiment to the background.
Next, I stamped a sentiment from the Awesome Ticker Tape stamp set in black ink onto white cardstock. I trimmed the sentiment down so that it just said “friend,” backed it with foam tape, and adhered it just under the “hello” sentiment.
To finish the card, I adhered the card front to a card base and then adhered some small pink gems to the centers of each of the flower shapes in the background.
I am here today featuring the Flora Layering Die set and using the Pinpoint Radial Plate for the background setting!
I chose only two colors of card stock for my card design today.
Once all my images where die cut, I used my liquid adhesive to make sure I had a good bond for each layer of the flora heart design and set aside to dry.
When cutting the pinpoint radial die you already have a panel cut to the size of a standard A2 size card base (4 ¼ in x 5 ½ in). I trimmed the panel down to 4 in x 5 ¼ in and framed this panel using the accenting color card stock.
I adhered my heart onto my panel making sure it was centered on the center circle. Once set I grabbed my sentiment and positioned it just below the focal point. I used solid card stock for this die cut.
Once my sentiment background was in position I placed the layers of my sentiment on top and added a few pearls to my hearts for embellishment.
As always, I hope you enjoyed today’s project… and if you want to see more details just click on the video below and see how these projects come together step by step!
Make sure you stay tuned for more wonderful projects coming soon! Have a great day and always remember… Be Creative!
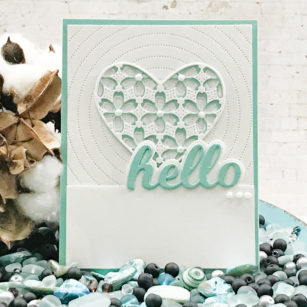
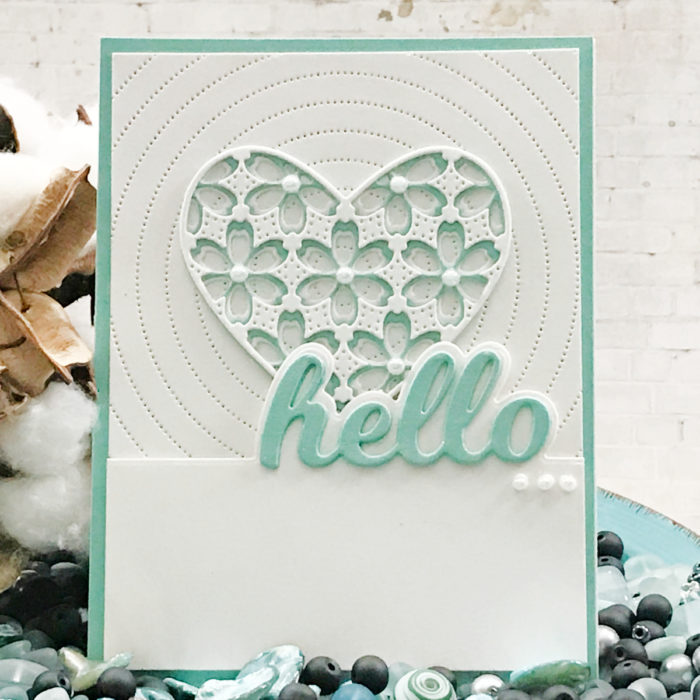
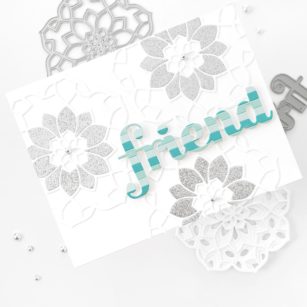
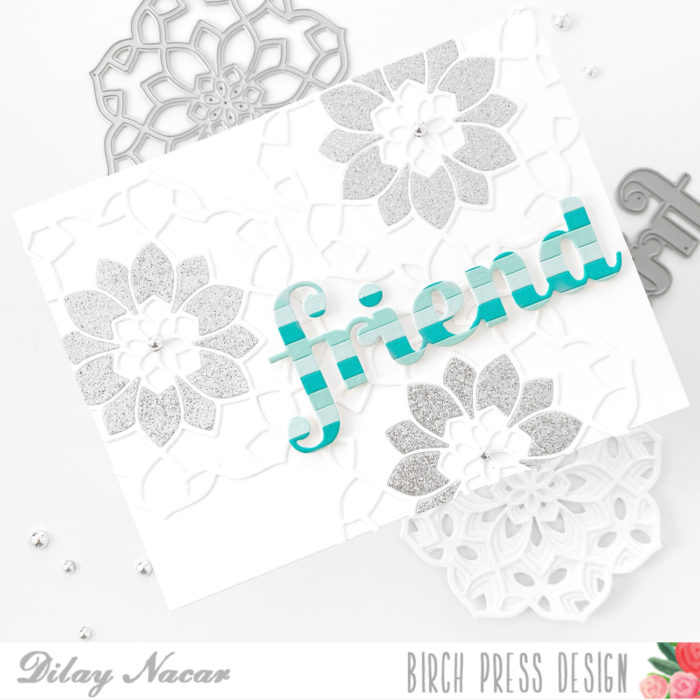
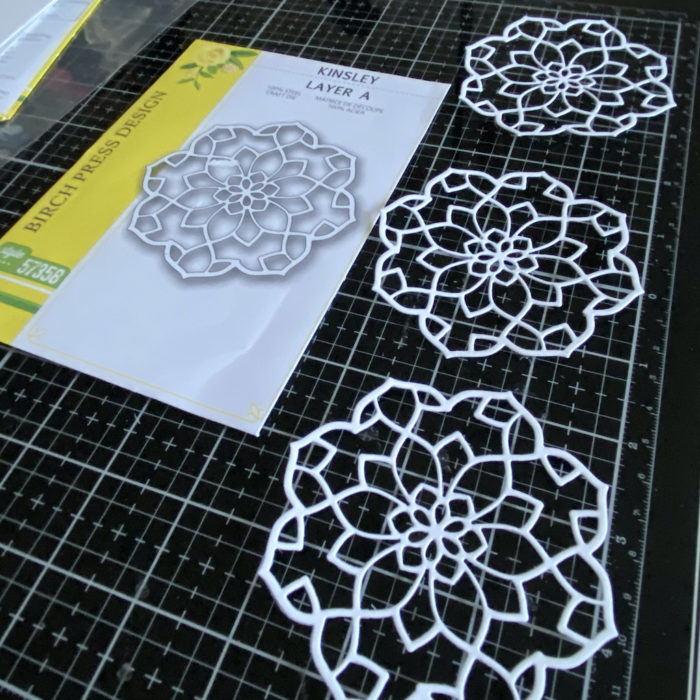
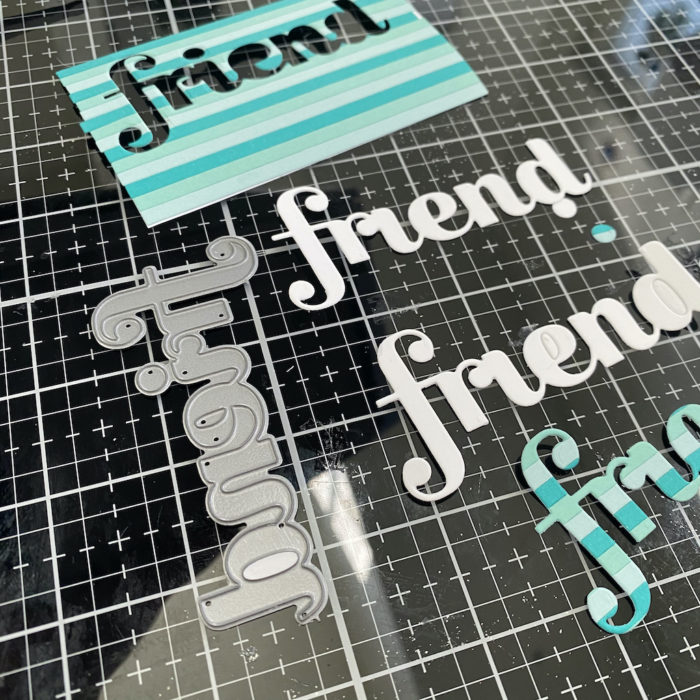
Hello, friends! Dilay here and I am back to share a clean and simple card that I created using one of my favorite dies: the ‘Kinsley Layer Set’. However this time, I used it a bit differently – I only used one layer! By using just the first layer, I was able to create an intricate background easily and quickly!
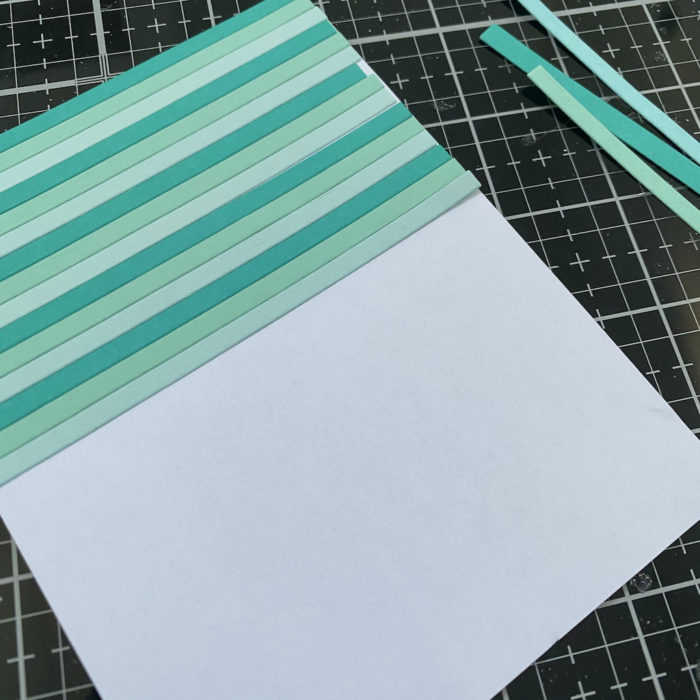
To get started, I cut multiple shades of teal cardstock (you can use any color for this step) into thin strips. I then used tape runner to adhere the strips onto a piece of white cardstock to create a background design to later die cut. I then set this aside to dry and started on the next step.
Strips of teal cardstock adhered to cardstock
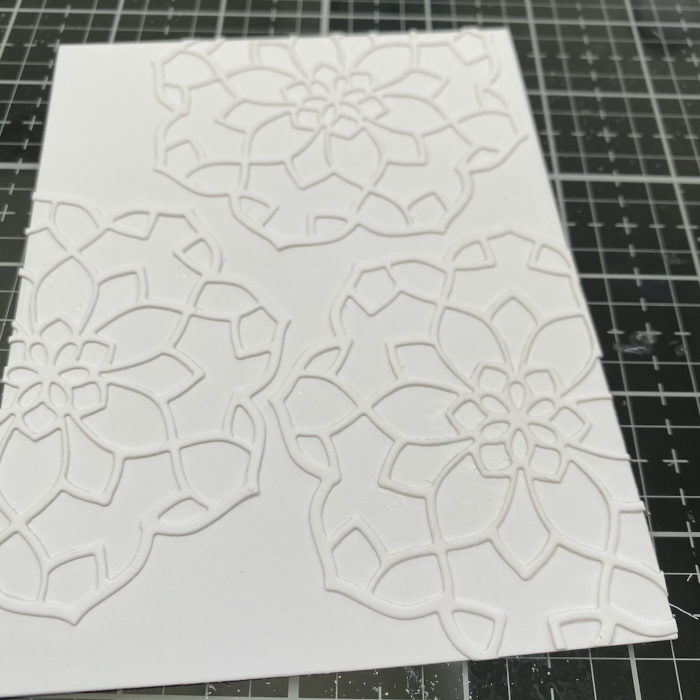
For the background of the card, I cut a piece of heavyweight white cardstock to an A2 size base (5.5” x 4.25”) as the panel. Next, I die cut only the ‘Kinsley Layer A’ die 3 times in white cardstock and adhered the 3 onto the panel in a design that I liked, trimming off any extra.
Die cut ‘Kinsley Layer A’ only 3 timesAdhered all 3 to A2 base to create background
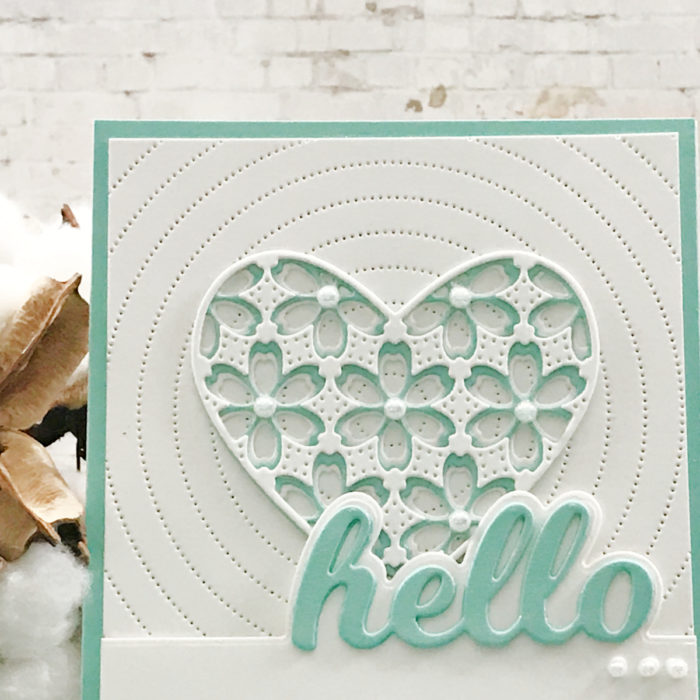
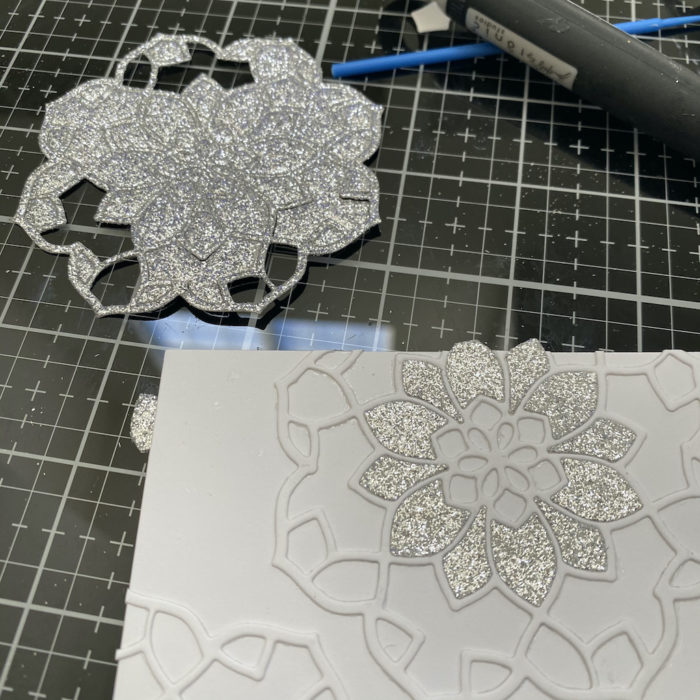
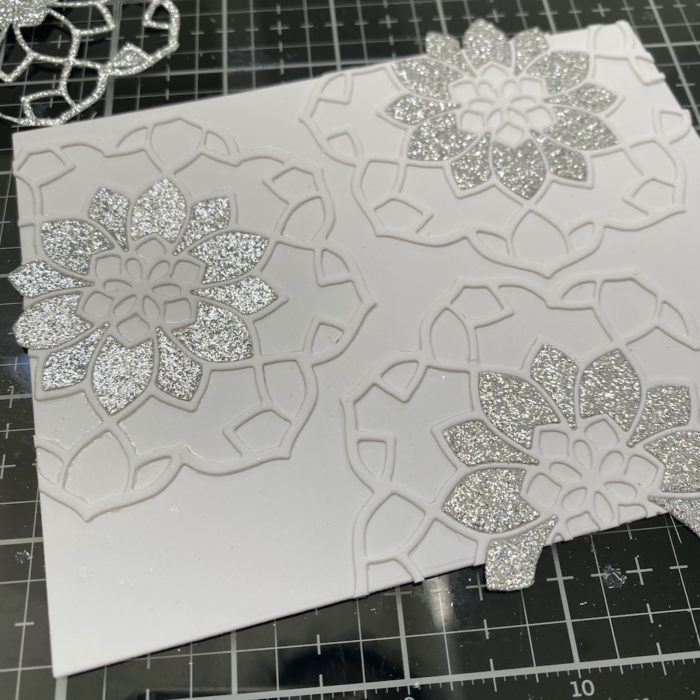
I then die cut the same die 3 more times from silver glitter cardstock and used the negative pieces to fill in the center portions of the ‘flower’, adhering them with liquid adhesive. I set that aside to dry.
Die cut ‘Kinsley Layer A’ in silver glitter cardstock 3 timesFilled in centers using negative pieces of glitter cardstock
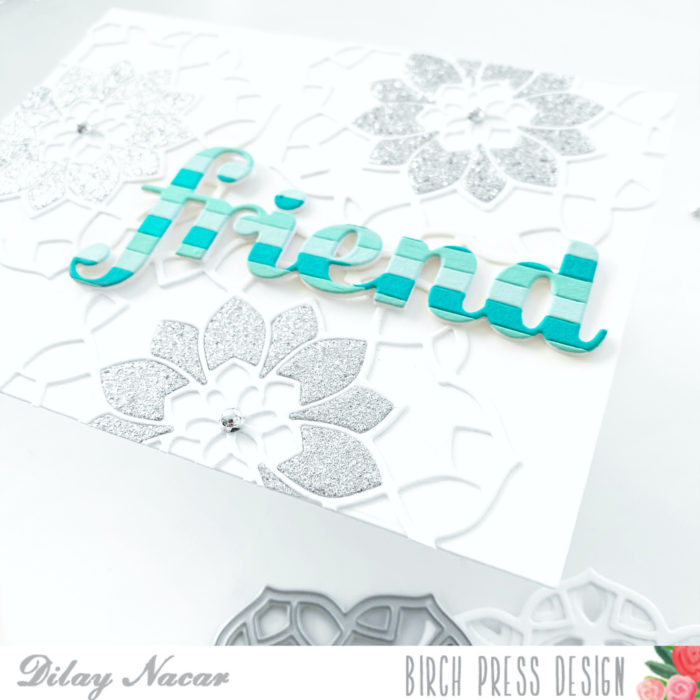
Next, I die cut the ‘Big Friend Sugar Script Die’ using the teal strip design sheet, and once again in white to adhere behind it for added stability and extra dimension.Finally, once the layers dried, I adhered the the sentiment onto the base and added silver flat bobbles to the center of the flowers.
Die cut strips in ‘Big Friend Sugar Script Die’
This technique is great if you’re looking to stretch your dies or create something a little more subtle. You can recreate this card with just about any layer die and color!
I hope you you enjoyed my post today and found some inspiration!
Wishing you all the best this holiday and in the coming year! It’s time to treat yourself to something special! Enjoy 25% off your entire purchase (discount will show in your shopping cart) and FREE Shipping (Continental USA only) December 25 through January 1!
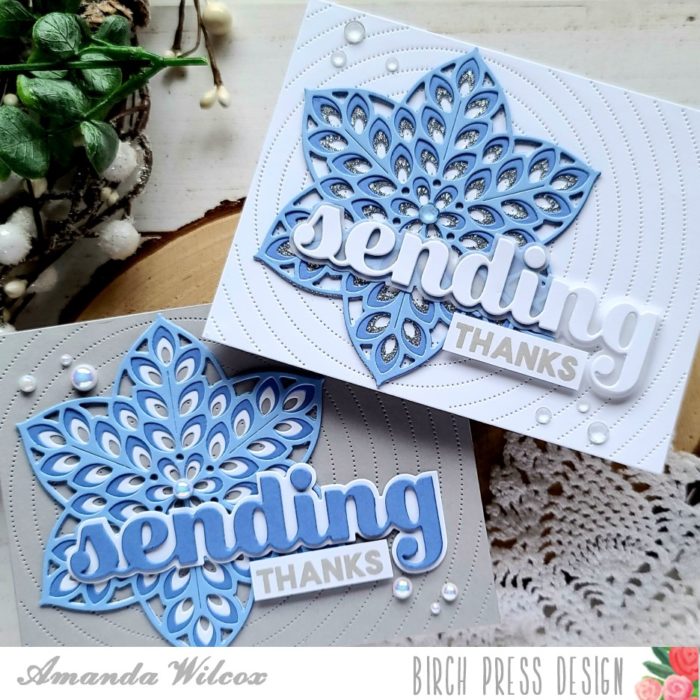
Hello everyone. This is Amanda from Twiddler’s Nook today getting a jump on winter thank you cards that I’ll be sending out after Christmas.
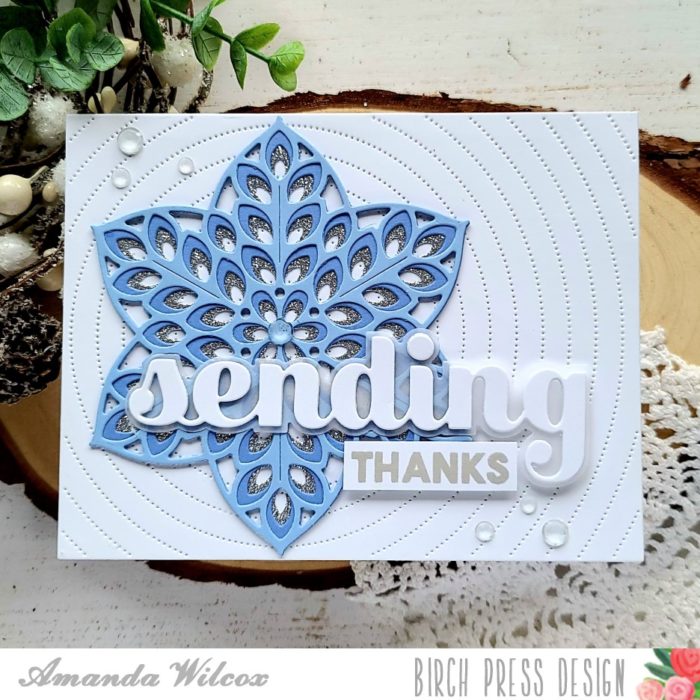
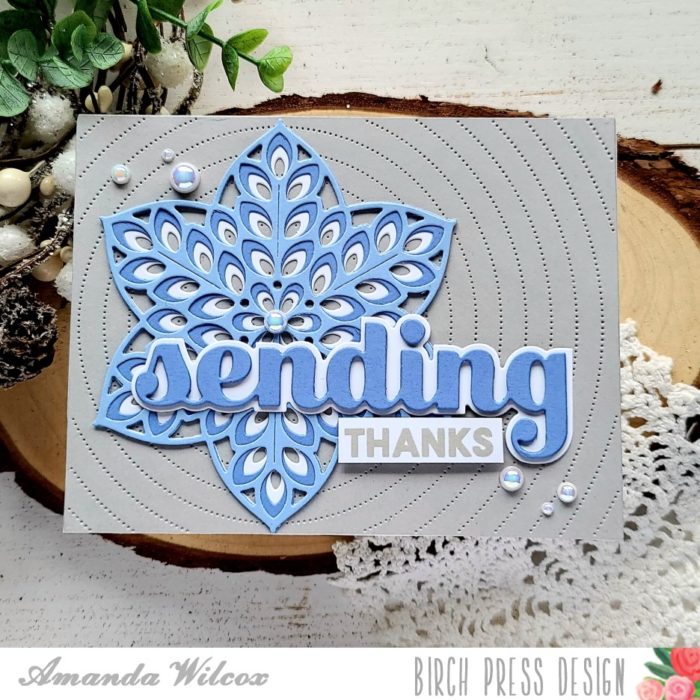
For these cards, I die cut the layers for the Floral Star from two different blue cardstocks and then the bottom layer from white and silver glitter cardstock. I was playing around with different looks and wanted to see which I liked better.
I used liquid glue to adhere the layers and put clear blocks on top to help them dry flat.
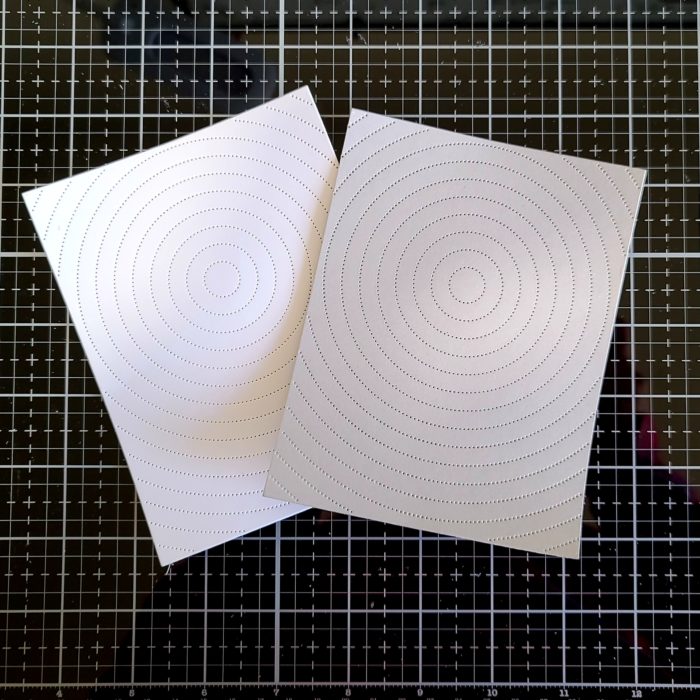
Next, I die cut the Radial Pinpoint Plate from a light gray and white cardstocks and adhered them to white card bases.
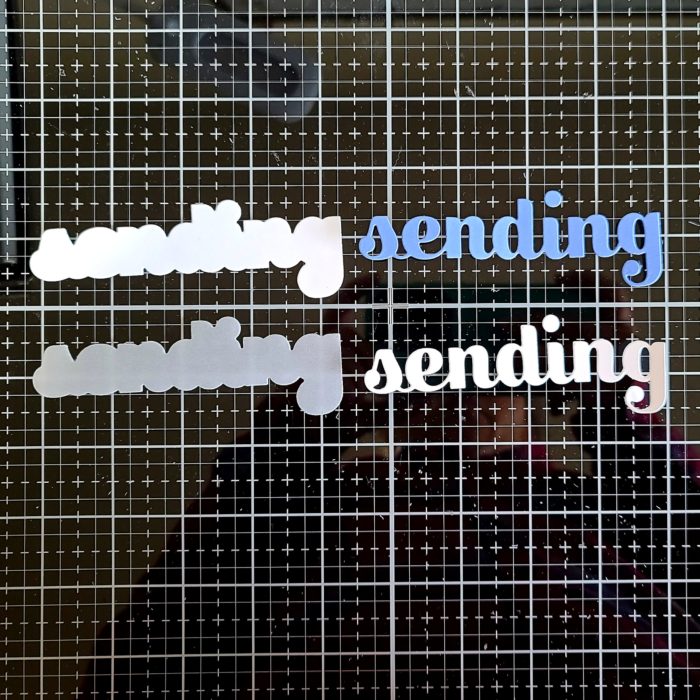
I knew I wanted these to be thank you cards so I pulled out the Big Sending Sugar Script word dies out and cut the shadow from vellum and white, and the word from white and the darker blue cardstock.
I really like the look of the stacked word dies for that dimension and visual interest so I cut each word 3 times and glued them together. Once those were dry, I moved on to assembling my cards.
I used liquid glue to adhere the floral star, then a combo of liquid glue and foam squares for the sentiments.
For finishing touches, I added some white pearls to the gray card and clear gems to the other.
I appreciate you sharing your time with me. Have a fabulous day.