Hi there its Tracey here today and I would love to share a bit of Autumn inspiration with you. I love summer, but the nights are getting cooler, the days are getting shorter and the sunflowers are in full bloom, which for me means fall is on its way.
Using fall colours along with the Viloa Plate Layers die set will change the mood to autumn. This die typically would be used the most in the spring or summer. I have created four cards to show you how you can create a whole different feel with your layered dies just by changing the colour. This is a great way to maximize the use of your dies. Remember that each one of the layers in a die set can create a beautiful card all on it own. I gave this die set a late summer, early autumn vibe.
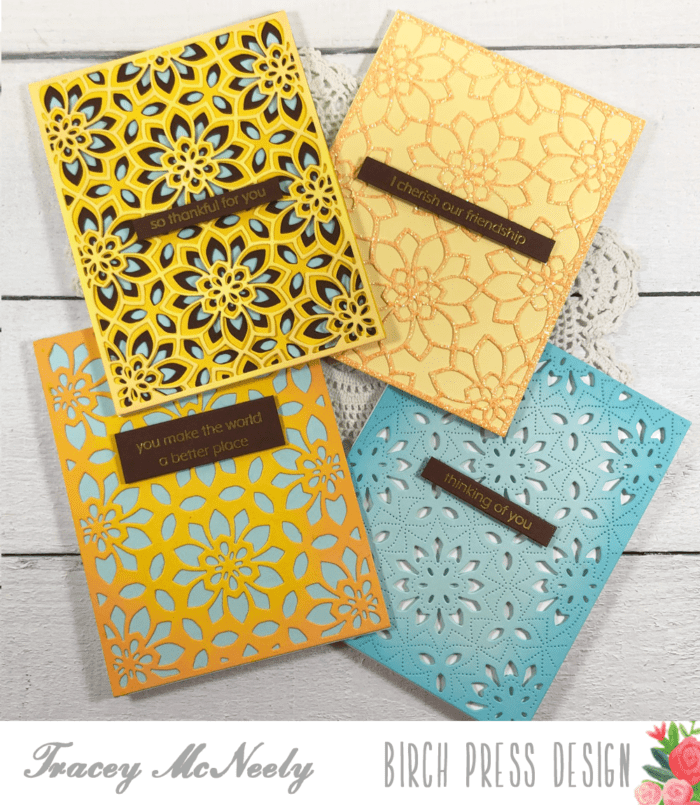
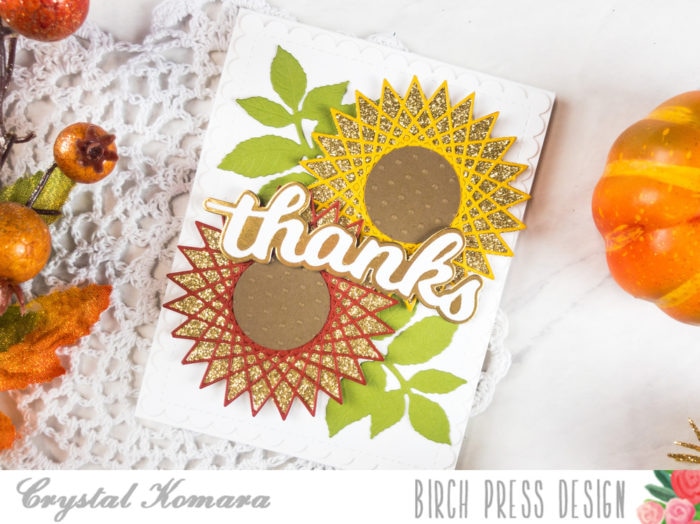
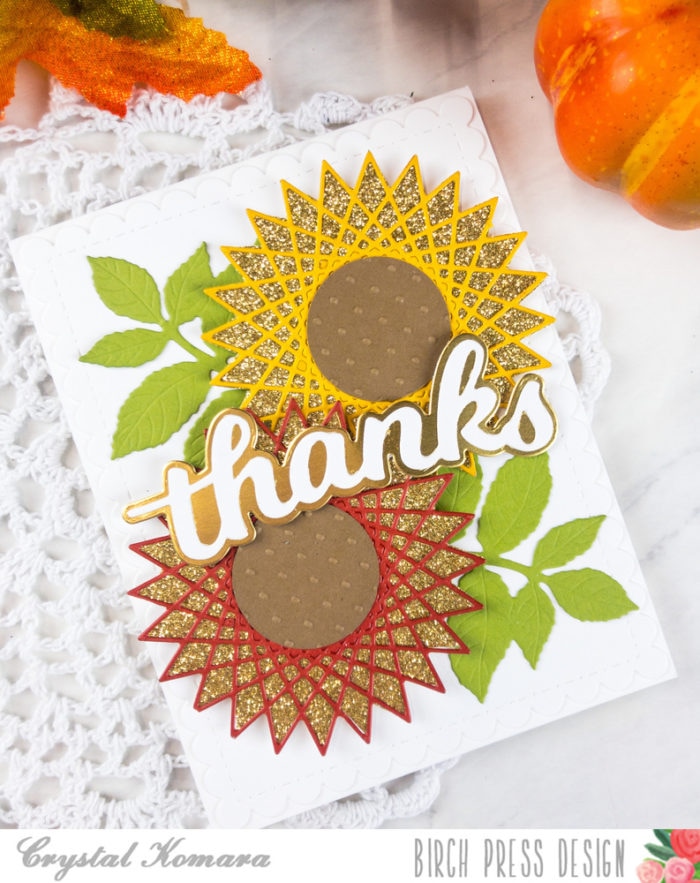
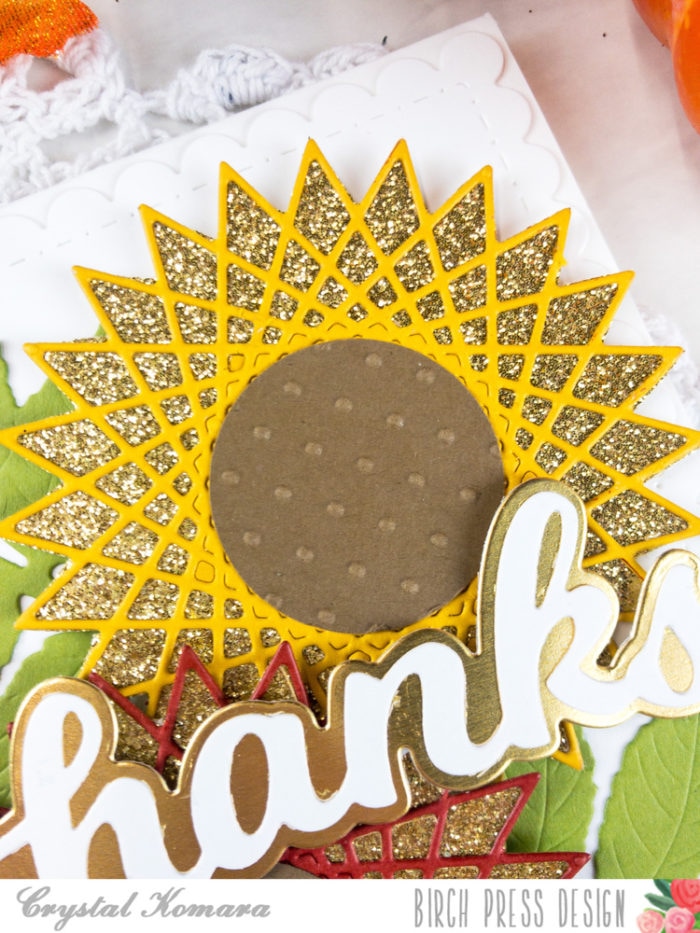
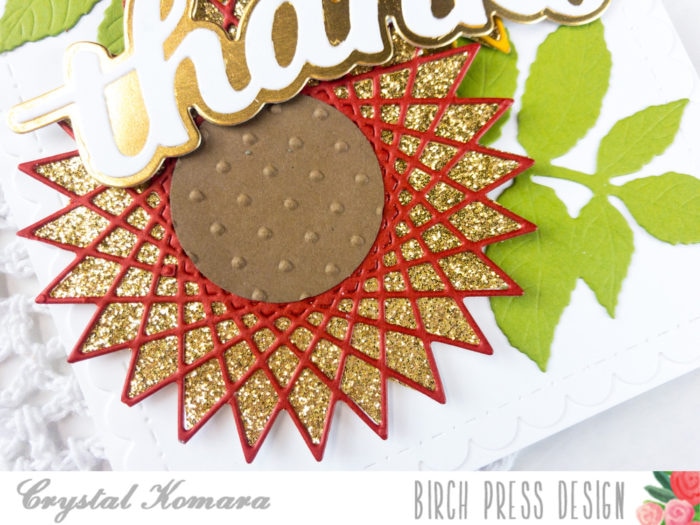
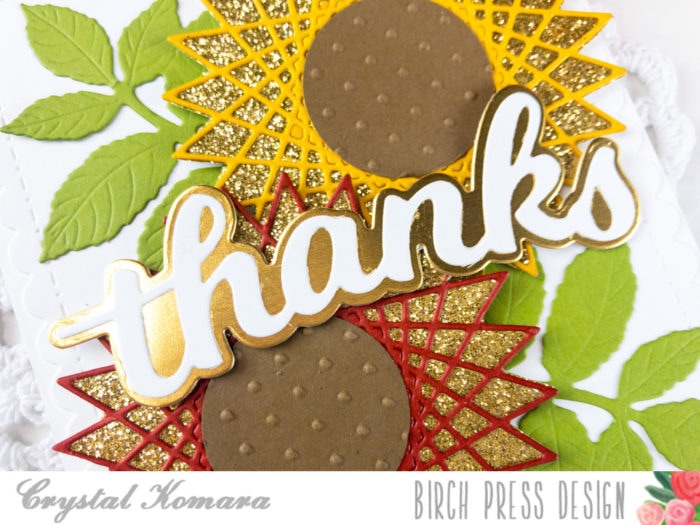
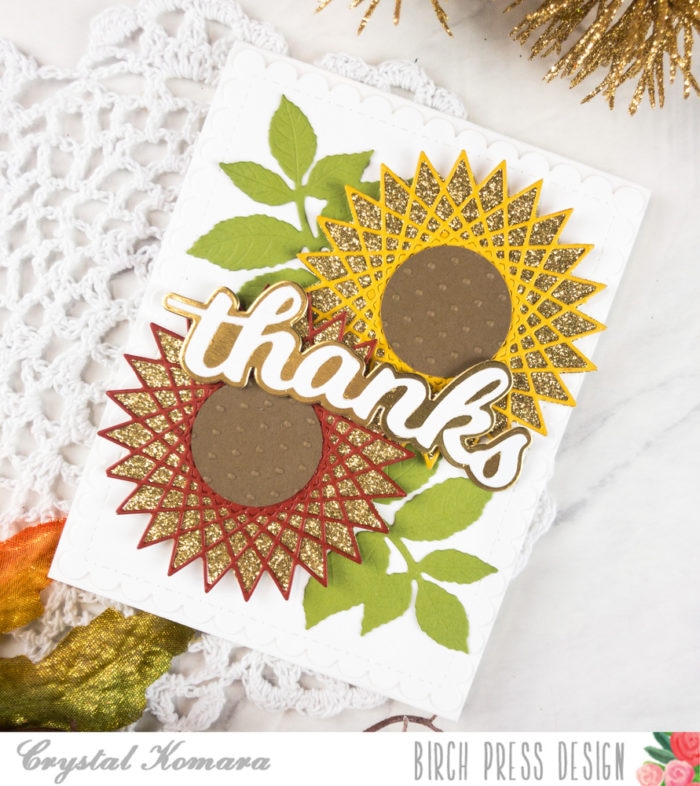
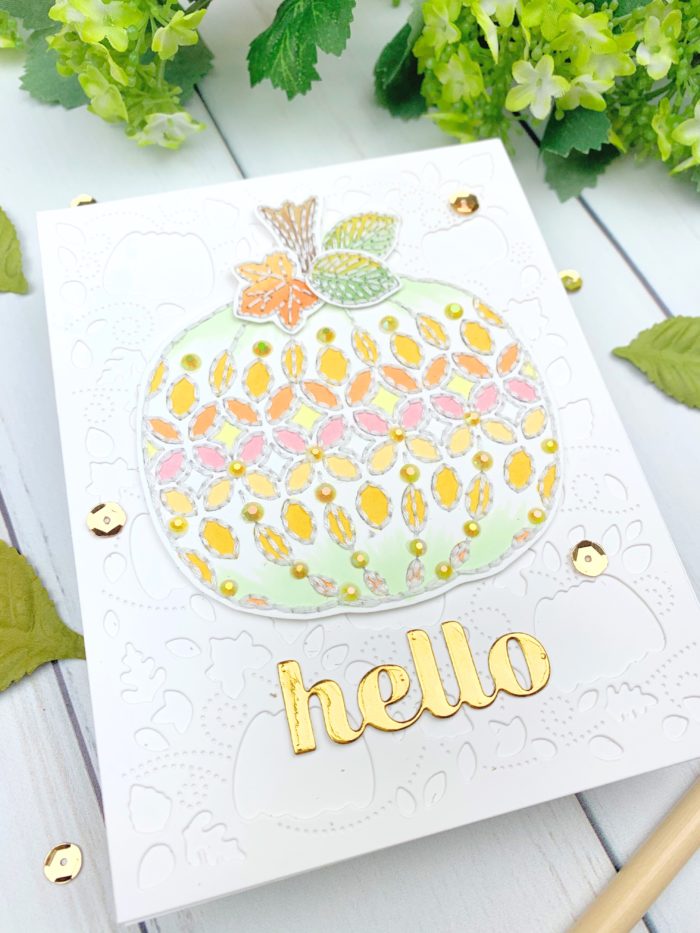
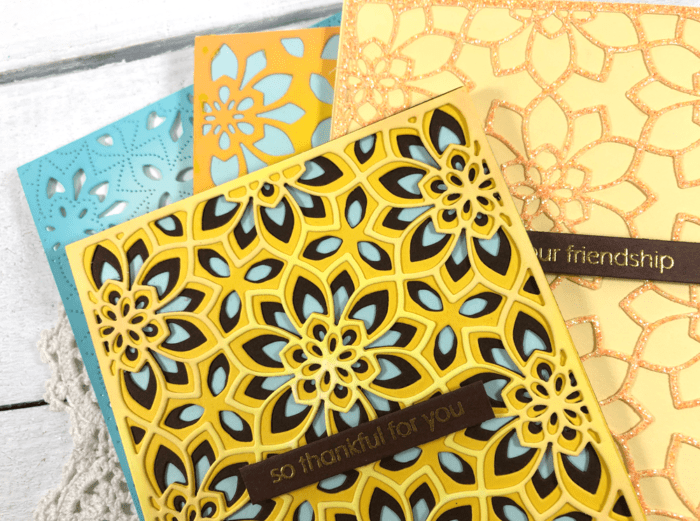
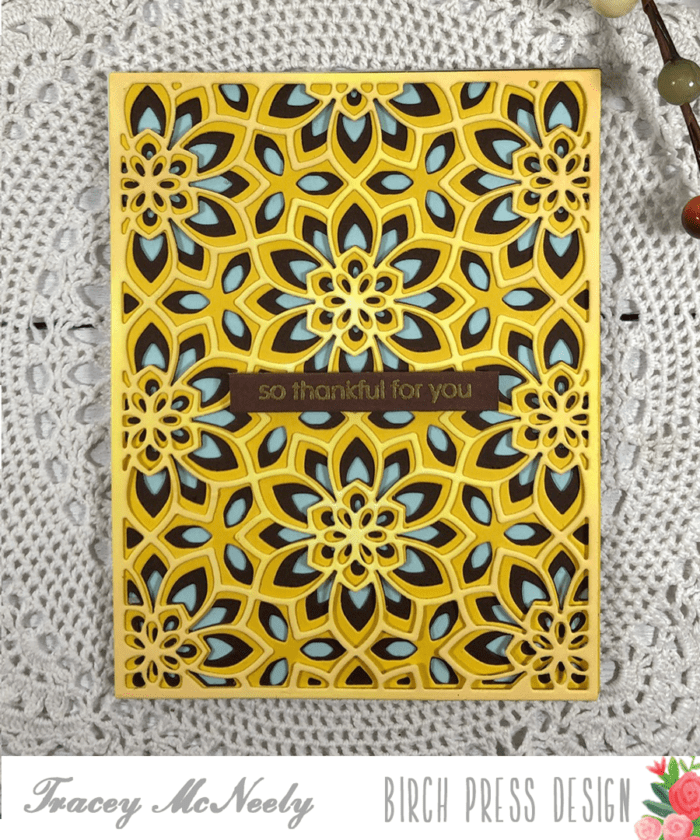
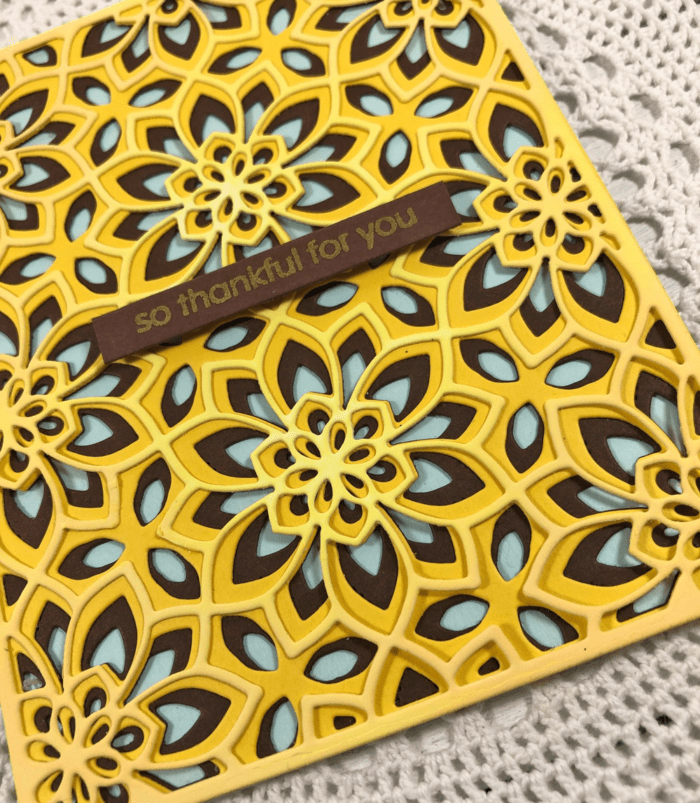
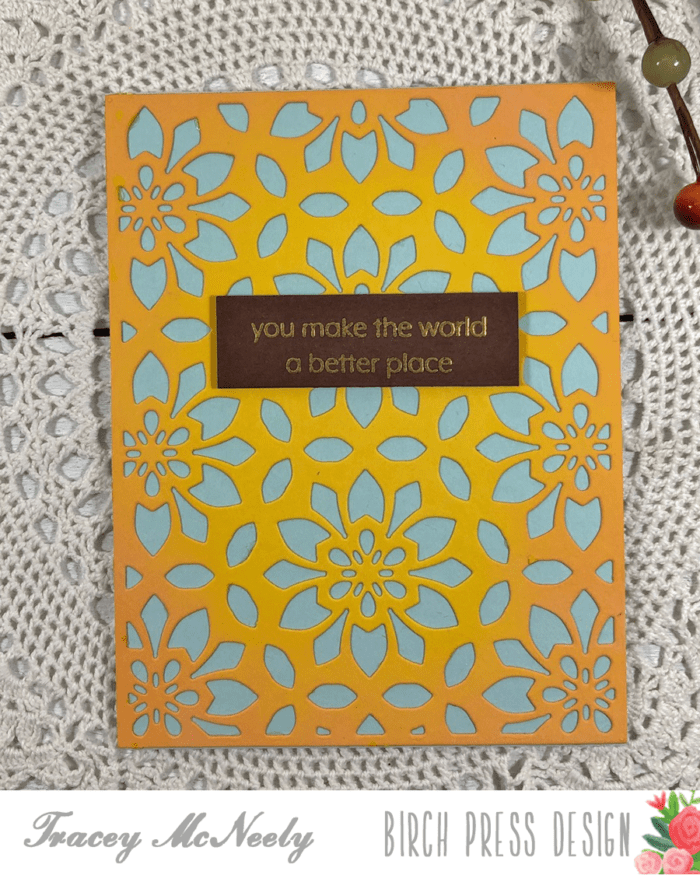
This first card uses all three layers of the Viloa Plate Layers die set. I wanted to make the flowers look like sunflowers so I chose my colours carefully. The layer C die has holes it will show your bottom layer which is typically your card base. What ever colour that is will show through. I added a soft blue cardstock panel to the card base. Layer C was cut from brown cardstock and Layer B from golden yellow. Then I ink blended a panel of Bristol Smooth cardstock with Squeezed Lemonade Distress Oxide ink leaving it a bit lighter in the centre of the panel. Once it was dry I cut it using Layer A. If you wait and make sure your panel is dry before die cutting the cut is always so much cleaner. All the layers were glued together and then glued to the cardbase.
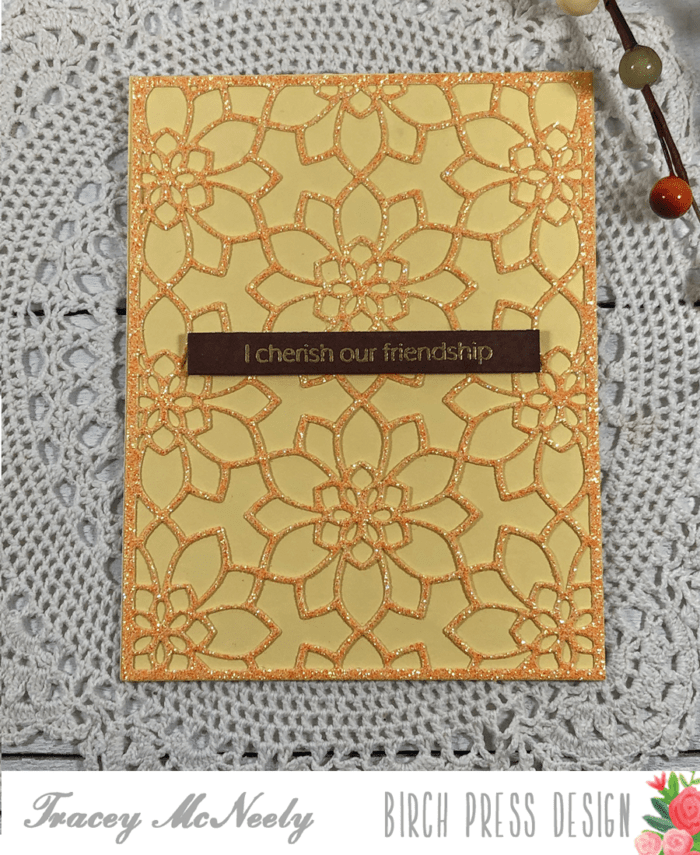
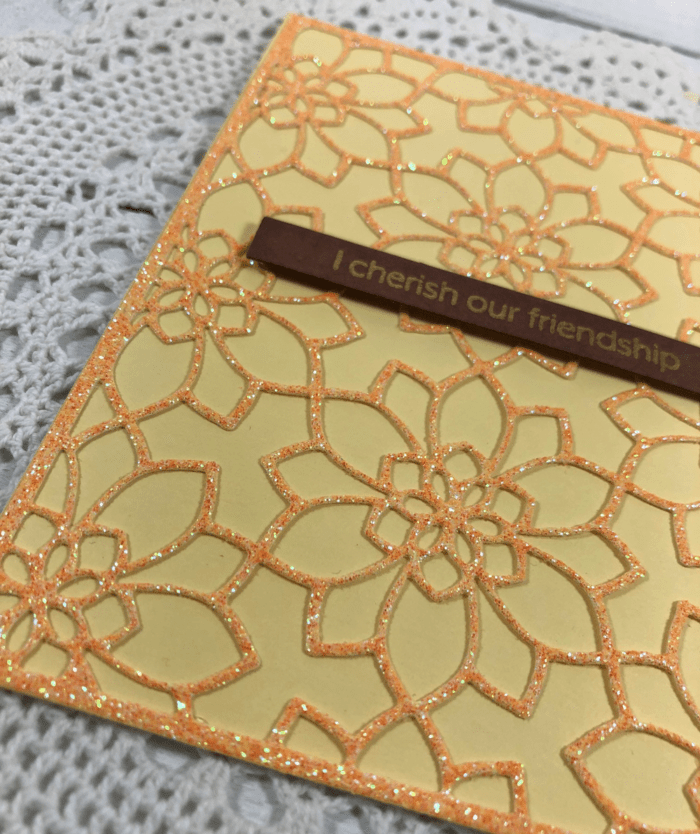
Card two uses only Layer A from the Viloa Plate Layers die set. It was cut golden yellow glitter paper from the Delicate Pastels Glitter Pad. The card front was covered with a panel of light yellow cardstock and the glitter piece was glued directly onto the card front giving it a nice tone-on-tone appearance but with the added bonus of sparkle!
The next card uses only Layer B from the Viloa Plate Layers die set. It was cut from a golden yellow cardstock. I ink blended Wild Honey Distress Oxide ink around the edges giving to give the die cut a bit of depth. The card front was covered with a panel of soft blue cardstock. The die cut was glued directly to the panel.

The last card uses Layer C of the Viola Layer die set. This might be a favourite of mine. It was cut it with the soft blue cardstock. The Layer C die creates beautiful stitching lines when it cuts which make it a perfect die to use all on i’s own. I ink blended Tumbled Glass Distress Oxide ink around the edges of the die cut. Once again I did this to add some depth to the design.
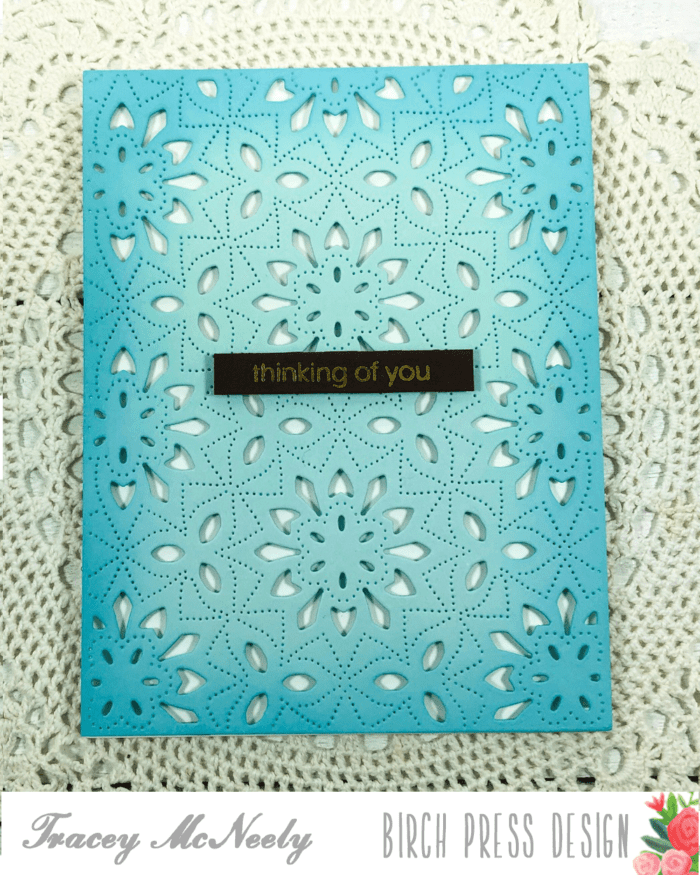
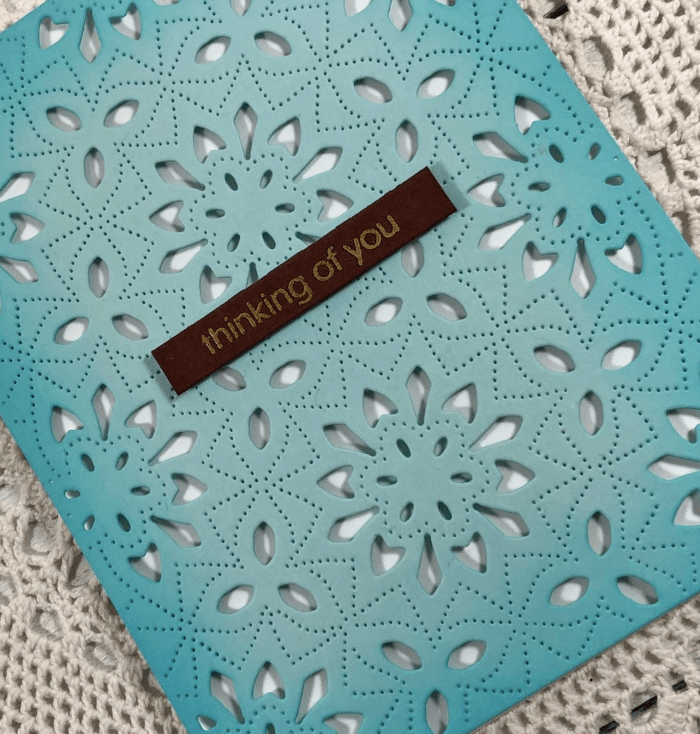
All of the sentiments are from the You Are Awesome stamp set. They were all embossed with a gold pearl embossing powder on brown cardstock.

When you have a set of Birch Press Design craft dies you can use just one die or all of the dies together o maximize your investment. Just by choosing a colour palette you can change the mood of your dies and your cards. All of your dies can be used year round!
Thank you so much for stopping in to craft with me today and we’ll see you next time!

Supplies