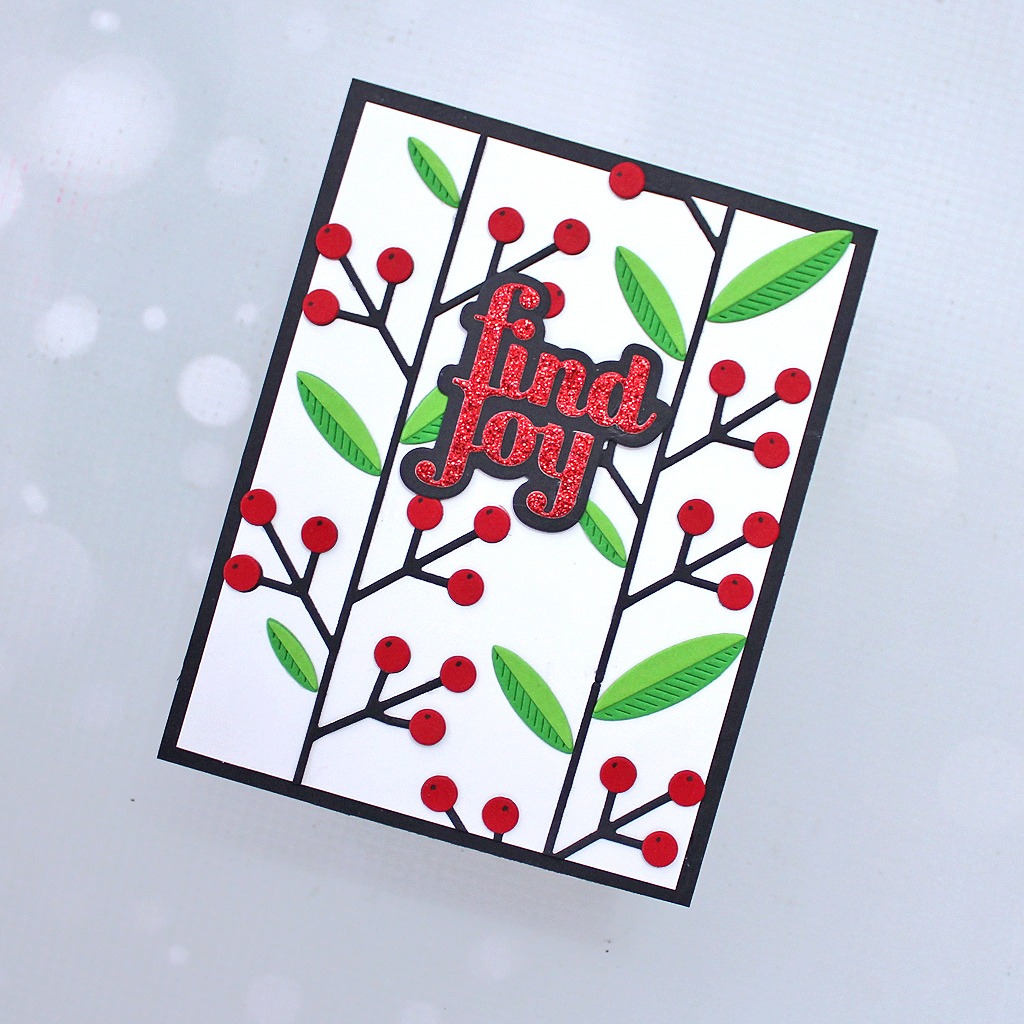
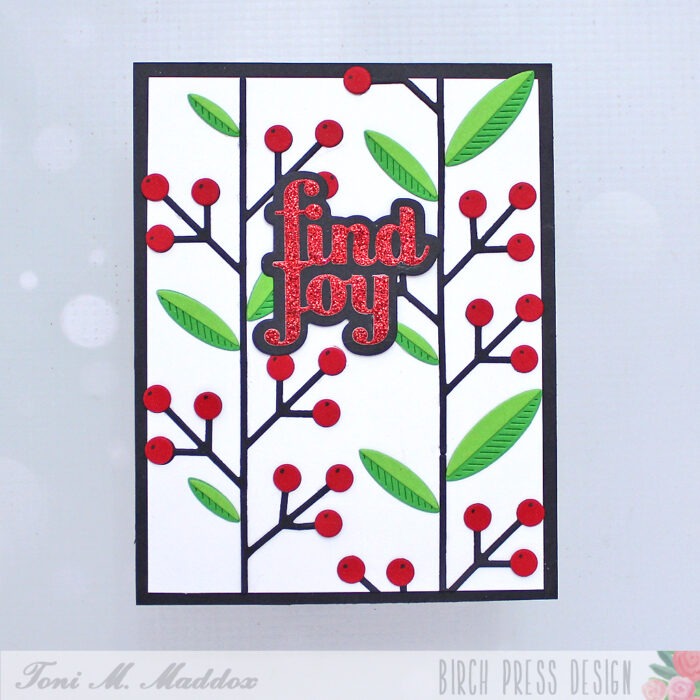
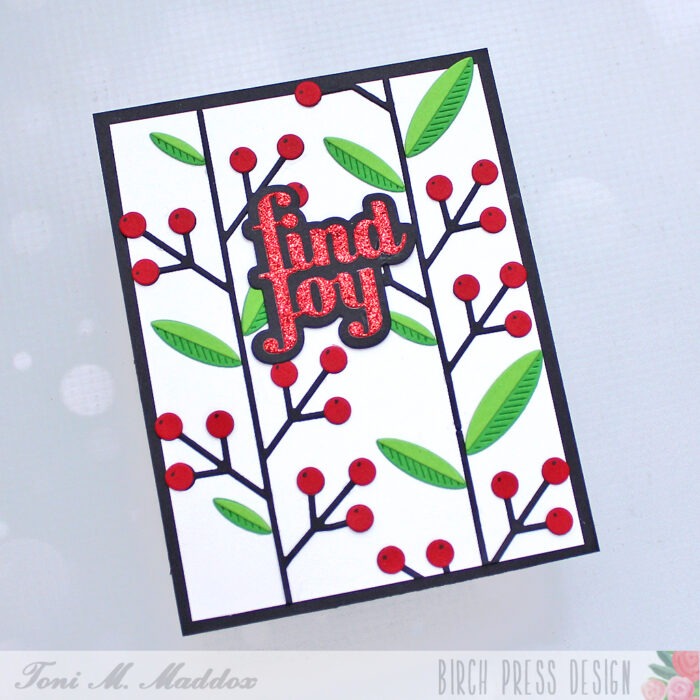
Hello, everyone! Toni here with a stylized greenery holiday card.
I was really struck by the stark lines of the Block Print Stems & Berries set. How could I really allow that to shine on the card?
I used bright Memory Box Cherry Red, Cilantro, and Leaf Sprout cardstock without sponging, making the design really pop on that white base.
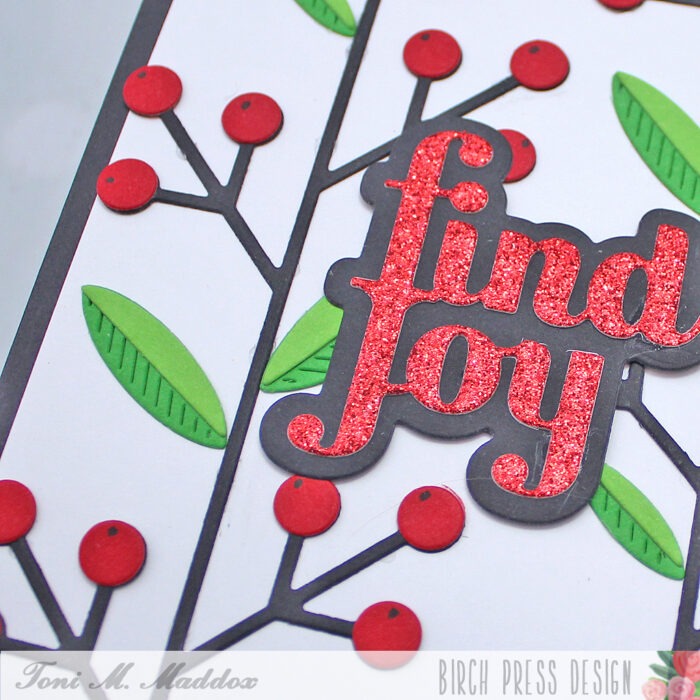
And how could I not use red glitter cardstock for the Find Joy word die. Mounting that on black along with the card base and stems in black–chef’s kiss!
Be sure to visit my blog, Frankie Helps Craft, for a full list of ingredients and to check out my other projects.
I hope you enjoyed today’s card and have a great rest of your week!
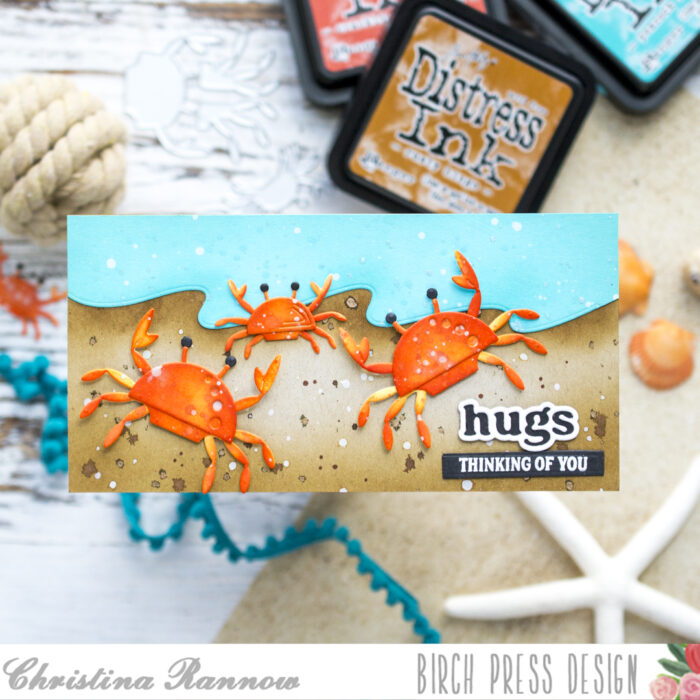
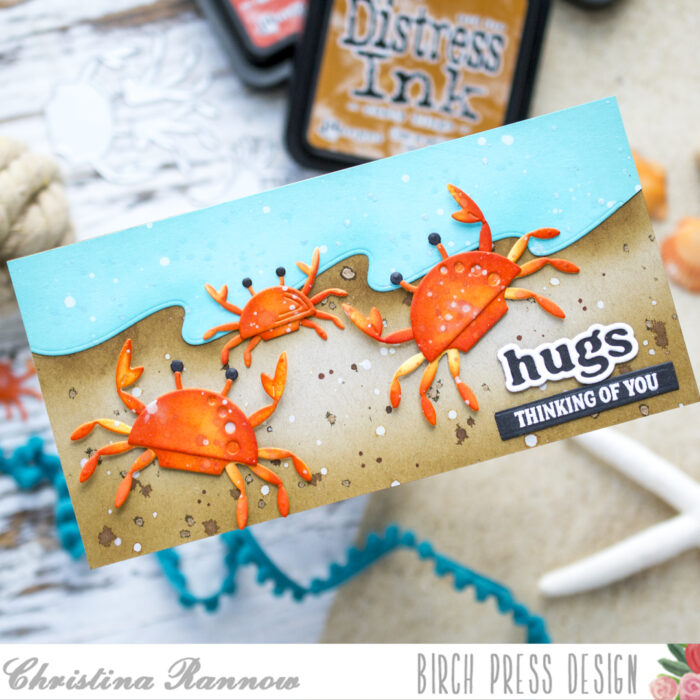
Hello! Christina here to share one last ocean-themed card with you before we move into some festive holiday cardmaking. For this project, I created a mini slimline card using the Block Print Dancing Crabs dies. These little guys are clawing around on a simple beach background full of sparkle and splatter. Let’s dive into this fun beach scene!
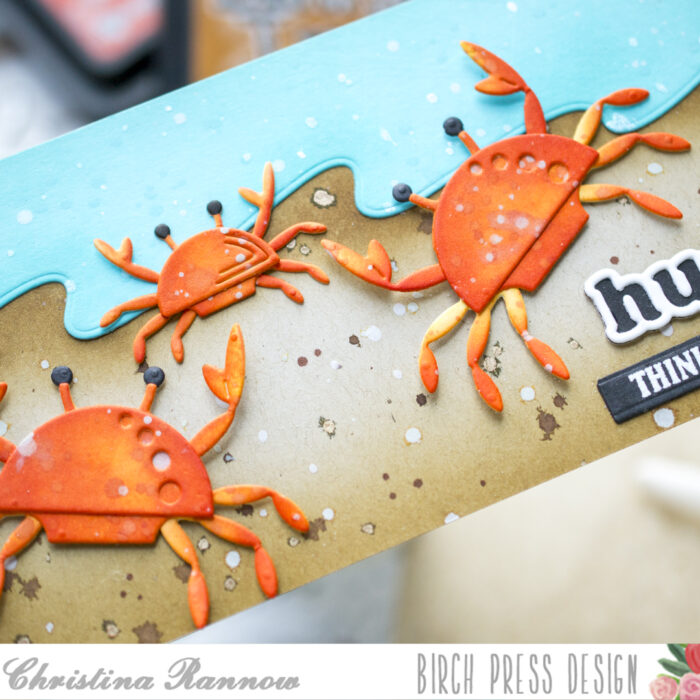
To start, I trimmed a piece of kraft cardstock to fit my mini slimline card base. The bases I use measure 6 ½ x 3 ⅛ inches, so that’s what I started with. Then I used a simple wave border to die-cut the water from Pool Party cardstock. Next, I pulled out my Distress Inks to blend in some shadows around the edges of both pieces. I also added some ink to the kraft cardstock where the water border will be. After blending in the ink, I also splattered both pieces with more of the Distress Inks as well as some sparkly Mica Stains in coordinating colors and white splatter medium. After a short dry time, I attached the water border to the kraft cardstock and moved on to die-cutting the Dancing Crabs.
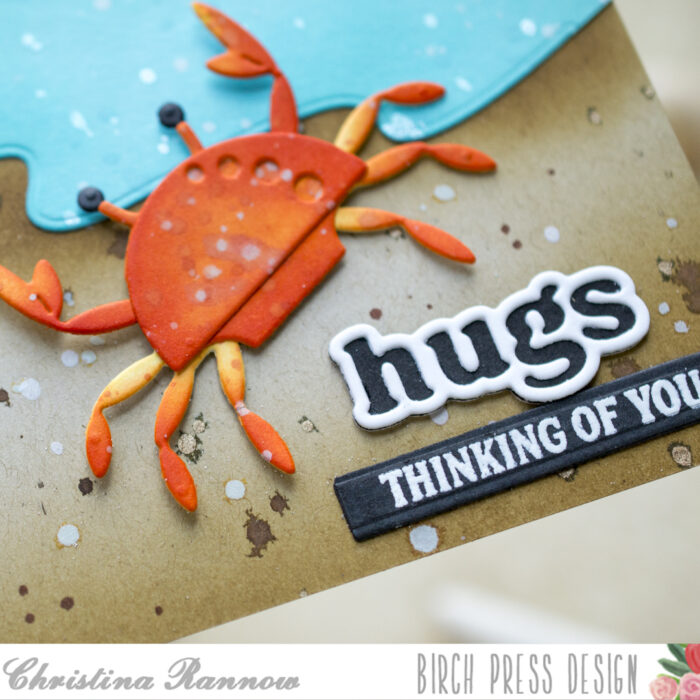
I die-cut the crab pieces from white cardstock and then ink blended each piece with multiple colors before also splattering them with more of the same ink colors. This will bring these little guys to life by adding depth and texture to the pieces. After assembling the crabs, I attached them to my card front with foam squares.
I finished my card design by adding a Hugs Vintage Sentiment diecut and a heat-embossed sub-sentiment using the Poppy Stamps Sentimental Banners set.
Thank you for checking out my mini slimline card featuring a fun beach scene I created using the Block Print Dancing Crabs die set. See you again soon!
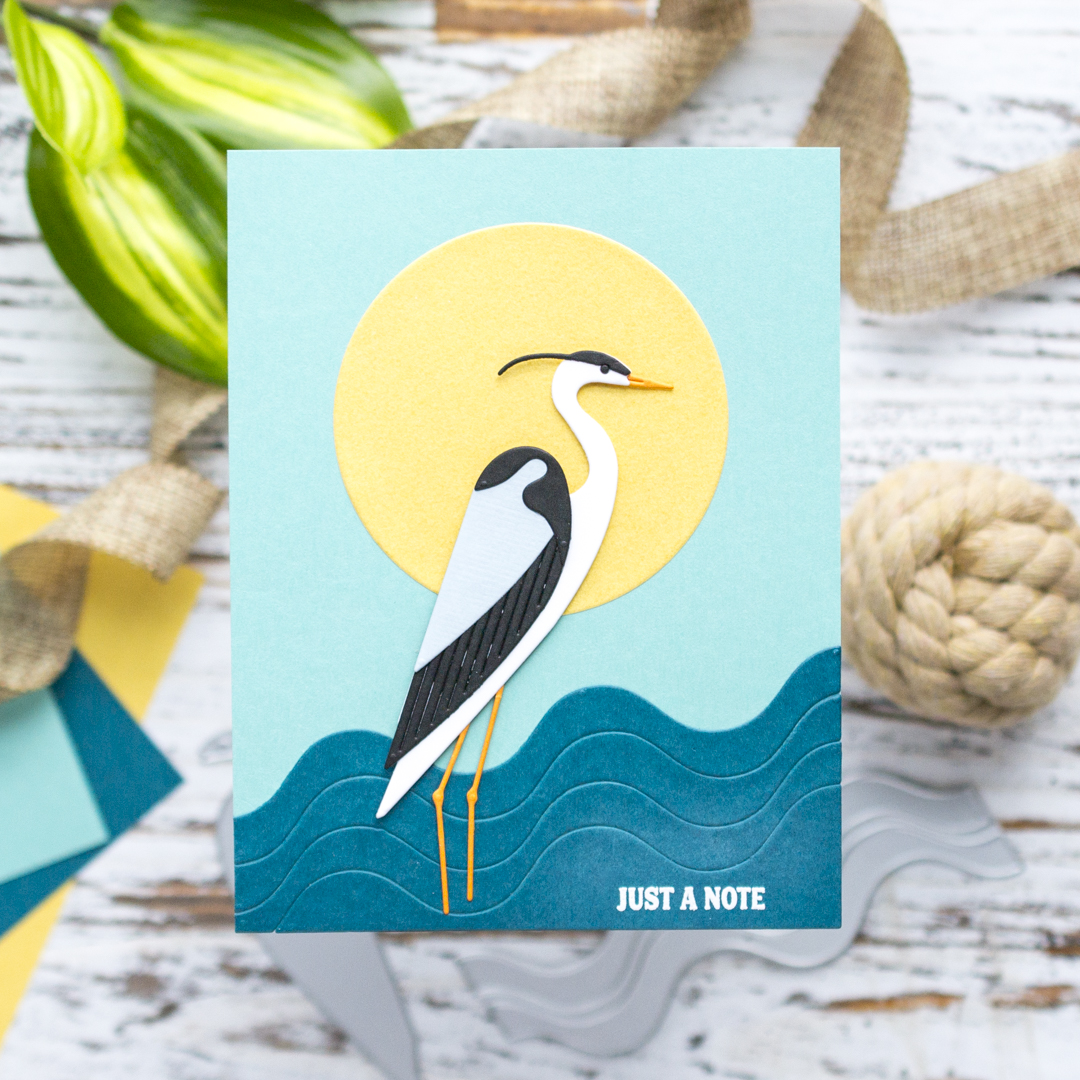
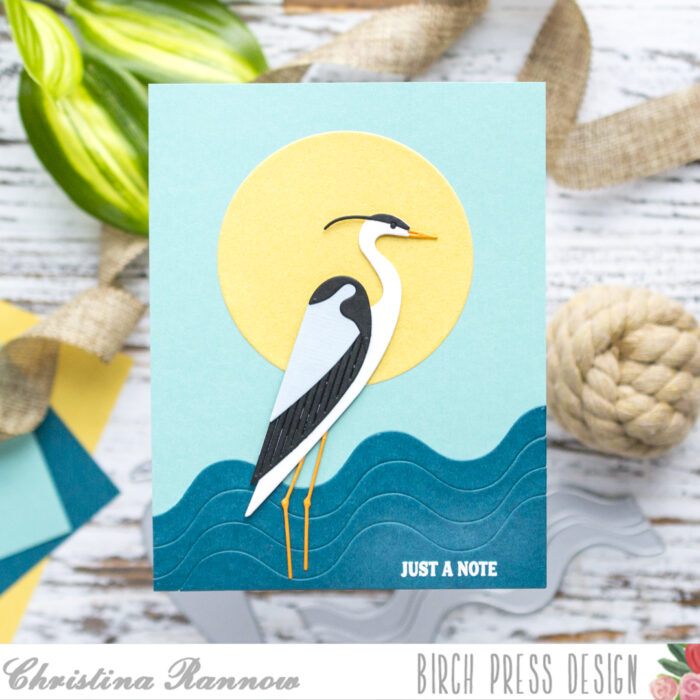
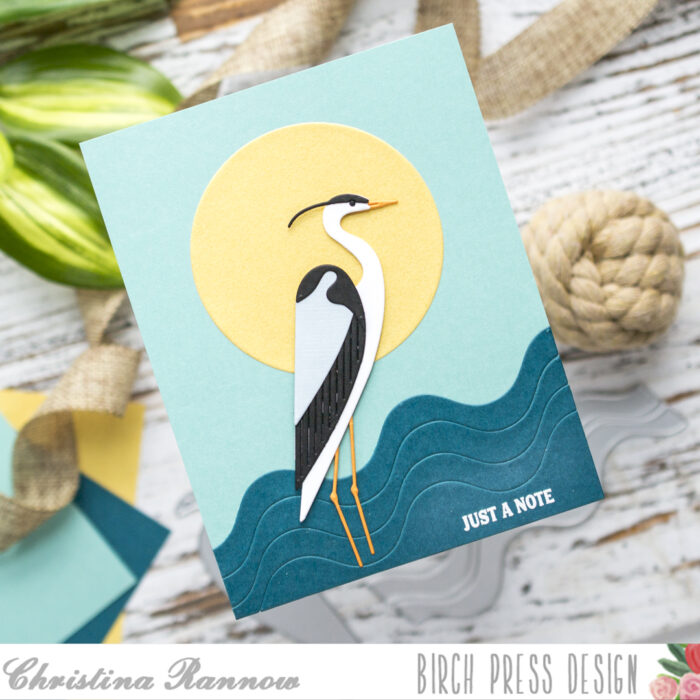
Hi friends! Christina here to share an elegant CAS card with you that’s perfect for any occasion. I used the Block Print Majestic Heron as my focal point and paired it with the Corner Waves Die for a simple design that comes together in no time. Let’s get started!
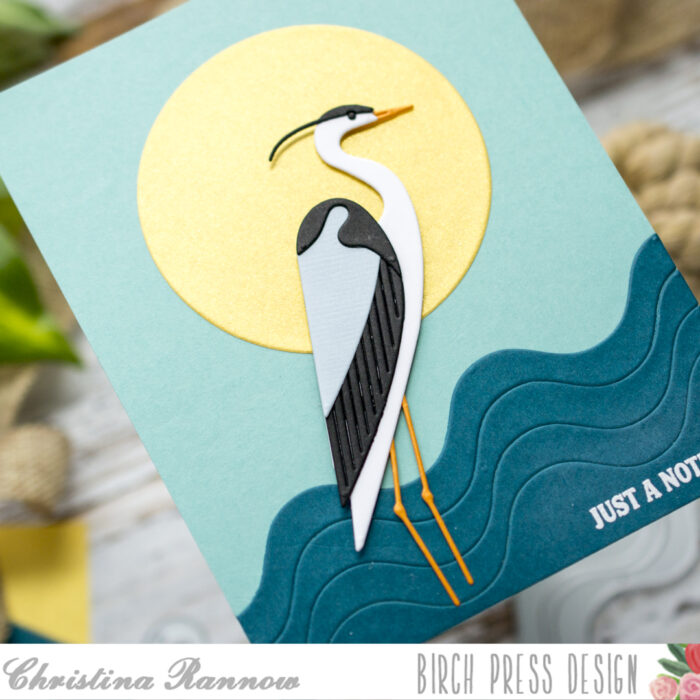
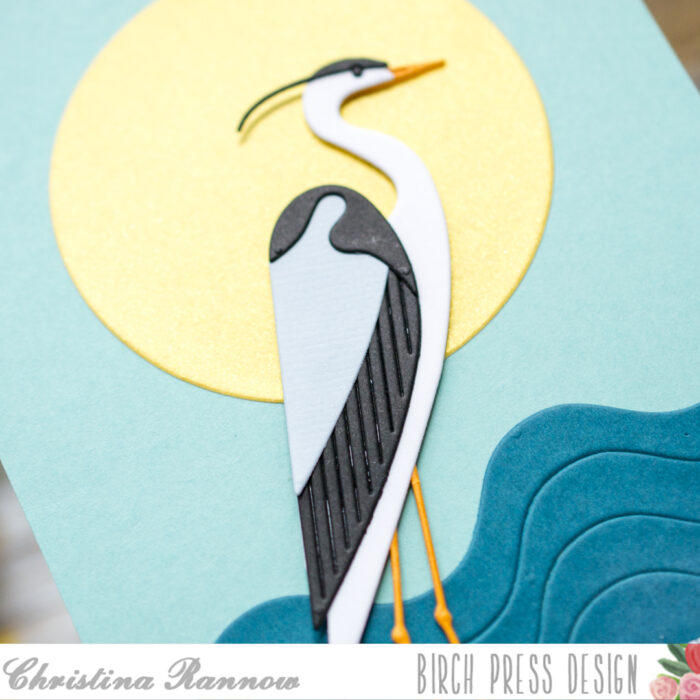
I started with die-cutting and assembling the Majestic Heron. There are just a few pieces to assemble to bring this magnificent bird to life, and I used only four cardstock colors – all of them I pulled from my scrap bin!
Next, I die-cut the Corner Waves from a dark teal color and attached them to the corner of a lighter teal cardstock panel. Then I die-cut a large circle from a brushed metallic paper to be the moon and attached it over the waves.
Using foam squares, I centered the heron on the panel and secured him in place. The last step was to heat emboss a small sentiment from the Sentimental Banners Stamp set from Poppy Stamps with white embossing powder.
And that’s all there is for this elegant CAS card design featuring the Block Print Majestic Heron Die Set. Thanks for reading, and I’ll see you again soon!
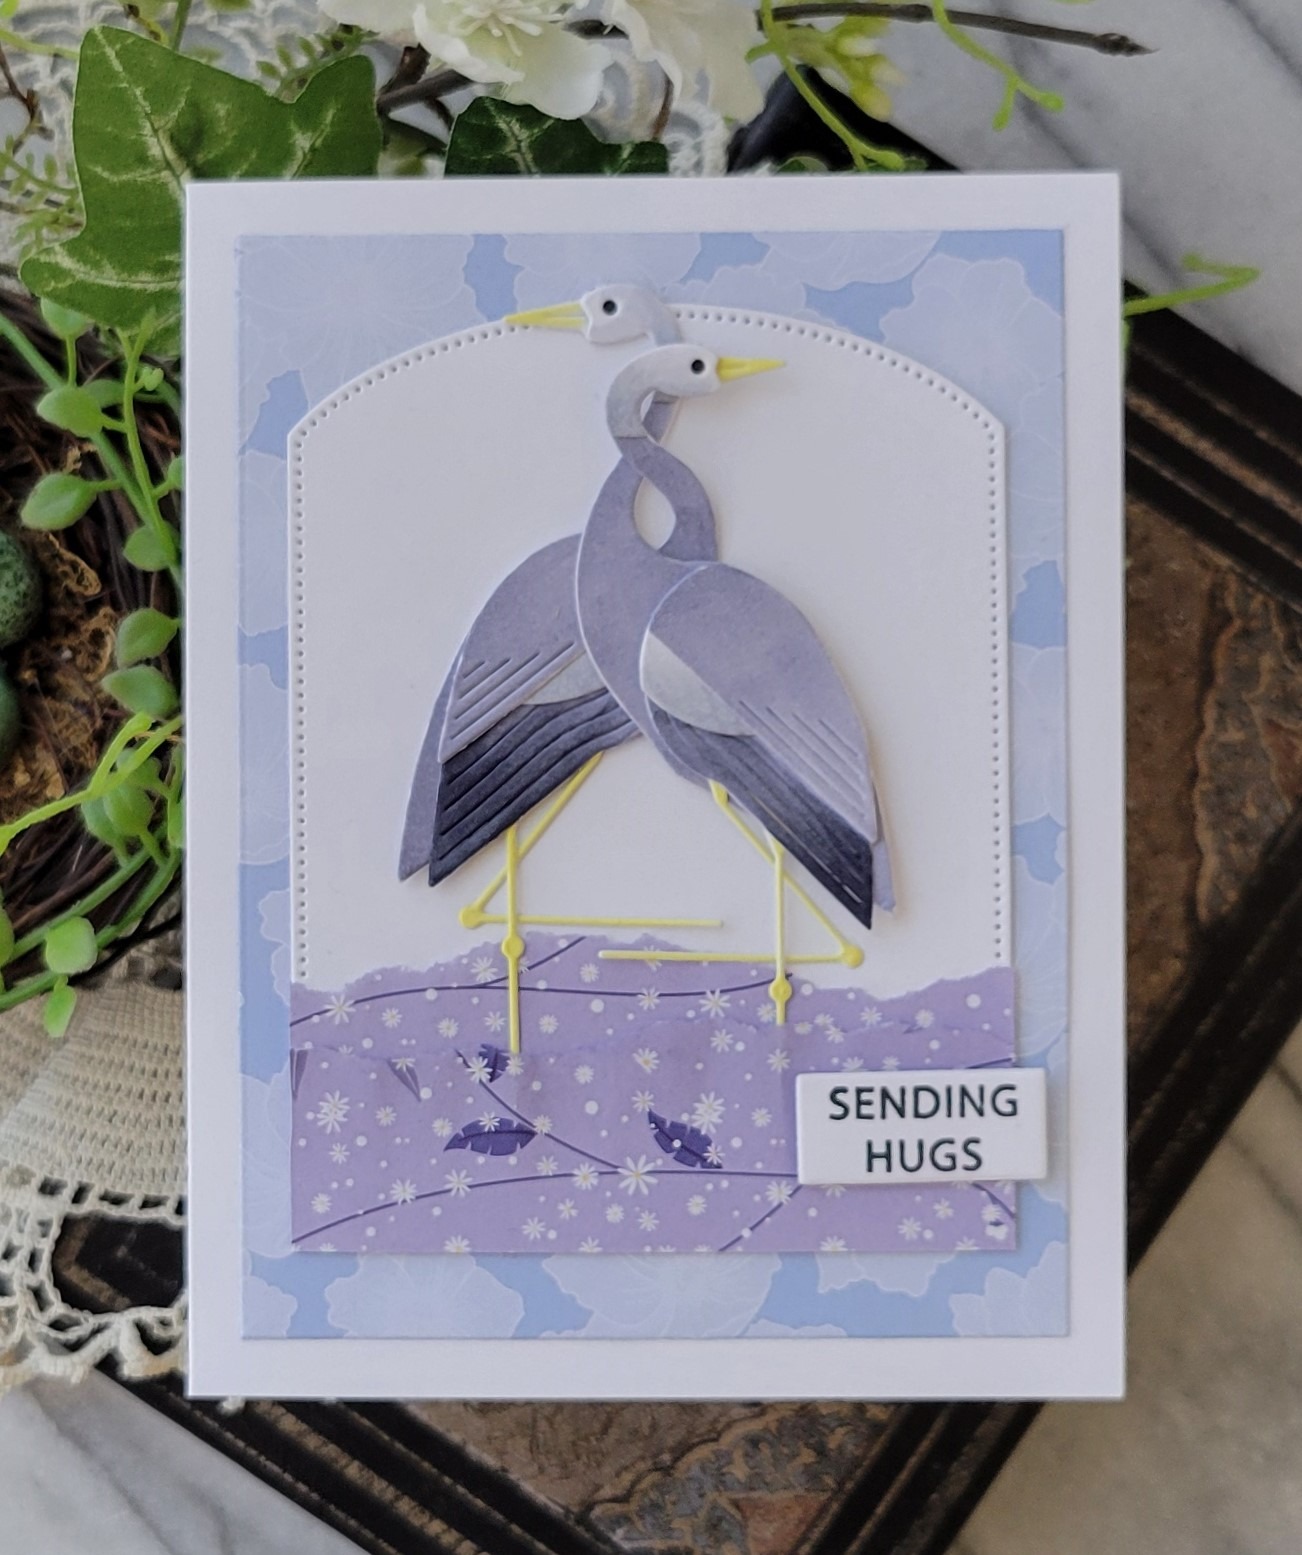
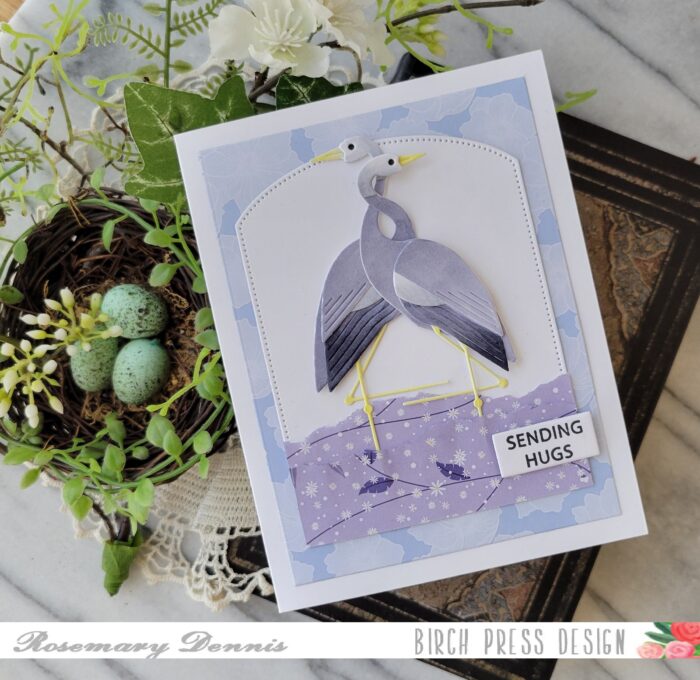
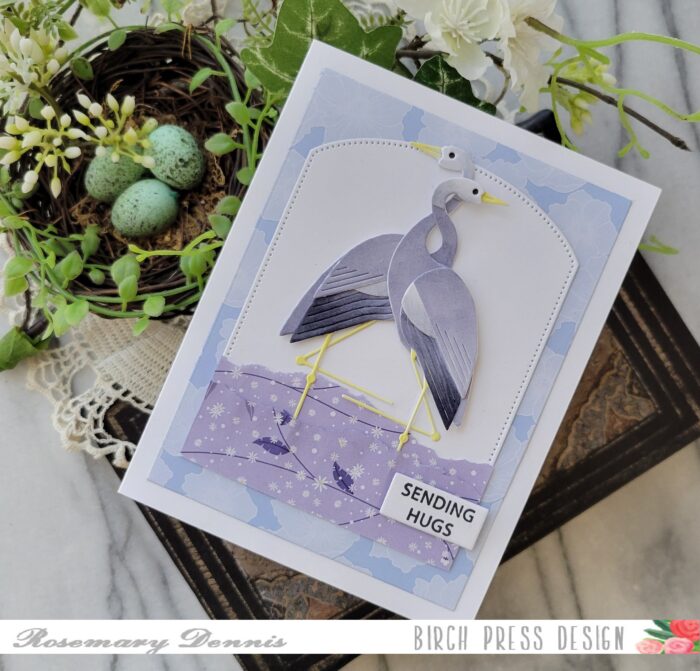
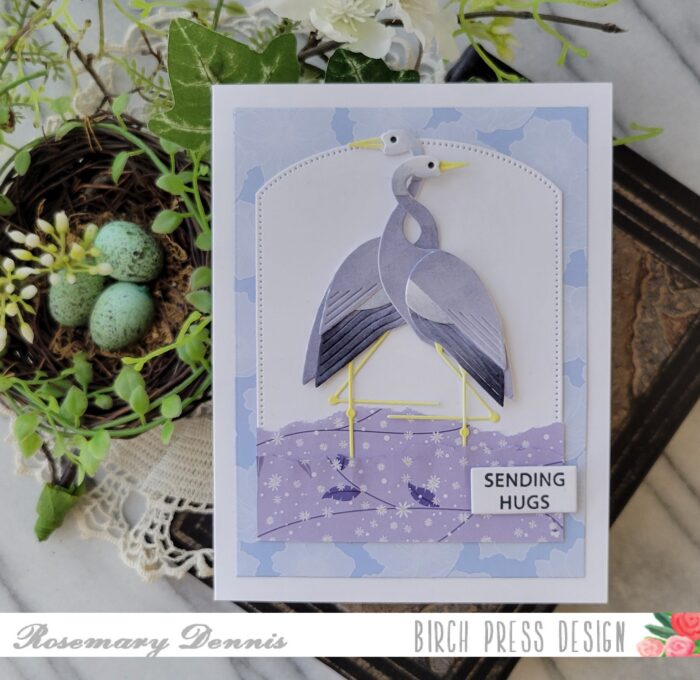
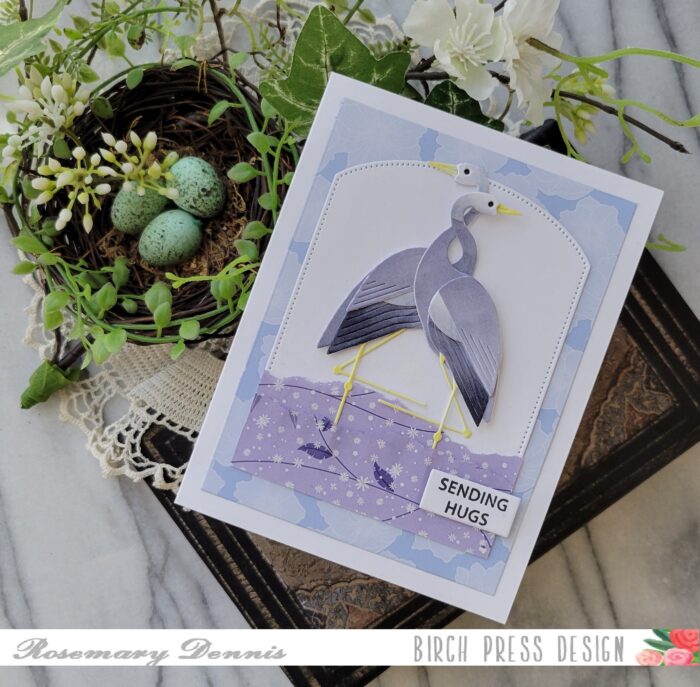
Hello everyone! Rosemary here on the blog today with a friendship style card made with the beautiful Block Print Standing Crane and Block Print Seaside Crane and patterned papers from the Memory Box Anemone Grove 6×6 pad. Let’s look at what I made.
I started my card by die cutting all the pieces of the cranes from white cardstock. Then I decided how I was going to color them. This time around I decided to use my Copic markers and went with a group of light blue violet markers for the body and feathers. A light yellow Copic was used for the legs and beak. I used a very dark gray marker for the eye. I let all the pieces dry and then adhered them together with liquid adhesive.
I wanted to create the look of the cranes standing in water, but decided I wanted to use torn edge patterned paper. I went through all my pads of Memory Box papers and found the Anemone Grove pad fit my design perfectly. I tore the strips from one piece and adhered them to a piece of white cardstock with liquid adhesive. I then die cut the piece with a Memory Box capped pierced die.
I did make sure to leave an area without glue so I could slide the cranes’ legs in between the layers. I used liquid adhesive and thin foam square to adhere the cranes to the panel. Another flip through the Anemone Grove pad and I found a piece that gave the appearance of clouds in the background. That was die cut with a Memory Box rectangle die and adhered to a white cardstock base. I adhered the main panel on top and then finished with the sentiment from the Birch Press Design Rainbow Days stamp set.
Well, that’s it for me. I hope you enjoyed today’s card. Thanks for stopping by and have a wonderful day.
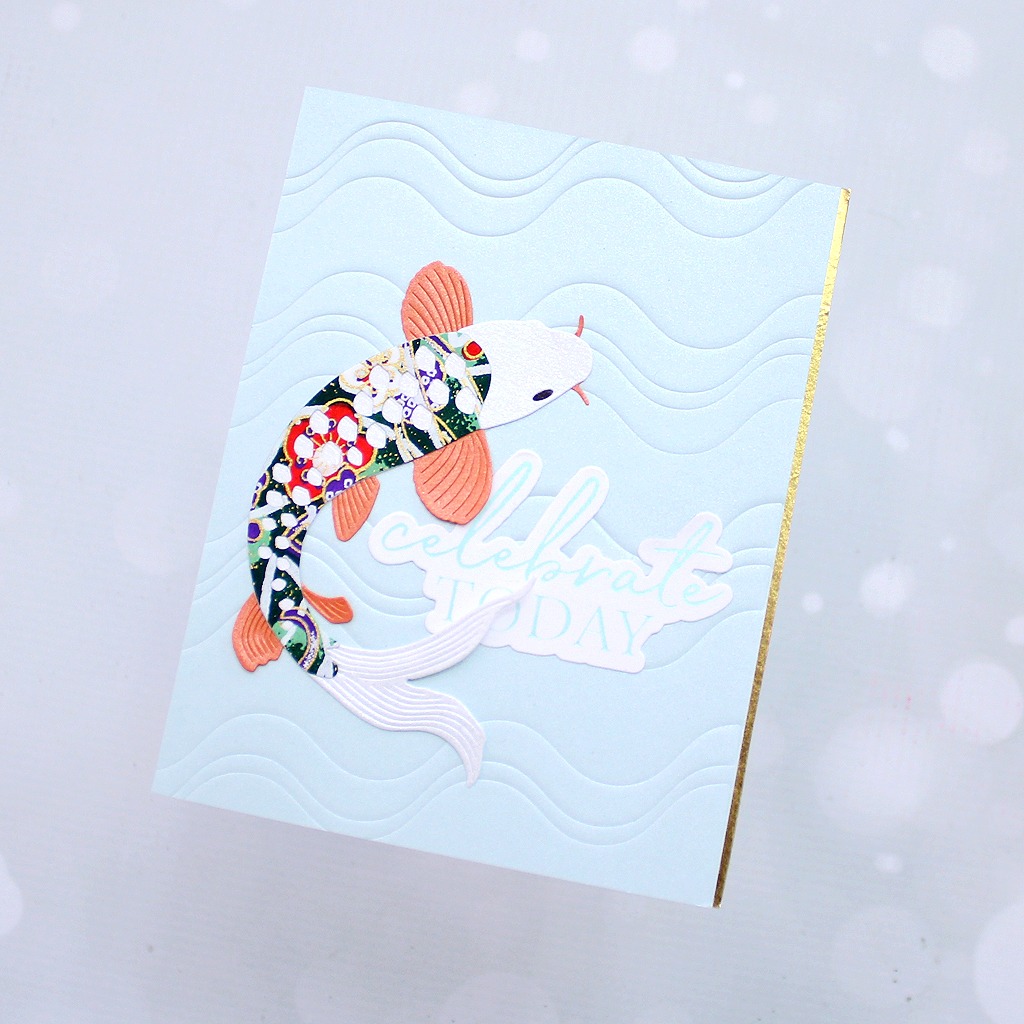
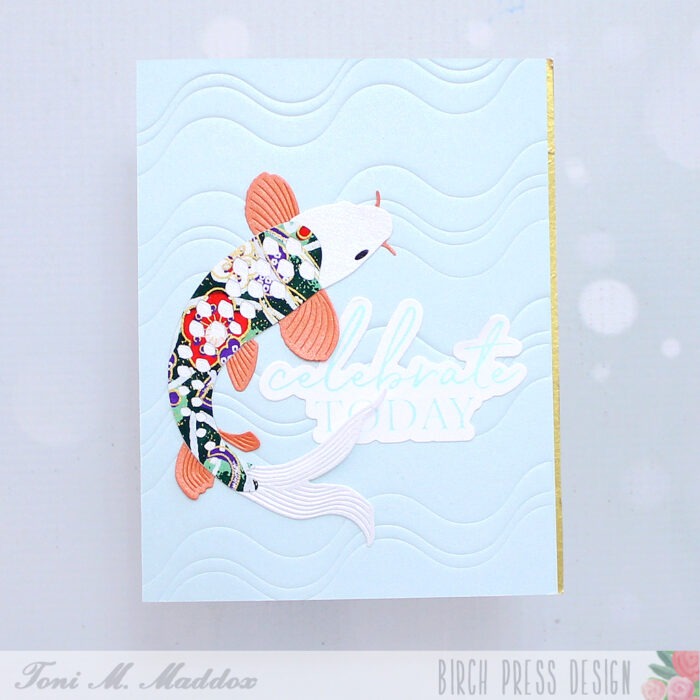
Hello, dear friends! Today I have a simple but impactful birthday/celebration card to share with you.
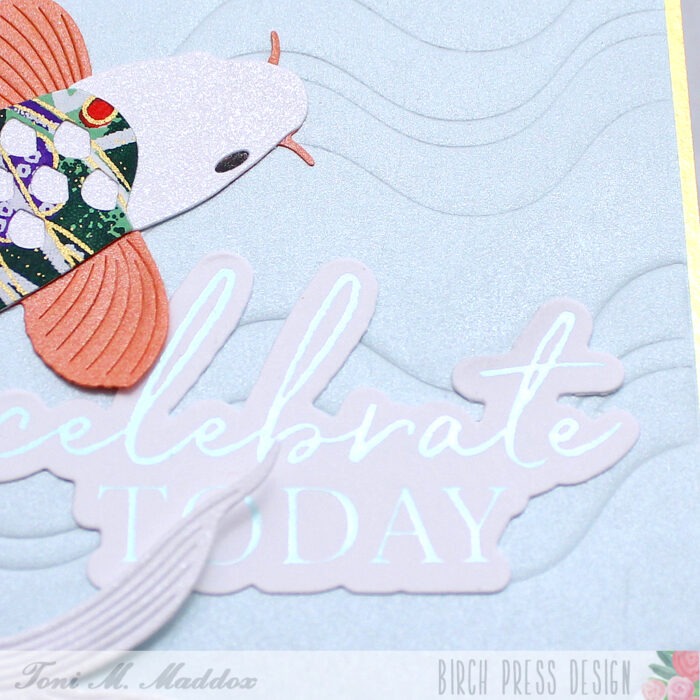
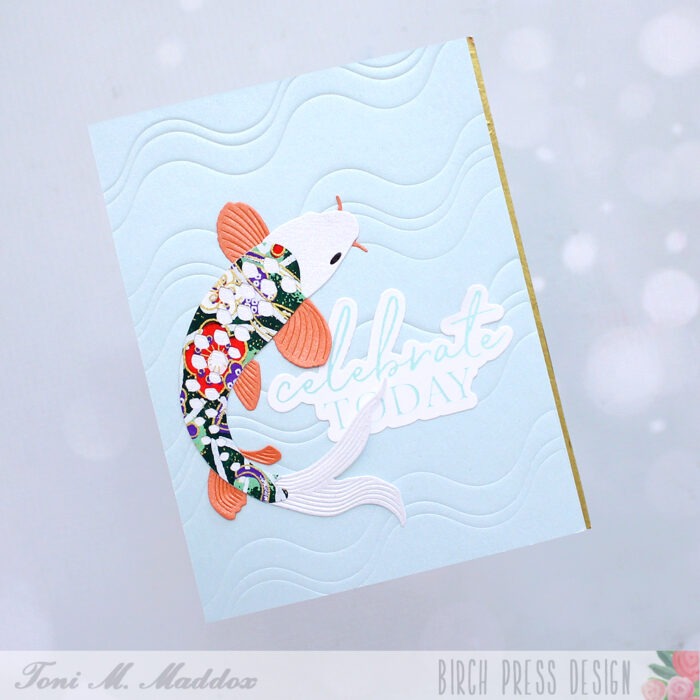
Using a piece of shimmery cardstock, I impressed the Corner Waves across the front card. I LOVE the effect, don’t you?
I used leftover origami paper and shimmery cardstocks with the Block Print Elegant Koi.
For the sentiment, I hot foiled Celebrate Today and cut it out with the coordinating outline die.
I positioned the koi to be swimming around the sentiment but it didn’t feel quite balanced. Thus, I removed a thin strip from the right and added gold washi to the card base to peek out and coordinate with the origami paper.
You can see the full list of supplies used on my blog, Frankie Helps Craft, as well as check out my other makes.
I hope you enjoyed today’s card and have a great rest of your week!
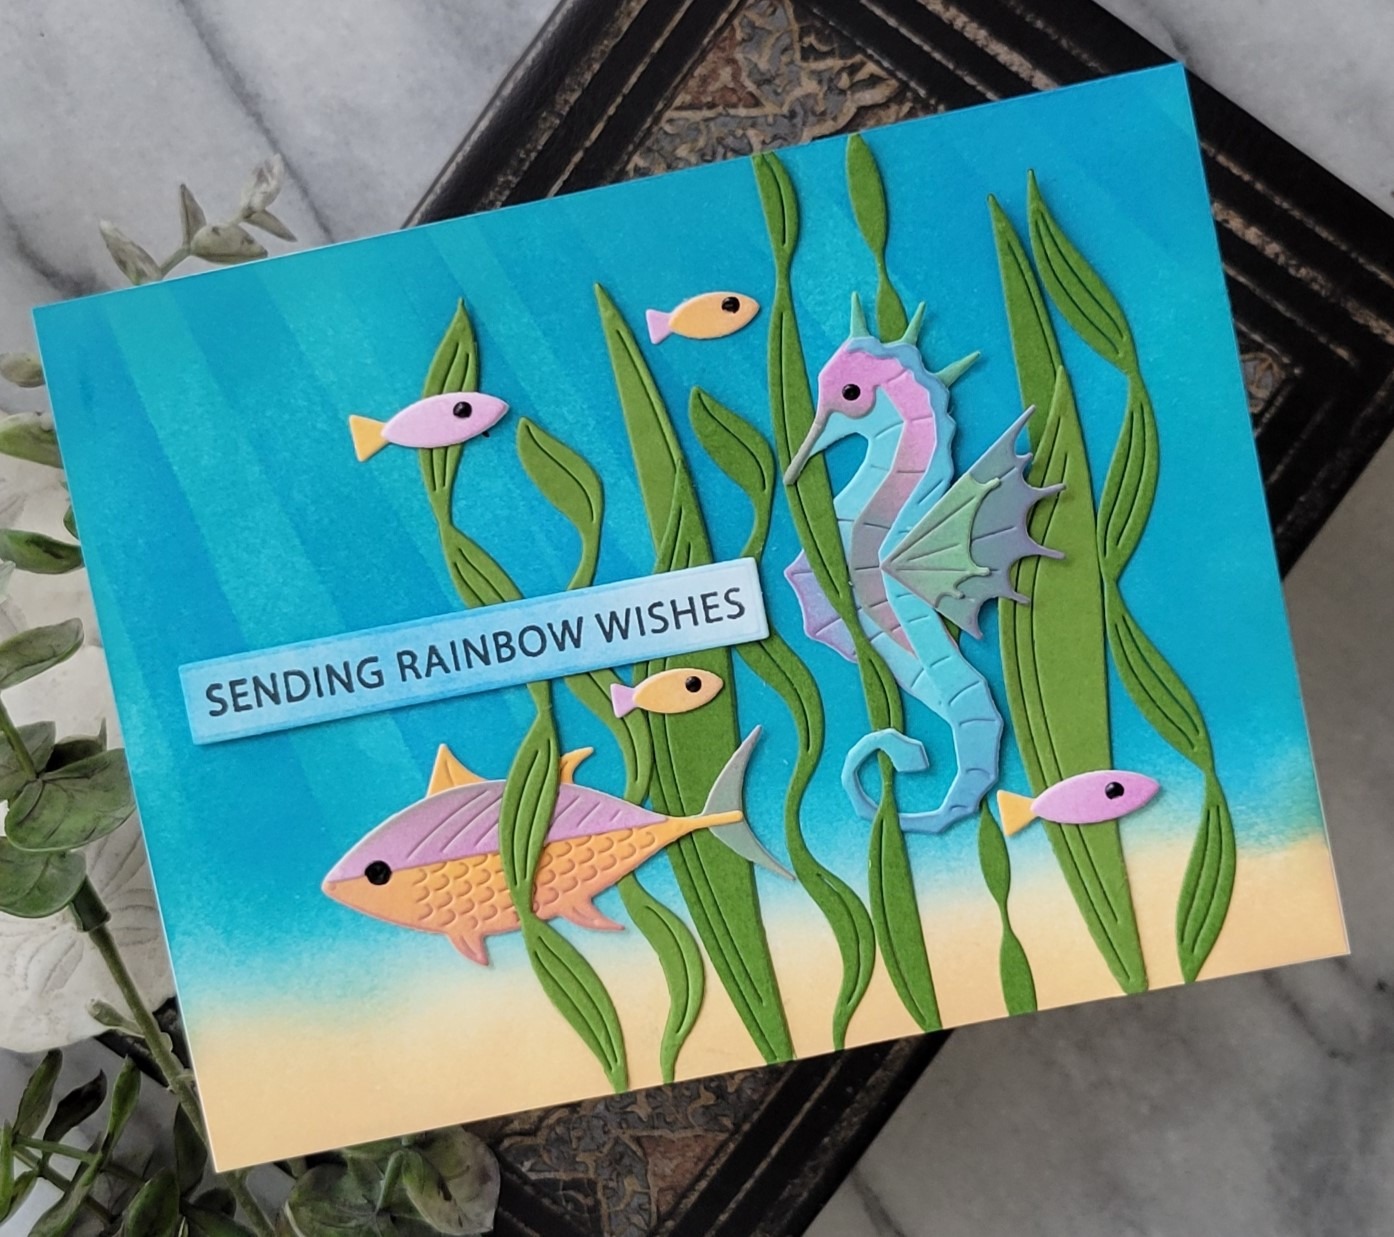
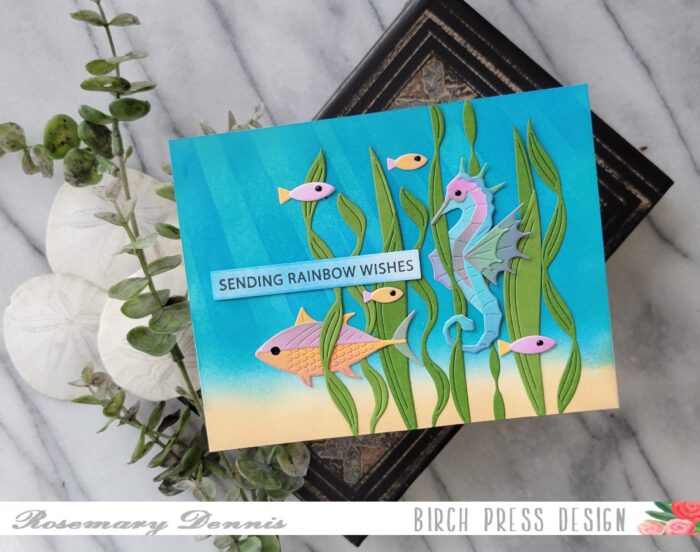
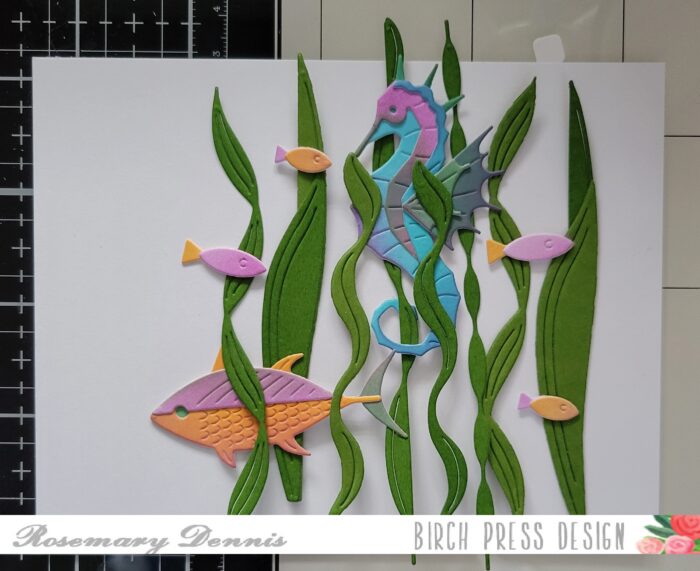
Hello! Hope your September is off to a great start. Today I’m sharing a card that was inspired by a seahorse exhibit that used to be at the Point Defiance Zoo and Aquarium located in Tacoma, Washington where I live. I used the new Block Print Proud Seahorse die set, as well as two other sets from the current release.
The exhibit had several tanks with different species of seahorses with the final and biggest tank exhibiting one of the largest species. It was so fun to watch them swimming around in the water or clinging to strands of kelp. I started by die cutting all the pieces for my seahorse and the fish that would be inside my “aquarium”. I used just a few colors of distress oxide ink to color the seahorse and fish. I did alot of mixing and matching to create colors.
Once I had all the pieces inked up and they were dry I assembled my seahorse and fish. The Sea Kelp and Mini Fish die set is fast becoming one of my most used set from the release. It is so versatile! I thought I needed a little bit bigger fish for my scene so I used the Block Prink Ocean Fish because it was just the right size. Then it was time to play around with the layout. Once I had that figured out I took a photo so I could recreate it.
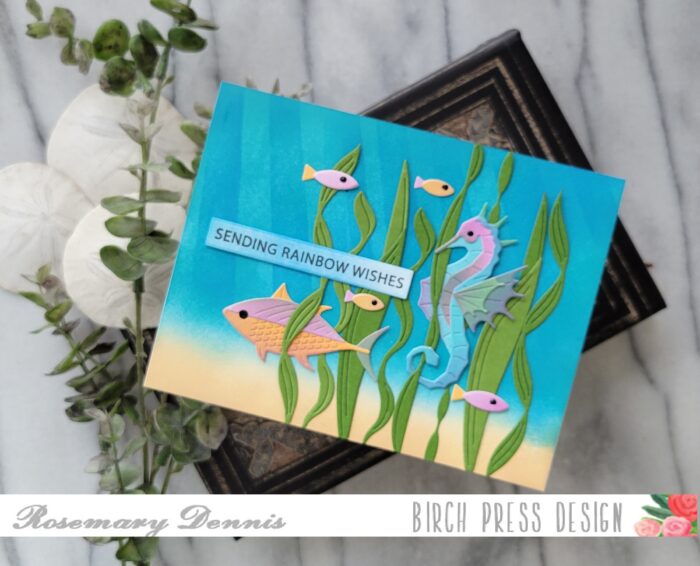
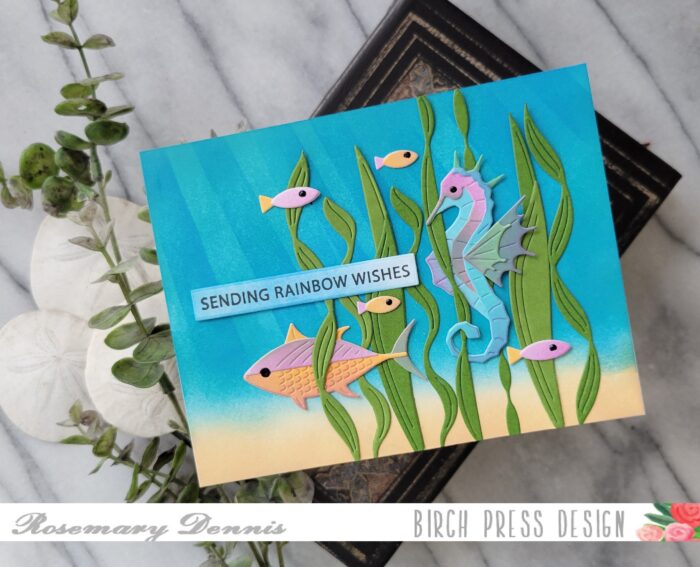
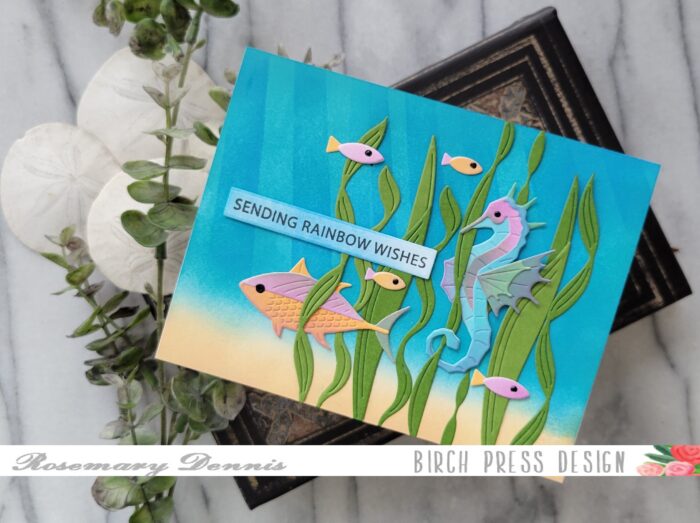
Now it was time to create my background. I inked up the bottom with Antique Linen distress oxide ink for my “sand” and Tumbled Glass and Mermaid Lagoon distress oxide inks for the water. I also used the Light Ray Stencil set to create the filter sunlight look. Now it was time to put together my scene.
Using the photo as my guide I adhered everything in place using liquid adhesive. When I was done with adhereing everything to my background I added the panel to a white cardstock base using strong double sided adhesive. Small dot of Nuvo jewel drops in black were added to the fish and seahorse for the eyes. The sentiment is from the older Rainbow Days Lingo stamp set. I stamped it on white cardstock with black ink, die cut it with a label die and then inked it up with ink left on my blending brush.
I hope you enjoyed today’s card. I had so much fun creating it! I also wanted to let you know that Birch Press Design is sponsoring the Die Cut Divas challenge this month. You can find all the details on the challenge and how to win here. Thanks so much for stopping by and have a wonderful day.
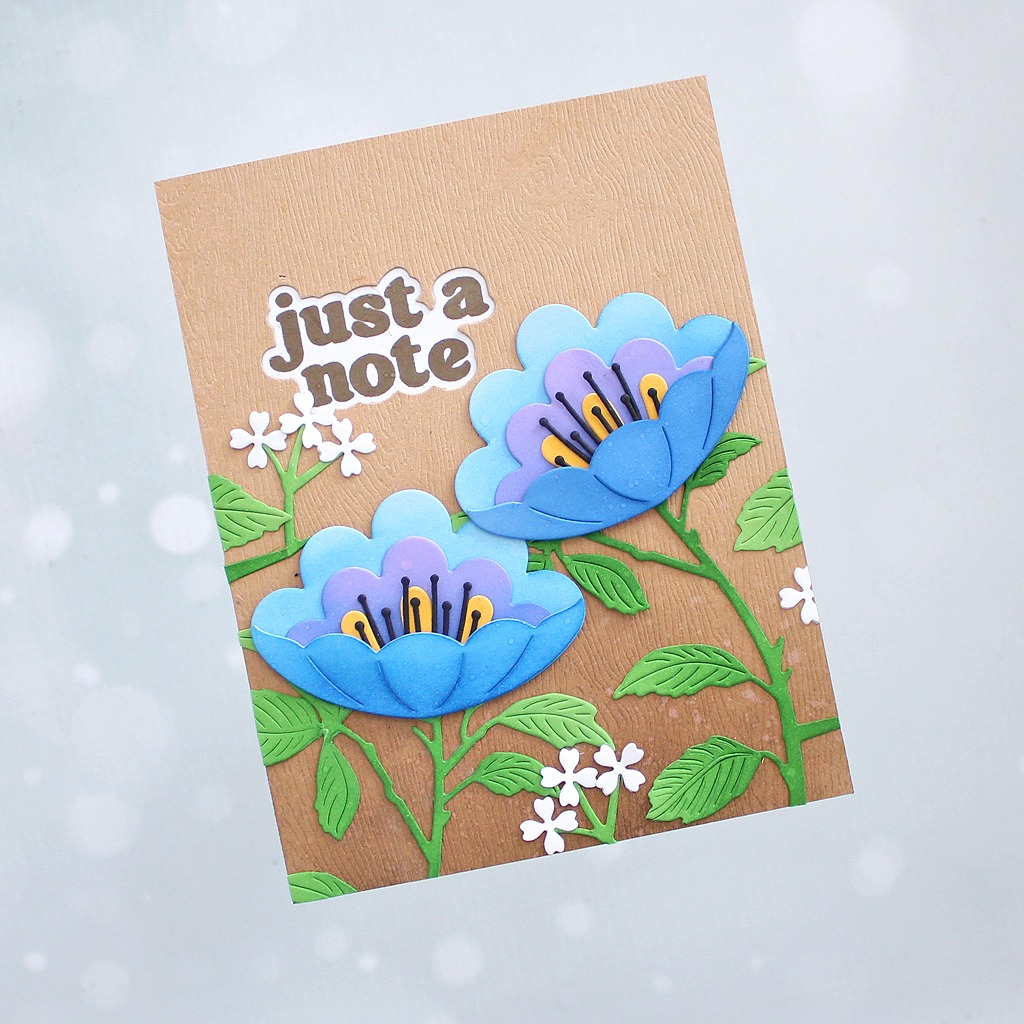
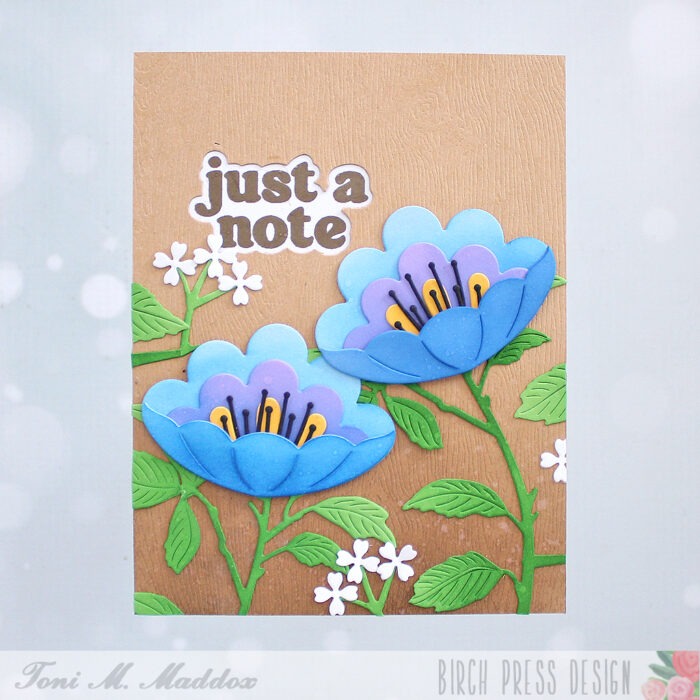
Hello, friends! I felt liked I needed a little change of pace from nautical cards so worked up this simple floral notecard.
I sponged the Memory Box Kraft Woodgrain Paper with Catherine Pooler Macchiato ink.
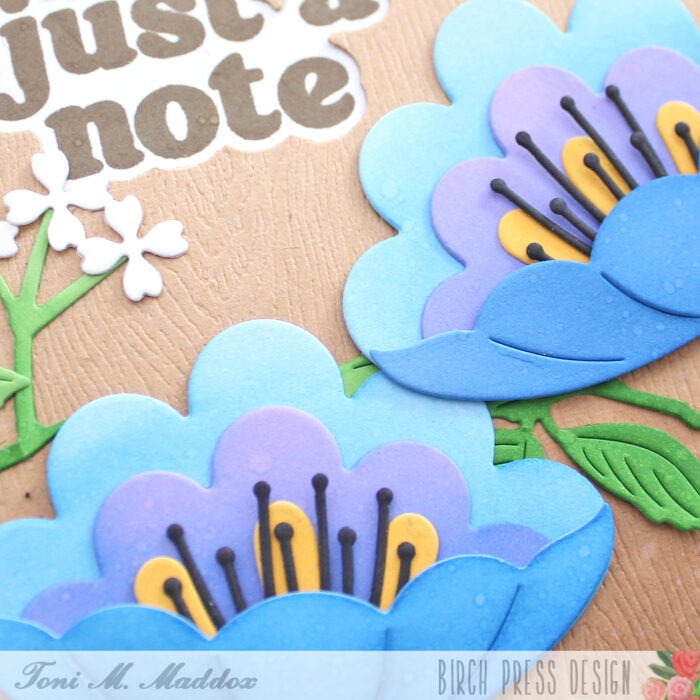
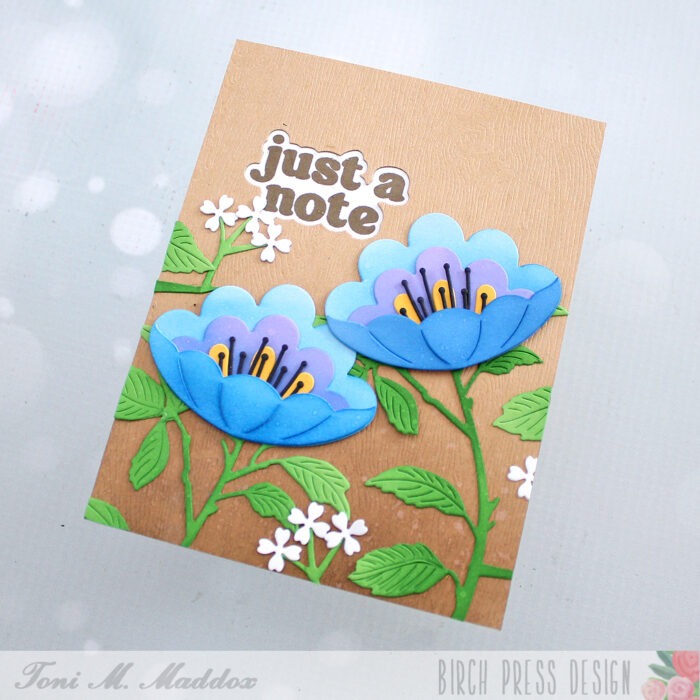
Next, I cut out the Block Print Passion Fruit Flower and Abundant Branch from Memory Box Powder Blue, Summer Squash and Lavender Bloom cardstocks, sponging CP inks for shading.
I cut an aperture for the Vintage Everyday Greetings sentiment using the outline die then stamped the sentiment using CP Macchiato.
Once all the elements were in place, I spattered the card front here and there for added interest.
Feel free to visit my blog, Frankie Helps Craft, for a full list of supplies used and to check out my other creations.
I hope you enjoyed today’s card and have a great rest of your week!
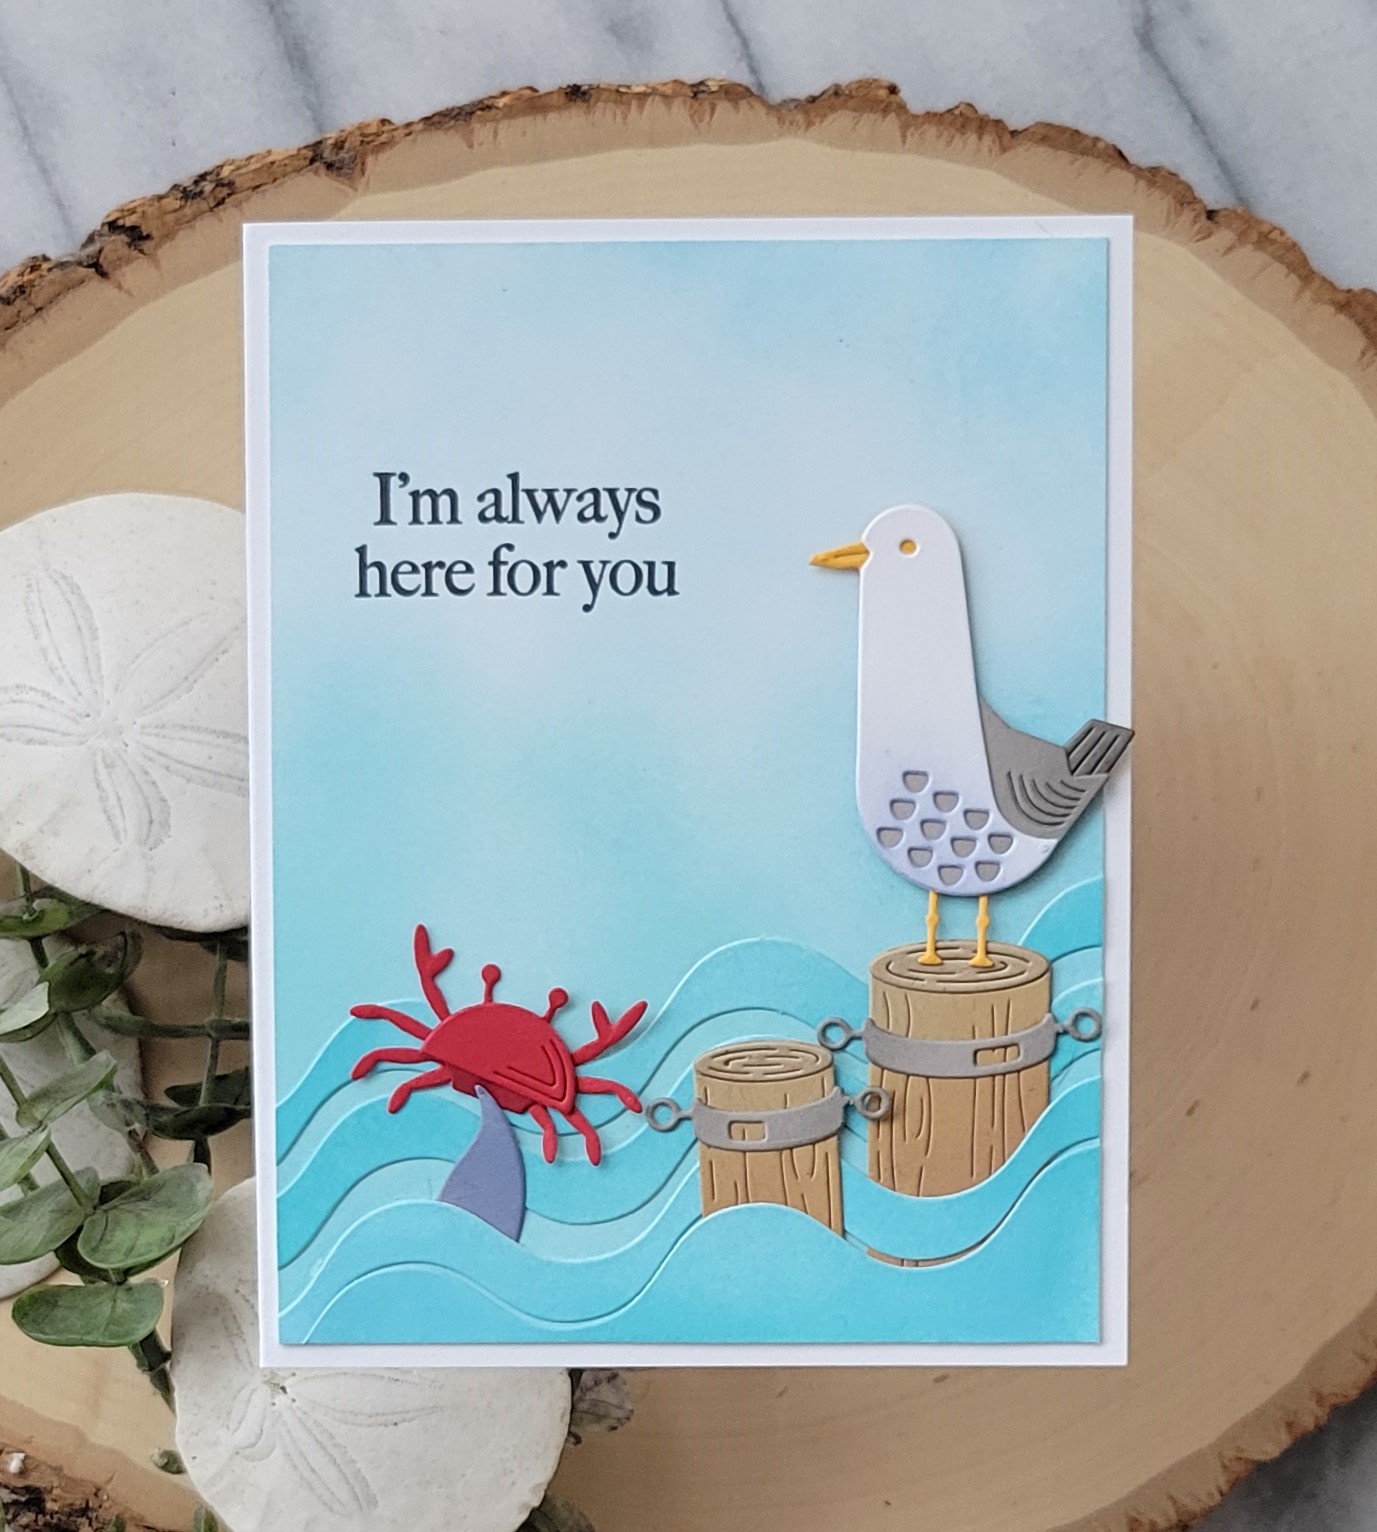
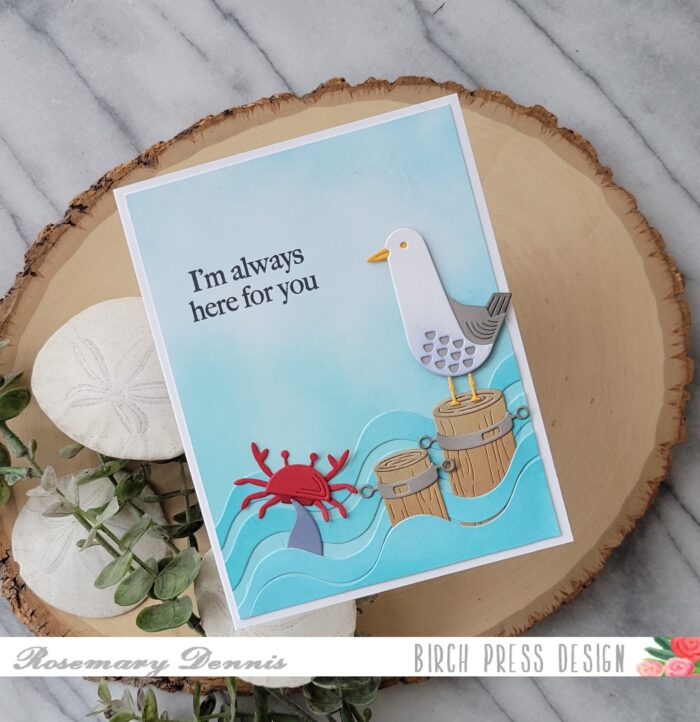
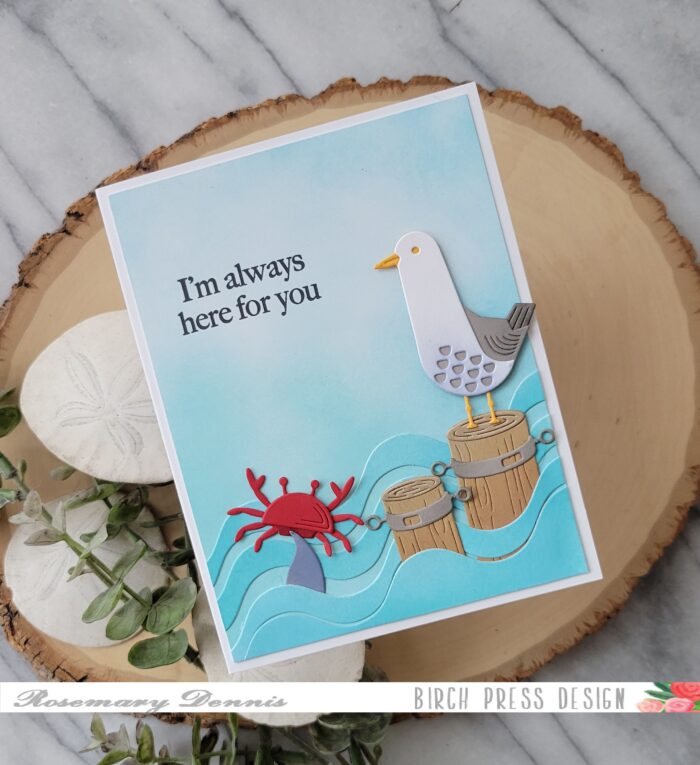
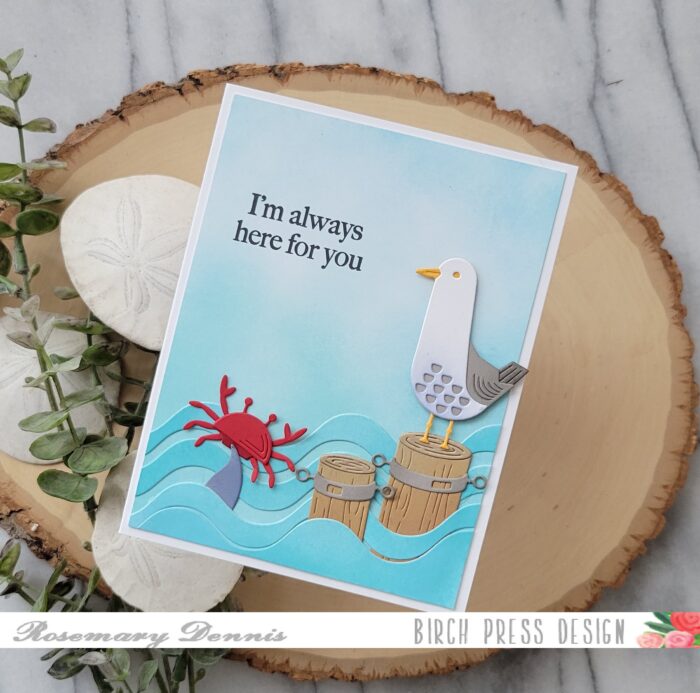
Happy end of August everyone! Rosemary here on the blog today with a card inspired by one of my favorite movies: Finding Nemo! Let’s take a look at what I created.
One of my favorite scenes in Finding Nemo is at the end of the movie when Dorie is asking if the crabs have seen Marlin and they ignore her so she grabs one and sticks it up above the waves to where a group of seagulls are sitting on a buoy. When I saw the new Block Print Dancing Crabs die set I immediately knew I wanted to recreate that scene. I used the new Waterfront Pilings dies, Block Print Happy Seaqull and Corner Waves dies to complete the card.
I started by inking up my panel with Tumbled Glass distress oxide ink. I used Tumbled Glass and Broken China on a piece of white cardstock that I die cut the corner waves from so there would be some contrast between the “waves” and the ocean/sky. The main panel was die cut to fit a card front and the sentiment from an Open Studio stamp set was stamped in black ink.
The I die cut the rest of the pieces that I needed to complete the card. I die cut the seagull from white, gray and yellow cardstock. A little bit of gray ink was added to the seagull’s tummy and then everything was adhered together with liquid adhesive and set aside to dry. It is hard to tell, but I did use two different red cardstocks for my little crab. There are two crabs in the set and I used the smallest one for my card. The pilings were die cut from kraft cardstock and then some brown ink was blended on to darken the bases. The tops were left un-inked. The bands around the pilings were die cut from gray cardstock and also got a little bit of inking.
The fin is from the new Block Print Majestic Whale. I die cut it from gray cardstock and then blended on blue in to change the color. Now it was time to assemble the card. I used liquid adhesive to attach everything. It was a bit tricky getting the “waves and the pilings adhered as I wanted them to be. I attached the bottom “wave” and then placed the pilings behind it, tilting the smaller piling. Then I added the second wave, tucking the fin into that one and working it behind the smaller piling. The final two waves were added behind the pilings and then the pilings were fully glued in place. I finished by attaching the seagull and the little crab.
I absolutely love how this card turned out! I was a little tricky, but so worth the effort. Let me know what you think and if it reminds you of Finding Nemo! Thanks for stopping by and have a wonderful day!
Hi friends! Christina here to share a masculine nautical-inspired card featuring the most delightful pelican from the new Block Print Pelican die set. He makes the perfect focal point for this little coastal scene I created using the Corner Waves and the Waterfront Pilings. To really play up the nautical theme of this design, I framed up the scene with a porthole window that was a breeze to make with just a couple of nesting circle dies. Let’s dive into the details of this card!
I started by die-cutting all the elements for my scene from colored cardstock. I chose ivory, slate gray, and orange for the pelican, and two shades of brown and matte silver for the waterfront pilings. I chose leaf green for the tiny fish from the Sea Kelp and Mini Fish die set and classic blue for the water. I assembled the diecuts and arranged them in a scene on the center of a light blue cardstock panel.
To create the porthole frame, I first die-cut a large circle from the center of a kraft woodgrain cardstock panel to be the porthole window. I attached this over the scene with foam tape. Then, I die-cut a circle frame from matte gold cardstock using two nesting circle dies. The smaller, inside circle is the same size as the porthole window, so it would match up perfectly. I attached this to the woodgrain panel and added a few matte gold pearls to complete the porthole look.
Finally, I heat embossed a sentiment with cream embossing powder on a slate gray sentiment strip and added a shiny black pearl to the pelican’s eye.
Thank you so much for reading about this masculine nautical-inspired card I created using new dies from the latest release. See you soon!
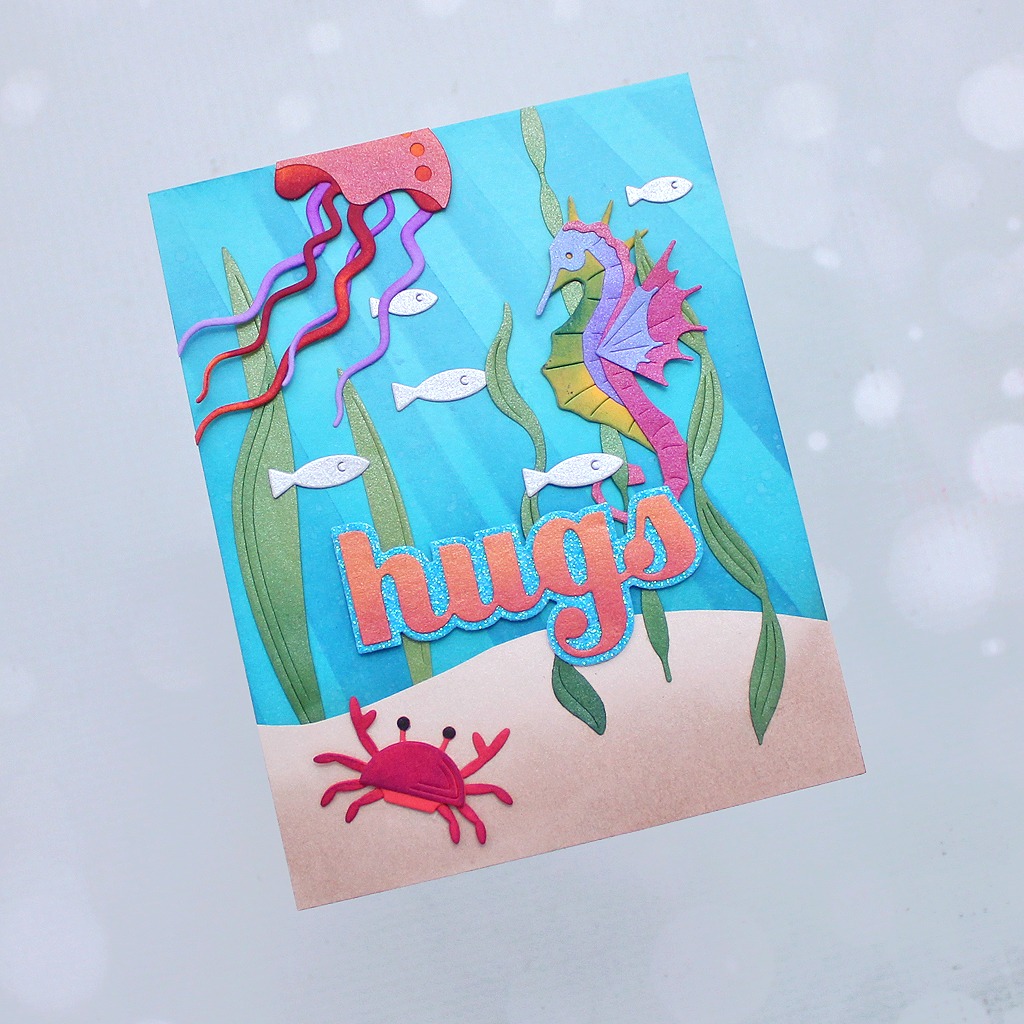
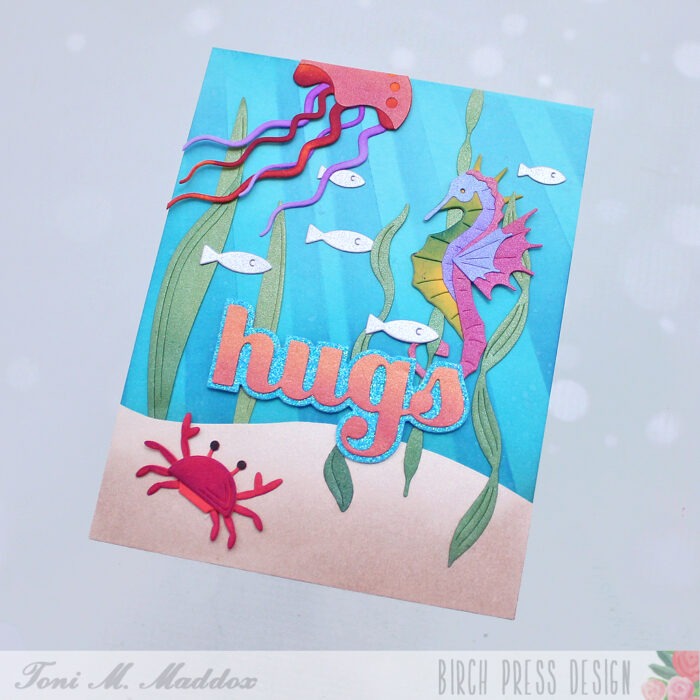
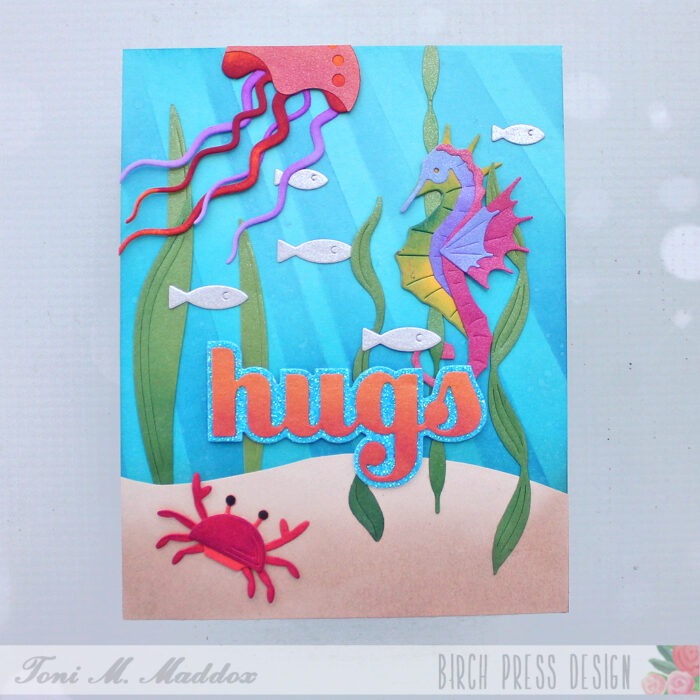
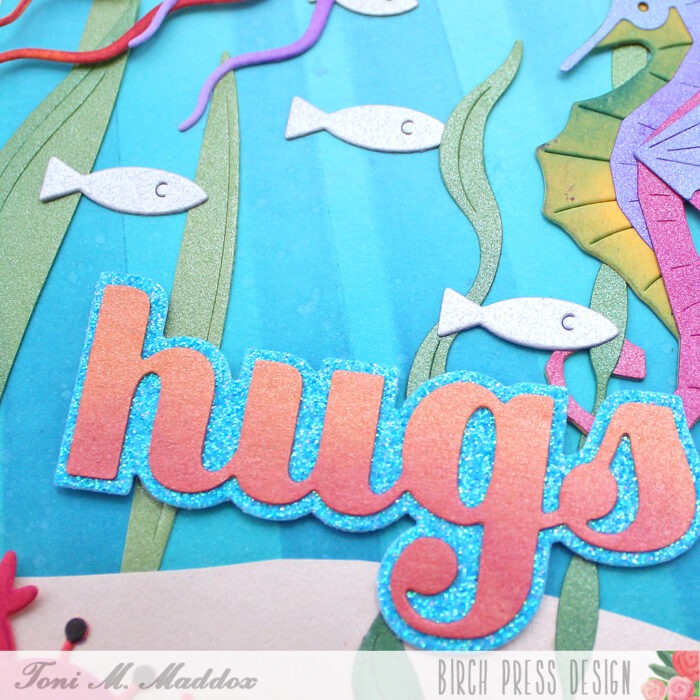
Hello, everyone! This underwater scene was so fun to create. I love seahorses. And that jellyfish–look at it!
My first step was to sponge the blue card base with Catherine Pooler inks and one layer of the two-part Light Ray Stencil. I spattered this with water and set aside.
Next I fussy cut the sand layer using a piece of scrap kraft cardstock and sponged it with CP Sand Castle ink.
I cut a few of the Block Print Sea Kelp & Mini Fish from a shimmery green and silver cardstock. I sponged the Sea Kelp with CP ink for a bit of shading.
I diecut the Block Print Proud Seahorse, Block Print Floating Jellyfish, and Block Print Dancing Crabs from a few Memory Box cardstocks with shimmery cardstock scraps for highlights.
I sponged the cardstocks, including the Sugar Script Big Hugs sentiment, with CP inks. I assembled the final scene, tucking the creatures in among the greenery. So cute!
Do visit my blog, Frankie Helps Craft, for a full list of ingredients and to check out my other projects.
I hope you enjoyed today’s card and have a great rest of your week!