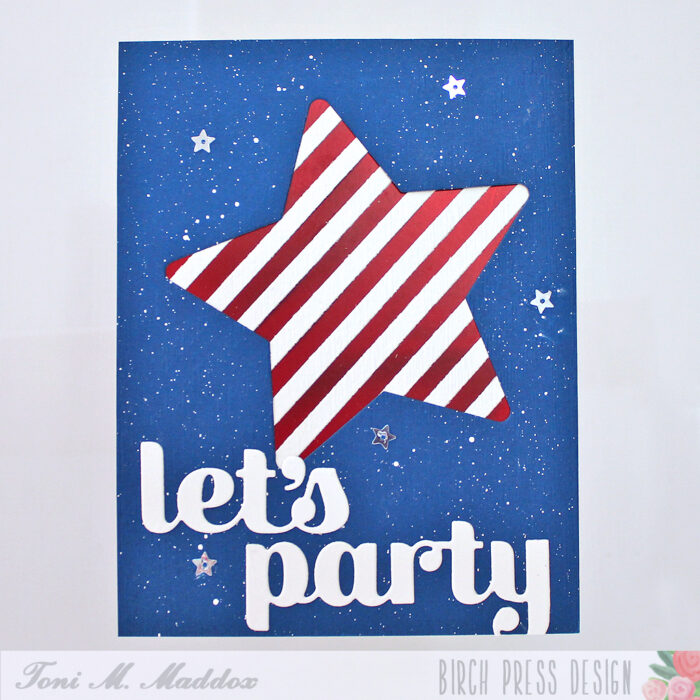
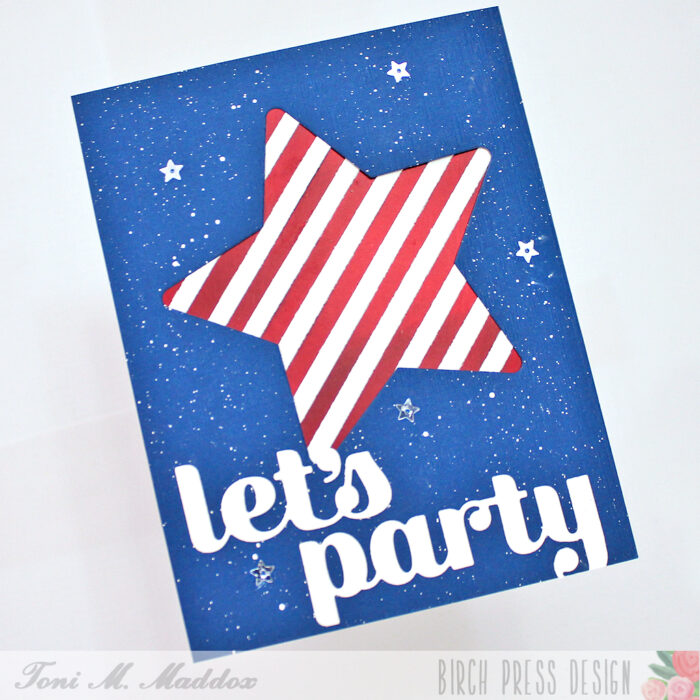
Hello, Birch Press fans! Toni here with you today sharing a card suitable for a patriotic birthday (in the US), congratulations, retirement or even an invitation to a Memorial Day BBQ.
This card was so easy and fun to make. Who doesn’t like spattering and shiny things?
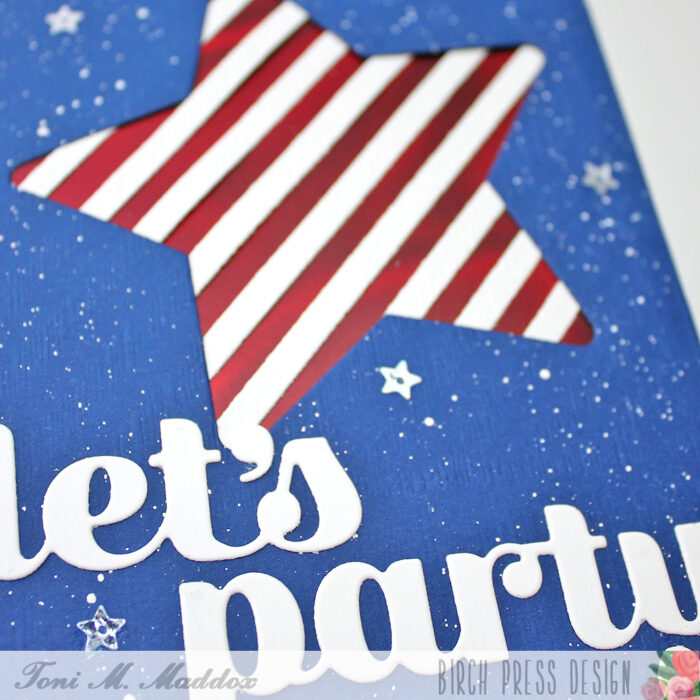
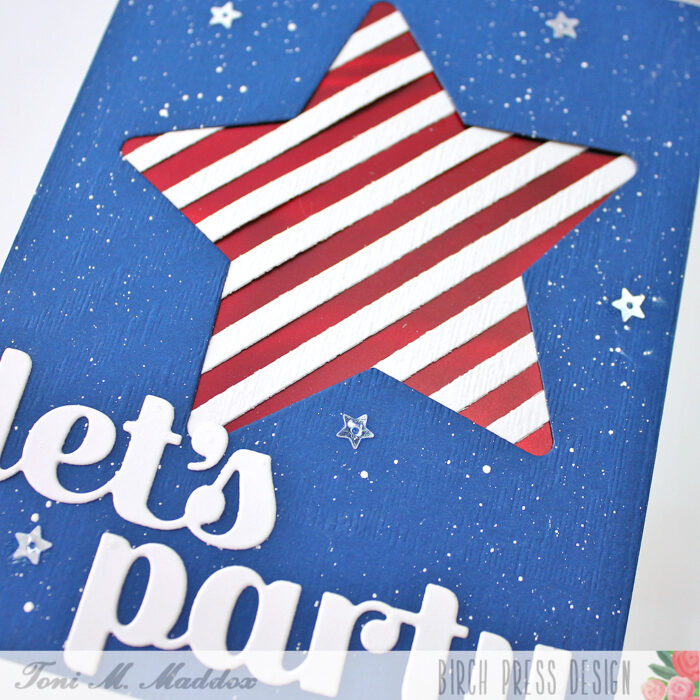
I started the card by cutting out the Piped Icing Star from a blue cardstock which I had embossed with a simple linen-type pattern. I then spattered the surface with Copic Opaque White (for stars or confetti).
Next I cut out a Linear Triangle in white which I positioned so that it created a striped background for the red foil cardstock beneath to peek through.
My final touches included adding the Let’s Party Sugar Script sentiment and a sprinkling of shiny star sequins.
I hope you enjoyed today’s card and have a great rest of your week!
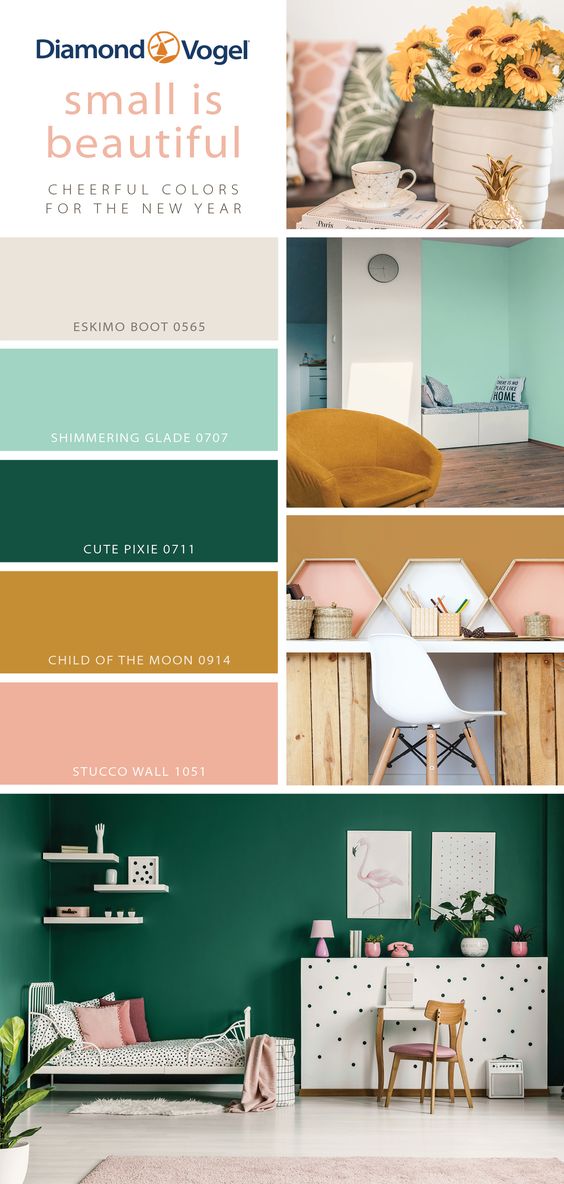
Hello crafty readers! This is Design Team member Crystal Komara here with you today and I’m really excited to share my card with you because it’s one of my favorite color palettes! First, let’s take a look at the inspiration for today’s birthday card:
Yes! My color inspiration came from a Pinterest photo from an architectural website. Kind of wild, right? What I liked about this photo was that these are colors I would not normally have considered ever putting together, and yet they work beautifully! Now, while I don’t want these colors in MY house (hello, neutrals girl here!) I found they worked well for a card.
Card details:
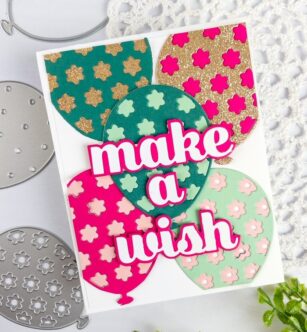
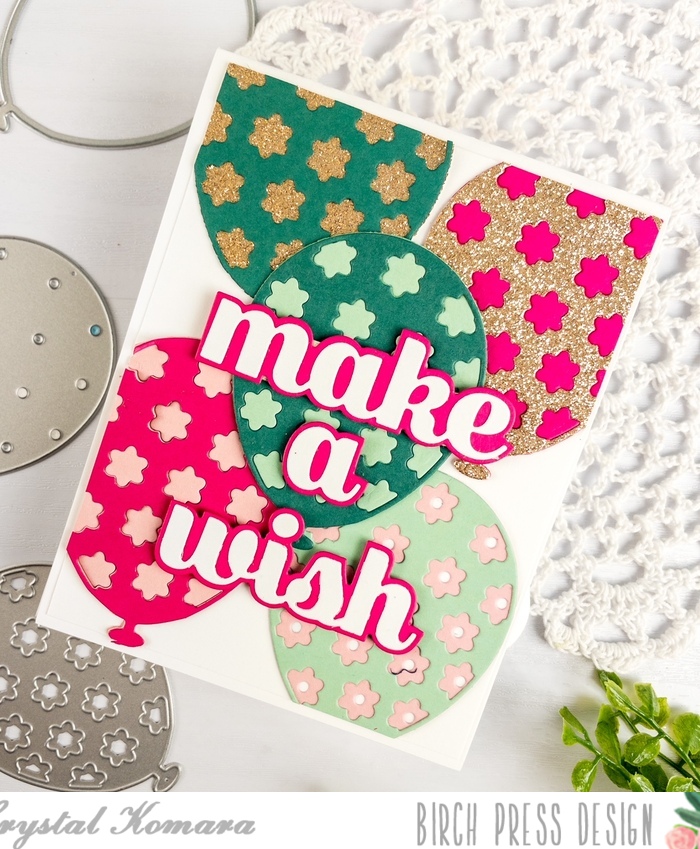
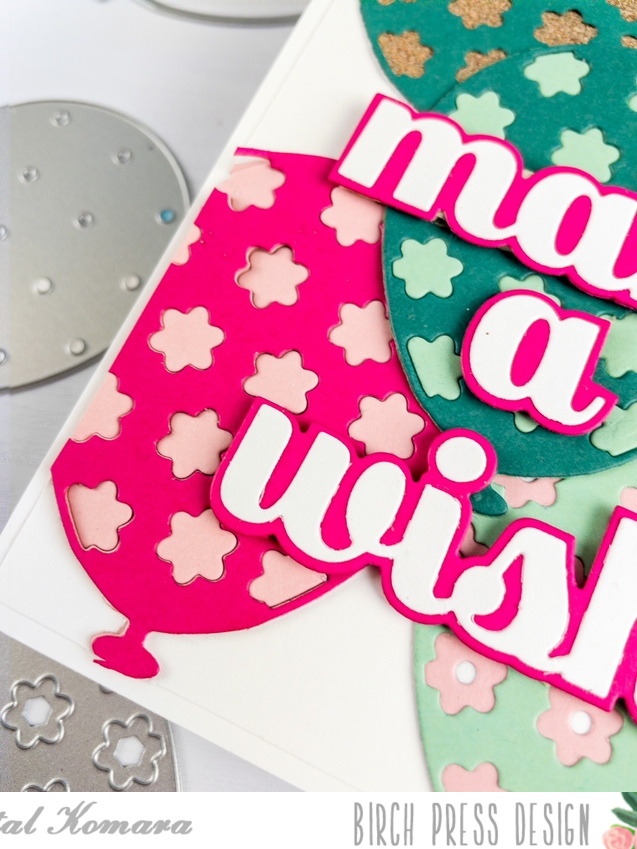
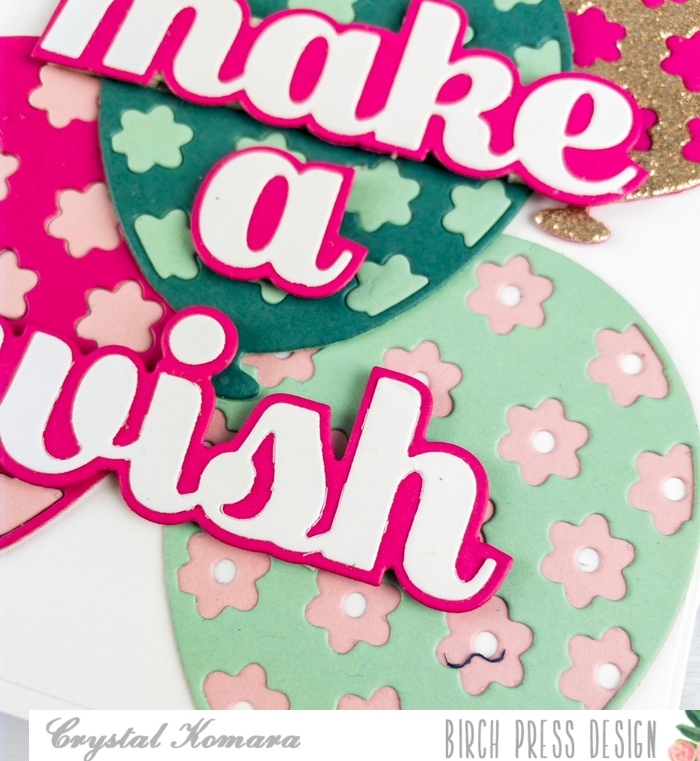
The base of this A2 sized card is made from 80 lb. Neenah Solar White Smooth. I also cut a 5 1/4″ x 4″ piece of the same white cardstock to be used as the first base layer. Using all three layers (A, B, and C) of the Floral Balloon Layer Set, I die cut four of every balloon in teal green, min green, light pink, gold glitter and magenta pink cardstock. (I really didn’t know how many balloon pieces I would need, so this gave me plenty to mix and match!) I really could have made two cards with all the pieces I had leftover.
I then began to play around and see what colors I liked layered over each other. I also toyed around with the balloon placement on the card. There was no real method to my madness, I simply kept rearranging until I found a layout that was pleasing to my eye.
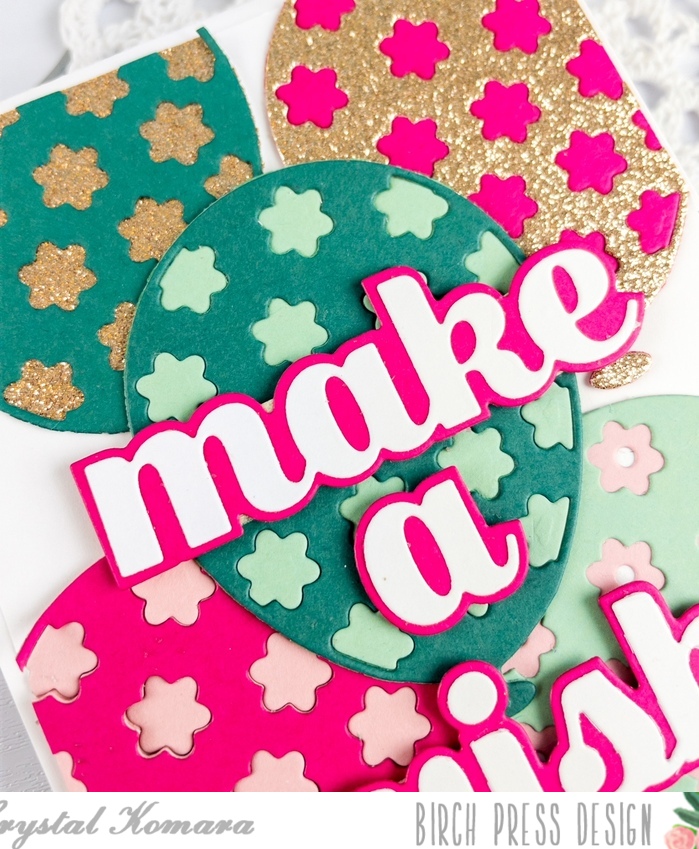
Using the Make a Wish Sugar Script word die, I cut the thicker shadow portion from darker pink cardstock and the thinner top portion from white cardstock. I layered the two together with a fine tip liquid glue and then used 3M foam adhesive behind to sentiment to adhere it to the card with added dimension.
I hope today’s post inspires YOU to find inspiration from the world around you! Thanks for visiting and have a wonderfully creative day!
Hello, Birch Press friends! Today, I am sharing a couple different methods that will enable you to stretch the use of your dies. You can use each method separately, or you can do what I did, and use them both on the same card. The best part is that it results in a bonus card! You can’t beat a 2 for 1 technique, right? All you need to get started is a background die. My cards feature the Flora Plate Layer Set.
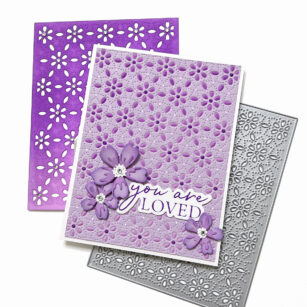
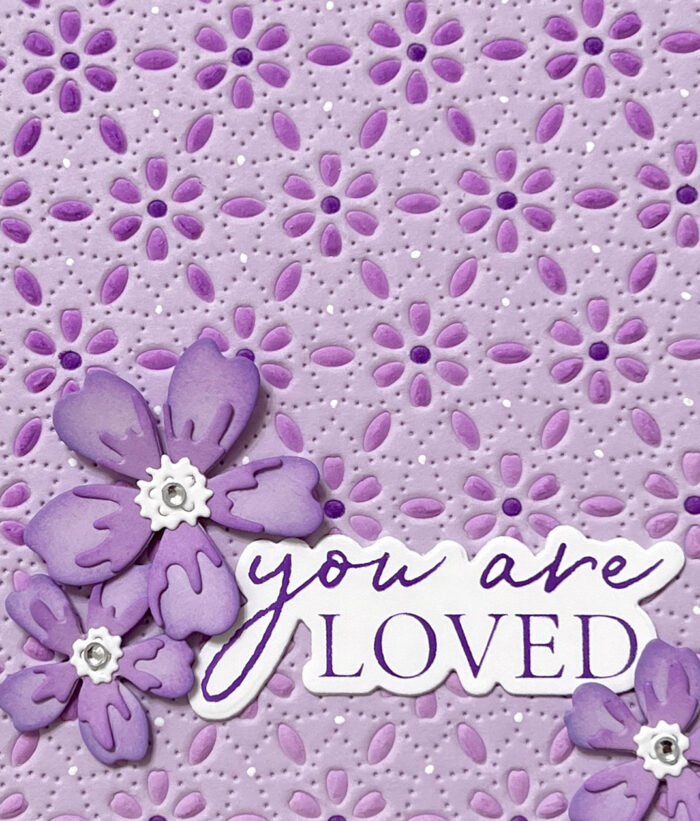
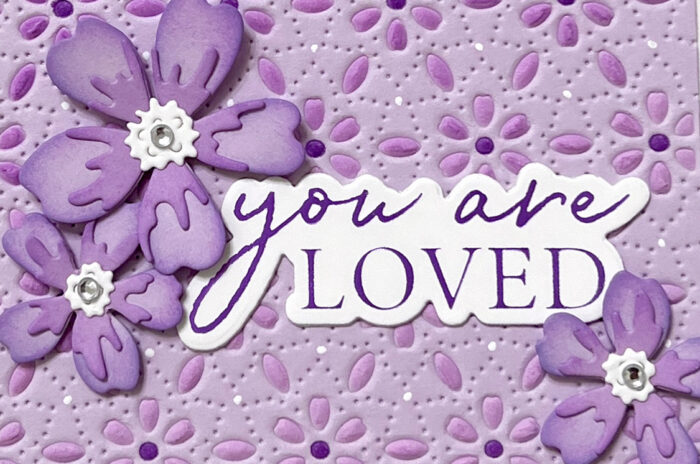
The first thing that I did was to use Plate C from the Flora Plate Layer set to emboss a piece of lavender card stock. It’s really easy to emboss your card stock with a die instead of cut it – you just need the rubber embossing mat and embossing plate for your die cutting machine. You place your card stock on top of the rubber mat and then place your die on top, cutting side down. It’s a really fun way of creating texture on your card stock.
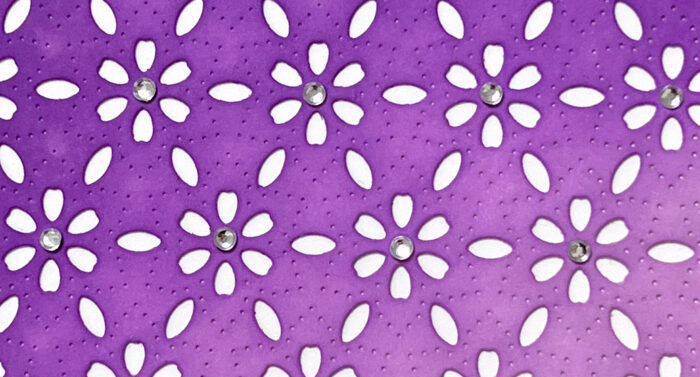
Embossing with a die is the first way I stretched the use of my Flora plate. The next method is just as easy. Simply cut a piece of white card stock using the die in the traditional way and then use it as a stencil! Specifically, I used it as a stencil to color the embossed panel that I created with the first method. I just put the white die cut panel on top of the lavender embossed panel and secured it with tape in a couple places so it wouldn’t move. It’s really easy to line up the die cut pattern with the embossed pattern, since they’re the exact same. I used two shades of purple to ink blend over my “stencil,” going from a lighter color in one corner to a darker color in the other corner. Once I was finished, I used a purple alcohol marker to color the center of each embossed flower on the panel. I also added a dot of white gel pen to enhance the dotted pattern around each flower
To decorate the front of this card, I created three flowers using the Phlox Blooms and Leaves Contour Layers set and the same lavender card stock that I created my panel with. I inked up the edges of the flowers and the flower interiors with the same two colors of ink that I used to stencil the background. For my sentiment, I foiled the “You Are Loved” hot foil plate with purple foil. I added a clear fairy drop to the center of each flower.
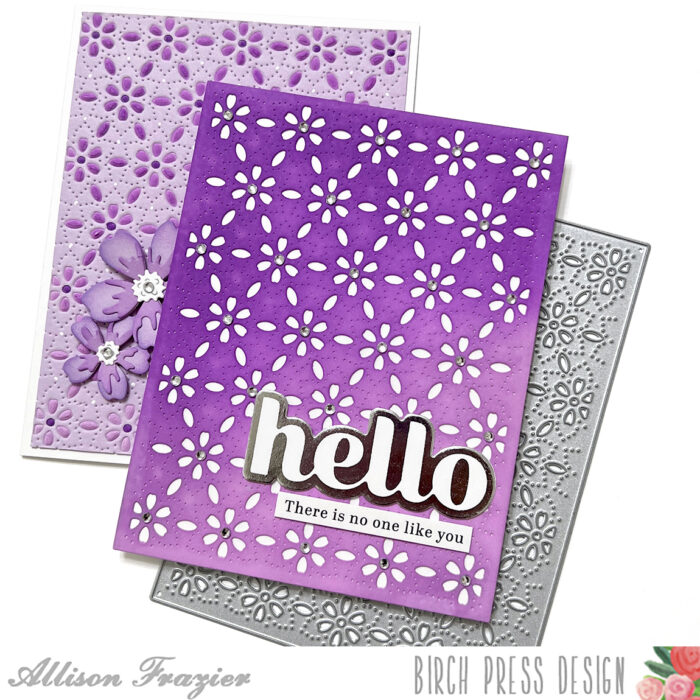
Instead of discarding the panel that I had used as a stencil, I used it to make a bonus card. I used my purple inks to smooth out the ink blending that I had already done when I used it as a stencil. I adhered the panel to a white card base and then hot foiled another sentiment. This time, I used the Hello Sugar Script hot foil plate and die, along with silver hot foil. Once I hot foiled the sentiment onto white card stock, I then took the foil remnant and hot foiled that using a solid hot foil plate. That is why the silver foil is on the outside, and the word itself is white. I added a sub-sentiment from my stash.
To finish my bonus card, I added a clear fairy jewel to the center of each flower on the panel. Just to recap – the purple die cut panel on the top card in the image above was used to stencil the embossed panel on the card pictured behind it. I love how these turned out, and I hope they put a smile on your face. Thank you so much for joining us today!
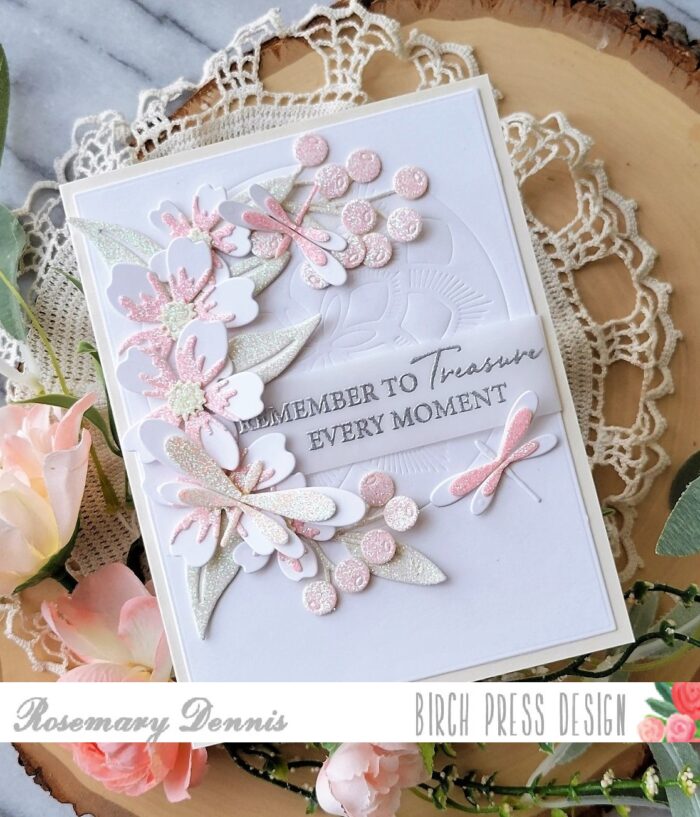
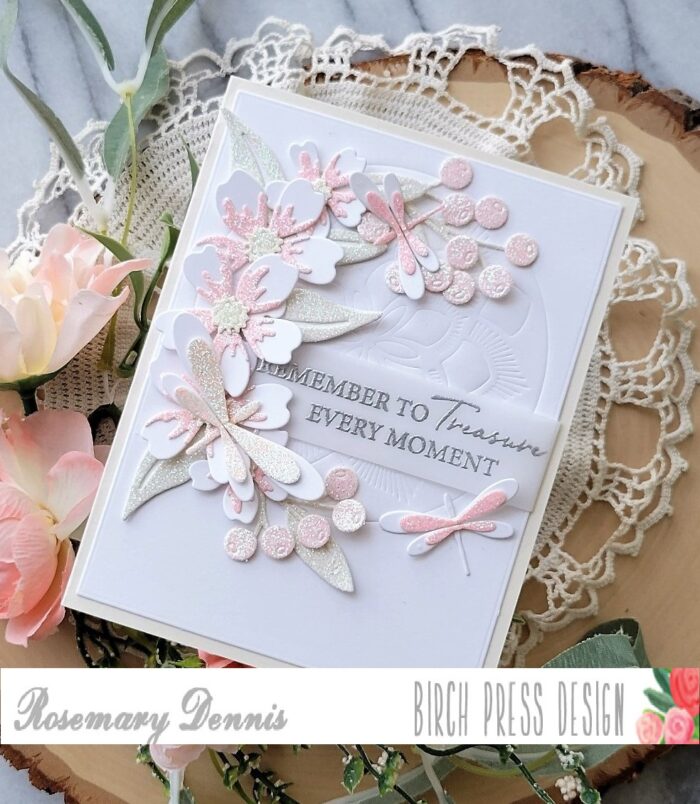
Hello everyone! I have a soft pastel card to share today that I created with glitter papers from the Memory Box Delicate Pastel Glitter pad and many different Birch Press Design dies. Let’s get started!
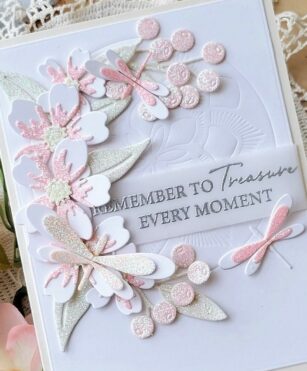
Birch Press Designs has so many wonderful layering dies and I just love going through them and finding ones that can also be used for embossing. As I was working on my idea for the card I flipped through my dies and came across the Arista layering set. I took one look at Layer B and knew immediately that I wanted to use it to emboss the background. I just love all the detail that is embossed into the background. (The embossing sandwich that works for me is my the diecutting platform, one cutting plate, a tan embossing mat, cardstock and die with the cutting side placed against the mat and a few cardstock shims.) I also knew that I wanted to use the Mixed Berry Contour Layers dies and the Simple Dragonfly Contour Layers. The Phlox Blooms and Leaves Contour Layers are so pretty and work wonderfully with the other dies.
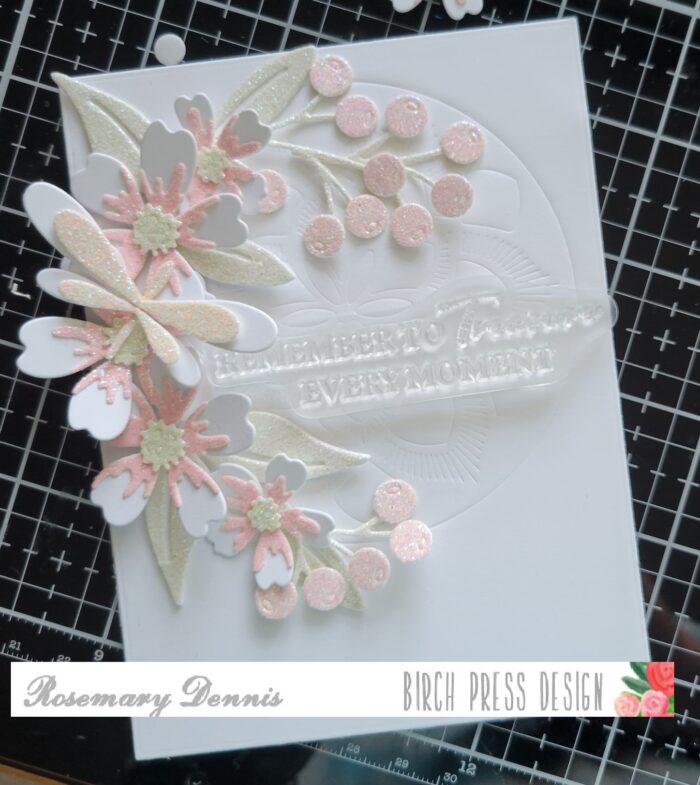
I die cut the flowers and leaves using white cardstock for the bases and then a sugary pink from the Delicate Pastel Glitter pad to the top layer. A pretty yellow from the pad was used for the flower centers. The glitter portion of the leaves were die cut from a light yellowy-green and layered on. I used yellow for the berry stems and a lighter pink for the berries. The above photo shows the general idea of the layout.
The base of the dragonflies were die cut from white and the layers from glitter papers. Going to be honest and tell you that when I started to put the dragonflies I got confused as to what layers went where. I got a bit frustrated with myself, but eventually I got them put together correctly. I used pink glitter paper for the small dragonflies and the larger one is a pretty light peach color. I used a sentiment from the beautiful Kind Hearts stamp set. It was heat embossed on vellum using silver embossing powder so it was stand out against all that white.
I cut the vellum into a strip and then wrapped part of it behind my panel and secured it with liquid adhesive. After that side had dried I secured the other side with liquid adhesive, as well. Then I started adding all the flowers, leaves and berry stems. The large flowers were popped up with thin foam squares. Everything else was adhered with liquid adhesive making it easy to tuck them into place. I finished with the dragonflies.
If you have yet, I hope you will look through your Birch Press Design layering dies and find ones that can be used to emboss the background of your projects. I think you will just love the look! Thanks for stopping by!
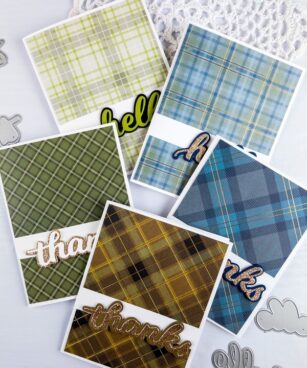
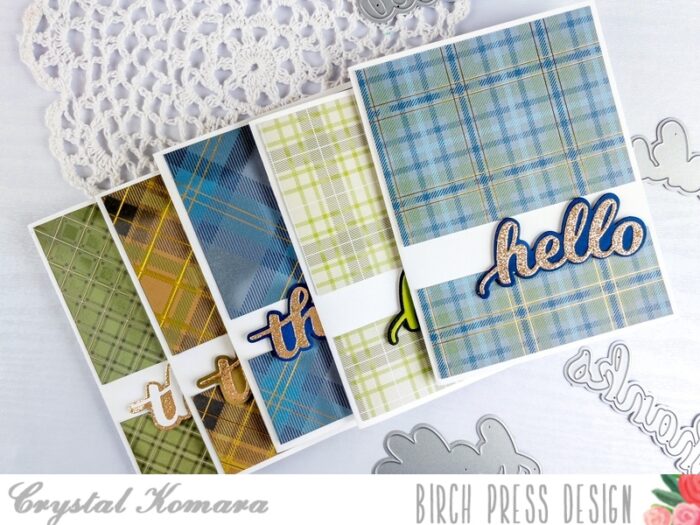
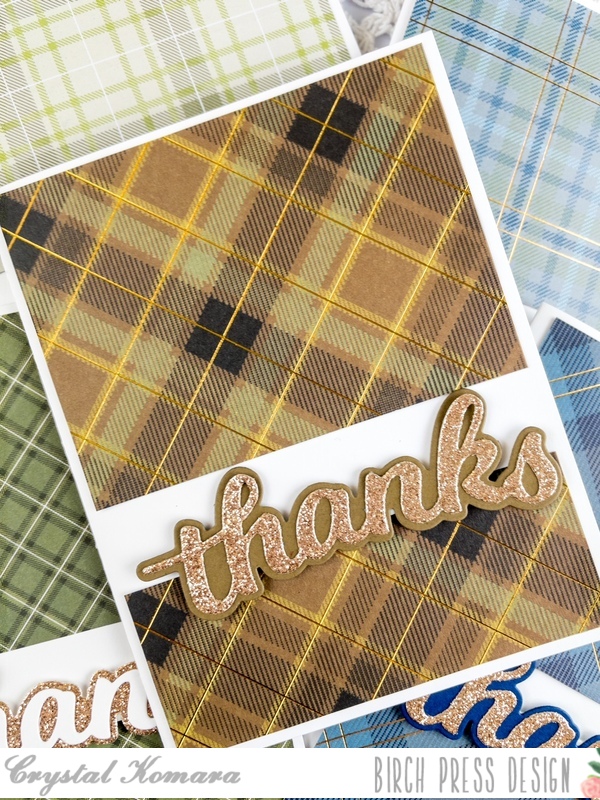
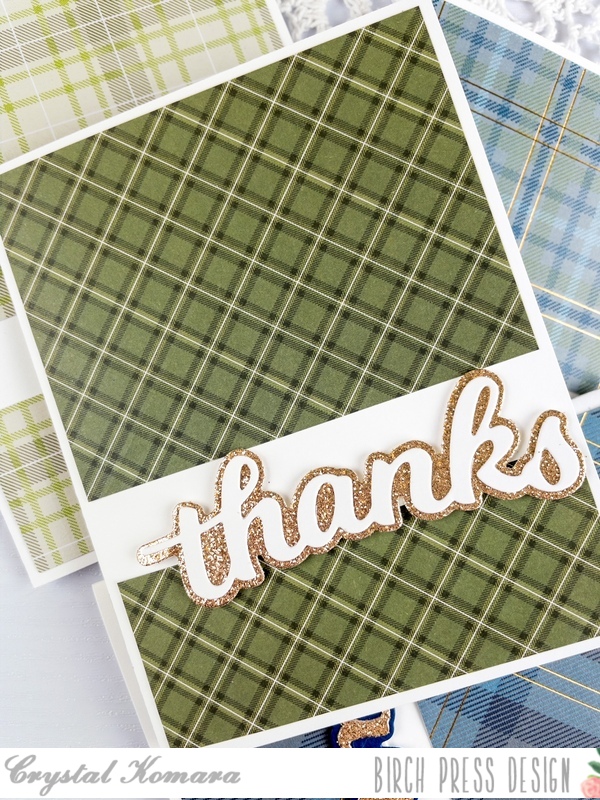
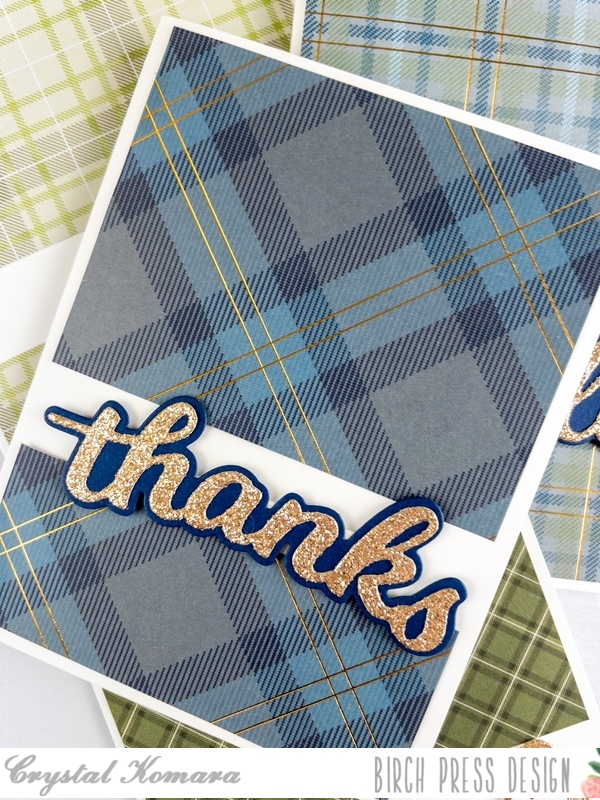
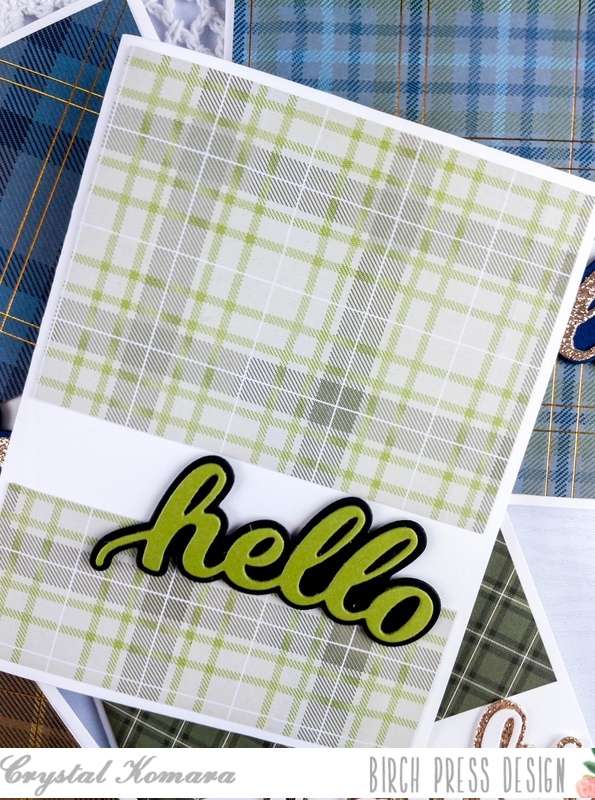
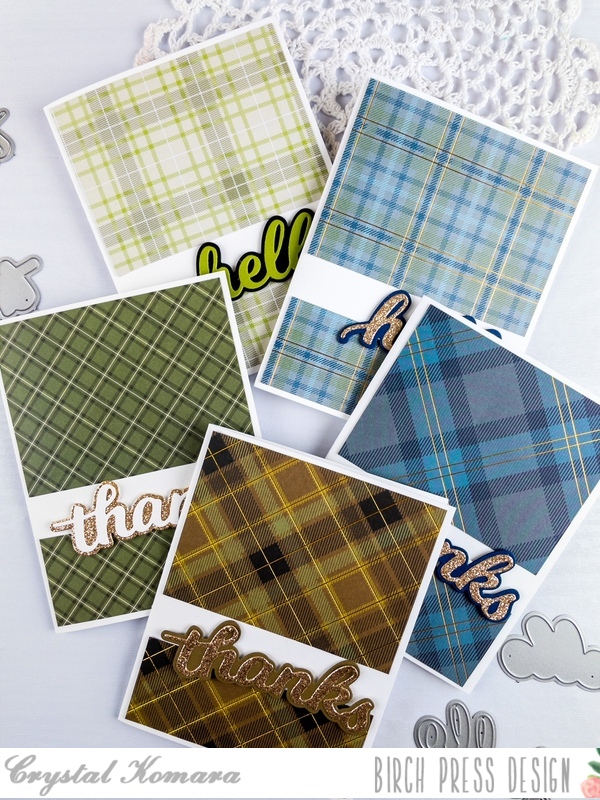
Hello crafty readers! This is Design Team member Crystal Komara here with you today sharing an idea for some CAS (Clean And Simple) quick and easy masculine cards. I don’t make masculine themed cards often, but it is always nice to have them on hand. By using a beautiful pack of paper and some shadow word dies, these five cards came together all in about half an hour!
Card details:
The base of these A2 cards is made from 80 lb. Neenah Solar White Smooth cardstock. I cut 5 1’4″ x 4″ pieces of foil plaid paper and then cut 1/2 from the center of each card. I adhered the plaid paper to the top and bottom halves of each card leaving some white space in between for the sentiment. (*Side note – unfortunately this exact pack of paper I used from Memory Box Co. is no longer available, but you can view other beautiful packs of paper from the same company here). Memory Box Co. is a sister company of Birch Press Design.
I used a variety of sentiments to make these cards work from all occasions like hello and thanks. This card is so simple and basic that you could use any style of patterned paper and any sentiments. Plus, they’re so quick and easy you’ll have a batch of cards in no time.
Thanks for following along and have a wonderfully creative day!
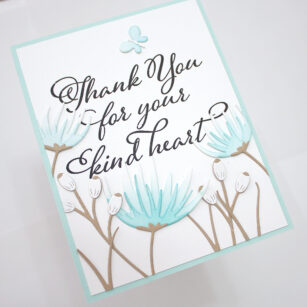
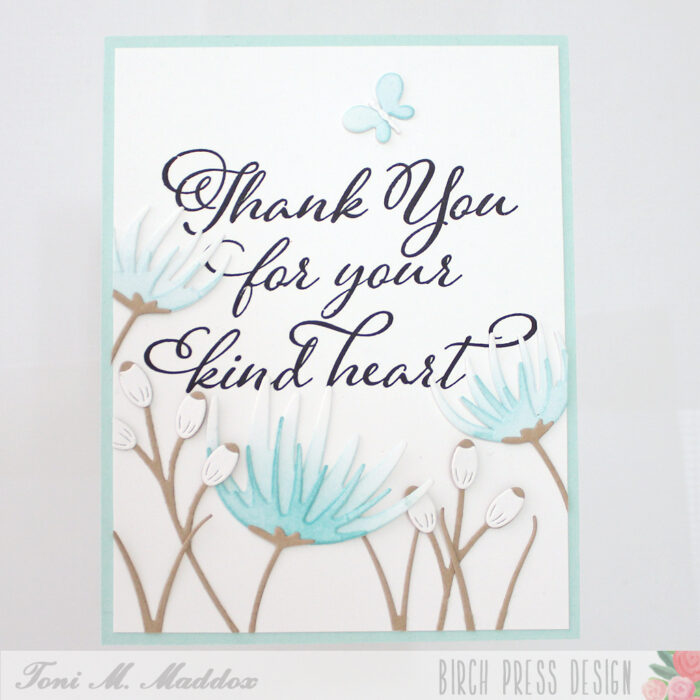
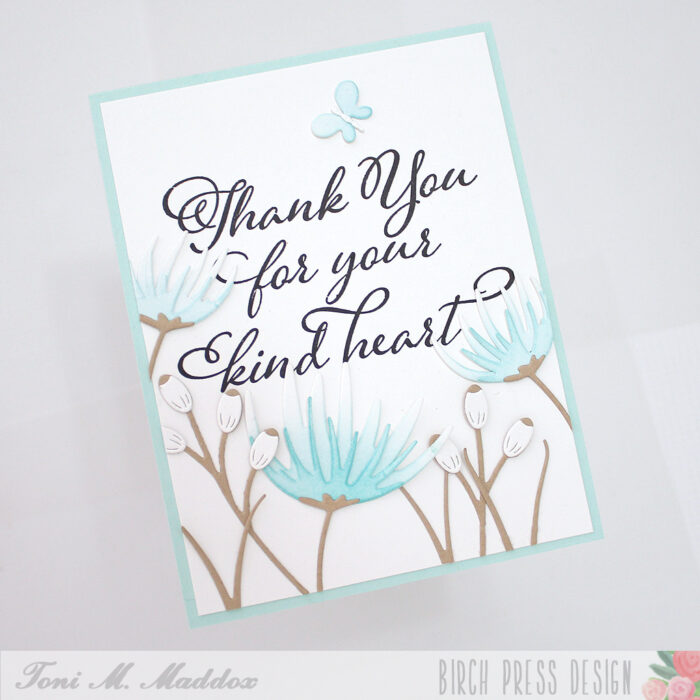
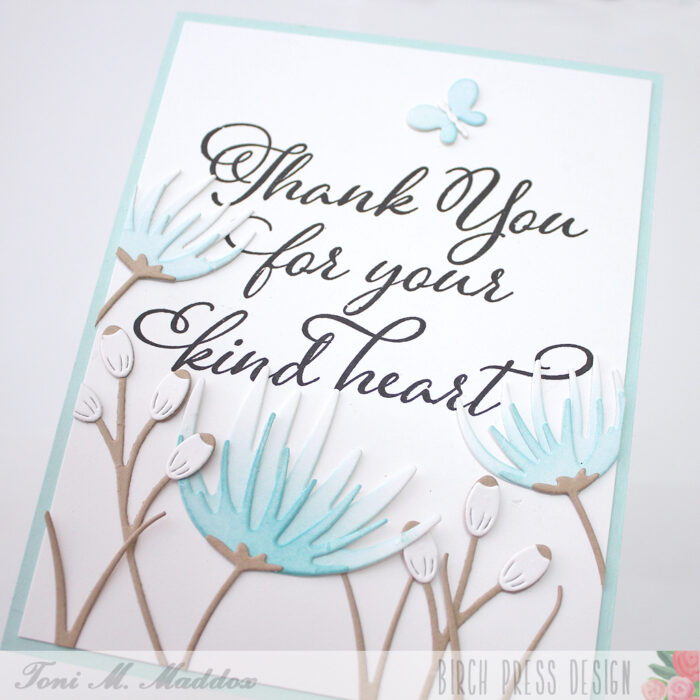
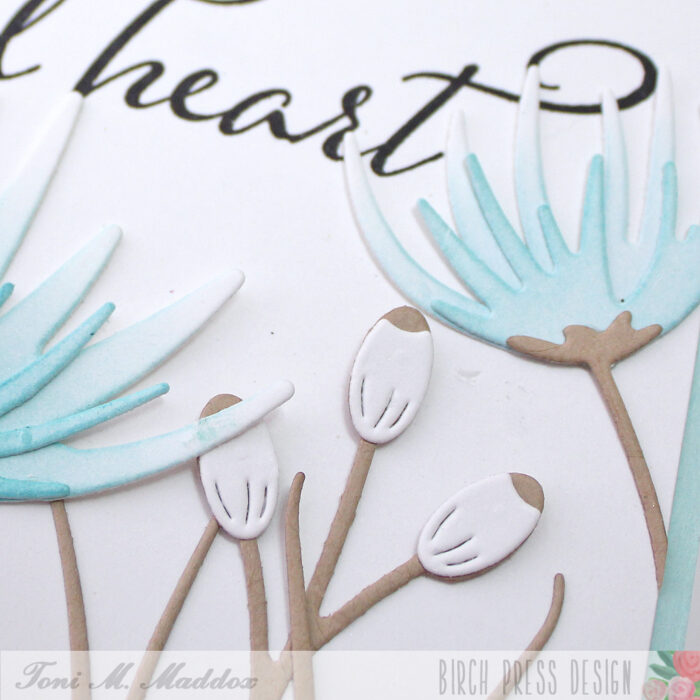
Hello, Birch Press fans! Toni here with you today sharing a simple thank you card using one of my favorite colors combos, aqua blue and kraft.
I cut out the Wispy Blooms as well as the Sylvan Berries and Leaves Contour Layers in white and kraft.
I then sponged the Wispy Blooms and the Simple Butterfly with just a touch of Distress Oxide Peacock Feathers (I think Salvaged Patina is a great substitute).
I stamped the Kind Hearts sentiment in black then framed it with the greenery (blue-ery?).
I added a few stems from the Sprouting Crocus Contour Layers in kraft to fill in a bit.
I hope you enjoyed today’s card and have a great rest of your week!
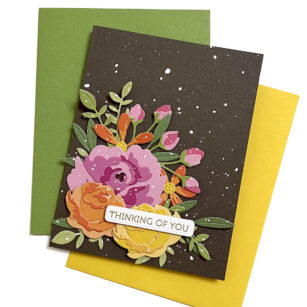
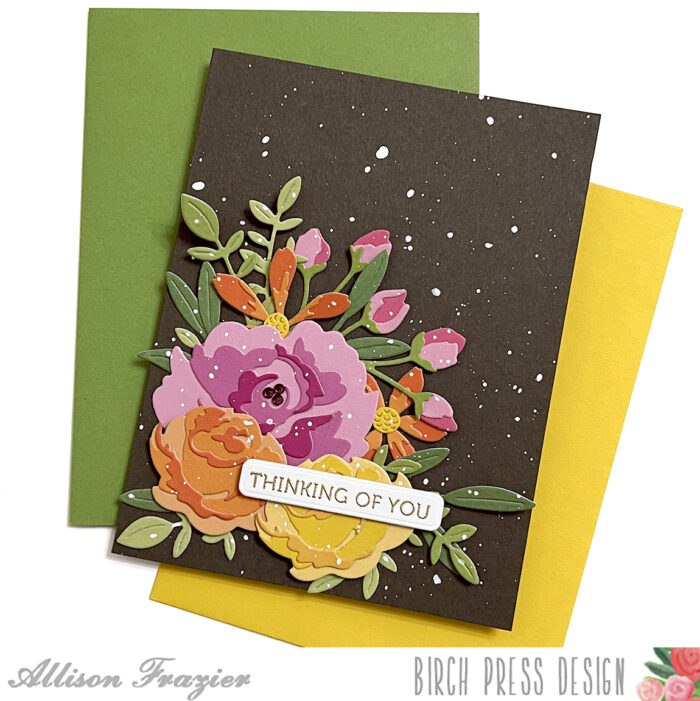
Hello, Birch Press friends! Today, I am sharing this card featuring a cluster of layered florals. There are so many amazing floral dies in the Birch Press collection, and I used a lot of them today! I love using a dark background – I think it provides a really dramatic pop.
I started my card by creating the layered roses first. For each of the roses, I chose three different shades of card stock for the layers. I used the Dainty Rose and Leaves Contour Layers set to create the yellow and orange roses. I used the Morning Rose and Triple Buds Contour Layers set to create the large pink rose. I used this same set and two shades of pink card stock for the buds and one shade of green card stock for the stems.
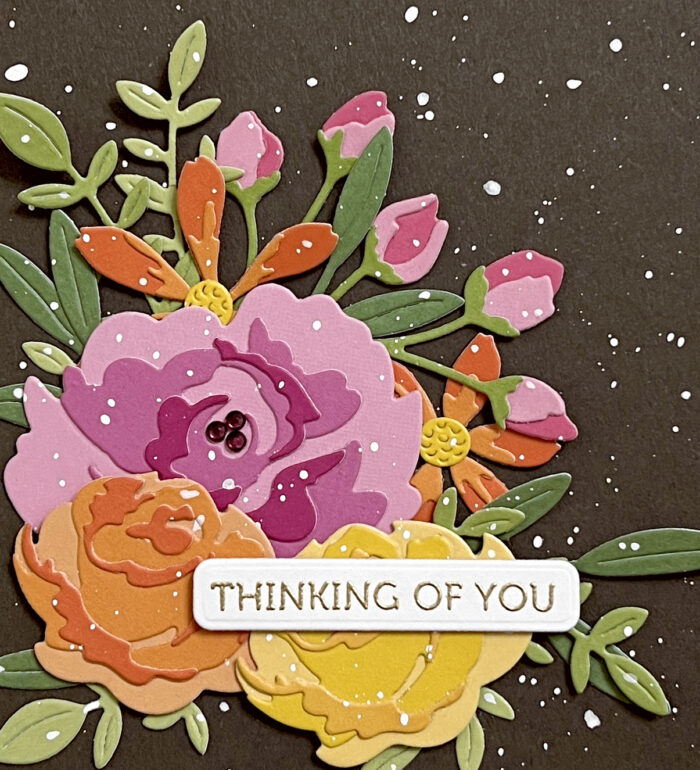
For the orange flowers, I used the Star Flowers Contour Layers set. I used two shades of orange card stock, as well as yellow for the center of the flowers. For all of the leaves, I used two die sets – the Jovial Blooms and Leaves Contour Layers and the Tiny Tuft Flowers and Leaves Contour Layers. Once I had all of my dies cut, I assembled the layers with liquid glue and then started arranging everything onto a dark brown A2 card base.
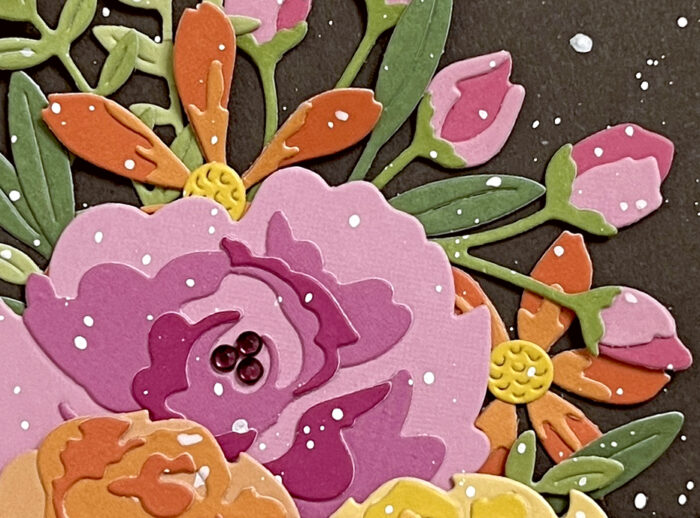
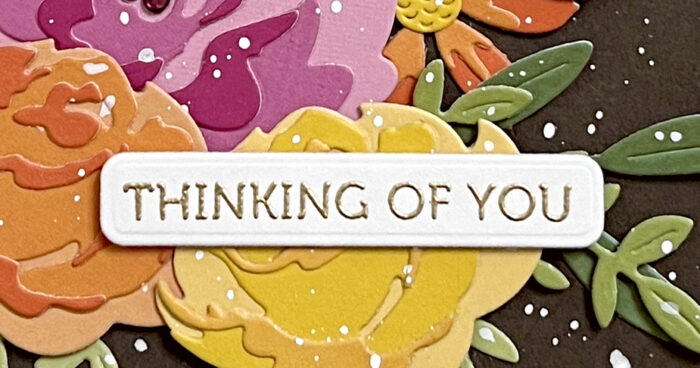
Once I was happy with the arrangement, I started glueing elements down, starting with the leaves and any other elements that were going to go behind something else, such as the smaller orange flowers and the pink buds. Once I got to the top elements, I used a couple different thicknesses of foam tape to adhere the orange and yellow roses. I heat embossed my sentiment with gold embossing powder. This sentiment comes from the Lingo Thanks Stamp Set. Before adhering my sentiment to the card, I splattered the whole thing with white acrylic paint.
For a final touch, I added some fairy jewels to the center of the large, pink rose. I love how it all turned out! Thank you so much for joining us today. I hope this card inspires you and brings a smile to your face.
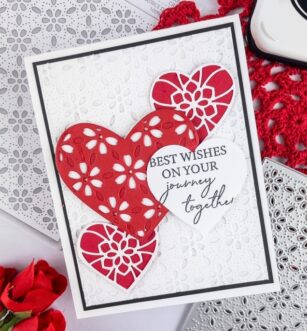
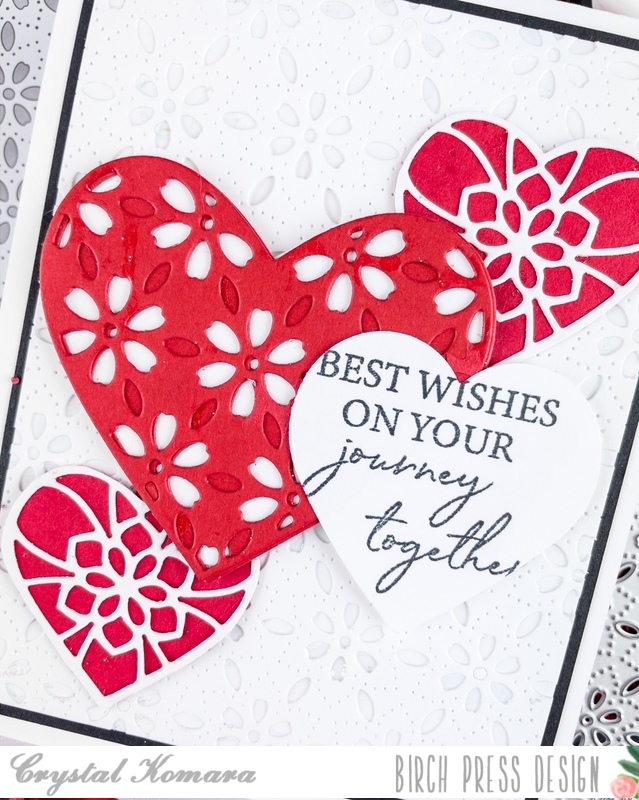
Hello friends and happy May! I feel like May is the unofficial start to summer, which also means that wedding season is upon us. This is Design Team member Crystal Komara here today to inspire you with a wedding/love themed card using a variety of product from Birch Press Design.
Card details:
The base of this A2 sized card is made from 80 lb. Neenah Solar White smooth cardstock. This is my go-to white cardstock for e-v-e-r-y-t-h-i-n-g! To create the background of this card I used Layer Plate C of the Flora Plate Layer set, and I die cut it from white cardstock. I mounted that die cut piece onto a piece of white cardstock for a white-on-white look and then mounted both pieces onto black cardstock before adhering it to the card base.
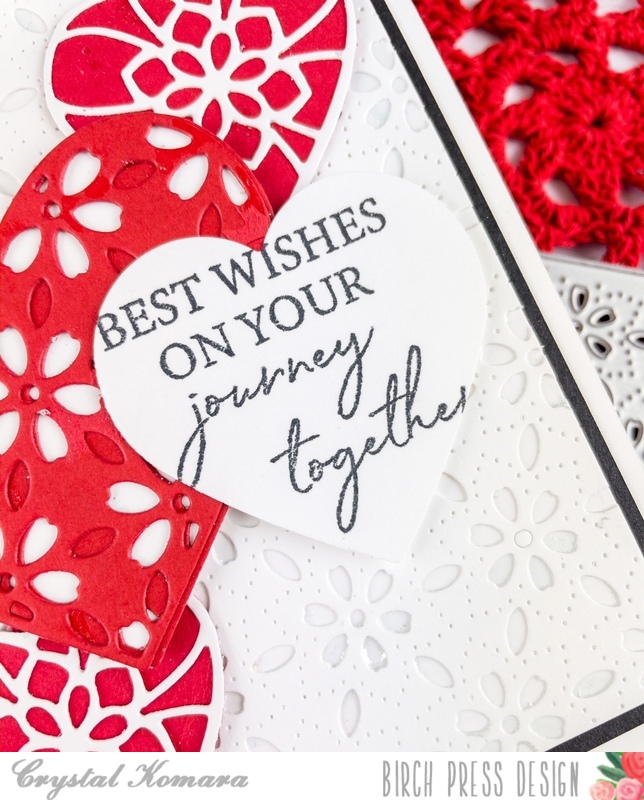
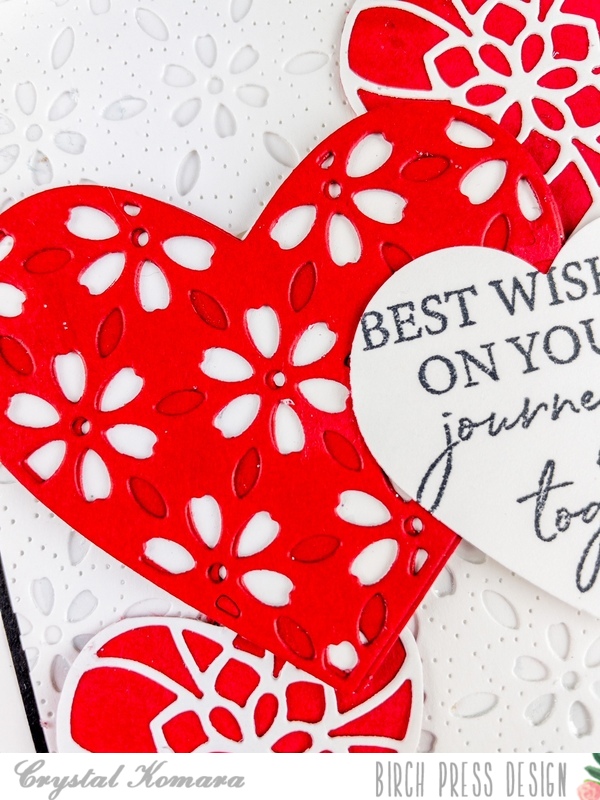
For the largest heart I used the Flora Heart Layer C. I die cut Layer A and Layer B from red cardstock. I adhered the two layers together with a fine-tip liquid glue. Then I adhered those of a piece of white cardstock and fussy cut a heart shape background. I adhered this heart to the card using 3M foam adhesive for added dimension.
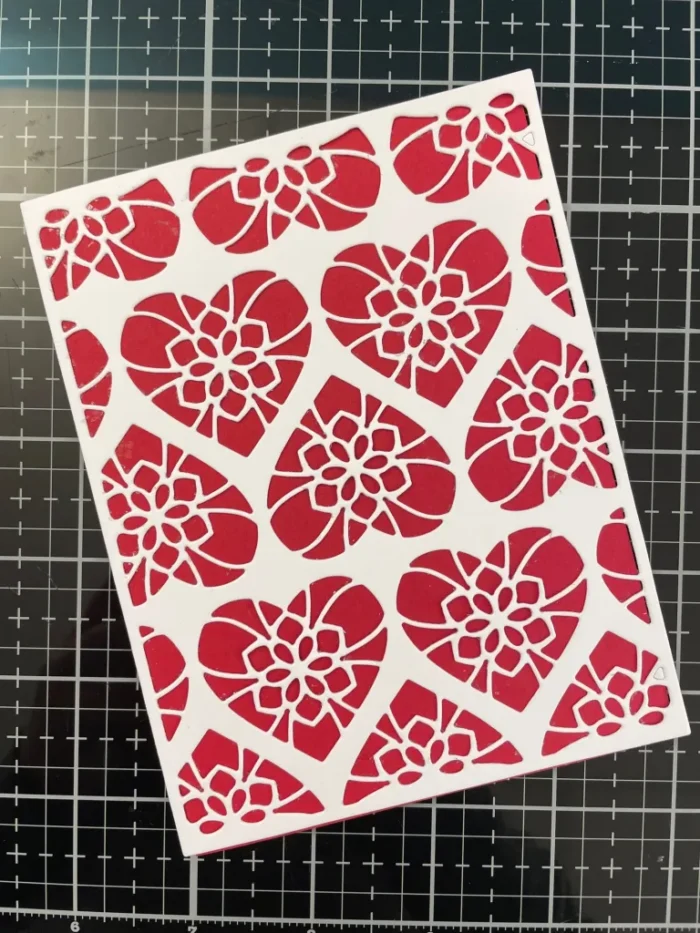
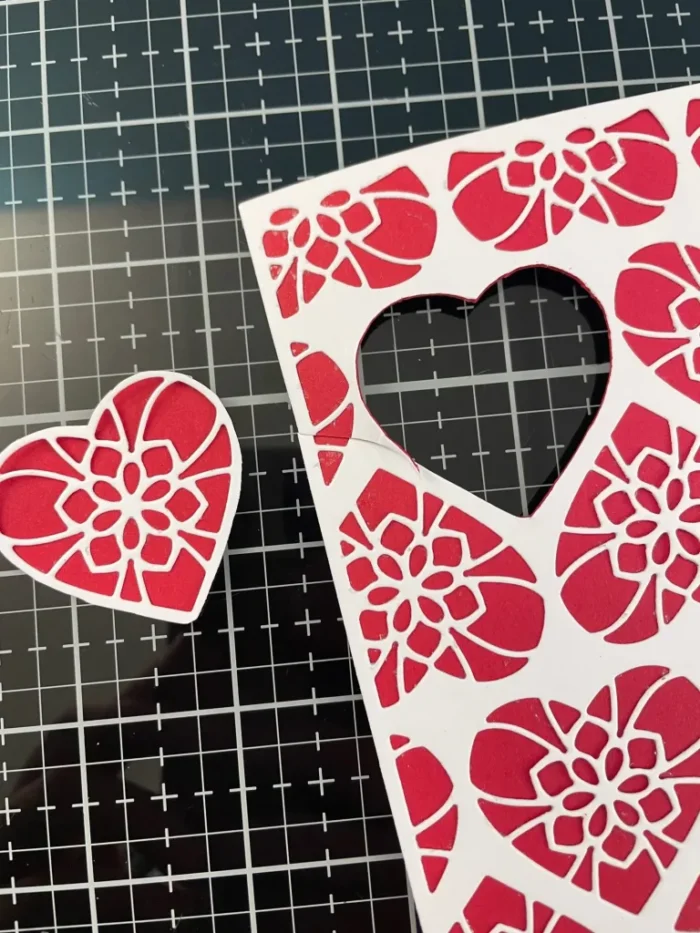
To create the two smaller hearts, I die cut Layer A of the Kinsley Heart Layer Set from white cardstock. I adhered this over a sheet of red cardstock and then fussy cut the individual hearts out.
For the sentiment, I stamped the font in black ink on white cardstock. This sentiment is from the Kind Hearts clear stamp set. I then used a heart punch to punch the sentiment out. I adhered the sentiment too the card using 3M foam adhesive.
I hope you have enjoyed today’s card. Thank you for visiting and have a wonderfully creative day!
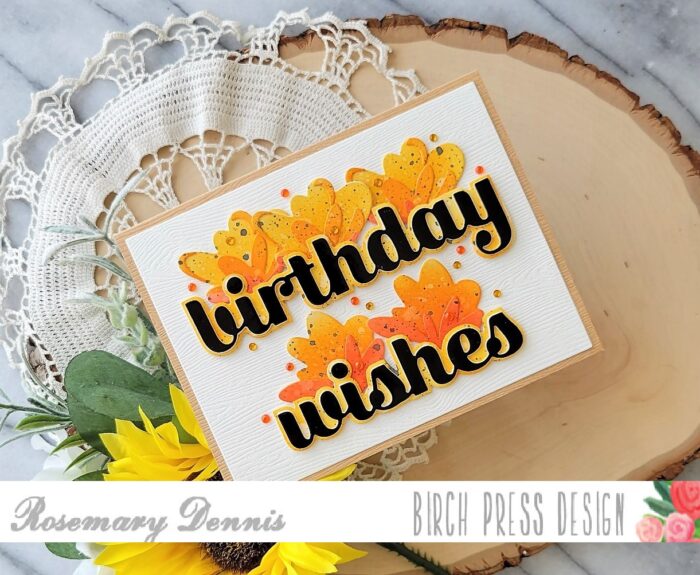
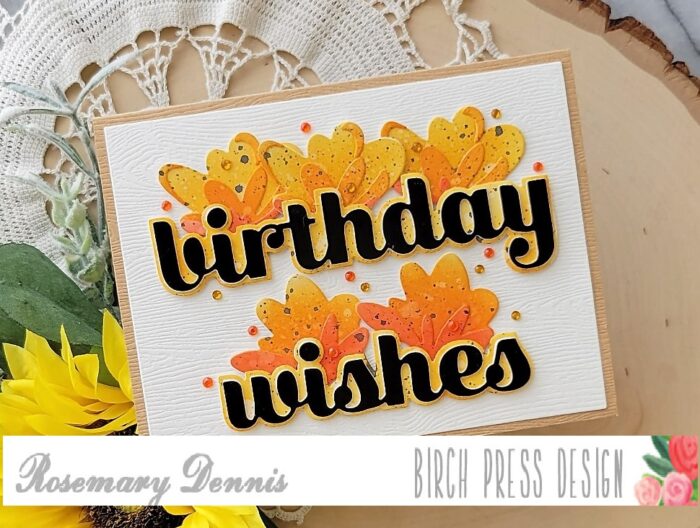
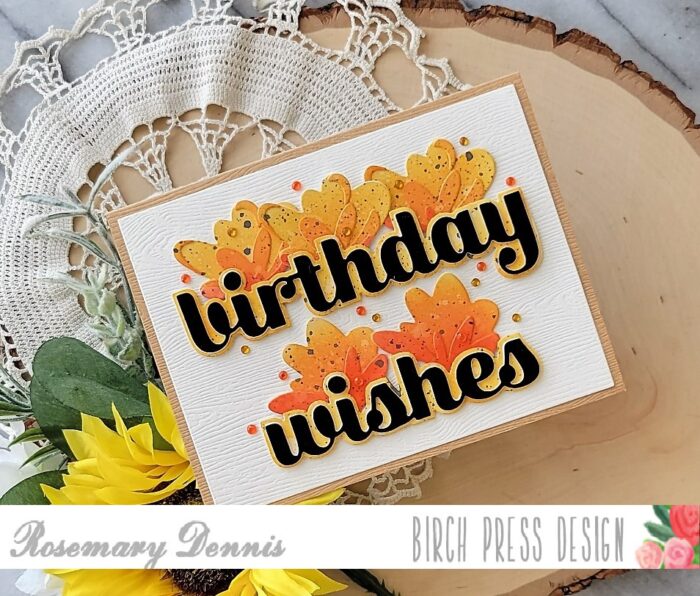
Wow, can you believe it is already the end of April? Where is the time going?! Today I’m sharing a card that was inspired by my other favorite crafting pursuit: cross-stitching. Before I started paper crafting I was an avid cross-stitcher, but I injured my shoulder and stitching became hard to do so I gave it up. Last summer I was inspired to start stitching, again, and discovered that it didn’t bother me as much as it had… yay! And that leads me to the card I’m sharing today. I had started stitching a chart using a warm orange floss and that got me to thinking about the colors I wanted to use for a card I would be making using the new Jovial Blooms and Leaves Contour Layers dies. I know it is spring, but I just love warm autumnal colors and that is where we are going, lol
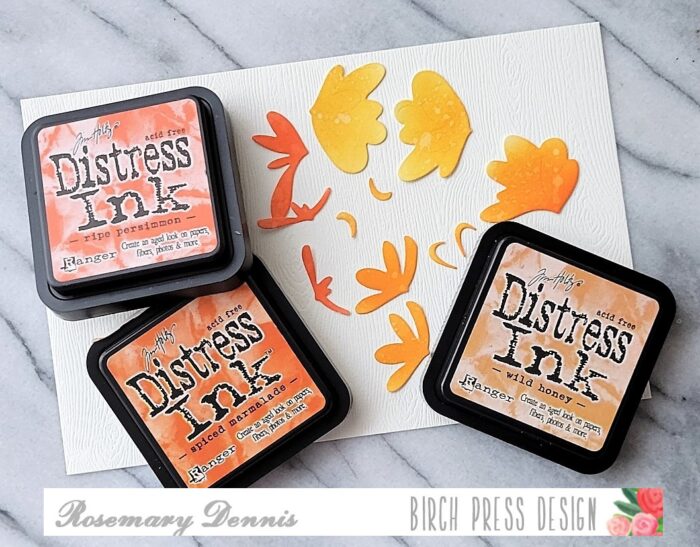
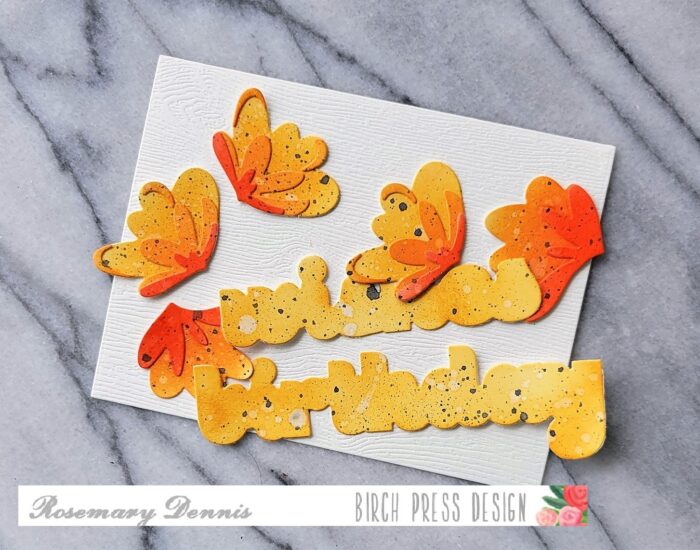
I started by die cutting all the flowers that I thought I would need for the card. Once I had everything die cut I put washi tape on the back of the panels to keep the pieces in place and did some simple ink blending using distress inks in Spiced Marmalade, Wild Honey and Ripe Persimmon. The flowers with three layers I used all three colors and for the flowers with only two layers I used Ripe Persimmon and Spiced Marmalade. I also splattered on some water to give the pieces a bit of a distressed look. Then I adhered all the layers together. I was so intent on getting my flowers put together that I completely forgot to add the stamens! Oops!
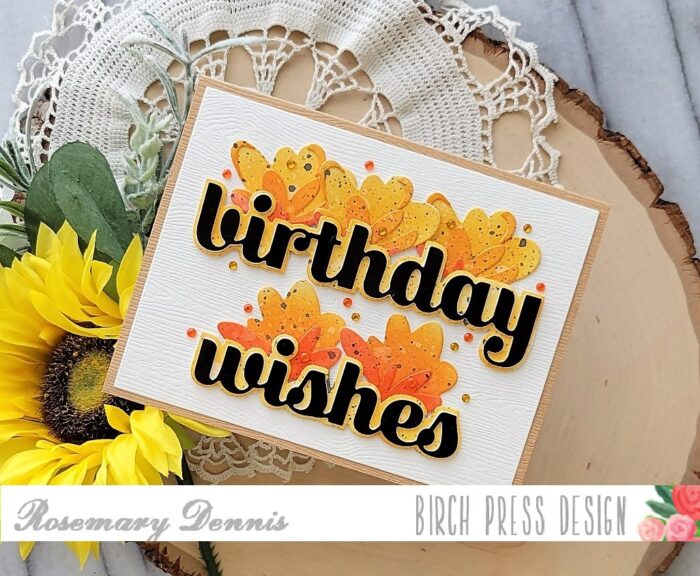
Once I had the flowers assembled I did a little bit more splattering using some black paint. At this point I pulled out the Birthday Wishes Sugar Script die set and die cut the top layer from Memory Box Open Studio glossy black cardstock. That cardstock is amazing! I love how thick and substantial it is. I die cut the shadow layers, inked them up with Wild Honey distress ink, and then splattered on water and black paint. I cut additional words out of scrap cardstock and adhered them to the glossy black words for additional dimension.
Once I had all my elements assembled and ready to go I die cut a piece of Memory Box Open Studio cream woodgrain for the background. I played around with the layout for quite sometime before finally settling on the layout you see.
I finished off the card with lots of little warm yellow and orange Open Studio fairy jewels. I did something I don’t normally do and created the card base from woodgrain cardstock. This time I used Memory Box Open Studio kraft woodgrain cardstock and I really like how it looks.
I hope you are inspired by my little trip to autumn. Thanks for stopping by and enjoy your day!
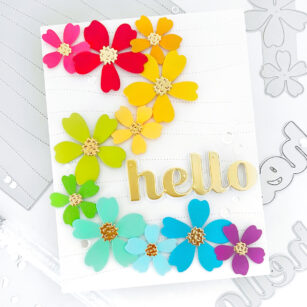
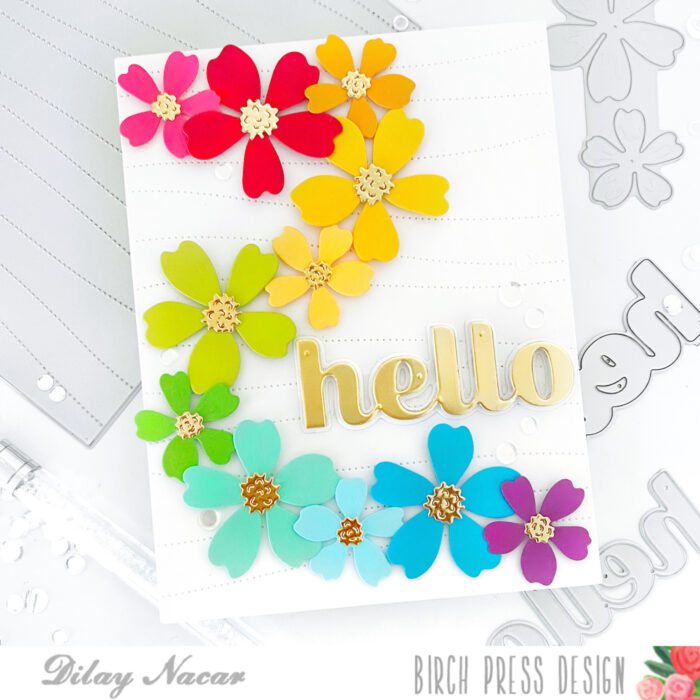
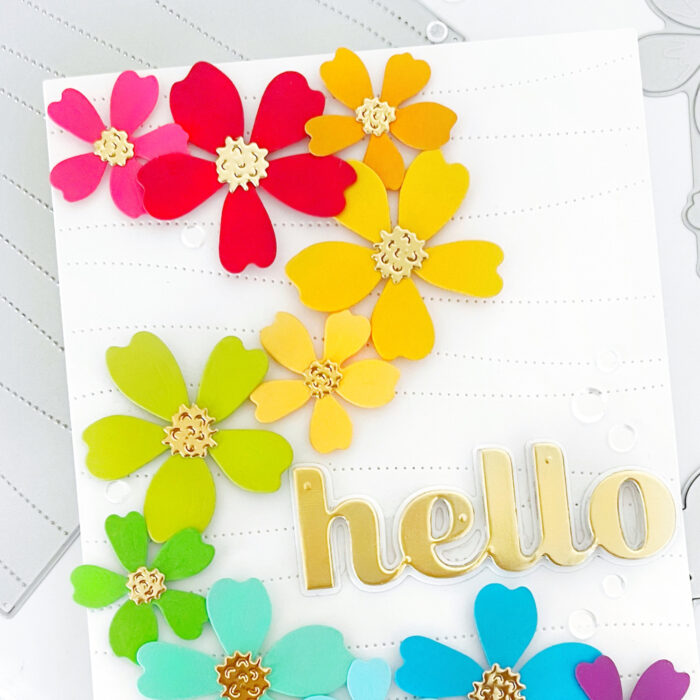
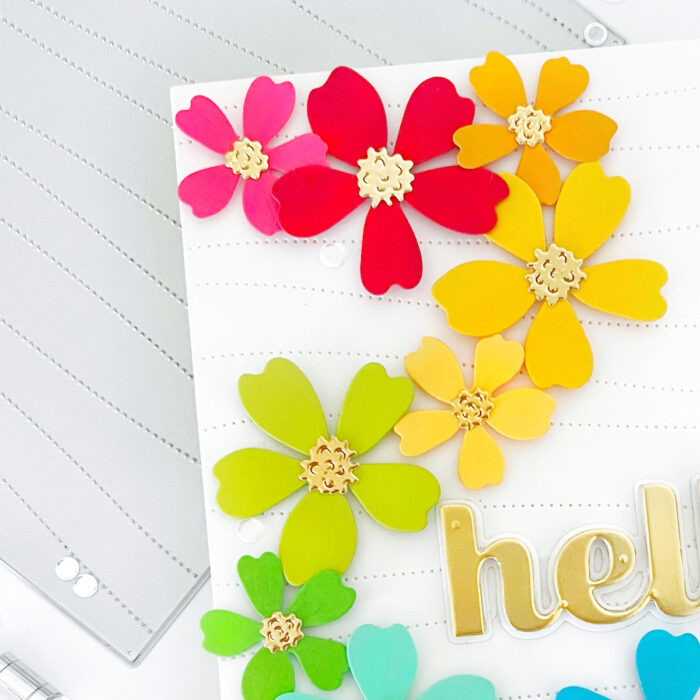
Hello and welcome, friends! Dee here with you today! A few weeks ago, I shared a mini slimline card similar this card design, but this version is a bit cleaner and easier to recreate.
To start, I die-cut each of the Phlox Blooms Lovely Layers Dies in various colors. Next, I die-cut the Pinpoint Contour Plate in white, then adhered each of the flowers with foam tape, cascading from the top in rainbow order.
Next, I die-cut Big Hello Sugar Script in mirror gold cardstock and adhered it to the top. To finish, I added a few clear sequins in between the flowers.