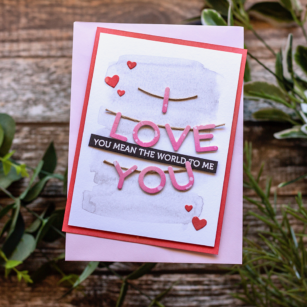
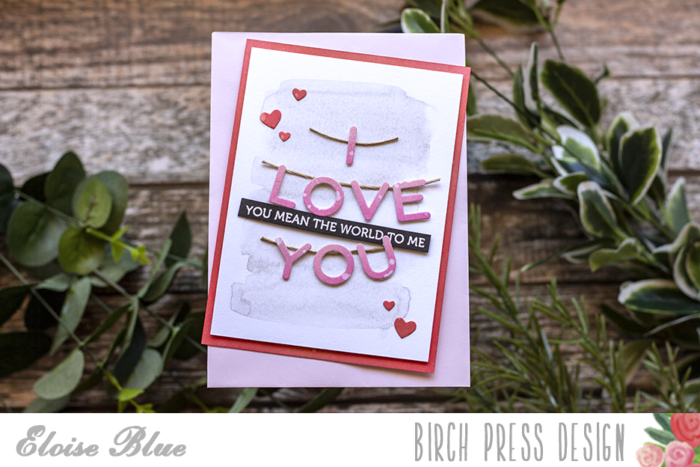
 Hi there it’s Tracey here with you today. With Valentines Day only a week away I thought I would share a shaker card with you made with Birch Press Design craft dies! I created a video below to show you my process for creating my shaker card.
 Smooshing with Distress Oxide inks is one of my favourite technques that I haven’t done in a while. My smooshing colours were inspired by a card I saw on Kristina Werner’s YouTube channel the other day. I started out by smooshing some Distress Oxide Ink onto my craft mat and then I spritzed it with water. Using a panel of watercolour paper I lay it down into the ink, held it briefly and lifted it. Before adding more ink I dried the panel with my heat tool and repeated this process two more time until the colours all worked in together. This panel is the background to the shaker card. I adhered that watercolour piece to a white top folding card base. Here are the supplies I used today.

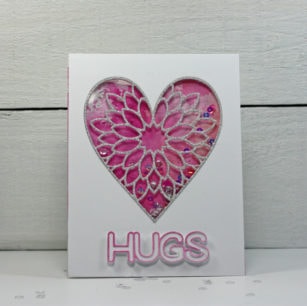
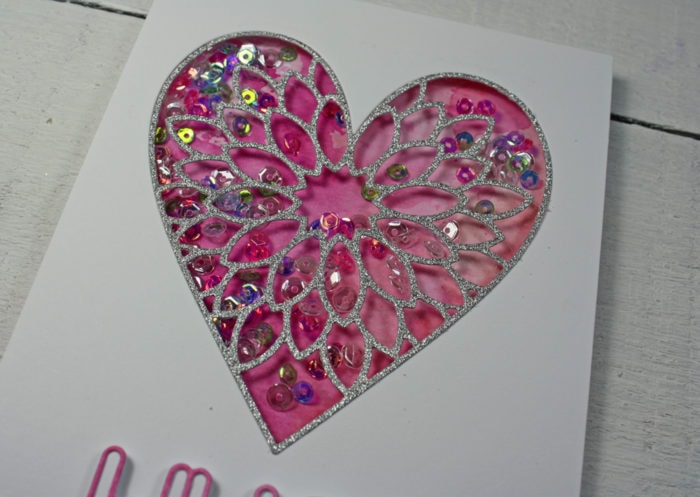
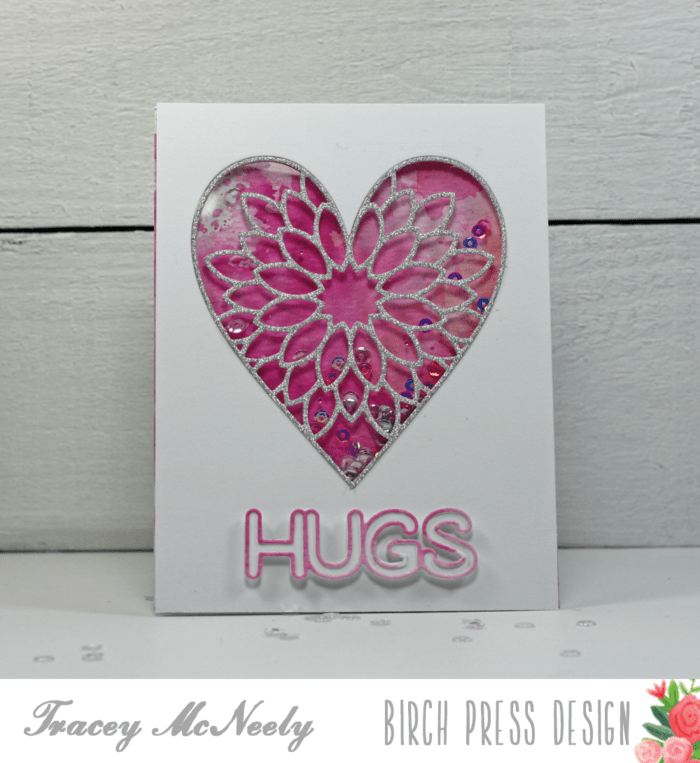
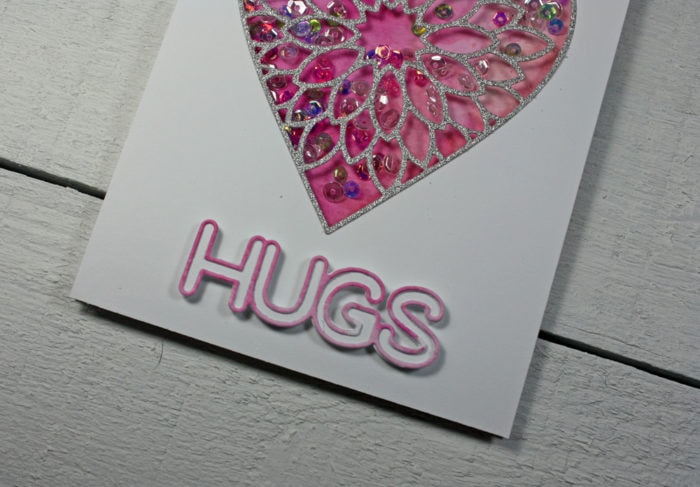
Using the Dahlia Heart Layer A die I cut a heart out of my card front, this will be the top of my shaker card. Then using the Dahlia Heart Layer A die once again I die cut one more from silver sparkle cardstock, this piece will inlay the heart on my card front.
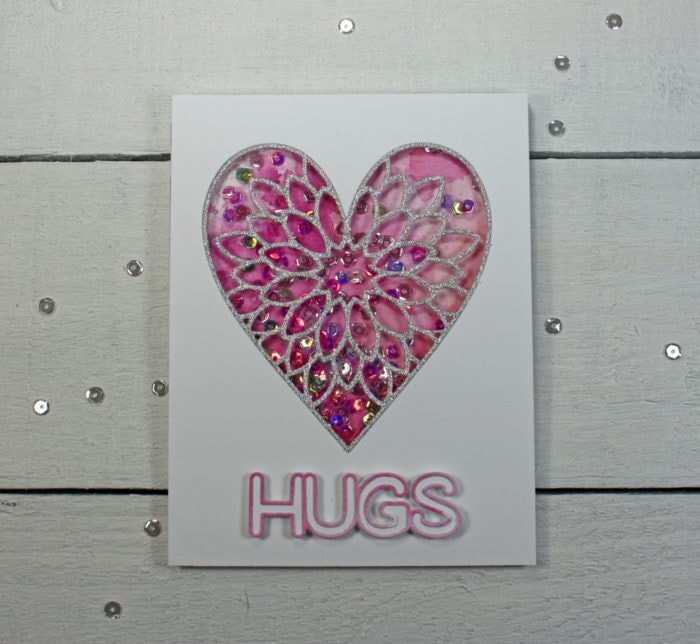 To make the shaker I adhered a piece of acetate over the back of the heart on the card front. I used tape runner to make sure the acetate was completely sealed close the edge of the heart. Turning it over on to the tissue backing paper helps to keep any dust off the front while working on the card. I adhered two layers of foam tape all over the back of the front panel, close the edge of the heart and right over to all exterior edges. Then I filled my shaker with sequins. I adhered the background panel/card base carefully to the shaker. Once it was flipped over I inlay the silver sparkle Dahlia die cut into the heart on the front panel.
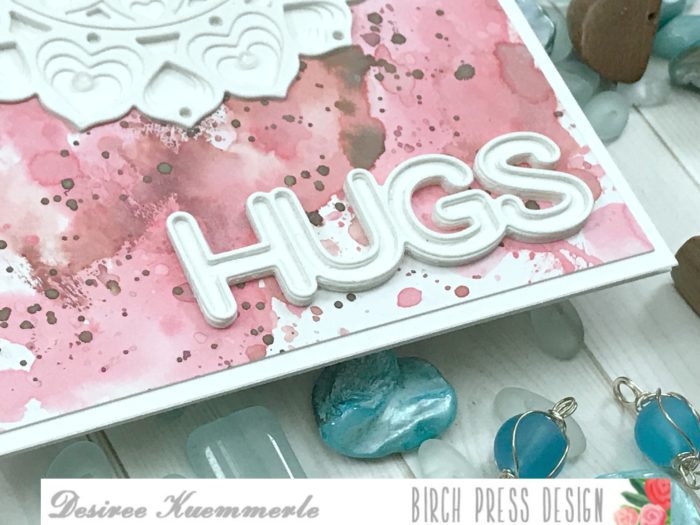
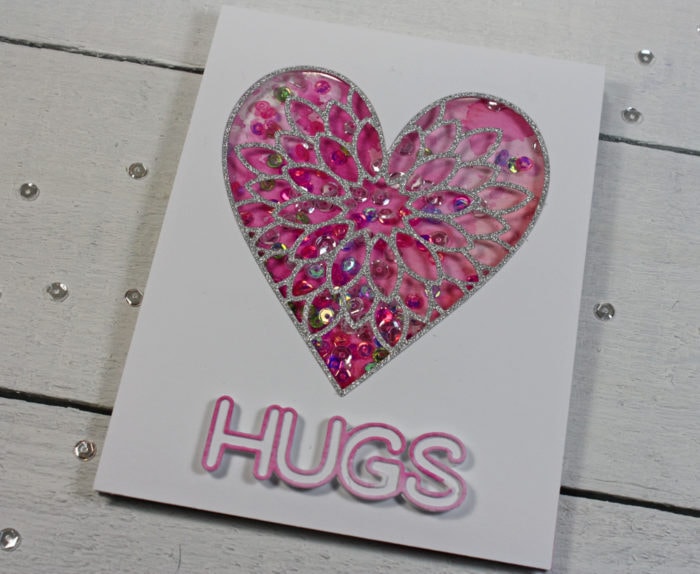 The last step was to add the ‘Hugs’ sentiment which is from the Big Lingo Type Hugs. Have you tried the Big Lingo Word dies yet? they are so cool. You can cut a frame, the word, and an outline that fits right on the edge of the word itself. I die cut he word ‘Hugs’ with white cardstock and then cut the thin cut of the word from the smooshed pieces I created earlier.
 Making a shaker is a great way to get more use out of your dies. Your could step this up a notch and build your layers up on the front panel like I did in this post HERE.
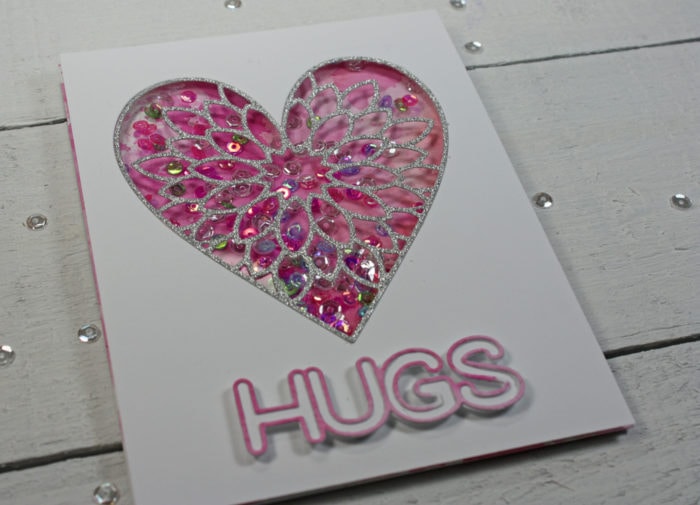
Tiny pieces of foam tape were put on the back of the hugs die to give it some added dimension.
 Thank you so much for stopping in today to make a shaker with me. I hope you try making a shaker with your Birch Press Design layered dies and when you do tag us in your Facebook and IG posts @birchpressdesign so we can see your work! Have a wonderful weekend!
Supplies


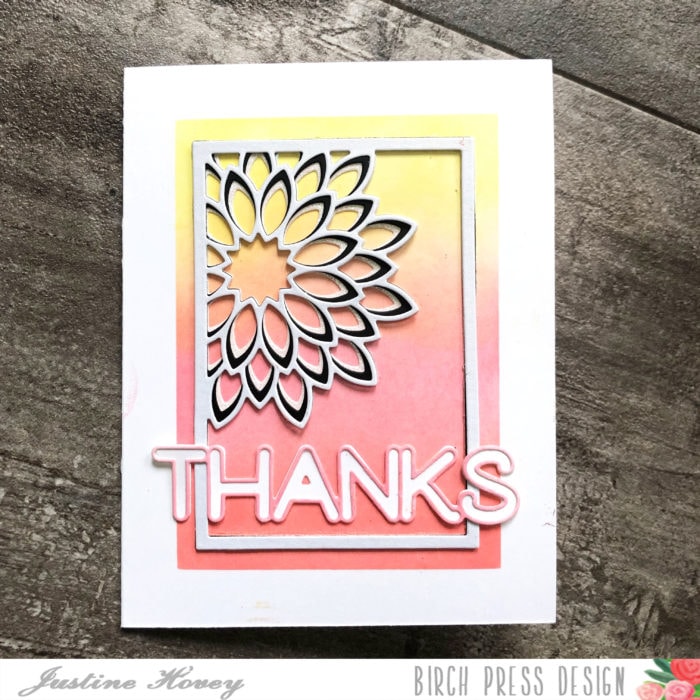


 Hi there it’s Tracey here today and I am so excited to share a card with you that was made using the brand new
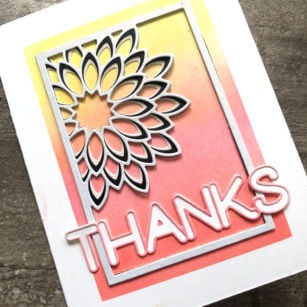
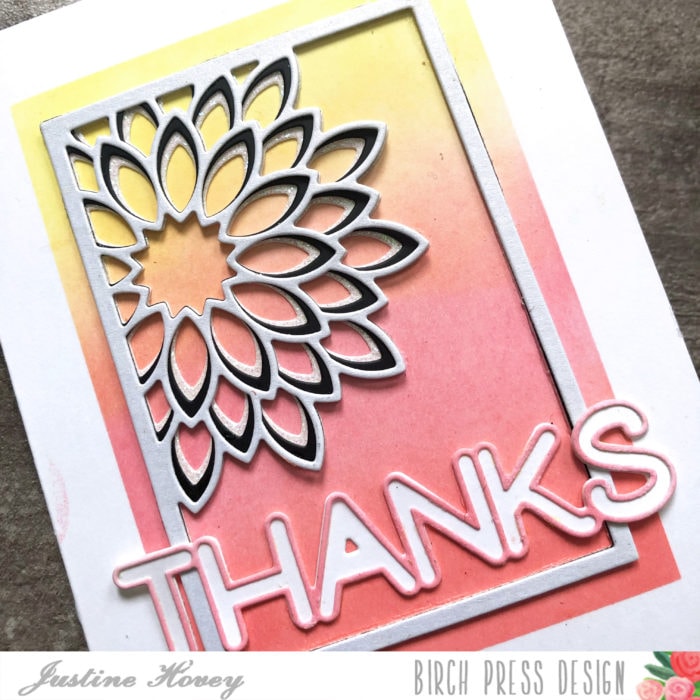
 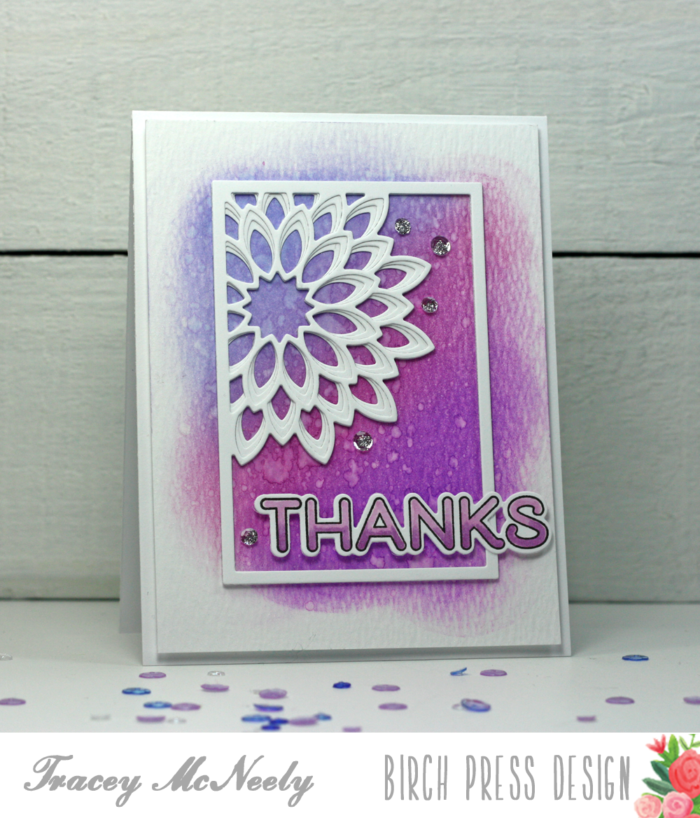 The mini frame was going to be the star of the show so I decided to add all my colour on to the panel behind the frame. Here are the supplies that I used to make the card:
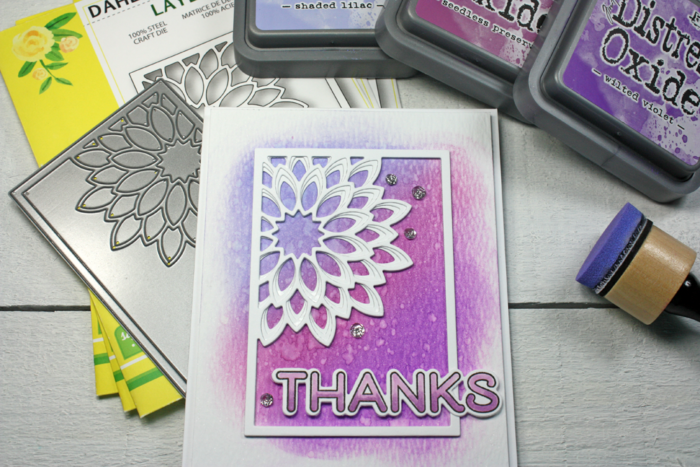 I started off with a watercolour panel that measured 5 1/4″ x 4″ and I sponged three shades of purple Distress Oxide Inks on to it. I spritzed it with water and let the panel dry. Once it was dry I sprayed it with a generous coating of Sheer Glimmer spray to give the panel lots of sparkle. If you don’t have a sparkle spray you could add shine with some glitter, Stickles or even with a shimmer pen like Wink of Stella.
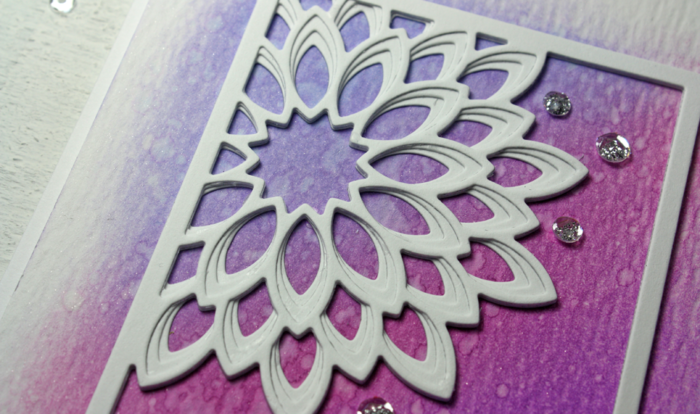
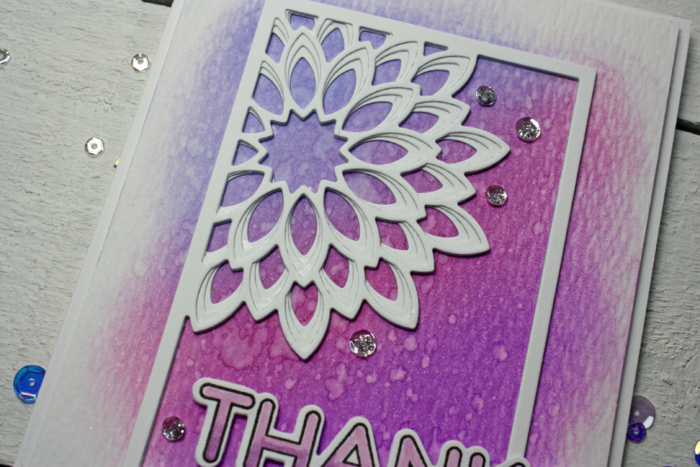 Once the panel was dry I cut out one of each layer of the Dahlia Mini Frame set with heavy white cardstock. The three layers were glued together with a liquid adhesive. I like using liquid adhesive with the Birch Press Design layering dies because it gives you a bit of time to wiggle the layers into place.
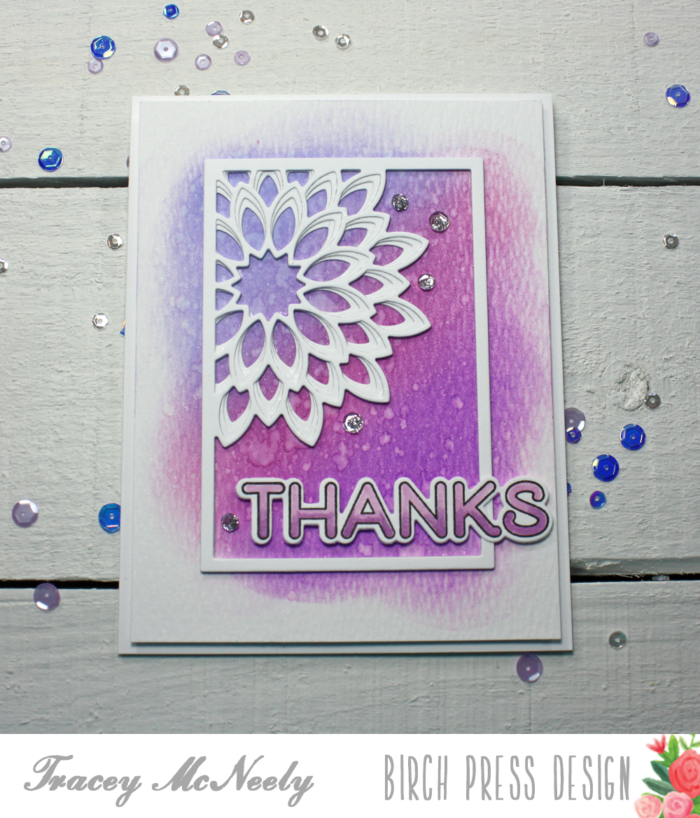 Once the frame was dry I adhered it to the watercolour panel and then set it aside to dry while I worked on my sentiment. I stamped and die cut the ‘Thanks’ from the brand new
 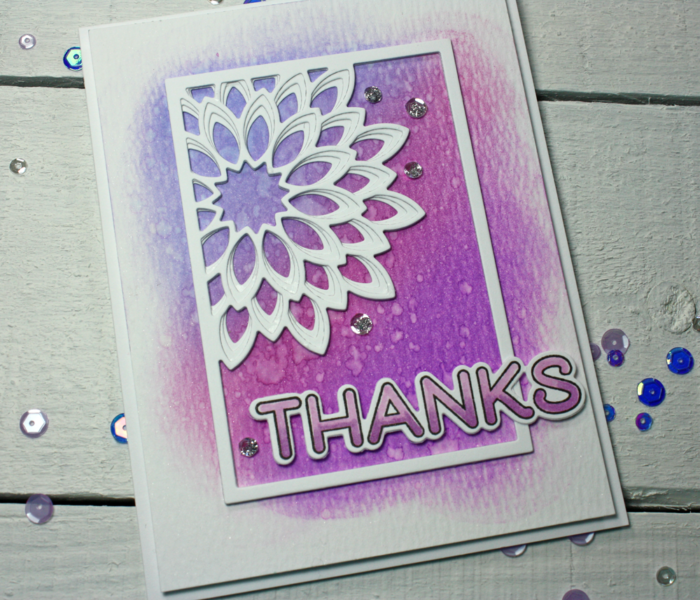 I was originally going to adhere the panel directly to the card base with tape runner but it didn’t stand out enough. So I carefully removed it and added foam tape pieces to it instead. I was worried that the tape runner might adhere to the card base accidentally so I used my powder tool to go over all the sticky that was around the foam tape. It worked out perfectly. This was one of those moments where I wished I had made a video! I love sharing my mistakes in my posts and how they can be fixed. Before adding the coloured thanks to the frame I backed it with pieces of foam tape so that it would sit at the same height as the frame.
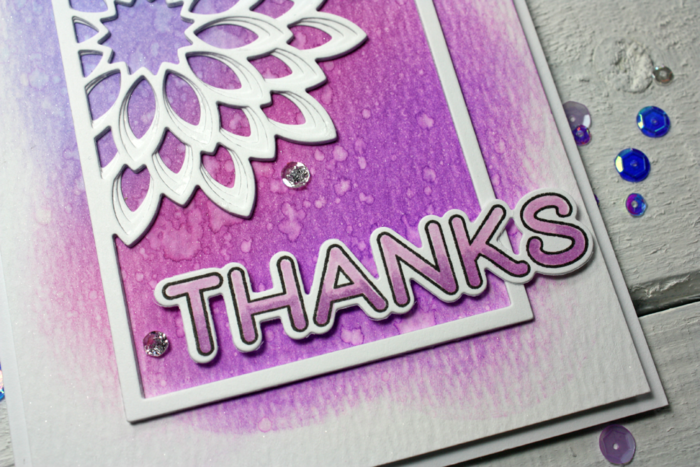 To finish off the card I added a few clear silver Stickle filled sequins that were size 4mm and 6mm. If just gives the card a little more sparkle.
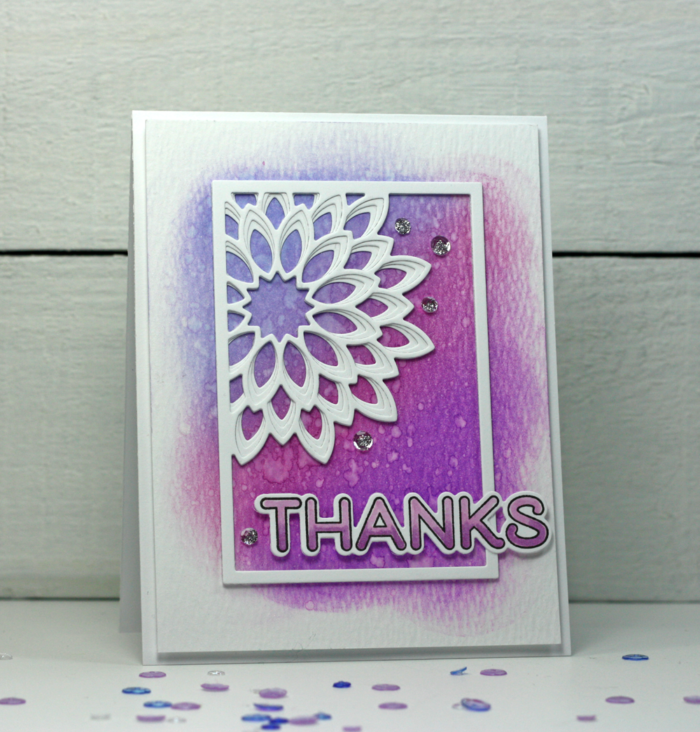 The
The 


 Hello Everyone!
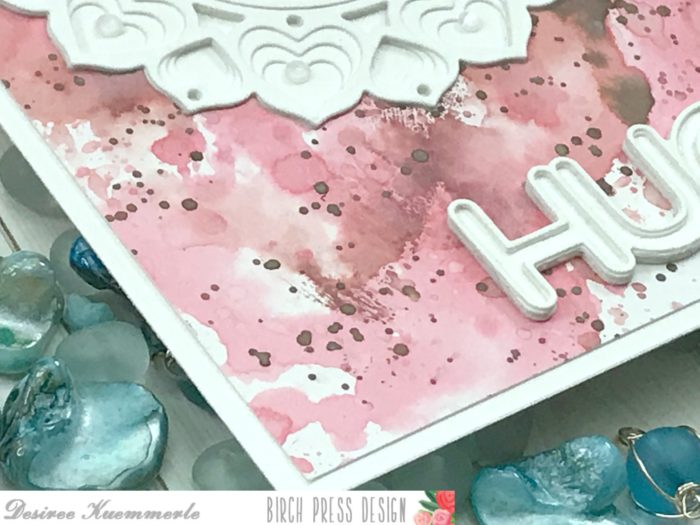


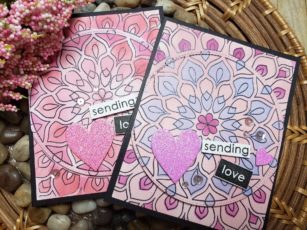
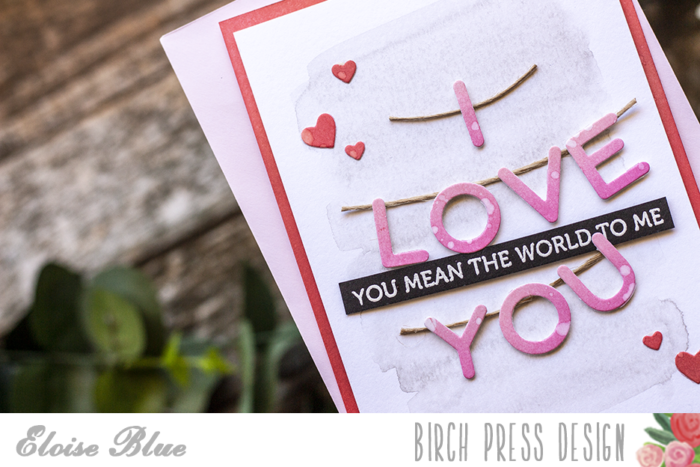
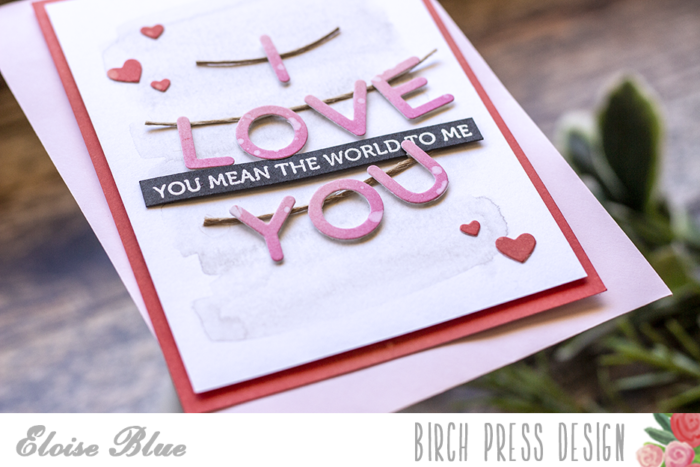
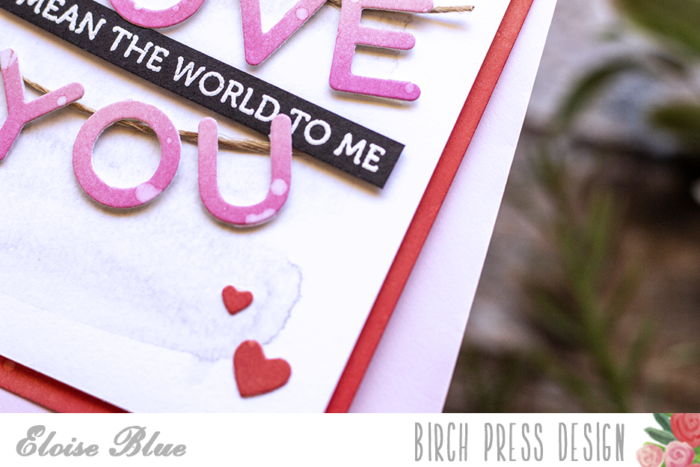
 Are you checking out the new Valentine’s release in the store? Today I’m showing two projects made with the Dahlia Heart layered set. You’re going to love these intricate heart designs not just for Valentine’s projects, but for wedding and anniversary’s too! We all want to know that we’re loved!
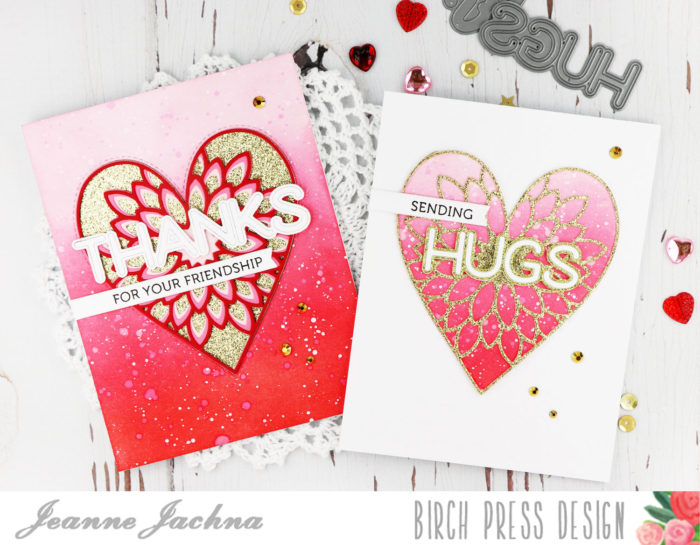 I made two cards from the same inked up distress panel.
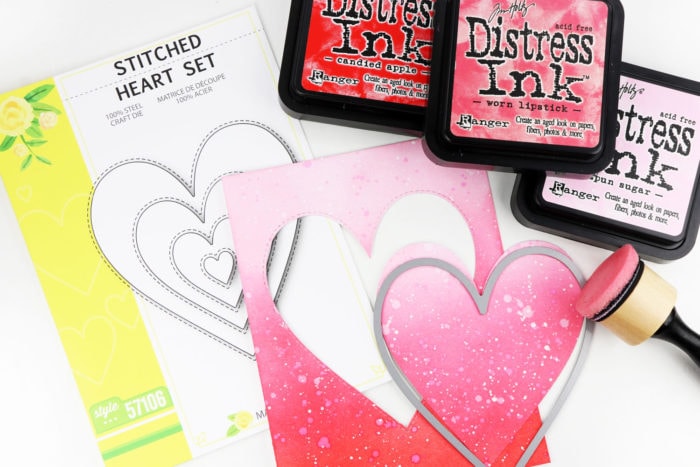 I inked a white card stock panel with Spun Sugar, Worn Lipstick and Candied Apple distress ink to achieve an ombre shades of red. The panel was splatered with water, some Picked Raspberry, and finally some white ink. Next I cut the largest Stitched Heart die from the panel. If you look close you can see it leaves a stitched outline along the outer edge of the die cut.
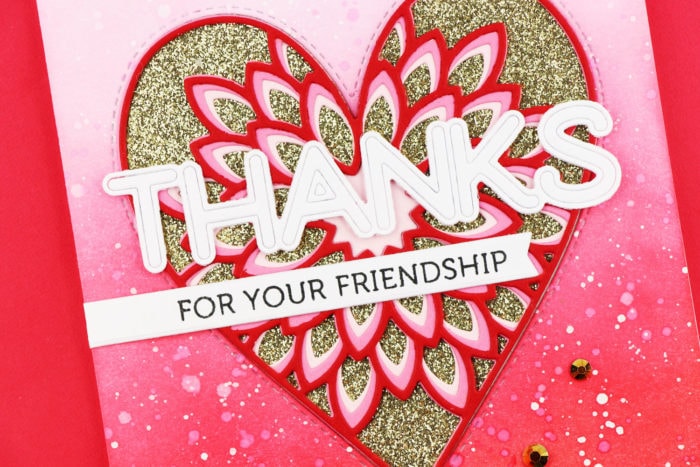 I adhered the panel to a card base, cut the Stitched Heart a second time from gold and inserted it inside the window cut on the panel. I cut and adhered the Dahlia Heart Layers one at a time over the gold heart. I used an acrylic block to hold them in place as they dried.
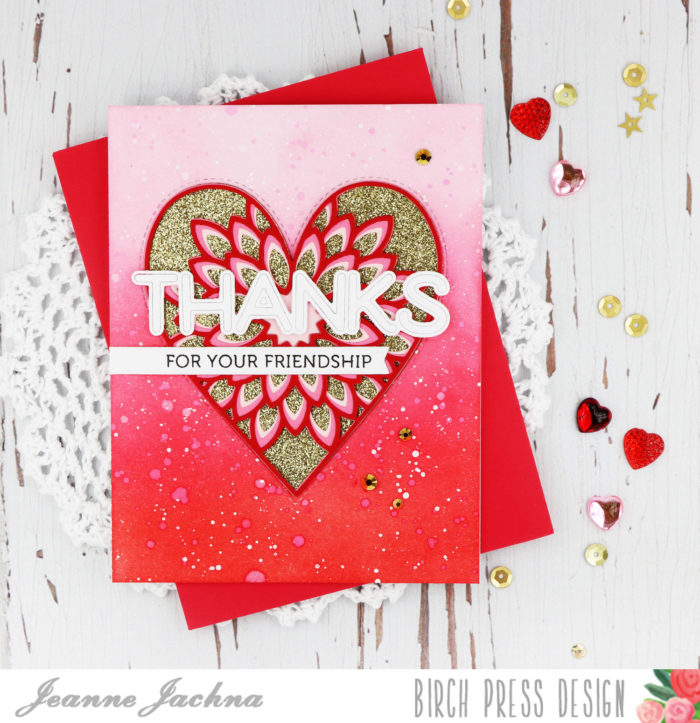
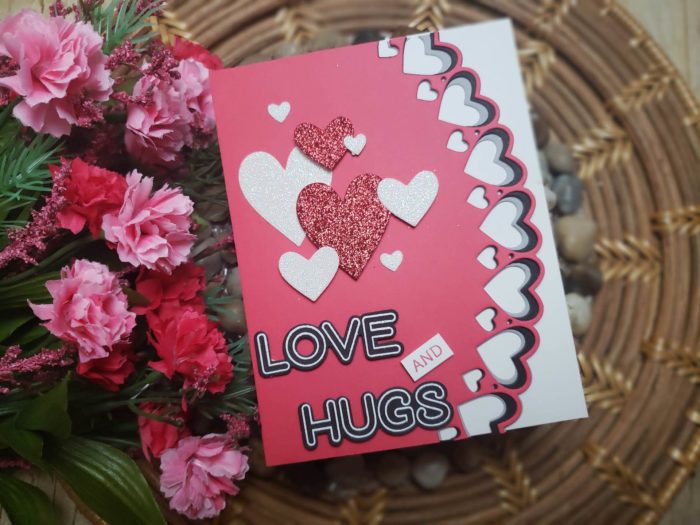
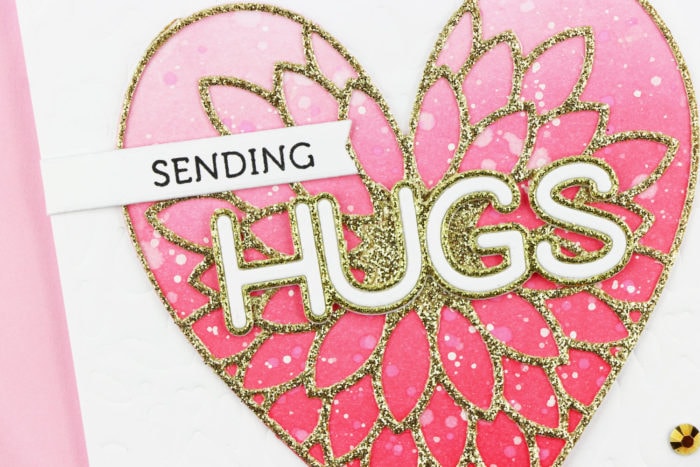
 I reserved the die cut heart for my second card. This one started with a white panel of card stock that was debossed using the Amour Layer C background die. I cut the Dahlia Heart Layer A from gold glitter paper and adhered it over the distress ink heart.
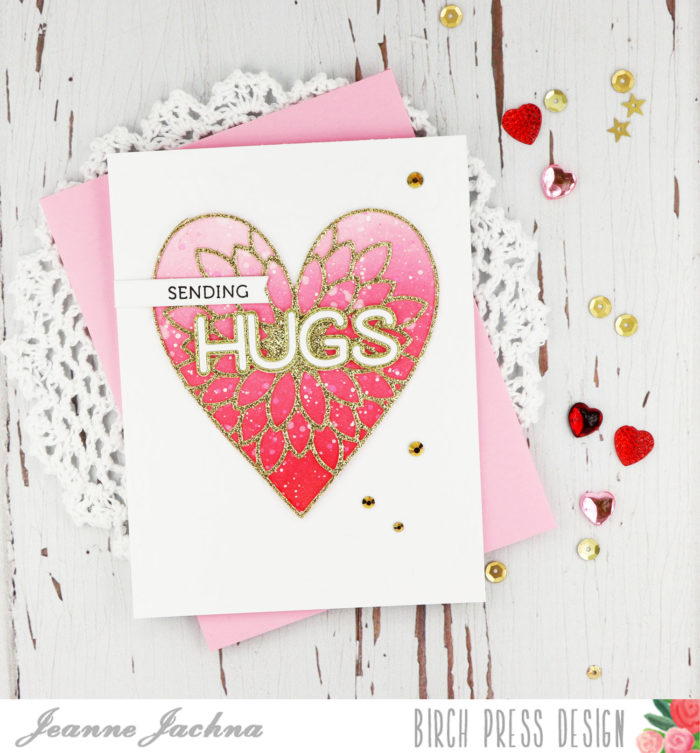 You’ll create lots of stunning projects with these beautiful intricate hearts.


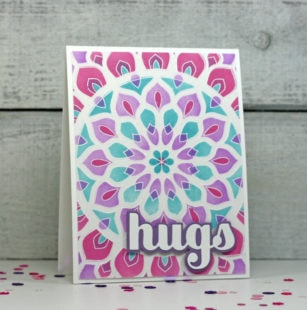
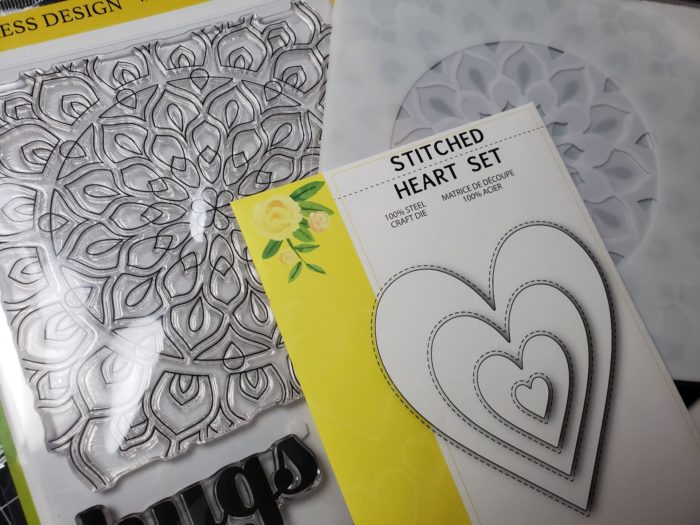
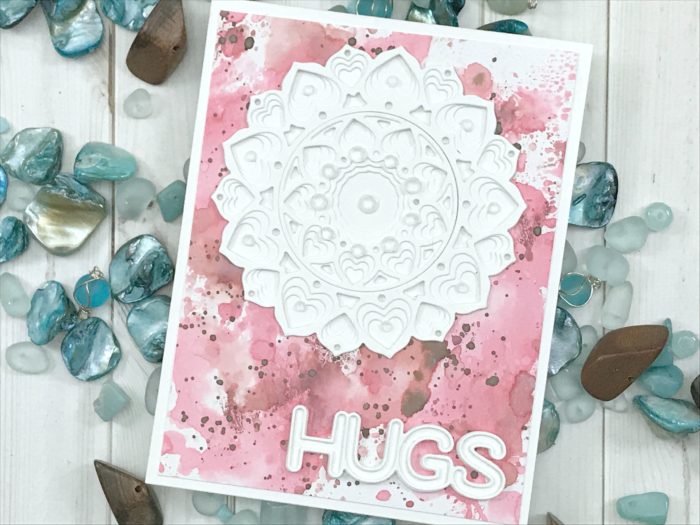
 Hi it’s Tracey here today and I am so excited to be sharing a project with you today using the new
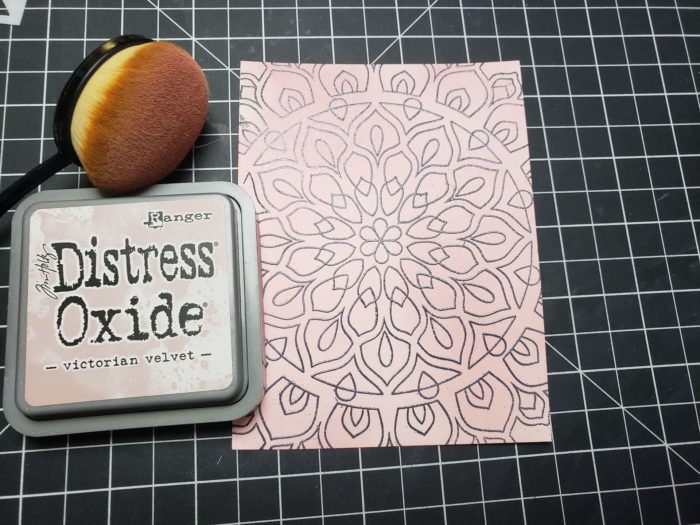
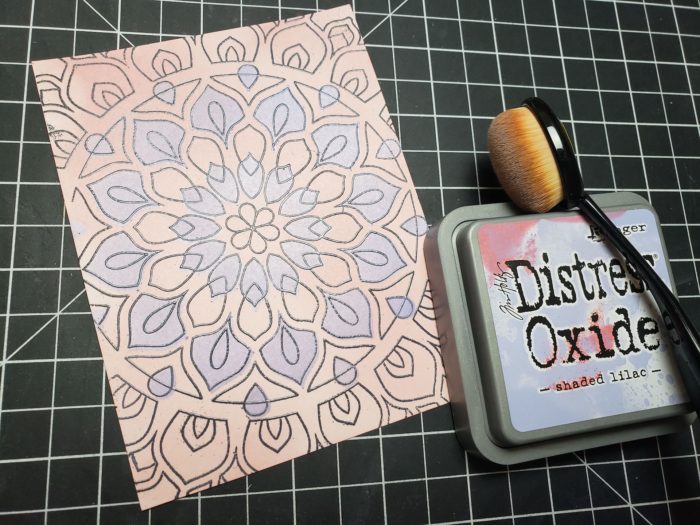
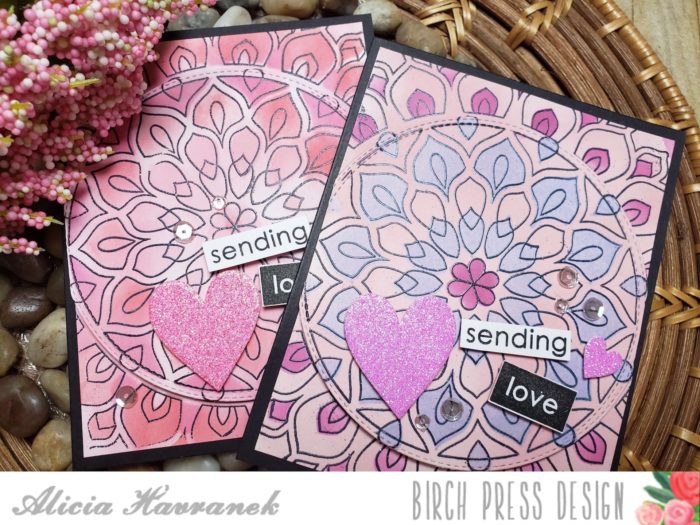
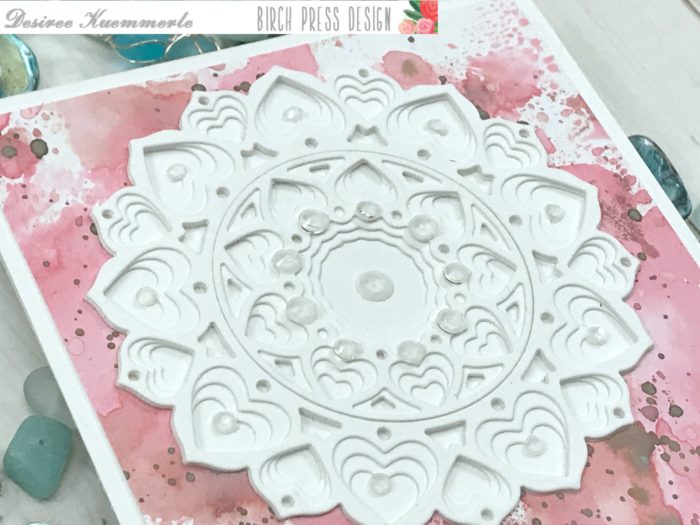
  To create this card I started out by stamping and white embossing the main image from the Shining Mandala stamp set onto a piece of Bristol Smooth cardstock. I chose Bristol Smooth because I am going to be ink blending with the stencil set. The colours I chose for the ink blending were all Distress Oxide inks–Broken China, Wilted Violet and Picked Raspberry. The way the stencils are cut out each layer exposes different sections of the overall stamp and also cover other areas allowing you to blend colours together in some places but also allowing other colours to shine on their own too! Here is the video I created to show you my process…
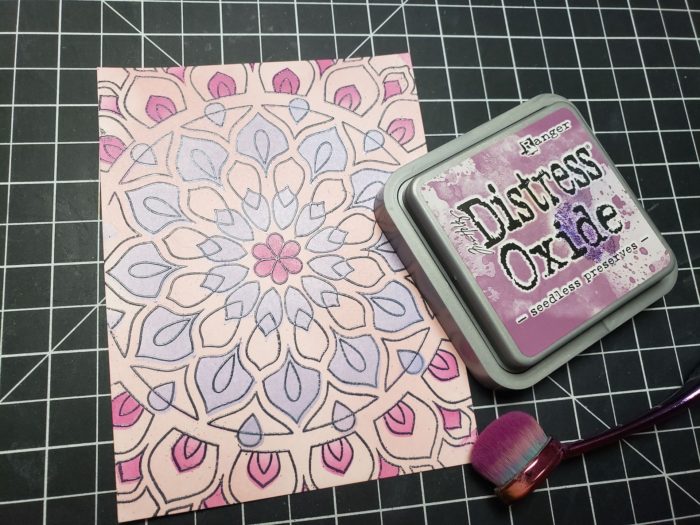
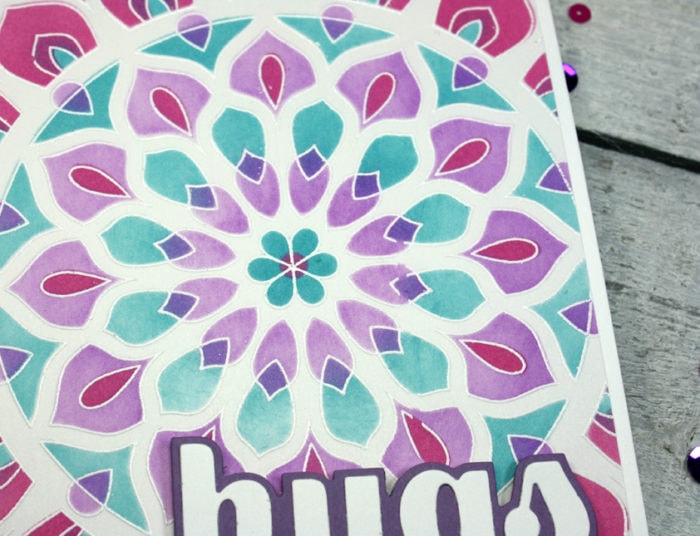
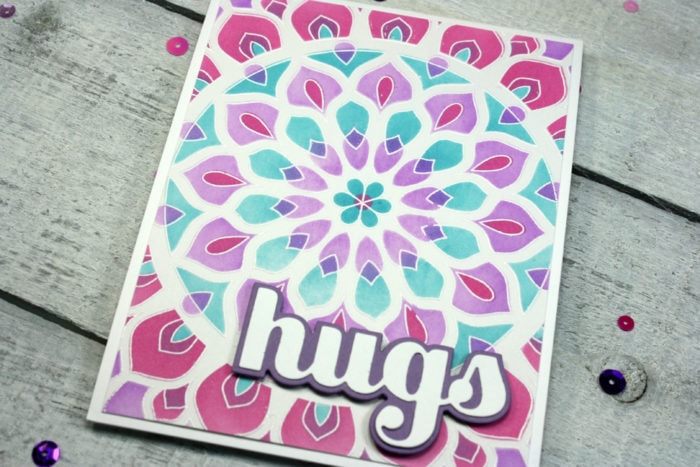 If you look a little closer you can see the clean white embossed lines and also how the colours blended together in some areas creating beautiful new hues.
 With this stencil set you could create a mandala completely independently from the stamp and still get all of the clean lines and blending depending on the overall look that you are trying to achieve.
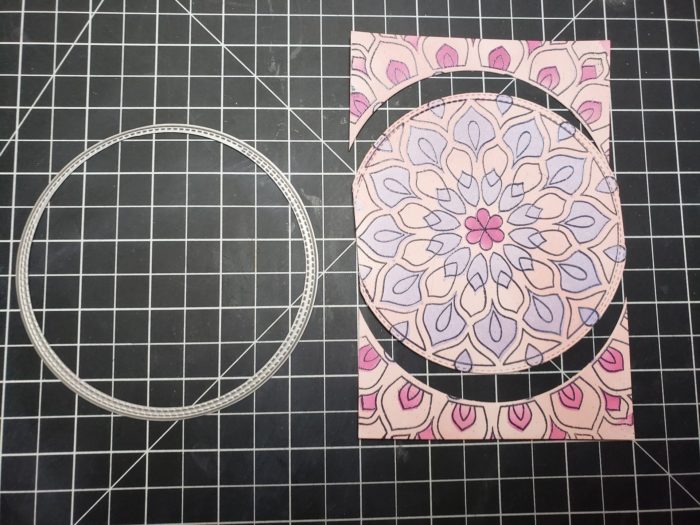
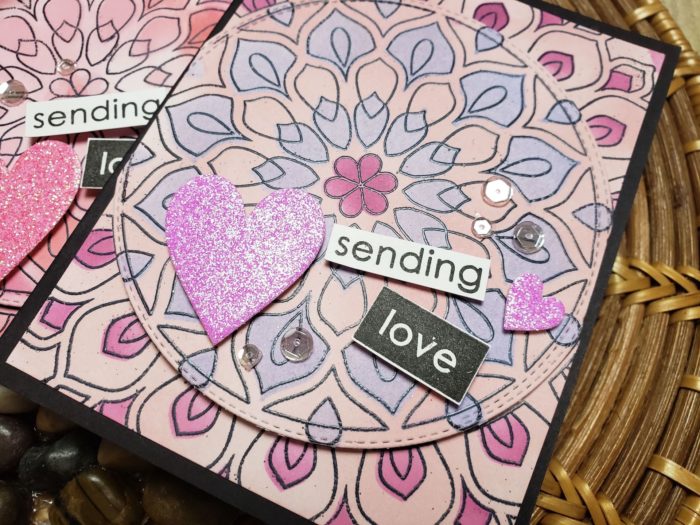
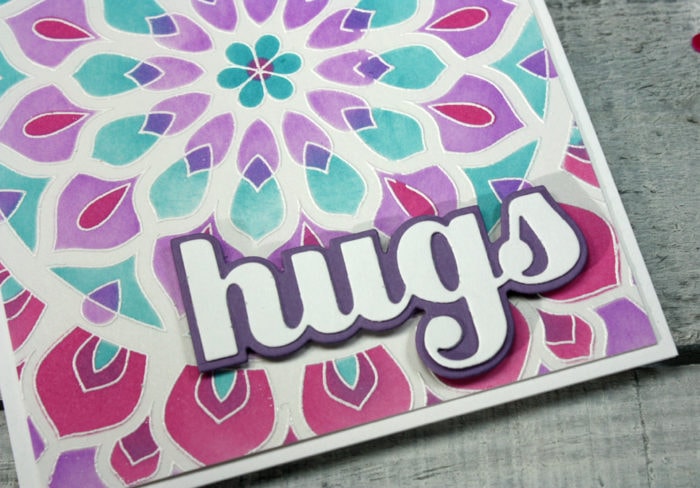 I used the