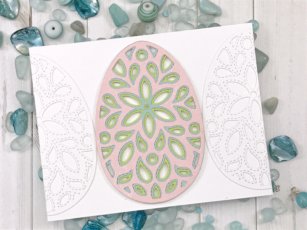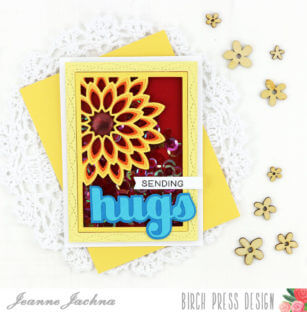
Hello! Today I will be featuring the lovely Dahlia Mini Frame Layering Die. This is a thin delicate die that looks great on its own, but I wanted to create a shaker card with this die. Thin dies can sometimes be difficult or impossible to create shaker cards with, but I will show you how with this die.

I first cut out each layer with 3 coordinating pieces of cardstock. Layer A is to the far right, layer B is in the middle and layer C is to the far left.

I then glued each layer together. Next, I took my card panel and traced the dahlia frame onto my card panel. I carefully cut out the center of the card panel. After cutting the center piece out, I added acetate to my card panel, then adhered my dahlia layers onto the acetate.


By doing this, I now have the space to add my foam adhesive to my card panel. Add your favorite sequins.

For the back of my panel, or what will be showing through the shaker piece I ink blended some Spun Sugar Distress Oxide Ink. I peeled off my foam backing and adhered the backing to my panel. I then glued my panel to my white card base.

I used the Big Hello Sugar Script Die for my sentiment. I seriously can’t get enough of these Big Sugar Script dies! They are awesome and make mass producing so easy!
I hope you enjoyed this card and it got the wheels turning on how you can create shaker cards using these gorgeous thin dies.


Supplies


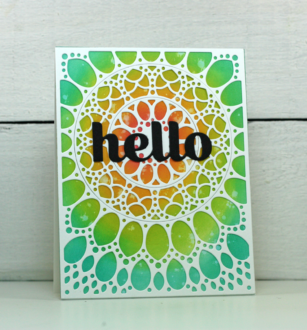
I created a simple background using a single stencil to highlight a word image at the center of the card – some clear glittery embossing paste created a raised textured burst effect that is eye catching!
Thanks for stopping by! I hope you’re having a great day! Today I’m playing with the new Adora Layer set! I love the versatility and many different looks you can achieve with this die set.
You can change the look by stacking the colors of the layers, but you can also remove the center circle design too!
I started by cutting a colored card stock panel slightly smaller than my card base. Next I die cut the Adora die from the panel before adhering it to the card base. This creates a clean window to insert the die into.
I adhered the layer C die into the open negative space and then adhered the Layers B and A over it creating a neat stack. Make sure you insert the center circle as you go – don’t save them for last. The dies are easier to assemble one layer at a time, vs. inserting the assembled circle stack in the center later.
I added a Big Lingo Type Thanks and a few gold glitter hearts as accents. I cut the hearts with the Adora dies.
I cut each die layer twice with a total of 6 different colors of card stock and then just swapped the centers to add more interest. Who doesn’t love a rainbow of color?
The new Lingo Type word dies are easy to work with.. each set includes a background die as well as an outline word die. The center of the letters on the outline die are removeable so you can use them on other projects or to create personalized messages if you like.
You’re going to love the many ways and fun different looks you’ll achieve with these beautiful stackable dies!
Finished Size 4.25 x 5.5″


During the month of February, this stamp set is on sale as our February Item of the Month for $34.99 and includes a set of matching layering stencils!
Hi there, it’s Tracey here today and I have a bright and cheery thank you card to share with you using the fabulous
To recreate this card start out by stamping the longest of the rectangle stamps on to Bristol Smooth cardstock using VersaFine or other watermark ink. Emboss the images using white embossing powder and then cut the rectangles out with the co-ordinating Hex Fade dies.
Using Distress Oxide inks or any other inks that you have, sponge a different colour ink on to the cut out rectangles. For this card colour was added to the images using Distress Oxide inks in Spiced Marmalade, Candied Apple, Mowed Lawn, Mermaid Lagoon and Wilted Violet.
The rectangle strips were adhered directly onto a white card base in rainbow order. HINT–start by placing the one strip in the centre of the card front, then add one strip to each outer edge. Finally place the other two strips in between. This is an easy way to get your spacing correct.
The bright colours over the white embossed rectangles really highlight the ombre effect of this stamp set. Just imagine what it would look like if you were to blend two shades of the same colour on each rectangle.
The ‘Thanks’ sentiment was cut using the
The finished card looks so good in the bright colours and the shine from the embossed images adds extra elegance to the overall design.
Thank you for stopping by to create with me today. The Hex Fade stamp set has endless possibilities. It can be used for almost any occasion and just by switching up the colour scheme or the method in which you stamp the images you can get totally different looks! See you next time here on the Birch Press Design blog!


Check out this video – you’ll see how using each stencil, one at a time to add color upon color, helps you make a masterpiece in no time!