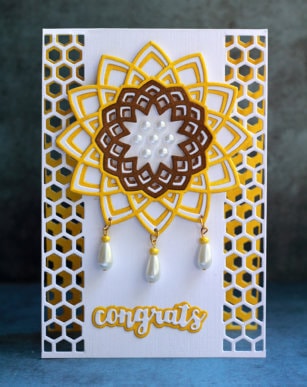
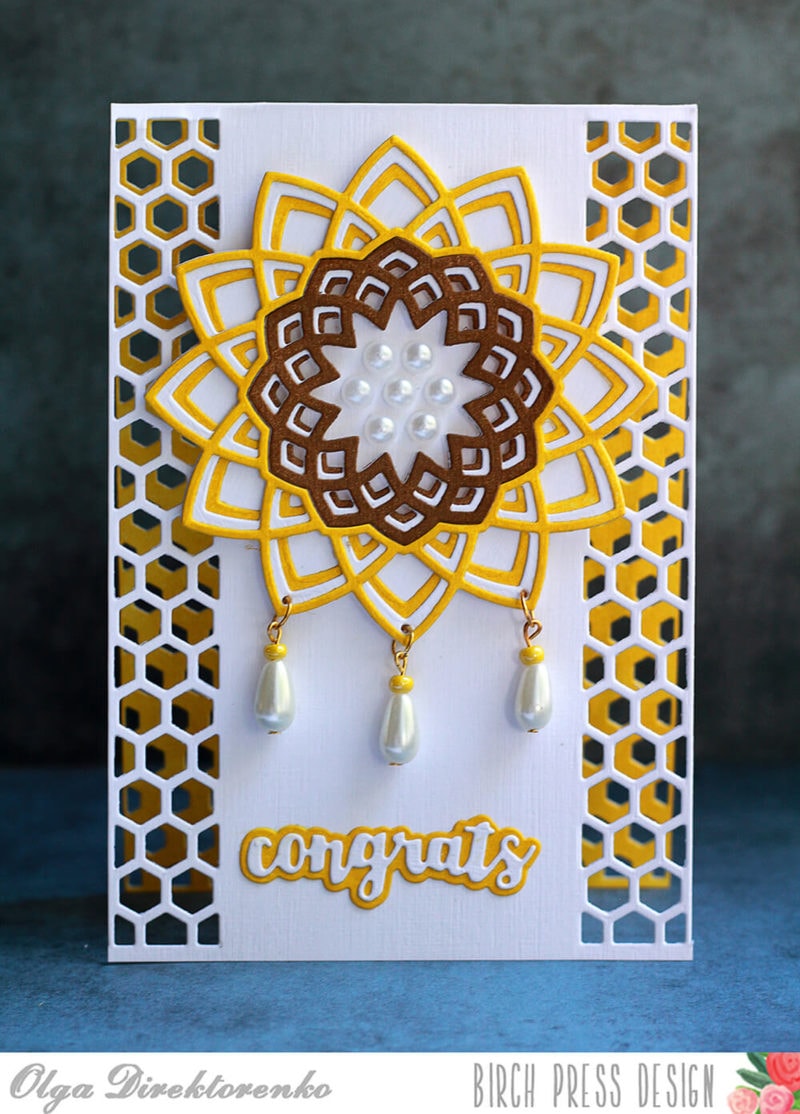
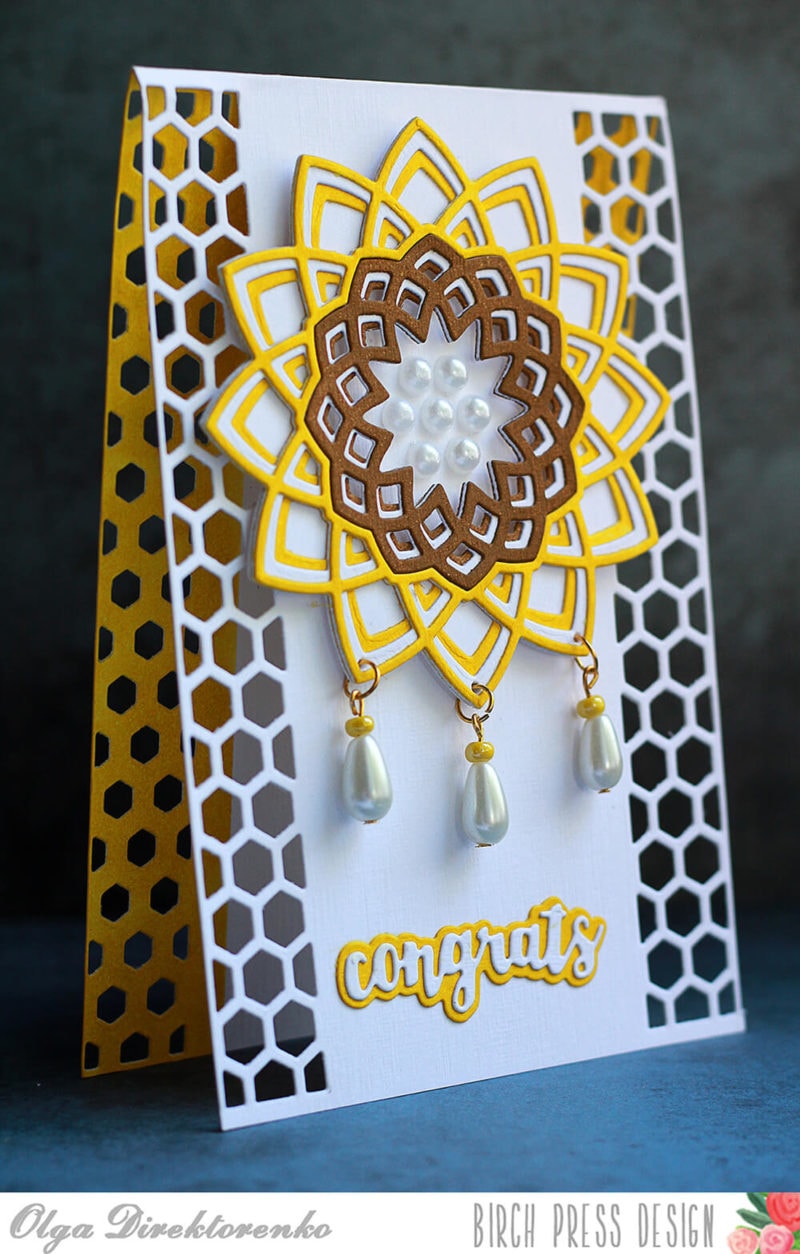
I hope you are having a wonderful summer. August is a sunflower season and I couldn’t help including this theme into a project. I thought that Dazzler layering set would make a great stylized sunflower because you can die cut the center and the outline separately and make them different colors.
To take the medallion one step further I have decided to add dangling charms to it. I pierced some holes in the petals and attached the teardrop charms with jump rings.
Want to know exactly how this project was created? Watch the step by step video tutorial here!
Thank you for visiting and keep enjoying those magical days of summer!
I hope you’re having a great day! I’m enjoying the sunshine because I know fall is just around the corner. When I create I’m inspired by the things I see. I’ve been enjoying watching the butterflies float through the yard visiting all the bright colored flowers in my garden. If you love butterflies too there’s lots to choose from in the store! You can find butterfly stamps, die cuts, and even embossed paper in the shop here.
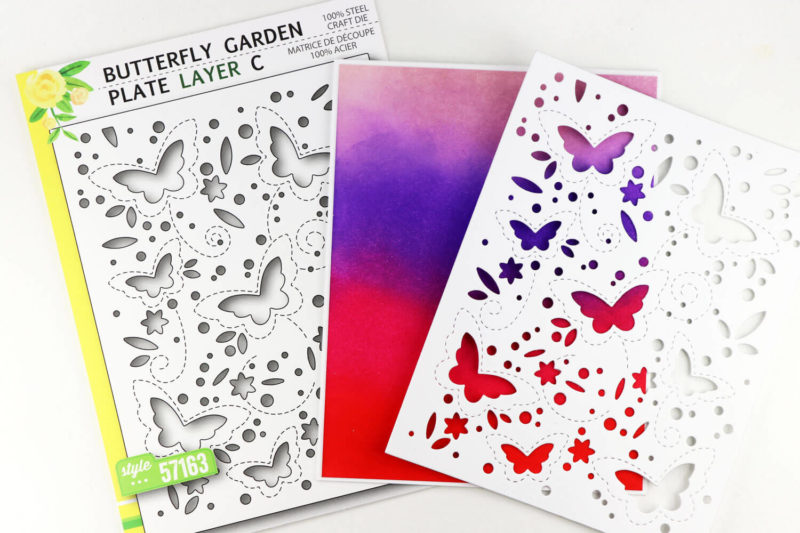
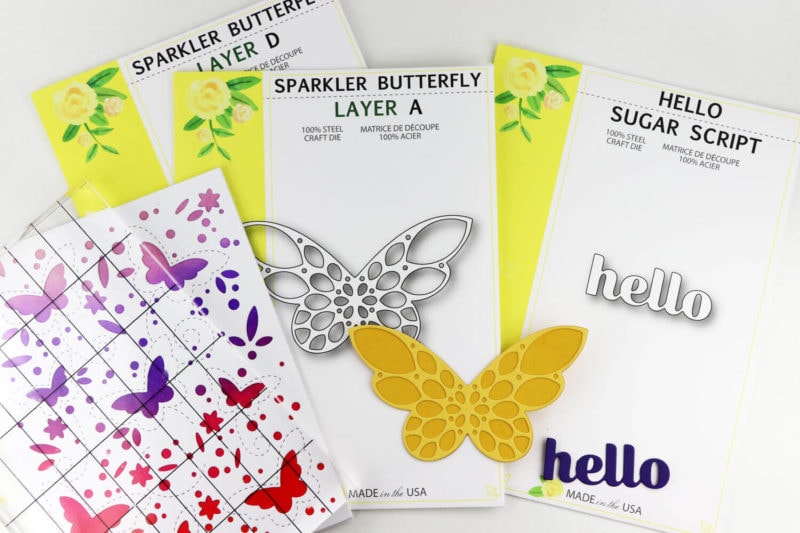
I love the Butterfly Garden Plate Layer C. The beautiful stitching is so pretty I just can’t bring myself to cover it up with the other layered dies available in this set.
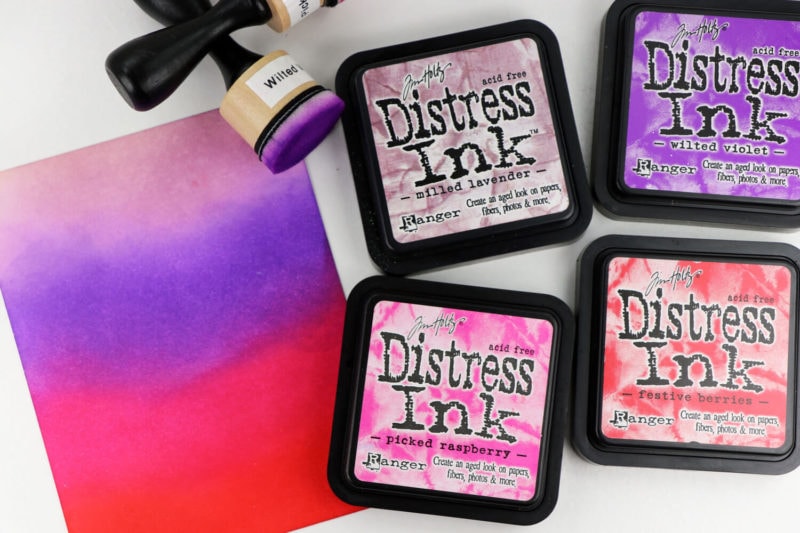
I inked up a panel of card stock with Distress Ink in Milled Lavender, Wilted Violet, Picked Raspberry and Festive Berries. I foam blending tool makes is easy to blend the colors. I cut this inked panel slightly smaller than my card base, and attached it to the card base.
Next I cut the Butterfly Garden Plate Layer C cut from white card stock and adhered it over the inked panel. I use an acrylic block placed over the die cut panel to keep the panel flat while the glue dries.
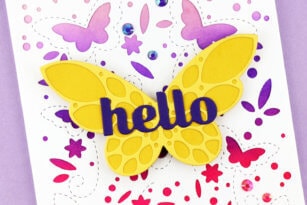
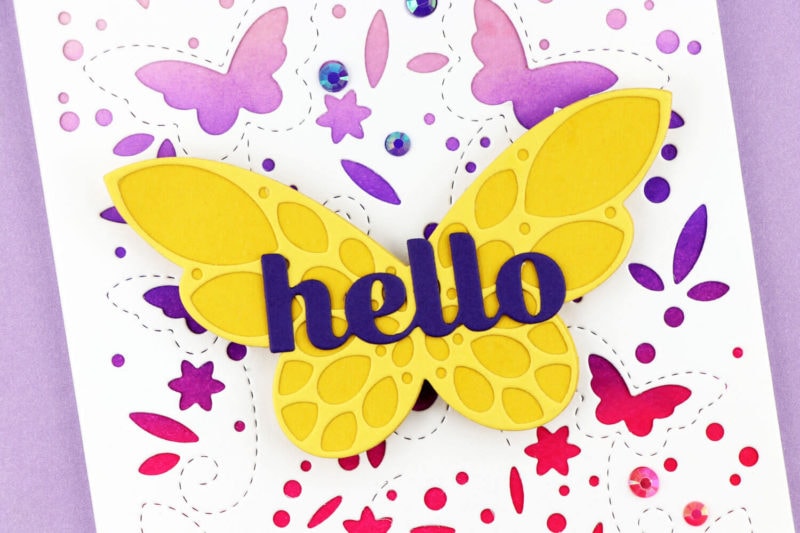
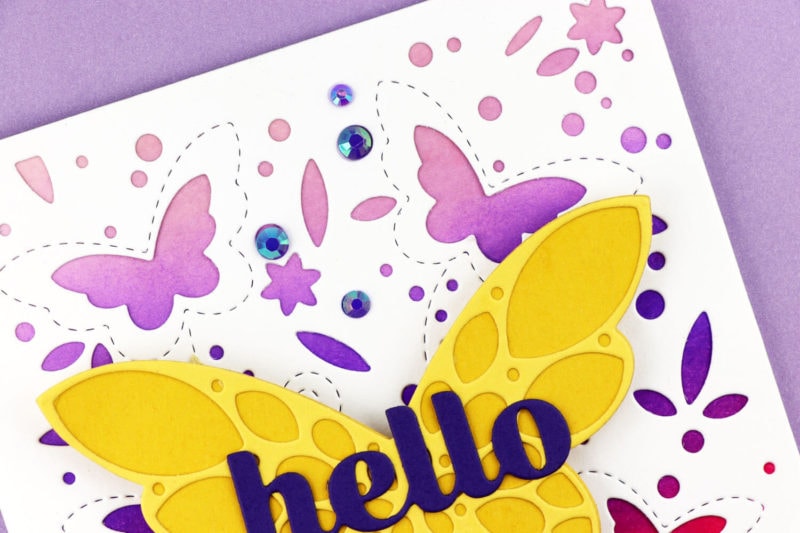
I cut the Sparkler Butterfly solid Layer D and intricate Layer A in shades of yellow card stock and adhered them together. I added a purple die cut Hello Sugar Script over the butterfly die cuts.
I chose yellow for the butterfly because yellow and purple are complimentary colors. That means they are opposite each other on the color wheel. I repeated the purple background color on the word die. I love all the bold color peeking through the die cut holes!
I hope you give this technique a try – it brings your die cut panels to life!
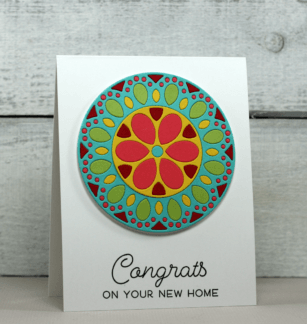
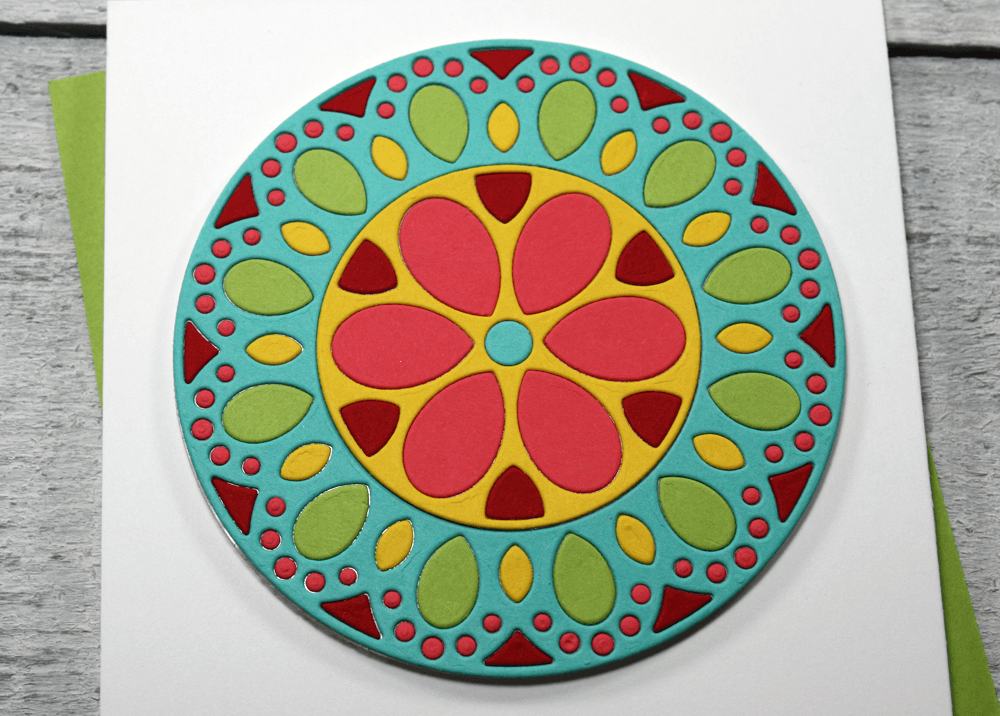
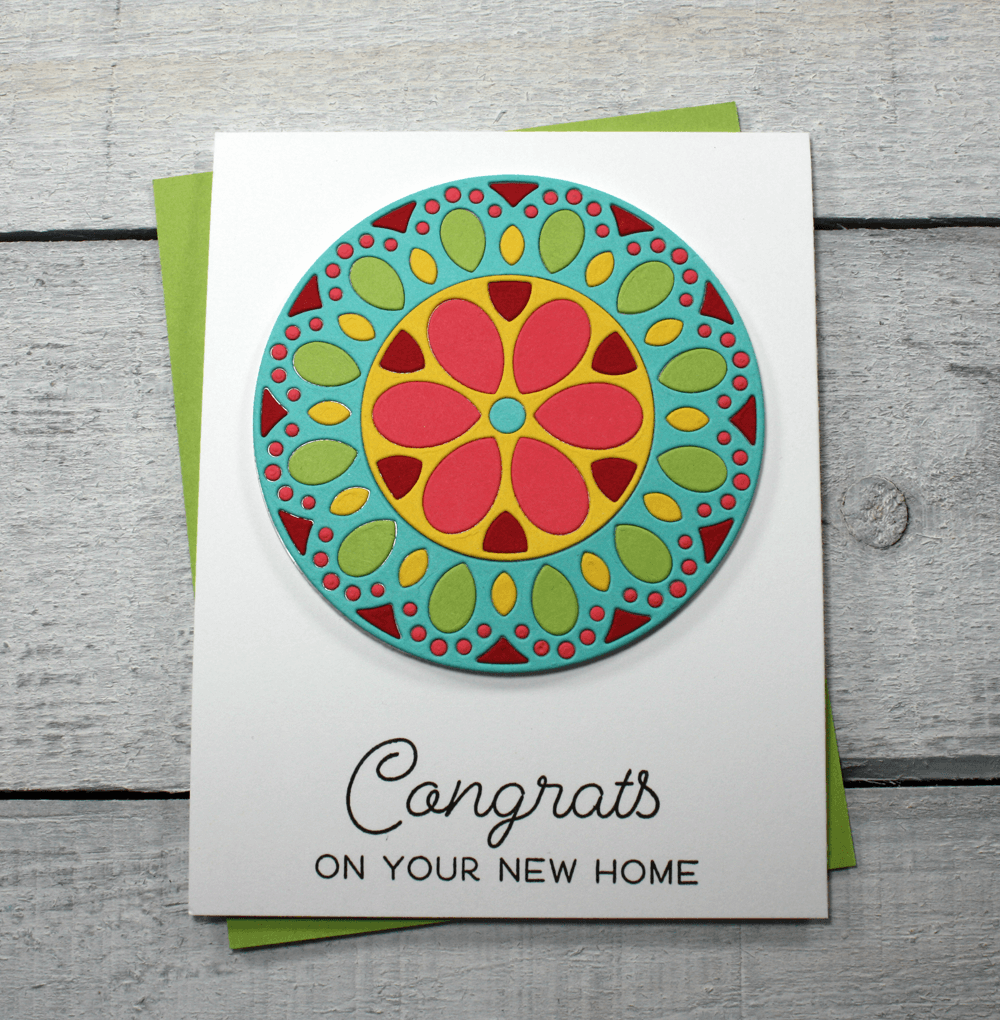
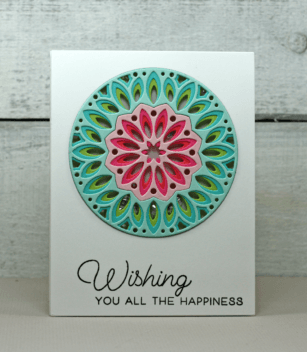
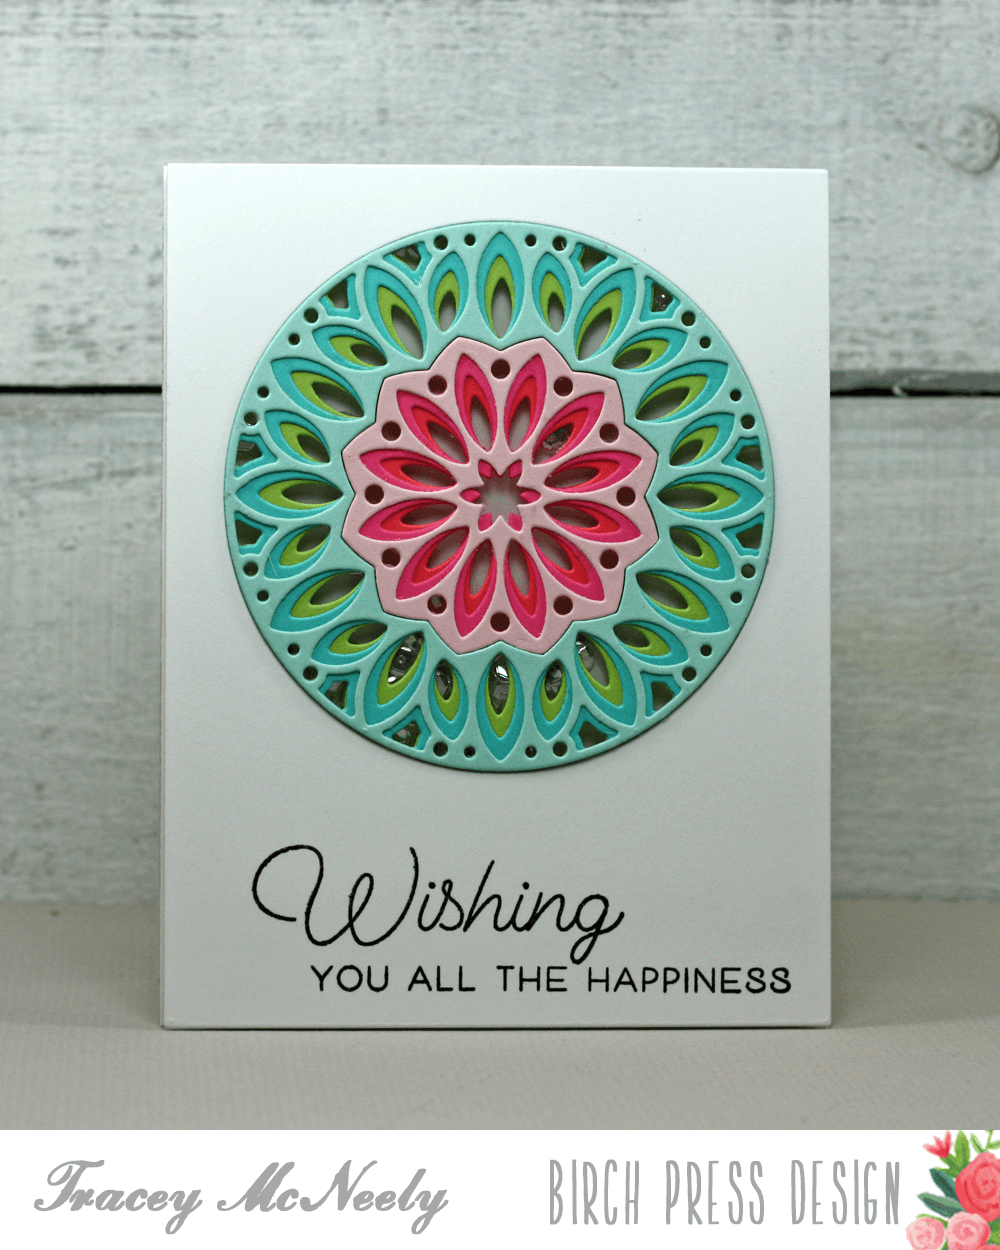
Do you like one layer cards that are easy for mailing? Today I am creating a beautiful mandala in four colours using just one mandala die. The beautiful Viva Layer A mandala is going to be the start of the show as all of the pieces are being inlaid into the card.
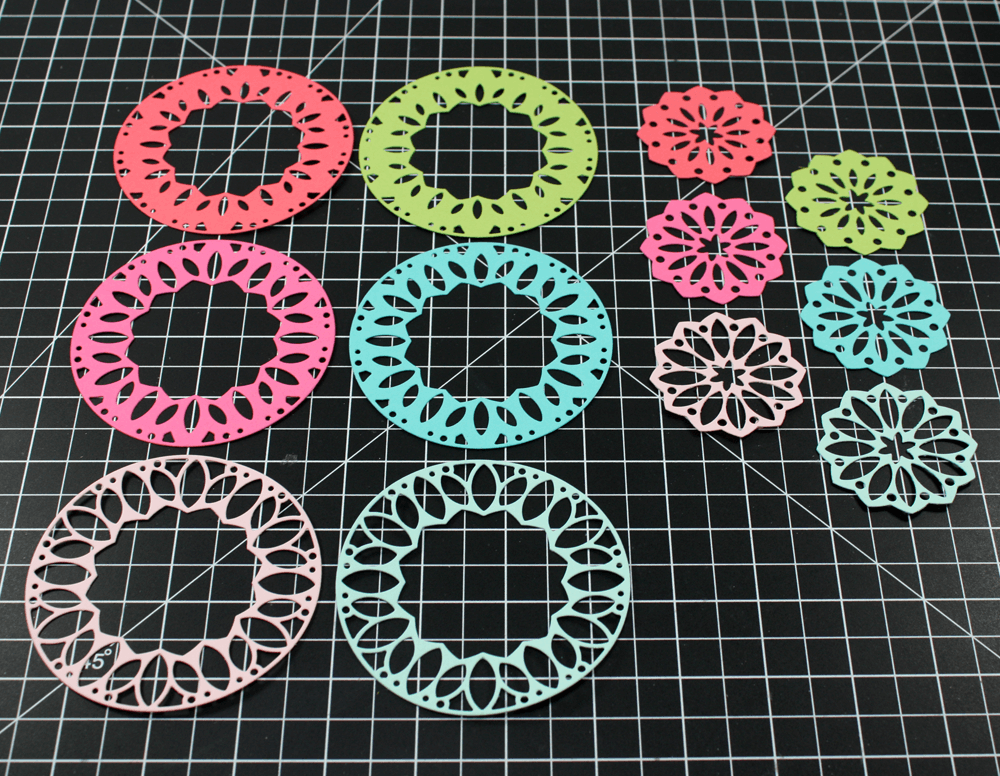
To create this card I started with the Mandala Circle Base that I die cut once with white cardstock and once with a piece of double sided adhesive paper. Using the Circle Base makes doing the inlaid mandala’s so much easier. The double sided adhesive paper die cuts were adhered the outter rim and the inner circle die cuts. The Viva Layer A die was cut once in each of five colours. Removing the adhesive baking from the circle base exposes the adhesive. Mix and match the colours and inlay the pieces.
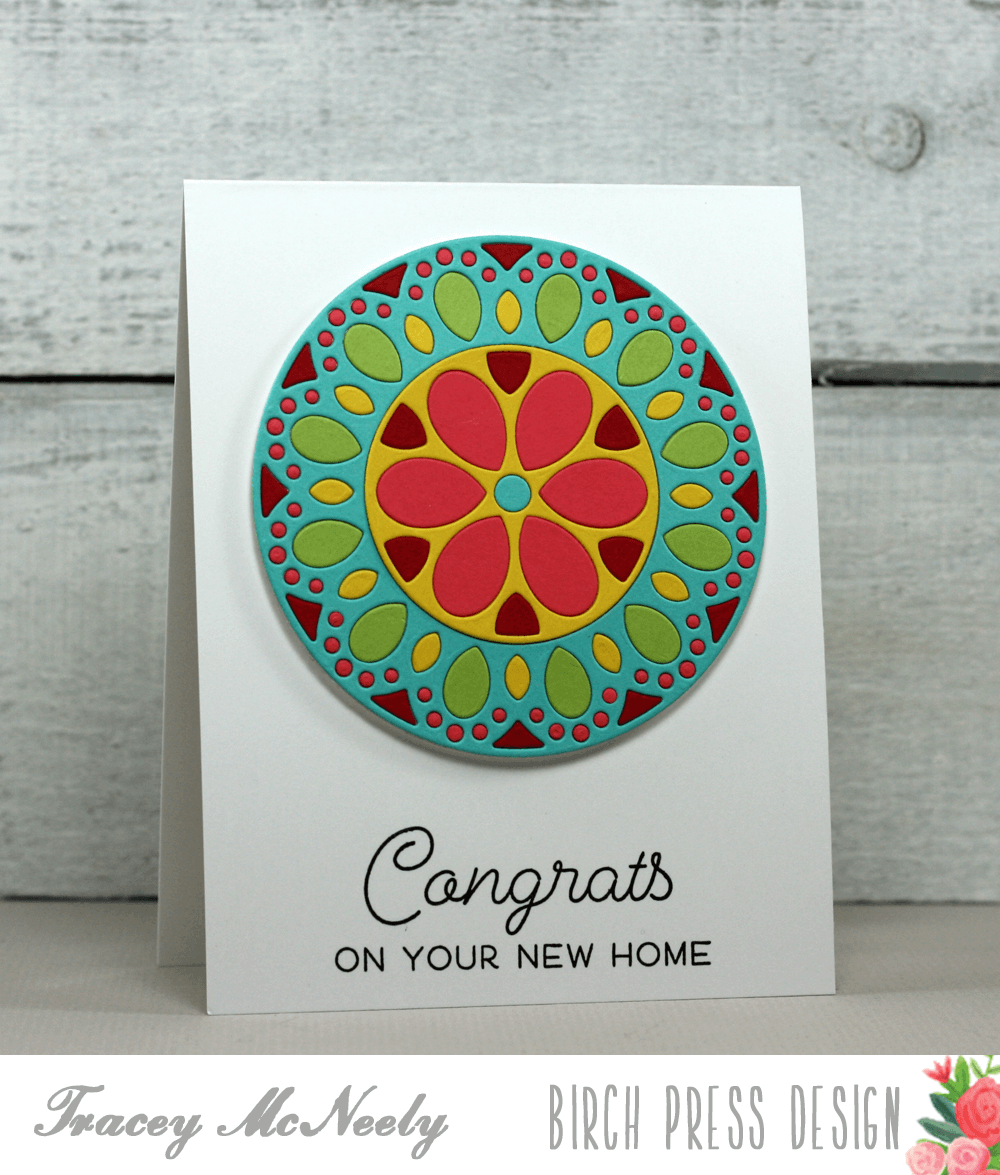
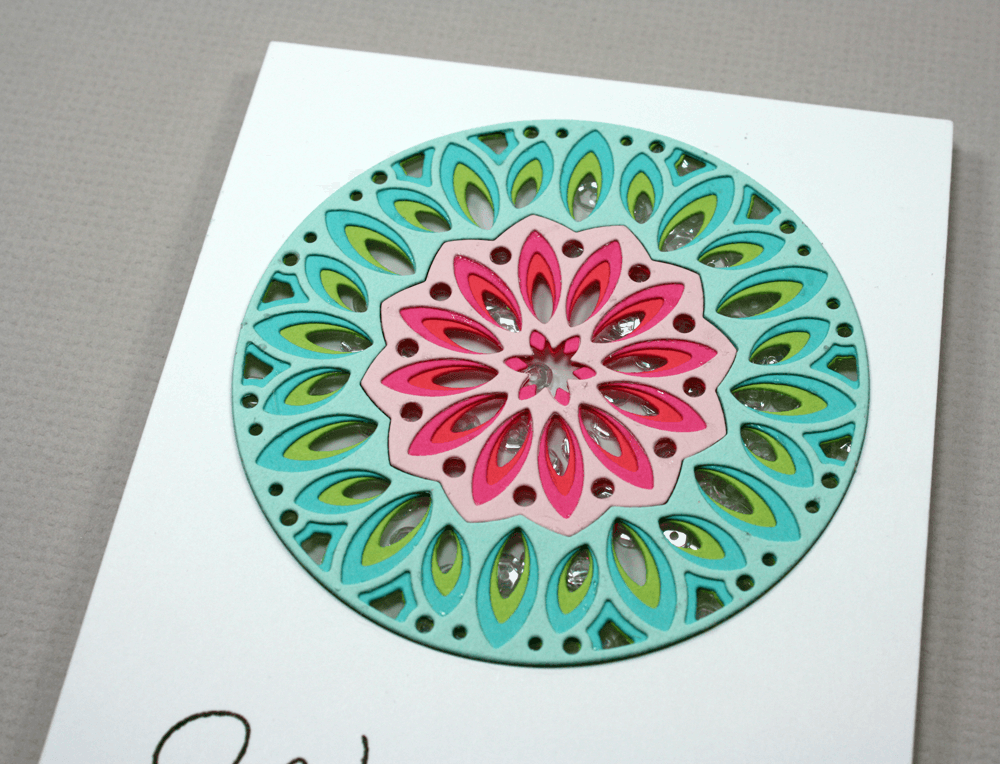
All of the colours together make this card very festive. To add more interest and dimension to the card the mandala was popped up with foam tape.
A sentiment from Hooray for Everything was used to make this a congratulatory card for a new home. I have a couple more of these to finish up using the extra pieces from each of the mandalas die cut.
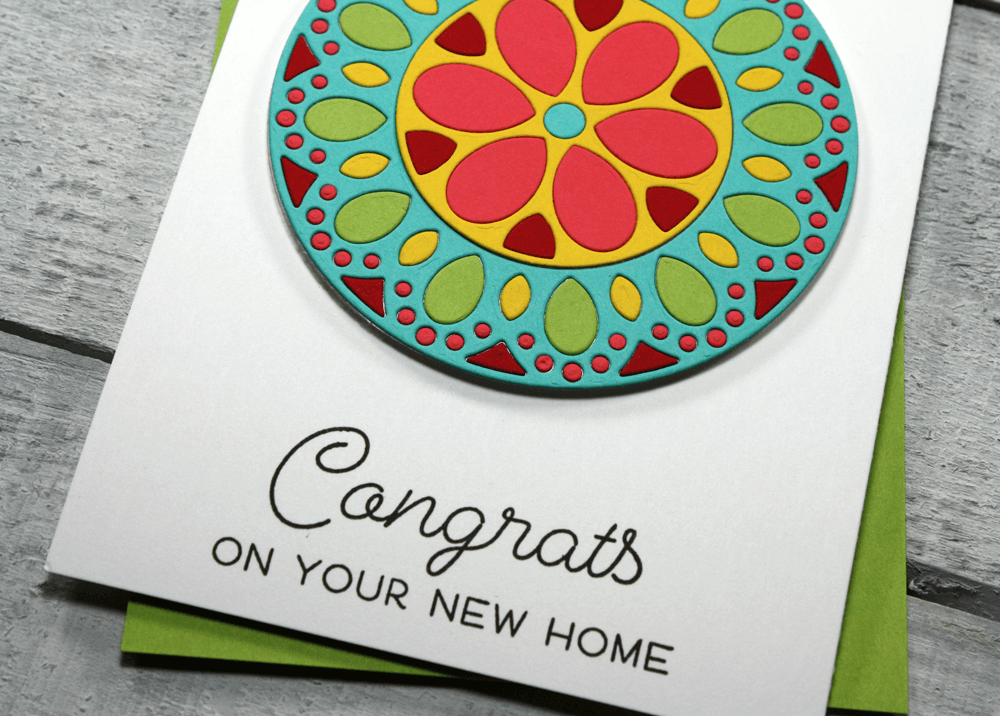
One more look at the card.
Thank you so much for dropping in today for another inspiration post. Inlaid die cuts are beautiful with our mandala craft dies, I hope I inspired you today to give it a try.
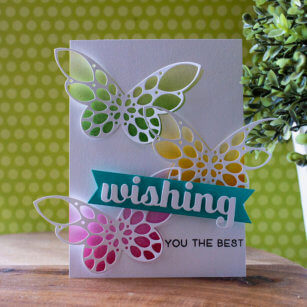
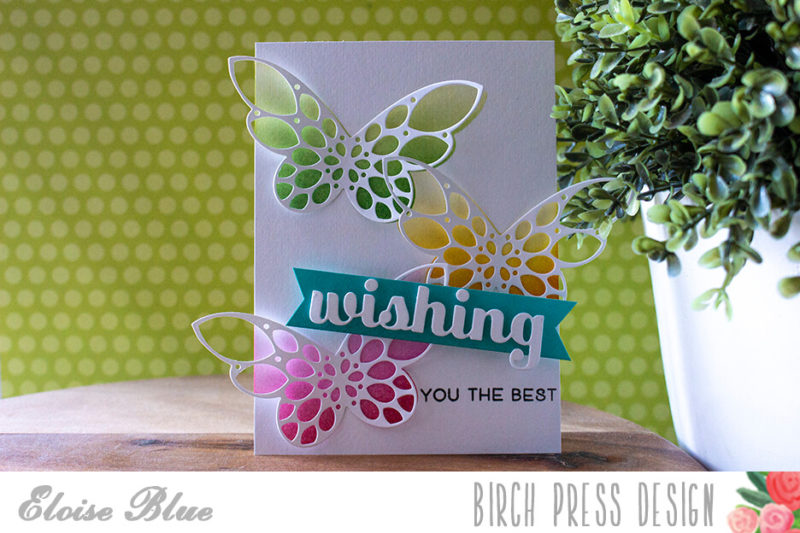
Hi everyone, Eloise back again today with another card. Today I’ll be making a simple encouragement card using the Sparkler Butterfly Dies both A and D to create a background using some Distress Inks. I’ll also be pulling in the Wishing Sugar Script Dies as well as the Wishing You The Best Stamp Set for my sentiments today.
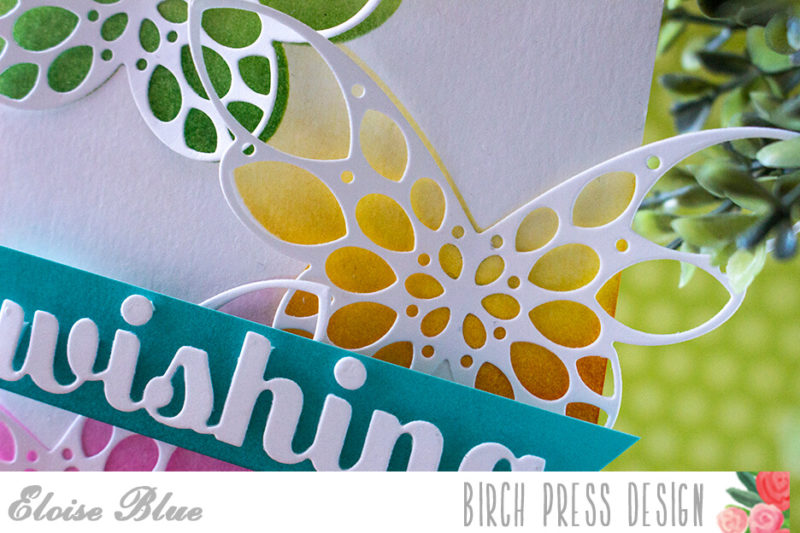
To begin my card I started off with die cutting the Sparkler Butterfly D Dies from some acetate so I could it as a stencil. I then placed it over some watercolour paper and began ink blending. I’m using a yellow, pink, green and aqua colour scheme today and each of my butterflies are blended ombre using various colours of Distress Inks.
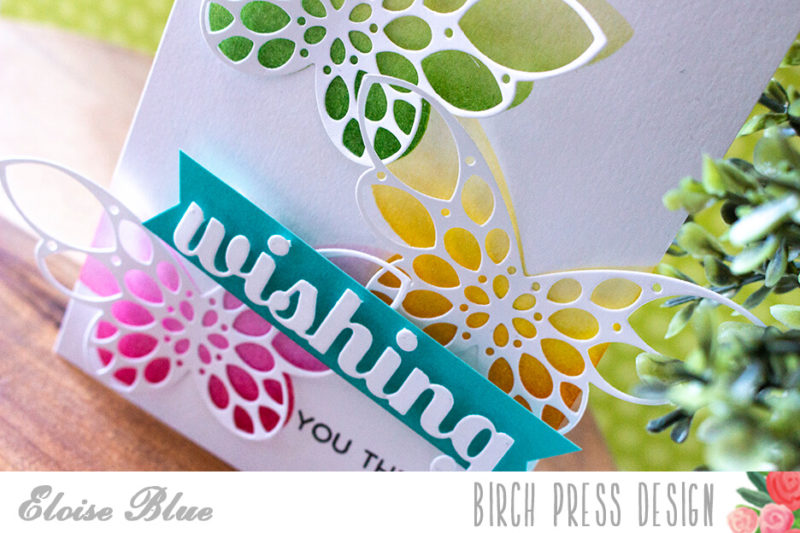
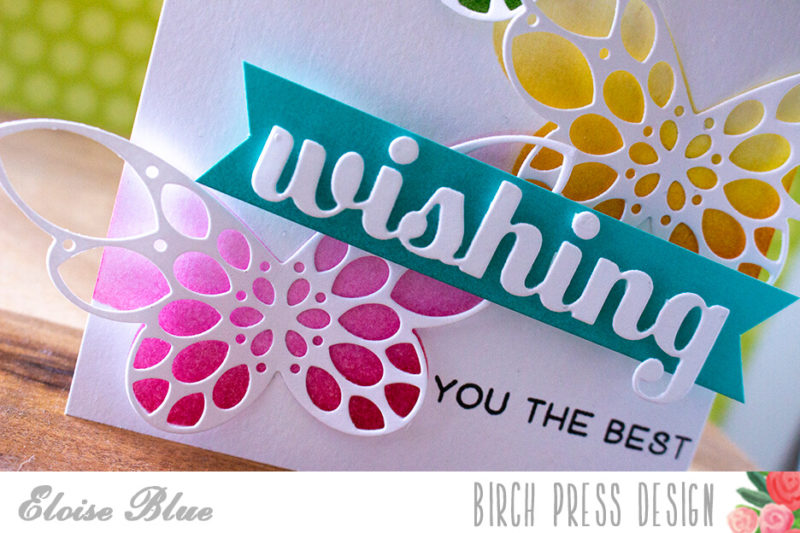
I started off with blending a pink butterfly at the bottom, using Spun Sugar, Picked Raspberry and Abandoned Coral. Then I moved the stencil to the right hand side and ink blended a yellow butterfly, for this I used Squeezed Lemonade, Mustard Seed and Spiced Marmalade and for the third butterfly, I made him green and used Twisted Citron, Mowed Lawn and Evergreen Bough.
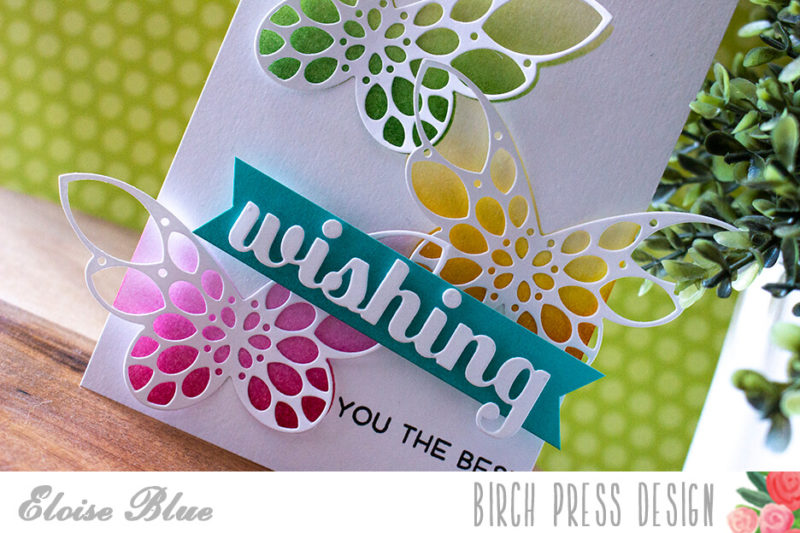
Now that my background was complete, I used the Sparkler Butterfly A Dies to cut three times from some white cardstock for the top layers. I added adhesive in the middle of the butterfly, pushed the wings up on either side and adhered them down in the centre. This way the wings aren’t adhered down fully and it gives it a nice dimensional effect. Next up, I took a piece of aqua cardstock and ink blended some Peacock Feathers onto the bottom of it. I cut the piece into a strip and added my own flag ends using scissors.
I then die cut the word ‘Wishing‘ out of more white cardstock, added foam tape to the back and adhered it onto the banner. I then adhered the banner at an angle to the centre of my panel and then stamped the additional ‘You The Best’ from Wishing You The Best Stamp Set in black into the white area of my card.
The video is linked down below if you would like to watch.
Thanks so much for stopping by today, I hope you enjoyed and got inspired to make your own stencils from your dies. See you next time!
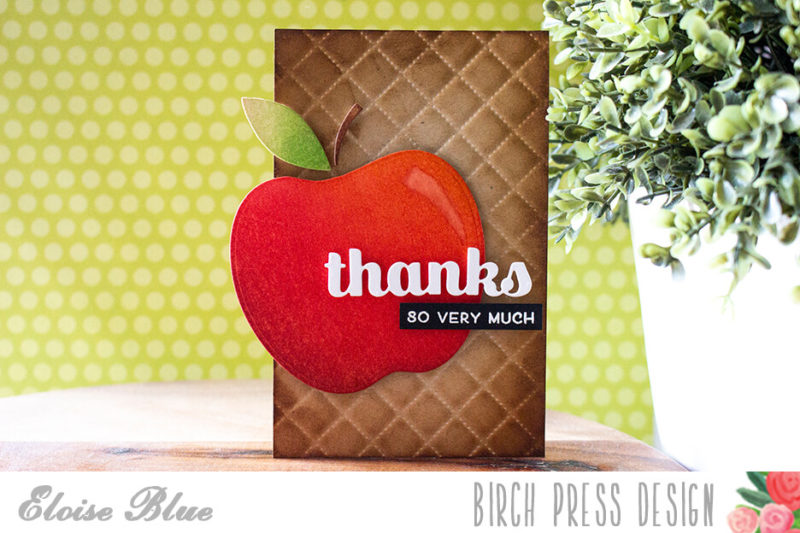
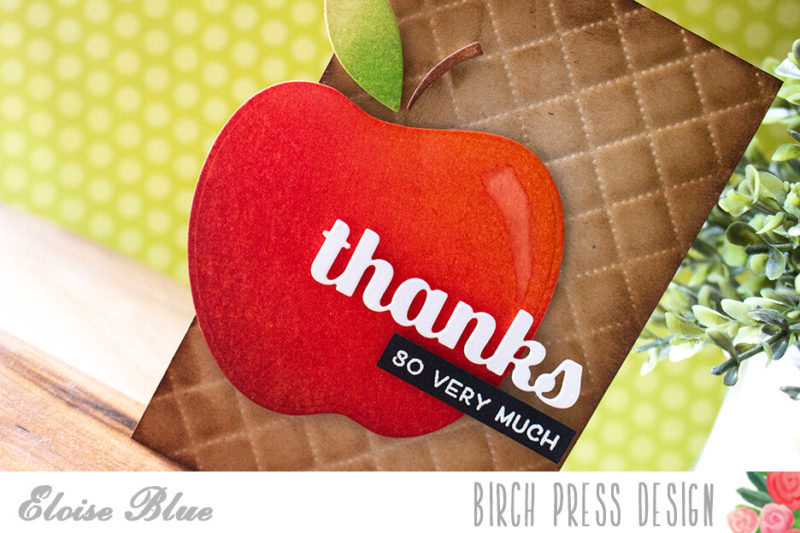
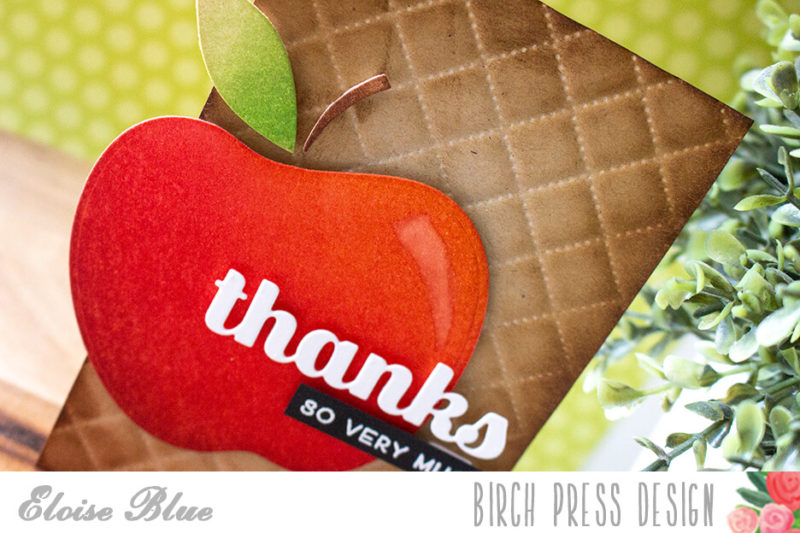
Hi friends, Eloise here and today I have a teacher appreciation card to share with you all using minimal supplies. This is also a card I feel that can be reproduced very easily if you’d like to give to multiple teachers. I used the ‘An Apple A Day‘ Die Set, ‘Thanks Sugar Script‘ Dies and Make A Statement Stamp Set to create this card.
To begin this card I started off my die cutting my apple die. I cut it from some watercolour cardstock sine I find that’s the best for blending Distress Inks. I then pulled various colours of Distress Inks out and coloured in the individual pieces of the die. I used Candied Apple, Barn Door, Festive Berries, Gathered Twigs and Fossilized Amber for my apple. Gathered Twigs for the stem and Shabby Shutters and Mowed Lawn for the leaf. Once everything was blended I set it off to the side to dry a little.
For the base of my card, I pulled some Neenah Desert Storm cardstock out and used the Quilted Embossing Folder from We R Memory Keepers on it. Then I used some more Gathered Twigs to ink blend around the edges. I also cut this piece to 3 1/2″ wide to make sure my apple could over lap the edge.
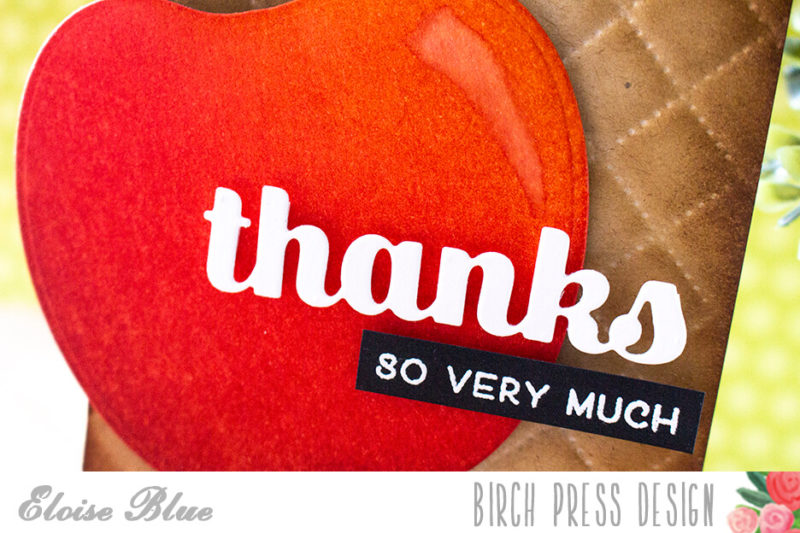
Next I added foam tape onto the images and adhered them overlapping the left hand side of my card panel. For my sentiment I used the ‘Thanks Sugar Script‘ Dies and cut that from white cardstock and then white heat embossed the ‘So Very Much’ sentiment from ‘Make A Statement‘ onto a thin strip of black cardstock.
Lastly, I added foam tape onto the backs of the sentiments and adhered them into place and then I added a ‘shine’ mark to the apple using my Wink of Stella pen in Clear.
The video is linked down below if you would like to watch.
Thanks so much for stopping by today, I hope you enjoyed and got inspired. See you next time!
Good morning and time for some more Birch Press Design inspiration. I am sure by now you have had a chance to play with the vast array of gorgeous mandala designs. For today’s card I used the Kaleidoscope Layer craft dies to create a fun shaker card.
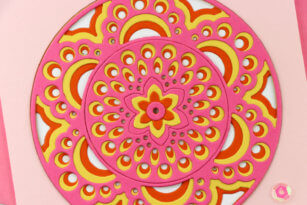
The Kaleidoscope mandala is actually two mandalas in one. There is an outer rind and and inner circle. By cutting different colours for the layers the options are endless. There are three layers to his mandala so by mix and matching the colours you can keep it as simple as you would like or by using more and more colours your design becomes more complex. For this shaker I have decided to make the outter ring using shades of pink and the inner circle blues and green.
We start by cutting the mandala. For this card I am choosing to cut the darkest and most dramatic colours using Kaleidoscope Layer C–so one cut with the green and one cut with the darkest of the pinks. Then cut 1 Kaleidoscope Layer B in both of your mid tones and finally Kaleidoscope Layer A in the lightest colours. Remember to use a metal shim to ensure crisp, clean cuts.
Once the layers are cut assemble the Mandala. By cutting each layer with two colours there were enough pieces to make two mandalas.
To create the shaker I an using the Mandala Card Frame. Cut one from white and then add the sentiment leaving enough room to add the die cut portion of the sentiment after the card is complete.
After you have added the stamped sentiment adhere a piece of acetate to the back of it to cover the window that the die created. I have prepared a short video for you to show you how I created, assembled the shaker and finished the card.
The mandala is set into the circle on the top of the card base. Add the final die cut portion of the sentiment and the card is done.
Thank you so much for joining me today with another creation with mandalas. You can make shaker card with any of the mandala designs if any colours you chose.
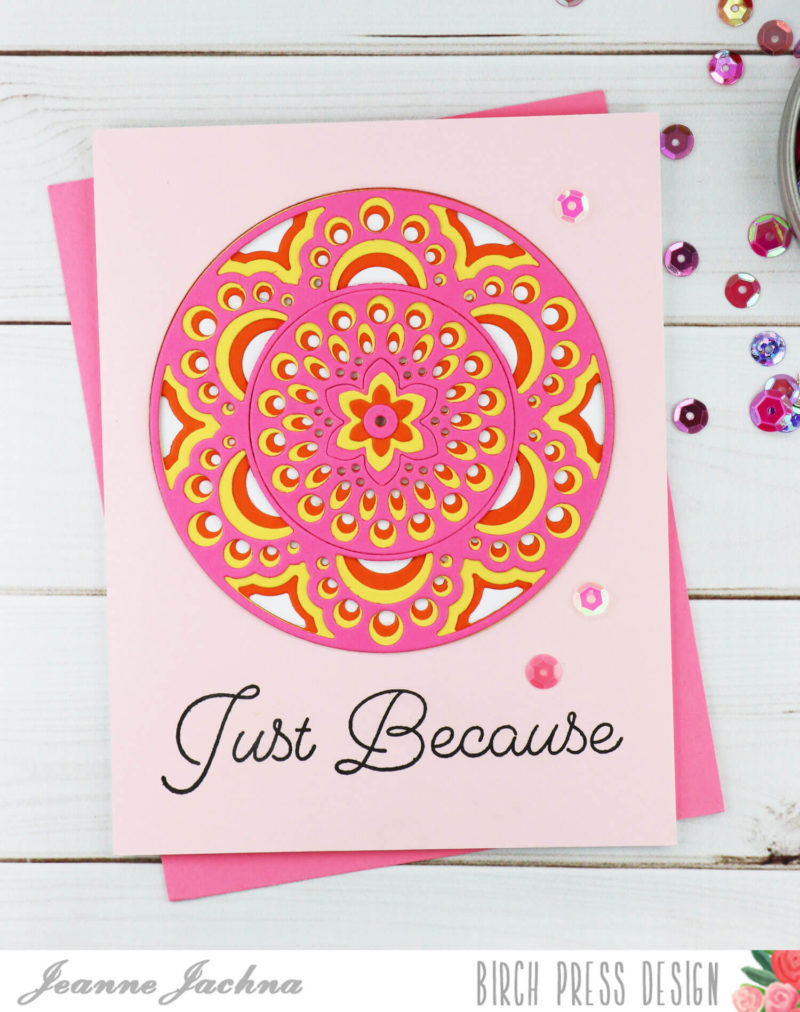
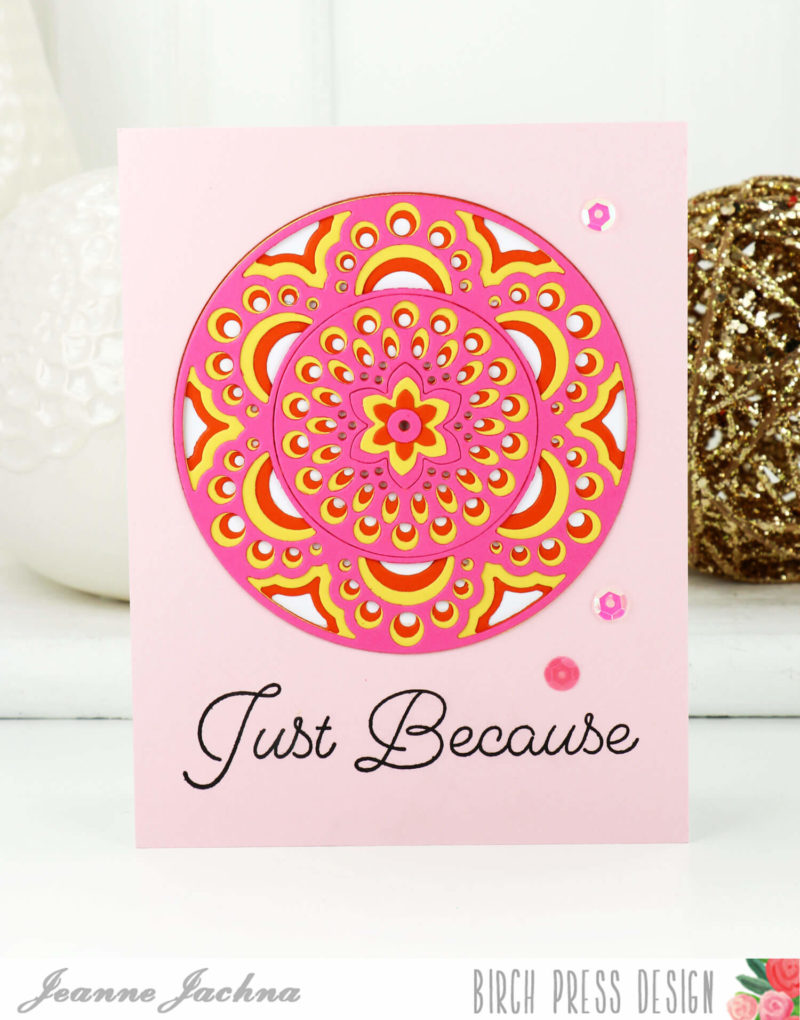
Thanks for stopping by! Jeanne here today with a pretty in pink mandala inspired card made with the Bali Layered Die set! I love to send cards for all occasions but the most special are the ones sent just because – a little note to let someone know they’re on my mind.
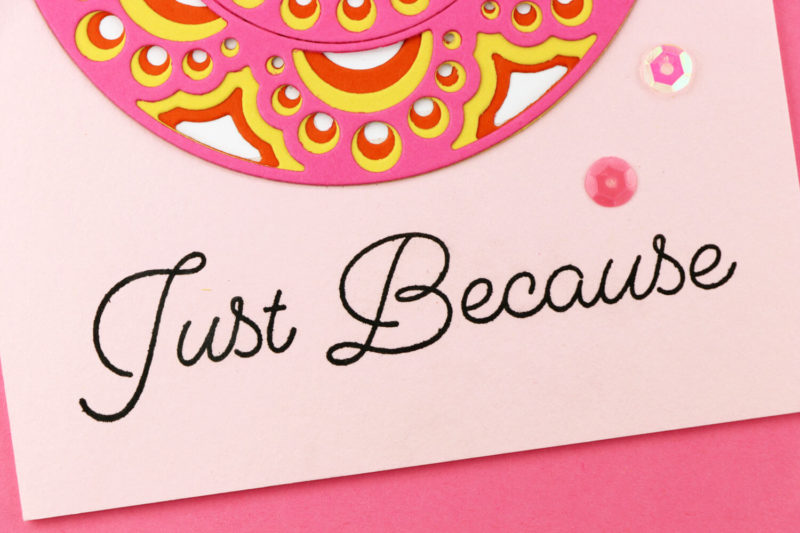
I started with a panel of soft pink card stock the same size as the front of my card base. I die cut the panel with the Mandala Circle Base and then stamped a sentiment from the Just Because clear stamp set. I always stamp before assembling my projects because if something goes wrong it’s easier to start over at the beginning!
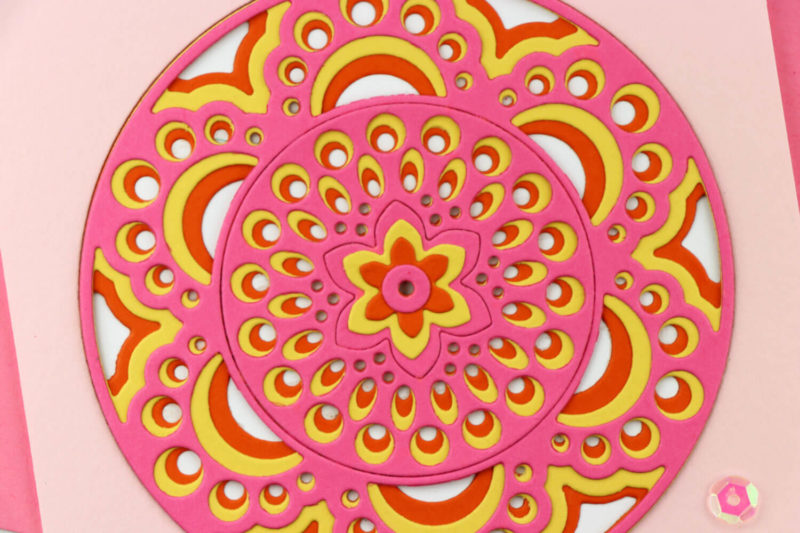
I attached the panel to my card base and then cut the Bali layers in orange yellow and pink – colors that remind me of flowers.
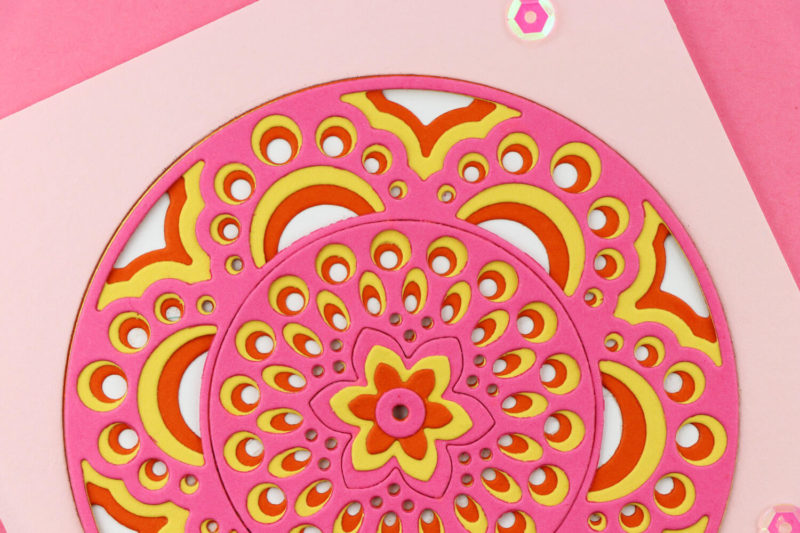
I adhered the die cut circles directly inside the circle opening. I’ve found if you adhere them together and then try to inlay them inside the opening it won’t quite fit as smoothly. The finishing touch is the flower in the center of the mandala made from the die cut pieces, and a sprinkle of Pretty In Pink sequins from the shop.
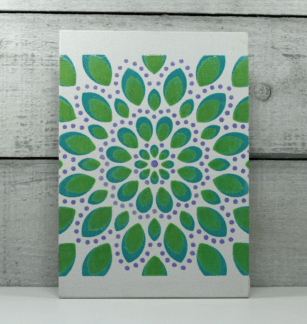
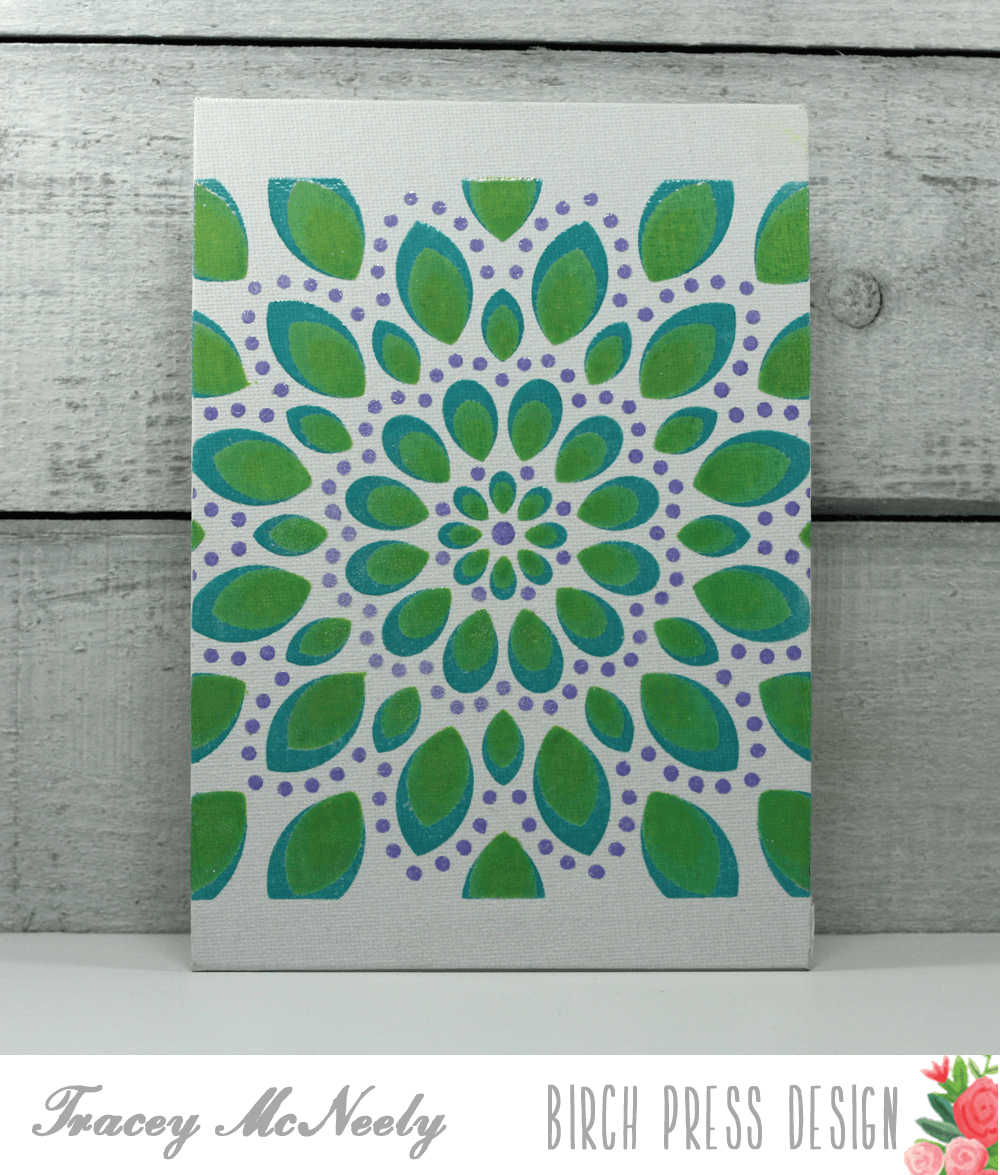
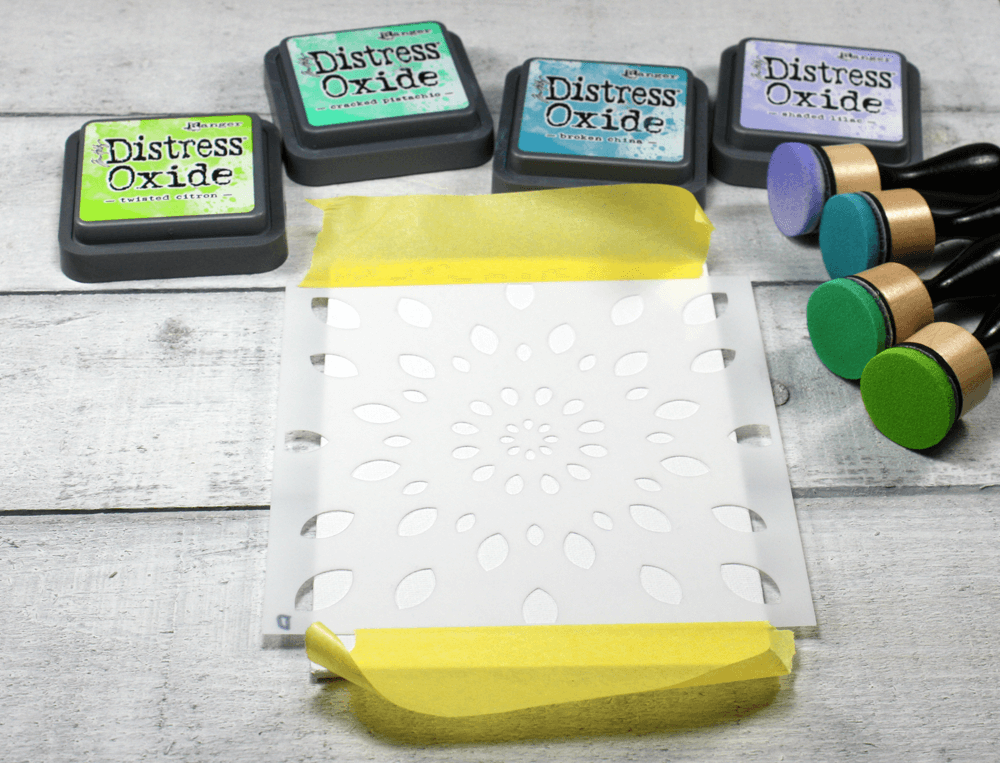
Hi, it’s Tracey here today with another crafty inspiration post. I am doing something a bit different today, I am creating a home decor piece using the Mandala Stencil Set with a 5″ x 7″ canvas.
I gathered my supplies I needed for this project, the Mandala Stencils, Distress Oxide Inks, painters tape, foam blending tools, embossing ink and clear embossing powder.
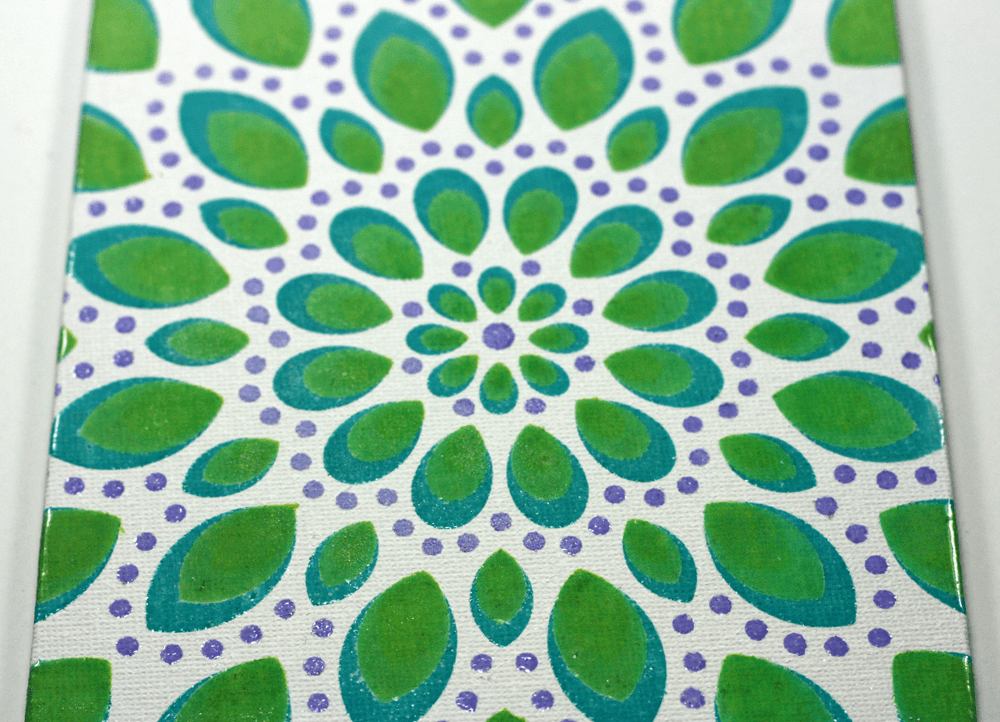
I used four colours of Distress Oxide Inks for my project. I started the first layer with the Mandala Stencil Layer D taped down with painter’s tape sponged using Twisted Citron Distress Oxide Ink. Leaving the stencil in place the ink was wiped off the stencil with a paper towel. Then a layer of VersaMark ink was applied and the stencil was removed. I sprinkled clear embossing powder on the canvas and heat set it. This is done so that when you apply ink to the next layer it doesn’t cover up or blend into the colour of the first layer.
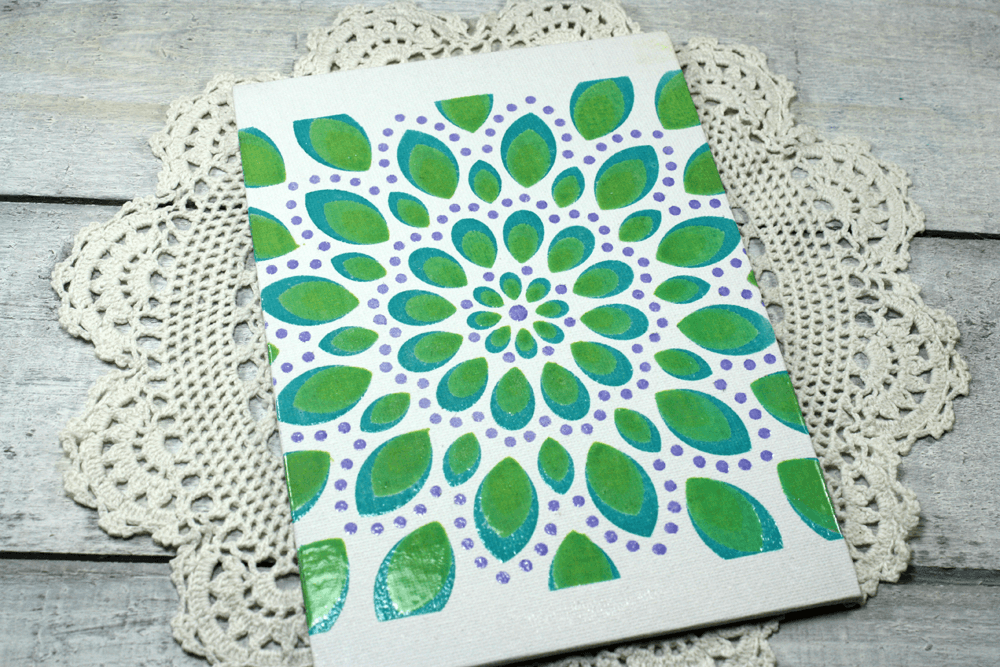
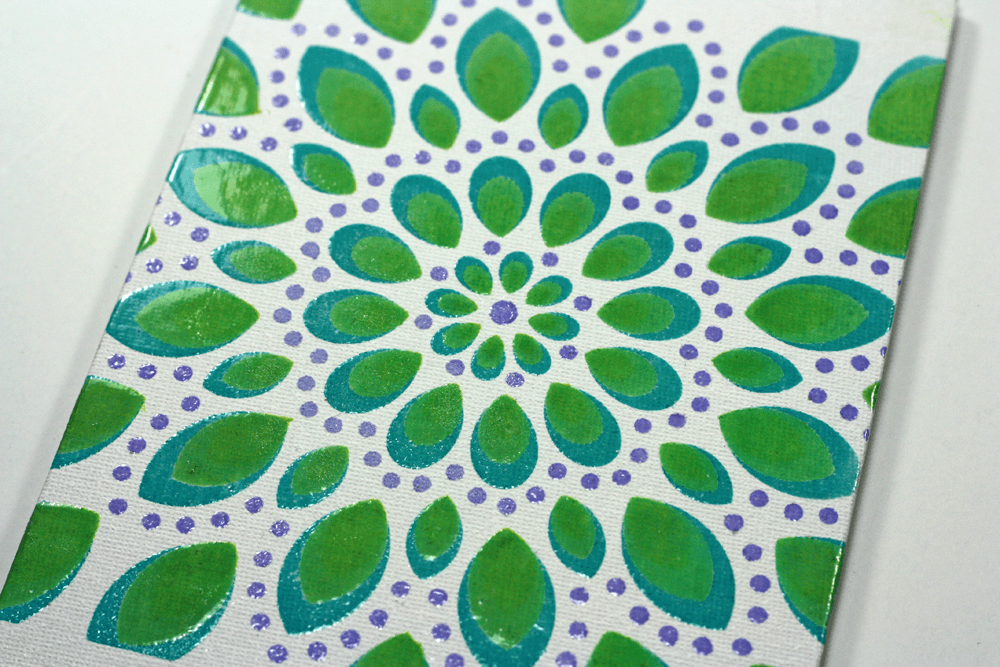
This process was repeated with the Mandala Stencil Layer C using Cracked Pistachio, then the Mandala Stencil Layer B using Broken China and then one last time with the Mandala Stencil Layer A using Shaded Lilac. After Layer A was sponged it was also clear embossed to match the rest of the canvas and also to seal it.
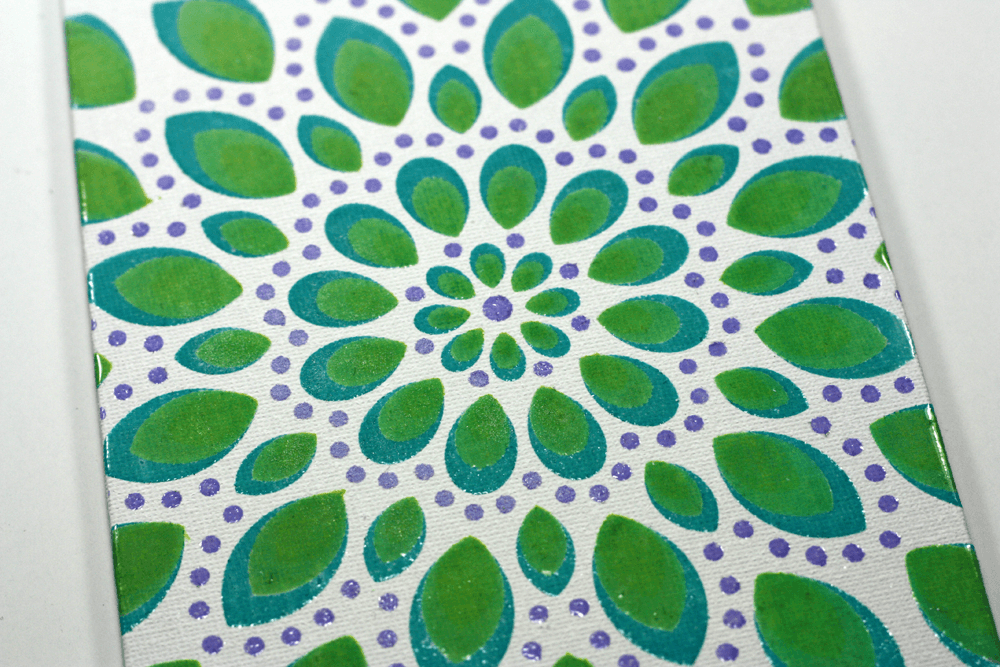
The completed project has beautiful sheen from the embossing and fabulous texture from the canvas. The embossing seals the piece to protect it from dirt and dust.
I hope you had fun creating something a little different today. As with all the Birch Press Design Mandalas you colour options are endless. Thanks for stopping in today and I hope you are inspired to try making a canvas of your own.
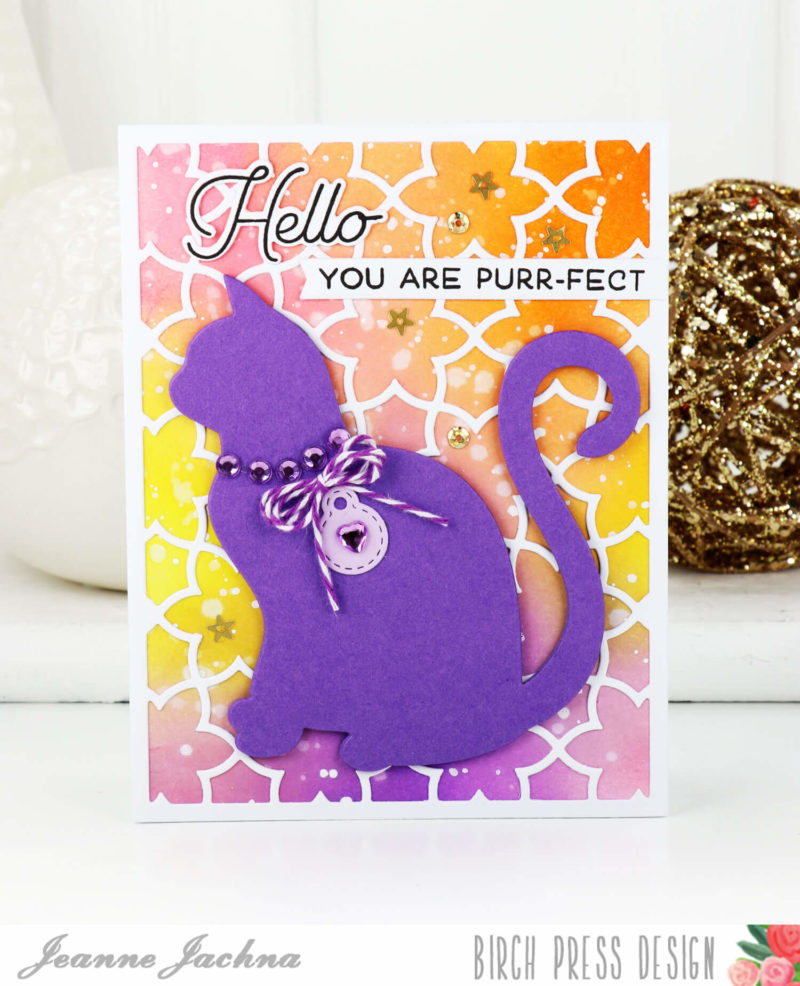
Do you love animals? For most of my life I’ve been surrounded by different pets. I’ve had dogs and cats and lots of more interesting things my children have brought home for some TLC… baby bunnies and birds, toads and turtles. My card today features the Purrfect Cats die cut. I love the intricate layered dies from Birch Press Design but I confess that I am always hesitant to cover them up. The backgrounds are so beautiful I always think they should take center stage. Sometimes I worry that if I add die cuts and embellishments that my card will look too busy or cluttered. I started my card with a distress ink background in Squeezed Lemonade, Mustard Seed, Dried Marigold, Worn Lipstick and Wilted Violet. The panel was splattered with water and white ink before I topped it with a Sevilla Layer A die cut. The Purrfect Cats die cut works well with the busy background because it is a large solid die cut in contrast with the detailed colorful background. I triple cut the cat and glued the die cuts together to make one thick die cut. I embellished the cat with some rhinestones, a twine bow and a bitty die cut tag. The background is embellished with gold sequins from the Not So Heavy Metal tin from the store. The sentiment is from the Love and Miss You stamp set. The coordinating die set cuts the large word sentiments from the stamp set.
I hope you have a great day with time to create!
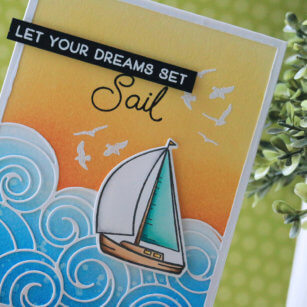
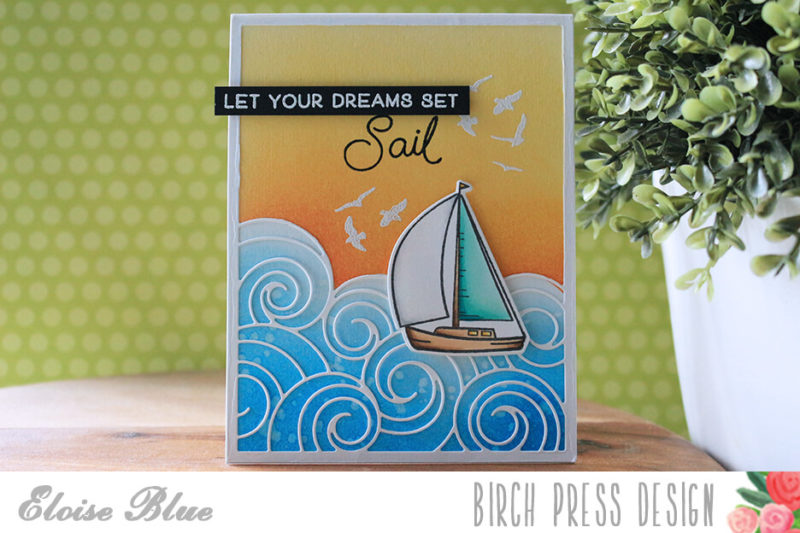
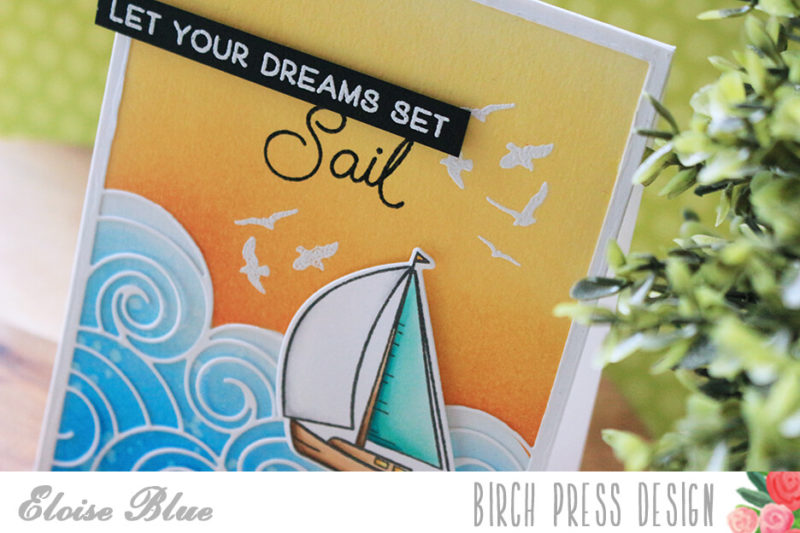
Hi friends, Eloise here and today I have a card to share with you all using the Let Your Dreams Sail Stamp Set along with just the A Plate from the Waves Plate Die. I’ll also be pulling in some Distress Inks to create a simple sunset background.
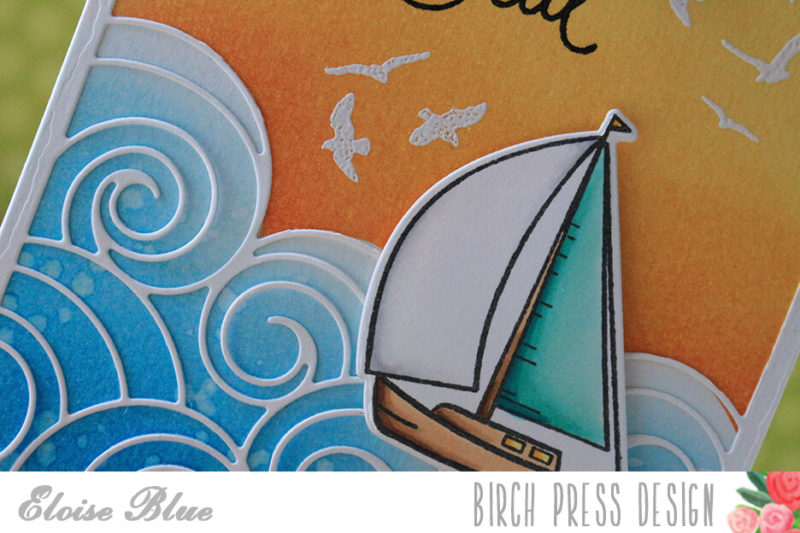
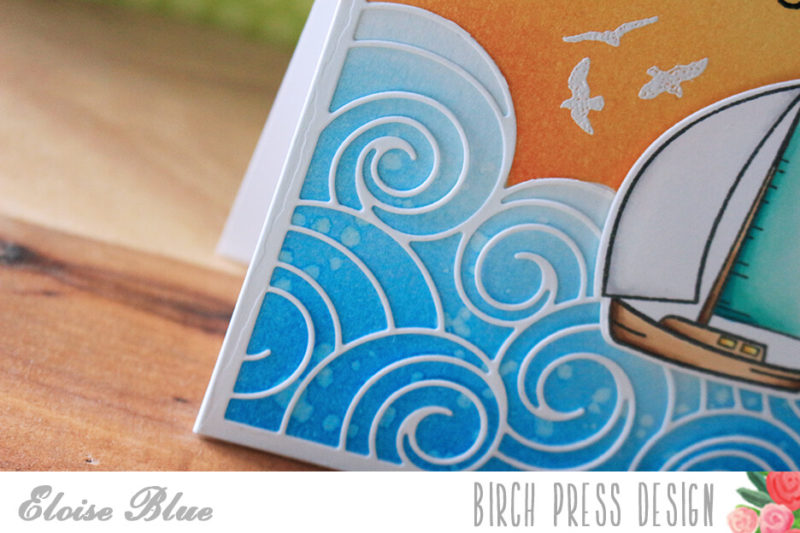
To begin my card today I started off with die cutting my background panel. I used the Waves Plate A Die and die cut it from some white cardstock. I used an exact knife to cut away some of the top excess waves, since I only wanted the waves to be focused along the bottom of the panel. I kept the frame in tact though, since I wanted it to frame off my design. Now my frame had been altered, I stamped out my sailboat from the Let Your Dreams Sail set and coloured it in with Copic Markers. I used the coordinating die to cut it out.
Now I was ready to work on the background. I first used the Waves Plate Die Cut as a template and traced the top of the waves onto some masking tape. I then cut it out with scissors and used it to mask off some watercolour paper. I used Abandoned Coral, Spiced Marmalade and Mustard Seed for the sunrise/sunset part of the background. I then used the negative mask and ink blended some Tumbled Glass and Salty Ocean at the bottom section.
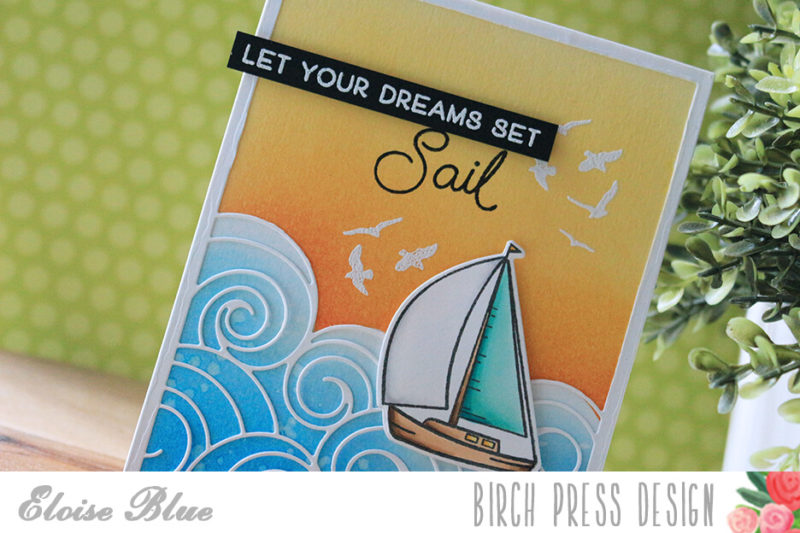
Now my background was done, I adhered my Waves background over the top. I then stamped some of the birds from Let Your Dreams Sail Stamp Set around the background and white heat embossed those. I then adhered my sailboat over the top as well. To finish off, I stamped the ‘Sail’ sentiment directly on the background with black ink and then white heat embossed the additional ‘Let Your Dreams Set’ sentiment onto a thin strip of black cardstock and adhered it to my card as well.
That finished off my card for today, I hope you enjoyed. The video is linked down below if you would like to watch it.
Thanks so much for stopping by today and I’ll catch you next time.


 I hope you’re having a great day! I’m enjoying the sunshine because I know fall is just around the corner. When I create I’m inspired by the things I see. I’ve been enjoying watching the butterflies float through the yard visiting all the bright colored flowers in my garden. If you love butterflies too there’s lots to choose from in the store! You can find butterfly stamps, die cuts, and even embossed paper
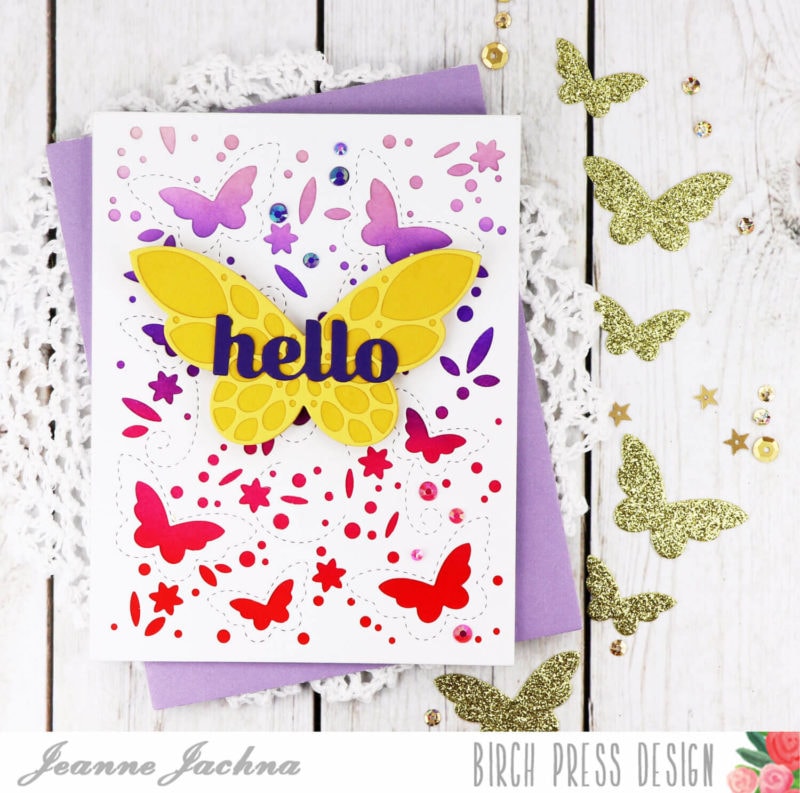
 I love all the bold color peeking through the die cut holes!
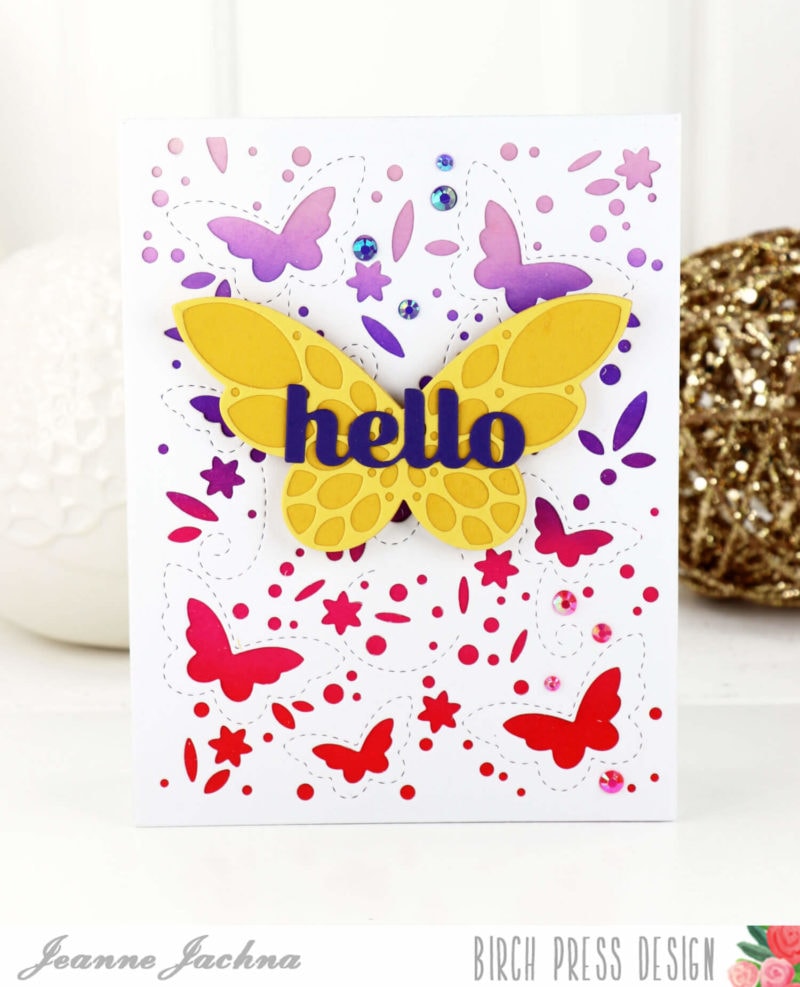


 Do you love animals? For most of my life I’ve been surrounded by different pets. I’ve had dogs and cats and lots of more interesting things my children have brought home for some TLC… baby bunnies and birds, toads and turtles. My card today features the Purrfect Cats die cut.
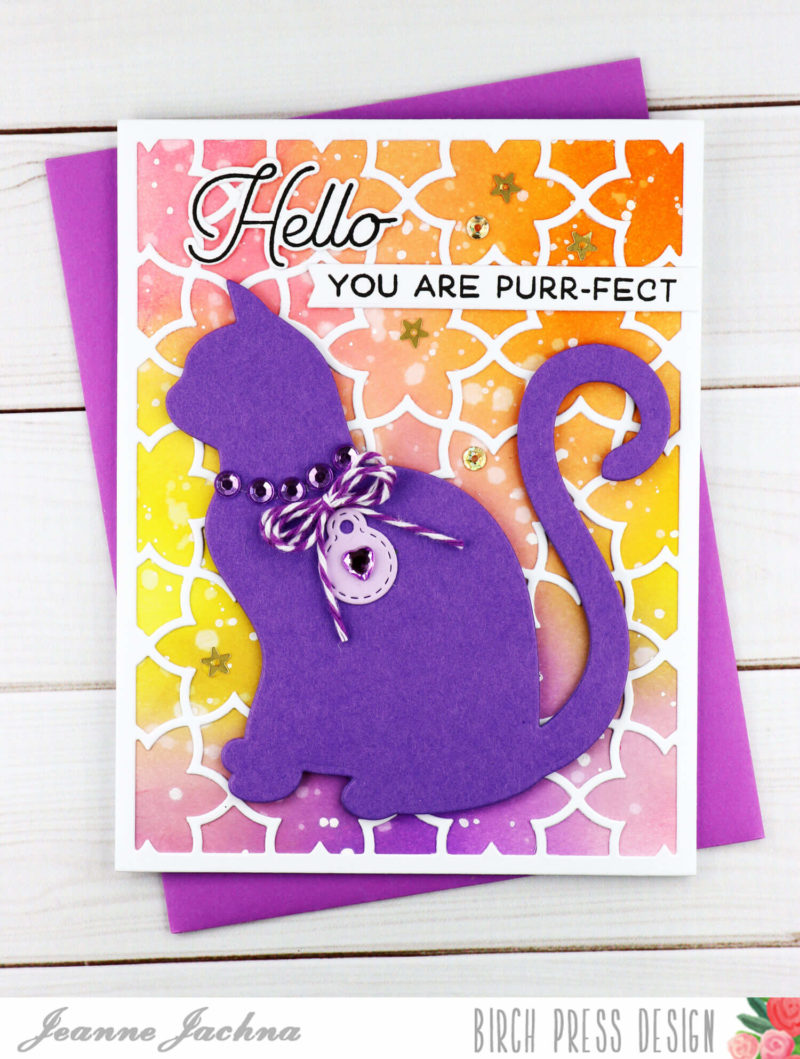 I love the intricate layered dies from Birch Press Design but I confess that I am always hesitant to cover them up. The backgrounds are so beautiful I always think they should take center stage. Sometimes I worry that if I add die cuts and embellishments that my card will look too busy or cluttered.
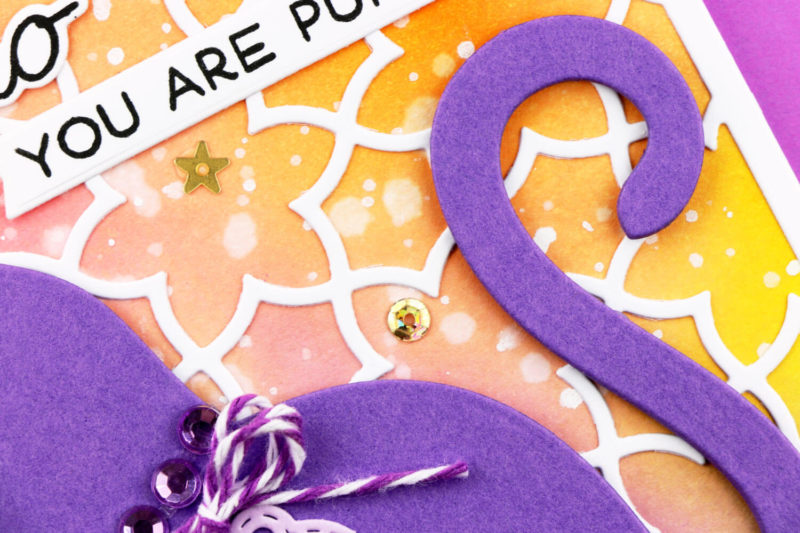 I started my card with a distress ink background in Squeezed Lemonade, Mustard Seed, Dried Marigold, Worn Lipstick and Wilted Violet. The panel was splattered with water and white ink before I topped it with a Sevilla Layer A die cut. The Purrfect Cats die cut works well with the busy background because it is a large solid die cut in contrast with the detailed colorful background.
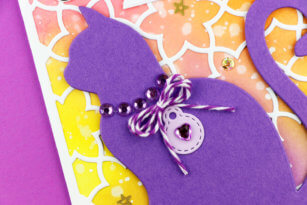
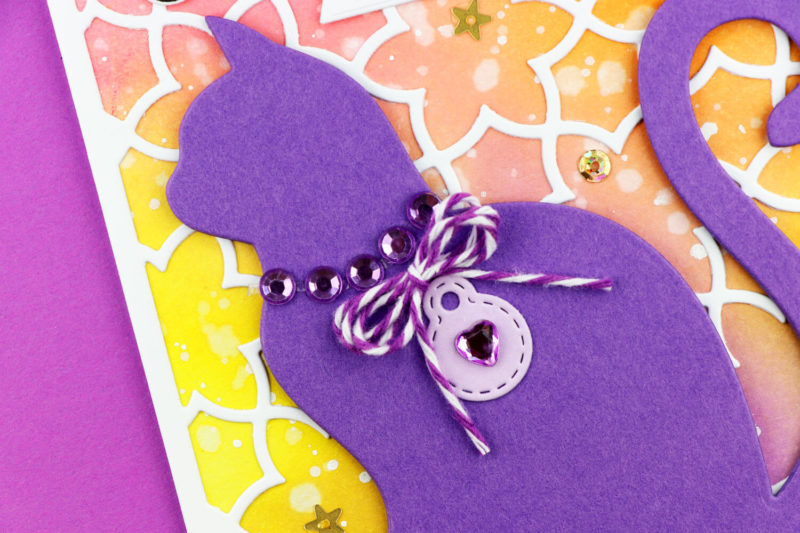
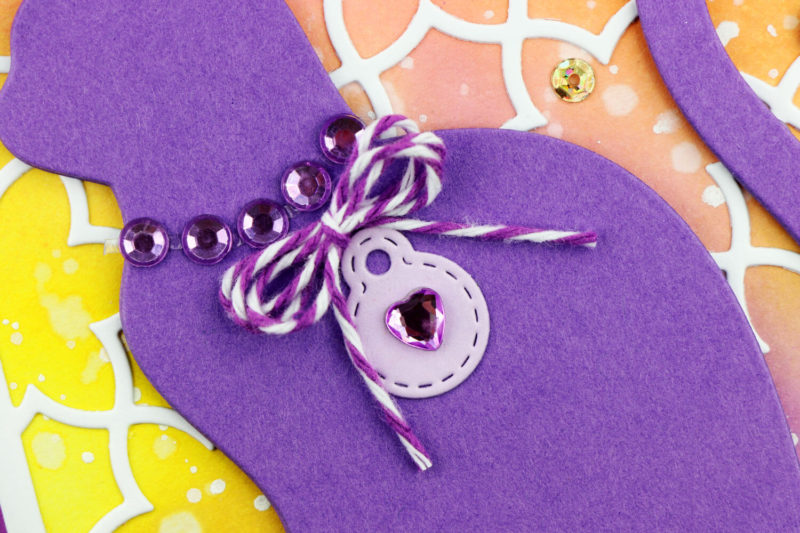 I triple cut the cat and glued the die cuts together to make one thick die cut. I embellished the cat with some rhinestones, a twine bow and a bitty die cut tag. The background is embellished with gold sequins from the Not So Heavy Metal tin from the store.
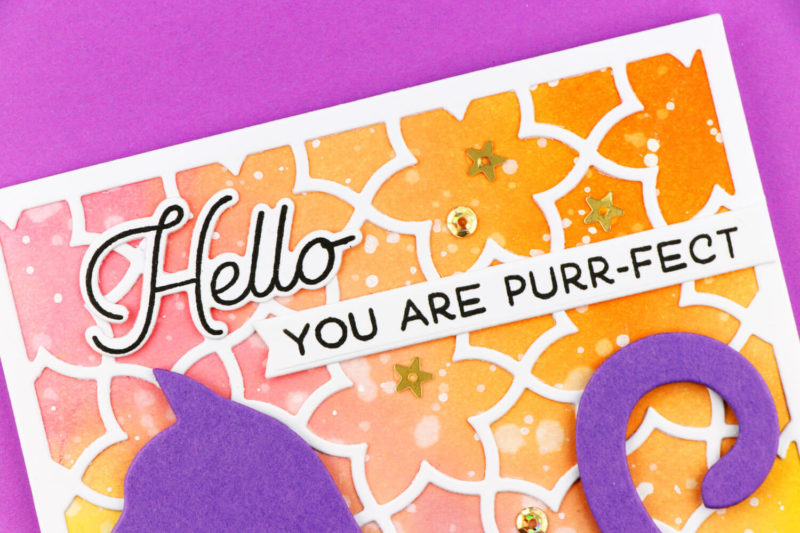 The sentiment is from the Love and Miss You stamp set. The coordinating die set cuts the large word sentiments from the stamp set.