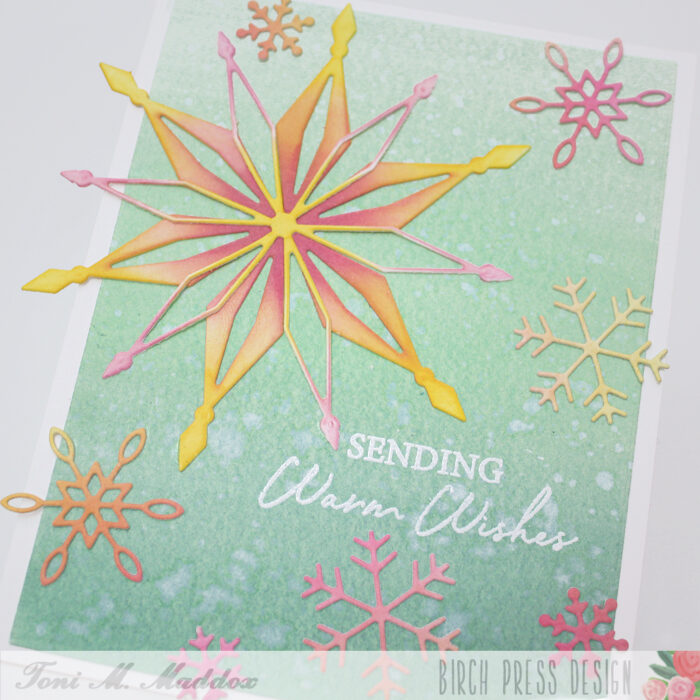
Hello crafty friends, It is Natasha and I am excited to be up on the blog with you today! Today’s project combines the beautiful Eloquent Butterfly layered set, paired with beautiful papers from Memory Box! So let’s get started!
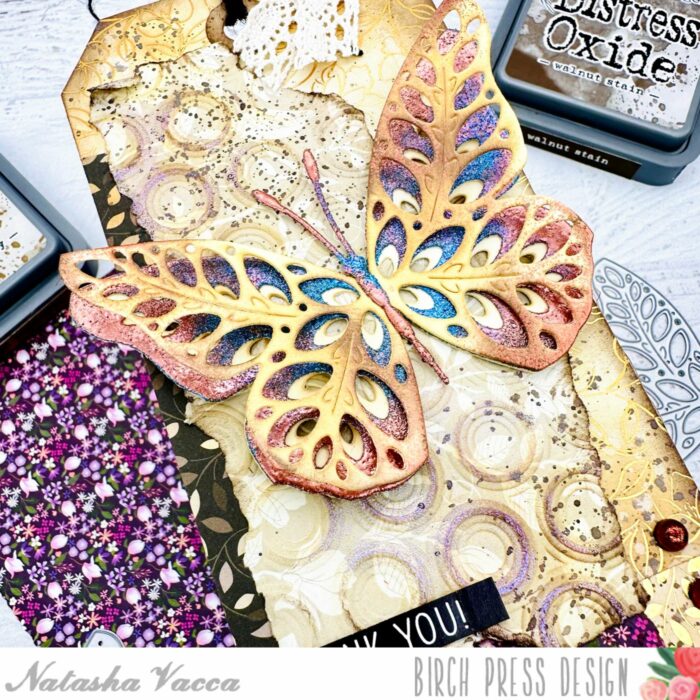
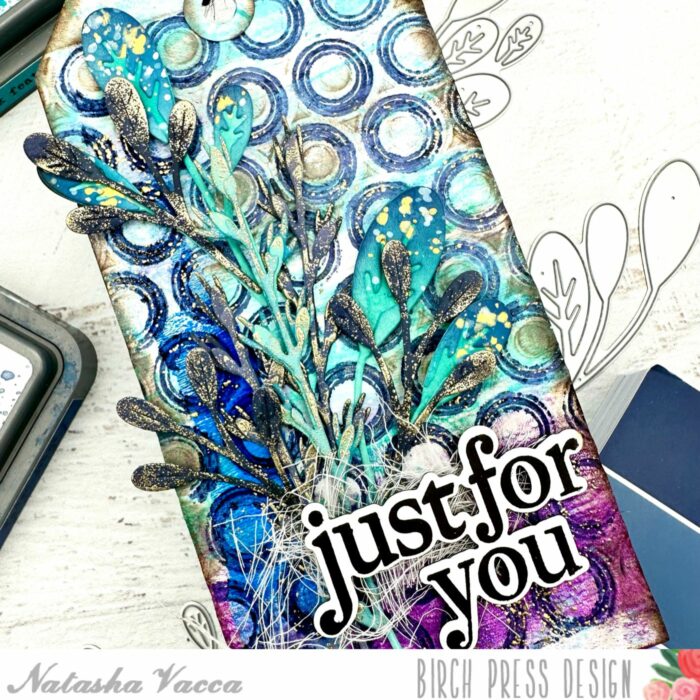
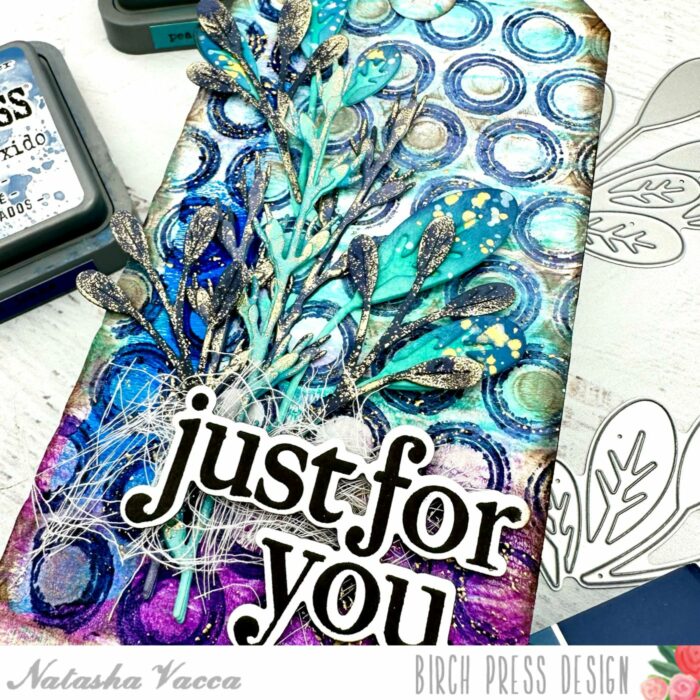
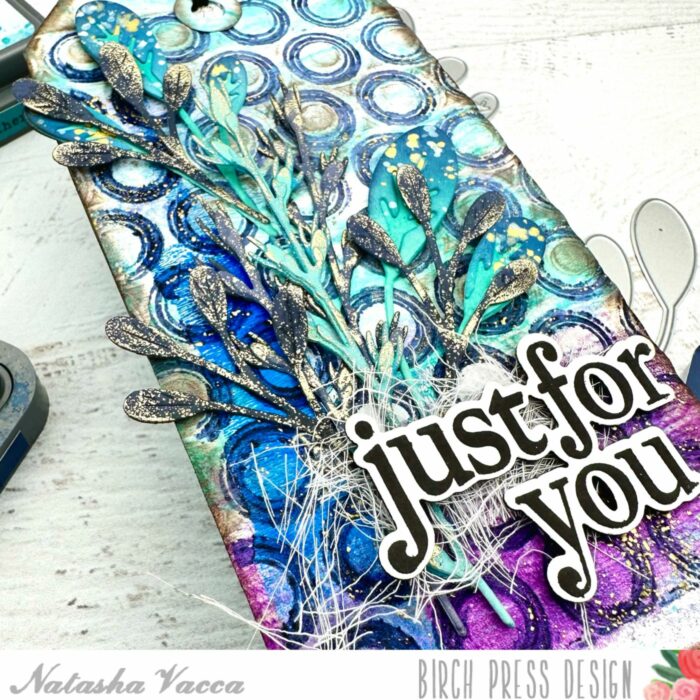
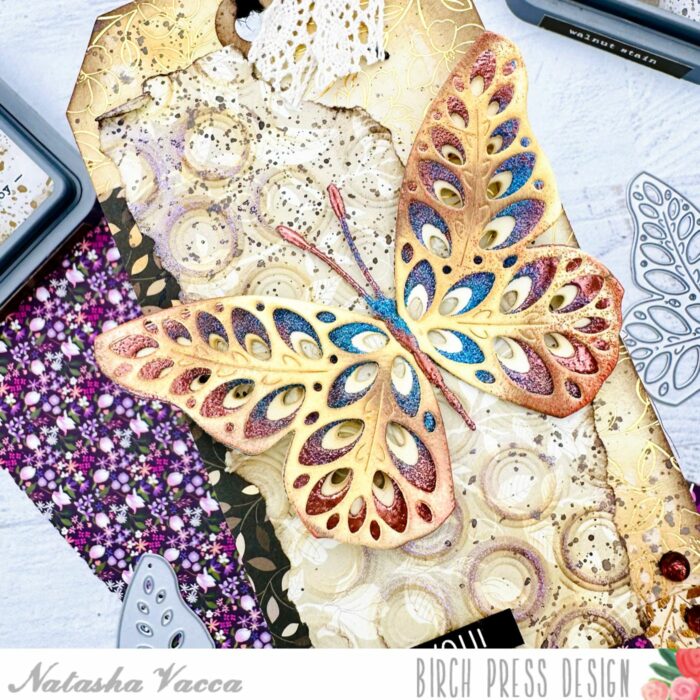
I started by die cutting each layer (A and C) from the Eloquent Butterfly onto white cardstock. Once it was die cut, I added Distress Oxide Ink (Brushed Corduroy and Walnut Stain) to layer A and C. For layer B I die cut the butterfly using the Memory Box Glitzy Glitter pad using a piece of blue glitter paper. Then on layer B I added a couple colors of embossing powder. I do one color at a time, adding layers and not fully covering the butterfly with one color of powder. I also added a bit of embossing powder to layer A to add more interest and texture. I then adhered the butterfly together using liquid glue and set it aside.
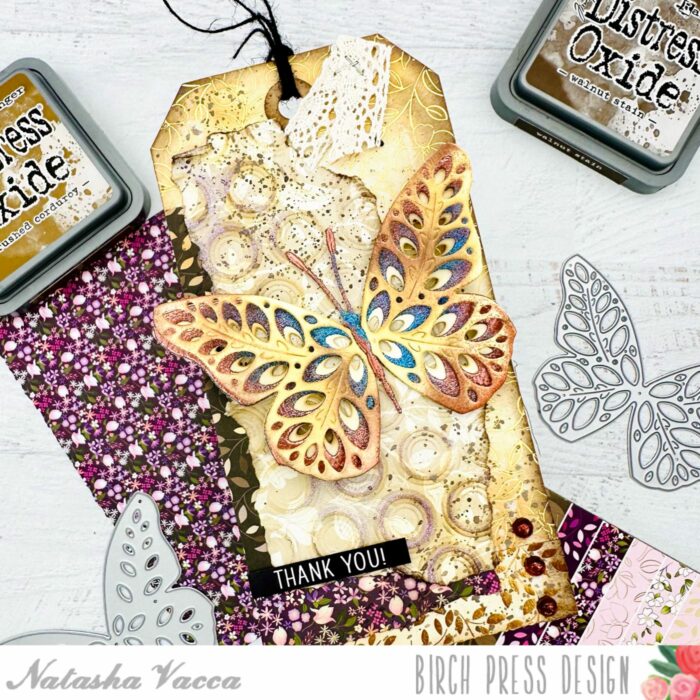
Next I started to work on my tag background using a pre-made tag from my stash. I then chose a few pieces of beautiful pattern paper from the Memory Box Magnolia Grove paper pad. I love these papers, they are so beautiful! I adhered the layers onto my tag, then dry embossed one of the papers using the Memory Box Ringadings embossing folder. Once this was dry embossed I tore the pattern paper to give a distressed look. I then added the same distress oxide inks to the paper. I added a bit more texture by applying an iridescent embossing powder to sections of the dry embossed paper. I then adhred the layer onto my tag,
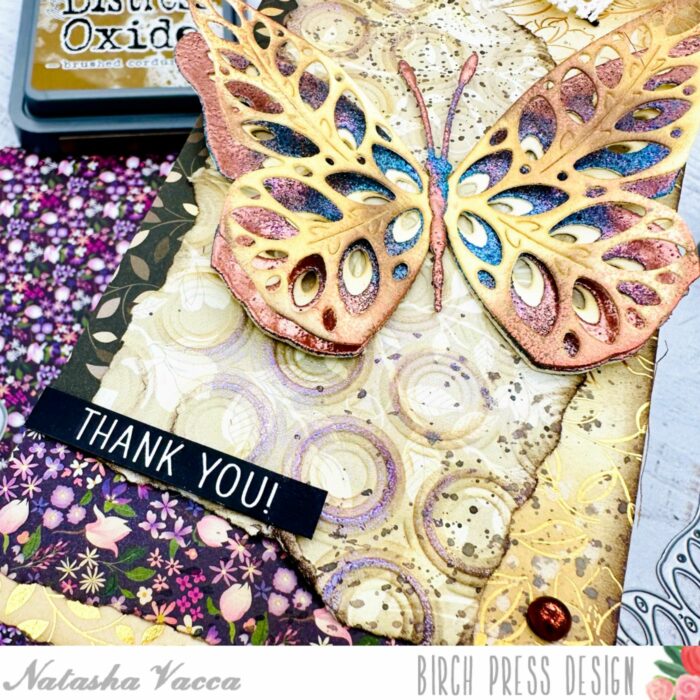
Next I added splatters to the tag panel using a brown spray from my stash. I allowed the panel to dry, then distressed the edges using my distress ink pad. I chose a sentiment from my stash and adhered this with foam tape, then adhered the butterfly to the tag using liquid glue.
I completed the project with a twine at the top of the tag and a few gems from the Christmas Fairy Drops collection!
Thank you so much for stopping by today! I will be back soon!

Supplies

Supplies