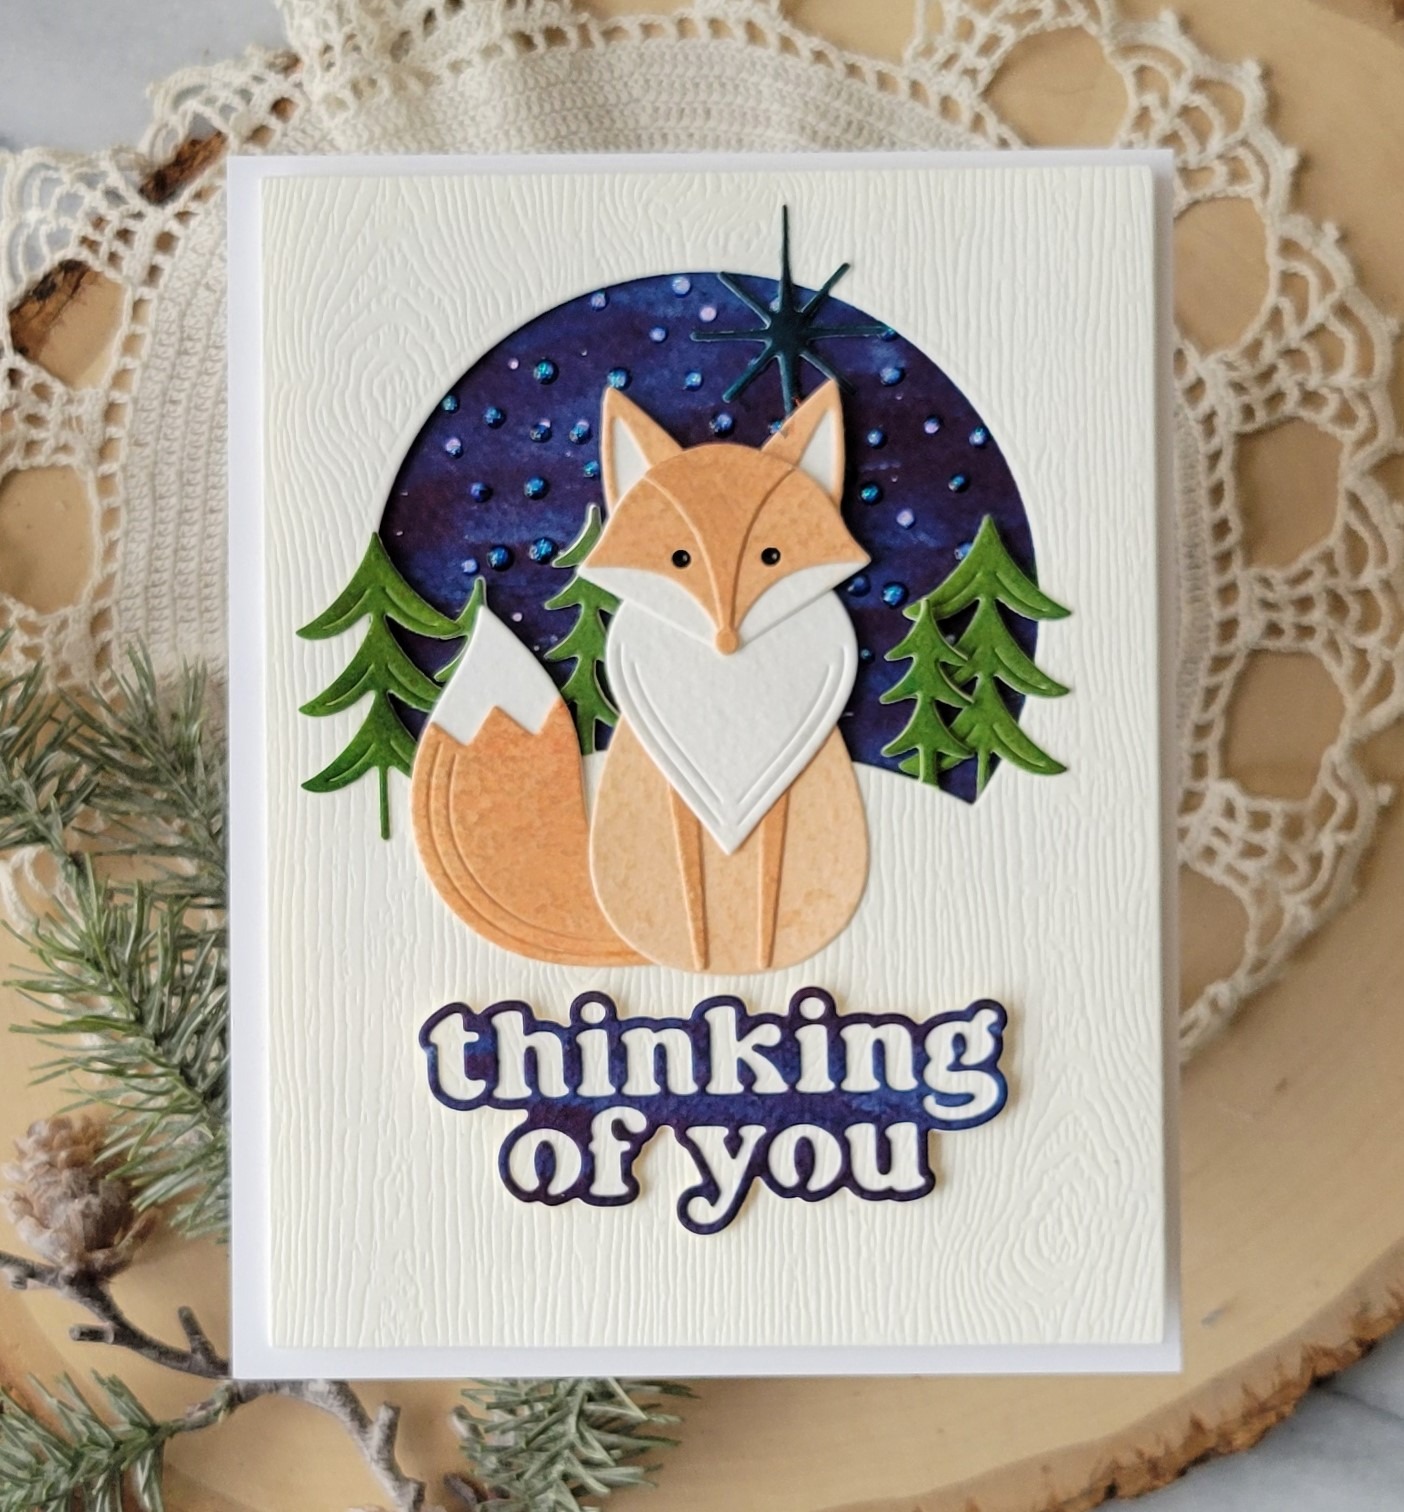
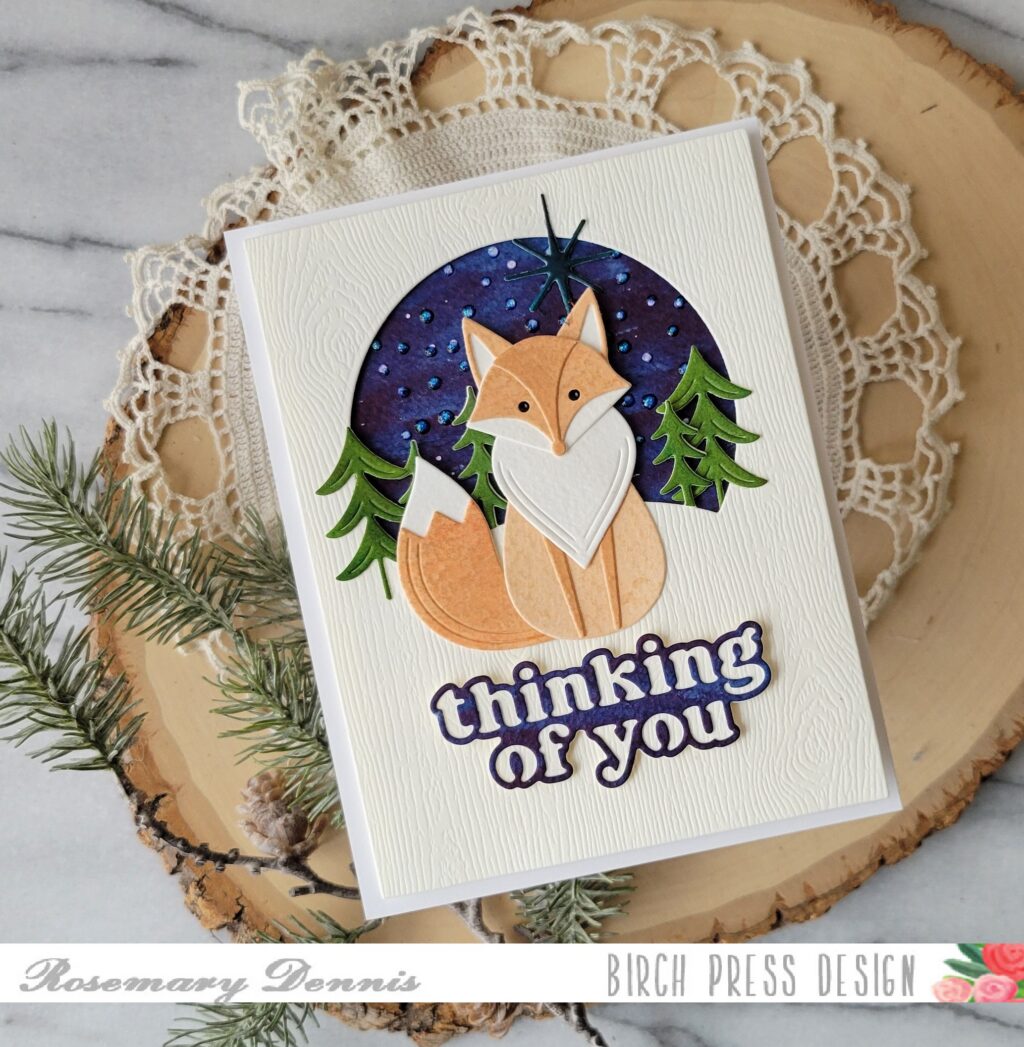
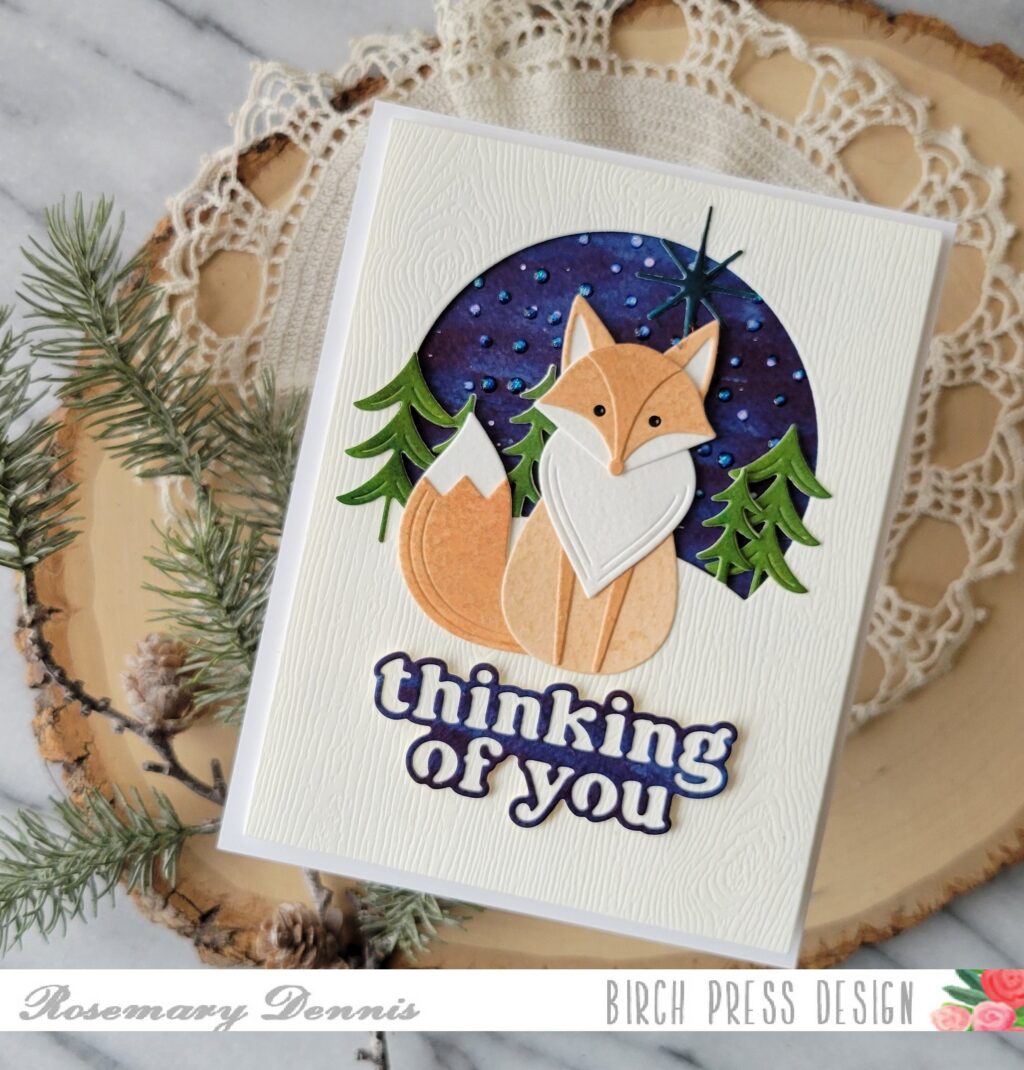
Hello everyone! Rosemary here on the blog today sharing a card created with the Block Print Wise Fox, Block Print Starry Night Scene and Thinking of You Vintage Sentiment die set. Let’s have a look at what I made.
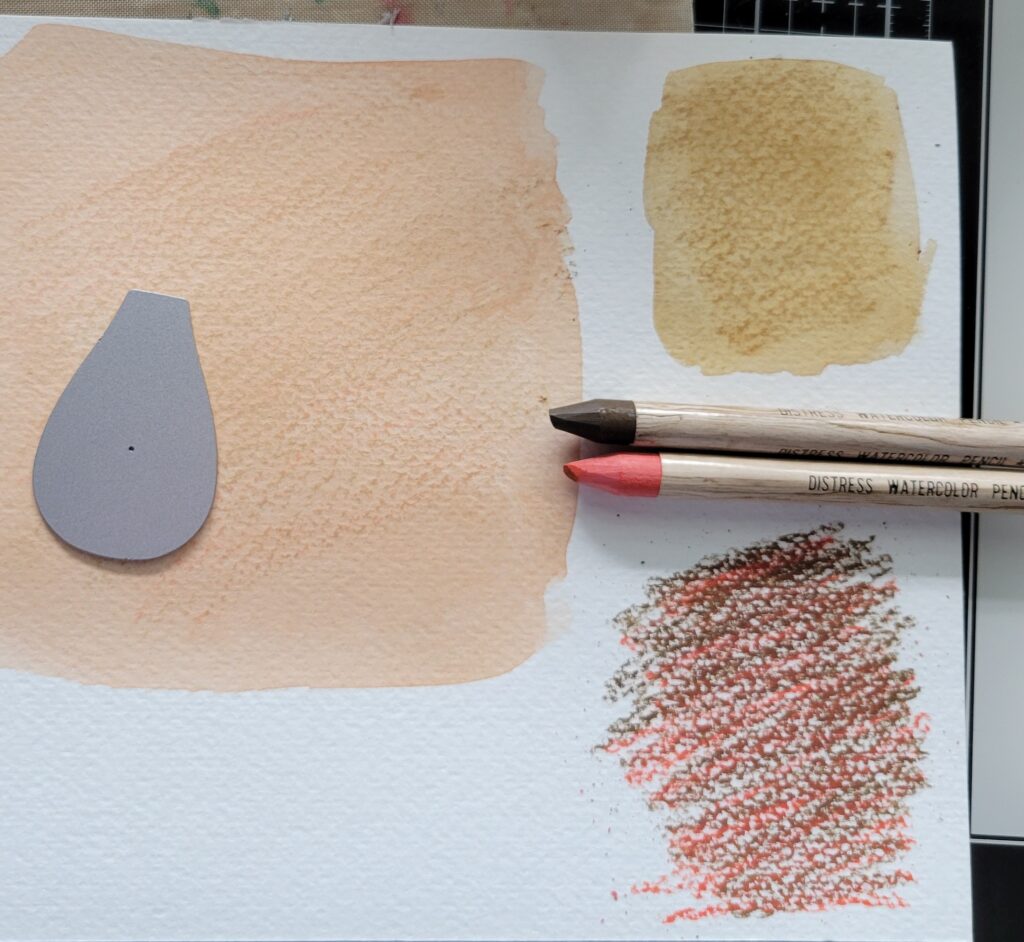
I started off my card by making all the pieces for my fox. I had been doing another rummage through my supplies and found my Distress watercolor pencils. I hadn’t really used them before so thought this would be a good time to give them a try.
I cut down a piece of watercolor cardstock and then scribbled on a combination of Gathered Twigs and Ripe Persimmon and then blended with water. The first generation of color was pretty light so I let the area dry and then scribbled on more color to get a slightly darker patch. To get an even darker value I got heavy handed with my scribbling and was able to get a nice darker tan color.
Once my panel was dry I die cut all the parts of the fox from different areas on the sheet to get the varying shades. I used the white parts were cut from the sheet of watercolor cardstock that wasn’t colored. I assembled my fox with liquid adhesive. Now it was time for the background. For this I used a Tonic Studios aqua flow pen in a dark blue on another piece of watercolor cardstock. I love the variation in the color that I was able to achieve.
I let it dry and then worked on the top panel that features the arched opening for the background piece. I die cut cream Memory Box woodgrain cardstock down with a rectangle die and then die cut the Starry Night Scene from the panel. I then die cut the trees and the star from scraps of cardstock that I had left over from the card I posted earlier this month. I trimmed out the trees and adhered them on top of the die cut panel.
The larger trees were also die cut from scraps. The background panel was dry and so I tried adding some “stars” to the background. I discovered that the blue is so deep and intense that the white just disappeared into the background. So I added drops of Nuvo jewel drops in a clear glitter. Once the panel was dry I adhered it to the top panel using thin foam squares.
I then adhered the fox and the large trees using thin foam squares. I finished with the sentiment that I die cut from a strip of watercolor cardstock that I colored with the same blue Aqua Flow pen and the woodgrain cardstock. I adhered them together and added to the card front with thin foam squares.
That’s it for me! I hope you enjoyed today’s project. Thanks for coming by and have a lovely day.
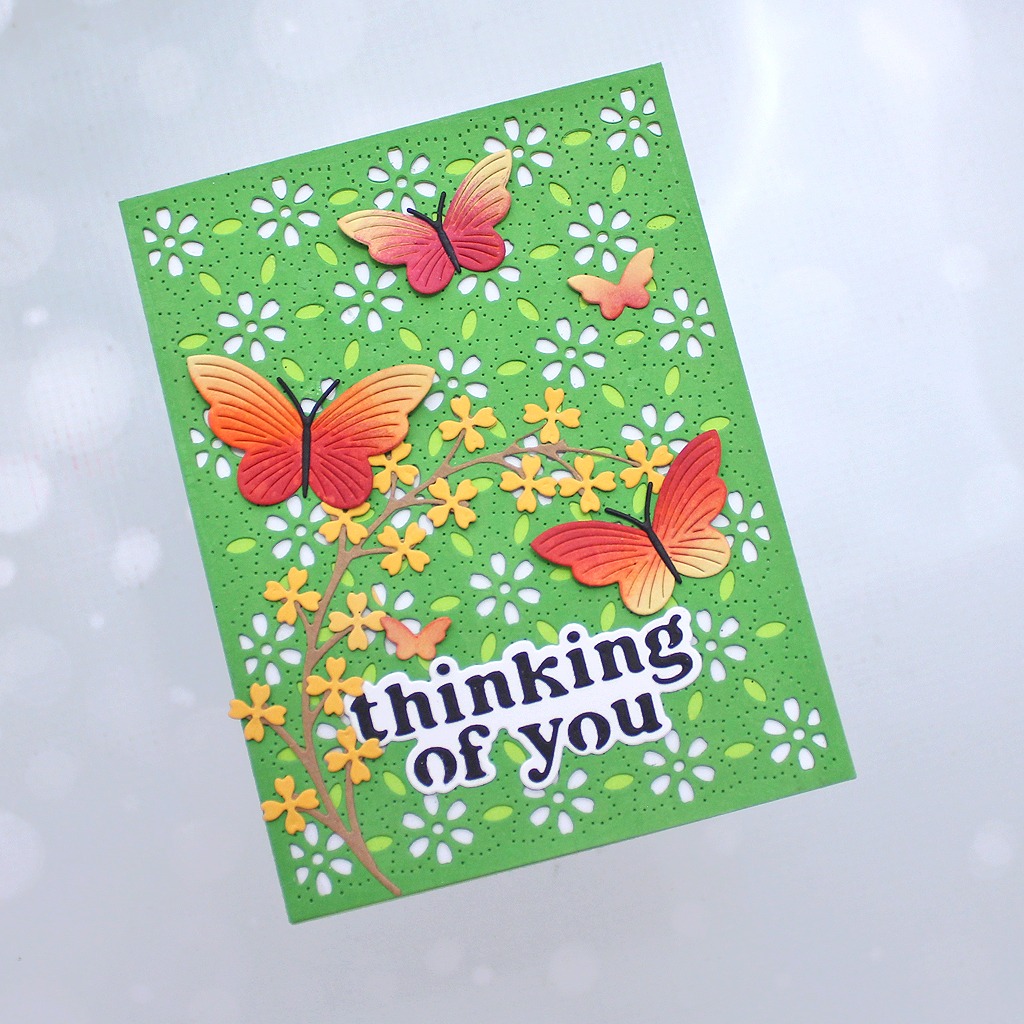
Are you ready for nicer weather, my friends? Toni here and I’m very much looking forward to spring so I channeled that into a cheerful card.
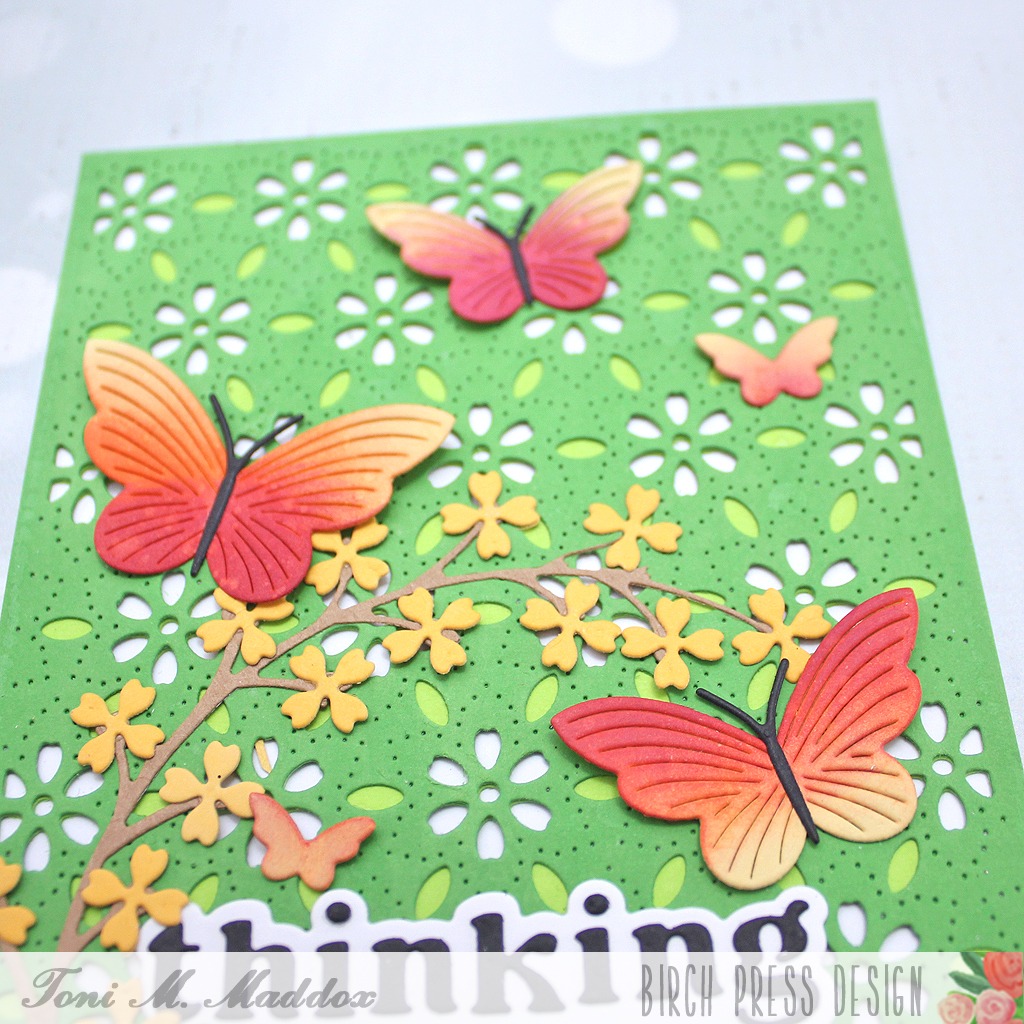
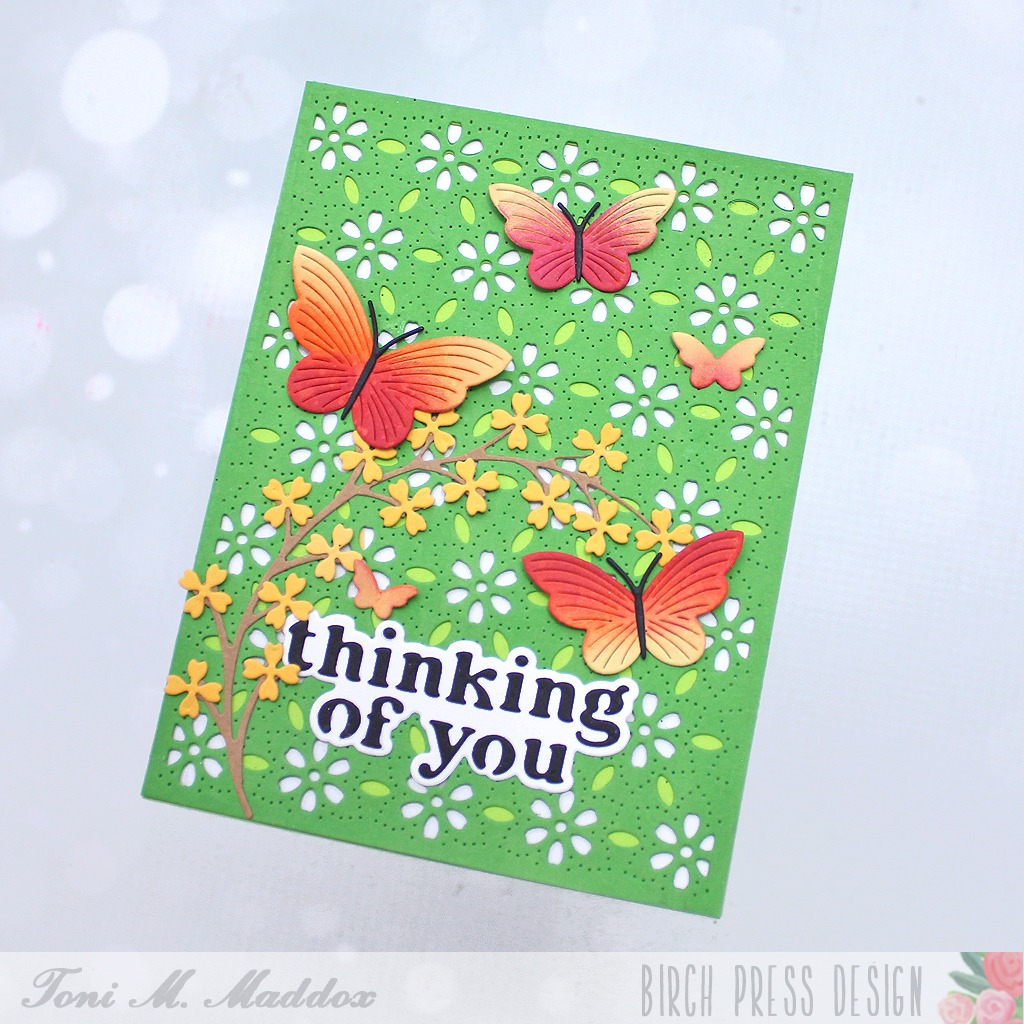
To create the background, I used two layers of the Flora Plate set, one from Memory Box Cilantro cardstock and the other from Key Lime.
Next, I cut out a branch from the Floral Arch Contour set from kraft. I then added Abundant Branch blossoms which I had cut from Memory Box Summer Squash cardstock.
Creating the butterflies might have been my favorite part. I cut the Linear Boho Butterflies from Memory Box Golden Wheat cardstock then sponged them with an orange and magenta ink to create a gradient. They’re so pretty!
Finally, I added the Thinking of You Vintage Sentiment, using black on white to really draw the eye.
I hope you enjoyed today’s card and have a great rest of your week!
Feel free to visit my blog, Frankie Helps Craft, for a full list of supplies used and to check out my other creations.
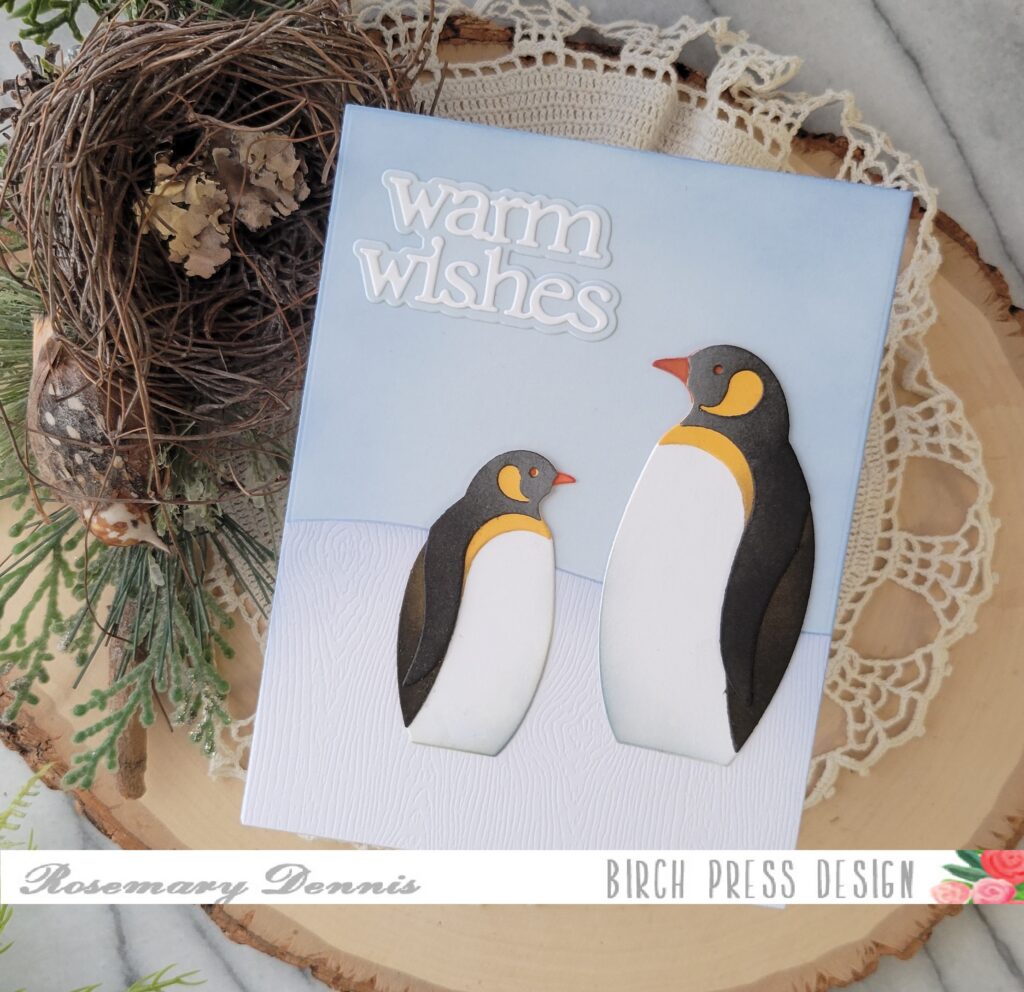
Hello everyone! Rosemary here on the blog today with a card that could be used for a winter birthday or a friendship card. Let’s look at what I made.
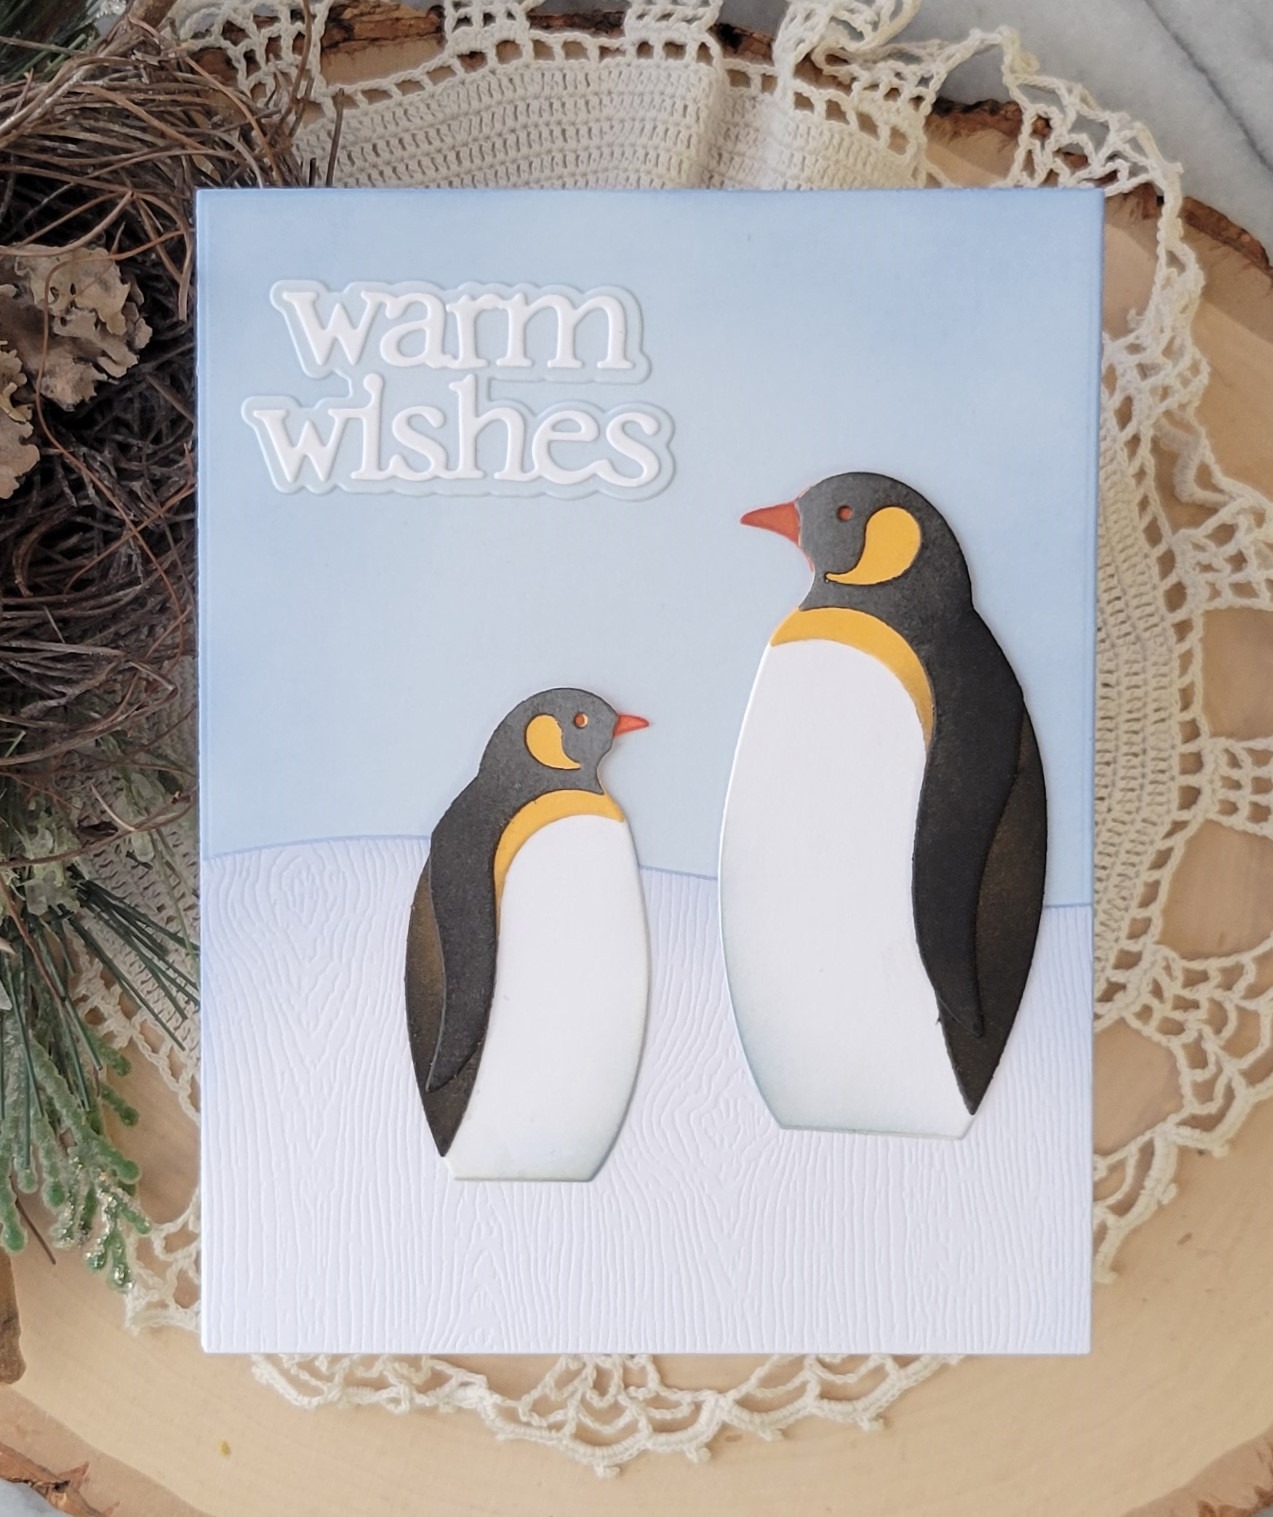
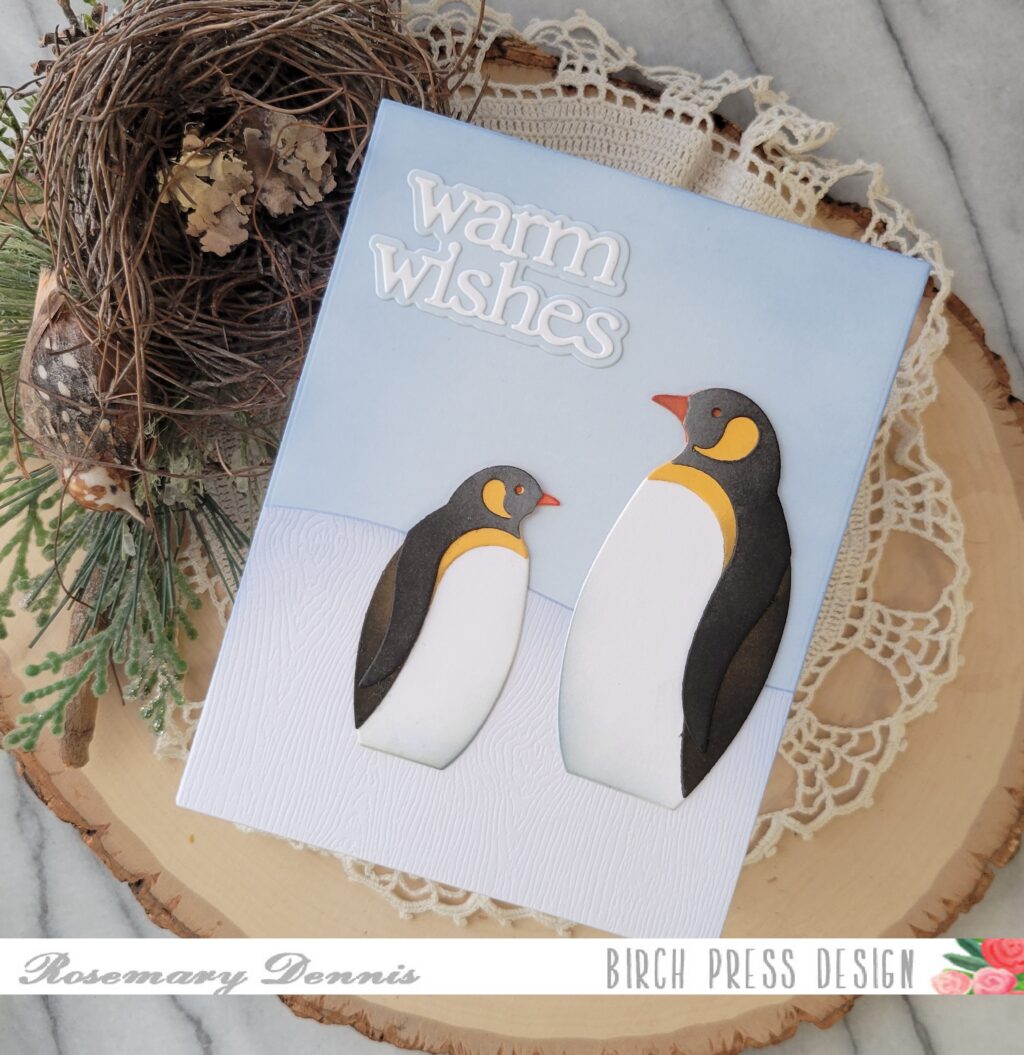
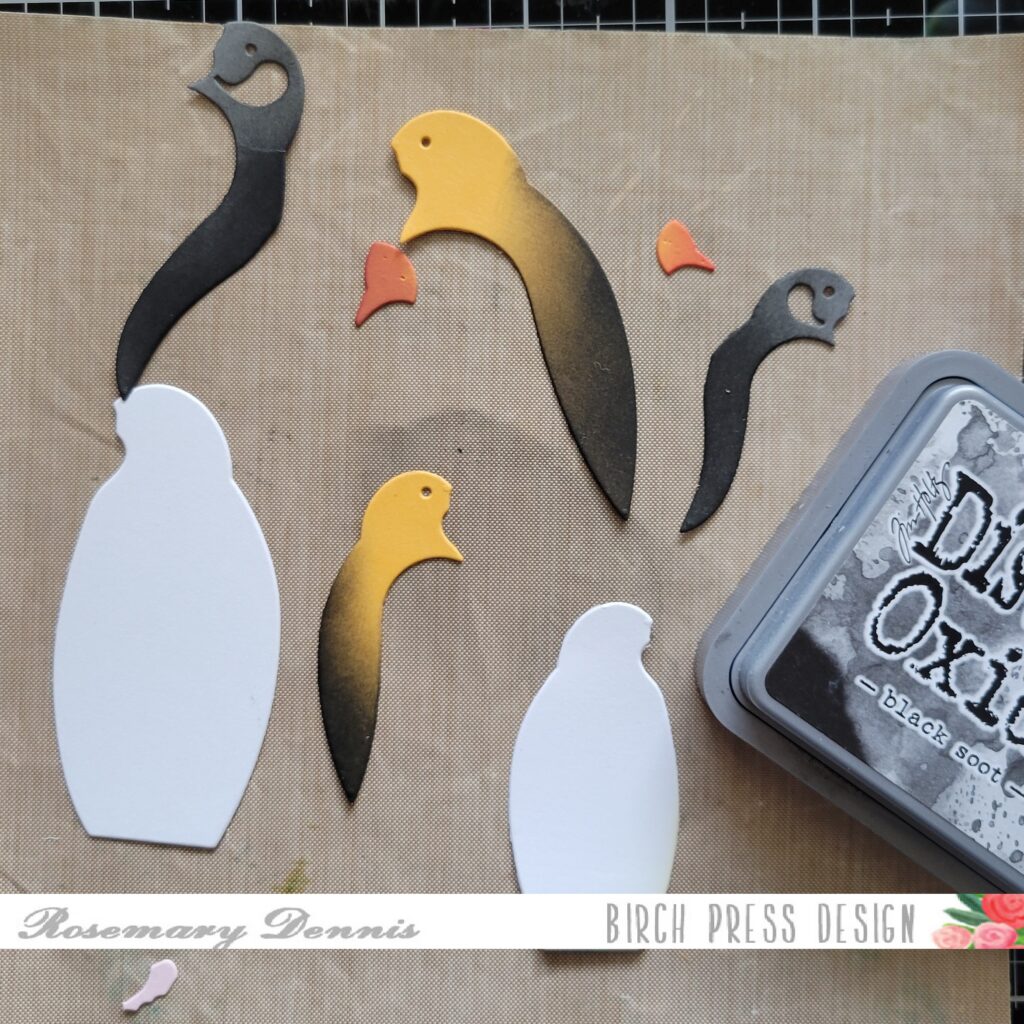
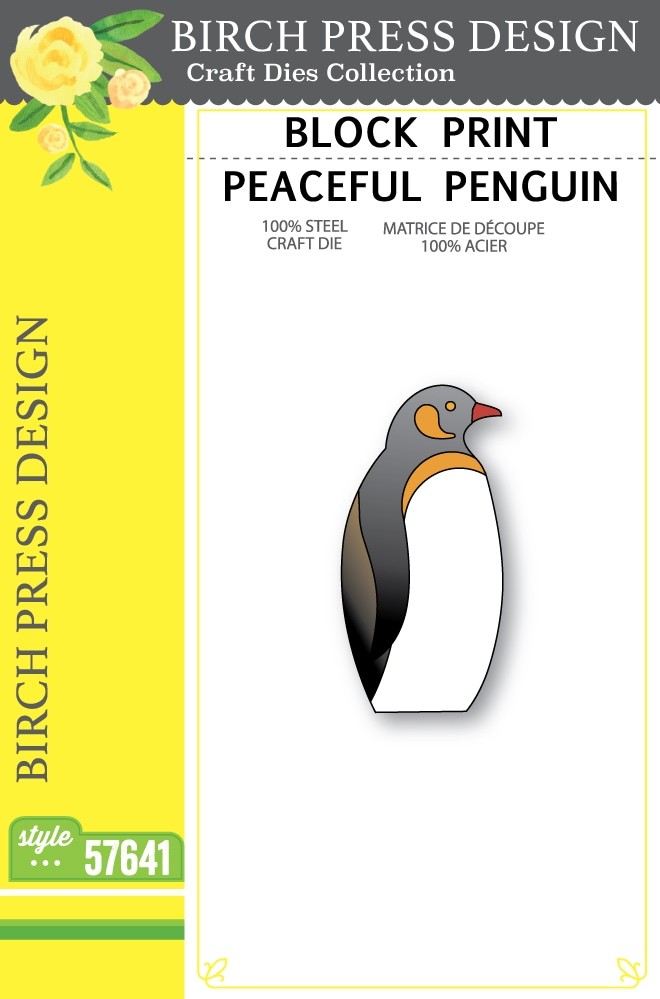
For my card today I used the Block Print Peaceful Penguin and Superb Penguin dies, as well as the Warm Wishes Dapper Script die set. These dies are from the winter release. I also used my favorite Wavy Hillside dies for the card. I started out by diecutting the pieces of my penguins.
I die cut the bodies from white, the beaks and second layer from a medium yellow (from the Memory Box Sunset 6×6 pad) and then a gray cardstock from my stash. I used Black Soot distress oxide ink on the yellow second layer and the gray top layer to darken them up, but still have some of the yellow and gray in each penguin. I used Fired Brick distress oxide ink on the beaks.
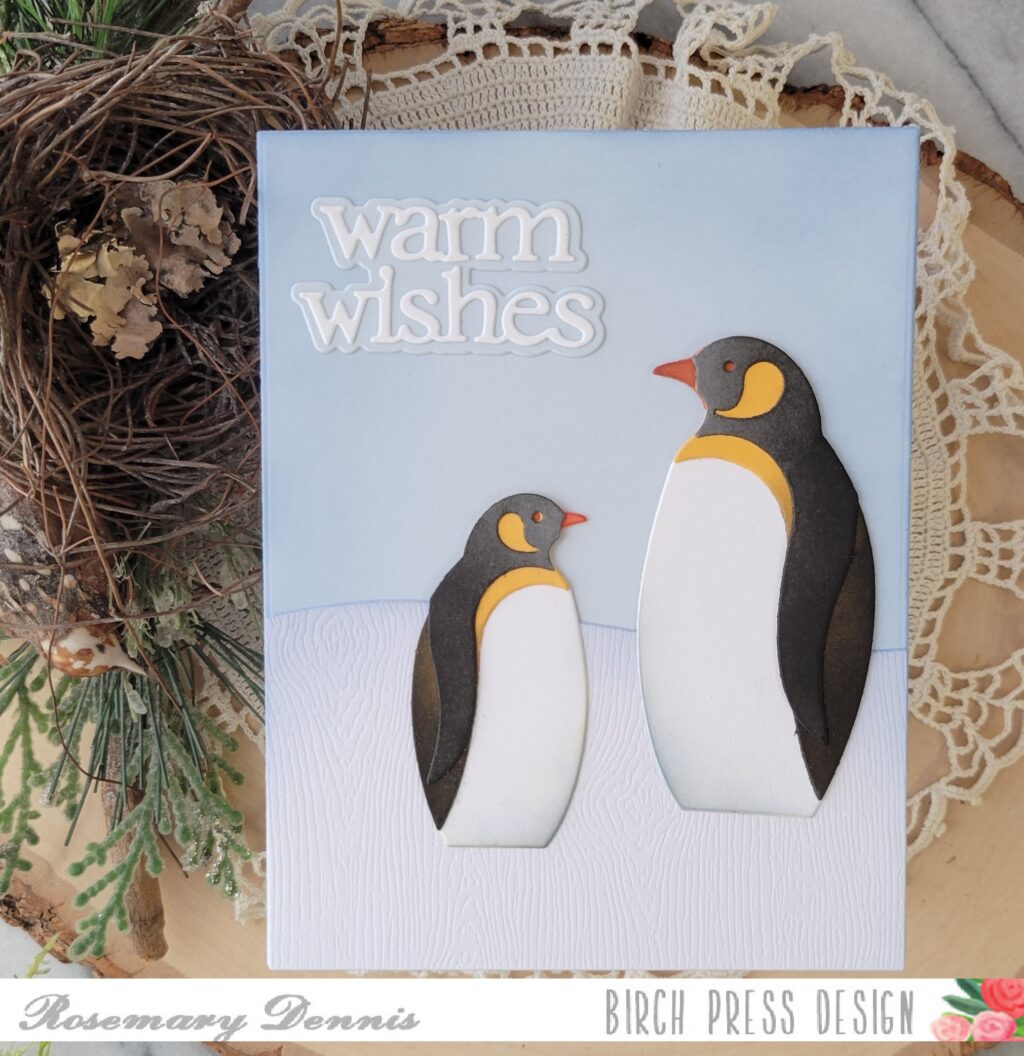
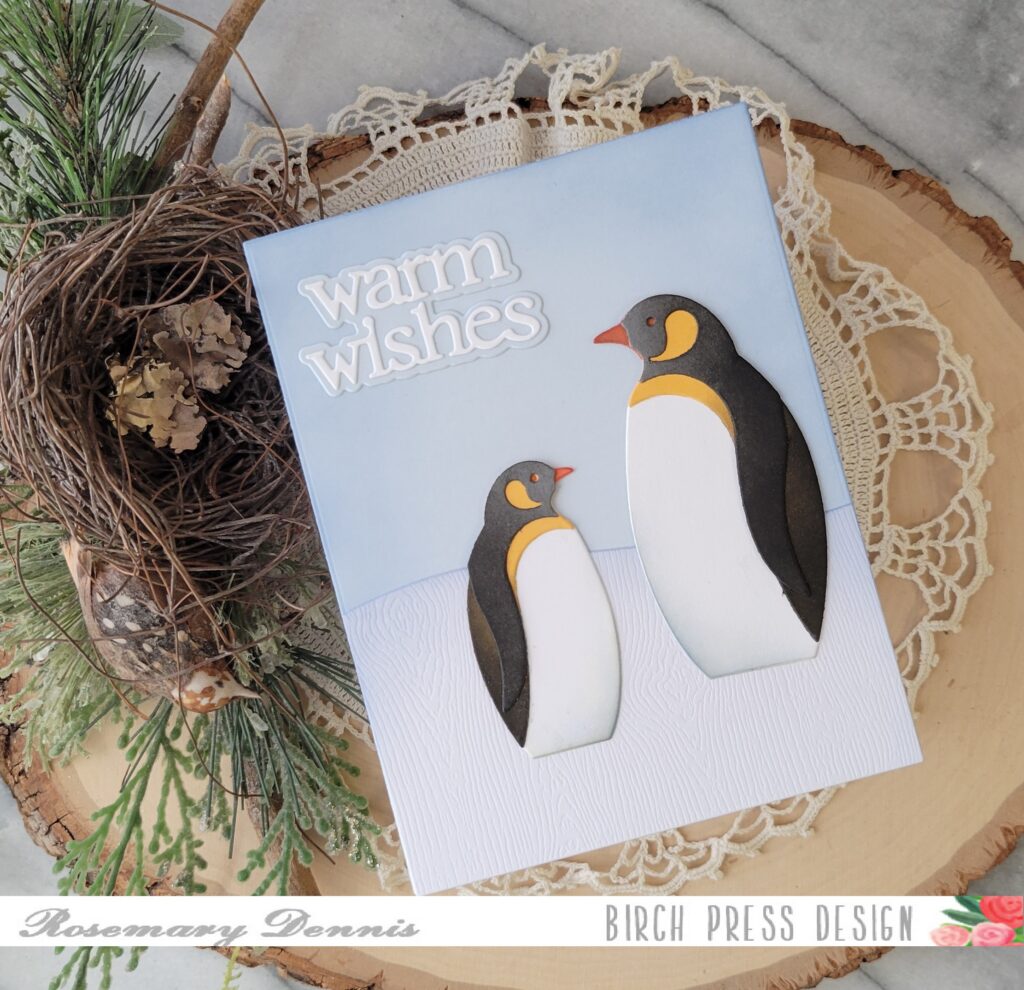
I let everything dry before adhering all the pieces with liquid adhesive. While the penguins were drying I die cut the wavy hill from Memory Box white woodgrain cardstock for some texture. A piece of light blue cardstock was die cut and then I did some light ink blending of a blue distress oxide ink around the edges. I don’t know what blue it is because I just used the residual ink on my blending brush for a soft look.
I added a little bit to the Wavy Hillside, as well. For the penguins I added a little bit of Pumice Stone distress oxide and then used the blue, again, over that. I layered the hillside onto the light blue panel with glue and then added my penguins, also with glue.
I finished off the card with the sentiment. I die cut the shadow layer from the same light blue cardstock as the background and the word layer from white cardstock. I adhered the words to the shadow layer with liquid adhesive and then adhere the sentiment to my card with liquid adhesive.
I hope you enjoyed today’s card. Have a wonderful day!
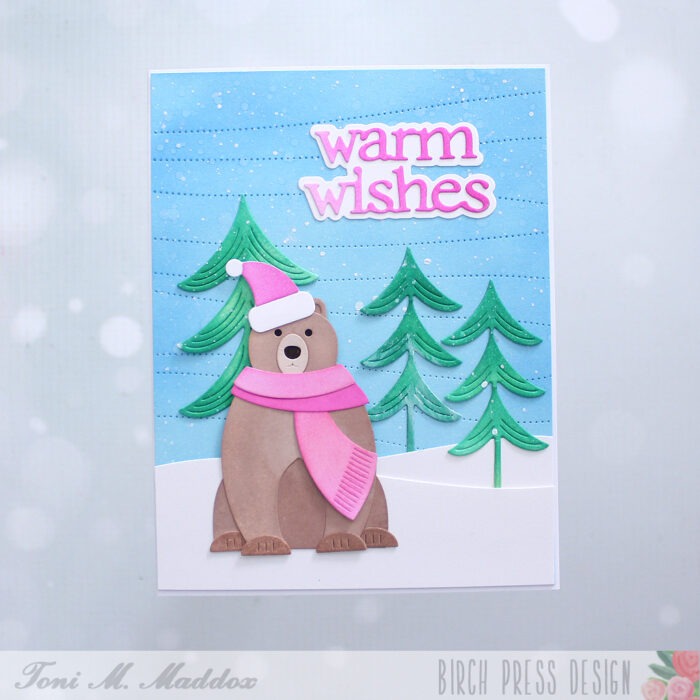
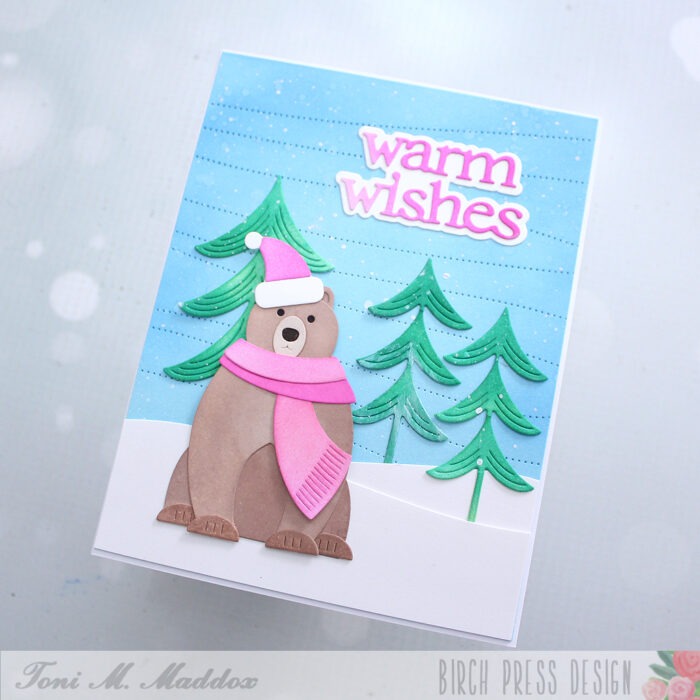
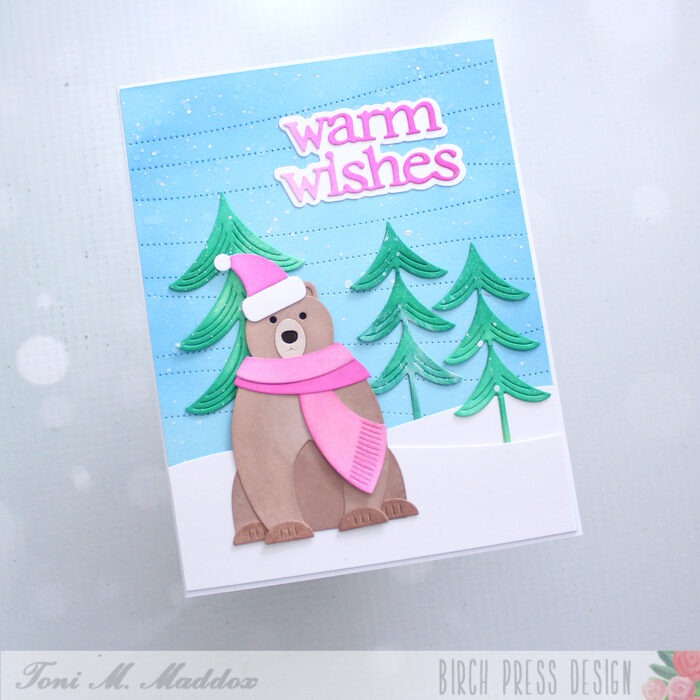
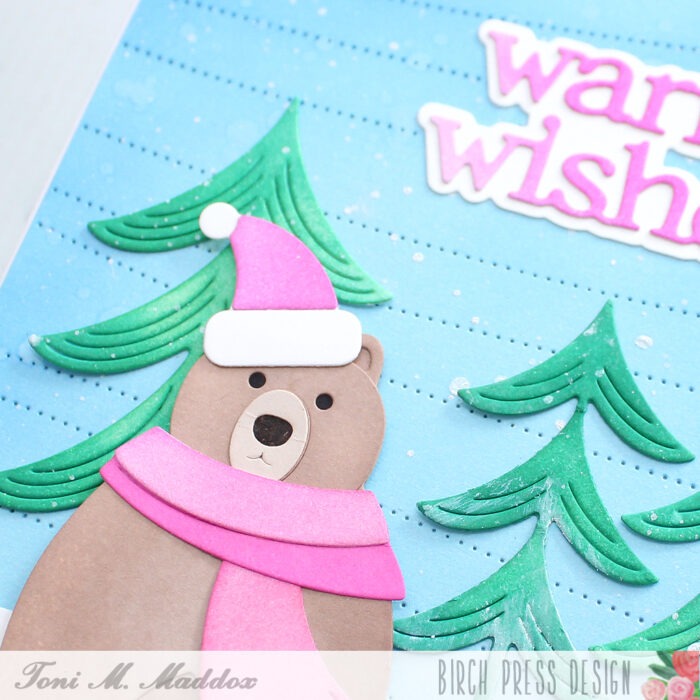
Are you staying cozy this season, my friends? Toni here and I’m loving the cold weather (from inside by the fire cuddling with my cat, of course). For today’s card, we have a winter scene.
First, the Pinpoint Contour Plate sponged in blue and spattered with water and Copic Opaque White reminds me of a blustery day.
On top of that I added a couple of Wavy Hillsides and Block Print Evergreen Trees.
But, the Block Print Polar Bear, disguised as a brown bear, is all ready for winter dressed warmly in his Block Print Hats and Scarves.
You know my love of pink so I had to match his winter accessories to the Warm Wishes Dapper Script sentiment.
Feel free to visit my blog, Frankie Helps Craft, for a full list of supplies used and to check out my other creations.
I hope you enjoyed today’s card and have a great rest of your week!
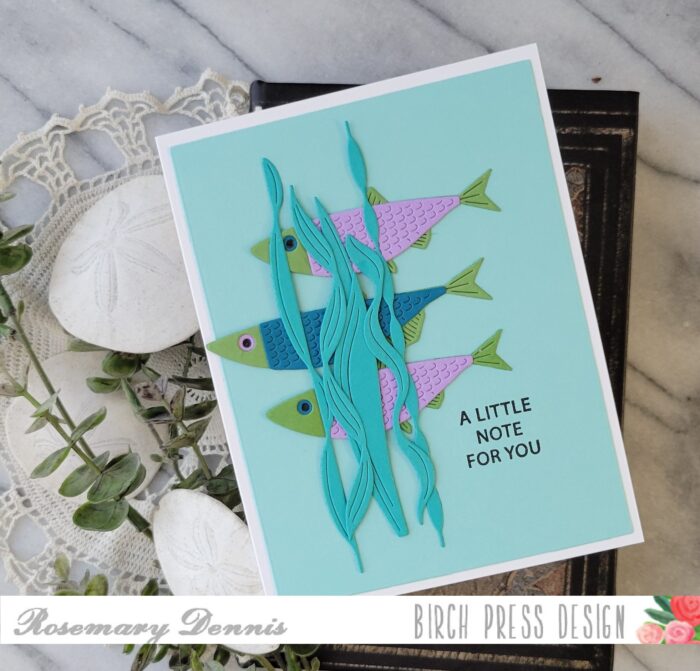
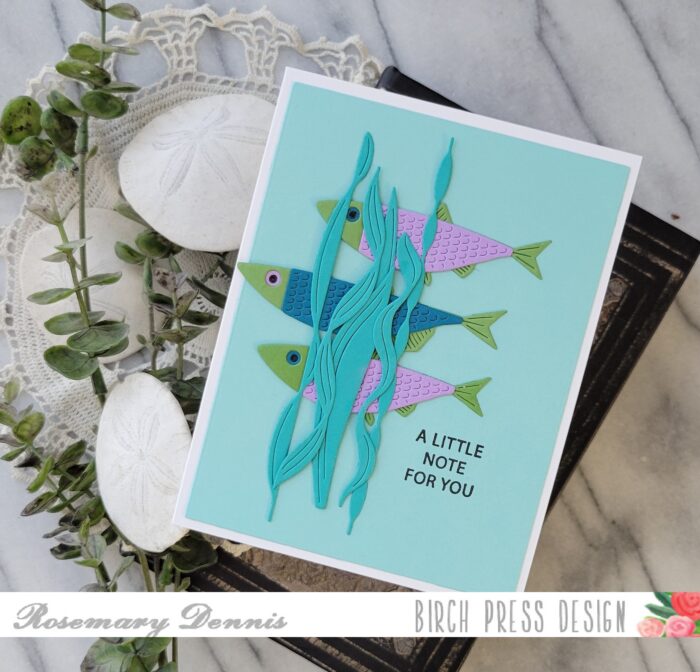
Hello everyone! Rosemary here on the blog today. Can’t believe it is already October! 2025 is definitely flying by, lol! I’m sharing a card today that I created with the fun Block Print Sardines and Sea Kelp and Mini Fish die sets. Let’s look at what I made.
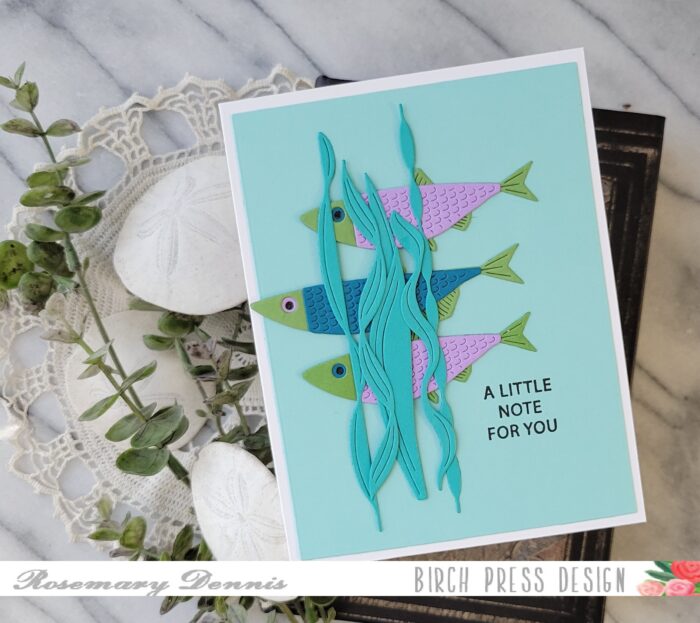
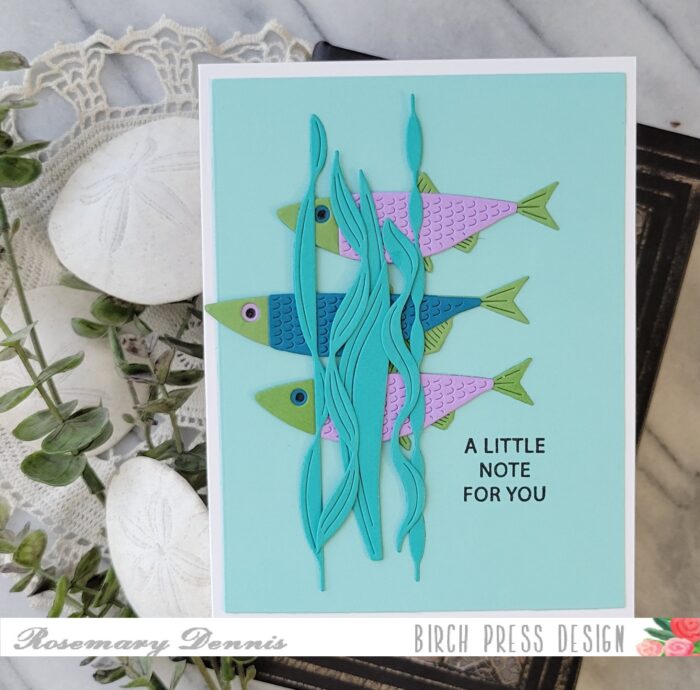
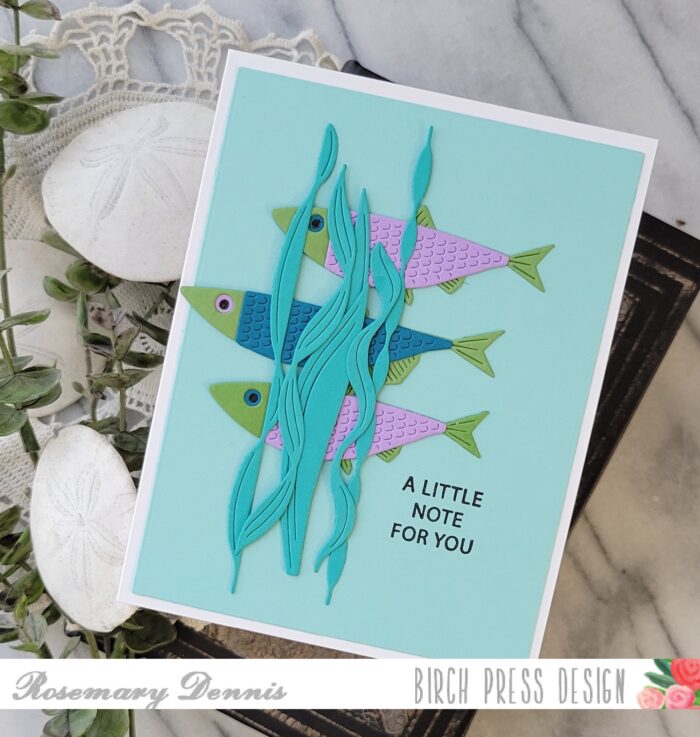
For this card I decided to go very clean and simple. I die cut the bodies of all the sardines from green cardstock and then die cut the body of the small sardine from purple cardstock and the larger sardine from a dark teal. There are two layers for the eye and so I swapped the colors using a purple layer for the teal fish and teal for the purple fish. The final eye layer was die cut from white cardstock and then colored with a dark gray (almost black) Copic marker.
I adhered all the layers using liquid adhesive and then set aside to dry. I used a rectangle die and light aqua cardstock to die cut a background. I used a medium aqua cardstock to die cut the kelp.
Then figured out my layout. I actually used a clean and simple sketch layout that I had saved for my starting point. I adhered the three fish to the background panel and then layered the kelp on top.
Once everything was dry I placed my panel in my stamping tool and stamped the sentiment from the Rainbow Days Lingo Notes stamp set. Like I said very clean and simple.
Well, that is it for me. I hope you enjoyed today’s card. Thanks for stopping by and have a great day.
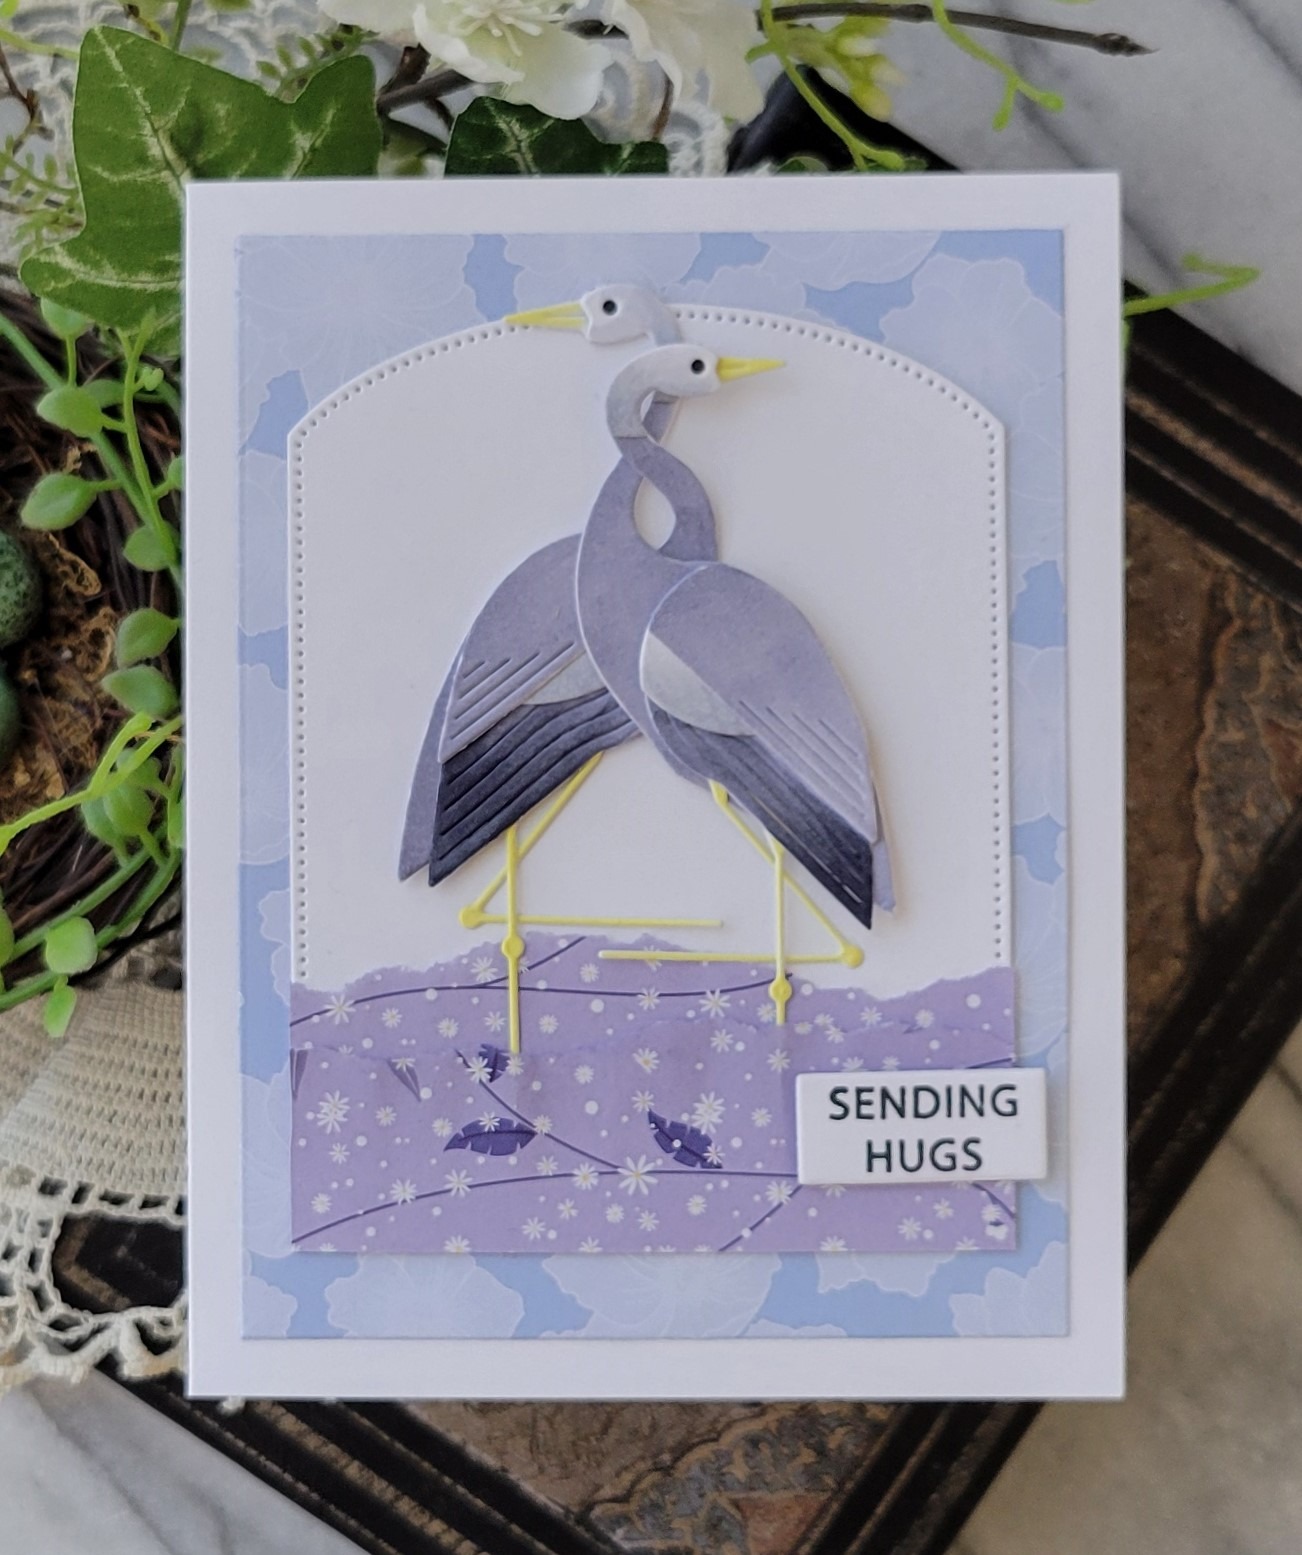
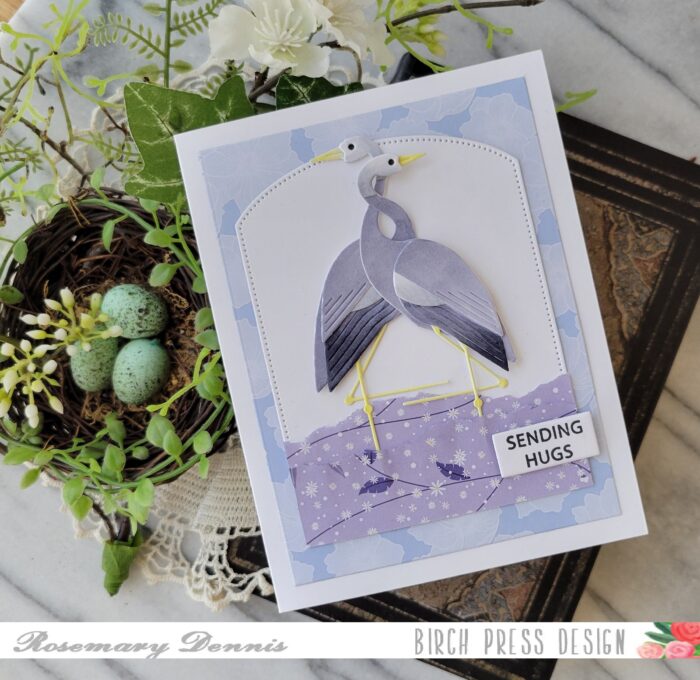
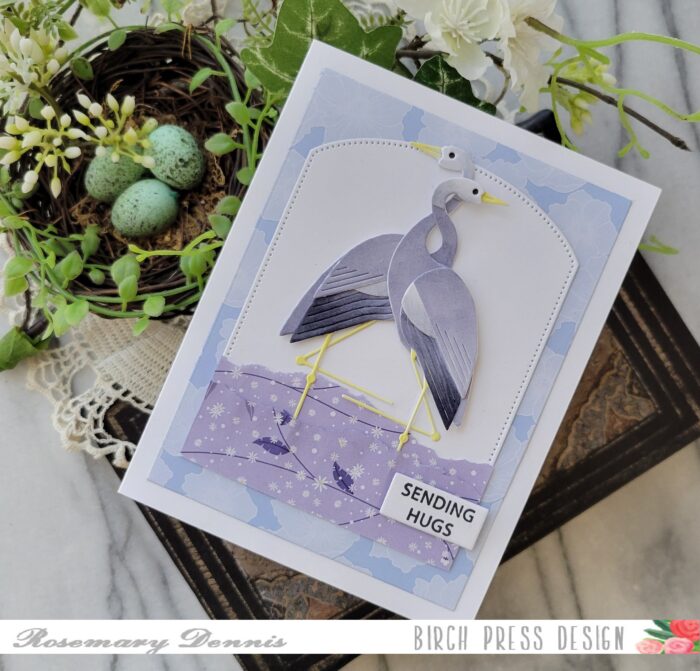
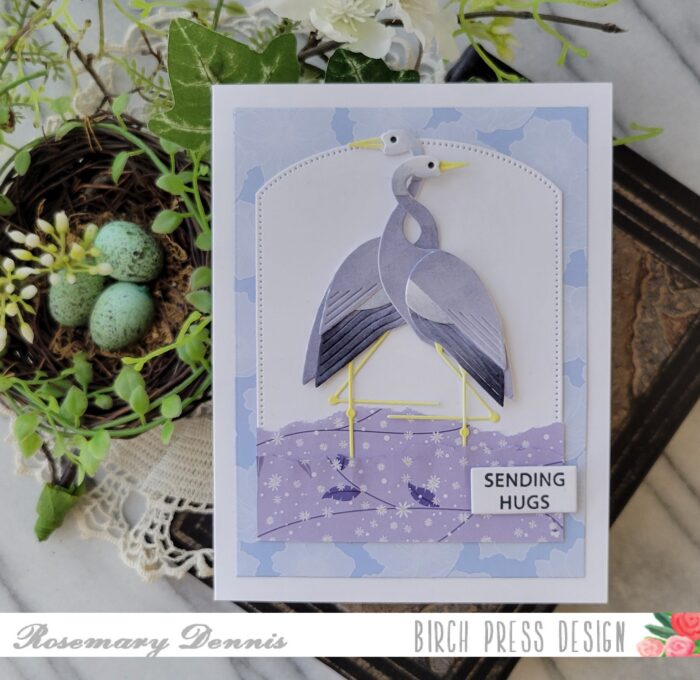
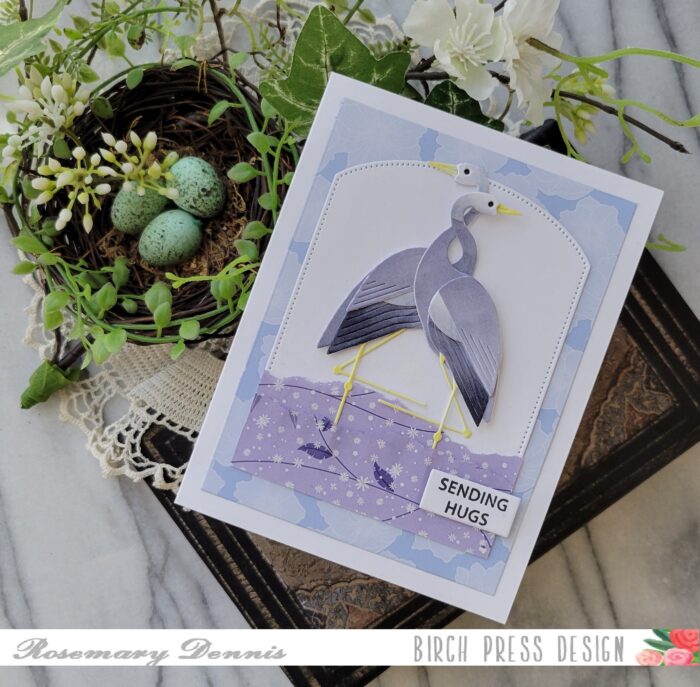
Hello everyone! Rosemary here on the blog today with a friendship style card made with the beautiful Block Print Standing Crane and Block Print Seaside Crane and patterned papers from the Memory Box Anemone Grove 6×6 pad. Let’s look at what I made.
I started my card by die cutting all the pieces of the cranes from white cardstock. Then I decided how I was going to color them. This time around I decided to use my Copic markers and went with a group of light blue violet markers for the body and feathers. A light yellow Copic was used for the legs and beak. I used a very dark gray marker for the eye. I let all the pieces dry and then adhered them together with liquid adhesive.
I wanted to create the look of the cranes standing in water, but decided I wanted to use torn edge patterned paper. I went through all my pads of Memory Box papers and found the Anemone Grove pad fit my design perfectly. I tore the strips from one piece and adhered them to a piece of white cardstock with liquid adhesive. I then die cut the piece with a Memory Box capped pierced die.
I did make sure to leave an area without glue so I could slide the cranes’ legs in between the layers. I used liquid adhesive and thin foam square to adhere the cranes to the panel. Another flip through the Anemone Grove pad and I found a piece that gave the appearance of clouds in the background. That was die cut with a Memory Box rectangle die and adhered to a white cardstock base. I adhered the main panel on top and then finished with the sentiment from the Birch Press Design Rainbow Days stamp set.
Well, that’s it for me. I hope you enjoyed today’s card. Thanks for stopping by and have a wonderful day.
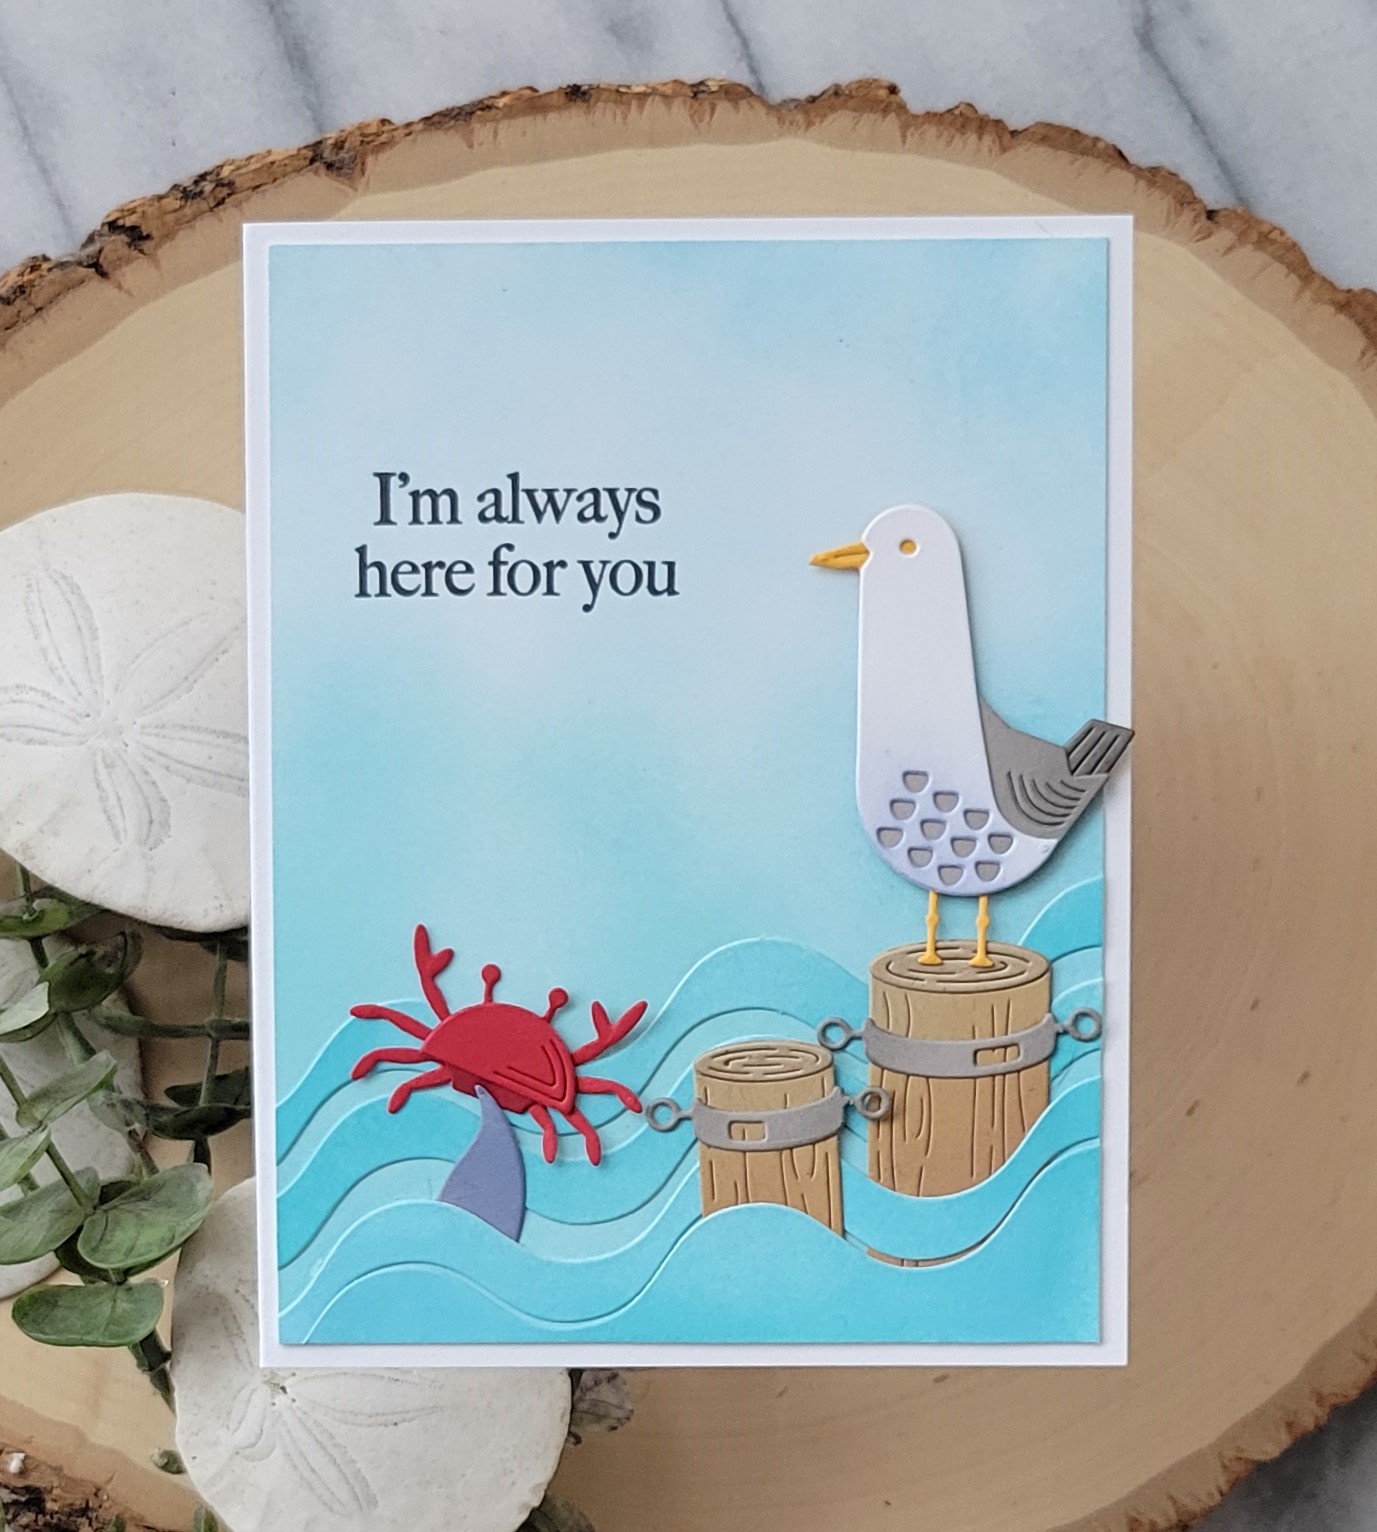
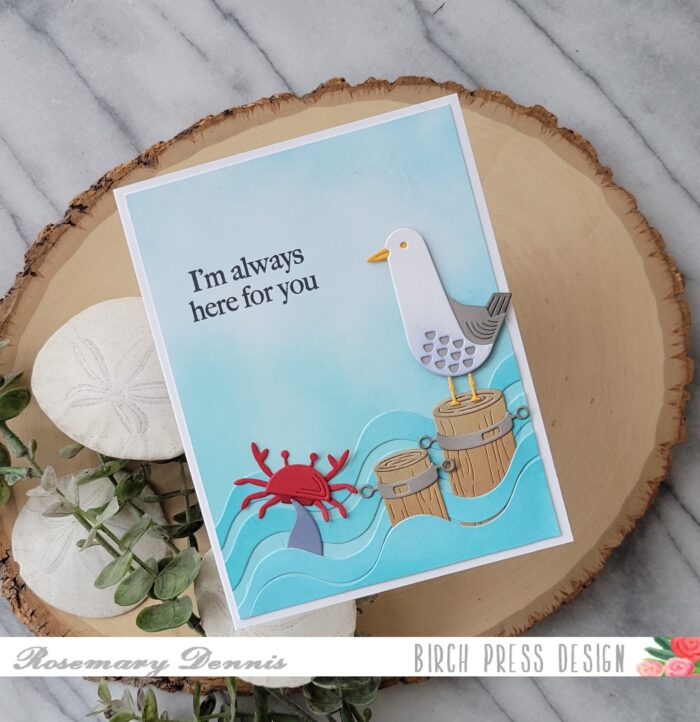
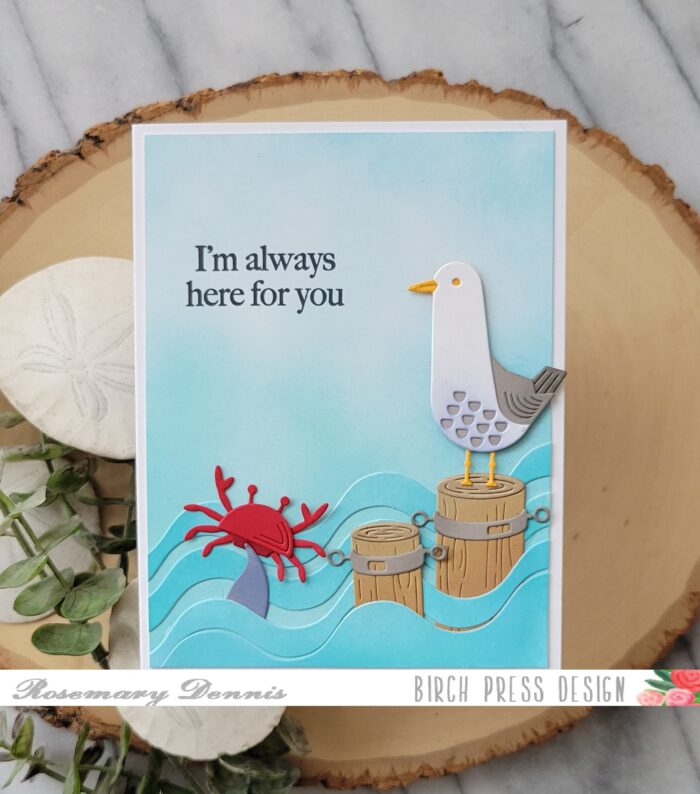
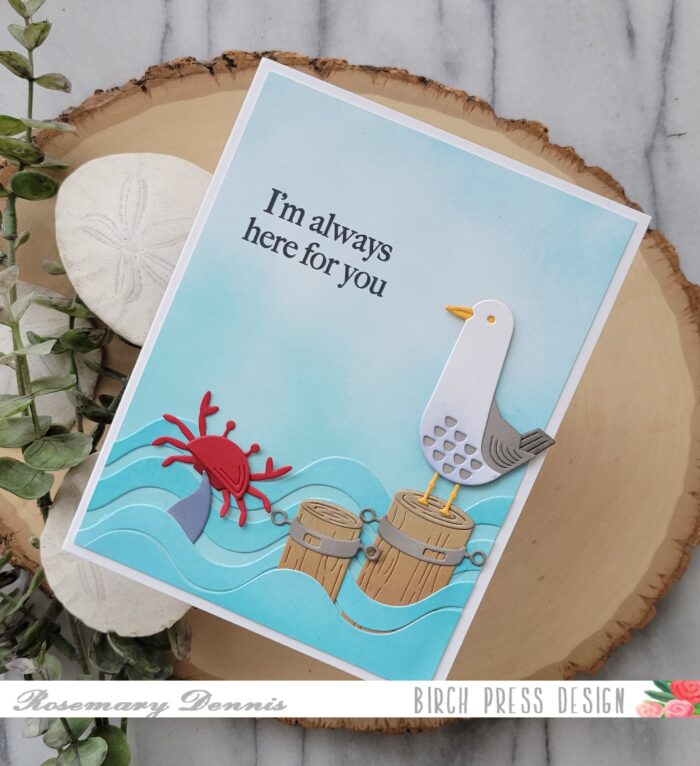
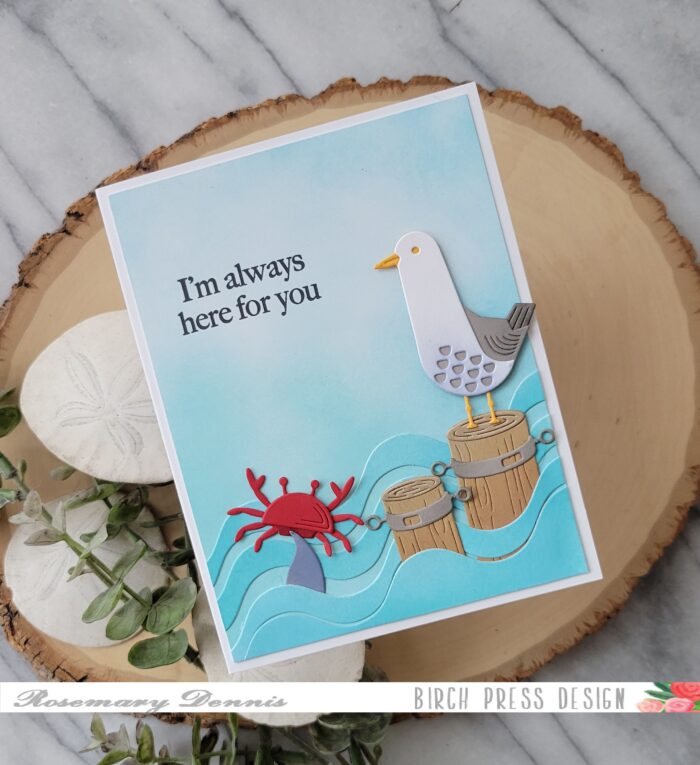
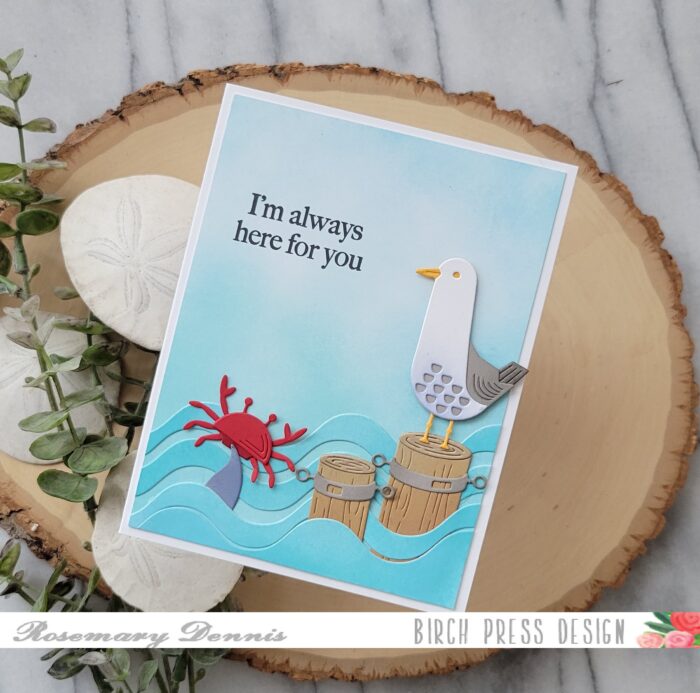
Happy end of August everyone! Rosemary here on the blog today with a card inspired by one of my favorite movies: Finding Nemo! Let’s take a look at what I created.
One of my favorite scenes in Finding Nemo is at the end of the movie when Dorie is asking if the crabs have seen Marlin and they ignore her so she grabs one and sticks it up above the waves to where a group of seagulls are sitting on a buoy. When I saw the new Block Print Dancing Crabs die set I immediately knew I wanted to recreate that scene. I used the new Waterfront Pilings dies, Block Print Happy Seaqull and Corner Waves dies to complete the card.
I started by inking up my panel with Tumbled Glass distress oxide ink. I used Tumbled Glass and Broken China on a piece of white cardstock that I die cut the corner waves from so there would be some contrast between the “waves” and the ocean/sky. The main panel was die cut to fit a card front and the sentiment from an Open Studio stamp set was stamped in black ink.
The I die cut the rest of the pieces that I needed to complete the card. I die cut the seagull from white, gray and yellow cardstock. A little bit of gray ink was added to the seagull’s tummy and then everything was adhered together with liquid adhesive and set aside to dry. It is hard to tell, but I did use two different red cardstocks for my little crab. There are two crabs in the set and I used the smallest one for my card. The pilings were die cut from kraft cardstock and then some brown ink was blended on to darken the bases. The tops were left un-inked. The bands around the pilings were die cut from gray cardstock and also got a little bit of inking.
The fin is from the new Block Print Majestic Whale. I die cut it from gray cardstock and then blended on blue in to change the color. Now it was time to assemble the card. I used liquid adhesive to attach everything. It was a bit tricky getting the “waves and the pilings adhered as I wanted them to be. I attached the bottom “wave” and then placed the pilings behind it, tilting the smaller piling. Then I added the second wave, tucking the fin into that one and working it behind the smaller piling. The final two waves were added behind the pilings and then the pilings were fully glued in place. I finished by attaching the seagull and the little crab.
I absolutely love how this card turned out! I was a little tricky, but so worth the effort. Let me know what you think and if it reminds you of Finding Nemo! Thanks for stopping by and have a wonderful day!
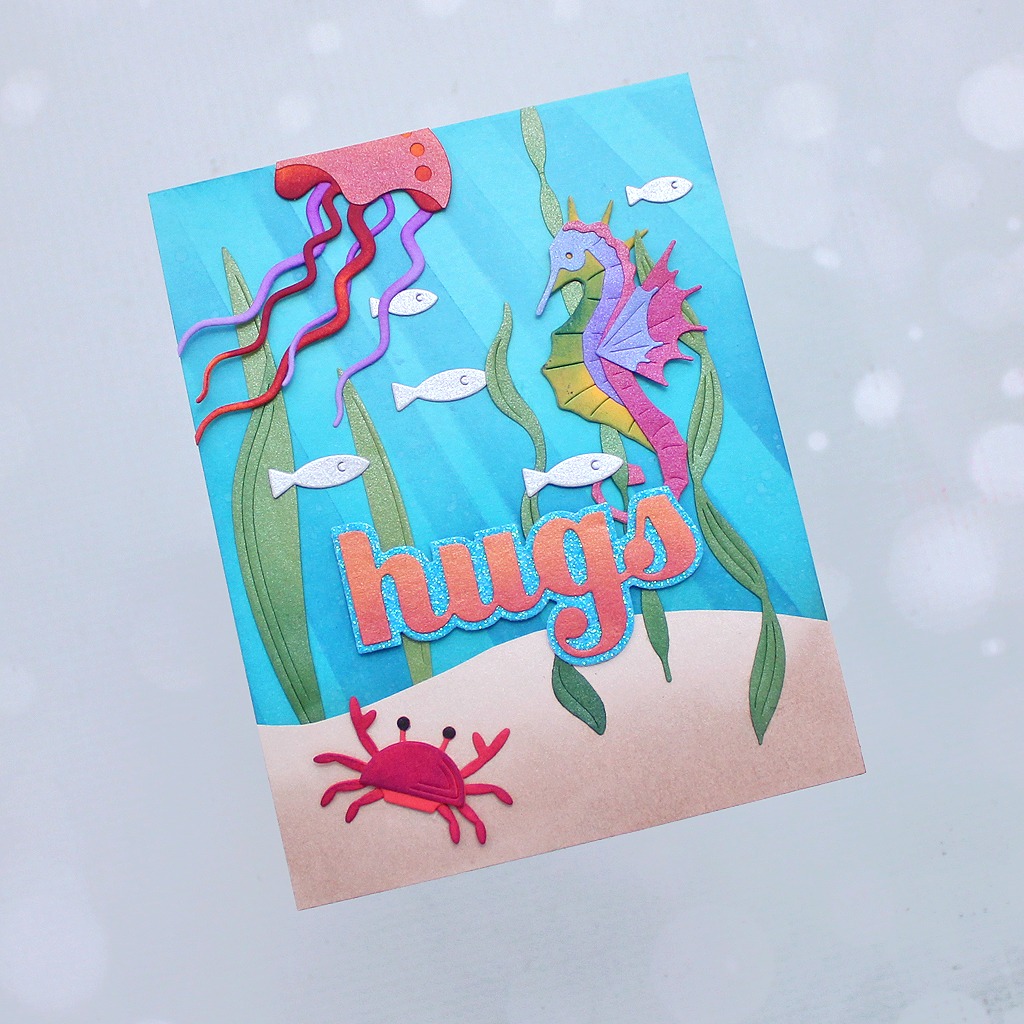
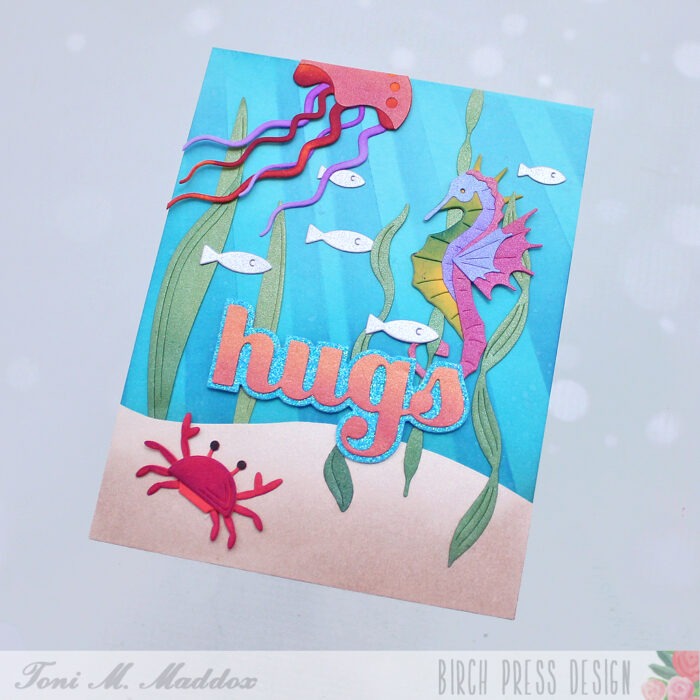
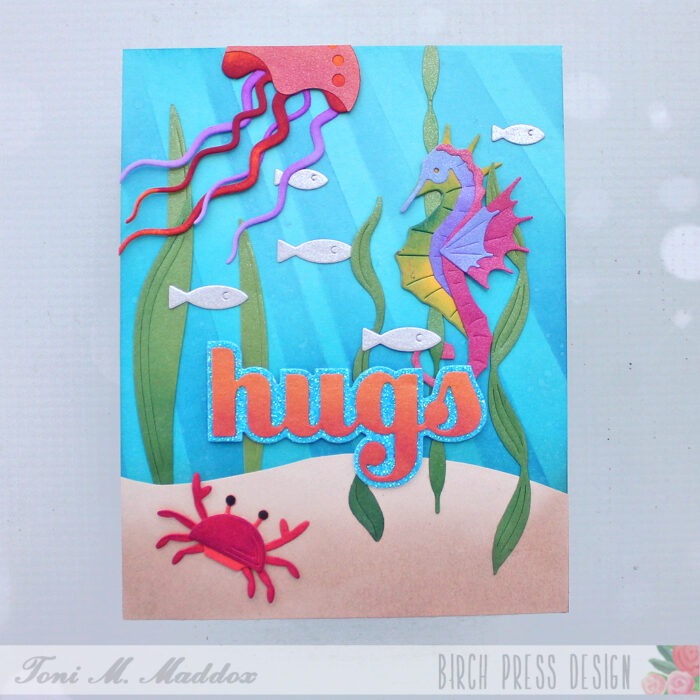
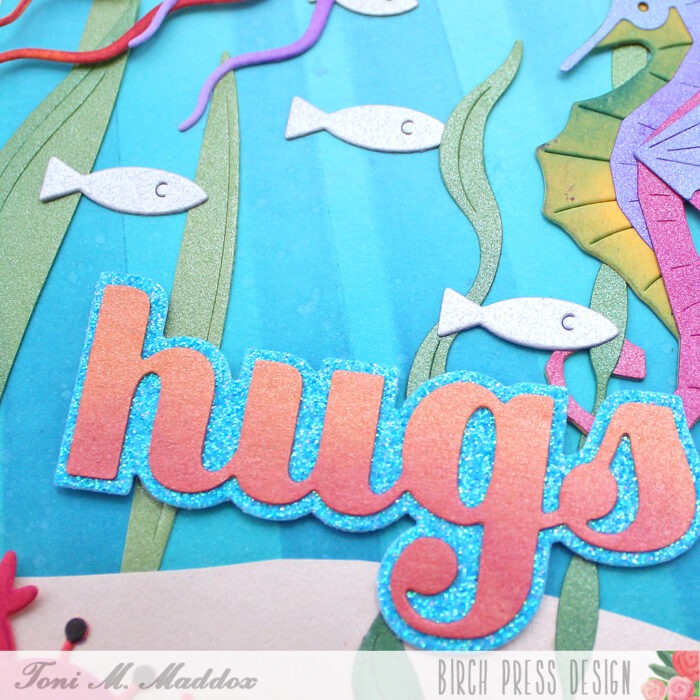
Hello, everyone! This underwater scene was so fun to create. I love seahorses. And that jellyfish–look at it!
My first step was to sponge the blue card base with Catherine Pooler inks and one layer of the two-part Light Ray Stencil. I spattered this with water and set aside.
Next I fussy cut the sand layer using a piece of scrap kraft cardstock and sponged it with CP Sand Castle ink.
I cut a few of the Block Print Sea Kelp & Mini Fish from a shimmery green and silver cardstock. I sponged the Sea Kelp with CP ink for a bit of shading.
I diecut the Block Print Proud Seahorse, Block Print Floating Jellyfish, and Block Print Dancing Crabs from a few Memory Box cardstocks with shimmery cardstock scraps for highlights.
I sponged the cardstocks, including the Sugar Script Big Hugs sentiment, with CP inks. I assembled the final scene, tucking the creatures in among the greenery. So cute!
Do visit my blog, Frankie Helps Craft, for a full list of ingredients and to check out my other projects.
I hope you enjoyed today’s card and have a great rest of your week!
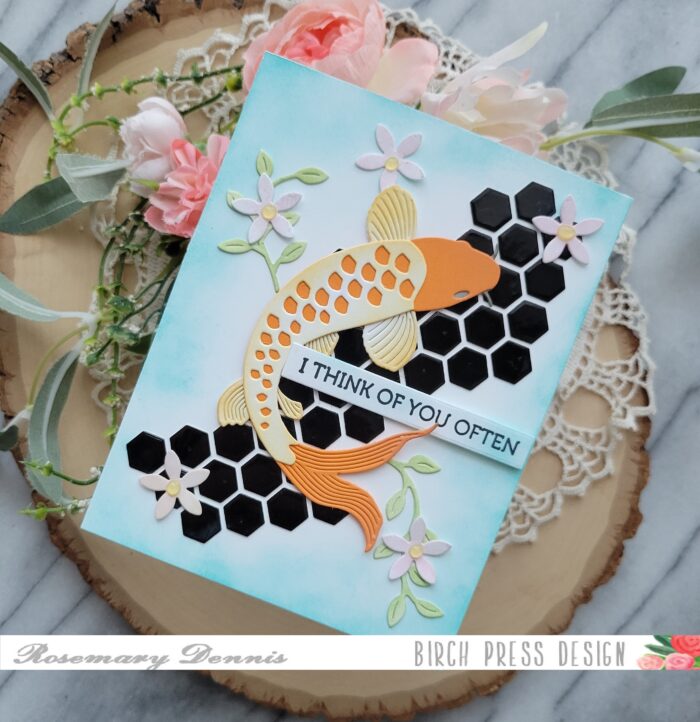
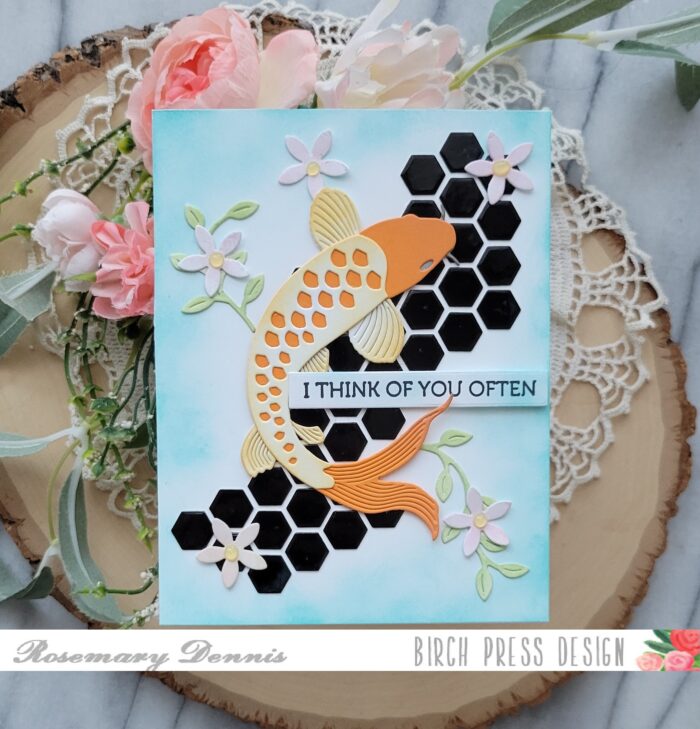
Hello everyone! Rosemary here on the blog today sharing a card I made using the gorgeous new Elegant Koi die, as well as the new Honeycomb Cut Out die and the older Floral Cross layering die set. Let’s have a look at what I made.
When I first saw the Elegant Koi die set (and the Koi Duo die set) I almost immediately thought of Kubota Garden located in the Rainier Beach neighborhood of Seattle. The garden is spectacular and has several ponds with numerous koi slowly swimming about. It is fun and relaxing to watch them swim by.
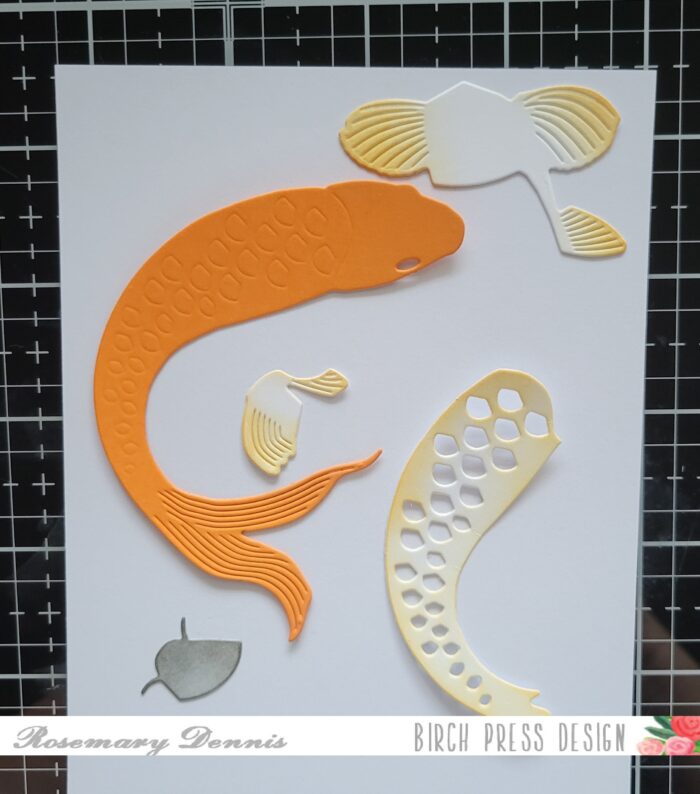
I started by die cutting my koi from cardstock. I die cut the main body of the koi from orange cardstock from the Memory Box Sunrise cardstock pack. The rest of the koi was die cut from off white and gray. I then added some ink to the gray and off white pieces to give them more depth. I used what distress oxide ink was left on my blending brush to add the color.
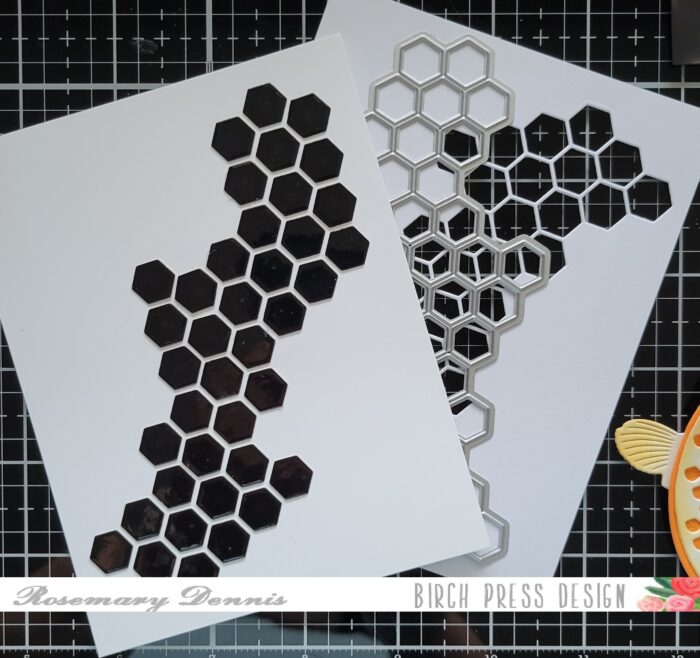
I set the piece aside to dry. Because I wanted my elegant koi to have an elegant pond to be swimming around in I decided to use the Honeycomb Cut Out die to create some tiles for the bottom of my pond. I used Memory Box glossy black cardstock for the tiles. I also die cut a template with the Honeycomb die so that I could layout and adhered my tile background perfectly.
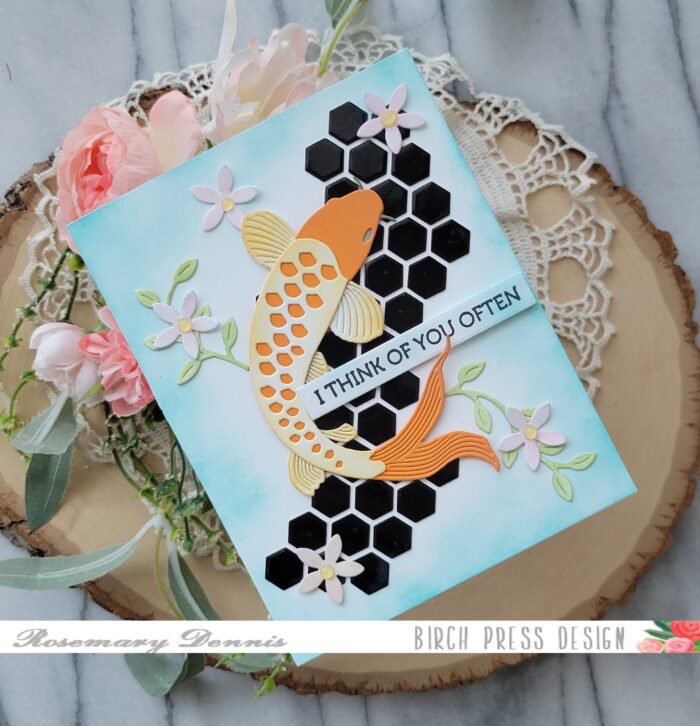
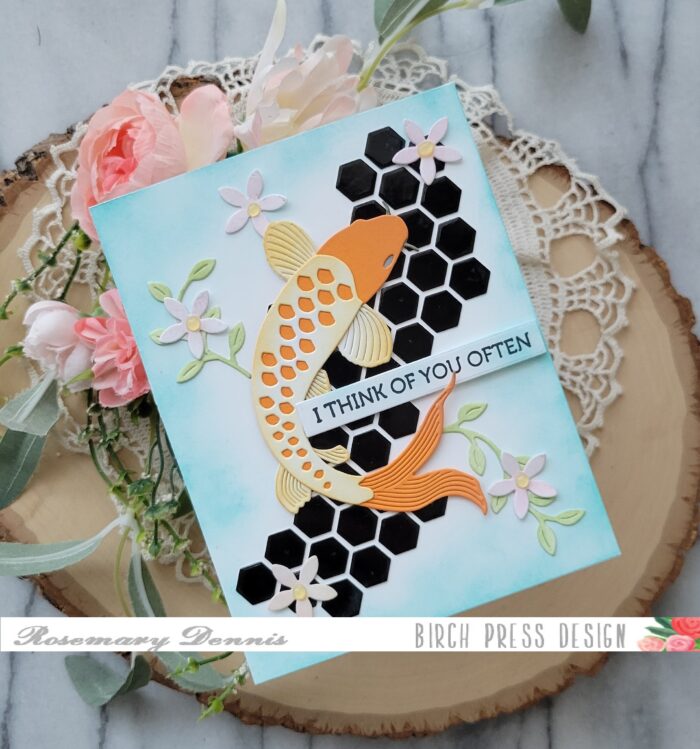
Once I had the background created I added some light inking using distress oxide inks in Tumbled Glass and Salty Ocean to the panel. I kept the color mainly at the edges, but did add some in the center of the panel. Once done with the ink blending I made sure to wipe off the ink that got on my black tiles.
To provide even more of a look of an elegant pond I used the leafy stems and flowers from the Floral Cross layering die set to create some waterlily type flowers. Light inking was used on these pieces as well. Now it was time to complete the pond. I adhered everything using liquid adhesive.
My sentiment is from the Crystal Lingo stamp set which is unfortunately no longer available. I did ink up the sentiment strip with the same inks used for the background so it blended in a bit more. I finished with small drop of Nuve Jewel drops in Limoncello.
I hope you enjoyed today’s card. Thanks for stopping by and have a wonderful day!