Category: Glitter

  • Butterfly Congratulations | By Natasha Vacca

    Butterfly Congratulations | By Natasha Vacca

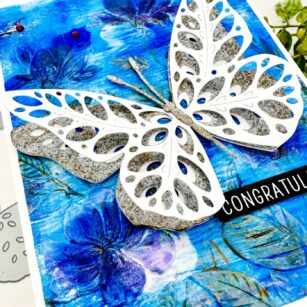
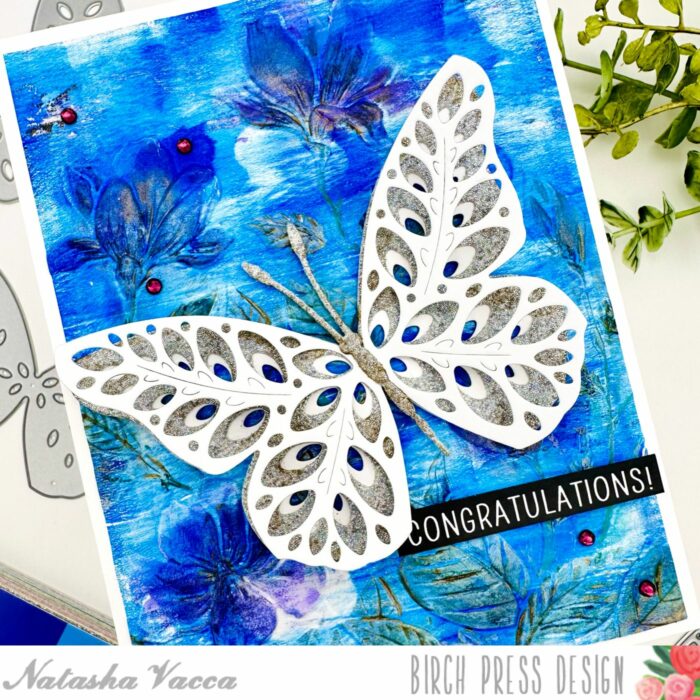
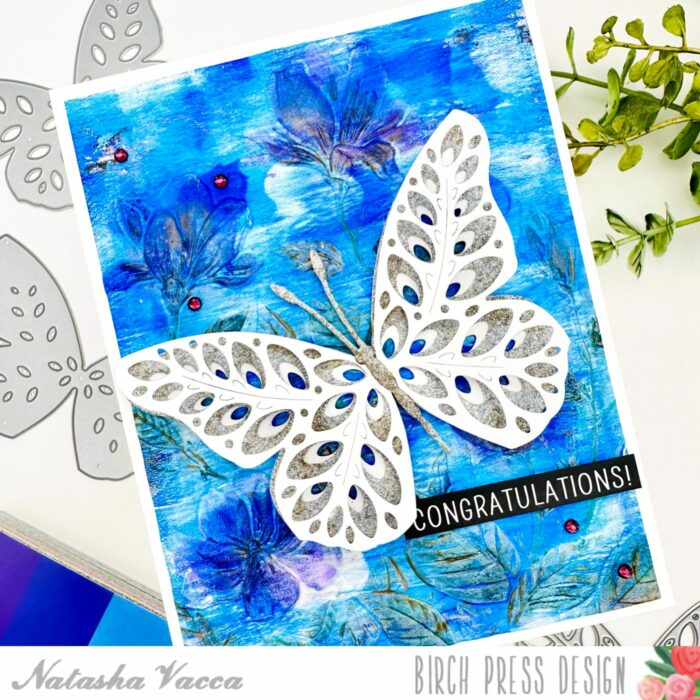
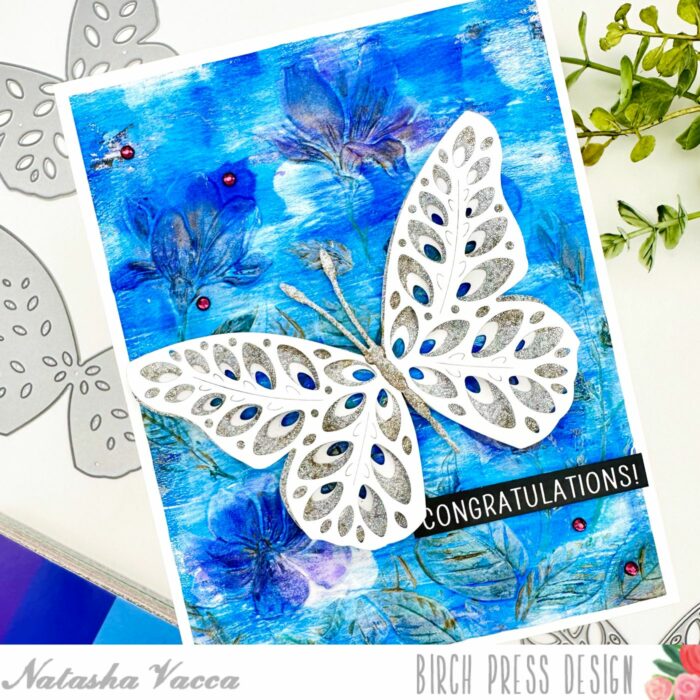
    Hello Birch Press friends! I am excited to be back up on the blog today sharing a card using the beautiful Eloquent Butterfly layering die set! So let’s get started!

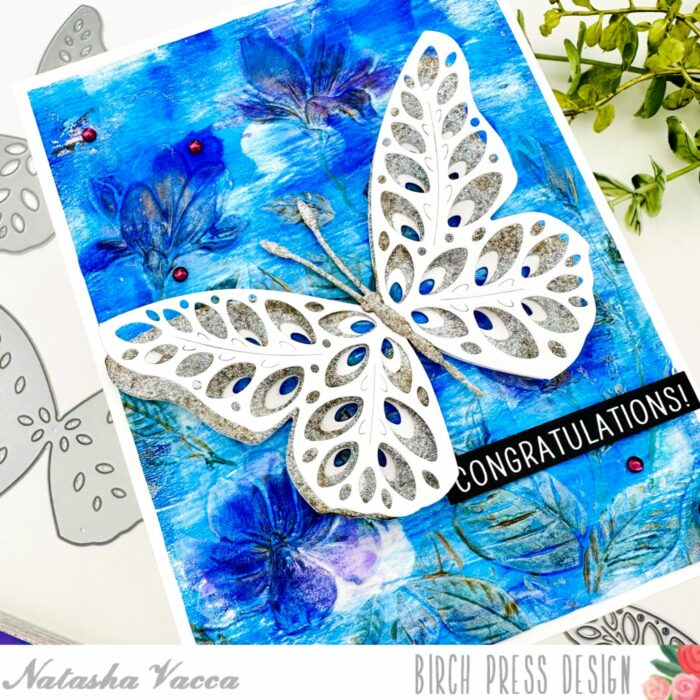
    I started by die cutting Layer A and C using white cardstock from the Eloquent Butterfly layering die set. I die cut Layer B using the Memory Box Glitzy Gltter Pad using a silver cardstock from the pad. I also die cut the antennae from the Butterfly Basics die set using the same silver cardstock. I wanted to distress the glitter cardstock a bit and added a distressed gold paper glaze to areas of silver glitter cardstock. I then adhered the layers of the butterfly together using liquid glue.

    Next I started to work on the background for my card using the Marvelous Magnolia 3D embossing folder from Memory Box. I dry embossed a gelli print from my stash. Once the florals were embossed I used some oil pastels on the flowers, leaves, and stems to add color to the embossed background.

    I also added the same paper glaze from the butterfly onto areas of the leaves. I allowed the panel to completely dry, then trimmed the panel using my paper trimmer. I then adhered the floral background onto an A2 card panel.

    Next I adhered the butterfly using liquid glue. I chose a sentiment from my stash to complete my card. I added a few purple gemstones from the Autumn Fairy Jewels collection. I had fun creating today’s card and I will be back soon!


    Supplies


    Supplies


  • Smooshed Ornament | by Toni M Maddox

    Smooshed Ornament | by Toni M Maddox

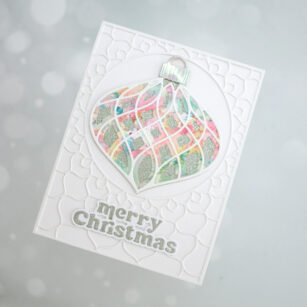
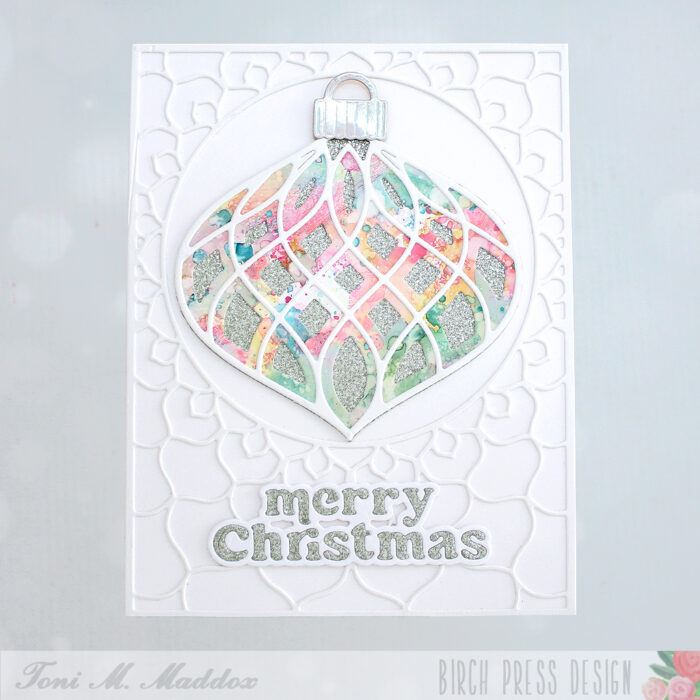
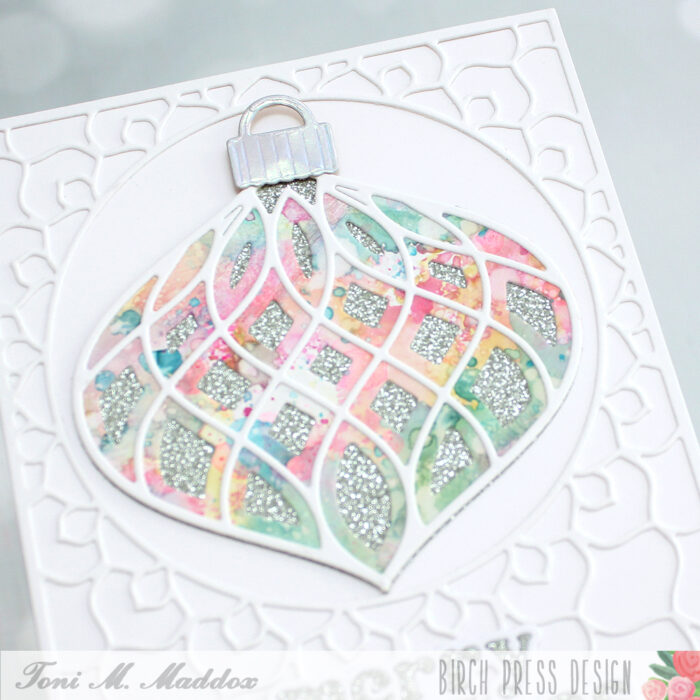
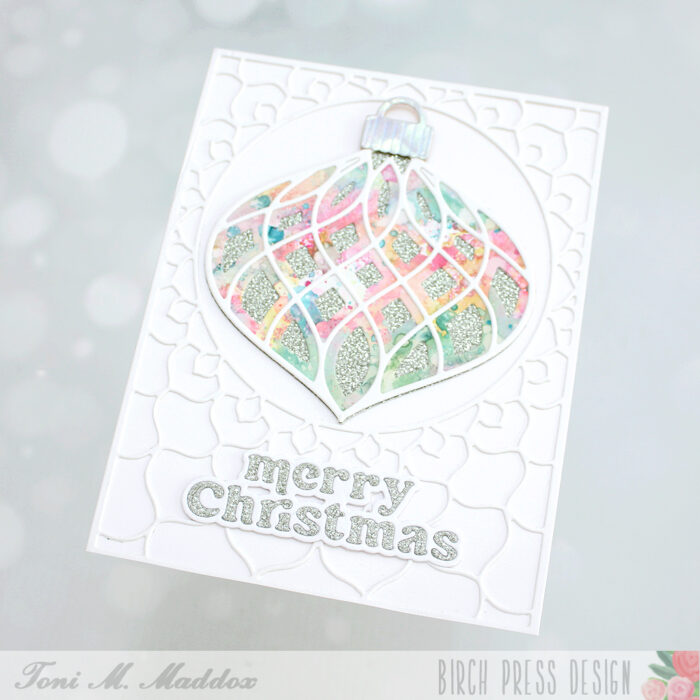
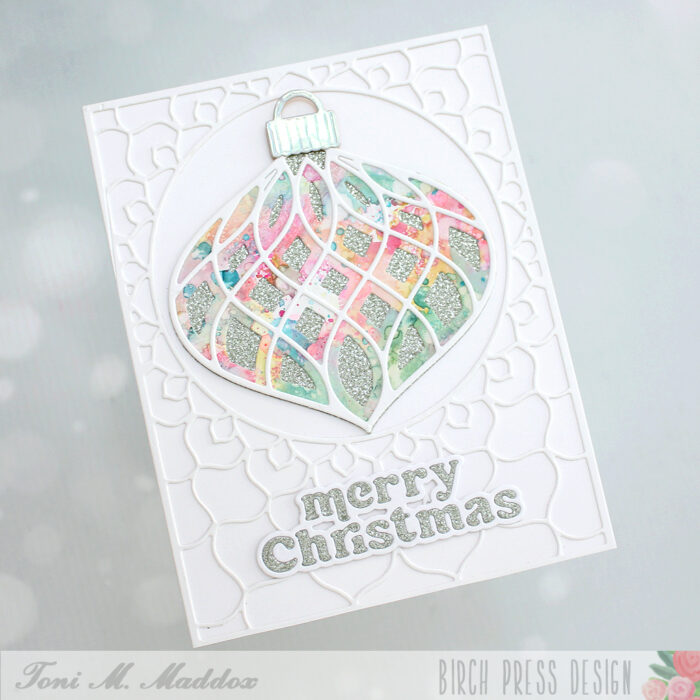
    Hello, Birch Press fans! Toni here with you today with a holiday card featuring the Revello Ornament Layering Dies. I’m a huge fan of Birch Press ornament dies and was thrilled to work with this one.

    This set is the 3 layering dies only. If you want a solid base for the ornament you can pair it with the Ornament Basics die set like I did or fussy cut one for yourself. Ornament hangers are also included or you can find a fancy scored one in the Radiant Ornament set.

    The ink-smooshed panel was made using Distress Oxide Picked Raspberry, Mustard Seed, Cracked Pistaschio, and Peacock Feathers. I used two of the three layers (A and C) so that more of my smooshed panel would show.

    I used a glitter cardstock from my stash for the bottom layer of the ornament as well as for the Merry Christmas letters. I then adhered the lot onto Epiphany Layer A mounted on the card base.

    I hope you enjoyed today’s card and have a great rest of your week!

    Supplies

  • Christmas Ornament | by Rosemary

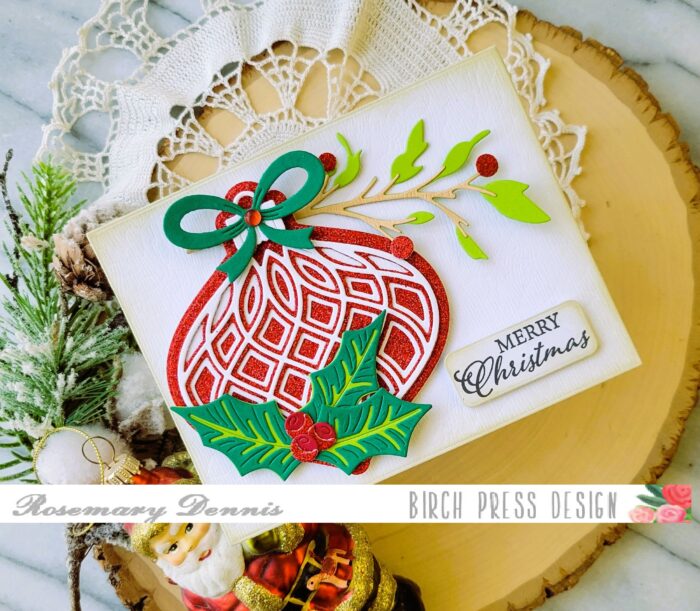
    Christmas Ornament | by Rosemary

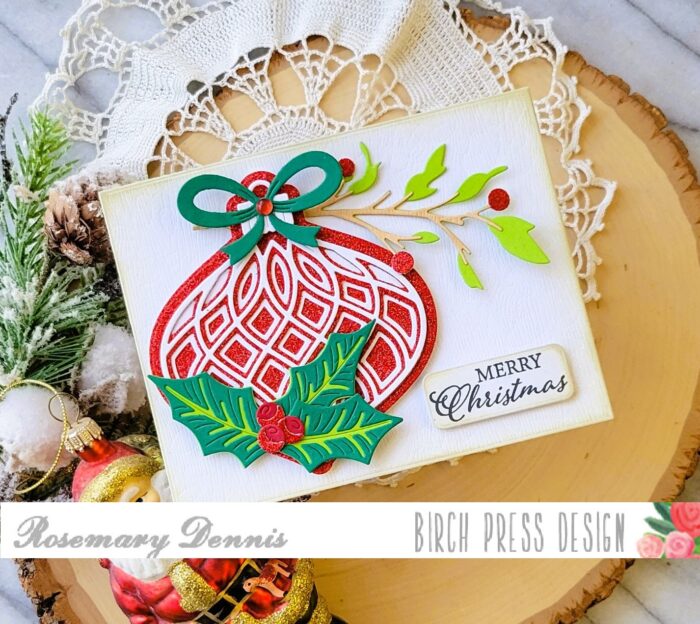
    Hello everyone! Rosemary here on the blog today sharing a card that I had a lot of fun creating using some new and old Birch Press Design products. Take a look at what I created.

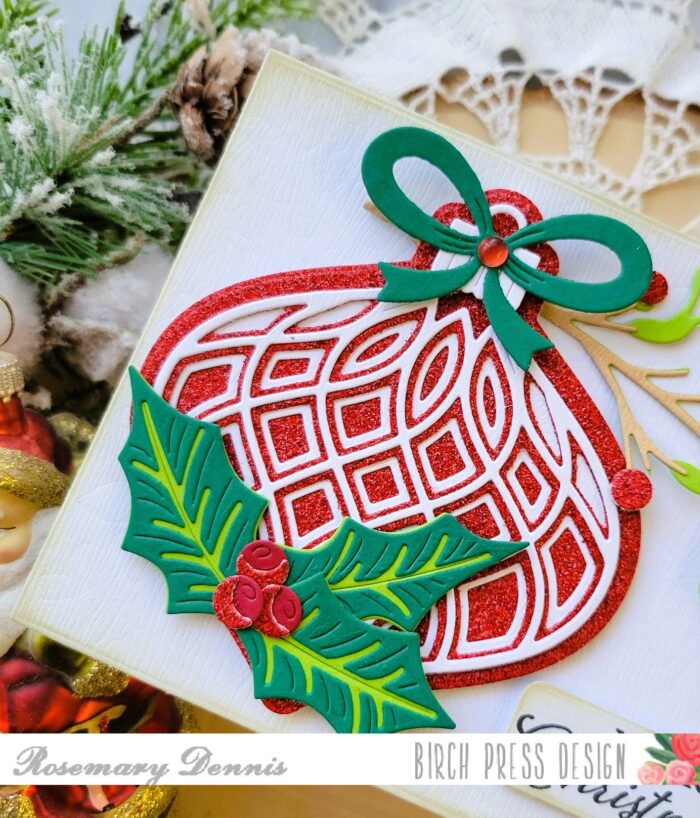
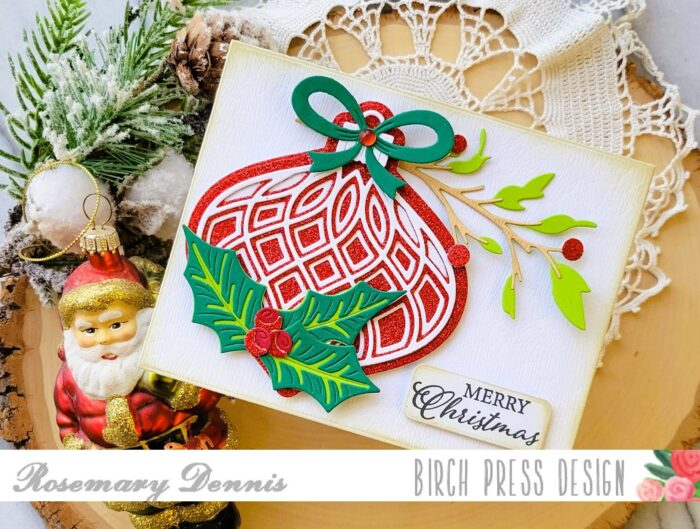
    I started off my card by creating my ornament. I used the new Revello Ornament Layer dies to cut my layers from Memory Box Glitzy Glitter cardstock in red and white cardstock. I used the layering ornament from the Christmas Ornament Pop Up Easel die set to die cut the backer from additional red glitter cardstock. I adhered all the pieces with liquid adhesive and then placed an acrylic block on top while it dried. I die cut the bow from green cardstock and the ornament top from white and adhered those with liquid adhesive, as well.

    The I set about creating my holly and berry cluster using the new Jolly Holly Contour Layers die set. As I die cut the two green cardstocks I used I wasn’t sure I would like how they looked layered together, but I really like the contrast that was created. I die cut the berries from red cardstock and the top layer from the same red glitter cardstock. I layered everything with liquid glue and set aside to dry.

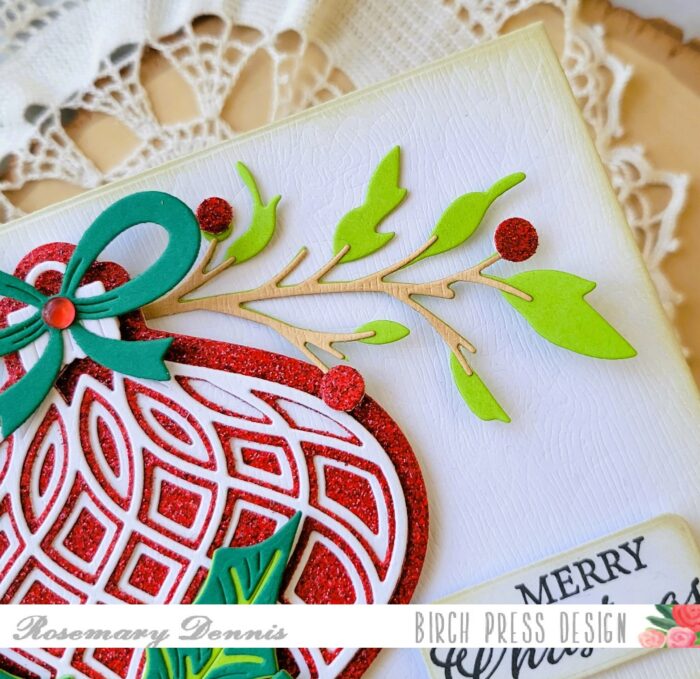
    For the background panel I decided to die cut some white woodgrain cardstock with a Memory Box Rectangle Frames die. I wanted a little more texture in the panel so I used the Layer A from the Herbarium Plate layering set to emboss the panel. The look is very subtle, but I like how it turned out. I then inked up the edges of the panel with Old Paper distress ink. I tried to capture the additional texture that was added in the photo below. If you look at the top corner you can see the embossing.

    I needed a branch for my ornament to hang from so I used the leafy branch from the Hillside Branch and Bramble Contour Layers die set. I die cut the branch from kraft woodgrain cardstock and the leaves from the same light green cardstock I used for the holly and the berries from the red glitter cardstock. I layered up everything and then got to building up my card. I finished with a sentiment from the new Glad Tidings stamp set. I stamped the sentiment with black in on a piece of the white woodgrain cardstock that I flipped to the smooth side, die cut the piece and then inked the edges with Old Paper distress ink. I adhered the branch with liquid adhesive and then popped up the ornament and sentiment with foam tape.

    I hope my card inspires you to pull out your Birch Press Design Christmas/holiday products and create some cards! Thanks for stopping by and have a lovely day.

    Supplies

  • Thanks Oval Leaves | by Crystal   Komara

    Thanks Oval Leaves | by Crystal Komara

    Hello friends! This is DT member Crystal Komara here with you today with what just might be my new favorite card ever that I’ve designed for Birch Press Design. Now, I’ll admit, I was initially hesitant to use the contour dies, becuase oh-so-much die cutting, but I promise, the end result is always SOOooo worth the work!!

    Card details:

    The base of this A2 sized card is made from 80 lb. Neenah Solar White Smooth cardstock. I cu ta 5 1/4″ x 4″ piece of black cardstock and dry embossed it using the Blooming 3D Embossing Folder from Memory Box Co, a sister company of Birch Press Design. This is my go-to floral embossing folder, it’s so elegant.

    Then I just began die cutting lots and lots of the Oval Leaves contour dies in yellow, orange and gold cardstock. I mismatched up the layers, so that I layered yellow with orange and rust with gold. There was no method to this matching up madness.

    Lastly, I flicked some gold acrylic paint onto the entire image and I love how this effect came out! It added a bit of grunge, but also a bit of sparkle!

    I love this card so much that I want to try re-creating it in other color palettes too, so be sure to check back in regularly to see what myself and the rest of the Design Team are creating to inspire you!

    Supplies

  • Poinsettia Blues | by Toni M Maddox

    Poinsettia Blues | by Toni M Maddox

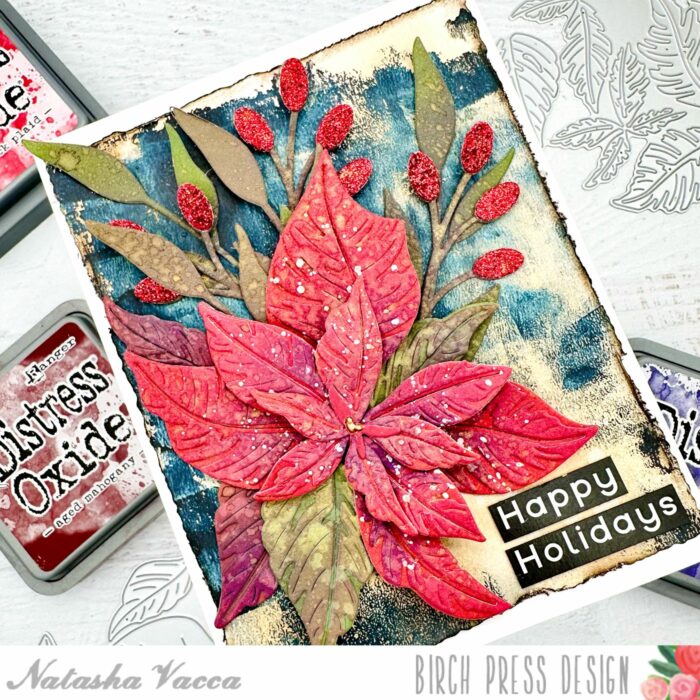
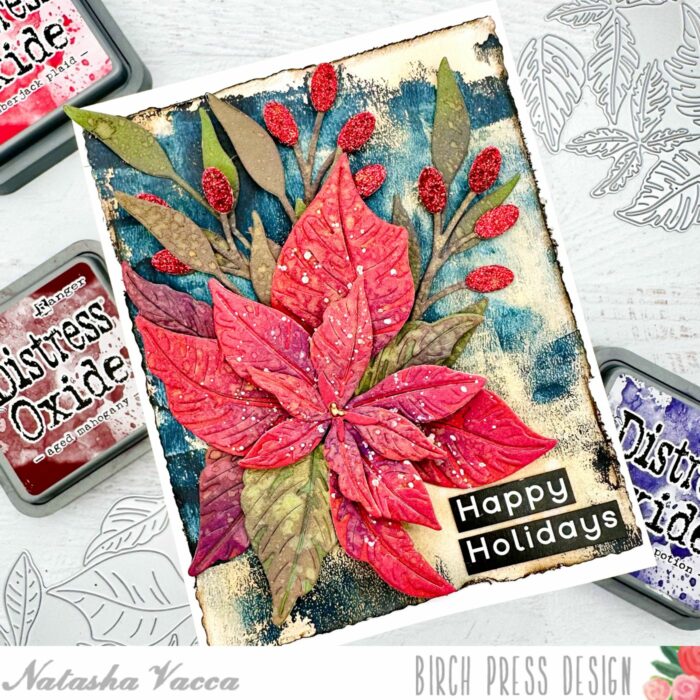
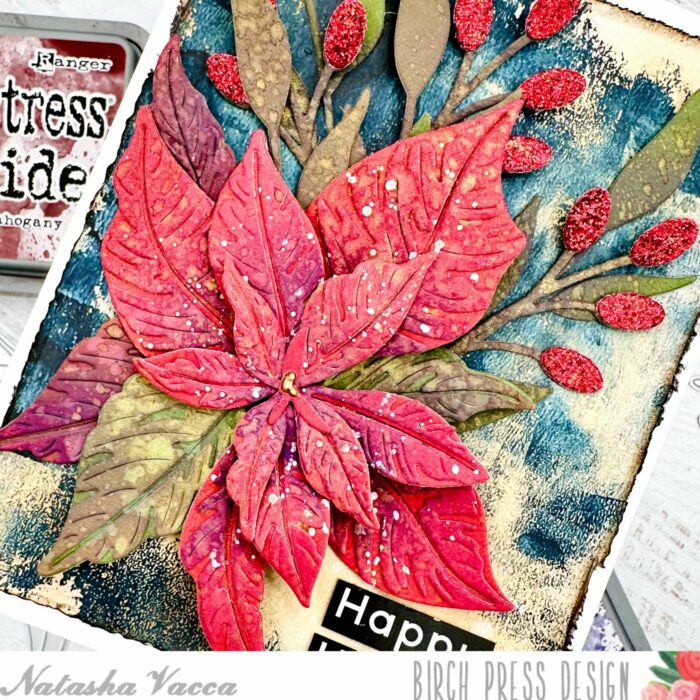
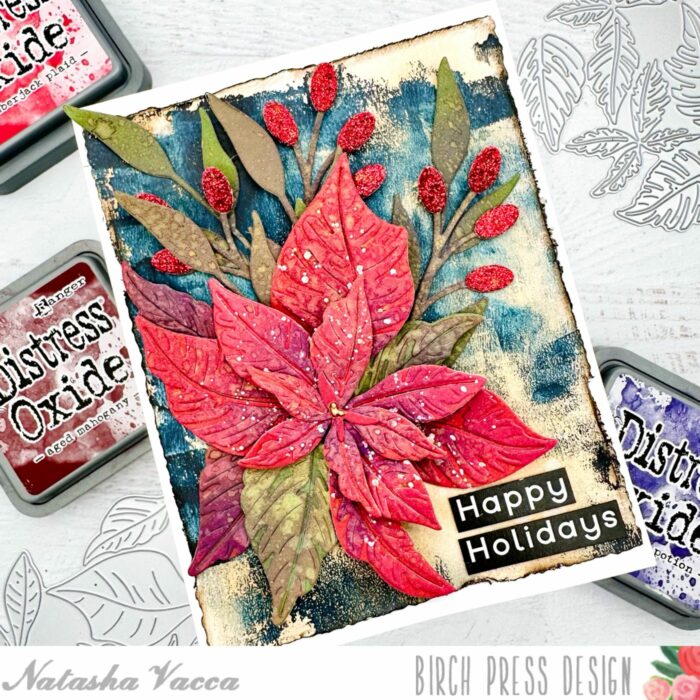
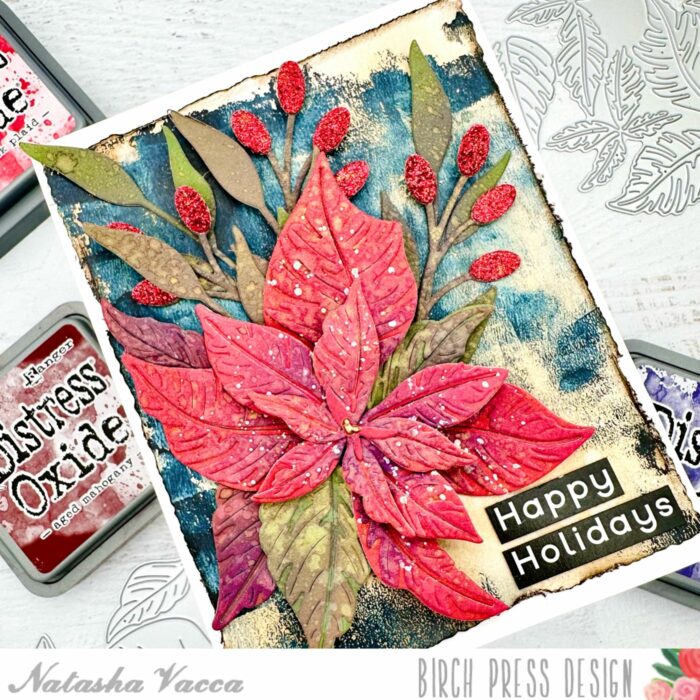
    Hello, Birch Press fans! Toni here with you today with a glorious holiday card. Isn’t the Splendid Poinsettia die set absolutely stunning?!

    It was so easy to create this detailed bloom using Distress Oxide Salvaged Patina, Peacock Feathers and Uncharted Mariner with just a touch of Mustard Seed on the stamen. Gor-ge-ous!

    For the card base I added a layer of double-sided tape then carefully positioned the Herbarium Plate Layer A on top. I then burnished Doodlebug Design Lily White Glitter into the openings with my finger. It’s messy to apply but the tape secures the glitter really well.

    I glued down the poinsettia next (love it so much!), tucking in a few Oval Leaf Branches Contour Layer sprigs among the leaves.

    I added the rather retro Holiday Hugs sentiment, opting to use only the outline so some of the glitter would show throught. You can’t have too much glitter!

    I hope you enjoyed today’s card and have a great rest of your week!

    Supplies

  • Alcohol Ink Adornment Leaves | by Crystal Komara

    Alcohol Ink Adornment Leaves | by Crystal Komara

    Hello friends and happy Monday! I hope you all had a wonderful (and hopefully creative) weekend. This is Design Team member Crystal Komara here today sharing two cards I made using the new Adornment Oak Leaf dies and some alcohol ink backgrounds. I love creating backgrounds with alcohol inks, they add so much visual contrast and color to cards. For more alcohol ink inspiration that I’ve created using Birch Press Design products, please check out this vibrant pink pumpkin or these blue balloons.

    Card details:

    The base of this A2 sized card is made from 80 lb. Neenah Solar White cardstock. This is my go-to cardstock for everything from die cutting, Copic coloring, card bases, ink blending, all of it. I create my alcohol ink backgrounds on high quality photo paper (in lieu of the more pricey Yupo paper). I promise it works just as well and it will save you money. For this first card I used violet alcohol ink, salmon alcohol ink and Valencia alcohol ink (all by Ranger Adirondack).

    I die cut the Adornment Oak Leaf dies from purple cardstock, rust colored cardstock and then gold glitter cardstock. I then layered the more detailed gold leaf layer over the solid colored cardstock using a fine tip glue. I adhered the leaves to the card and then stamped the sentiment “forever grateful” in Versamark ink and then heat embossed it with gold embossing powder. This sentiment is from the Brush Sentiments clear stamp set. I used an oval punch to punch out the sentiment and adhered it to the card with some linen thread behind it for added texture.

    For the second card, I used the exact same alcohol ink background and card measurements, except I used just cranberry alcohol ink. I die cut the Adornment Oak Leaf from cranberry cardstock and gold glitter cardstock. I layered the two together before adhering them to the card with 3M foam adhesive for added dimension. I used the same sentiment and again added linen thread beneath the sentiment for texture.

    I hope you have enjoyed today’s cards! Thanks for visiting and have a wonderfully creative day!

    Supplies

  • Adornment Wreath | By Natasha Vacca

    Adornment Wreath | By Natasha Vacca

    Hello Crafty Friends! It is Natasha here today and I am excited to be back on the blog today! Today I am sharing the beautiful new Adornment Wreath die set! So let’s get started!

    I love this gorgeous wreath and wanted to create a card using the wreath as my focal image. I started by die cutting the Adornment Wreath. I die cut the base layer 2 times using white card stock and the top layer 2 times as well. Once these were die cut, I adhered them together using liquid glue. I set the wreath aside to work on my background.

    For my background I chose a gelli print from my stash. I chose a background with beautiful pops of color to compliment the white wreath. I then ran the background through my die cutting machine with the Ringadings embossing folder from Memory Box.

    Next I added some distressing to my dry embossed background, using both distress crayons, as well as paper glaze. I love the added shine and sparkle from the Gold paper glaze.

    I then added some black splatters to the background and set it aside to dry. Once it was dry I trimmed the panel and distressed the edges using my distressing tool. I then added some Black Soot distress ink to the edges of the panel. I adhered the panel to my A2 card base.

    I completed my card by adhering the wreath to my card front using liquid glue. I chose a sentiment strip from my stash and adhered this with foam tape.

    Thanks so much for stopping by today! I will be back soon!


    Supplies


    Supplies

  • warm wishes | by Rosemary Dennis

    warm wishes | by Rosemary Dennis

    Hello everyone, Rosemary here today on the blog. Fall is almost here and that has my thoughts turning to pumpkins! I love pumpkins and when I saw the Adornment Pumpkin die set in the new release I was over the moon excited. I couldn’t wait to create something with this beautiful die set. I actually created a different pumpkin using the die set, mirror cardstock and alcohol inks, but decided that I wanted something a little more elegant. Like Cinderella’s pumpkin coach. So I pulled out some pretty gold glitter cardstock from the Memory Box Majestic Hues 6×6 pad, white cardstock and got to work.

    Once I had my pumpkin completed I moved on to creating a background and for this I used the Viola Plate C to emboss white cardstock that I then spritzed with two of the new Tim Holtz distress mica sprays, Fallen Acorn and Unravelled. The Unravelled mica spray has a lovely light gold look to it and the Fallen Acorn has a beautiful bronze look to it. Both were perfect with the gold glitter pumpkin.

    I used scraps leftover from completing the background to die cut the bare branches from the Hillside Branch and Bramble Contour Layers die set. I die cut the new Warm Wishes Vintage word die set from white cardstock and as you can see in the photo, the gold glitter cardstock. When I started editing my photos, I realized that there was just too much glitter too close together, so I die cut the words layer from white cardstock, adhered it on top of the glitter and retook my photos!

    I adhered the pumpkin to my background using strong double sided tape and then used liquid adhesive to glue all the branches into place. I struggled a bit with where to put the sentiment and finally decided to place it at the bottom of the pumpkin. I was going to spritz the white sentiment with more mica spray, but decided that because I used white cardstock that I did not spritz with mica spray to create my solid layer for the glitter pieces of the pumpkin the sentiment would be the same to provide additional contrast between the spritzed and non-spritzed elements.

    I hope you enjoyed today’s project. Thanks for stopping by and have a wonderful day!

    Supplies
  • Adornment Oak Leaf | by Crystal Komara

    Adornment Oak Leaf | by Crystal Komara

    Hello friends! Welcome back from the long weekend, I hope you all enjoyed your holiday weekend celebrating the official end to summer. I’m so ready for fall, my favorite season of the year here in New England. This is Design Team member Crystal Komara here today sharing a card that I made using the new Adornment Oak Leaf. This card also marks my first foray into the mixed media world and honestly, I’m still not sure what I think! I mean I like (kinda sorta) how this card came out, but I wouldn’t say I love the process of how I got there. One very messy step at a time and a lot of self doubt. So, I’ll preserve judgement until I play around a little bit more to see if mixed media will “be my thing.”

    Card details:

    The base of this A6 (6 1/4″ x 4 1/2″) is made from 80 lb. Neenah Solar White Smooth cardstock. The background paper was leftover in my scrap bin, but it had the perfect fall colors I wanted, so I cut it to 6″ x 4 1/4″ and then splattered black ink and gold metallic spray all over the paper before adhering it directly to the card base.

    Using the Adornment Oak Leaf die, I die cut three different colored leaves in a rust colored cardstock, a yellow cardstock and a cherry red cardstock. I then cut the overlapping detail element from gold glitter paper. I adhered the gold glitter paper over each leaf and then splattered the leaves with black ink and gold metallic spray. I adhered the leaves to the card using 3M foam adhesive for added dimension.

    Using the Big Sugar Script Thanks Die, I die cut the shadow layer from white cardstock and the thinner layer from rust colored glitter cardstock. I adhered both layers together with a fine-tip liquid glue and then I adhered the entire sentiment to the card with 3M foam adhesive.

    I love the colors of this card, but will I try mixed media again? Yes, in small doses, when I am fully prepared to be splattered by my own ink flicking!

    Thanks for visiting and have a wonderfully creative day!


    Supplies
     

  • Pink Adornment Pumpkin | by Crystal Komara

    Pink Adornment Pumpkin | by Crystal Komara

    Hello friends and happy Friday! I hope you have fun things planned for the weekend ahead! This is Design Team member Crystal Komara here with you today sharing a card made using the new Adornment Pumpkin dies.

    I looooooove how this card came out, if I do say so myself! While the pink alcohol ink pumpkin is a little more vibrant than I had initially intended, it works. That’s the thing with alcohol ink, you never quite know what you’re going to get and they can be a bit unpredictable in how they move and dry as you blow them around.

    Card details:

    *Please note, a full list of supplies is located at the end of this post.
    The base of this A2 sized card was made from 80 lb. Neenah Solar White Smooth alcohol ink. Using Layer Plate A (the top layer) of the Herbarium Plate Layering Set, I die cut this from white cardstock and then mounted a sheet of magneta cardstock behind it before adhering it directly to the card base. I die cut the solid pumpkin from a scrap piece of an alcohol ink background I had in my craft bin and then die cut the frame using pink glitter cardstock from the 6″ x 6″ Glitzy Glitter paper pack. I adhered the two layers together with a fine tip liquid glue.

    I created a pumpkin stem from espresso brown cardstock and leaves from both green cardstock and green glitter cardstock. There was a lot of piece work here using these smaller contour dies. Next, using the new Oval Leaf Branches Contour Layers, I die cut leaves from pink glitter cardstock, espresso brown carsdstock and the same green and green glitter cardstock used on the leaves. Then I pieces all the layers of the leaves together (again, a little bit time consuming here to do all these small details, but SO worth it in the end). Then it was just a matter of adhering all the small branches and leaves into a pattern that was pleasing to the eye.
    I stamped the sentiment “forever grateful” in magenta ink on white cardstock and used oval punch to punch it over before adhering it to the pumpkin with 3M foam adhesive. This sentiment is from the Brush Sentiments clear stamp set.

    I love using non-traditional colors to create holiday or seasonal cards. Pink is perfect in lieu of traditional orange pumpkins.

    Thanks for visiting and have a wonderfully creative day!

    Supplies