Category: Handmade Paper

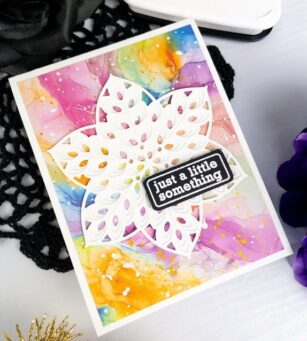
  • Just a Little Something | by Crystal Komara

    Just a Little Something | by Crystal Komara

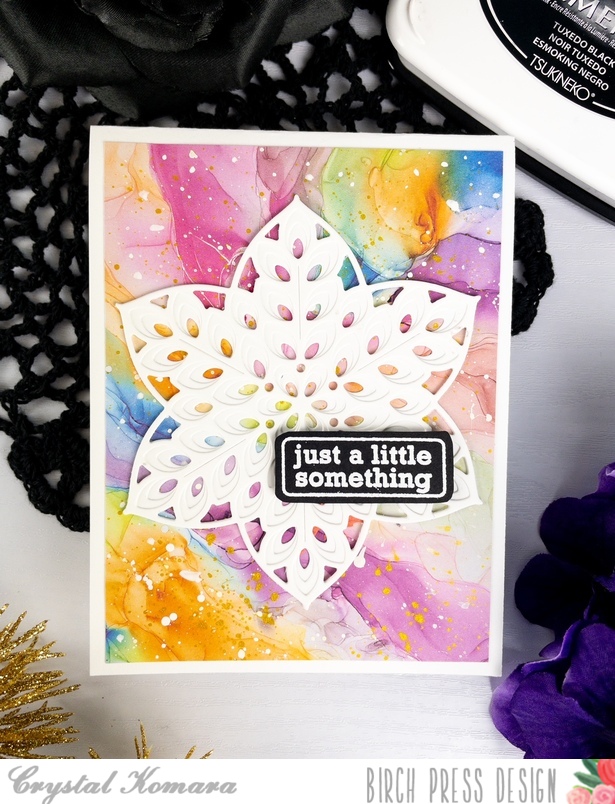
    Hello crafty friends and happy August! Where did the summer go already!? This is Design Team member Crystal Komara here today sharing a vibrant alcohol ink card featuring the Floral Star Layer set. Because this background has so much intense color, you might not even notice that I used just three layers of white on that Floral Star.
    Card details:

    This A2 card is made from 80 lb. Neenah Solar White smooth cardstock. I pulled a scrap piece of a previously made alcohol ink background from my stash and splattered some white and gold ink all over the alcohol ink. I cut it down to 5 1/4″ x 4″ and adhered it directly to the white cards base.

    Next, I die cut all three layers – Layer A, Layer B and Layer C of the Floral Star Layering set from white cardstock. I adhered the three layers together using a fine-tip liquid glue. Then I adhered the full die to the center of the alcohol ink background.
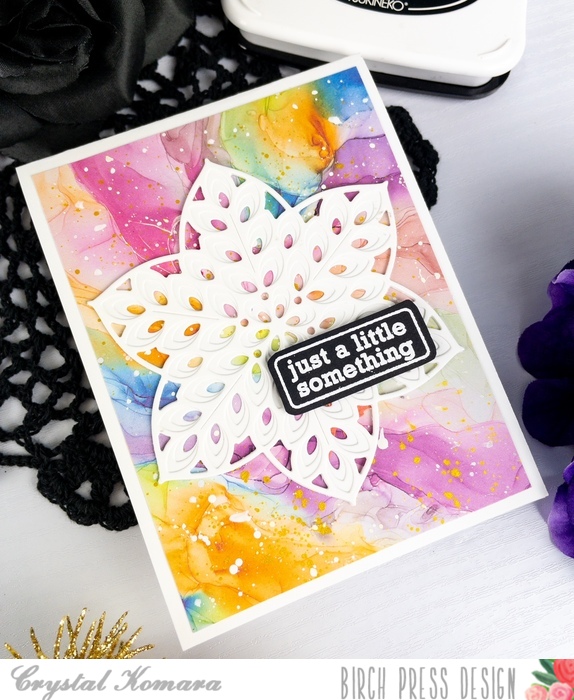
    Using the Contempo Greetings stamp set, I stamped the sentiment in Versamark ink on black cardstock. I heat embossed the sentiment with white embossing powder and used the coordinating die to die cut the sentiment out. I adhered the sentiment to the card using 3M foam adhesive for added dimension.
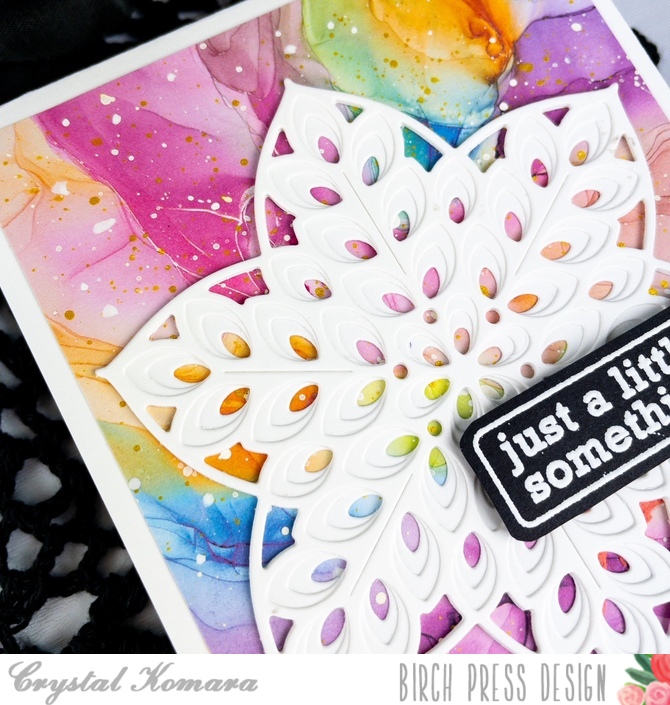
    I LOVE using alcohol inks on my cards, they are a great way to add visual interest and unique designs. Thanks for visiting and have a wonderfully creative day!

    Supplies
  • Early Blossom | By Natasha Vacca

    Early Blossom | By Natasha Vacca

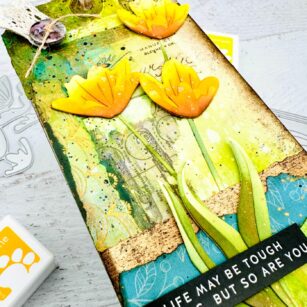
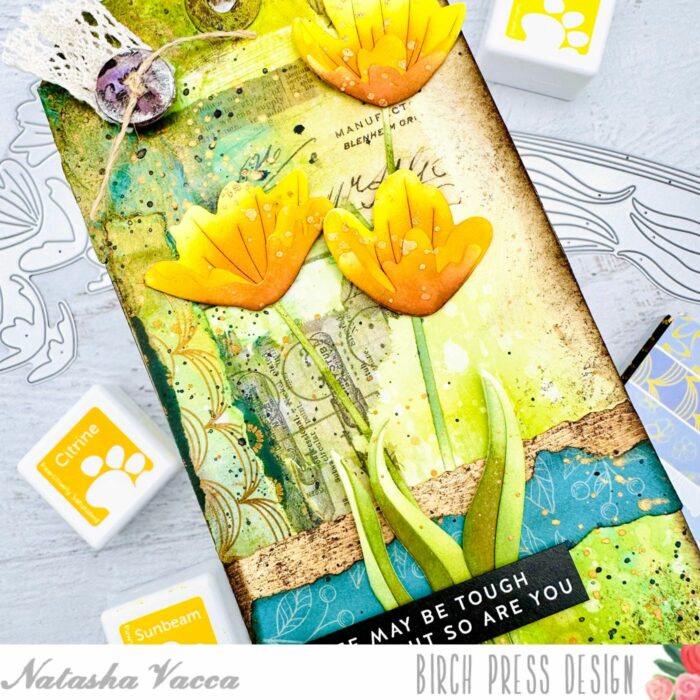
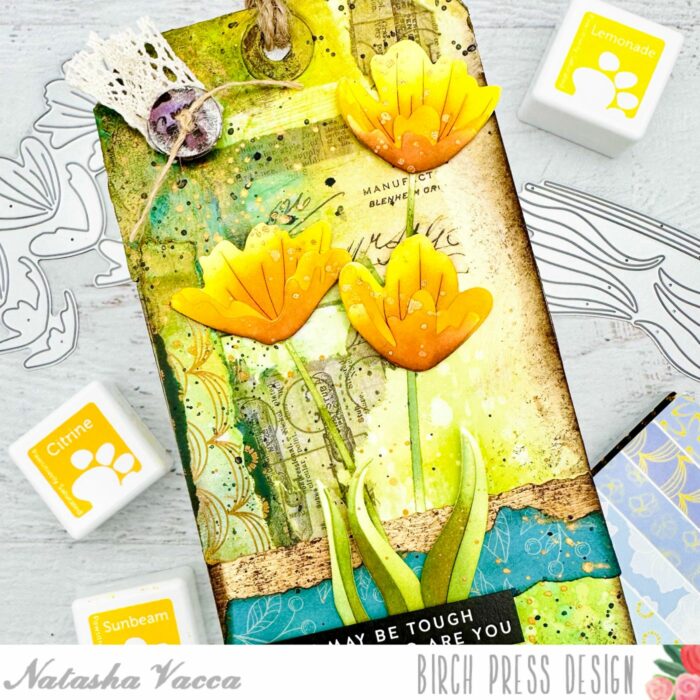
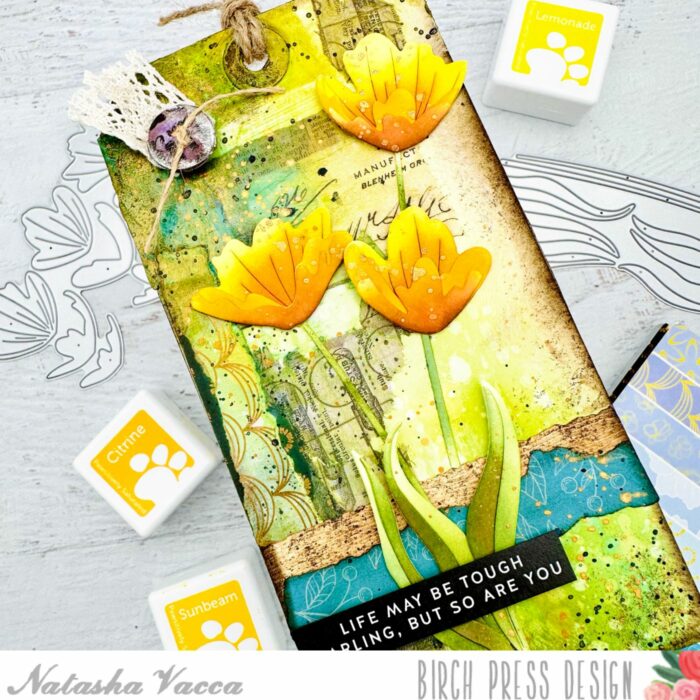
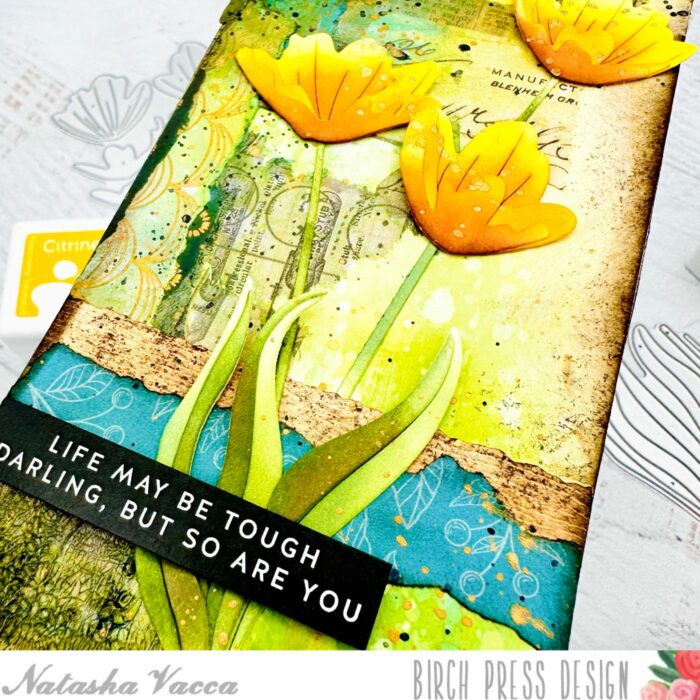
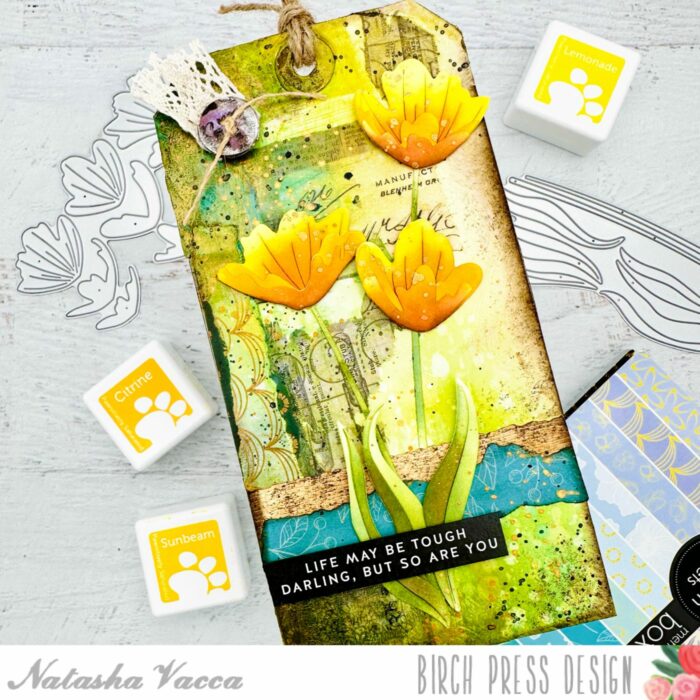
    Hello Crafty Friends! I hope you had a great weekend! I am excited to be up on the blog today sharing a new release from Birch Press Designs with you – the beautiful Early Blossom Contour Layers die set! I love florals and these dies make it so easy to create with! So let’s get started!

    I started by die cutting the florals using Hammermill white card stock. I then ink blended each of the layers using a combination of dye inks. Once all the inking was complete, I adhered each of the layers together using liquid glue.

    Next I started to work on the background tag for my floral die cuts. I started with a pre-made tag then added papers and collage paper to the tag. I used the Anemone Grove Paper pad, as well as collage paper from my stash. I ripped pieces of paper for a distress look, then adhered them with collage medium. I allowed this to dry, then inked up the background using Distress Oxide Inks. I used: Antique Linen, Pumice Stone, Peacocks Feathers, Vintage Photo, Walnut Stain, and Mustard Seed. I layered these on, as well as splattered with water droplets for added texture.

    Next I added Translucent Crackle Paint to sections of the tag, allowed this to dry, then applied Distress Crayons over the top of the crackle paint. I also added some paper glaze to sections for added texture. I then added splatters to the tag using black and gold. I then adhered all the layers together using liquid glue and foam tape. The wood grain paper paper in the center of the tag is from Memory Box and it is in the color cream. I applied ink and sponging to the paper for added texture.

    I chose a pre-made sentiment from my stash and adhered this to my tag as well. I darkened the edges of the tag using Distress Ink in Ground Espresso using a blending tool, as well as additional texture using a sea sponge. The tag was completed with twine for the top, as well as lace and a button.

    I had a lot of fun putting this together! I encourage you to use your pattern paper in new ways to add texture to your card bases and backgrounds too! Thanks so much for stopping by today! I will be back soon!


    Supplies


    Supplies


  • Rustic Poinsettia | By Natasha Vacca

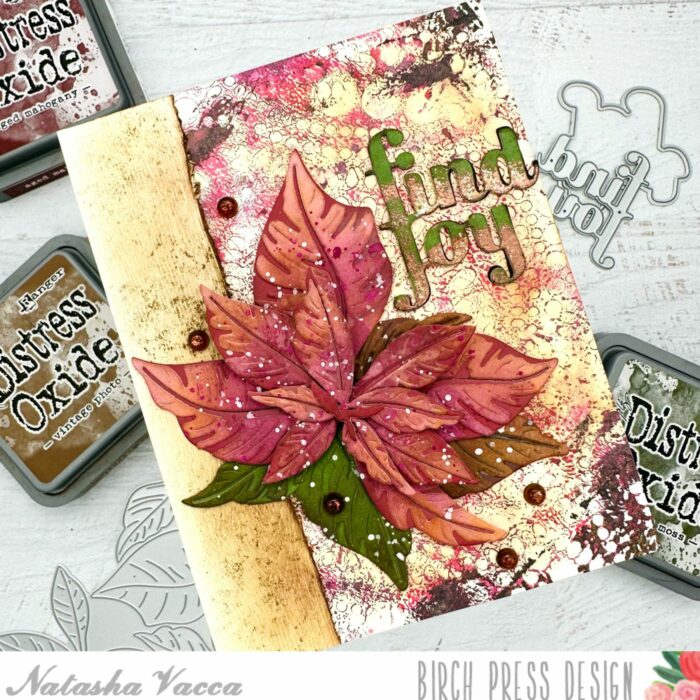
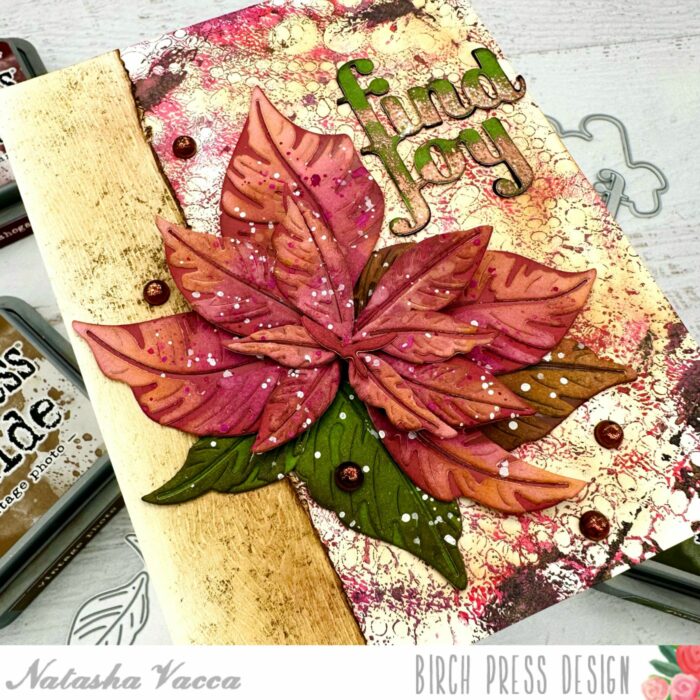
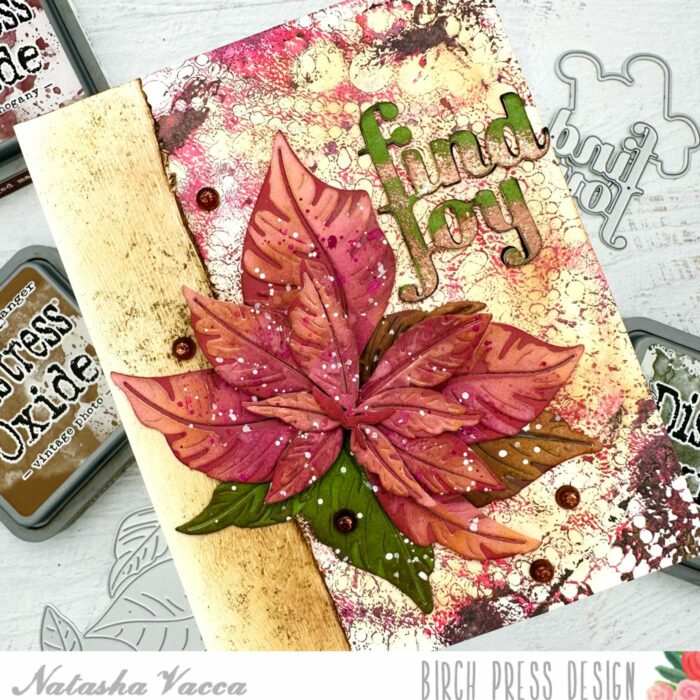
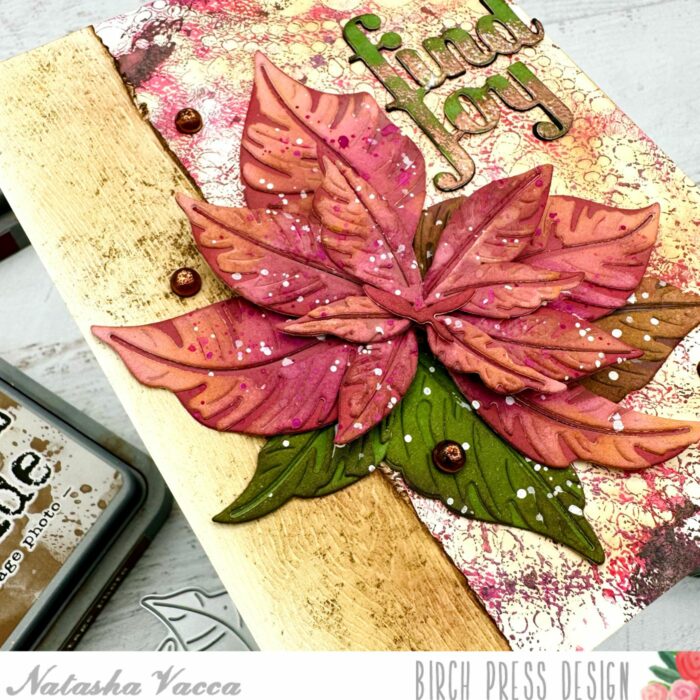
    Rustic Poinsettia | By Natasha Vacca

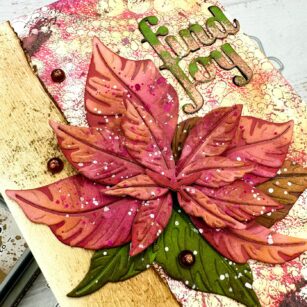
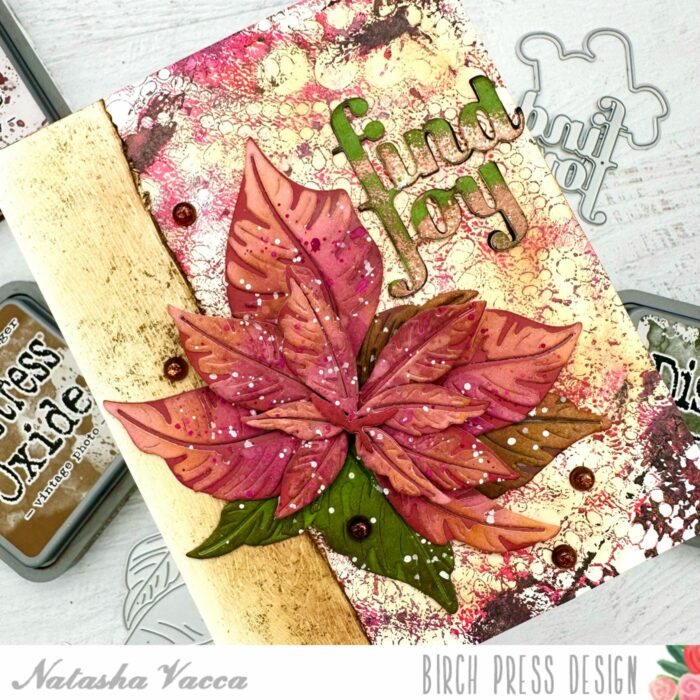
    Hello Crafty friends! I am excited to be back on the blog today sharing the beautiful new Splendid Poinsettia Contour Layer dies. I had so much fun creating a rustic inspired holiday card, so let’s get started!

    I started with the beautiful Poinsettia die and the Berry Red paper pack from Memory Box. I chose 2 shades of red and pink paper from this pack. I cut the Poinsettia using both colors of paper. I then die cut the leaves for the Poinsettia using the Lush Green paper pad from Memory box. Once all the parts were die cut, I wanted to add more dimension using inks.

    On my die cuts I used a combination of distress oxide inks, as well as dye inks. I ink blended the layers for the flower and leaves until I had the dimension and colors I was looking for. I added water droplets to each layer and picked up some color using a paper towel. I then added white splatter to each layer using a paintbrush and allowed them to dry.

    Once all the splatters were dry, I adhered the Poinsettia and leaf layers together using liquid glue and foam tape. Next I chose a background from my stash. I chose a colorful background from my gelli prints to use as a focal point behind my Poinsettia. I then trimmed about a 1 inch rectangle from the Cream Woodgrain Paper Pack. I distressed the edges using my paper trimmer and my distress tool. I then inked up the woodgrain paper using distress oxide inks.

    Next I adhered the gelli print panel to an A2 card base. I adhered the 1 inch strip of wood grain on the left side of the card panel. I then adhered the Poinsettia and leaves using liquid glue.

    I completed the card using the Find Joy and Outline sentiment. I had previously made the top layer using green paper and added texture using heat embossing. I die cut 2 more layers for added dimension. Once all the layers were adhered, I added this to my card front. I added a few gems from the Fairy Dewdrops in Christmas Fairy.

    I had so much fun creating today’s card and I hope you enjoyed it too! I will be back soon with more crafty inspiration!


    Supplies


    Supplies


  • Colorful Blooms, Thank you Tag | By Natasha Vacca

    Hello Birch Press Designs crafty friends! I am excited to be back on the blog today! Today’s project features a colorful tag with beautiful blooms, lots of color, and texture too! I am using a few beautiful die sets, a pre-made tag base from my collection, an embossing folder, and a gelli print! So let’s get started!

    I was on the blog last week and shared how I created these flowers, leaves, and stems! When I was working on last week’s post, I made extra flowers and leaves! I love doing this as it saves time and allows you to have more die cuts for another project. I started with 4 die collections and 2 pads of colored card stock from Memory Box. I am using the Phlox Blooms and Leaves Contour Layers, Mixed Berry Contour Layers, Delicate Floral Buds Contour Layers, and the Sylvan Berries and Leaves Contour Layers. I used 2 pads from Memory Box: Berry Red and Lush Green. I love these pads of paper! The colors are amazing and they die cut beautifully and they are super easy to add ink blending on top as well! From each of the die sets listed above I die cut the leaves and stems using 2 shades of green paper from the Lush Green pad. Then for the floral dies (shared above) I used 2 shades of pink from the Berry Red paper pad.

    After my leaves and florals were all die cut I laid them out on my ink blending mat. For the green die cuts I used a combination of a light and green dye ink. On the pink layers I used a combination of dark pink and a purple dye ink. Once all the inking was completed I added water droplets to add a bit more texture to each piece. I added the water droplets, then picked up the color with a paper towel. I set each piece aside and allowed them to dry. Once dry I adhered the leaves and floral layers together with liquid glue.

    Next I used a pre-made tag for my base of my project. I then adhered a piece of a gelli print to my tag base. I adhered this with liquid glue. I did rough up the edges using my distress tool. Next I used the 3D Embossing Folder – Geometric Crystals from Memory Box. I ran this through my die cutting machine. I then ripped a piece of the dry embossed background and adhered this to the right side of my tag. I then added a couple more pieces of gelli print to the base layer. I did rip each of these layers as I wanted a worn look to the background. I added 2 strips of washi tape to the bottom of the tag to complete the base of the tag. Once everything was adhered I added distress ink to the edge of the tag and a few metallic gold splatters.

    Next I worked on the placement of my flowers and leaves on my tag base. Once I was happy with the placement, I adhered everything down with liquid glue and foam tape. I completed the tag with a sentiment from my stash and a piece of twine on the top! I also added a few fairy drops for added interest and texture.

    I hope today’s project inspires you to use your die cuts in another way! They are so much fun and the possibilities and endless!

    Thank you for stopping by today, I will be back soon!


    Supplies


    Supplies


  • Hello Sweet Friend | By Natasha Vacca

    Hello Birch Press Friends! I am excited to be up on the blog today sharing the gorgeous Eloquent Butterfly layering die set! I absolutely love this set and decided to use this set today with a mixed media vibe! I hope you enjoy it, let’s get started!

    I started with the beautiful Eloquent Butterfly layering die set. I die cut all 3 layers. First I die cut layer C using white card stock, layer B using white and an inked background from my stash, and then layer A using an inked background from my stash. The inked backgrounds were made using sprays. Once all the layers were die cut, I added dye ink to layer B and layer A. I feel this adds a bit more texture and definition to the layer. On layer A I also added a bit of embossing glaze for added texture. I then adhered all layers together and added foam tape. I then die cut the antennae for the butterfly from the Butterfly Basics die set using a piece of card stock from the Vintage Pastel Mirror pad and adhered this with liquid glue to the butterfly.

    Next I chose a gelli print from my stash and embossed the panel using the Flora Plate die set. I used Layer C from the set and followed the instructions in my die cutting machine to emboss the panel onto my gelli print. Next I distressed the edges of the panel using a paper trimmer, distress tool, and then inked up the edges with distress ink.

    I then added a bit more texture to the panel using metallic paint by adding splatters with my paintbrush. Next I added a bit more distress ink to the raised areas of my background panel using a blending tool.

    To complete my card I adhered the panel to an A2 card base. Next I added two strips of paper, one from an old book and another piece of gelli print. Both pieces were distressed using a combination of distress inks and embossing glaze. I added the Hugs Honey Script sentiment to my card. I die cut the shadow layer using white card stock and ink blended the shadow with distress oxide. I die cut the hugs sentiment 3 times using kraft card stock and adhered them together with liquid glue. I then ink blended the sentiment with distress inks. I added a sub sentiment from my stash. Both sentiments were adhered using liquid glue.

    Thanks so much for stopping by today! I had so much fun creating today’s card! I will be back soon!


    Supplies


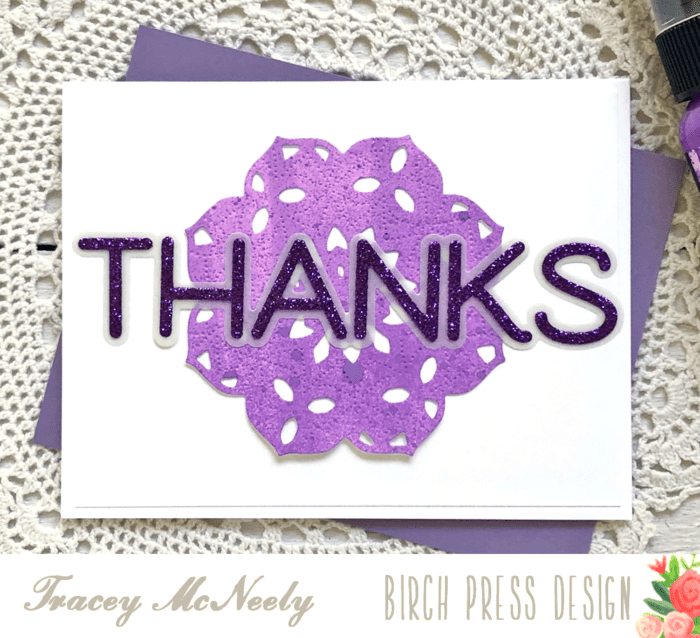
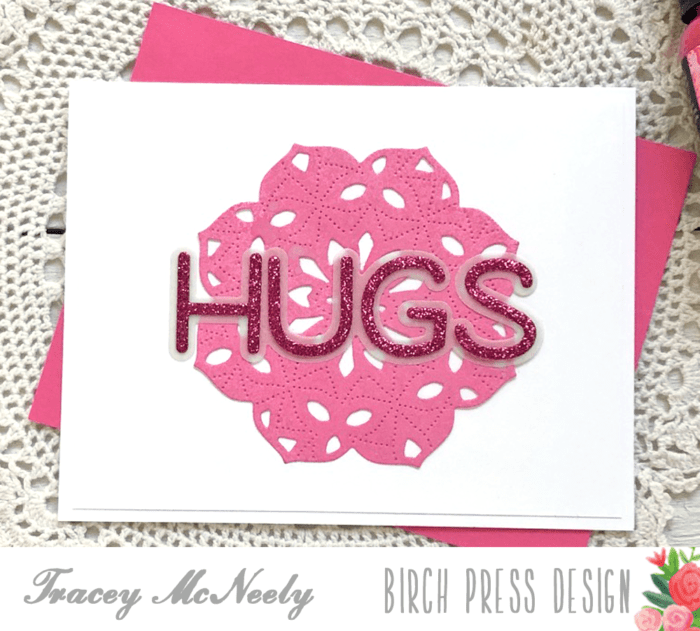
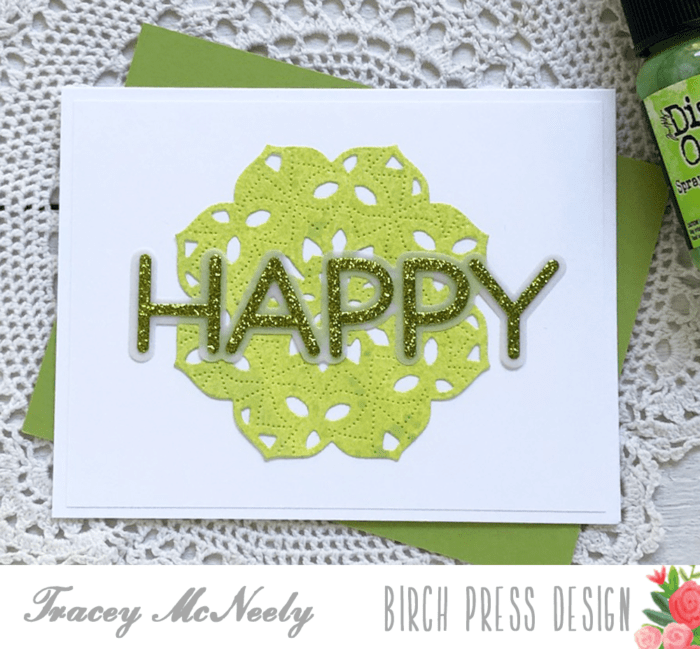
  • Creating Multiple Cards with One Design | by Tracey McNeely

    Creating Multiple Cards with One Design | by Tracey McNeely

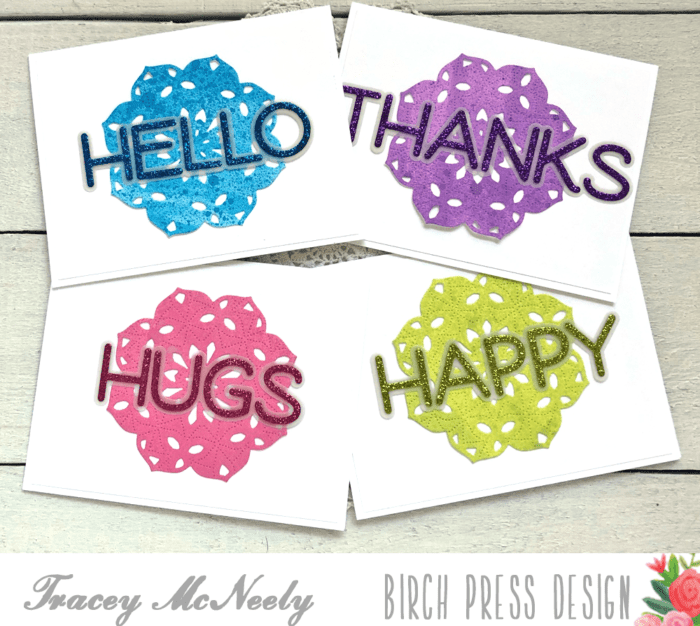
    Hi there it’s Tracey. Today I am going to show you how easy it is to use one basic card design and by changing just one element you can make multiple cards each with a different theme.

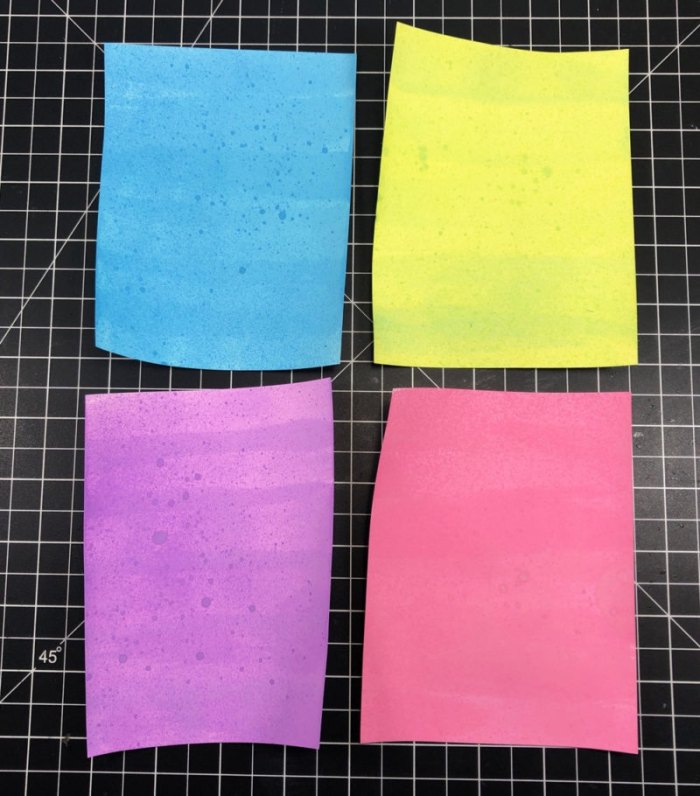
    Each one of my four cards uses the newly released Kinsley Layer Set. The background paper for each of the die cuts was custom made using Distress Oxide Spray Inks. I sprayed some ink on my glass media mat and then sprayed some water onto the ink. I picked up the water with a foam blending tool and ran it back and forth across a panel of white cardstock until the whole panel was covered. I left some time so the first coat dry and then gave each of the panels a spritz of the same colour Distress Oxide Spray Ink direct to paper to add some subtle interest. I let the panels dry completely and then I cut four of the Kinsley Layer Dies Layer C from each panel. I chose to use only Layer C because on its own it creates a beautiful stitched pattern.

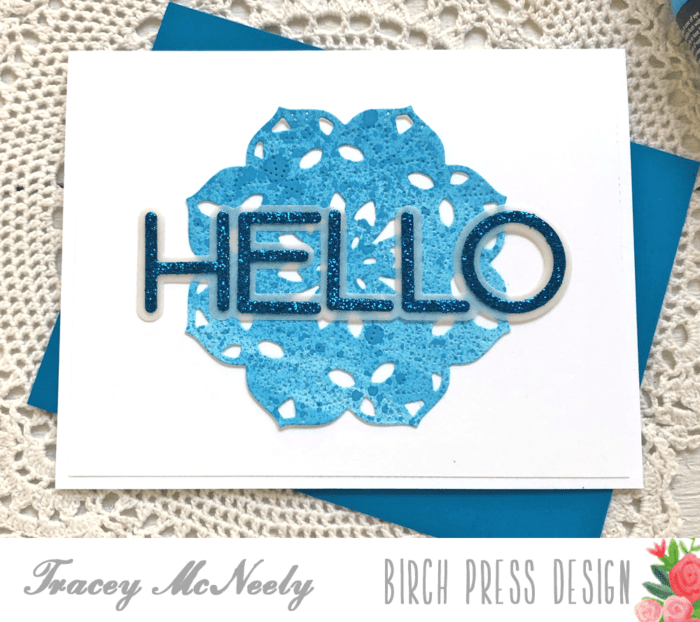
    Next I used the new Jumbo Lingo word dies to create glittery sentiments from the Twinkling Jewel Glitter Pad to co-ordinate with each of the die cuts. I used Jumbo Lingo Hello, Jumbo Lingo Thanks, Jumbo Lingo Hugs and Jumbo Lingo Happy. I cut the shadow from vellum cardstock and the individual letters from the glitter cardstock.

    Each white A2 sized card has a 5 1/4″ x 4″ mat that I adhered the Kinsley Layer die directly to and the sentiments added to the top with liquid glue. The mat was then adhered to the card base directly making the card nice and flat for mailing.

    Thanks so much for stopping in today. Give it a try, choose a simple background and change up your sentiments to make a collection of cards to have at the ready. You never know…

    Supplies

  • Big Thanks!by Jennifer Svare

    Big Thanks!
    by Jennifer Svare

    Hello! Thank you so much for stopping by! Today I’ve made a thank you card using the gorgeous Pink Folia handmade paper available right here at Birchpress Design, along with the stunning Calen layers A and B.

    For the Calen layers, I used two shades of brown for the base layer, and a gold vellum for the top layer. I love the extra details in Layer A that seem to float above the design. So pretty!

    For the top and bottom borders, I chose the darker pink. To bring it all together, the Big Thanks Sugar Script is cut using white, with the lighter pink background.

    Check out the video below for more info on how this card was made! Have a great day, and I’ll see you again soon!


    Supplies


  • Textured Paper Gift Boxes | Jennifer Svare

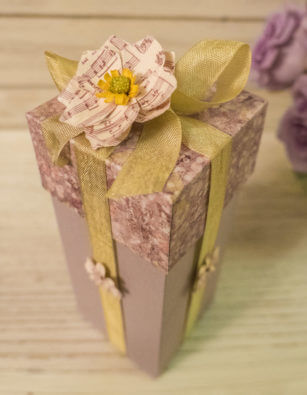
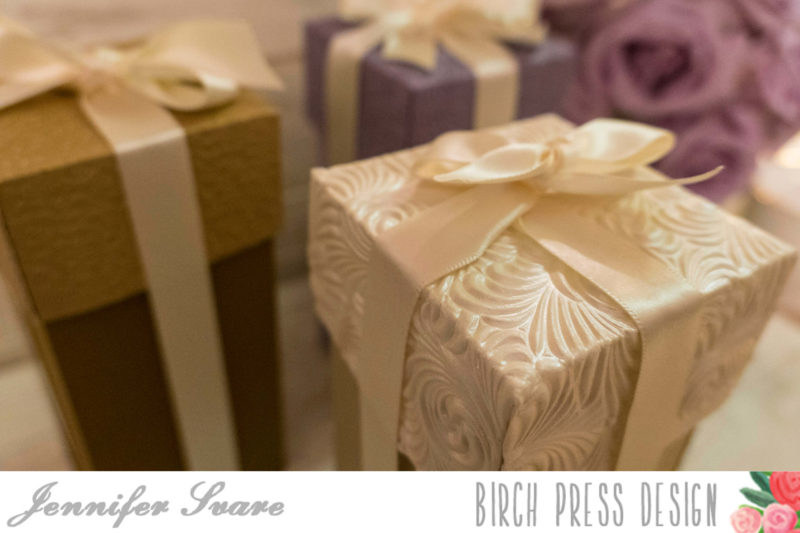
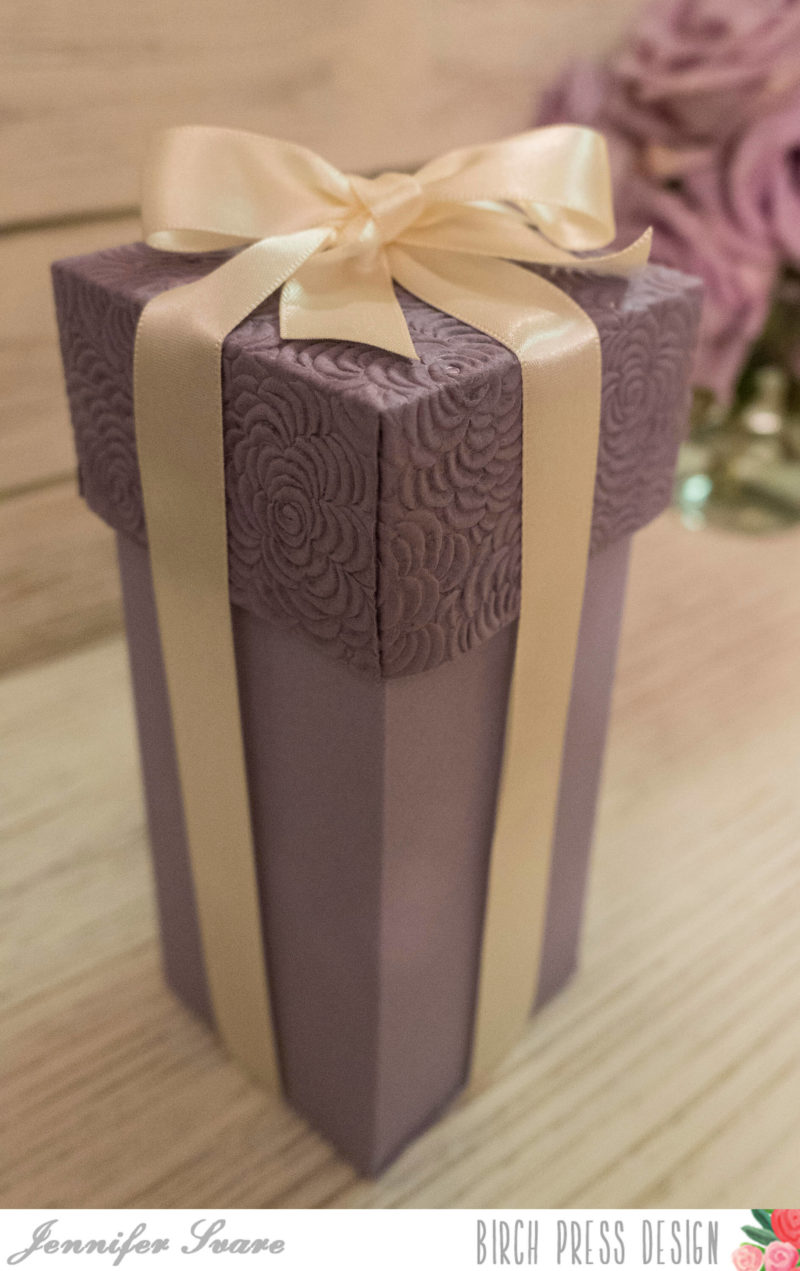
    Textured Paper Gift Boxes | Jennifer Svare

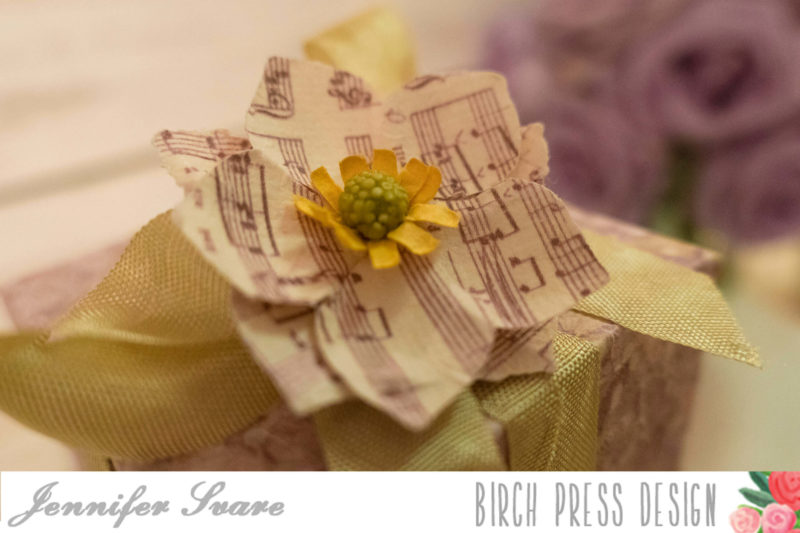
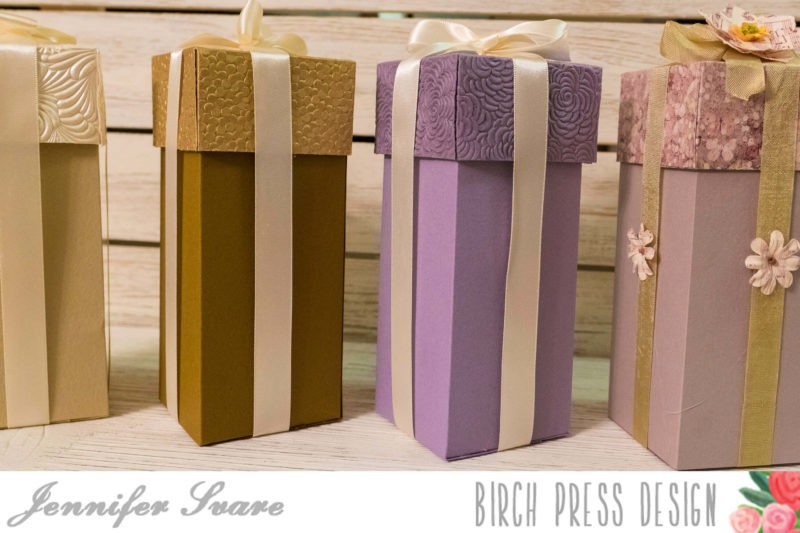
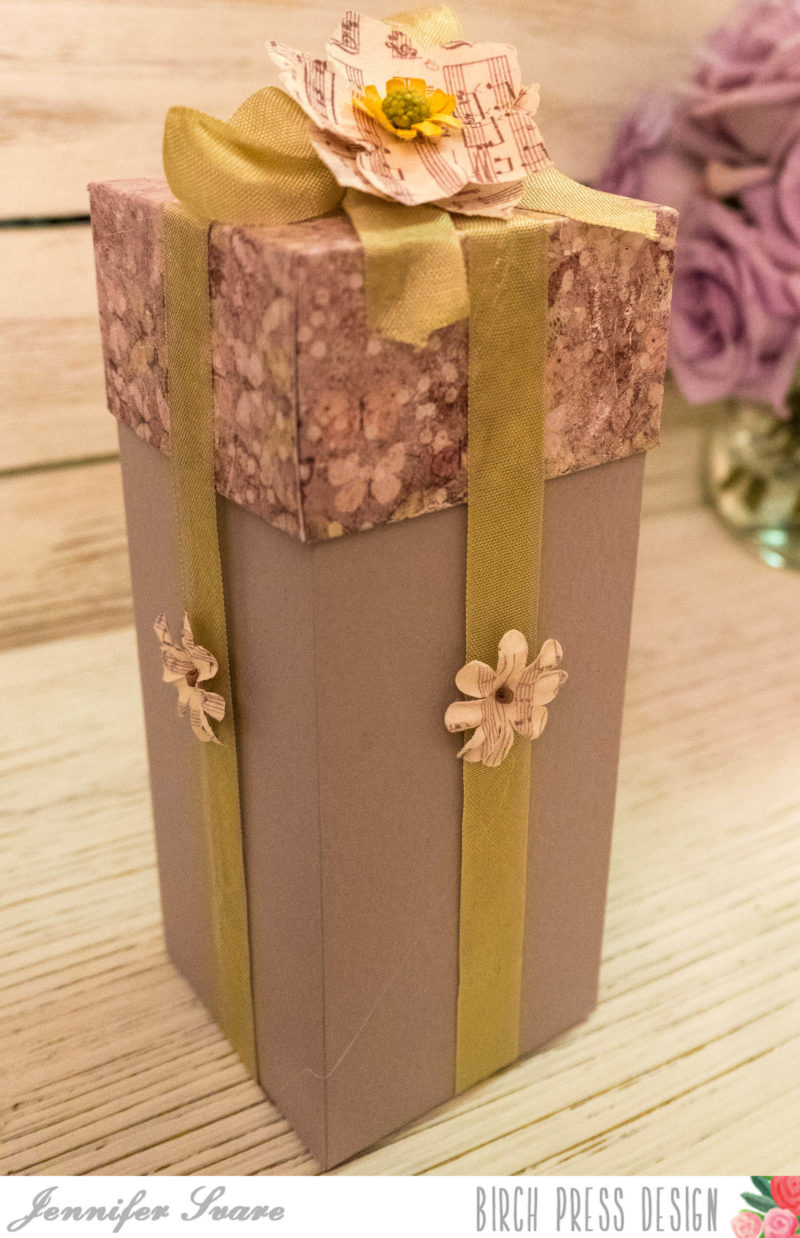
    Hello!  Today I’ll share how I made some very simple gift boxes; in fact, they are so easy and fun that I made several varieties to have on hand.  The new papers from Birchpress are incredible for the box tops, and add such elegance.  The Ivory Swirl, Pebble Gold, and Cabbage Rose Lavender were used for the box tops in these examples.  Many, many combinations could be made, and these would be incredible with the new Italian ribbon in all those beautiful colors.

    In addition to the handmade papers, I also made a top with a page from the Wild & Free 6×6 paper pad.  I love how the tops take a 6×6, and the bottoms take an 8 1/2 x 11. The size is perfect for many gifts, and also limitless options on paper. Best of all, a simple scoring board was used to create these!

    The My Favorite Story Flowers make a gorgeous embellishment and match the papers perfectly.  Super simple to make – check out the video below!


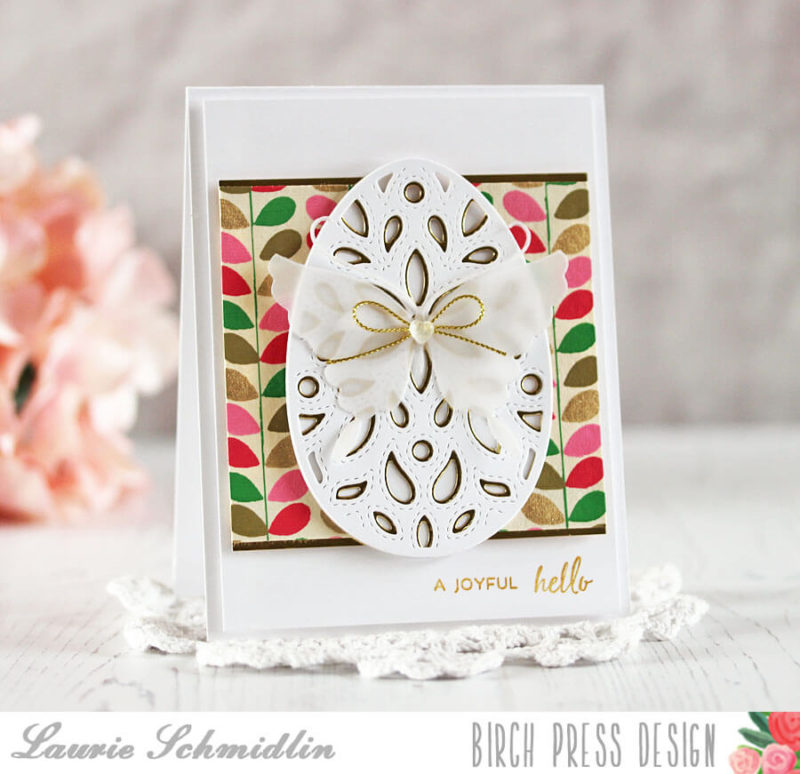
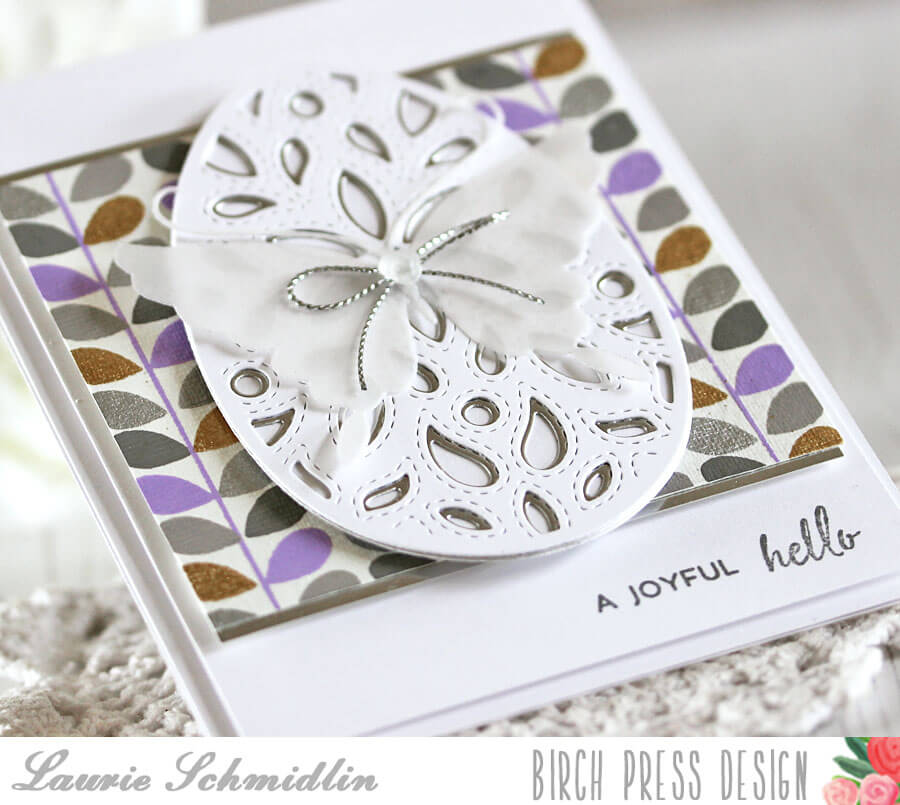
  • A Joyful Hello | By Laurie Schmidlin

    A Joyful Hello | By Laurie Schmidlin


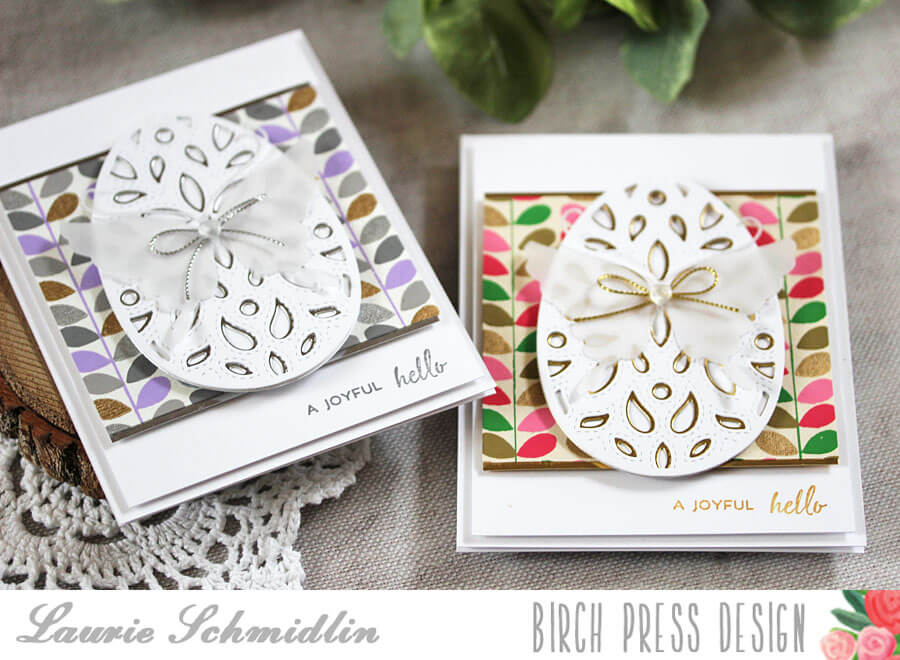
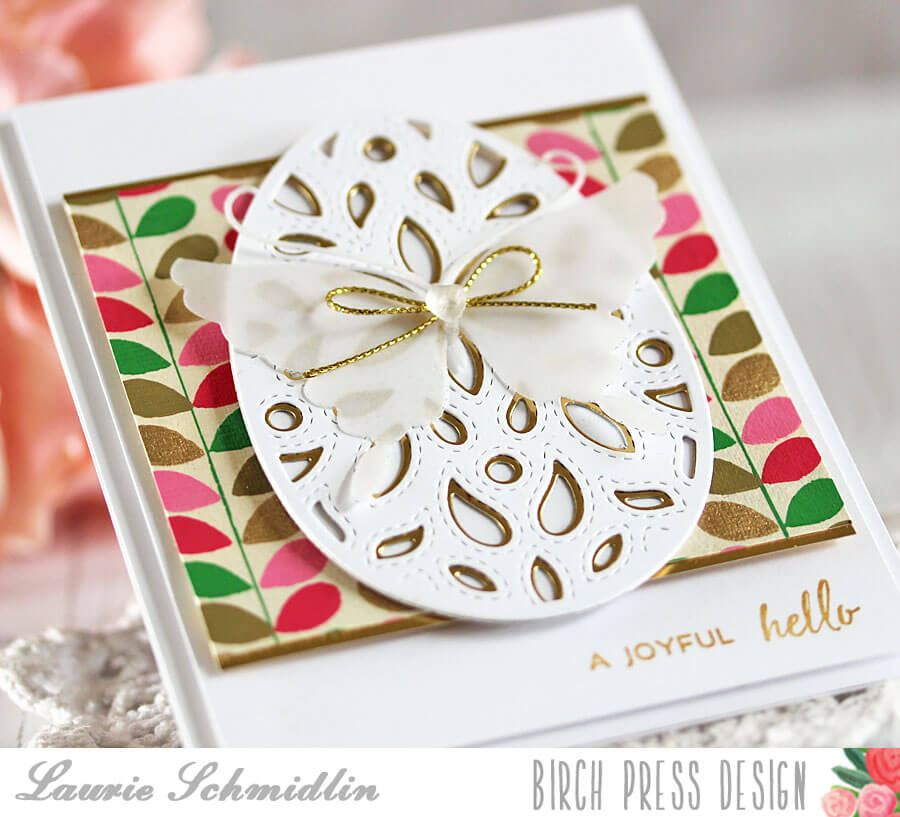
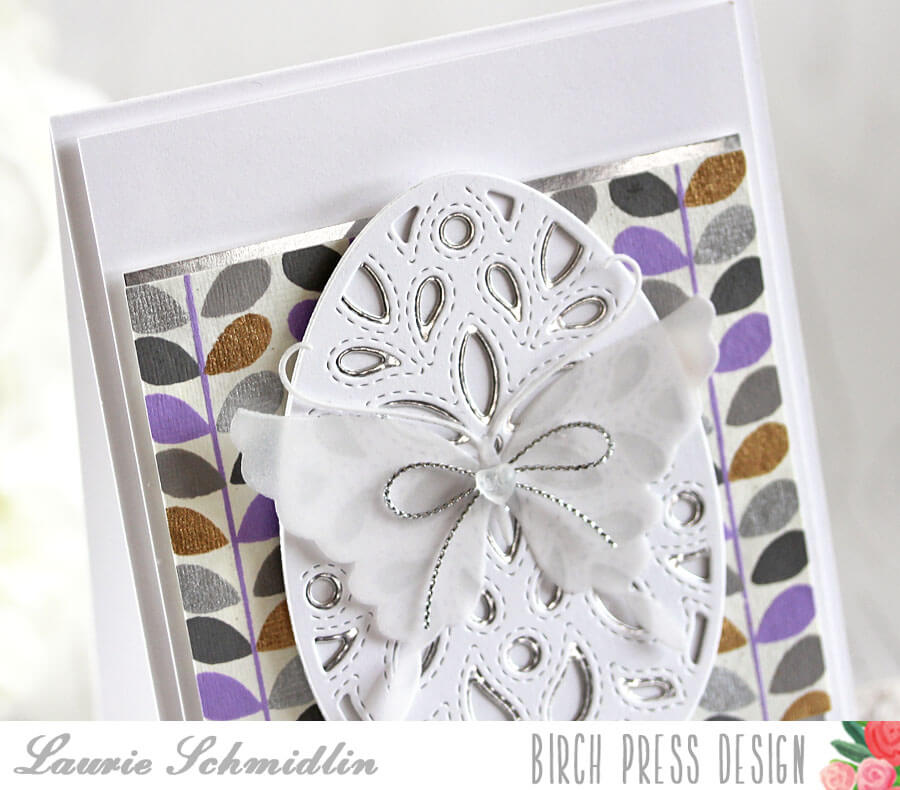
    The new Fiori Egg Layer Set is perfect for creating elegant Easter cards in no time at all!  The beautiful stitching detail makes it look like you spent hours and not the mere minutes it actually takes to die cut and assemble these eggs!


    I started by adding a layer of Pink Folia Handmade Paper to a white cardstock background layer.


    I wanted to accent the gold in the paper a bit more so I added a slightly larger shiny gold layer underneath the handmade paper.


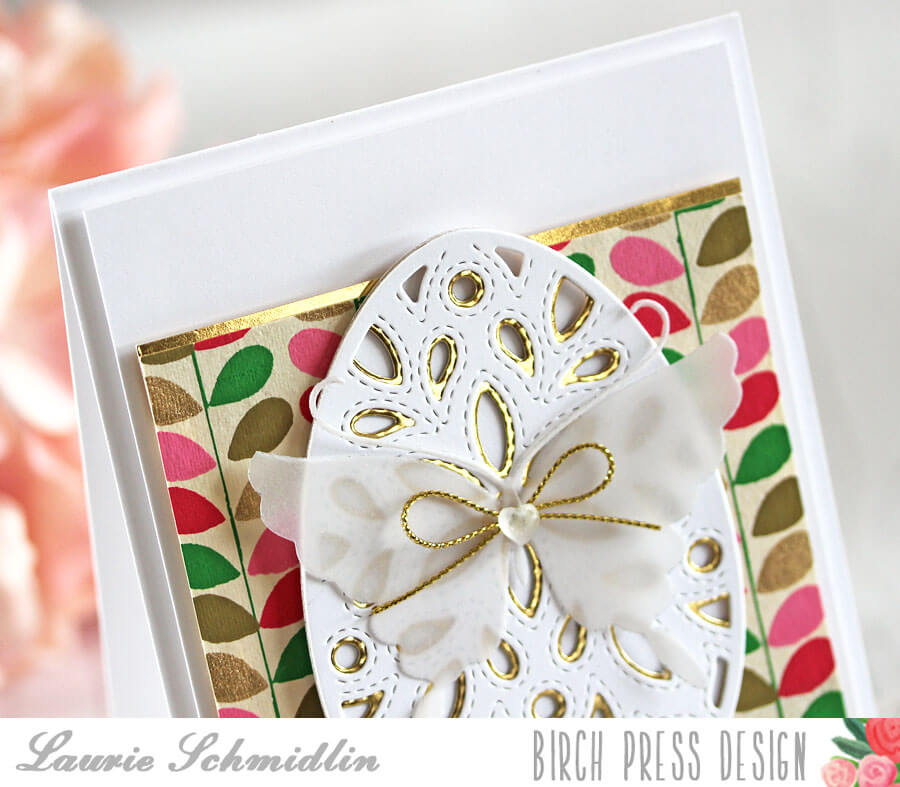
    To create the egg, I started by die cutting the Firori Egg Layer B out of shiny gold cardstock.  I topped that with a white die cut Fiori Egg Layer C.  I adhered both layers onto the a white solid egg layer, die cut with the largest die from the Stitched Egg Set.


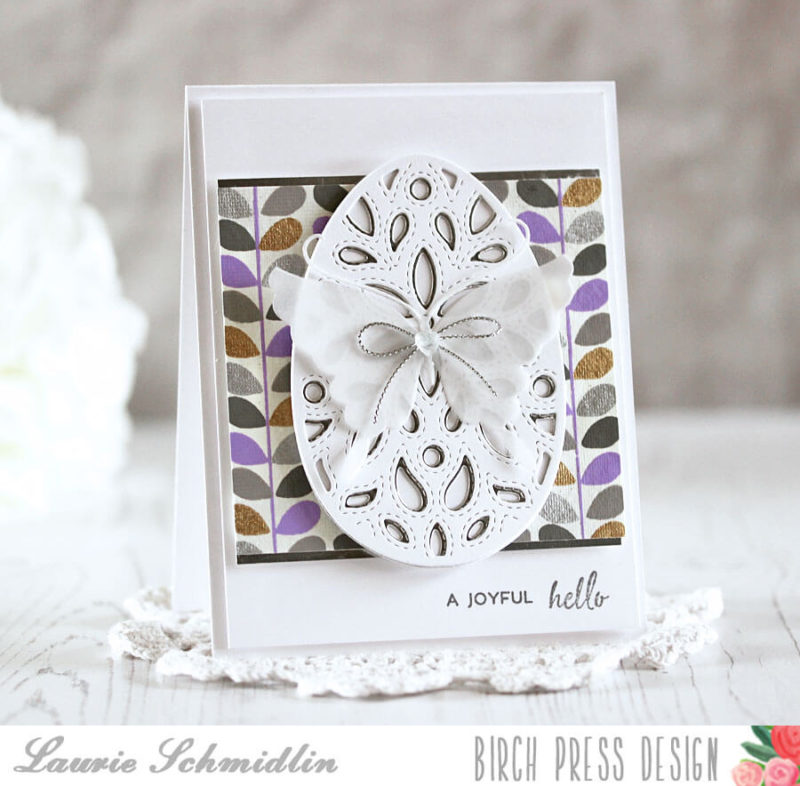
    For my second card, I kept the design exactly the same just swapping out  the patterned paper and accent color.  For this card I used a piece of the Lavender Folia Handmade Paper and shiny silver paper as the accent.


    The sentiment at the bottom of each card is from the A Little Birdie stamp set.


    For embellishment, I added a die cut butterfly from the Paradisio Butterfly Layer C die, some metallic string, and a clear heart.


    Before I go, I wanted to remind you that you still have time to take advantage of the Spring Sale!  Just enter the sale code listed above and receive 10% off your entire order!  But hurry, the sale ends tonight (Monday) at midnight PDT!


    Supplies
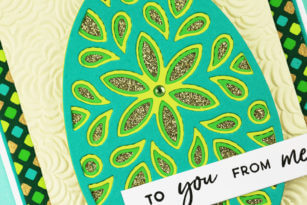
     

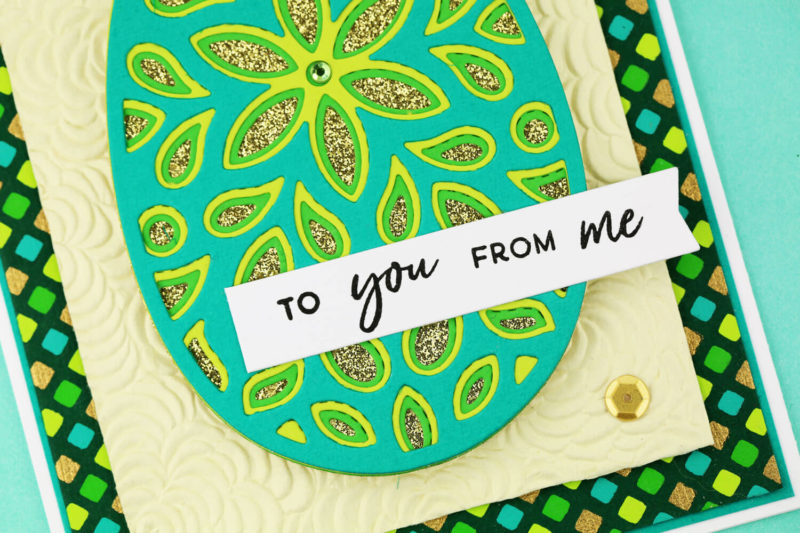
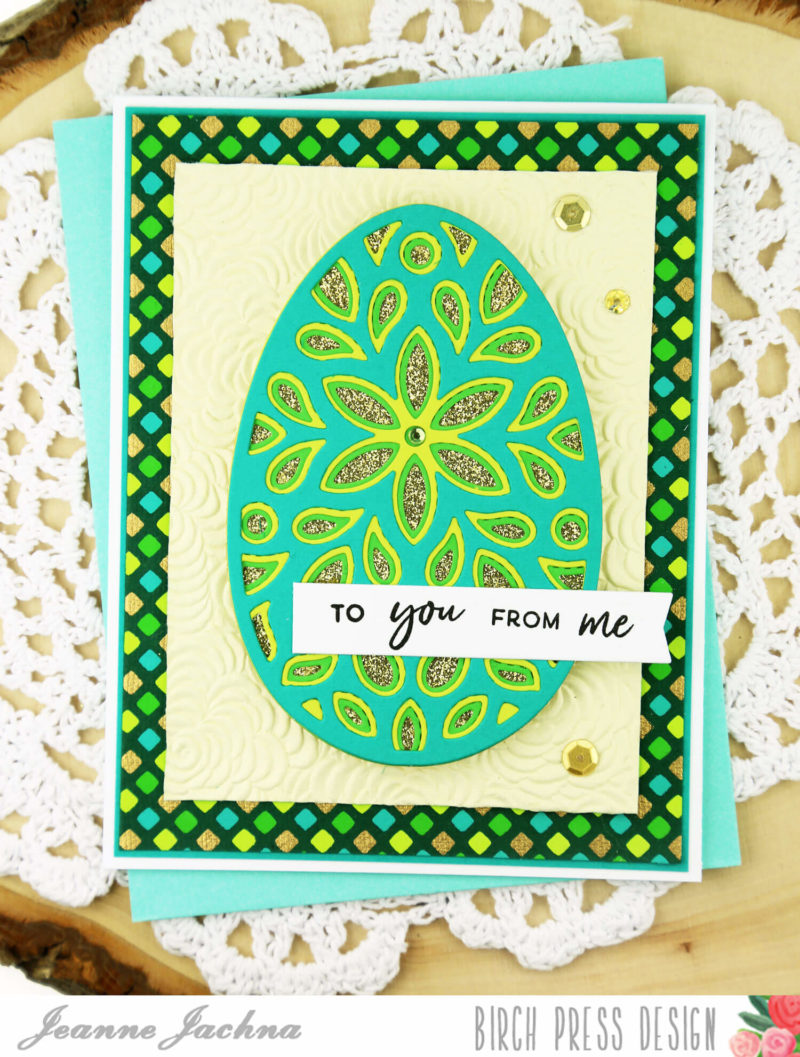
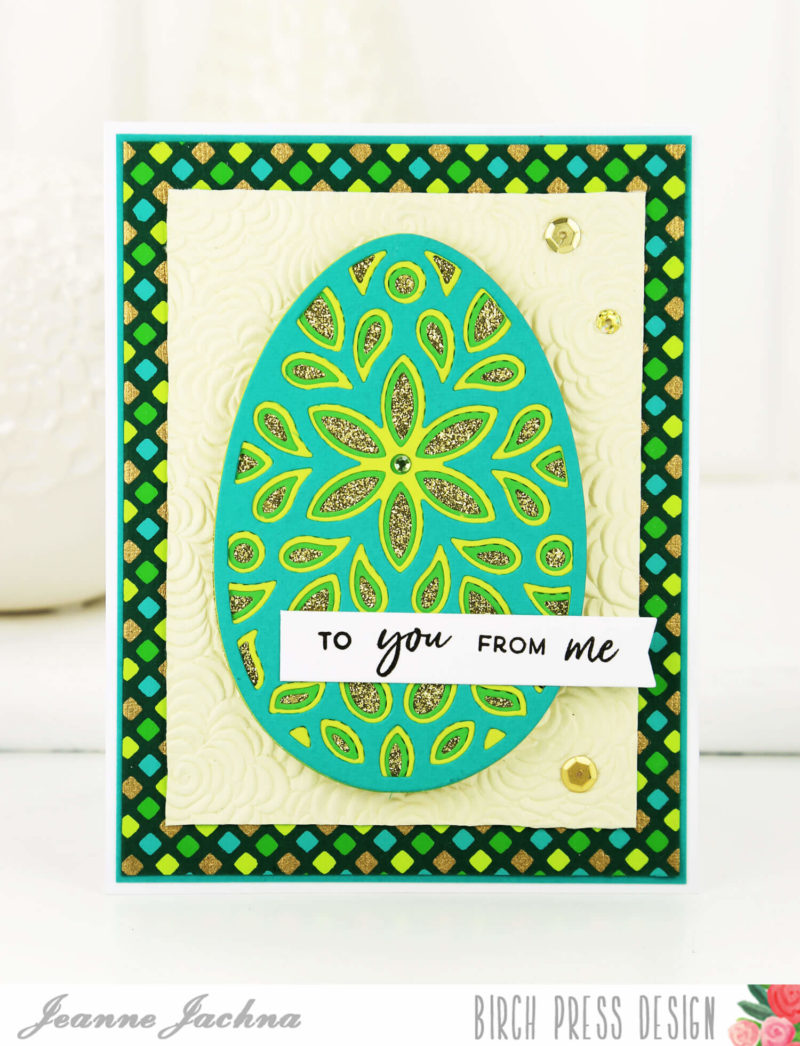
  • Emerald and Teal Fiori Layered Egg | by Jeanne Jachna

    Emerald and Teal Fiori Layered Egg | by Jeanne Jachna

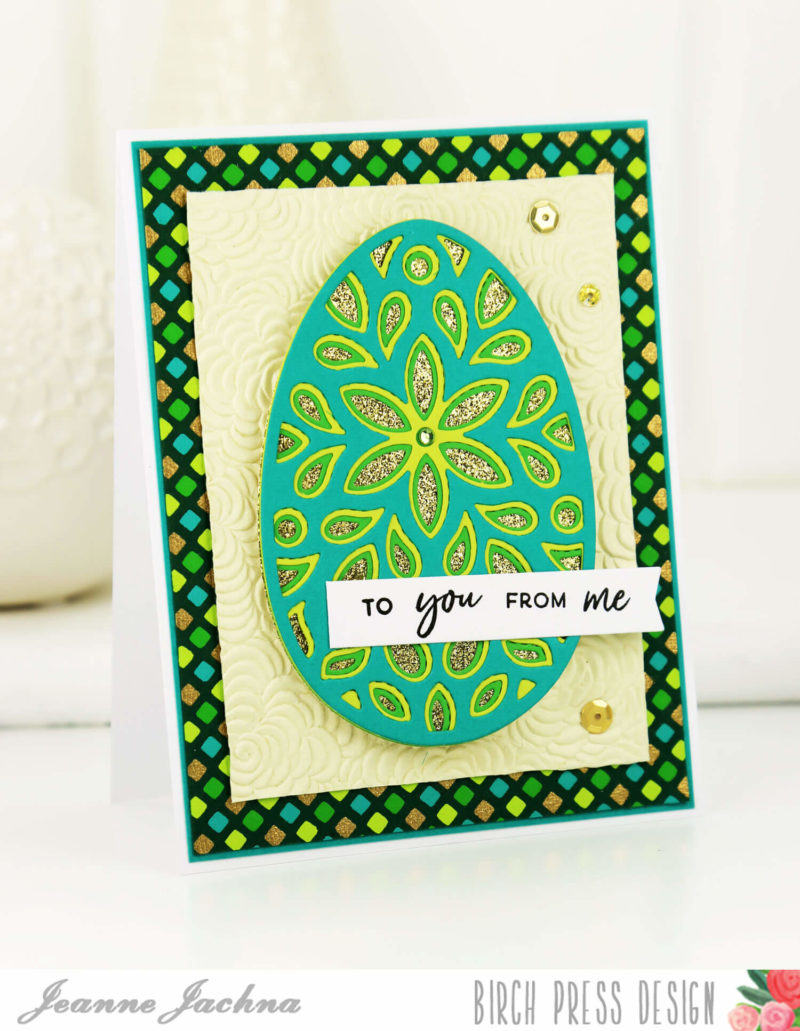
    Hi it’s Jeanne posting on the blog today!  And wow!  Have I got a gorgeous project to share with you today!  I made this beautiful emerald and teal Easter Egg card.

    The Birch Press Design Layered dies have a rich expensive look when layered together.  The Fiori Egg is no exception.  With the new hand made papers in the shop this will impress everyone on your greeting card list.

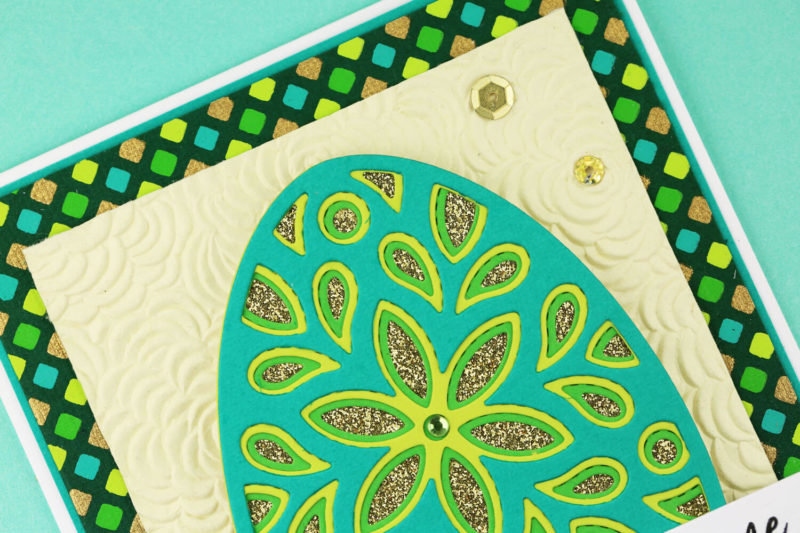
    I’ve never worked with hand made paper before. I was surprised by the thickness and soft cottony feel.  This paper is gorgeous and you’re not going to want to waste even the tiniest scrap!  The Cabbage Rose Ivory has deep embossing, and the Diamond Dot has metallic gold accents.   All the hand made papers in the shop are “tree free” meaning that they are made from 100% recycled material.   I would have never guessed that these thick and rich elegant, hand made papers are eco friendly!  You can see them all here.

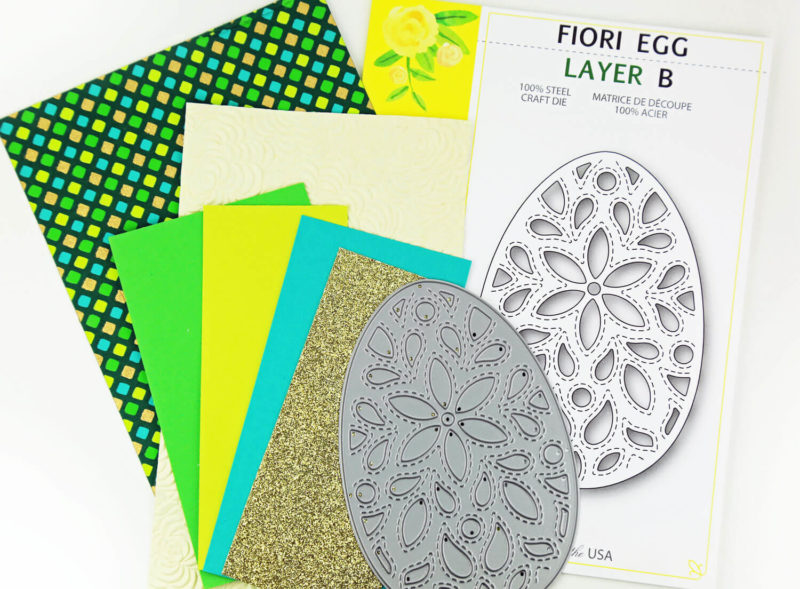
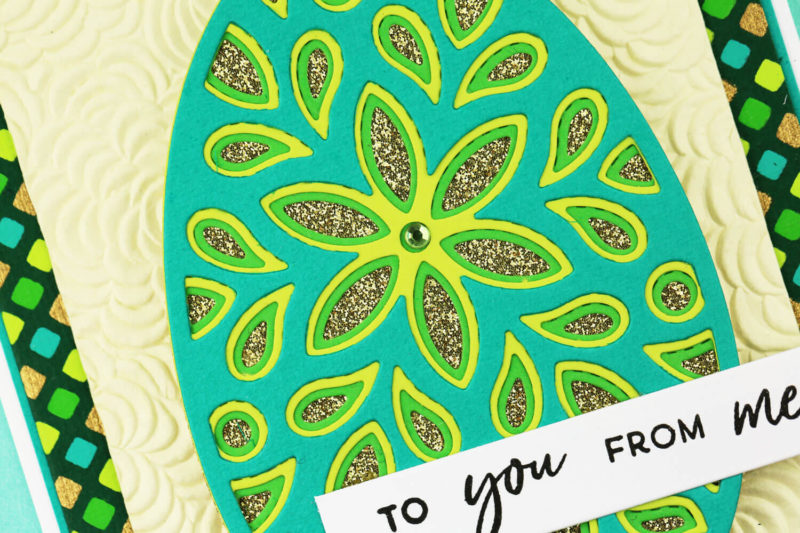
    I cut the Fiori Egg plates in colors that coordinate with the Diamond Dot handmade paper ; teal, emerald, lime and GOLD.

    The gold solid egg was cut with the largest egg from the Stitched Egg die set.   This is a set of three eggs with a stitched outline detail.

    The finishing touch was a gem in the egg center, and some gold sequins to repeat the gold in the background paper, and egg layer.  The sequins are from the Not So Heavy Metal tin in the store.
     I wish you could see this beauty in person – all that gold is total eye candy!


    Birch Press Design Fiori Egg Layer A
    Birch Press Design Fiori Egg Layer A
    Shop at:
    BPD
    Birch Press Design Fiori Egg Layer B
    Birch Press Design Fiori Egg Layer B
    Shop at:
    BPD
    Birch Press Design Fiori Egg Layer C
    Birch Press Design Fiori Egg Layer C
    Shop at:
    BPD
    Birch Press Deisgn Stitched Egg Set
    Birch Press Deisgn Stitched Egg Set
    Shop at:
    BPD
    Birch Press Design A Little Birdie Stamps
    Birch Press Design A Little Birdie Stamps
    Shop at:
    BPD
    Birch Press Design Cabbage Rose Ivory Handmade Paper
    Birch Press Design Cabbage Rose Ivory Handmade Paper
    Shop at:
    BPD
    Birch Press Design Diamond Dot Handmade Paper
    Birch Press Design Diamond Dot Handmade Paper
    Shop at:
    BPD
    Birch Press Design Not So Heavy Metal Sequins
    Birch Press Design Not So Heavy Metal Sequins
    Shop at:
    BPD