Category: Tracey McNeely

  • You Are So Awesome | by Tracey McNeely

    You Are So Awesome | by Tracey McNeely

    Hi there, it’s Tracey here today and I have a card and video to share with you. I remember as a kid that is was very common to receive funny store bought slimline cards for birthdays and other occasions. Slimline cards seem be popping up all over the web lately so today I created a 3 1/2″ x 8 1/2″ card that can be mailed in a standard No. 10 envelope and a video to show you what I did.

    One of the challenges with creating these cards is what to fill all that space in with. The Regal Peacock layer set is a great design to work with this tall, slim card size.

    To begin I cut a 7″ X 8 1/2″ piece of white cardstock for my card base and I scored it at 3 1/2″. Then I cut a 3 1/4″ x 8 1/4″ panel from Bristol Smooth cardstock that I blended Distress Oxide inks onto. I used Tumbled Glass and Salty Ocean Distress Oxide inks to create a blue background. Once I had the panel blended out I mixed some Perfect Pearls with water and splattered it on to the panel then set it aside to dry while I prepared the Peacock die cuts.

    The main die for this set is Regal Peacock Layer A which cuts the peacock body and the solid tail. I created a rainbow tail because we could all use a little colour right about now. I die cut all the layers with cardstock–Layer A with a bright blue, Layer D with green, Layer C from bright pink and Layer B from orange. All the layers were glued together with liquid glue and I set it aside. I folded the card base along the score line and then attached the inner blended panel with tape runner.

    The two line sentiment is from the ‘You Are Awesome‘ clear stamp set. I stamped and white embossed the large word ‘awesome’ near the bottom of my panel and then the line ‘you are so’ was white embossed on a strip of black cardstock and added just above.
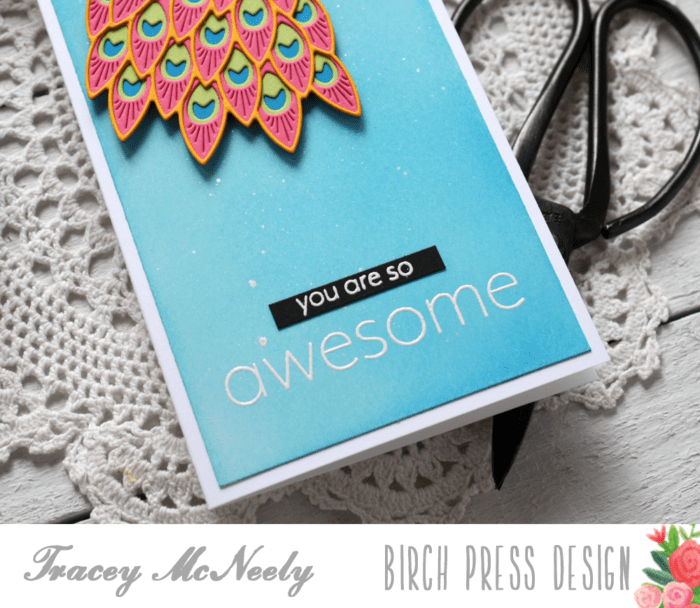
    The peacock was added to the top of the panel with foam tape. A tiny piece of foam tape was added behind the peacock’s head to give it a bit more support. You want your card to survive the mail and allow your recipient to enjoy it once it comes of out the envelope too!

    Thank you so much for joining me today and I hope you are finding time to be crafty while you are staying/sheltering at home. Enjoy the rest of your week! Stay safe.

    Supplies
  • Thanks | by Tracey McNeely

    Thanks | by Tracey McNeely

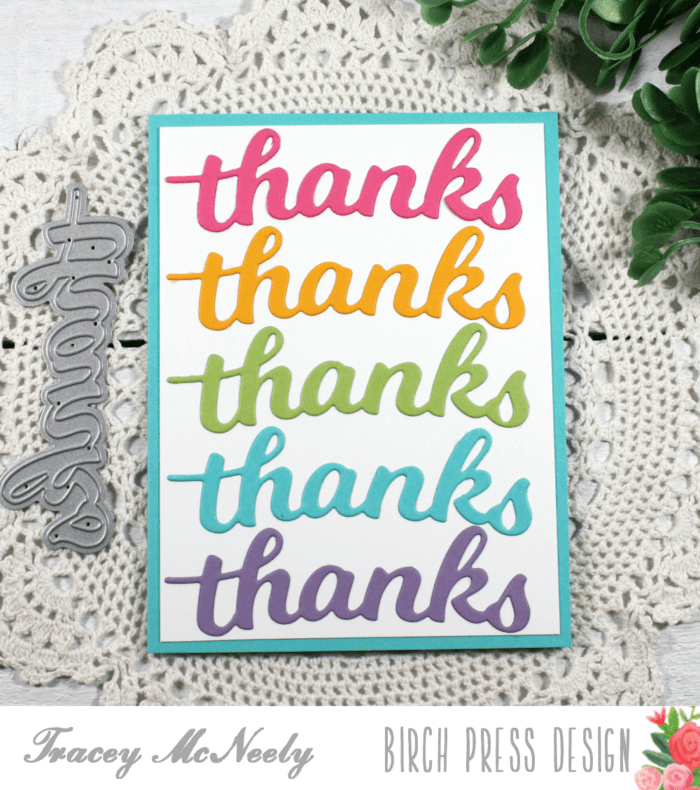
    Hi there, it’s Tracey back again today. I hope that you are managing well as we continue fighting the virus to flatten the curve. Being creative is relaxing for me and it helps keep my mind settled while we are social distancing and staying home. I think I have had rainbows on my mind lately and today I am sharing a really quick and easy thank you card using rainbow colours and one essential die!

    The Honey Script dies have become essentials in my cardmaking these days. The perfect balance of script and curve and this die duo comes with the word and a shadow! Today’s card uses the Honey Script Thanks die, five times.

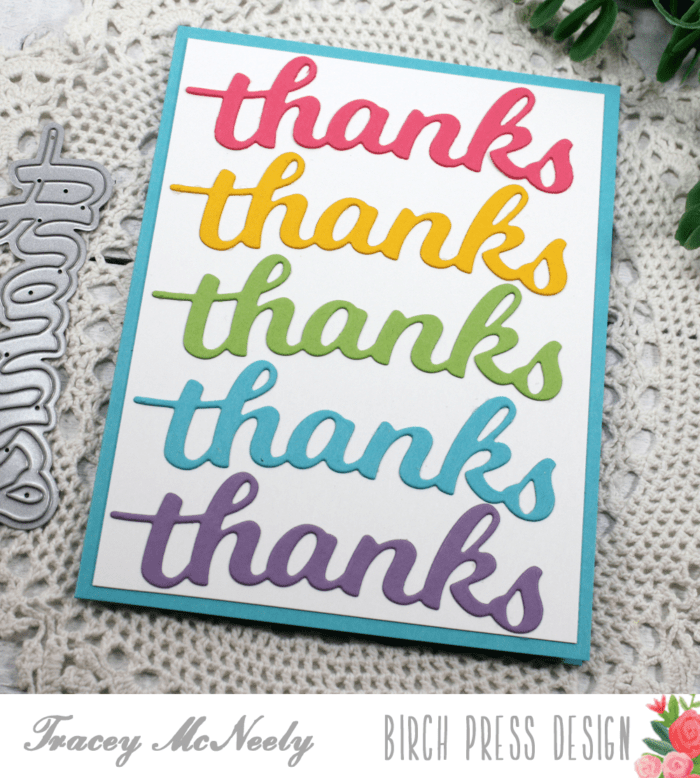
    The word ‘thanks’ was cut five times with five different colours of cardstock. In this case a rainbow of pink, yellow, green, blue and purple.

    I cut my white panel to 5 1/4″ x 4″ and the word thanks fills the space from left to right perfectly. There was just the right amount of space between the top and bottom of the white panel to fit the word five times comfortably.

    TIP: I glued the top pink and bottom purple die cut to the white panel first. Then the green die cut to the middle. By doing this is made it easy to space the dies out evenly.

    The die cuts were adhered to the panel with liquid glue just to allow for a bit of wiggle room if necessary. The panel was attached directly to a blue cardbase making it nice and flat for mailing. Really simple and very pretty, don’t the colours make you smile?

    Thank you for stopping in today and I hope I have inspired you to try making a card with just die cut words. You could use any colour scheme you would like–rainbow, monochromatic, ombre, anything goes!

    Supplies

  • Glittered Hugs | by Tracey McNeely

    Glittered Hugs | by Tracey McNeely

    Hi there, it’s Tracey here today with a super glittery card and video using the String Art Frame die along with some other products from the recent Spring release.

    For full start to finish instructions see the video below.

    To create my background I started off by ink blending a panel of Bristol Smooth cardstock using three shades of Distress Oxide Inks–Cracked Pistachio, Peacock Feathers and Shaded Lilac. I used the Ring Tile Stencil to stencil over the panel using Nuvo Glimmer Paste in Moonstone.

    Once the stenciled design was dry I adhered it to the front of my card base with tape runner. The String Art Frame die was cut from heavyweight white cardstock and then glued it to the glitter stenciled, blended ink panel with liquid glue.

    TIP: Try dotting liquid glue around the outter edges and on any connection points when working with an intricate die cut for good coverage.

    The Honey Script Hugs word dies were cut with vellum for the base and white cardstock for the word and glued together also with liquid glue. It was adhered over the circle in the centre of the String Art Frame by adding a bit of glue to the left and right edges of the word.

    To add a sentiment on the inside of the card, I cut of panel of white cardstock to 5″ x 3 3/4″. Then I stamped ‘spread kindness this Easter’ using the Blooming Spring clear stamp set and attached the panel inside the card.

    The glittered stenciling with the die cuts on top add so much dimension and depth to the finished card.

    Thank you so much for stopping in and creating with me today. Wishing you and your family a Happy Easter and hope that we will all be able to celebrate once again with the people we love.

    Supplies

  • String Art Corner & Giveway | by Tracey McNeely

    String Art Corner & Giveway | by Tracey McNeely

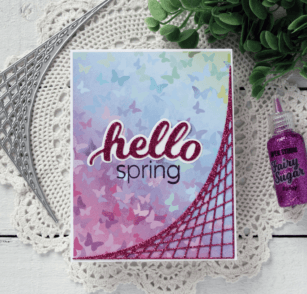
    Hi there it’s Tracey here today and I’m so excited to introduce the newly released String Art Corner die! This week we re having a Blog Blitz and today I have a short video tutorial about using the corner die cuts along with patterned paper!

    I selected the pretty purple butterfly paper from the Memory Box Springtime Bouquet patterned paper pad along with the String Art Corner die, the Memory Box Twinkling Jewel Glitter Pad, the Honey Script Hello dies and the Blooming Spring clear stamp set.

    The patterned paper was trimmed down to leave a 1/8″ border around it on the card base and I die cut the String Art Corner die with co-ordinating paper from the Memory Box Twinkling Jewel Glitter Pad.

    Have a closer look at how gorgeous this intricate die cut is with the patterned paper and cut with the the glittery cardstock!

    We will be having giveaways on our Instagram Account March 21-29, 2020. One comment will be chosen at random from each of the Instagram posts during the blog blitz. Only one prize per person per giveaway. We use a random number generator to select winners from comments. You have until midnight US EST April 1 to leave a comment on each and every Instagram post that you want to enter. Winners will be announced on the Instagram posts on April 3.

    For your chance to win the String Art Corner die…

    1) Follow Birch Press Design on Instagram
    2) Double Tap (LIKE) the post with this giveaway
    3) Tag A Friend in the comments
    Good luck! And thanks for joining us for the Blog Blitz! 

    Supplies

  • You Are the Best | by Tracey McNeely

    You Are the Best | by Tracey McNeely

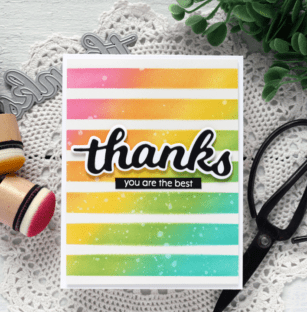
    Hi there, it’s Tracey back today with an ink blended thank you card created with the new Bold Stripes stencil. I also have a process video to share how I created this bright and cheery card.

    I placed the stencil over a panel of Bristol Smooth cardstock and then blended a rainbow of Distress Oxide inks–Picked Raspberry, Spiced Marmalade, More Mustard, Mowed Lawn and Peacock Feathers. Once the stencil was removed I splattered some clean water onto the panel and lifted some of the colour with a paper towel.

    The blended panel was trimmed down to 5 1/4″ x 4″ and then attached to the card base with foam tape for dimension. The large sentiment was cut from the new Honey Script Thanks dies. Thanks was cut from white cardstock for the base and black cardstock for the actual word. It was adhered to the card front with foam tape to make it really pop.

    The second line of the sentiment is from the You Are Awesome stamp set. I stamped and white embossed the phrase ‘You are the Best’ on a thin strip of black cardstock that was adhered directly to the card front underneath the word thanks.

    The black and white sentiments have a really big impact against the bright rainbow background!

    Thanks so much for stopping in today and I hope that you mind is spinning with all the colour combinations that you could create with the Bold Stripes stencil.

    Supplies

  • Creating Custom Backgrounds with Stencils | by Tracey McNeely

    Creating Custom Backgrounds with Stencils | by Tracey McNeely

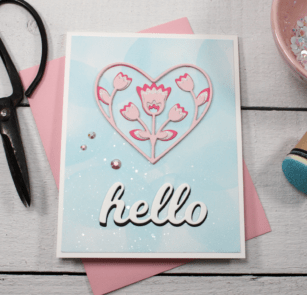
    Hi there, it’s Tracey back today with a little more inspiration using the Folk Art Heart Layer dies set. When I was planning my card I was thinking spring, but as I finished up my card a big snow storm was blowing in.

    To create my custom background I used the Circle Burst stencil to ink blend over a panel of Bristol Smooth cardstock using only one colour of Distress Oxide ink (Tumbled Glass). Using a geometric shaped stencil allow you to customize your results. I randomly moved the stencil over the panel and ink blended until the entire panel was covered. I flicked some watered down Perfect Pearls with a paintbrush to the panel to add a little bit more interest. Some areas ended up darker and some areas more white but the result was a pretty backdrop for the layered tulips.

    I cut the Folk Art Heart Layers from dark pink (Layer C), light pink (Layer A) and the light pink from the Delicate Pastel Glitter Pad. I glued the layers together with liquid glue.

    The hello is from the Hello Topper die and it was cut once from black and once from white. The two pieces were glued together slightly offset to create a shadow so it would stand out on the card front.

    The stenciled panel was trimmed down to 4″ x 5 1/4″ and adhered to a top folding white card base. To finish the card off I attached the layered tulips and the sentiment to the card front.

    Thank so much for stopping in today to create with me and I hope you try using your stencils in a different way to create a custom background. Stop by tomorrow for some more inspiration here on the blog.

    Supplies

  • Building an All Die Cut Card by Tracey McNeely

    Building an All Die Cut Card by Tracey McNeely

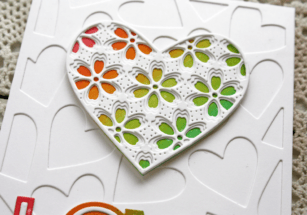
    Hi there, it’s Tracey today and I will be sharing an all die cuts card and video tutorial using the Flora Heart Layers die set, the Cherish Plate die set and the Simple Love sentiment die.

    I created two custom ink blended panels from Bristol Smooth cardstock. The first was a 3″ square that will be the base layer for my layered Floral Heart and a second smaller rectangular panel will fit the Simple Love sentiment die. I blended the ink on both panels with distress oxide ink in rainbow order—picked raspberry, orange marmalade, moved law and peacock feather.

    Once they were blended I flicked some clean water on to the panel and lifted some of the colour with paper towel. Once it was dry I cut the largest heart from the Perfect Hearts die set, it fits perfectly behind the Flora Heart Layers dies.

    Each layer from the Flora Heart Layers die set was cut from heavyweight white cardstock and I used liquid adhesive the glue the layers together. To complete the heart I glued the layered heart to the rainbow base layer.

    I cut layer A from the Cherish Plate die set also from white cardstock and glued it to the font of a white top folding card base. The Simple Love Die set comes in two pieces. I cut the larger of the two Dies from the second ink blended panel and then the detail layer from white cardstock. The smaller letters were glued to the sentiment with liquid adhesive.

    I added the heart and the sentiment to the card base. Leaving the card like this allows you to customize the inside to say whatever you want for the occasion. Thanks so much for stopping by today and watch the video below for more details on how I put this card together.

    Supplies