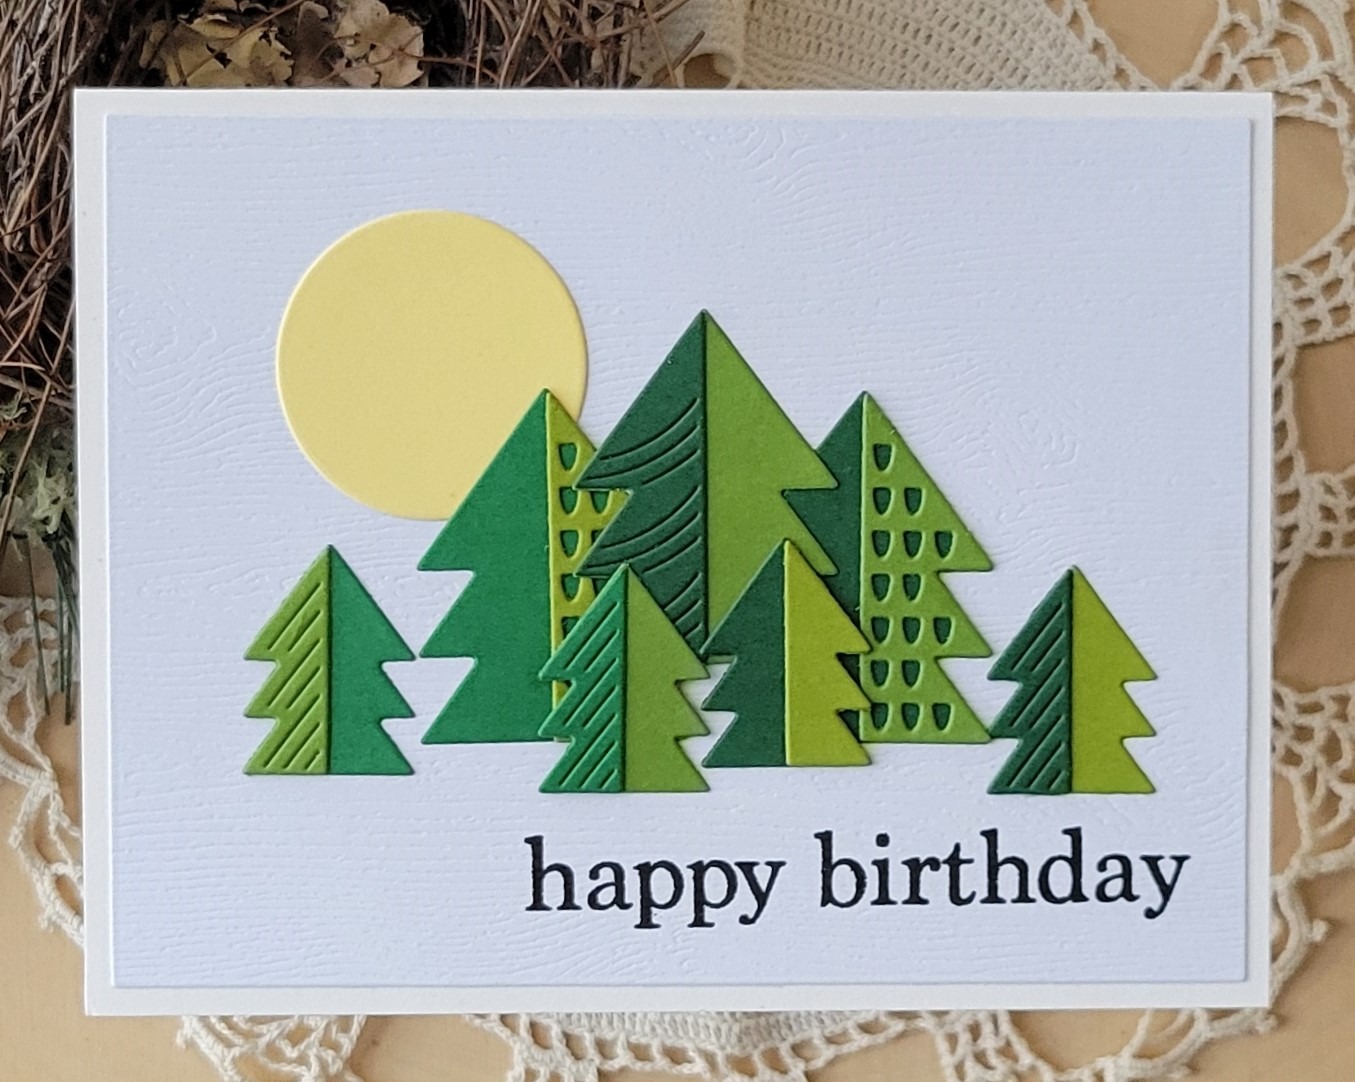
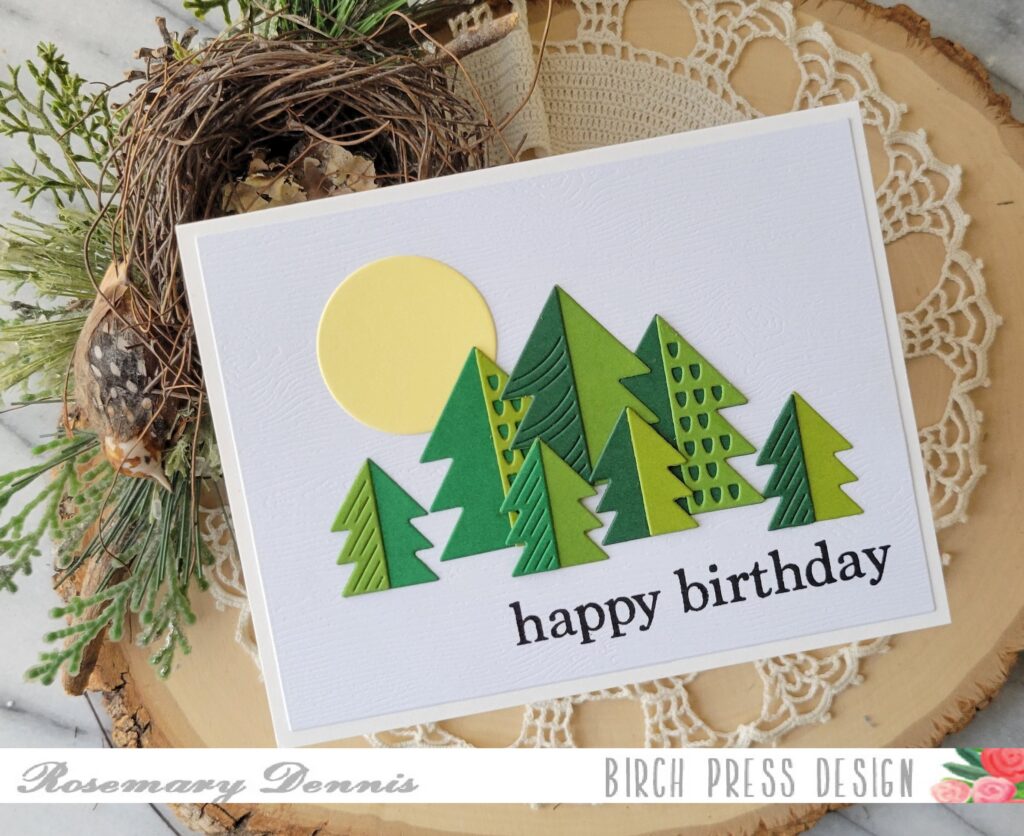
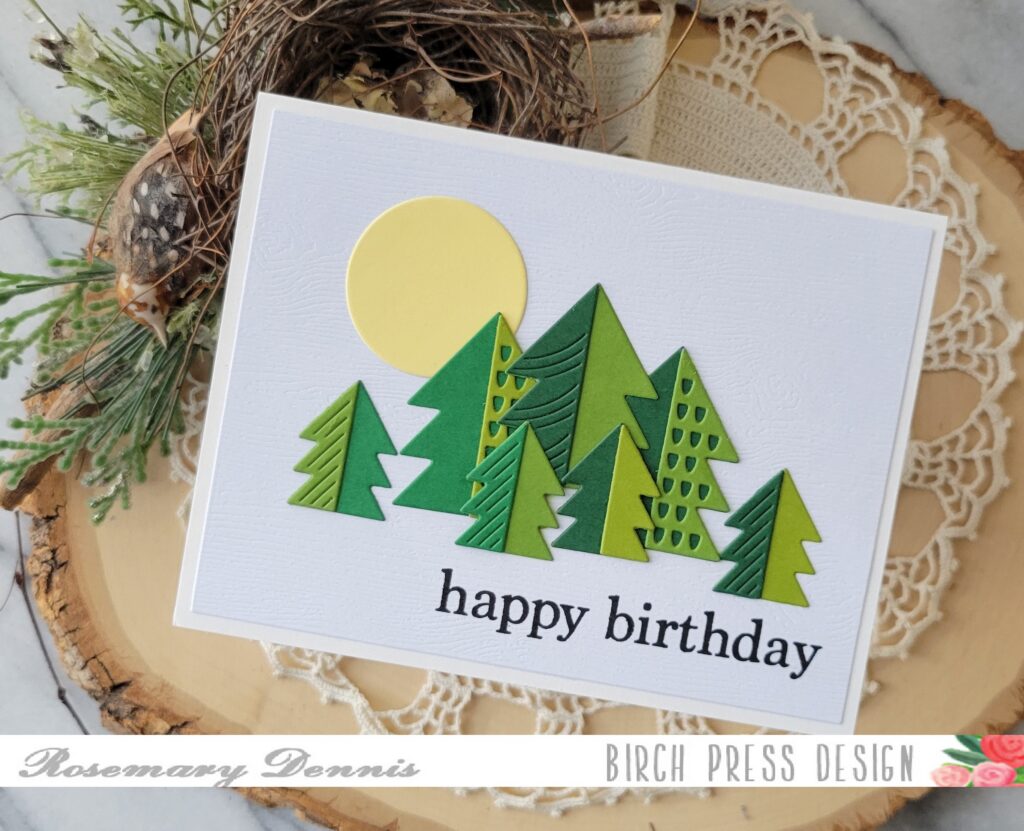
Hello friends! Rosemary here on the blog today sharing a birthday card with a little more of a masculine feel to it. I used the fun Block Print Pine Trees die set, as well as a sentiment from the Plain and Simple Birthday Greetings stamp. Here is what I created.
I started by pulling shades of green from the Memory Box Greenery 6×6 cardstock pad and die cutting trees. I then mixed and matched the different colors to make the different trees and adhered them together with glue.
As the trees dried I tried out different arrangements and settled on the one you see. Now for the background. What to do, what to do? I know… a woodgrain background, lol! I also decided to add a sun in the background and used a yellow from the Memory Box Sunrise 6×6 cardstock pad.
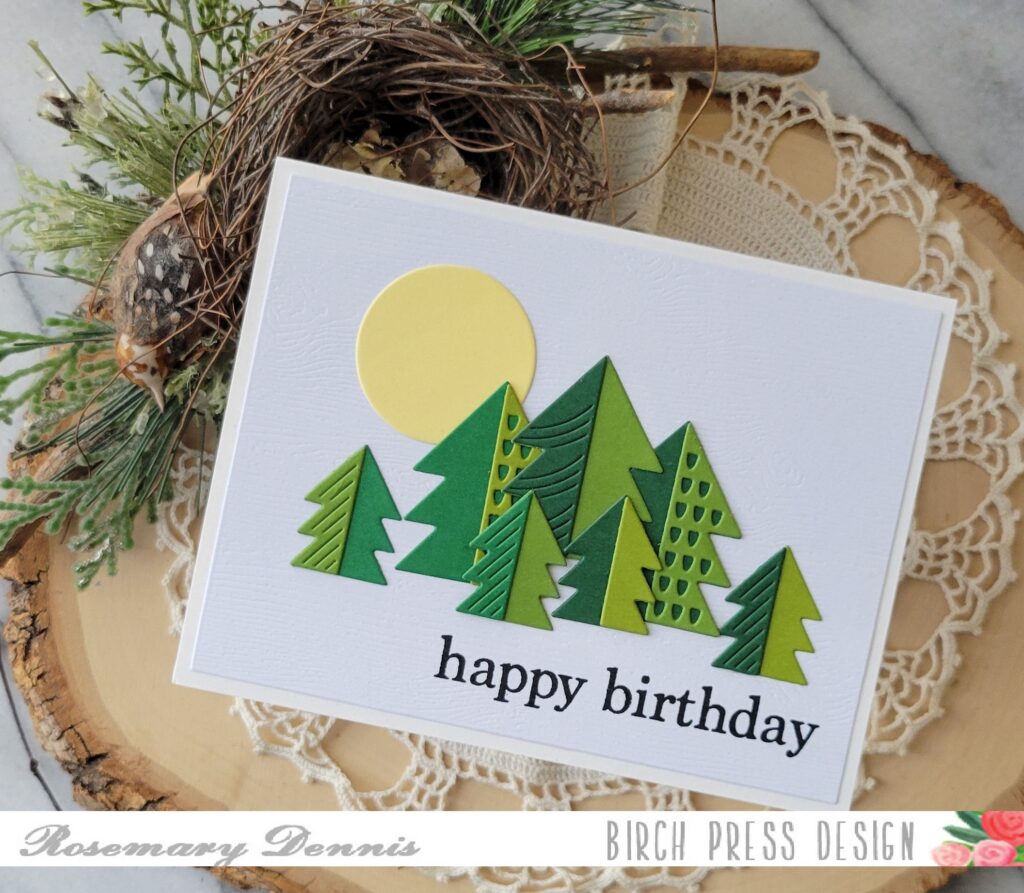
I love the Memory Box woodgrain cardstock and decided to use a piece of the white woodgrain cardstock. I die cut it down to fit a card front and then searched for a sentiment.
I settled on the happy birthday sentiment and stamped it on to the woodgrain panel. I did stamp it several times to make sure I got the best coverage I could.
I adhered everything to the card front with glue as I didn’t want to add any more bulk to the card. I then adhered the panel to a off white cardstock base to provide just a little bit of contrast.
Well, that is it for me. I hope you enjoyed today’s project. Thanks for stopping by the blog today. Have a wonderful day.
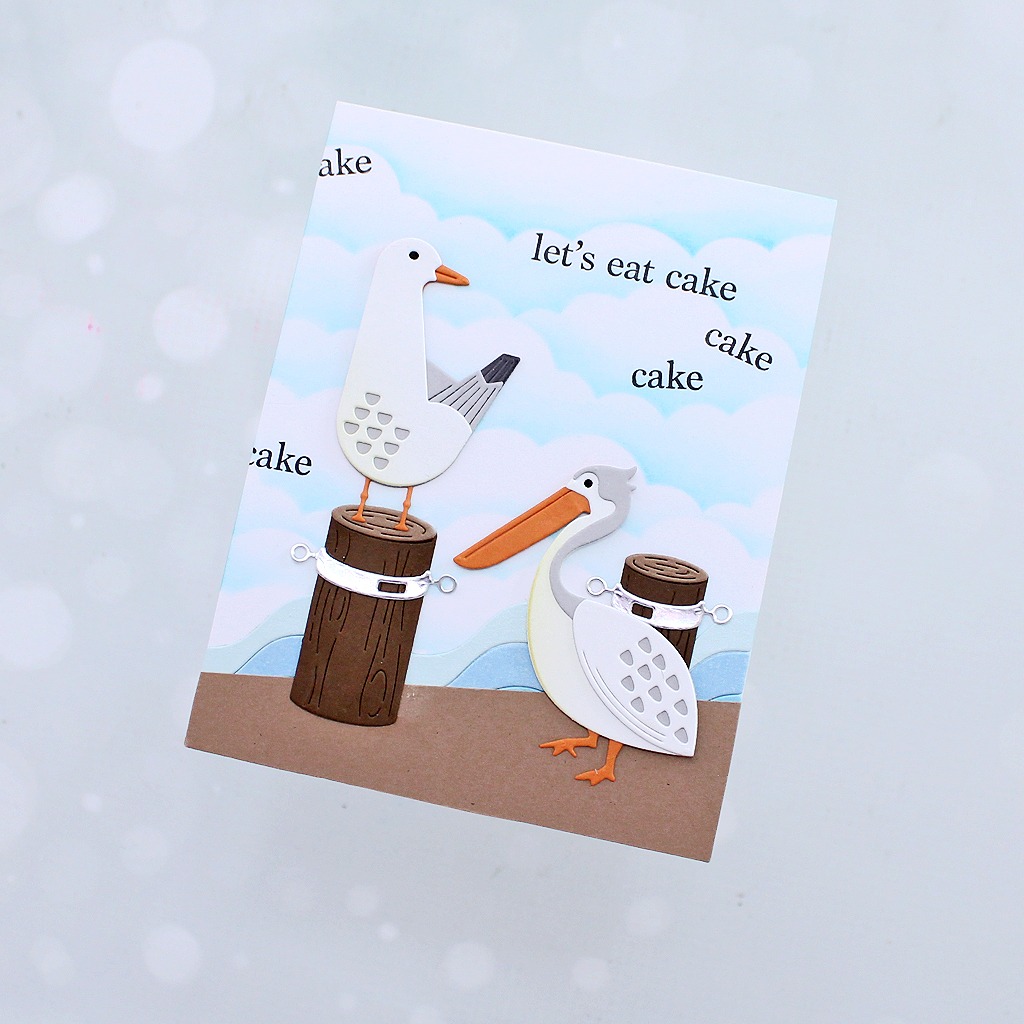
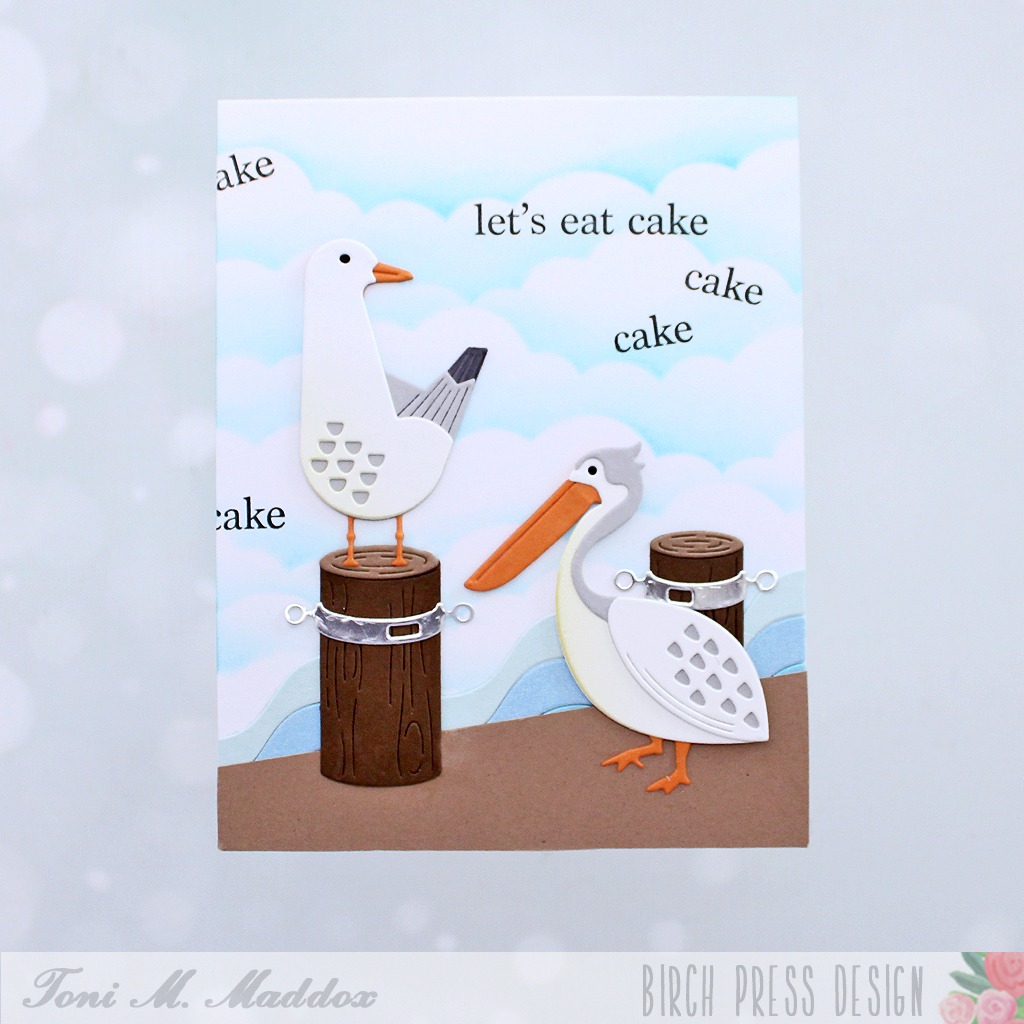
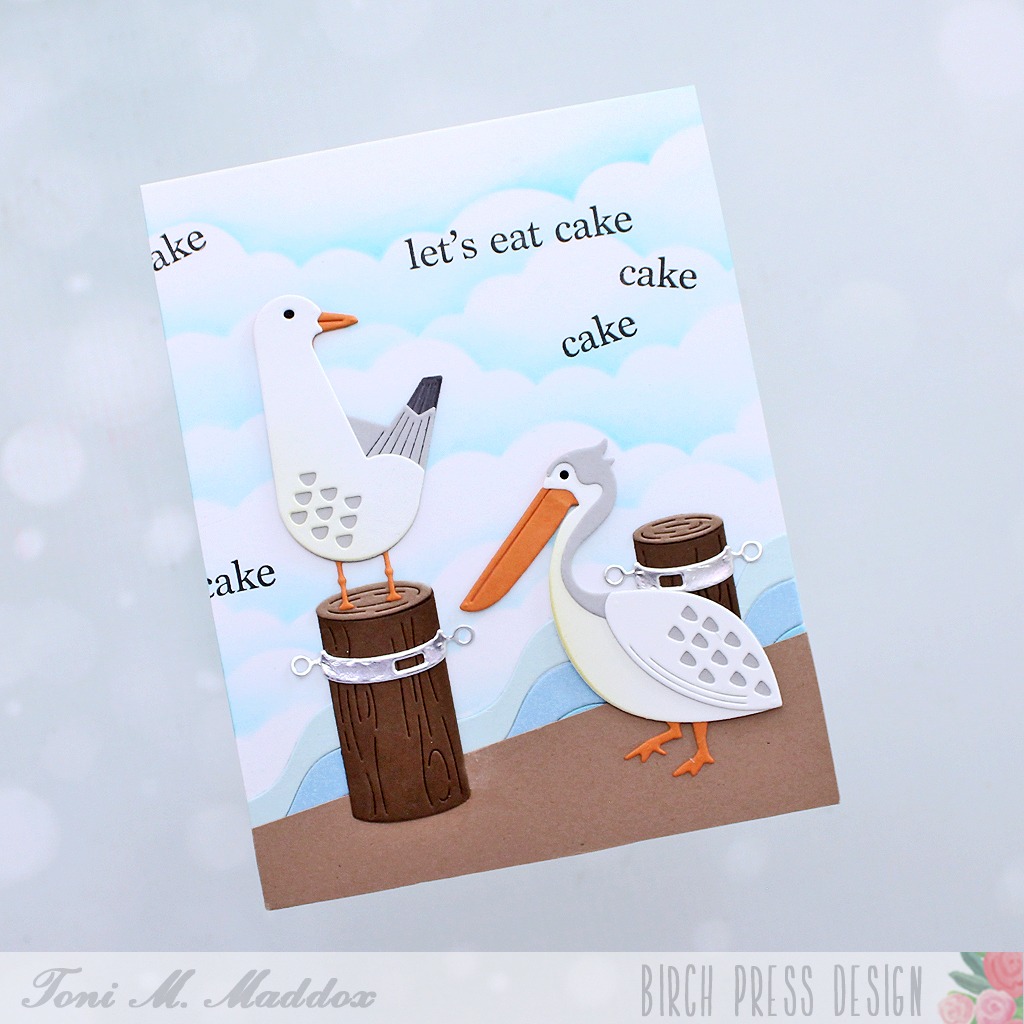
Ahoy, friends! Toni with you today sharing a nautical birthday card that’s sure to get a chuckle from the recipient.
I started the card by sponging the background with a cloud stencil and Catherine Pooler ink.
Next, I added the Birch Press Design Corner Waves cut from a few shades of scrap blue cardstocks beneath an angle-cut piece of kraft cardstock with the Birch Press Design Waterfront Pilings to represent a pier.
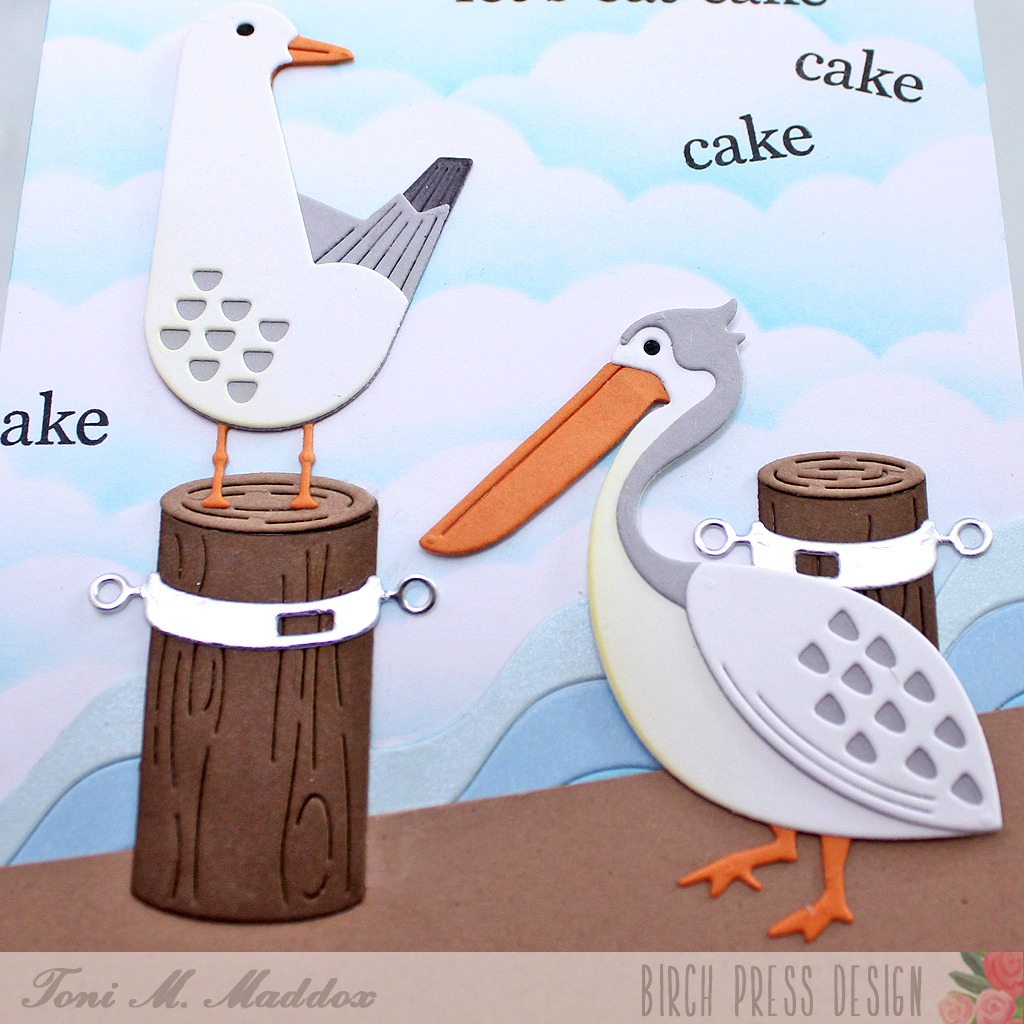
The birds, Birch Press Design Block Print Curious Seagull and Block Print Pelican, were fun to assemble and ever so cute. Notice how I sponged just a touch of yellow on their bellies for a bit of shading.
My final step was to add the Birch Press Design Plain & Simple Birthday Greetings stamped in Versafine Clair Nocturne. I can totally hear the seagulls overhead!
I hope you enjoyed today’s card and have a great rest of your week!
Feel free to visit my blog, Frankie Helps Craft, for a full list of supplies used and to check out my other creations.
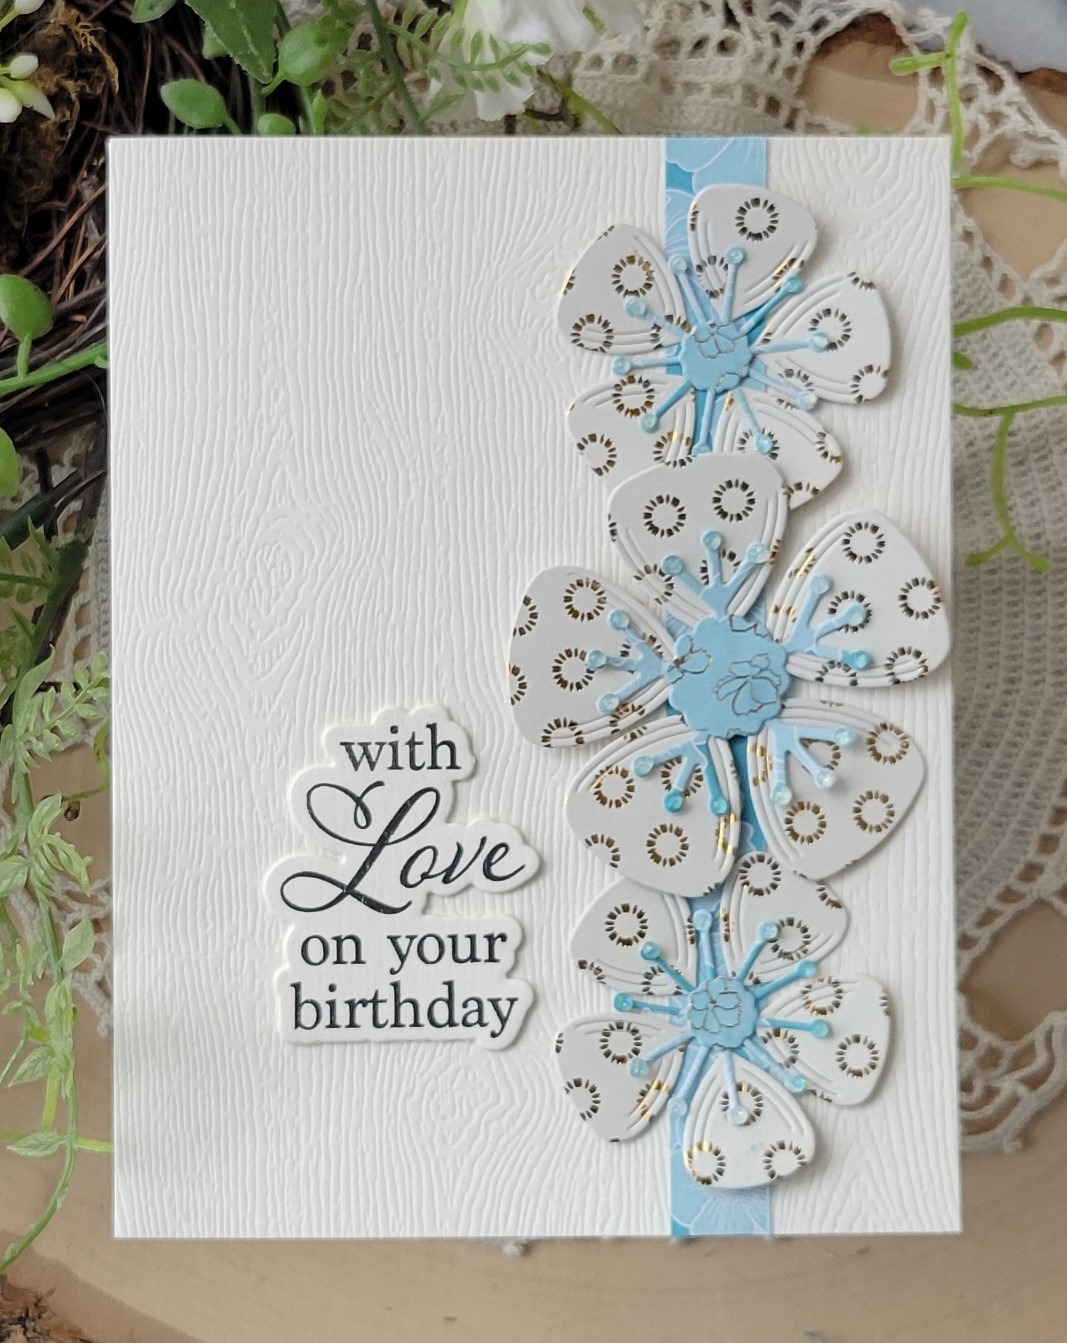
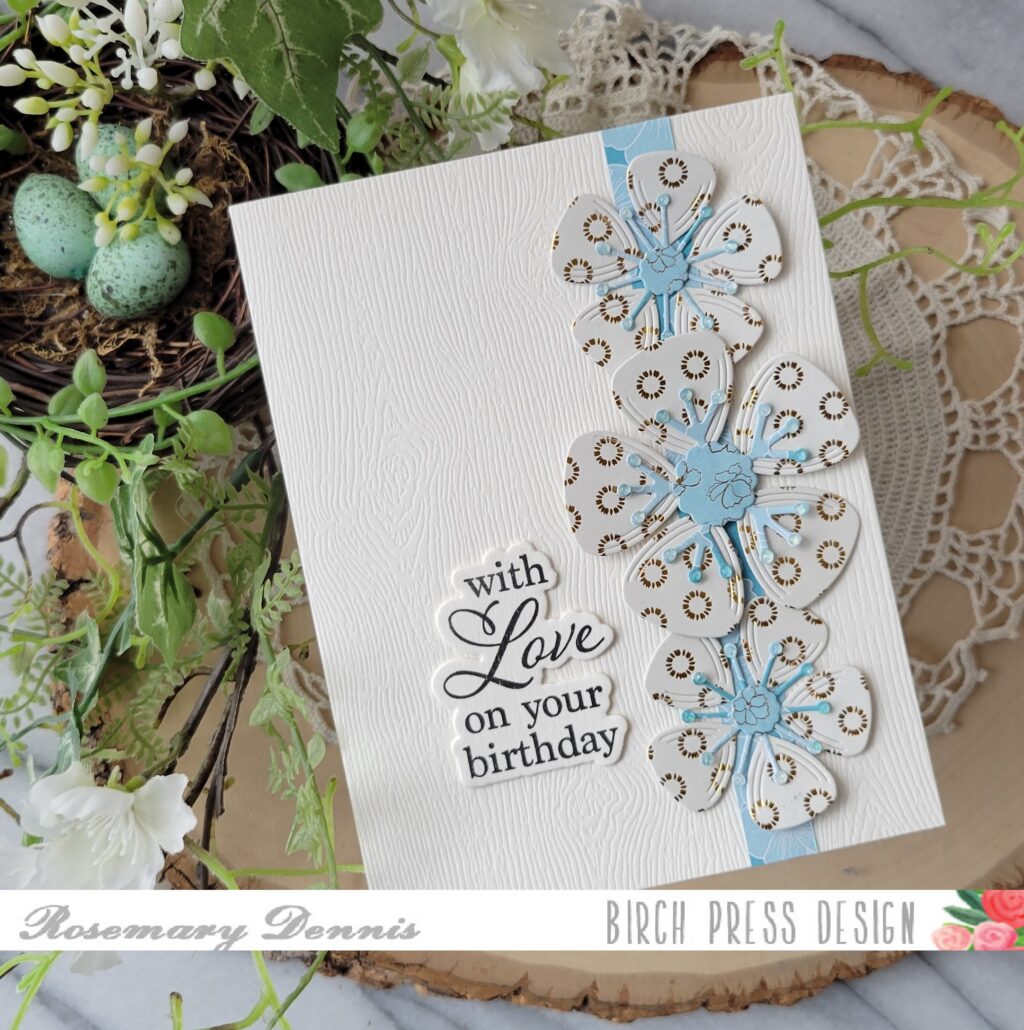
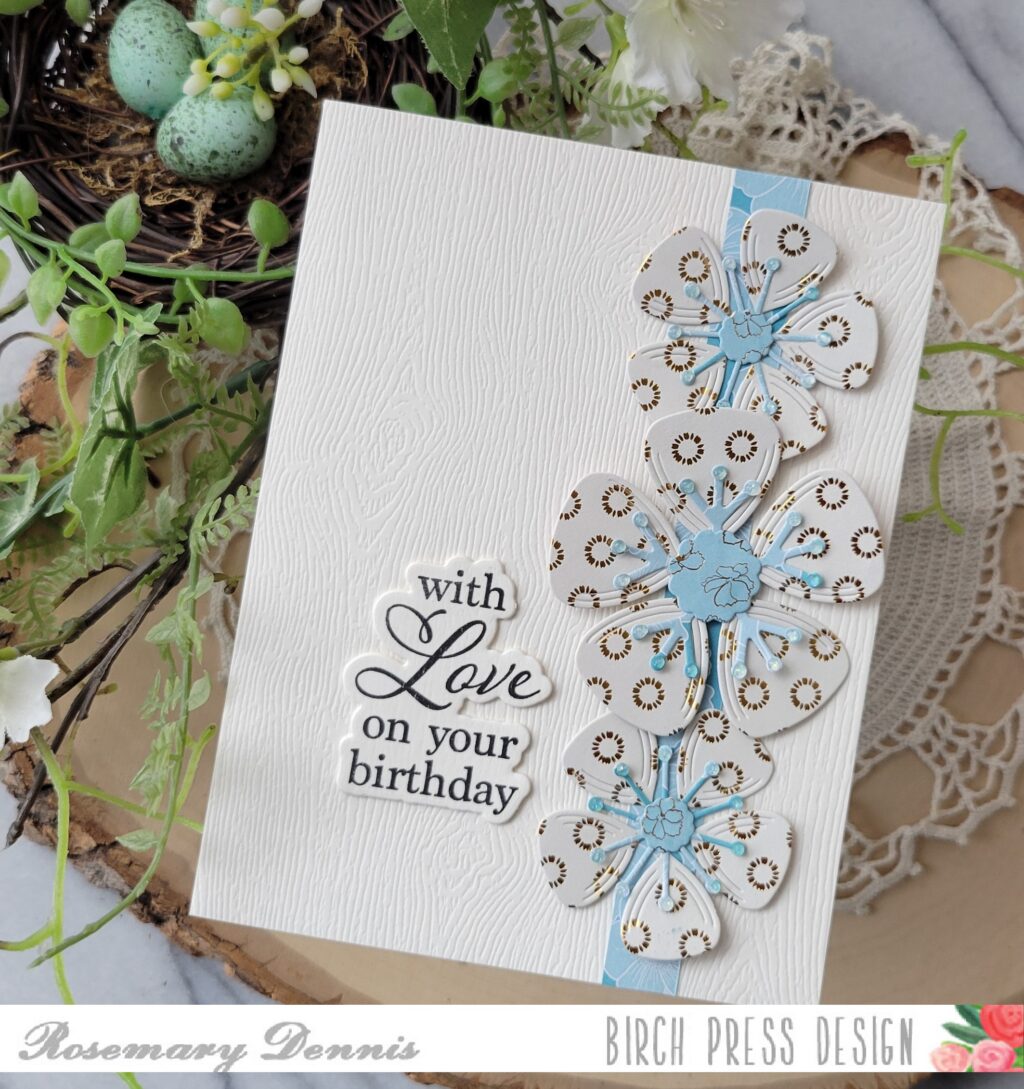
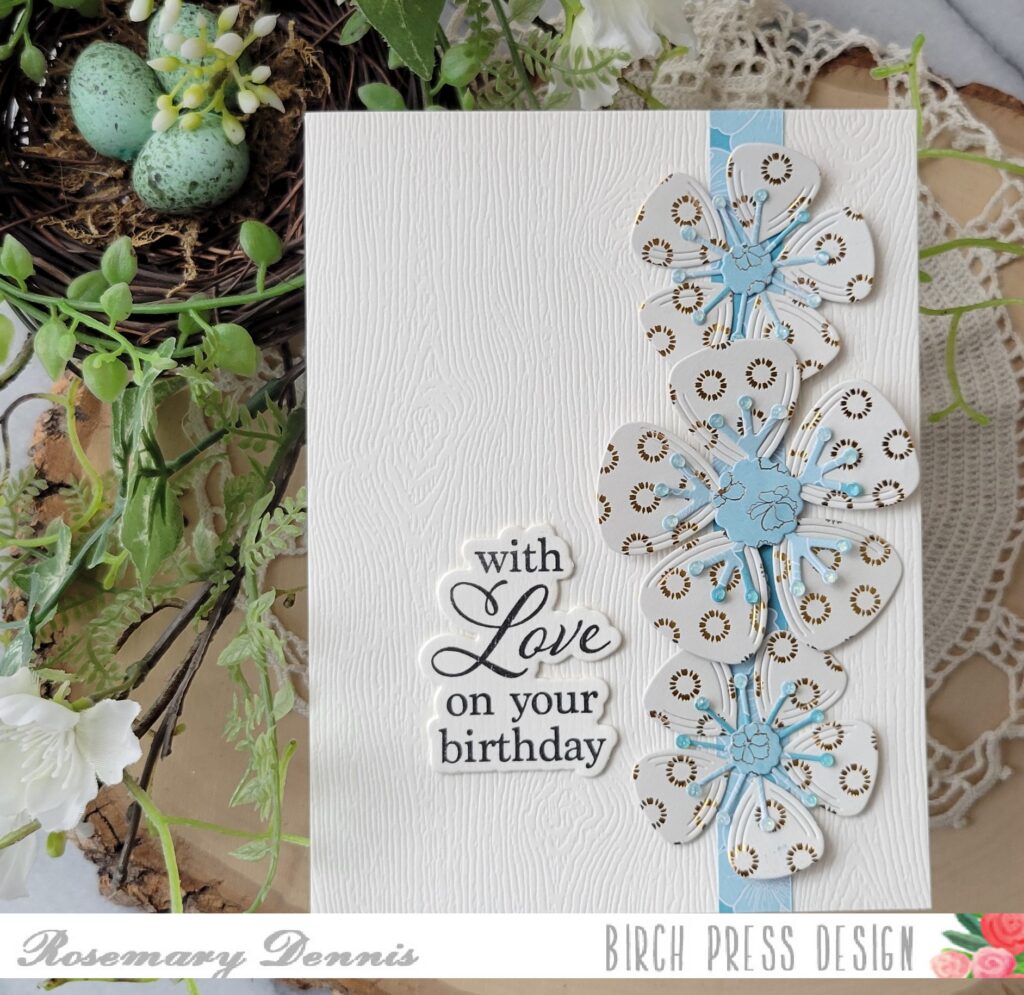
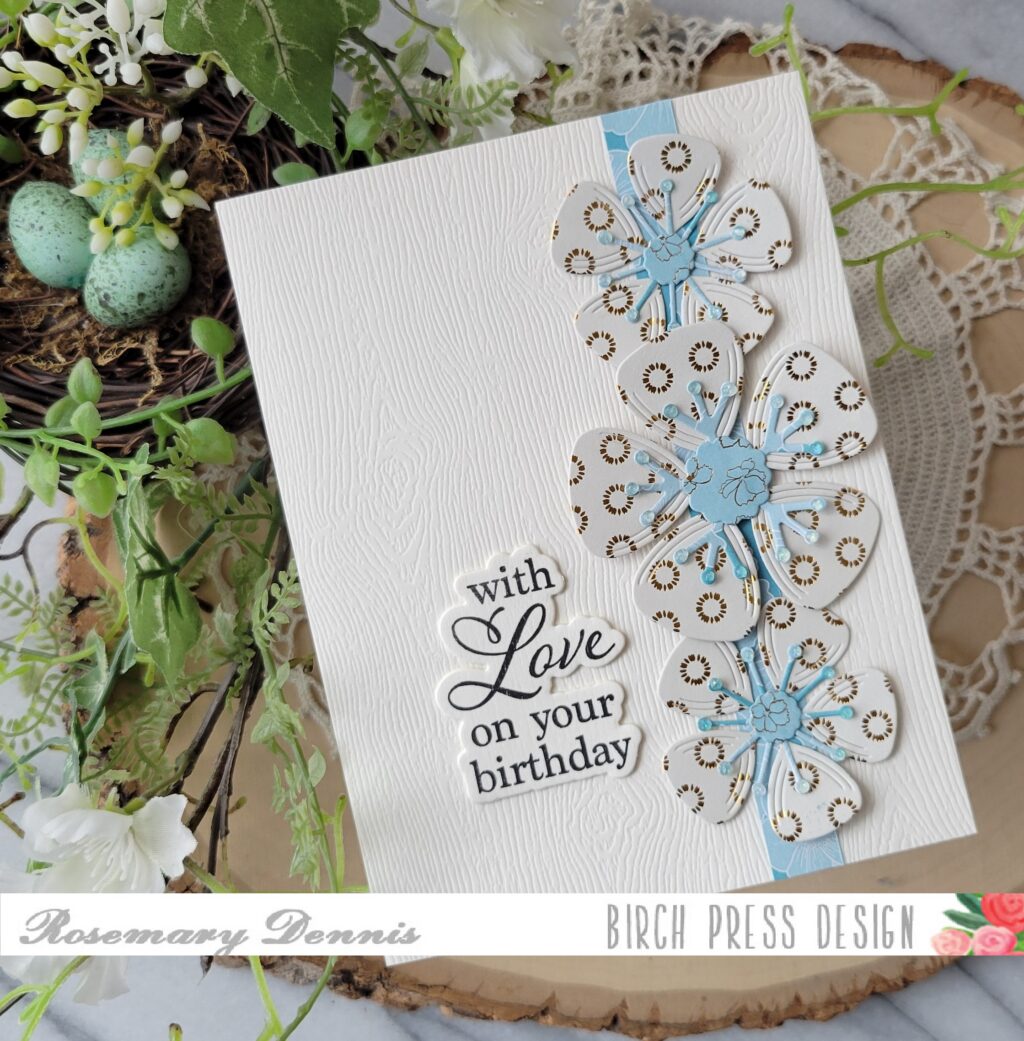
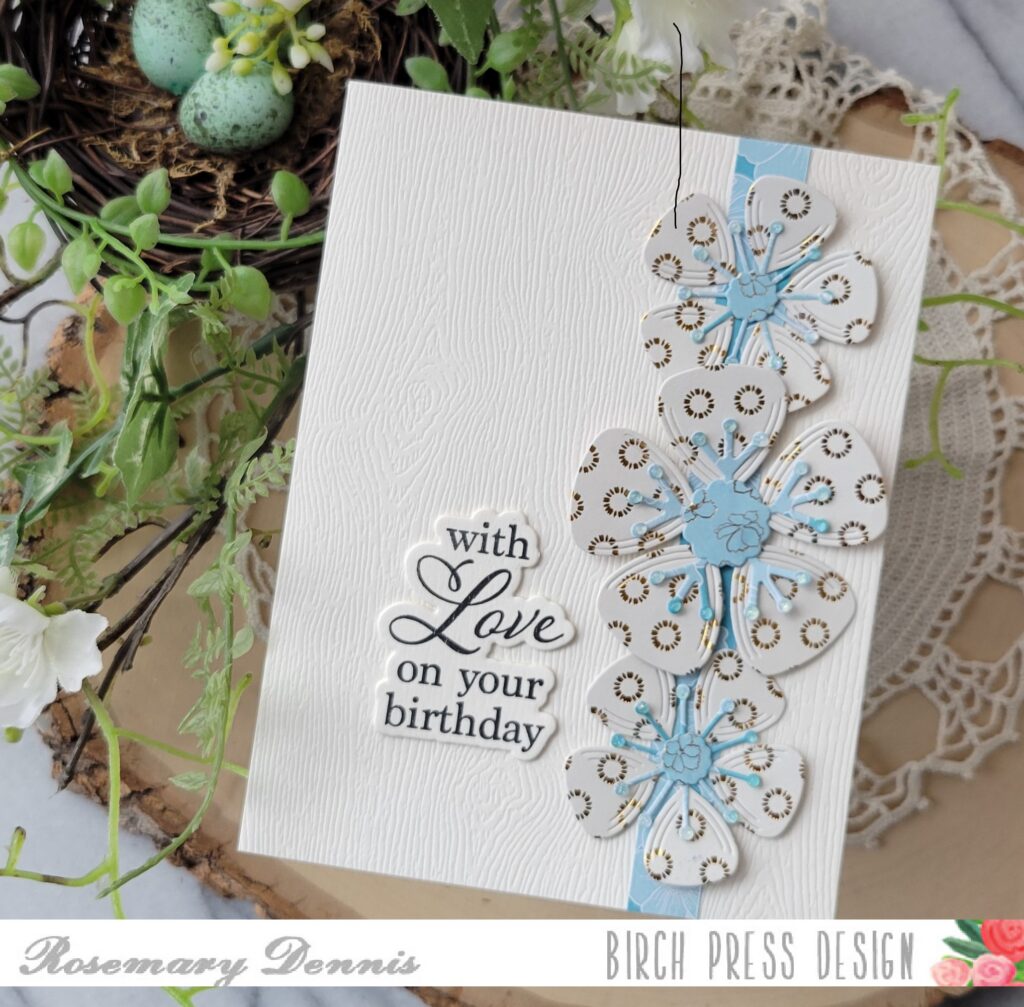
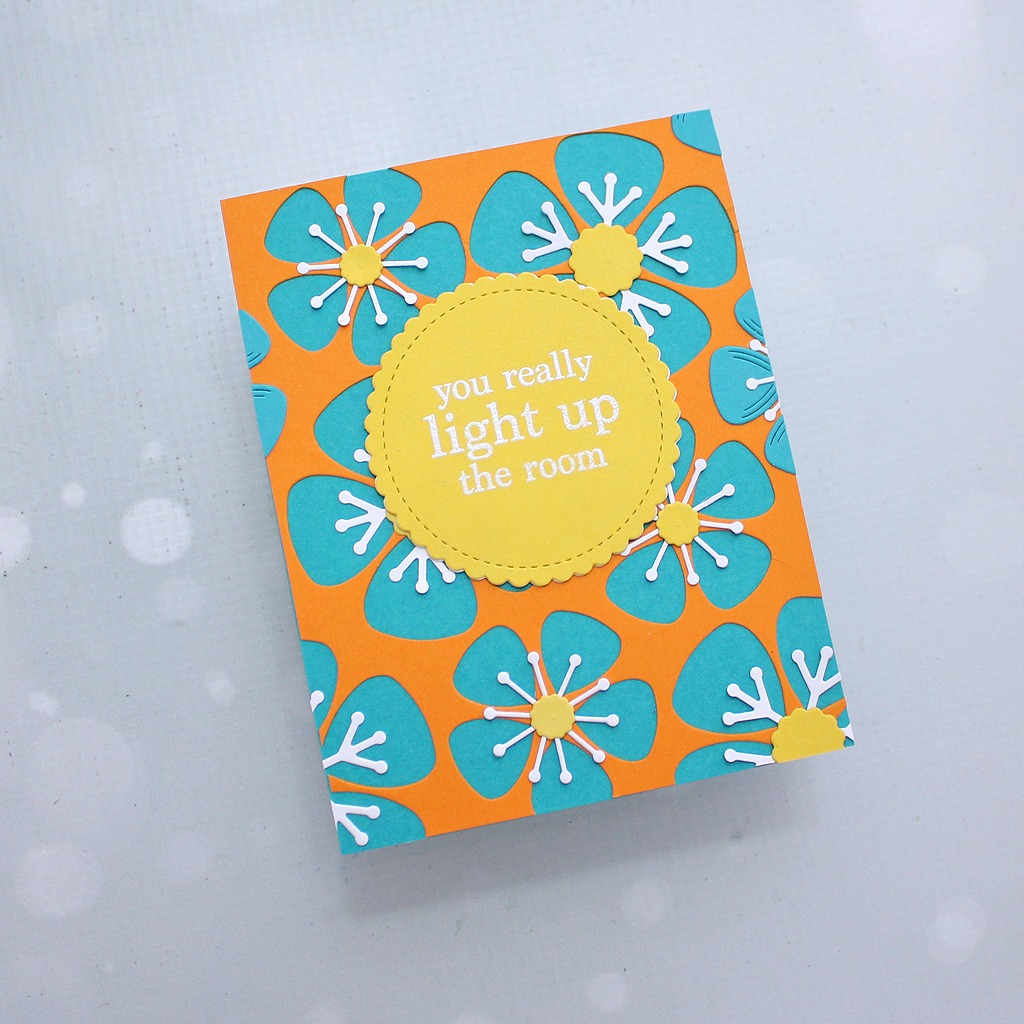
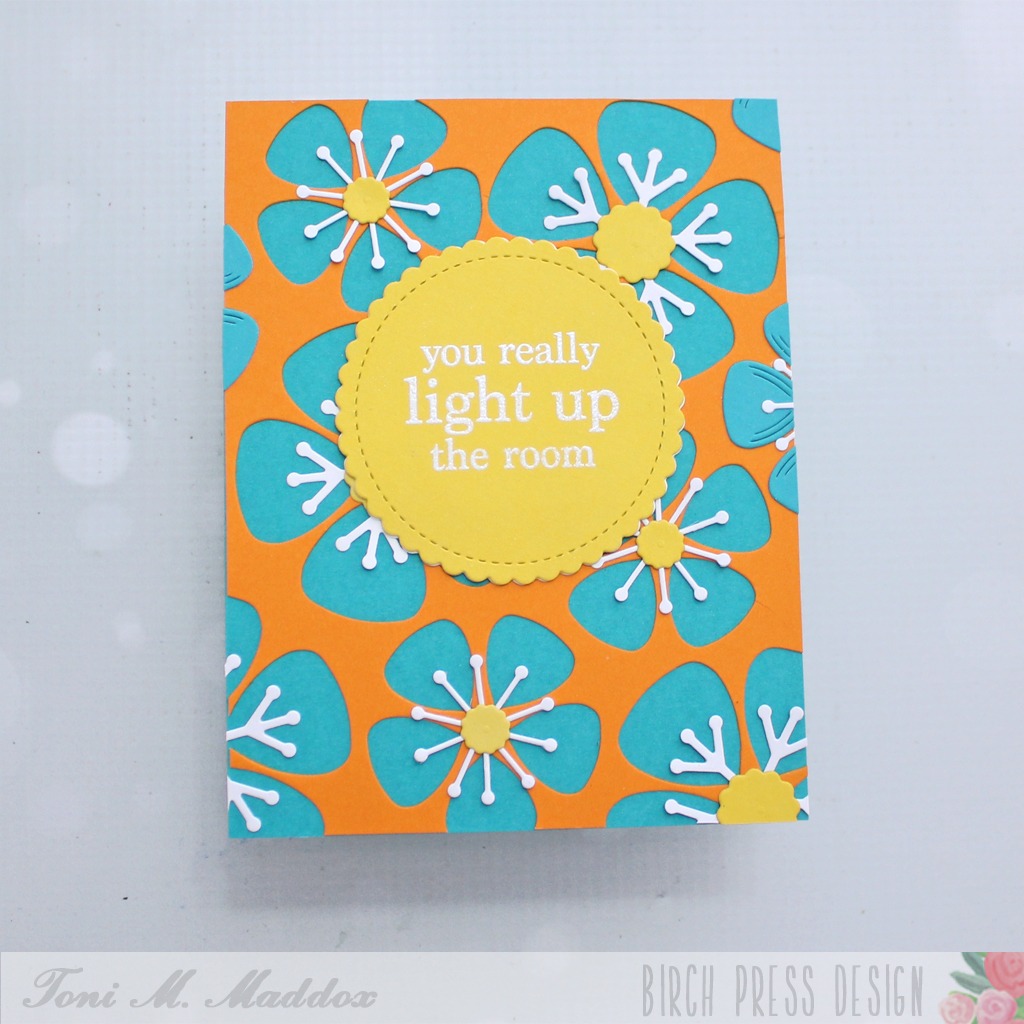
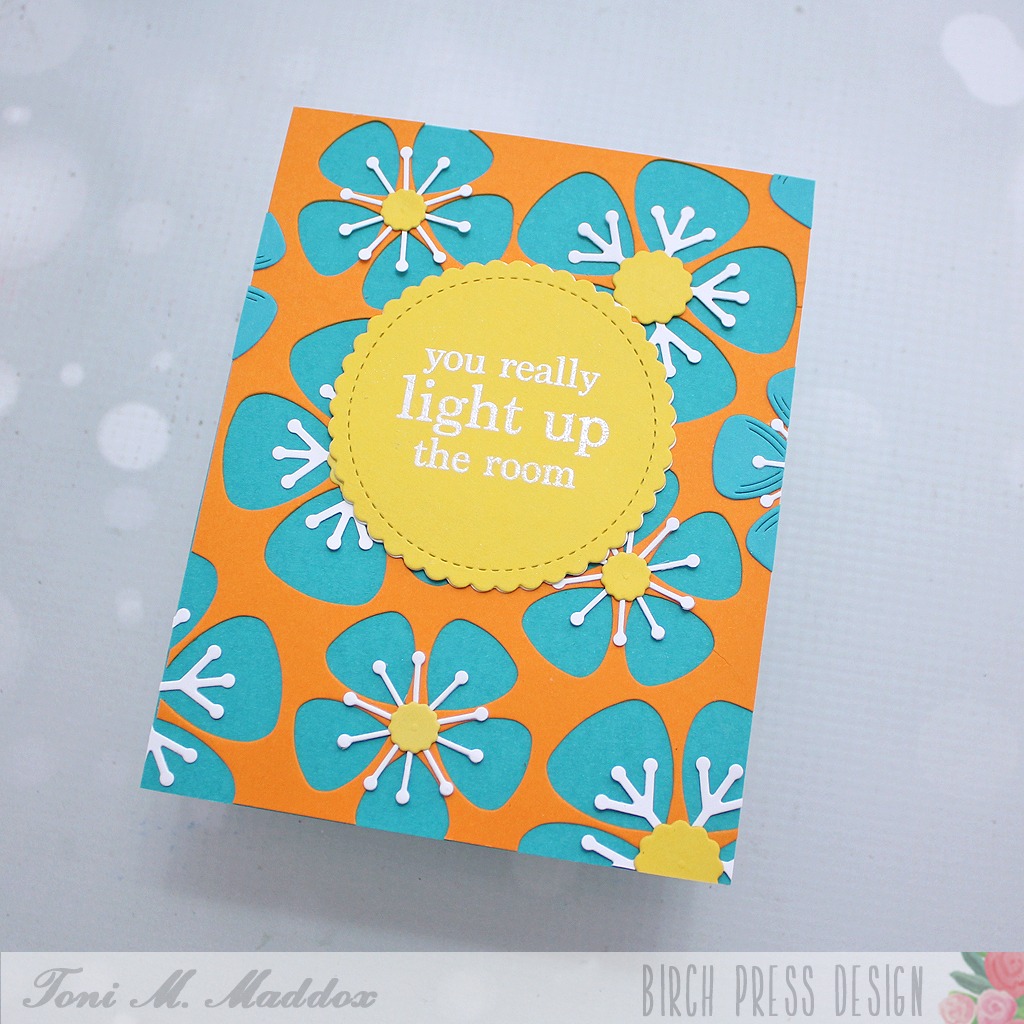
Hello everyone! Rosemary here on the blog today with a simple design using the Block Print Lovely Flower and Elegant Birthday Sentiments stamp and die set. I also used some papers from the Memory Box Anemone Grove 6×6 paper pad. Let’s look at what I made.
I guess this month I have a theme of using patterned paper, lol! I’m often hesitant to use patterned paper for die cutting, but decided that I would give it a try, again. For this card I decided to make sure that I used a more neutral pattern for the flowers. For that I chose a cream paper with gold foiling.
I chose a light blue paper with gold foiled flowers to use for the flower centers. A strip of the flip side for the blue paper was used as an accent as well.
I adhered all the pieces of the flowers together and set them aside to dry. I love the Memory Box woodgrain cardstock for backgrounds as it adds a nice subtle look. I trimmed down a piece of cream woodgrain and then added the strip of patterned paper.
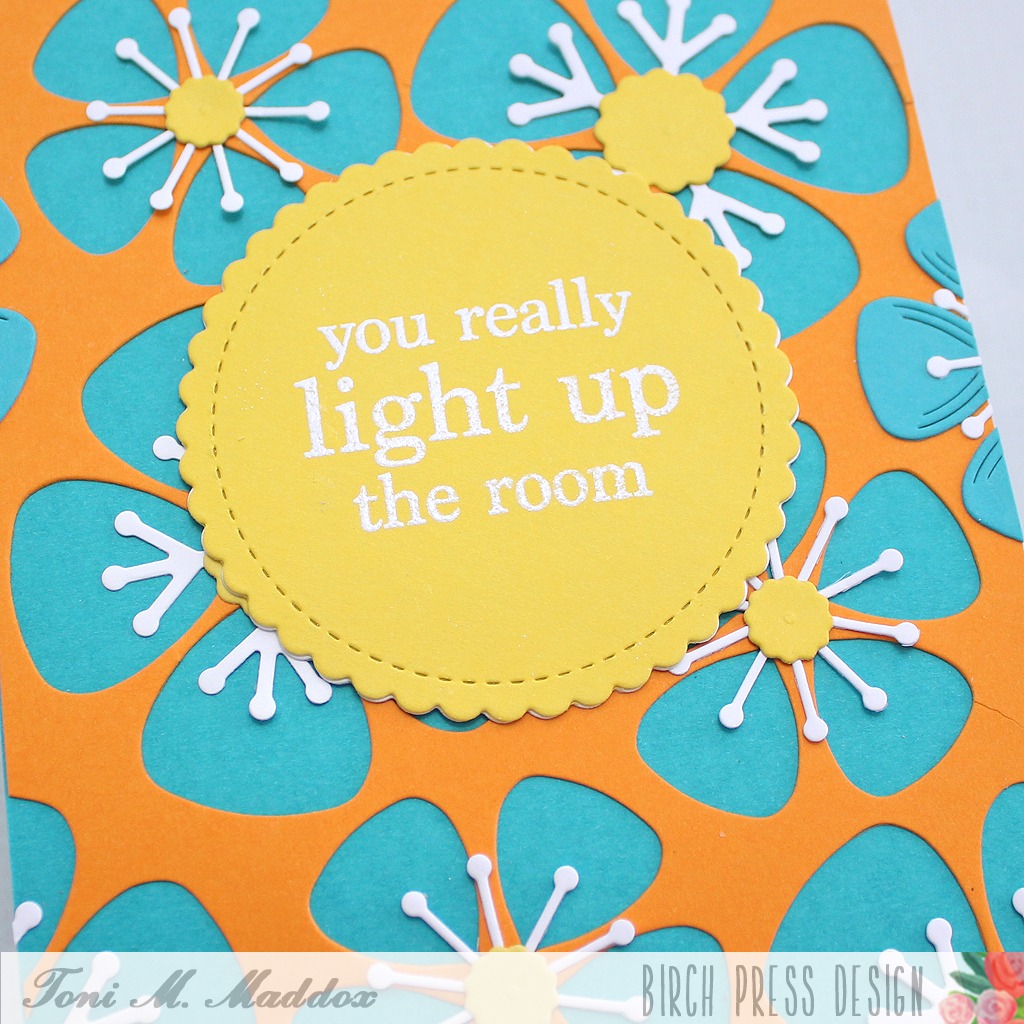
The flowers were then adhered to the paper strip. I used a thin foam square for the large flower and then glue for the two smaller flowers. A dot of a crystal lacquer was added to each of the little stymens and I set aside the panel to dry.
I finished with the sentiment that I stamped in black on the reverse side of a piece of the cream woodgrain cardstock thus achieving a nice cohesive look. I hope you enjoyed today’s project. Thanks for stopping by and have a wonderful day.
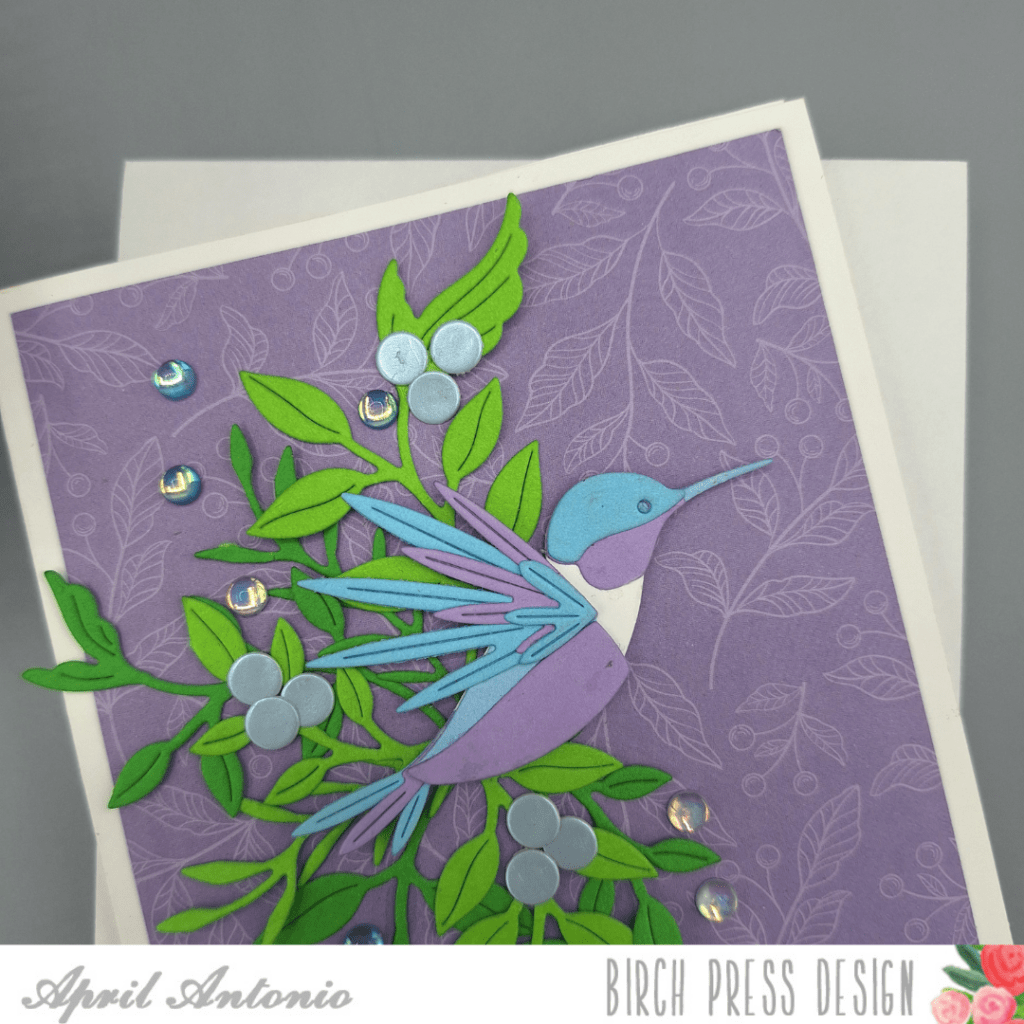
There’s something about a hummingbird mid-flight that makes a card feel alive — and when you set one against a soft, dusky purple background, the whole thing turns into a little moment of calm. This is a “Thank You” card I made using the Block Print Soaring Hummingbird, and I’m so happy with how serene and pretty it came out. Let me walk you through how it came together.
Starting with the base
I kept the foundation clean and simple — a crisp white card base — so all the color and detail could really sit front and center. With a design this layered, I find it helps to start neutral and let the dies do the talking.
A soft, leafy background
Before adding anything else, I built out the background panel in a gentle dusky purple using a patterned paper sheet from the Lavender Bloom Paper pack from Memory Box. I love the way the tone-on-tone leaf-and-berry pattern fades into the cardstock — it gives the panel depth and movement without ever competing with the main scene. That subtle botanical layer is what makes the bright greens and the hummingbird pop the way they do.
Die cutting the foliage
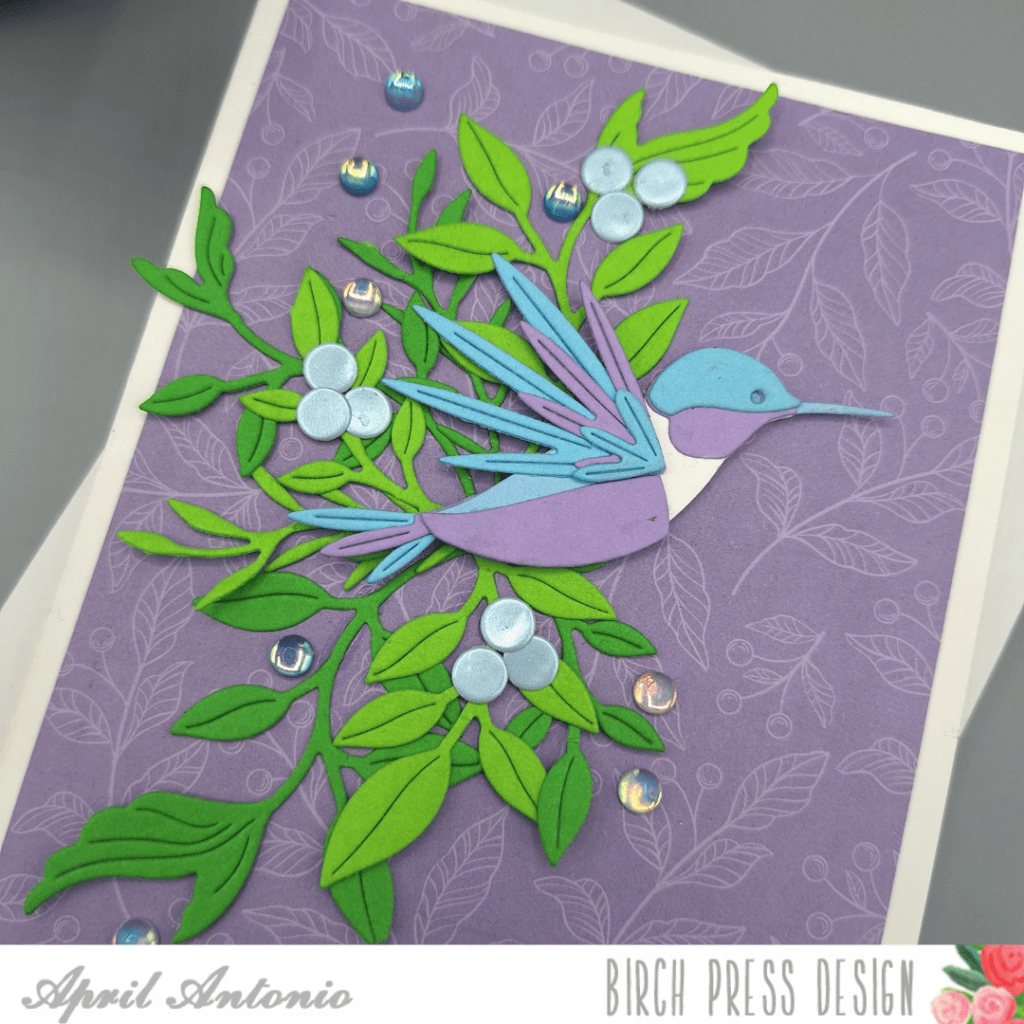
Next came the greenery, and this is where the card really started to feel like a little garden. I cut the leaves and branches from a mix of greens using the Foliage Bunch die set. Working with two greens instead of one gives the foliage so much more dimension; some leaves come forward, others recede, and suddenly you’ve got a believable little thicket for your bird to fly through.
Building the hummingbird
Now for the star of the show. The Block Print Soaring Hummingbird is such a beautiful, layered die — those long, fanned wing feathers are what give it that gorgeous sense of motion. For this version I went cool and dreamy: a soft lilac body paired with layers of sky blue and periwinkle across the wing and tail. I used cardstock colors from Memory Box in Blueberry Mist and Lavender Bloom.
I foam mounted the finished hummingbird up off the foliage so it sits of the panel.
A scatter of berries
To tie the scene together a bit more I took the berry die from the Block Print Mod Branches die set and cut some pastel blue ‘berries’ out. I added clusters of soft blue berries nestled in among the leaves.
Adding the sentiment
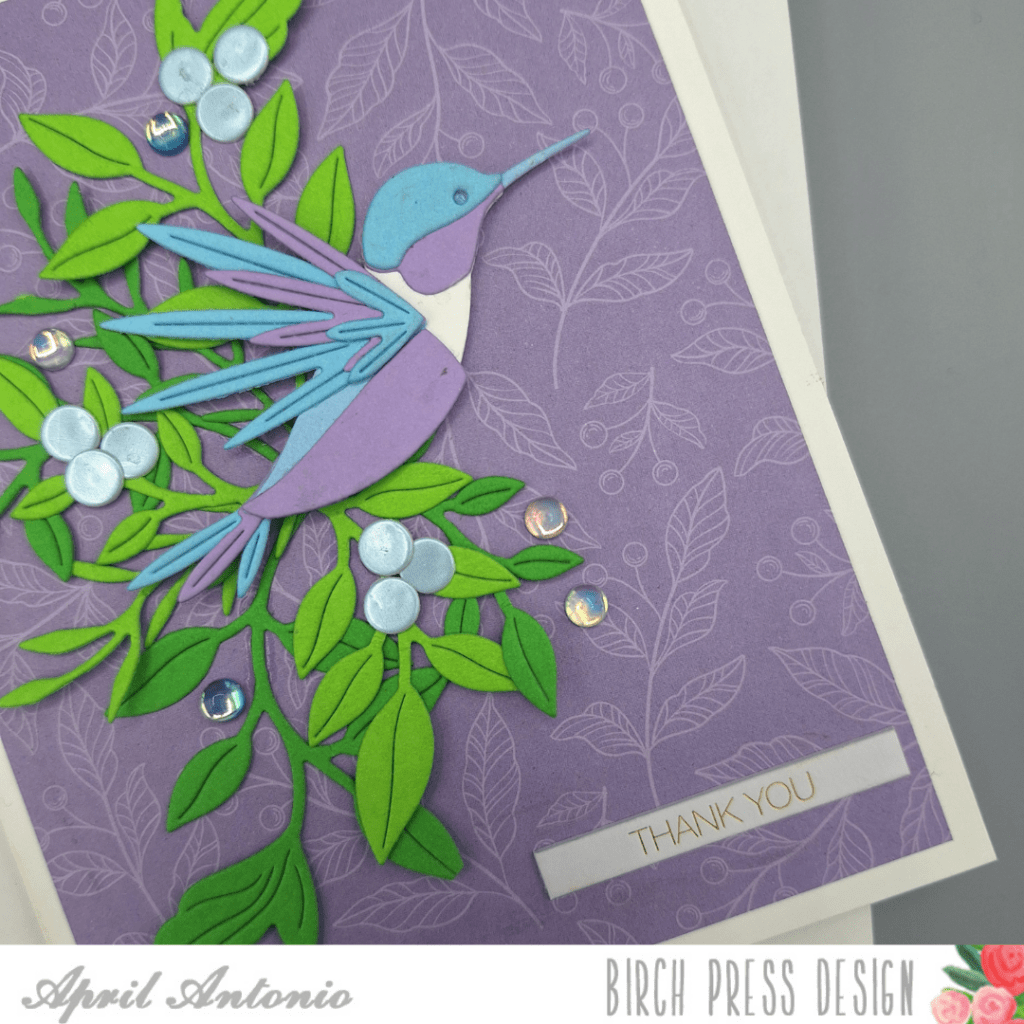
For the greeting I kept it short and warm — a simple “thank you” in the lower right corner using one of the beautiful gold foil greetings from Memory Box (p.s. they also come in a beautiful gold foil on black!). I love using these sentiments, especially when I’m short on time, because they are beautiful and easy to adhere to any card.
The clean little gold sentiment is just enough; with so much happening in the florals and the bird, the card didn’t need a long phrase.
Finishing touches
To finish, I scattered a handful of iridescent gems across the panel since I can’t resist adding some sparklies!
The finished card
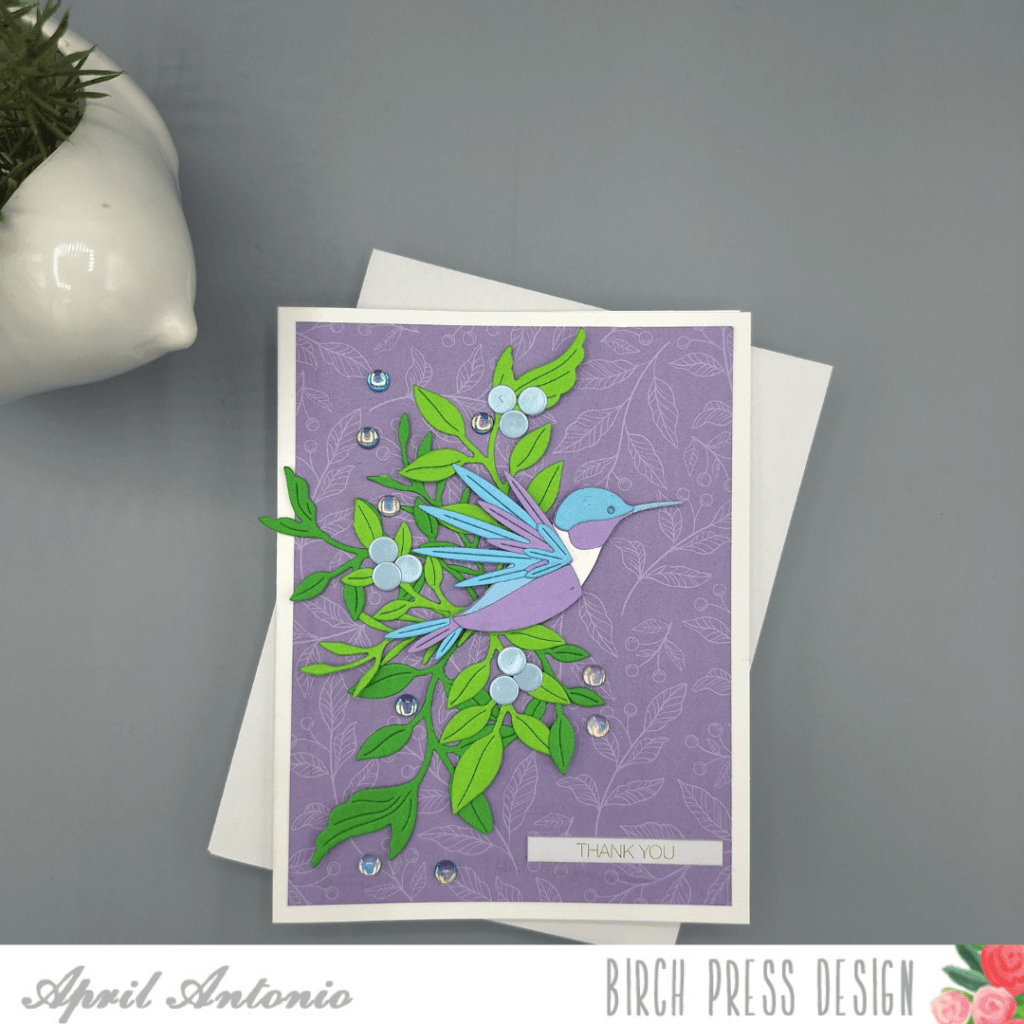
The end result is a card that feels soft, a little bit magical, and genuinely peaceful — exactly the energy I want a thank-you to carry. The dusky purple background lets all those cool blues and fresh greens breathe, and the hummingbird brings just enough movement to keep your eye dancing around the whole scene.
Have you made a card with the Block Print Soaring Hummingbird]? I’d love to see your version — tag Birch Press and share what you’ve created!
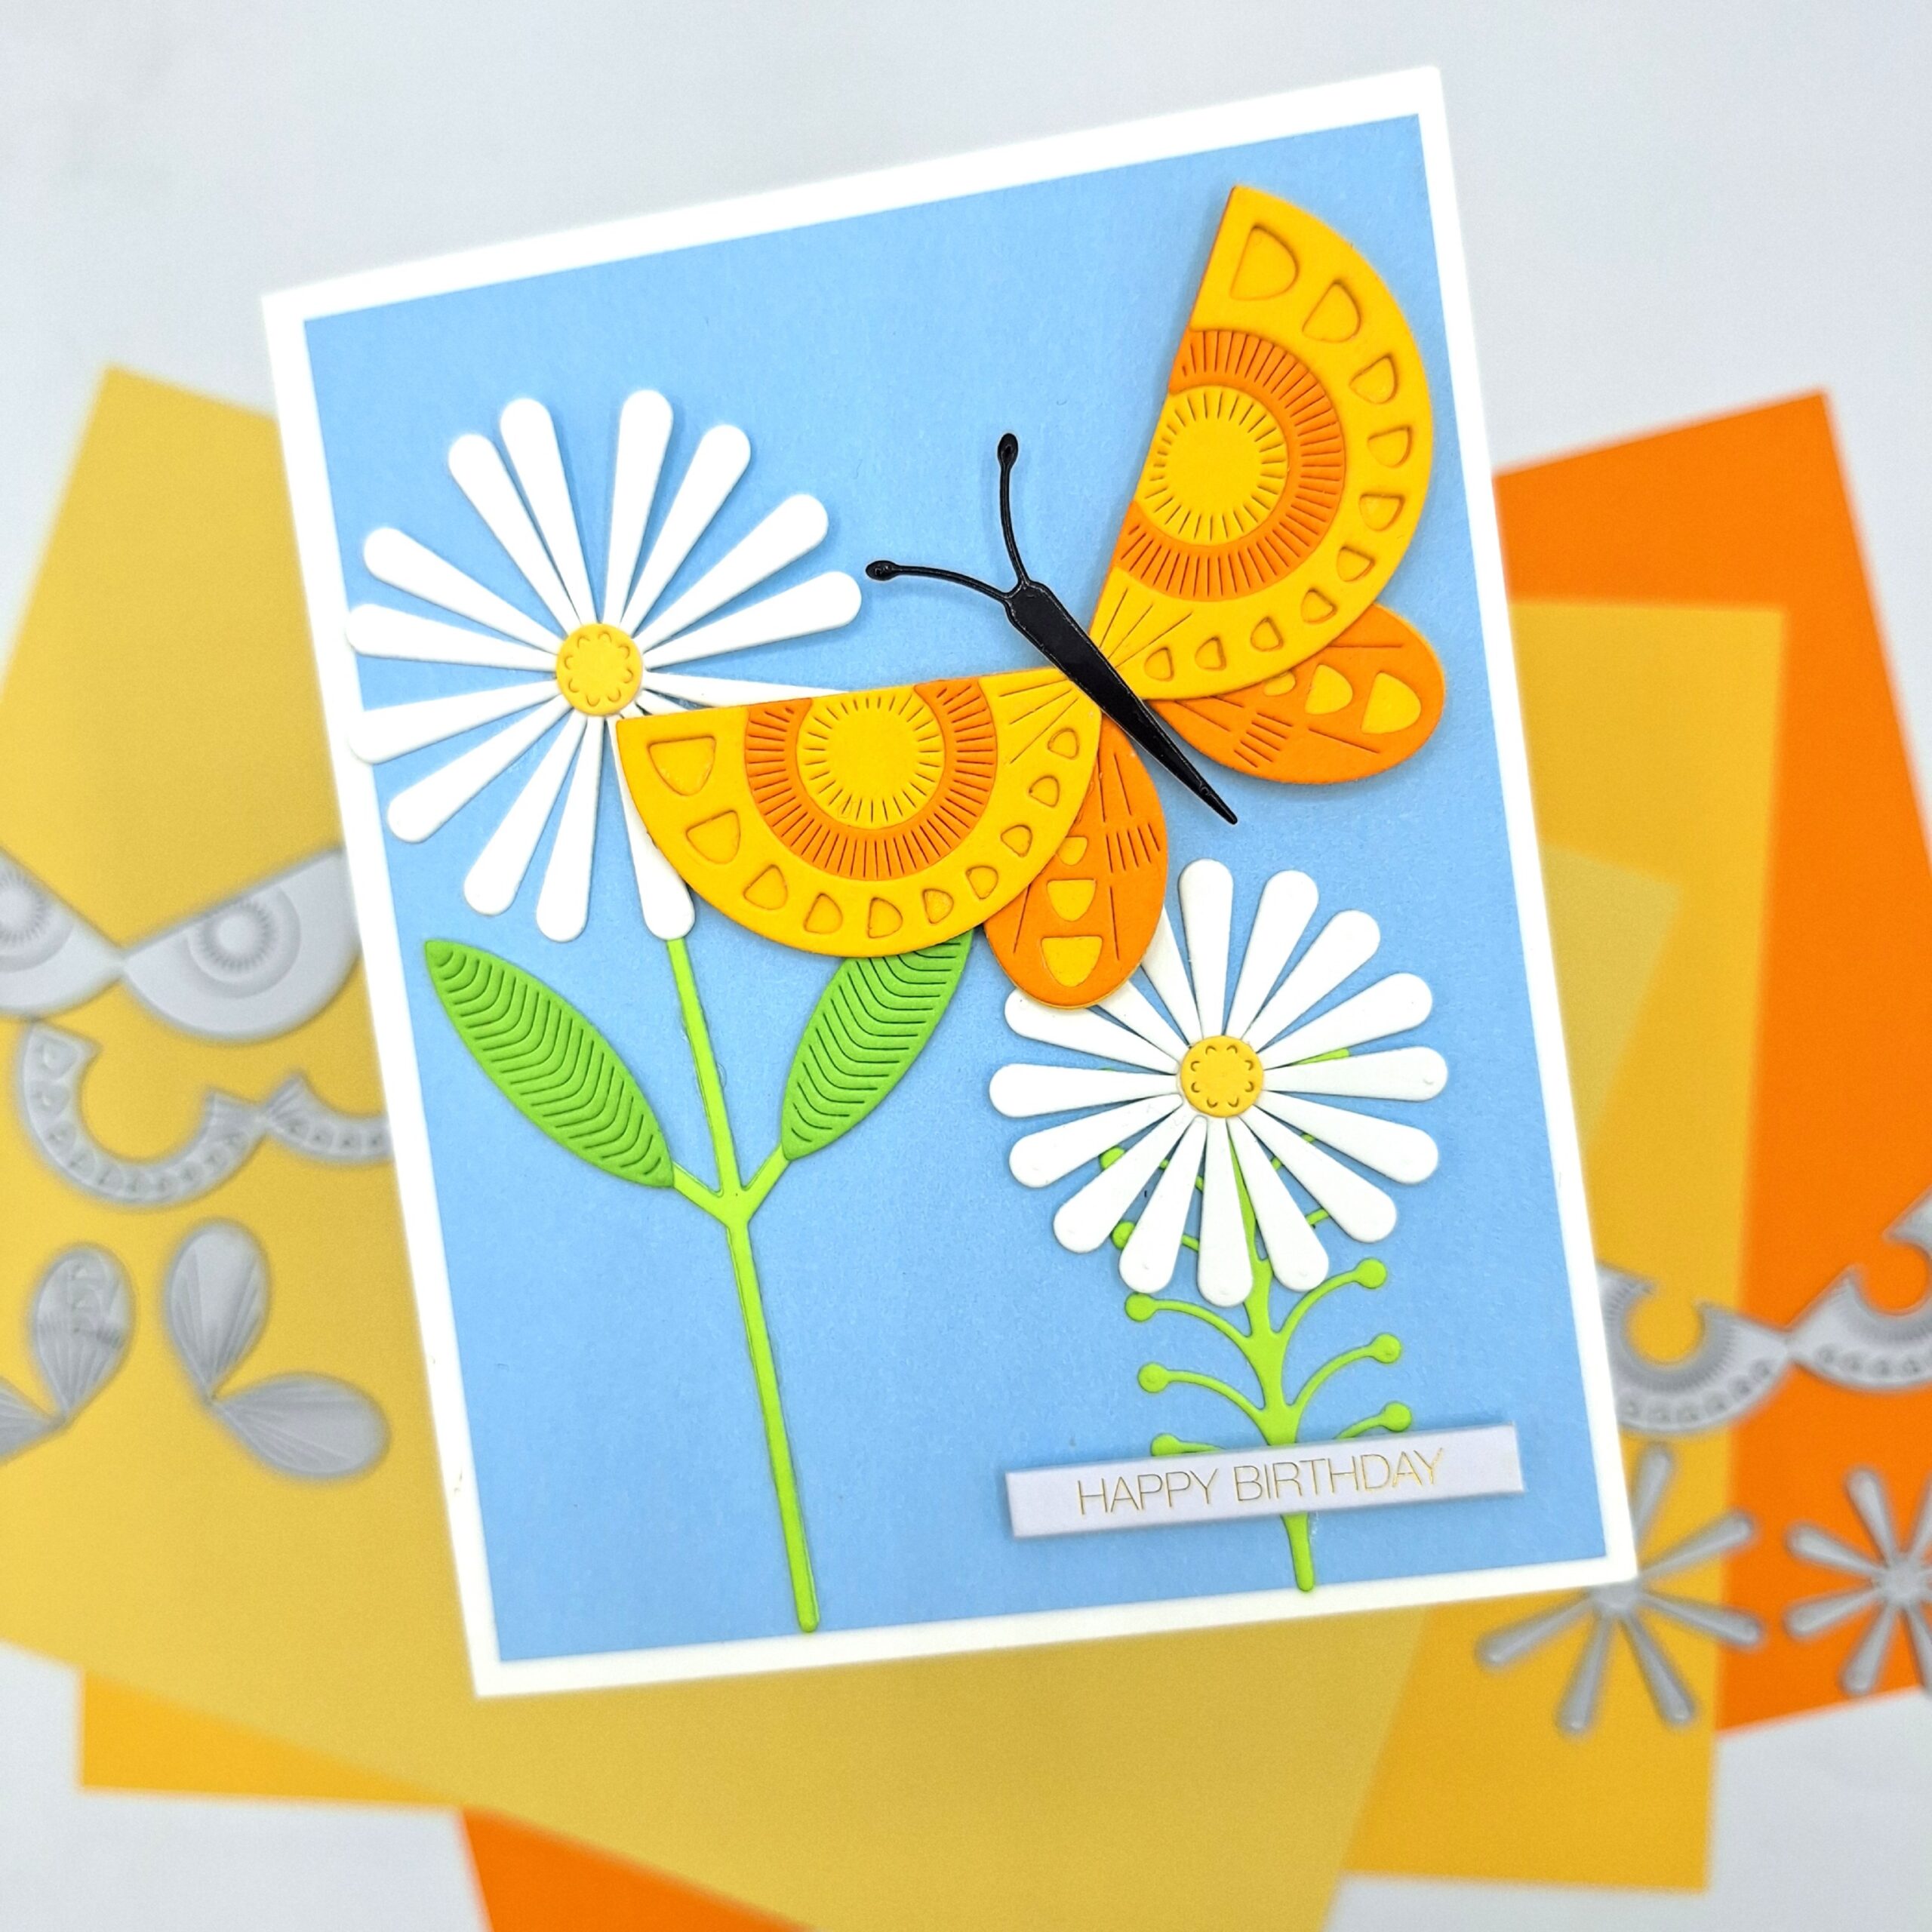
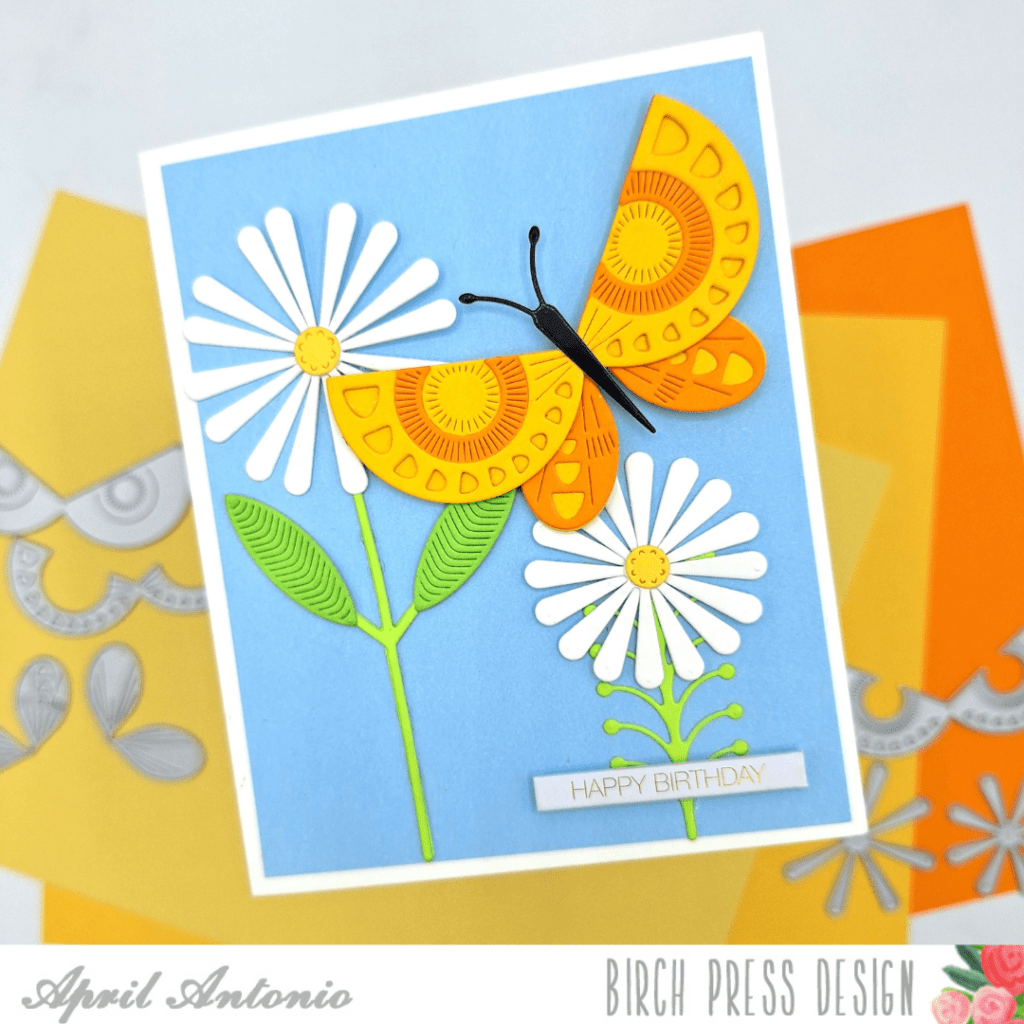
Sometimes two dies come together and create something that just feels like pure Spring joy — and that is exactly what happened with this card. The Block Print Radiant Butterfly and Block Print Daisy Flower dies were practically made for each other, and I had so much fun bringing this little garden scene to life.
Building the garden scene
The card base is Memory Box Powder Blue cardstock — and from the moment I cut it I knew this was going to be a happy card. That soft blue sky color sets the whole mood — fresh, airy, and full of possibility. Memory Box is a sister brand to Birch Press Design, and their cardstock is my go-to for all my Birch Press projects. The colors are rich, the weight is perfect for die cutting, and they coordinate beautifully with the Block Print die collection.
The daisies
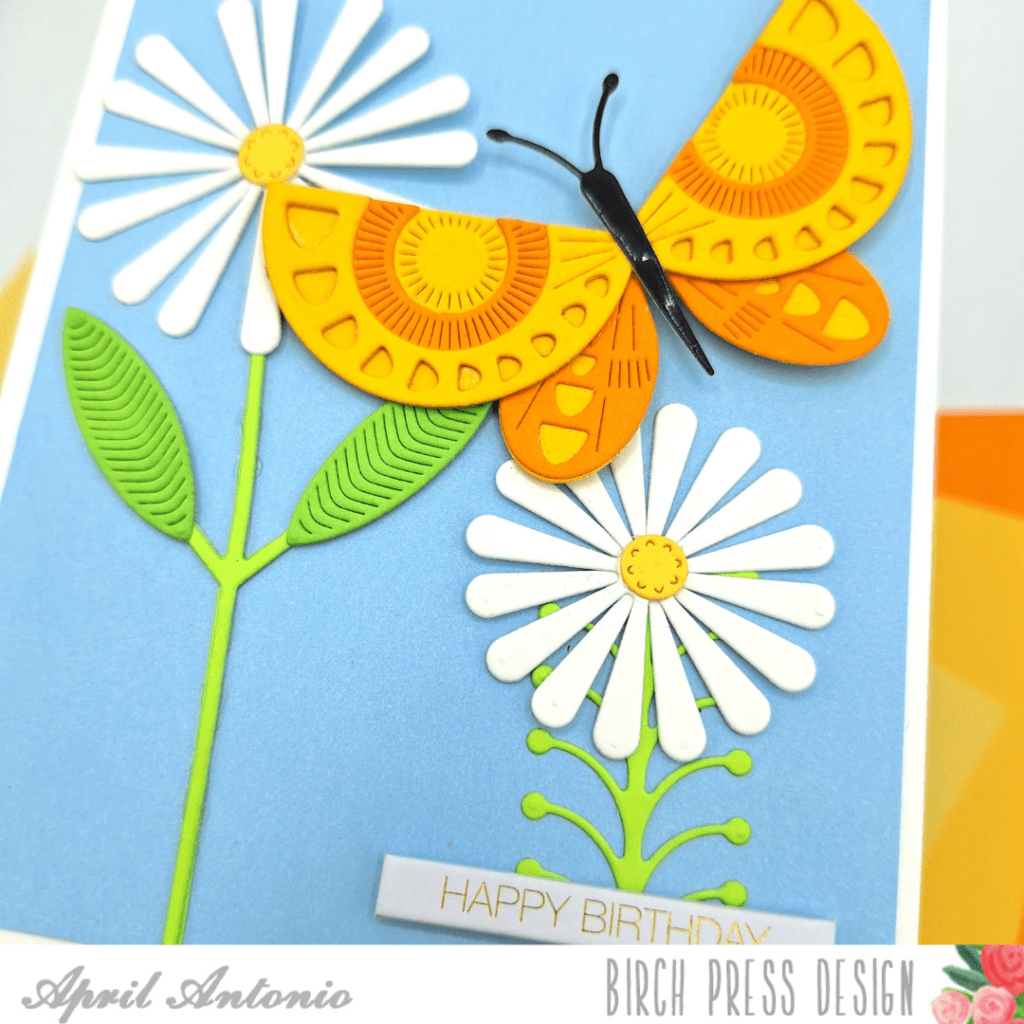
The Block Print Daisy Flower die creates the most beautifully detailed daisies. The die set comes with two flower sizes — one taller and one slightly shorter — to give the composition a natural, garden-grown feel. Both I cut from heavy weight white cardstock with the flower centers in Memory Box Golden Wheat. The stems and leaves are cut from Memory Box Key Lime and Leaf Sprout, which together create that lovely variation of greens you see in a real garden. Using two different greens side by side adds so much depth to what could easily be a flat background element.
The star of the show
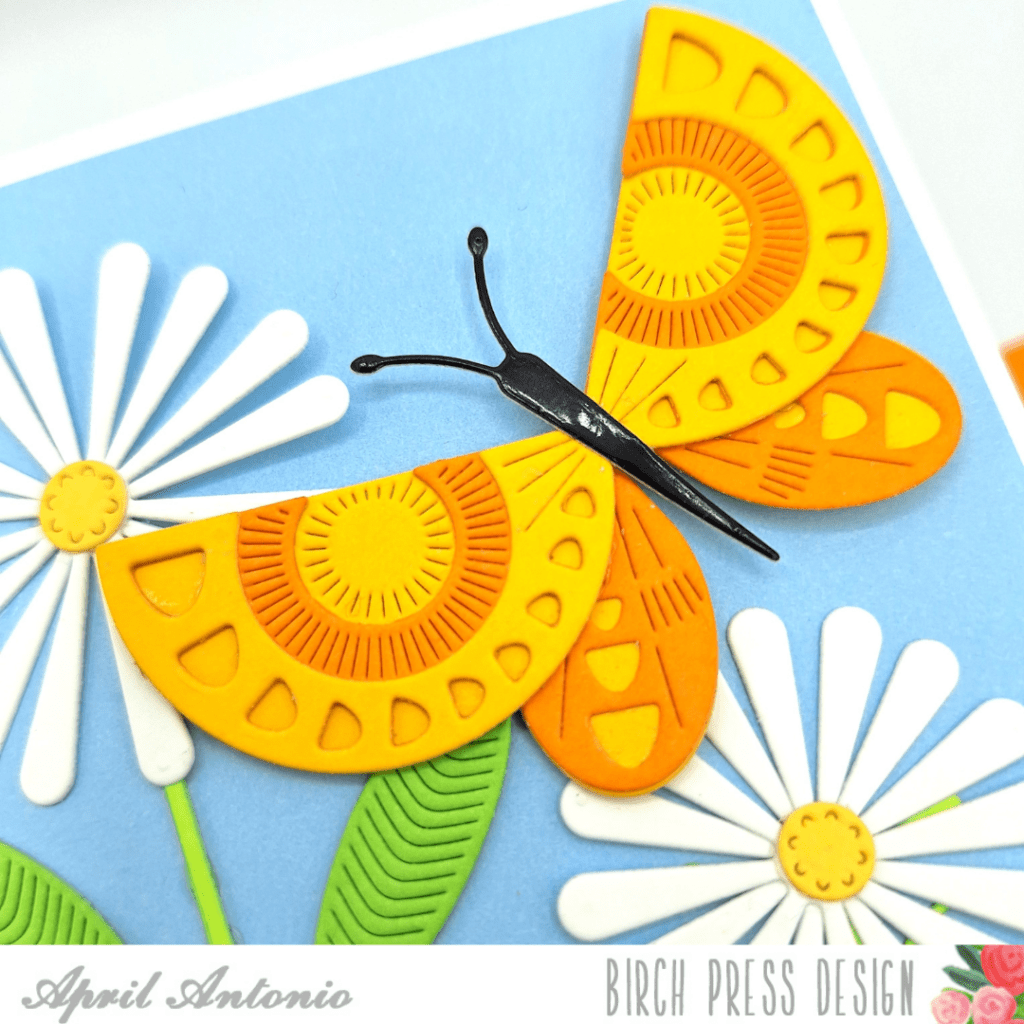
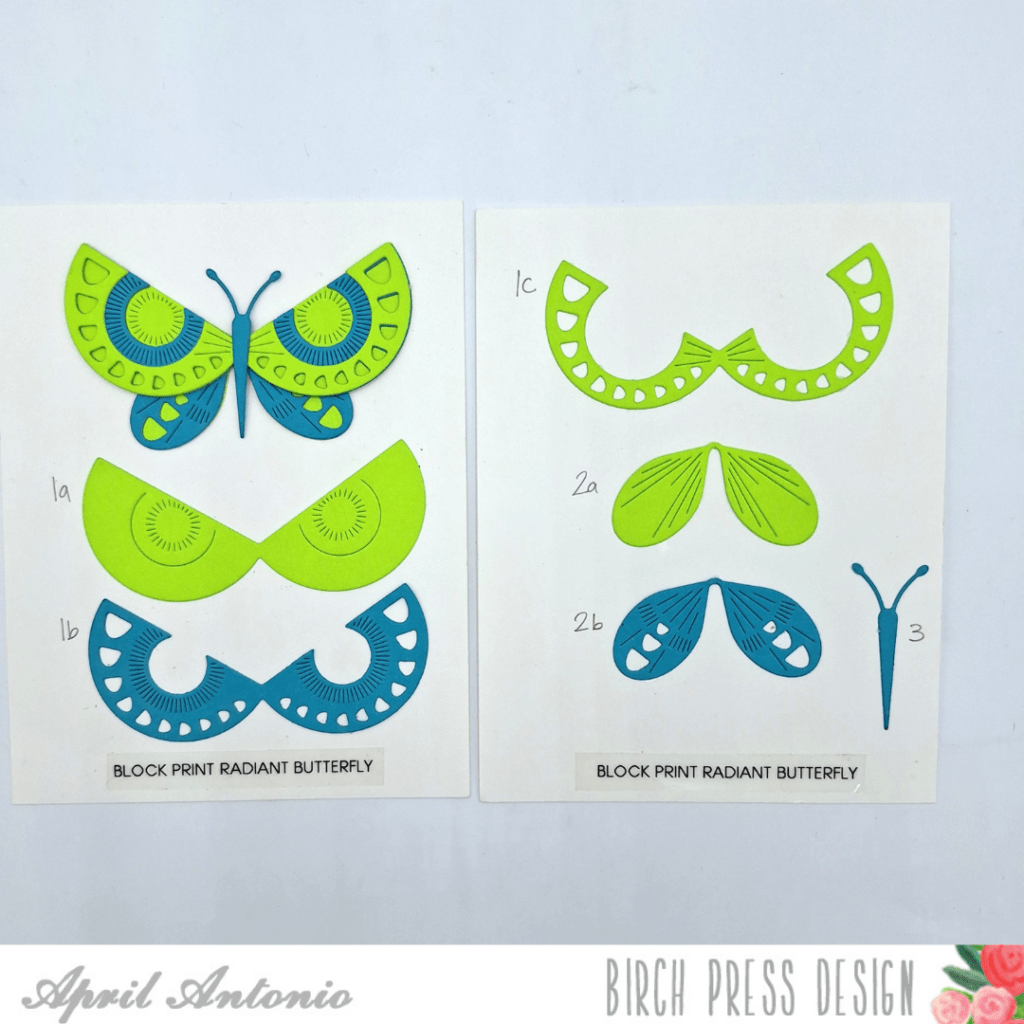
The Block Print Radiant Butterfly is everything. The wing layers in this die set are stunning — so detailed, so satisfying to piece together — and the combination of Memory Box Summer Squash and Orange Peel for the upper and lower wing layers gives this butterfly such warmth and vibrancy against that cool blue background. The antennae are cut from the Memory Box Glossy Paper Pack in Black, which adds that crisp finishing detail that really brings the whole butterfly to life.
The butterfly is foam mounted over the daisy stems so it feels like it’s truly landing in the garden — that little bit of dimension makes such a difference in the finished card.
The finishing touch
I finished the card with a happy birthday sentiment from the Open Studio Greeting Tabs. Simple, clean, and lets the garden scene do all the talking.
The result is a card that feels genuinely alive — like you caught a summer garden at just the right moment, butterfly wings still mid-flutter. I hope it inspires you to pull out your own Radiant Butterfly die and see what garden scenes you can create!
A little sneak peek for the curious
If you’ve ever looked at a layering die and wondered where to even begin with all those pieces — you’re not alone. I’ve been working on cut maps for my Birch Press dies to help map out the layering order before I start, and I made one for this butterfly. I’m not ready to share the full tutorial just yet, but if you look closely at the photo below, you might get a little preview of what’s coming. 😉
Stay tuned — there’s more to come on this one!
I’d love to see what you’ve made — tag Birch Press Design and share your version!
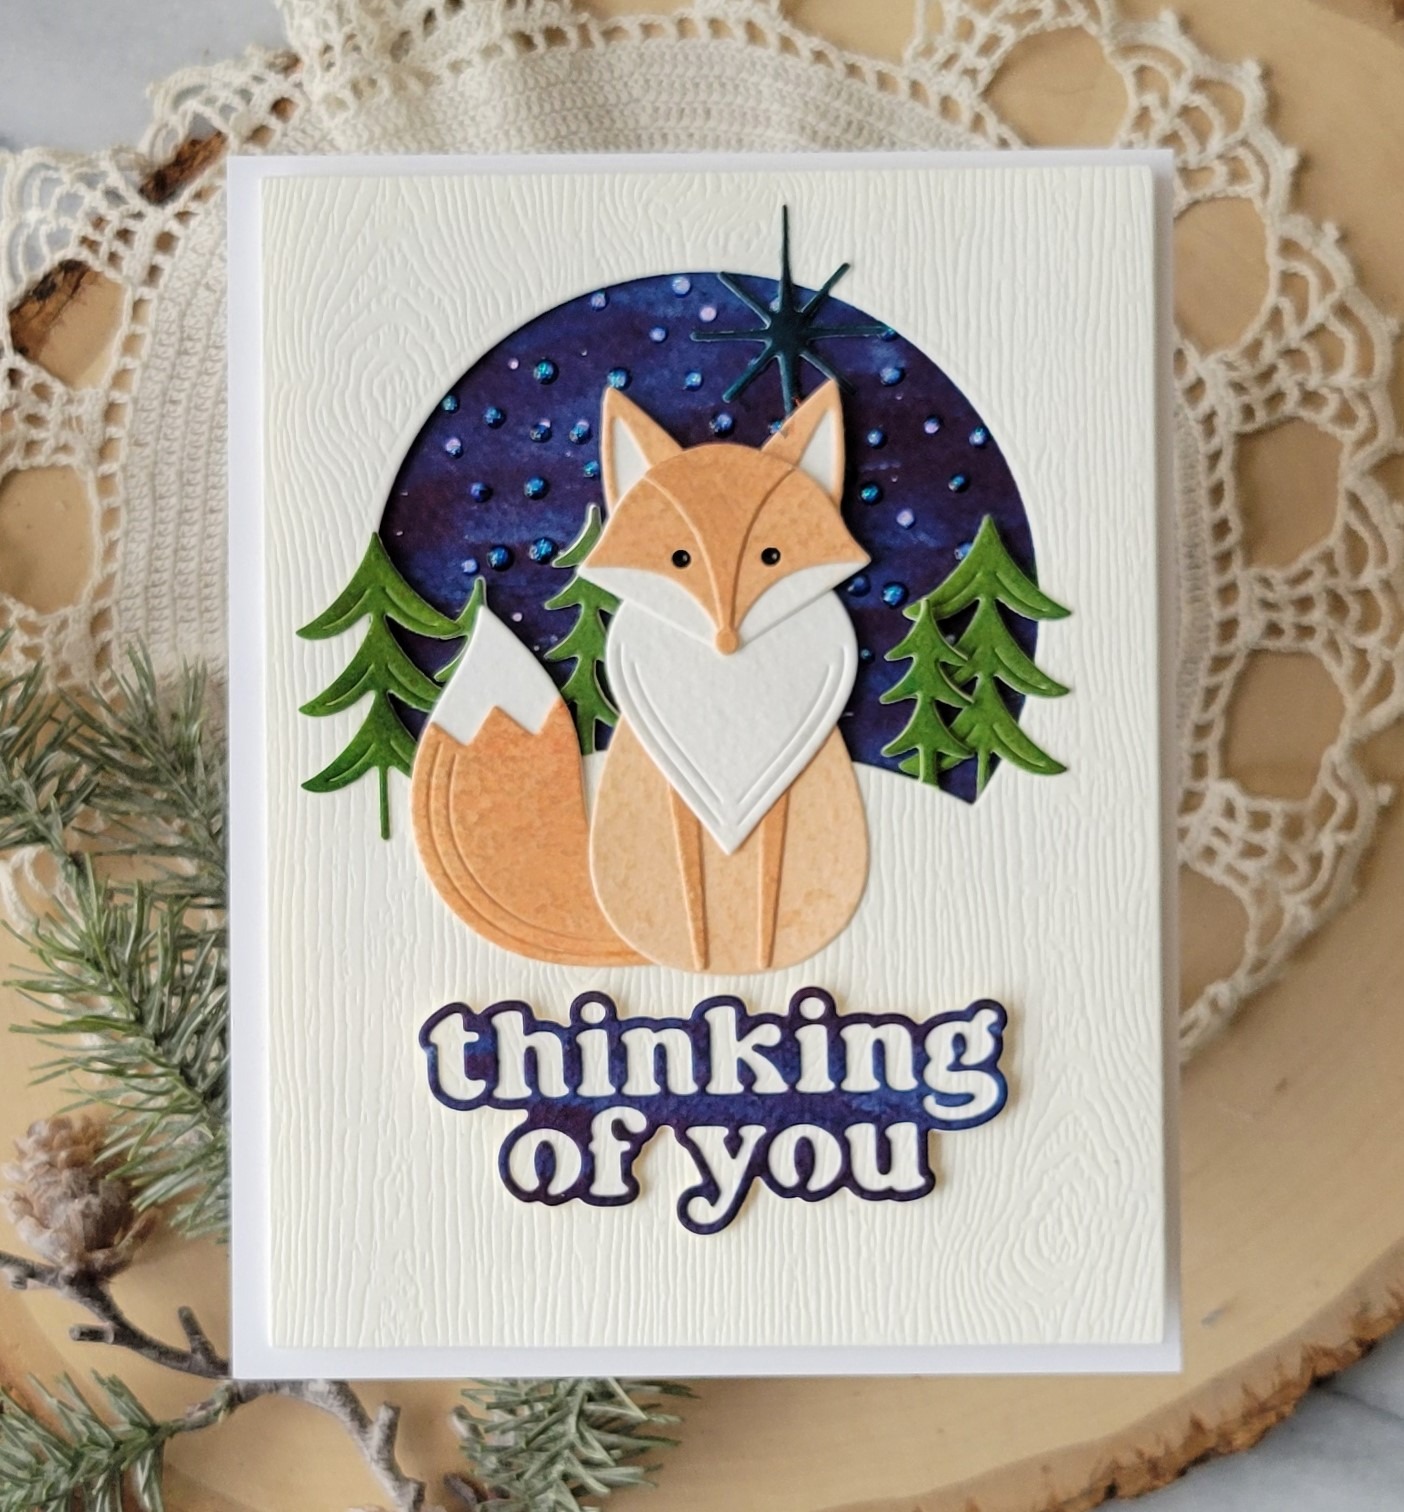
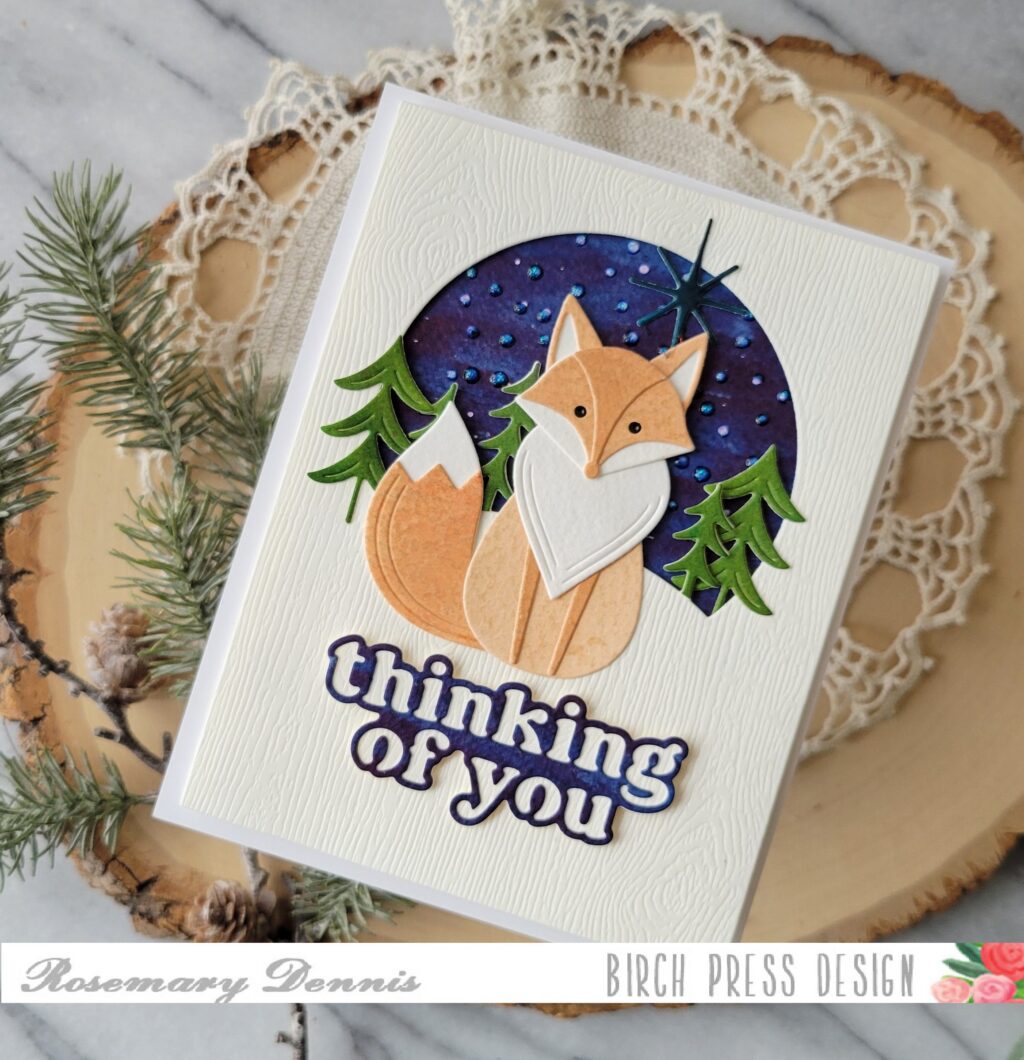
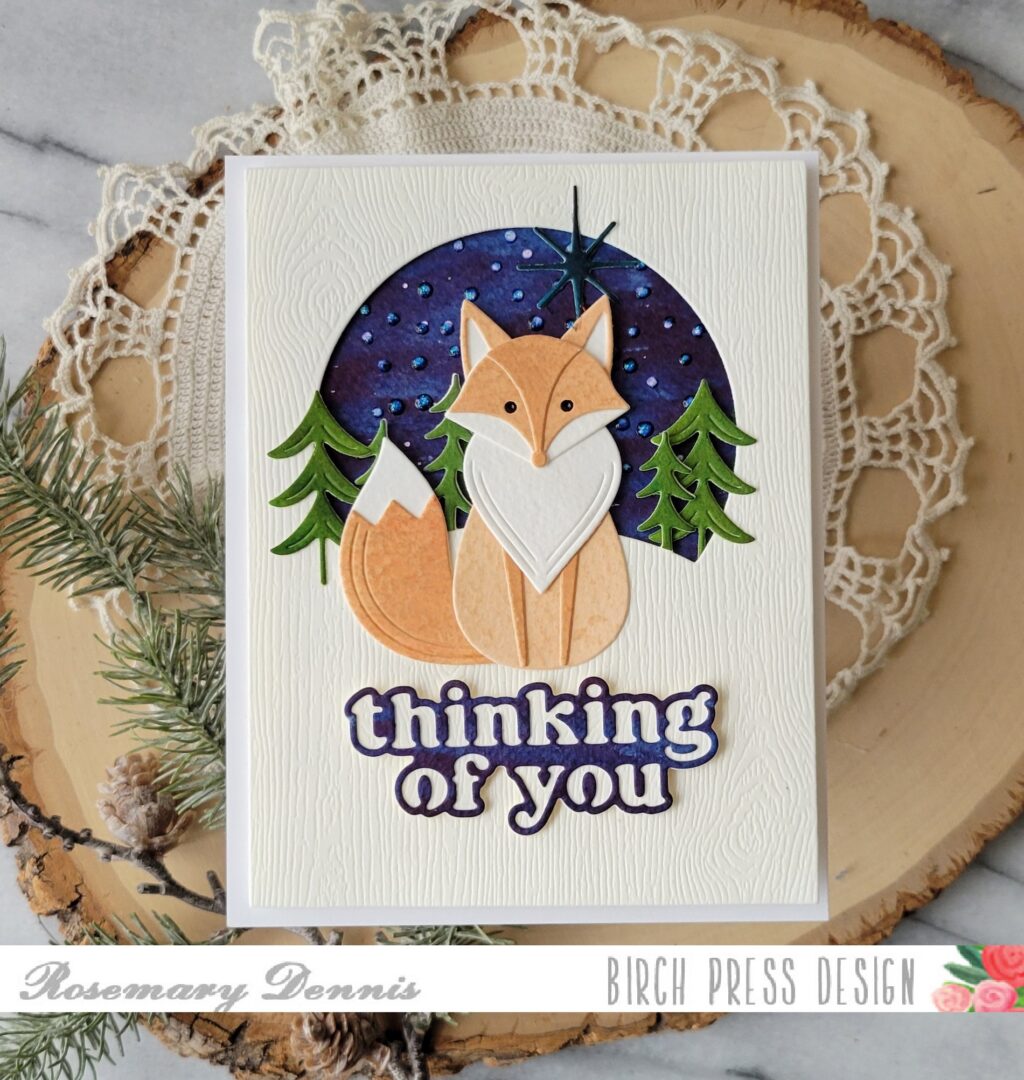
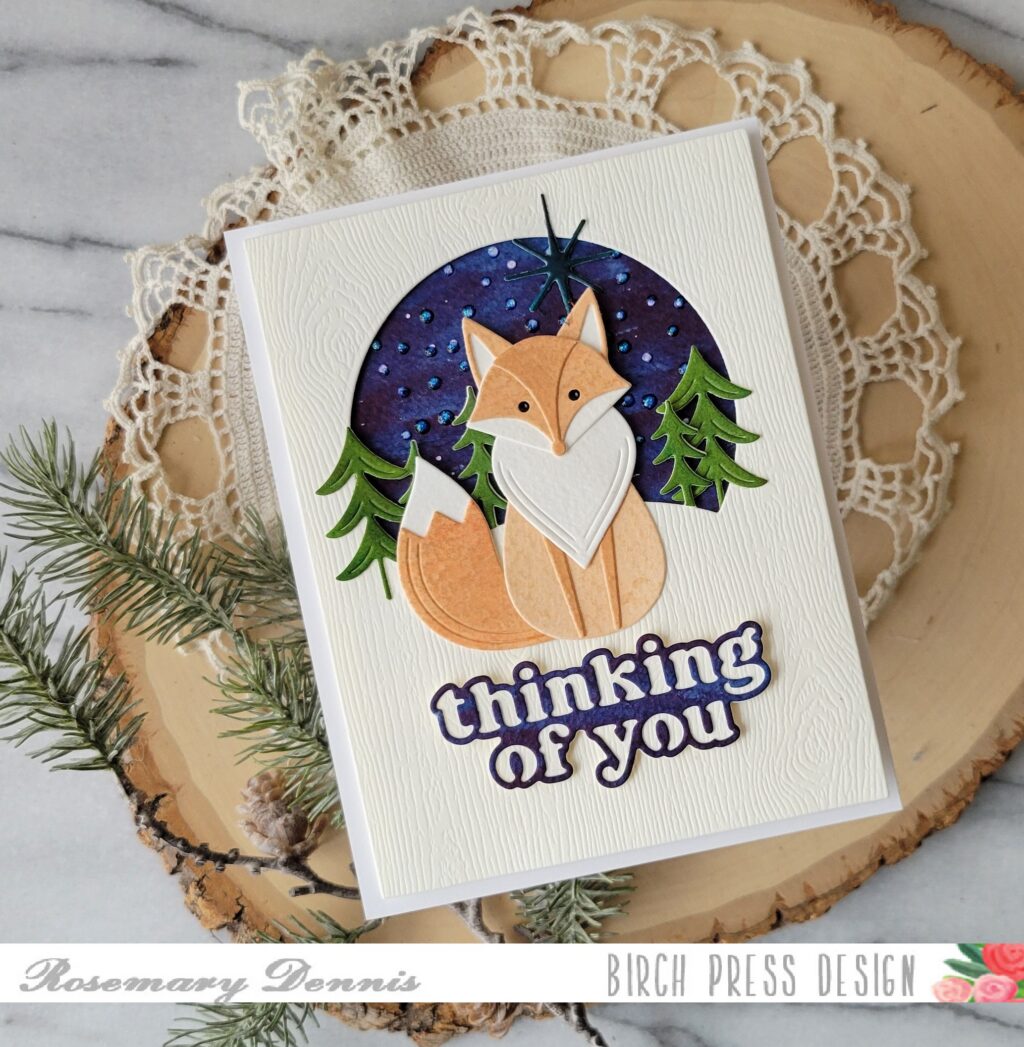
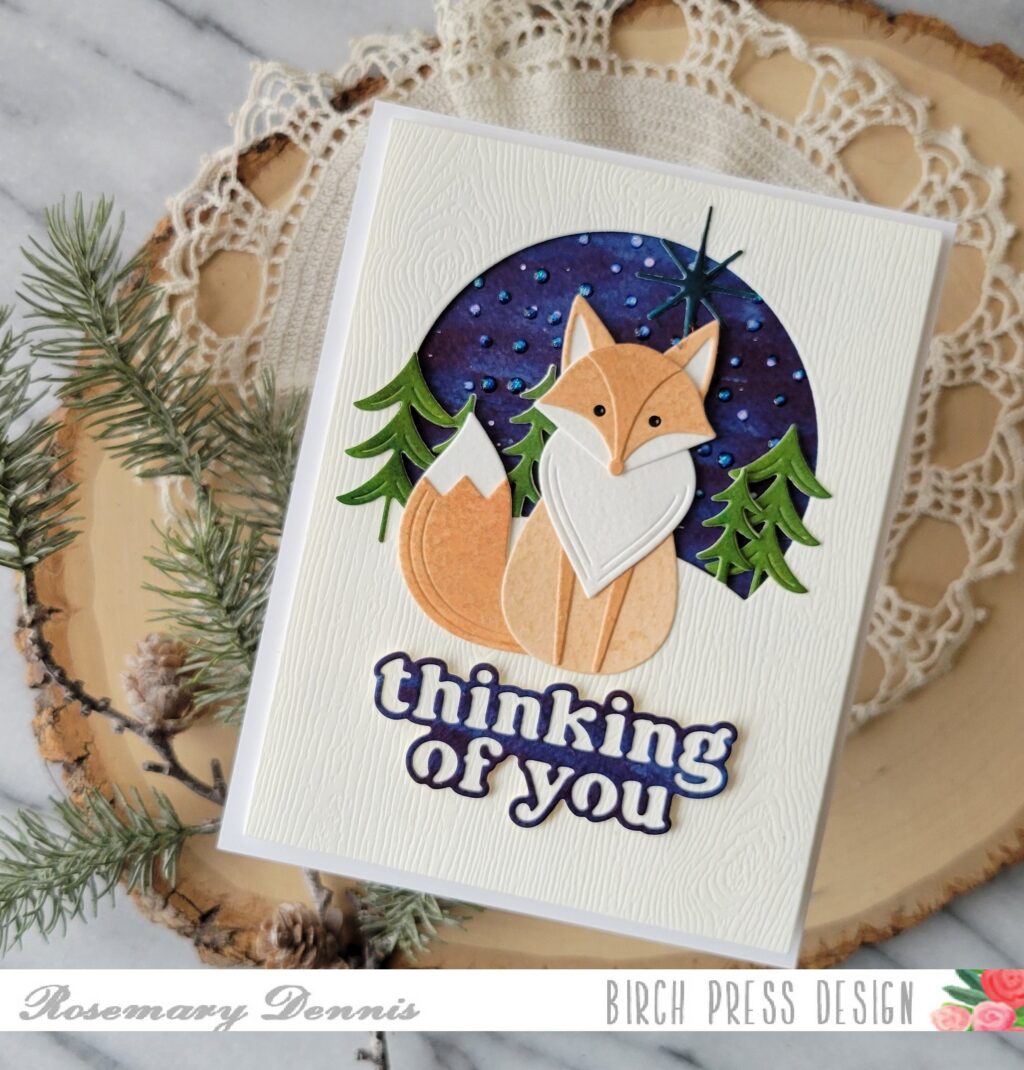
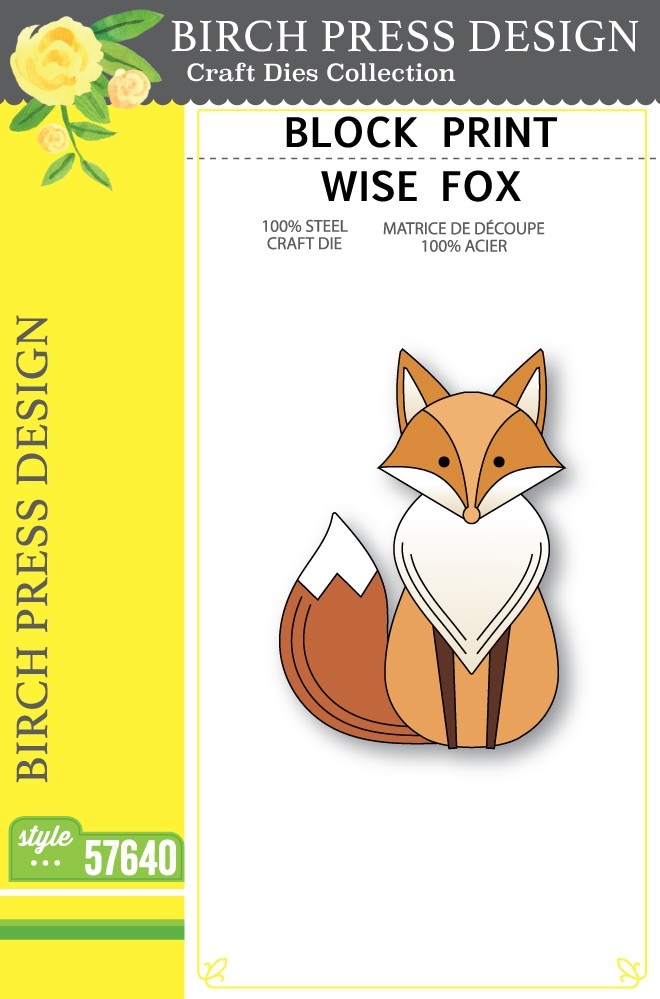
Hello everyone! Rosemary here on the blog today sharing a card created with the Block Print Wise Fox, Block Print Starry Night Scene and Thinking of You Vintage Sentiment die set. Let’s have a look at what I made.
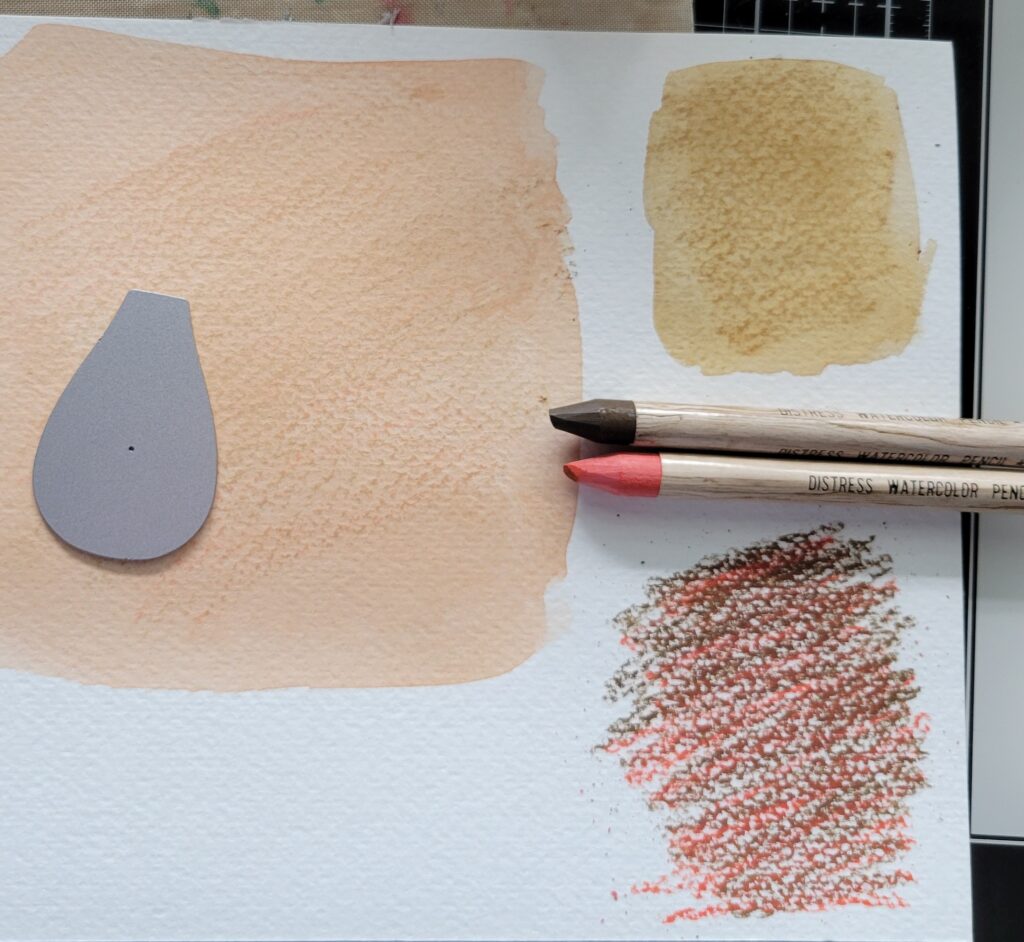
I started off my card by making all the pieces for my fox. I had been doing another rummage through my supplies and found my Distress watercolor pencils. I hadn’t really used them before so thought this would be a good time to give them a try.
I cut down a piece of watercolor cardstock and then scribbled on a combination of Gathered Twigs and Ripe Persimmon and then blended with water. The first generation of color was pretty light so I let the area dry and then scribbled on more color to get a slightly darker patch. To get an even darker value I got heavy handed with my scribbling and was able to get a nice darker tan color.
Once my panel was dry I die cut all the parts of the fox from different areas on the sheet to get the varying shades. I used the white parts were cut from the sheet of watercolor cardstock that wasn’t colored. I assembled my fox with liquid adhesive. Now it was time for the background. For this I used a Tonic Studios aqua flow pen in a dark blue on another piece of watercolor cardstock. I love the variation in the color that I was able to achieve.
I let it dry and then worked on the top panel that features the arched opening for the background piece. I die cut cream Memory Box woodgrain cardstock down with a rectangle die and then die cut the Starry Night Scene from the panel. I then die cut the trees and the star from scraps of cardstock that I had left over from the card I posted earlier this month. I trimmed out the trees and adhered them on top of the die cut panel.
The larger trees were also die cut from scraps. The background panel was dry and so I tried adding some “stars” to the background. I discovered that the blue is so deep and intense that the white just disappeared into the background. So I added drops of Nuvo jewel drops in a clear glitter. Once the panel was dry I adhered it to the top panel using thin foam squares.
I then adhered the fox and the large trees using thin foam squares. I finished with the sentiment that I die cut from a strip of watercolor cardstock that I colored with the same blue Aqua Flow pen and the woodgrain cardstock. I adhered them together and added to the card front with thin foam squares.
That’s it for me! I hope you enjoyed today’s project. Thanks for coming by and have a lovely day.
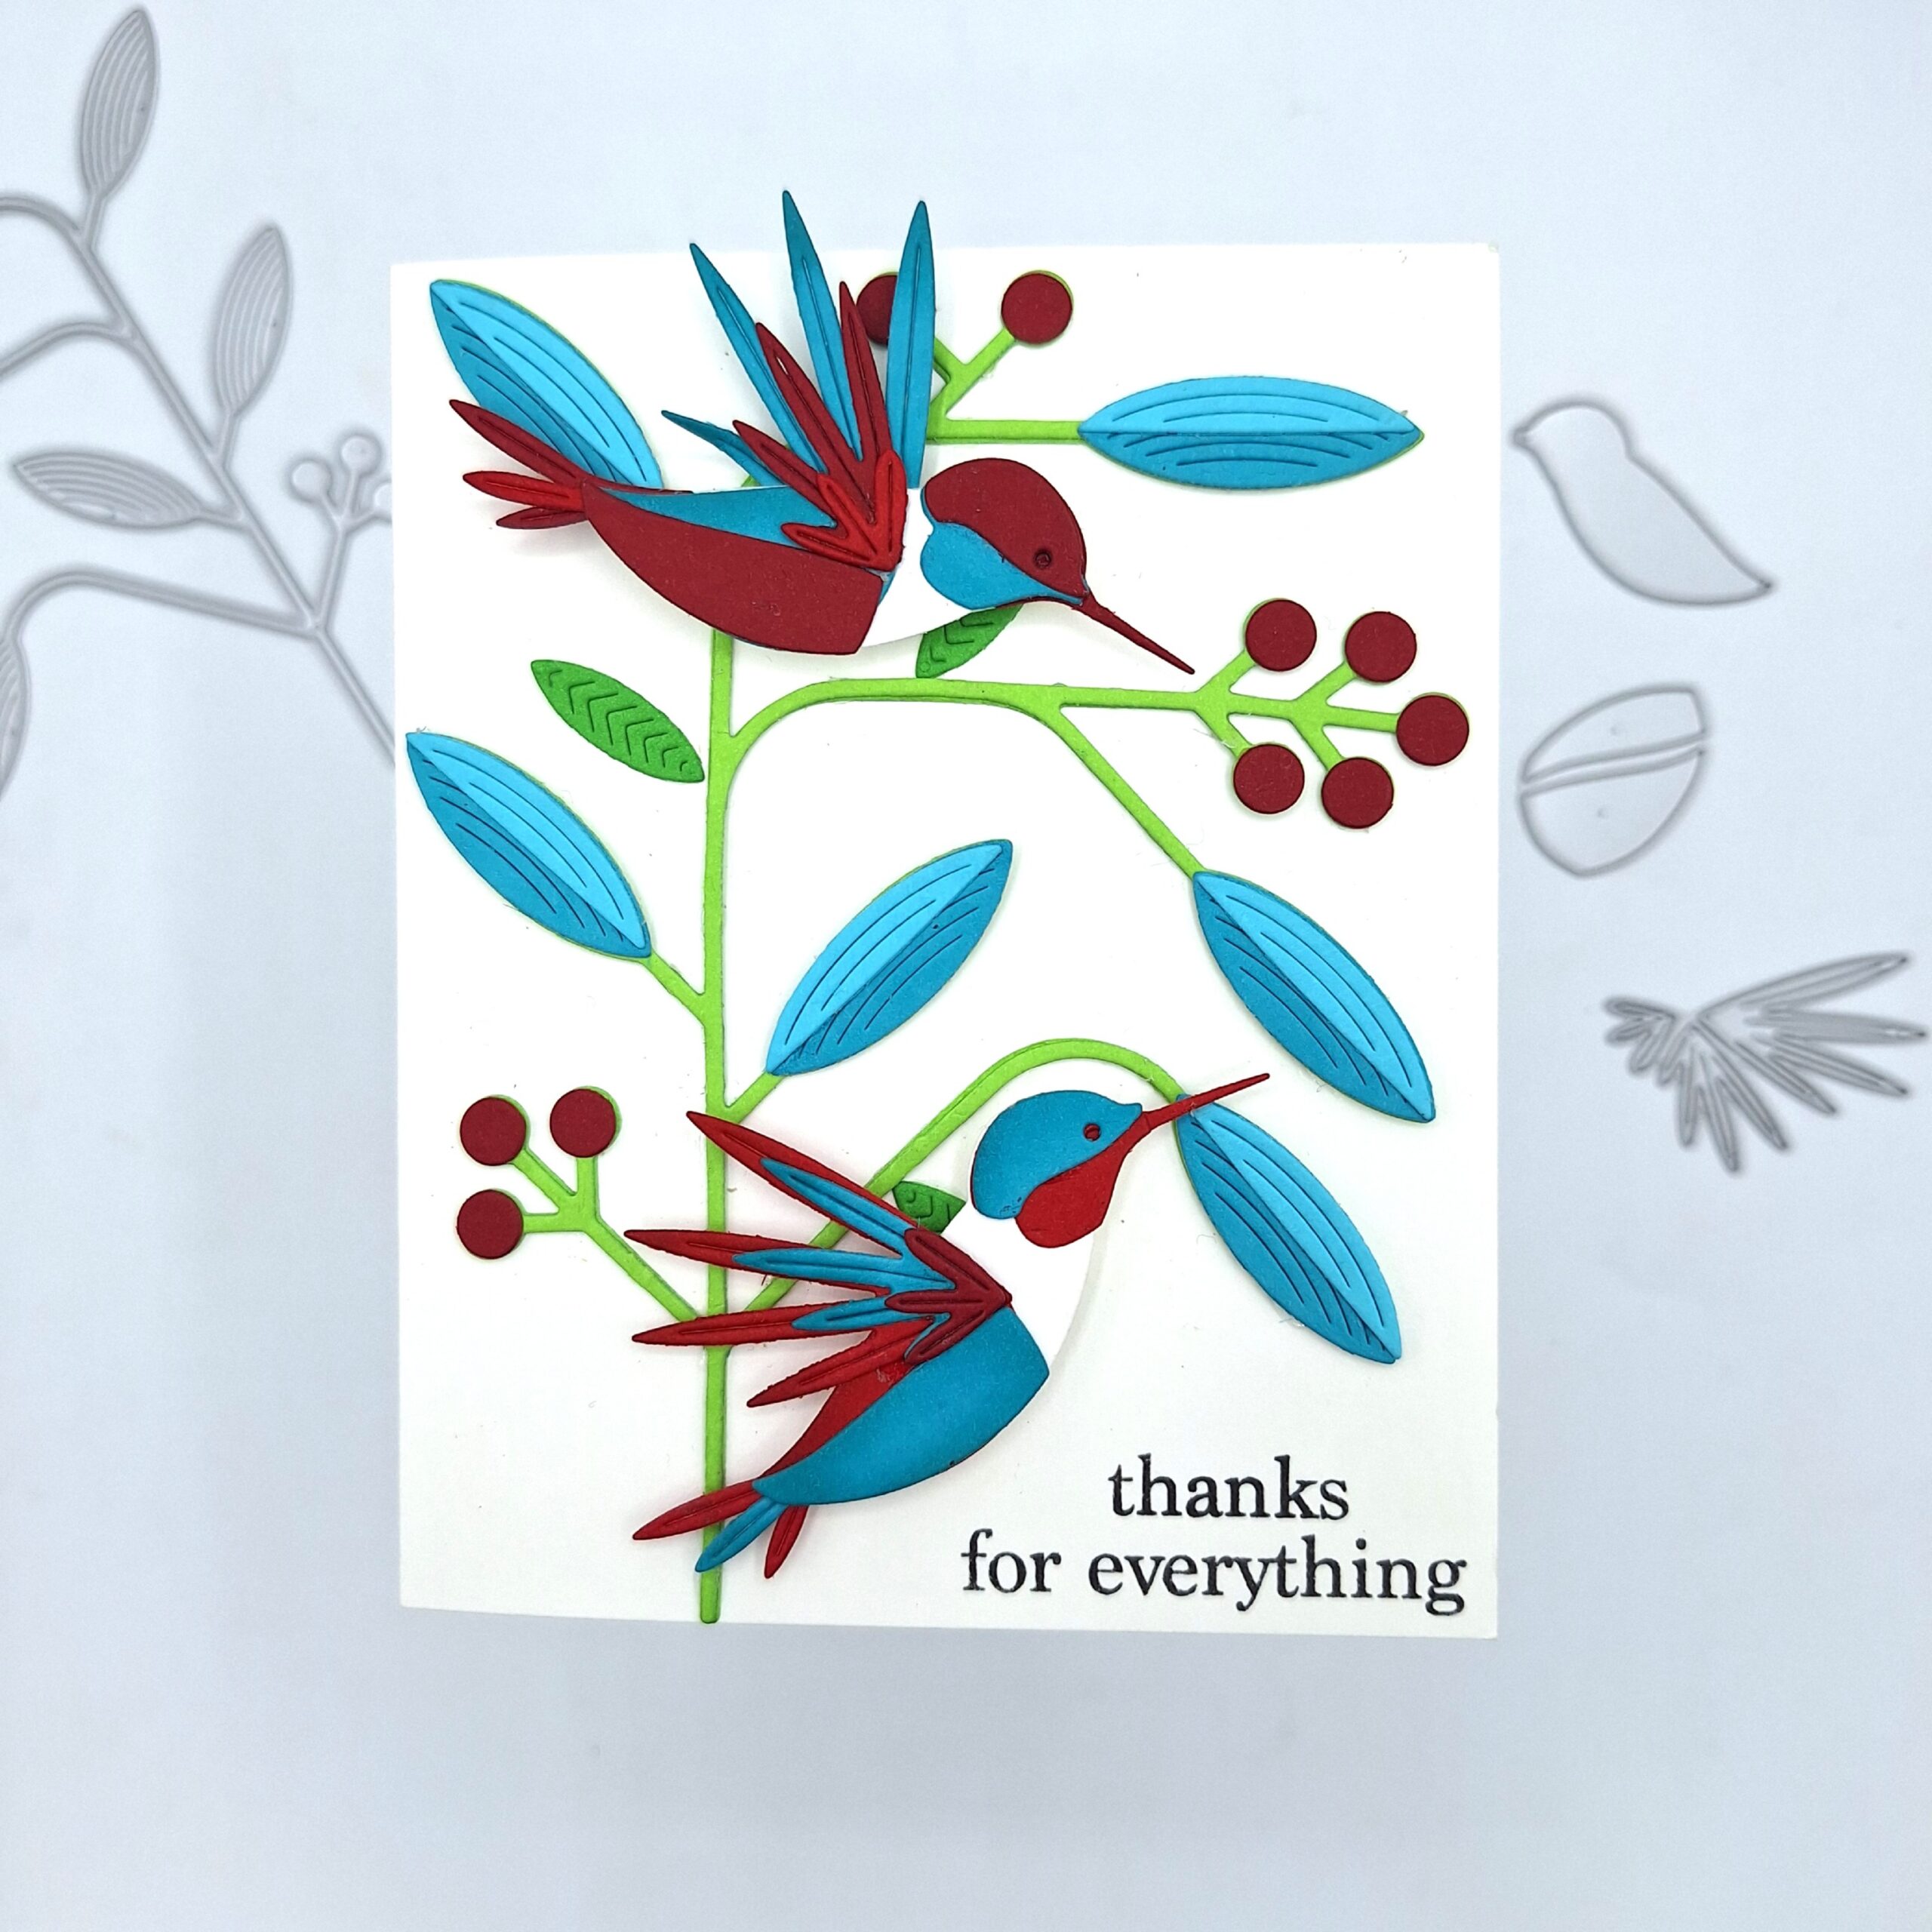
If you’ve been wanting to try the Block Print Soaring Hummingbird from Birch Press Design — consider this your sign. This die set is one of those that looks incredibly intricate but is so satisfying to put together once you understand how all the pieces work. Pair it with the Block Print Mod Branches and you’ve got a card that feels lush, layered, and alive. Let me walk you through how this “Thanks for Everything” card came together!
Starting with the base
My card base is Neenah Solar White 110lb cardstock — my go-to for any card where I want the colors to really pop. White was the right call here because the color palette on this card is doing a lot of beautiful work and I didn’t want anything competing with it.
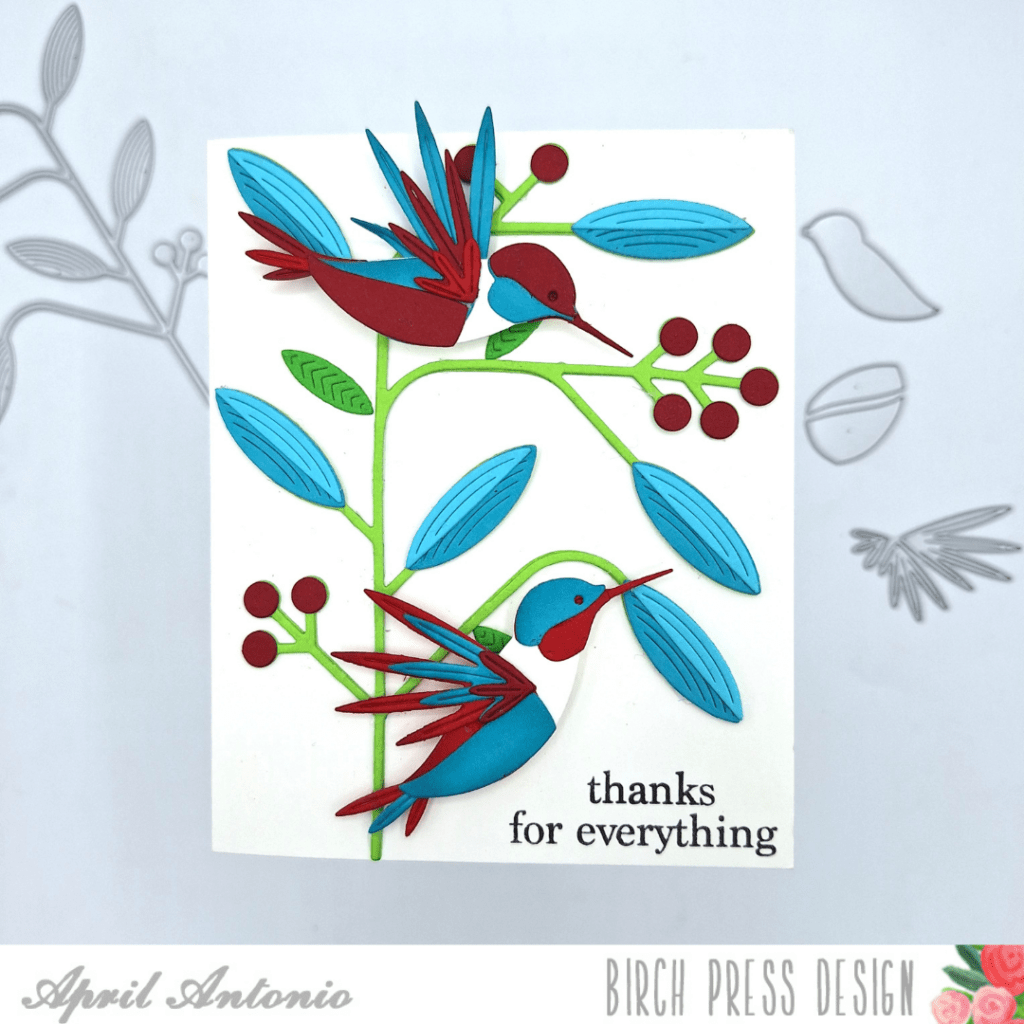
Building the branches
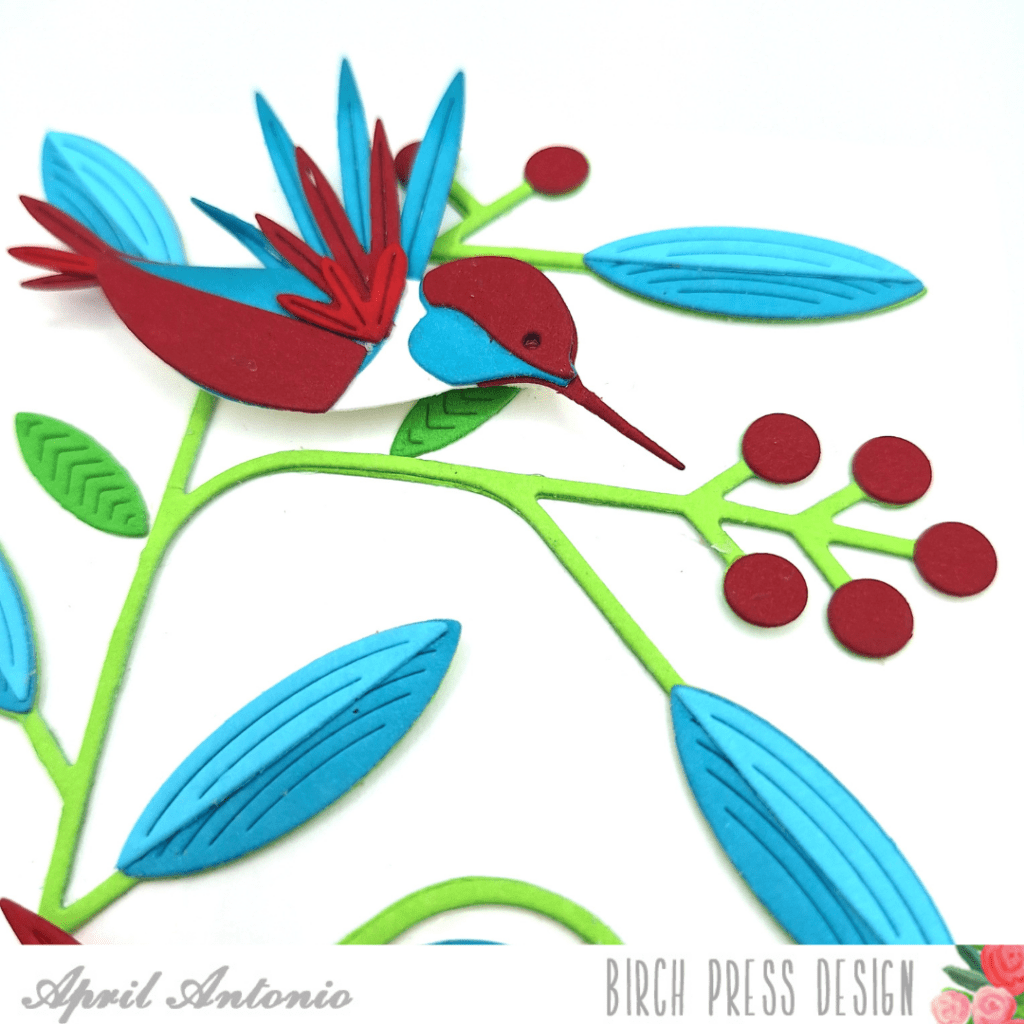
Before the hummingbirds even come into play, the Block Print Mod Branches die sets the whole scene. I die cut the branches from Birch Press Leaf Sprout cardstock — that bright, fresh lime green is such a perfect backdrop for everything that gets layered on top. The branches arc across the card and give the whole design that botanical, nature-forward feeling I was going for.
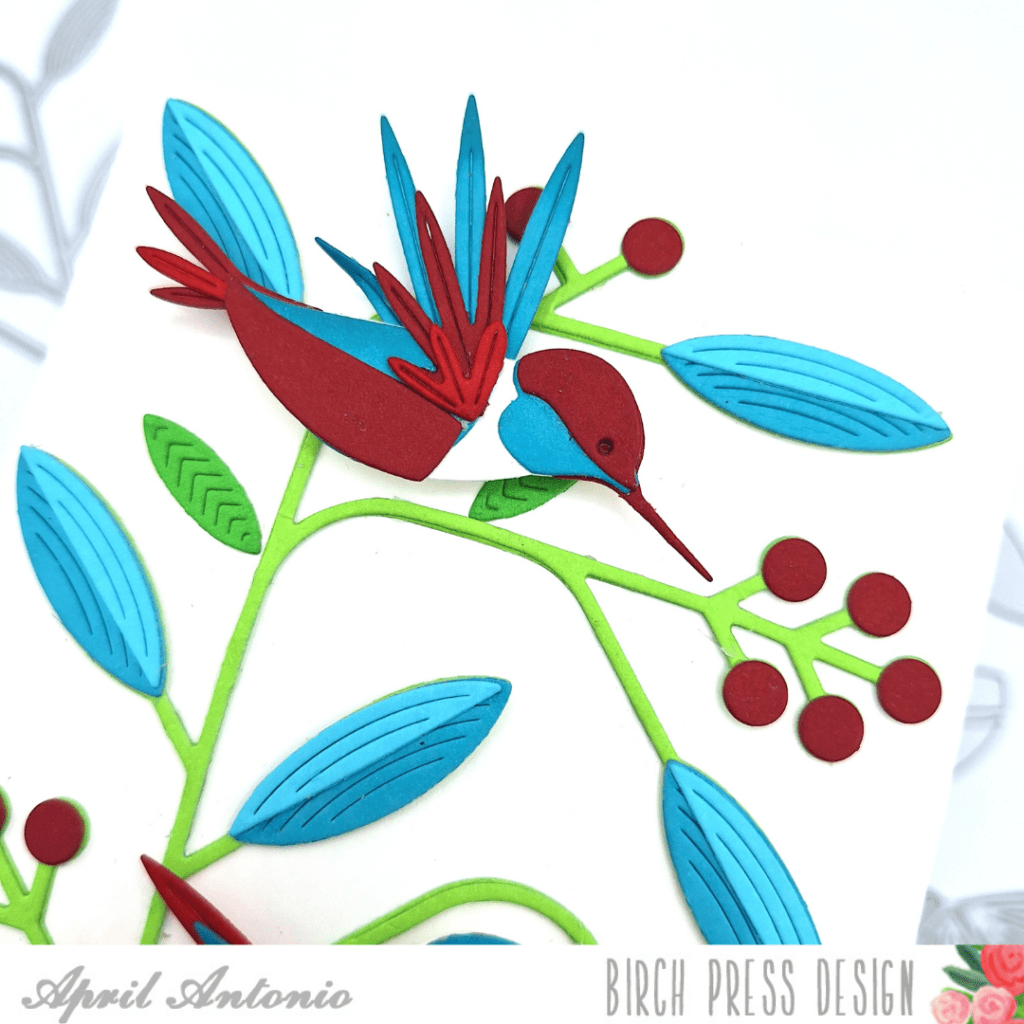
I added the leaves in Birch Press Pool Party and Deep Turquoise, and the little berry clusters in Cranberry. Before assembling everything I did some light ink blending on many of the individual pieces to add depth and dimension — it’s a small step that makes a big difference in how finished and rich the final card looks.
Die cutting the hummingbirds
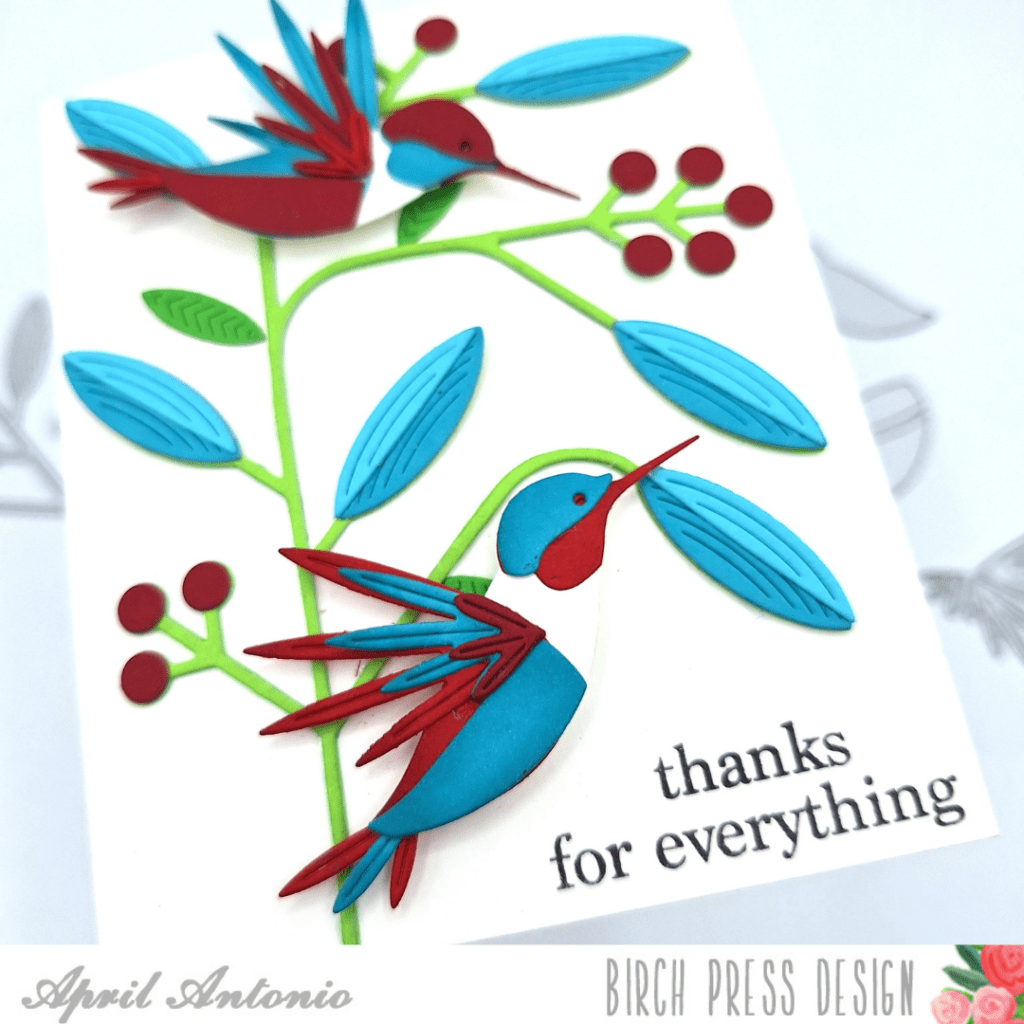
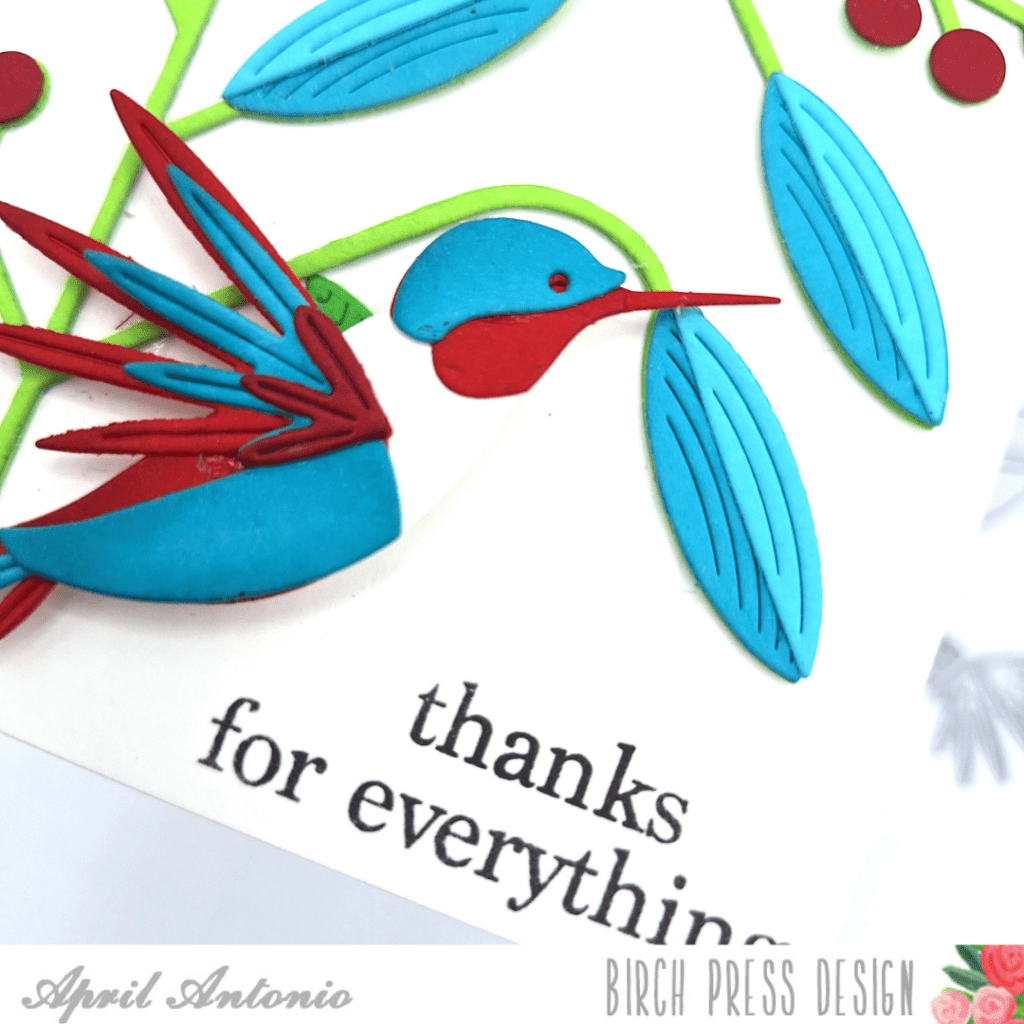
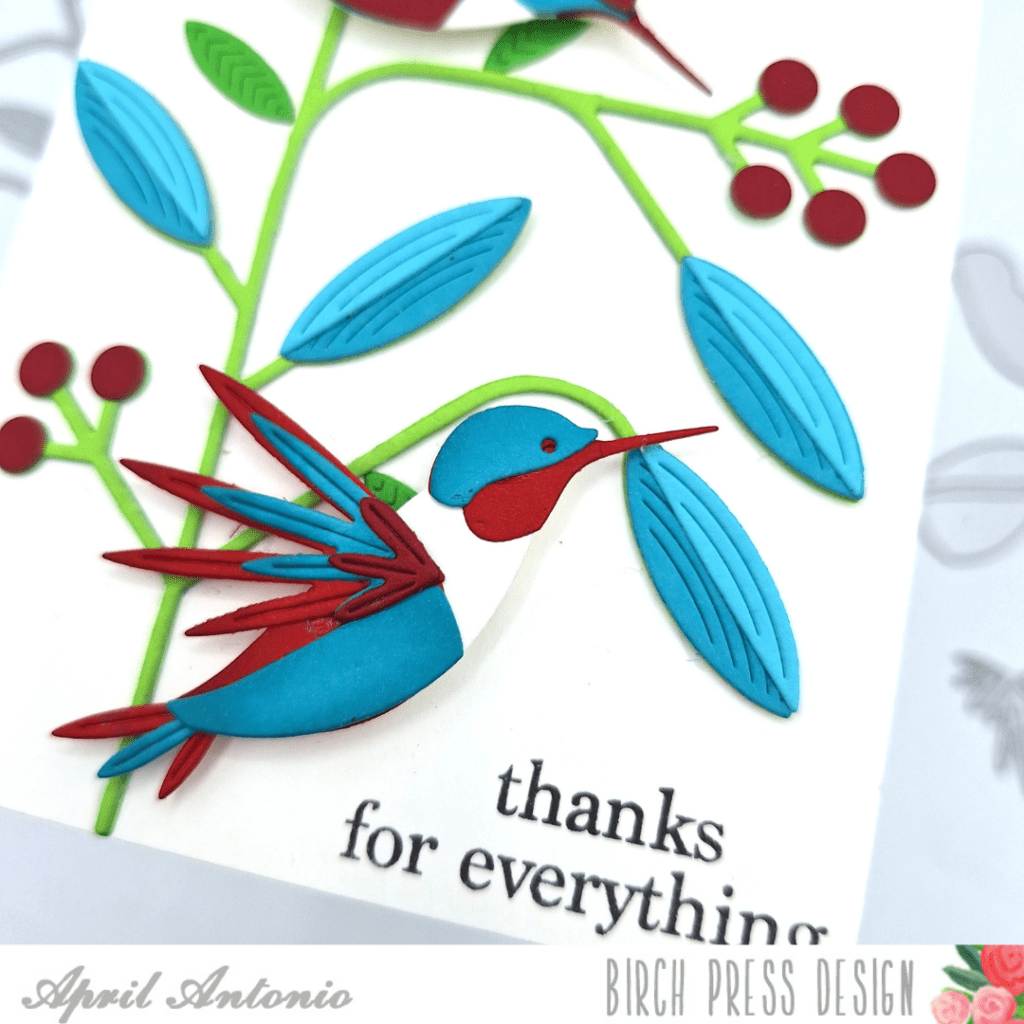
Now for the stars of the show. The Block Print Soaring Hummingbird die produces the most beautifully detailed little birds — the layered wing feathers, the delicate tail, the sweet little beak. I made two hummingbirds for this card, which felt right for the branching composition — one perched toward the top and one hovering near the bottom, both facing inward toward the center of the card.
For the coloring I used a mix of Birch Press cardstock — Cranberry and Cherry Red for the wing feathers and tail detail, Pool Party and Deep Turquoise for the body and larger wing layers. The contrast between the deep cranberry reds and those cool aqua blues is what gives this card its energy. Both hummingbirds are foam mounted onto the branch for a lovely dimensional lift — that little bit of elevation really makes them feel like they’re in motion.
Adding the sentiment
For the sentiment I used the Vintage Everyday Greetings stamp set. The phrase “thanks for everything” stamped directly onto the card base in black dye ink — clean and simple, which felt right given how much is happening visually with the birds and branches. Because of the space available in the lower right corner, I stamped “thanks” on one line and “for everything” just below it, which actually turned into a really nice little layout moment.
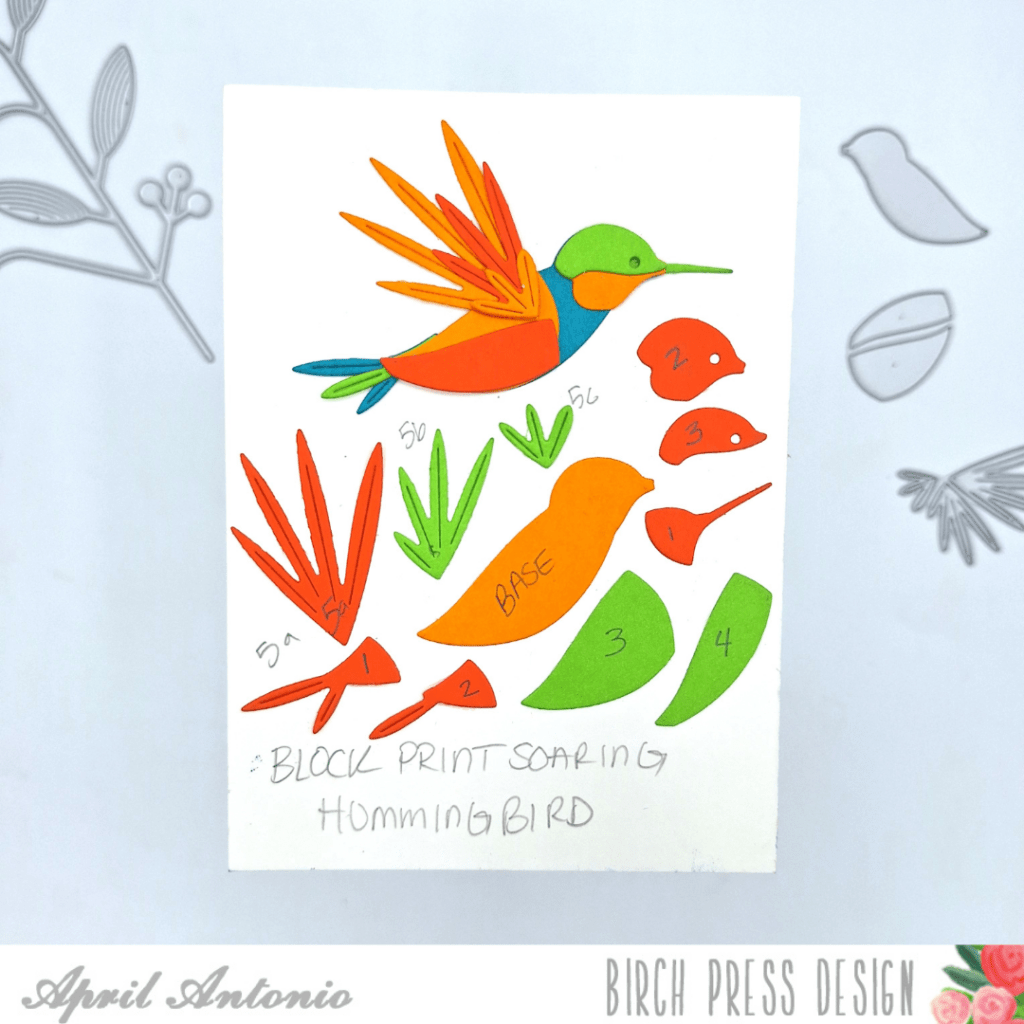
A little sneak peek for the curious
I’ll be honest — this die set has a lot of pieces, and figuring out the layering order is half the fun. I’ve been working on cut maps for my Birch Press dies to help me keep track of exactly how everything goes together, and I made one for the Block Print Soaring Hummingbird. I’m not going to say too much about it just yet — but if you look closely at the photo below, you might get a little preview of what’s coming. 😉
Stay tuned — there’s more to come on this one.
The finished card
The end result is a card that feels like a little piece of botanical art. The white card base lets all those rich, saturated colors breathe, the two hummingbirds bring movement and life to the design, and the Mod Branches tie everything together into one cohesive scene. It’s one of my favorite cards I’ve made with these dies so far — and I have a feeling it won’t be the last version of this one.
Have you made a card with the Block Print Soaring Hummingbird? I’d love to see what you’ve created — tag Birch Press and share your version!
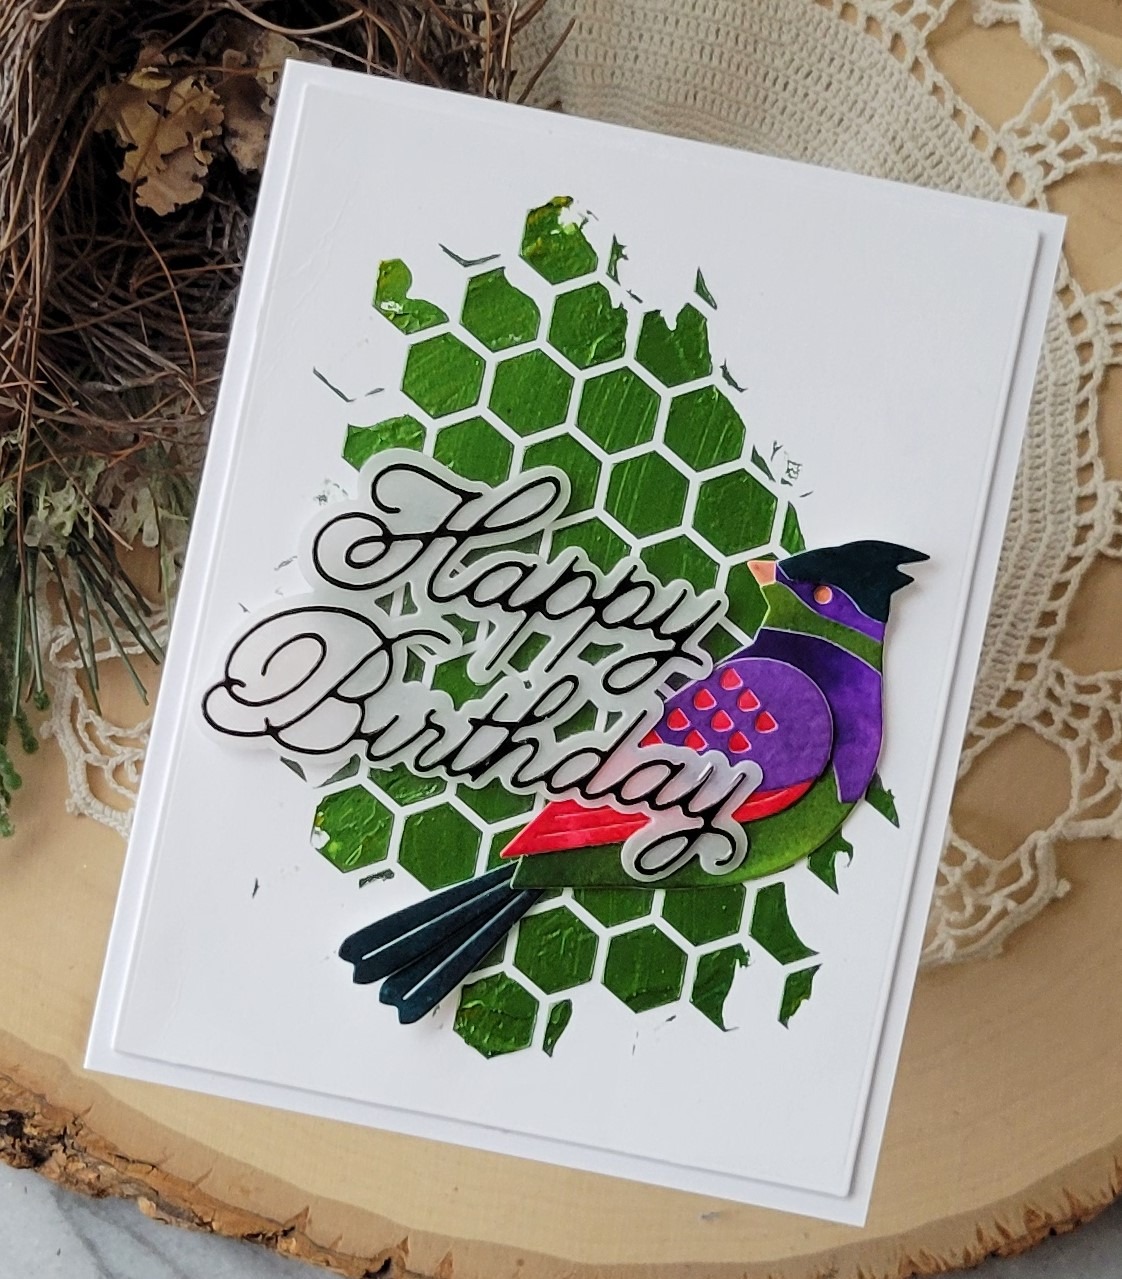
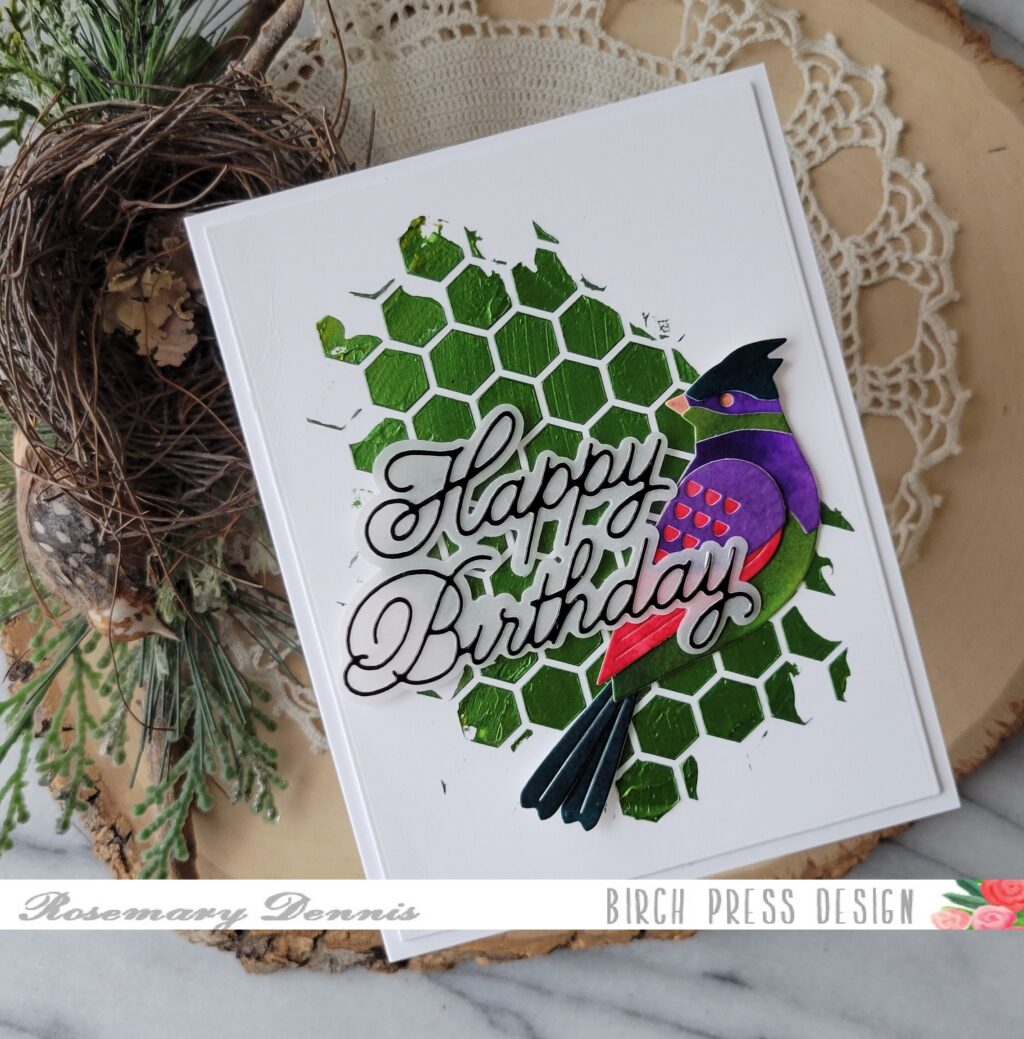
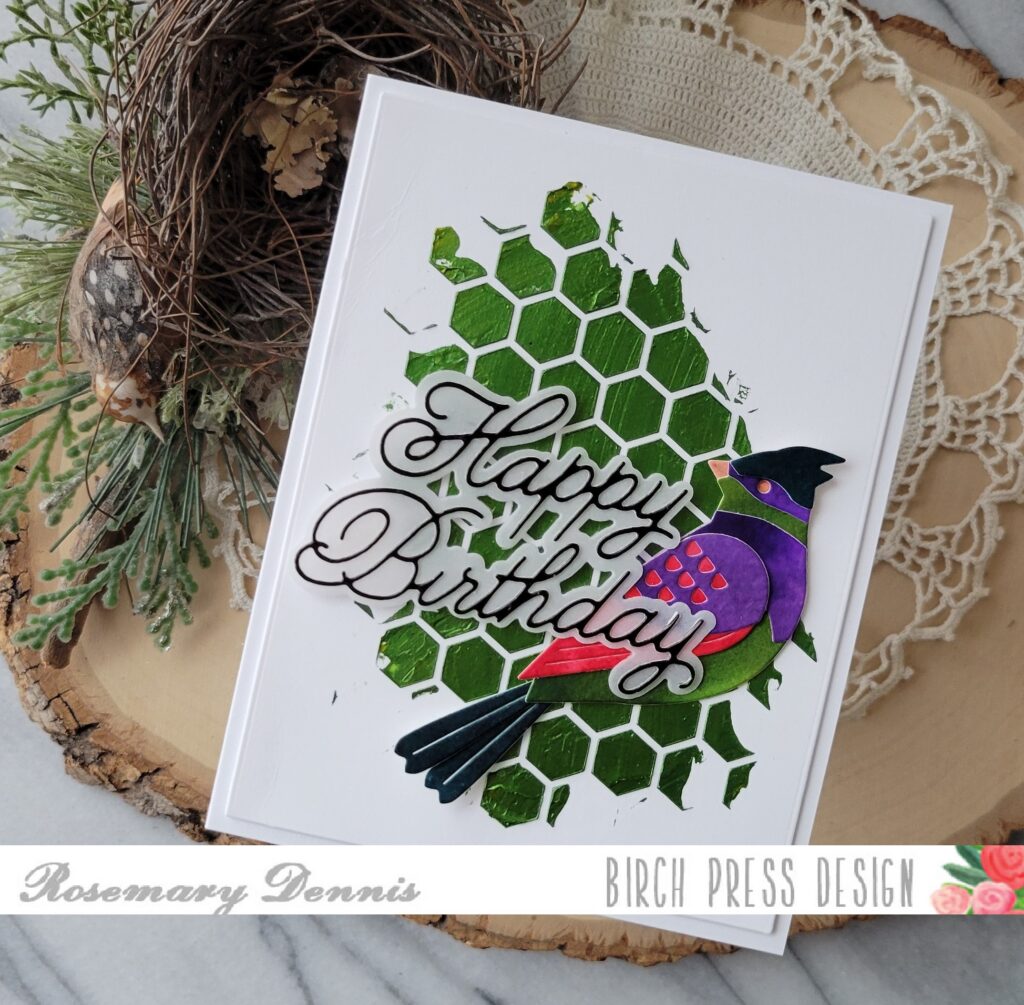
Hello, hello! Rosemary here on the blog today share a fun mixed media card that I made with the new Block Print Tropical Perched Bird and Handwritten Happy Birthday and Outline dies. I also used the Honeycomb Stencil for the project. Let’s take a look at what I made.
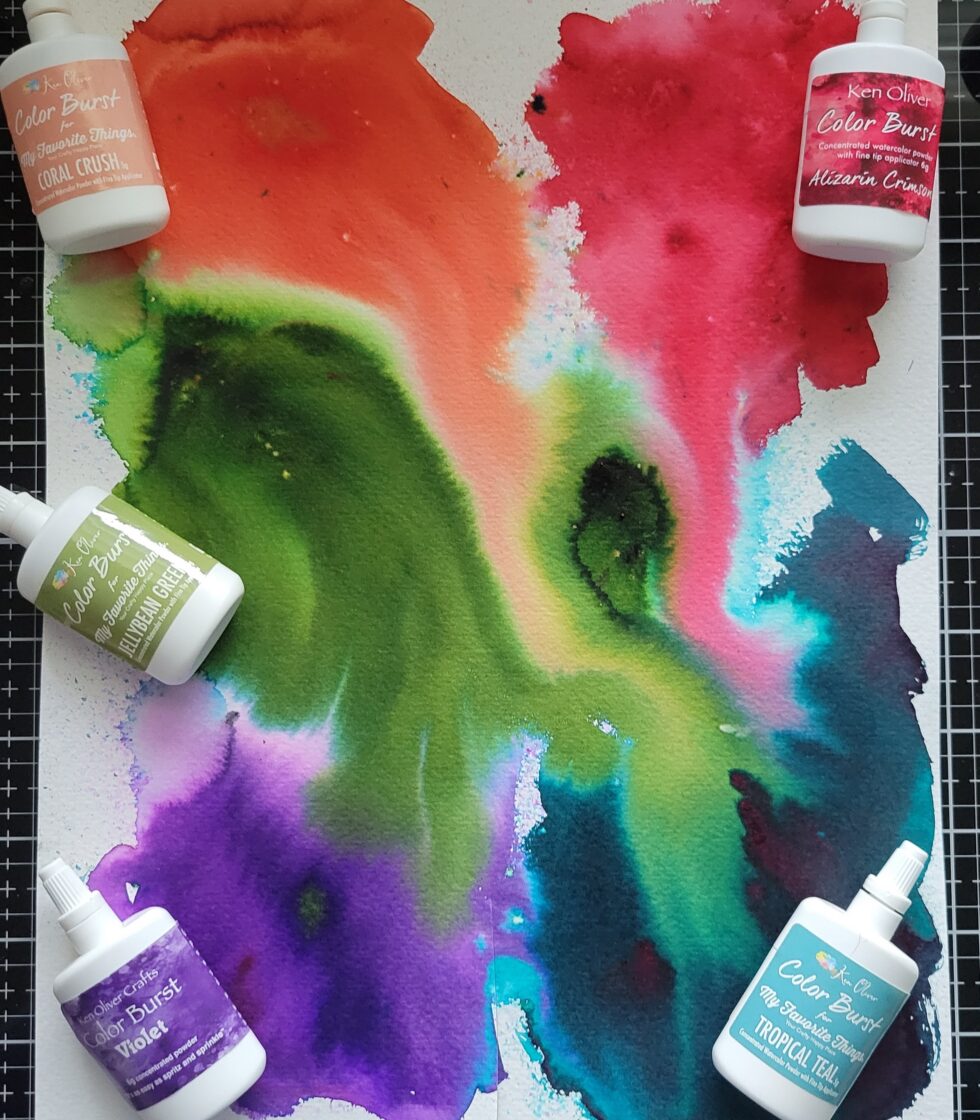
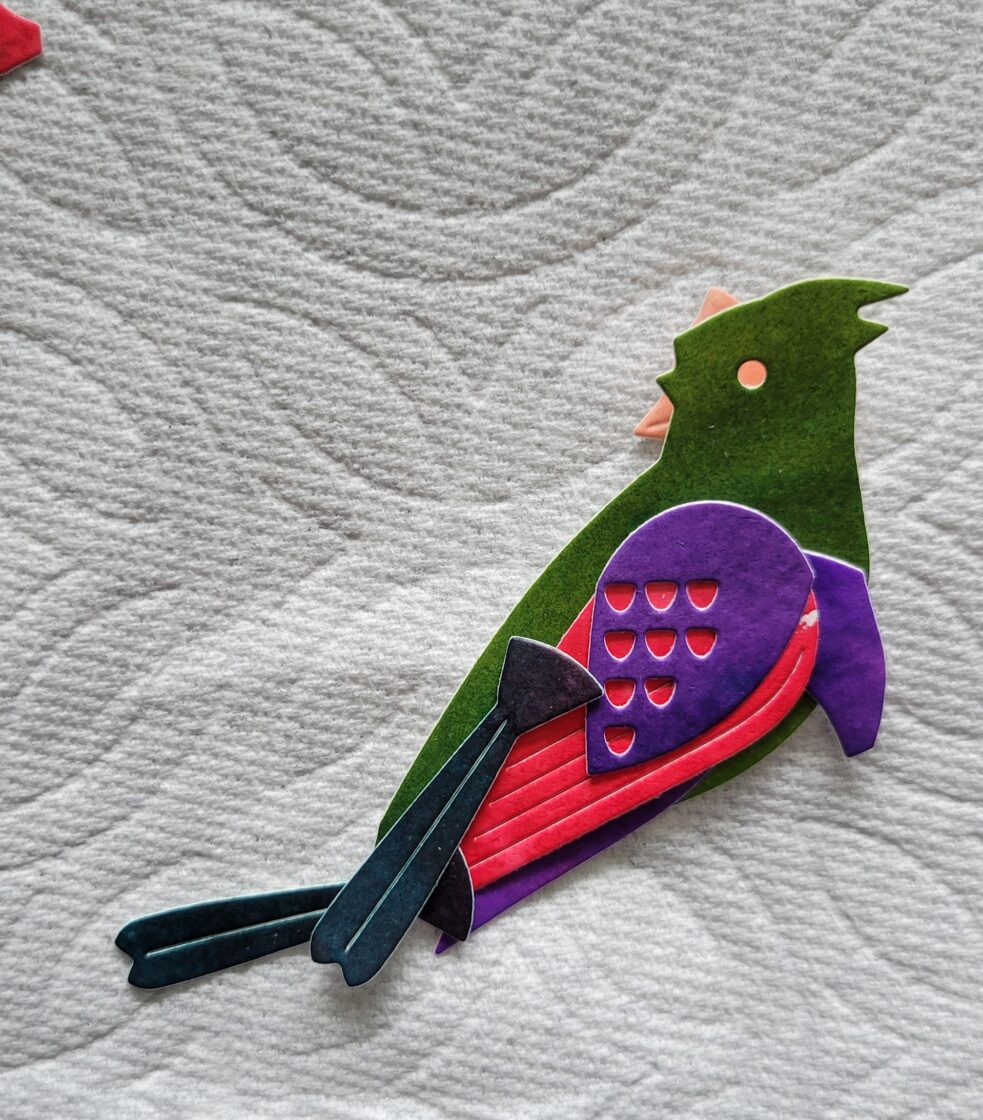
When I started the card I used just going to use some colored cardstock to create my bird. Then I started going through my supplies and I found containers of some Ken Oliver color burst medium that I had purchased long ago. So I decided to grab a sheet of watercolor cardstock and see what happened. Below is what happened, lol.
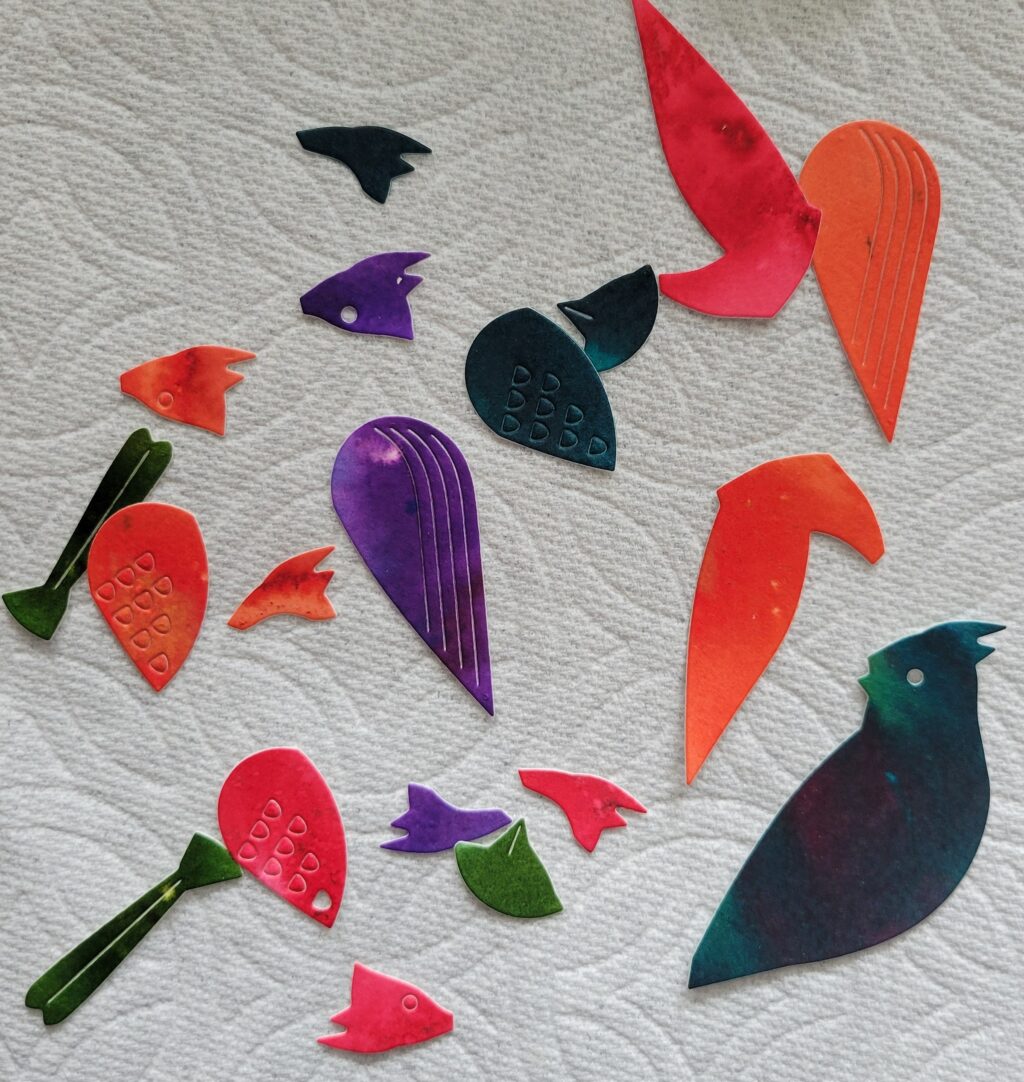
Bit of a mess, right? But I knew I could make something out of it once I cut all the pieces. I cut both dies multiple times so that I would have enough pieces to come up with the right combination.
Here are the majority of the pieces.
And here is the combination that I decided upon. Originally I was going to have more red in the bird, but in the end decided to limit that color to just the wing.
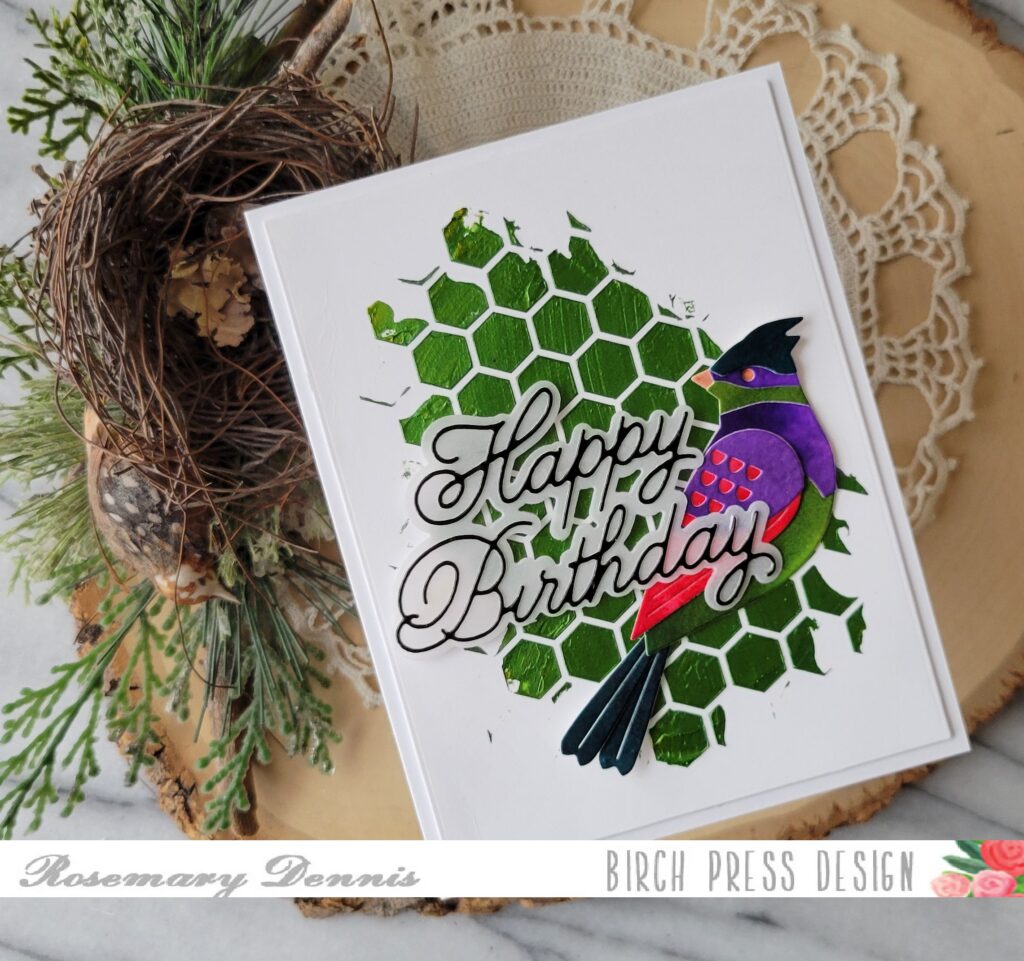
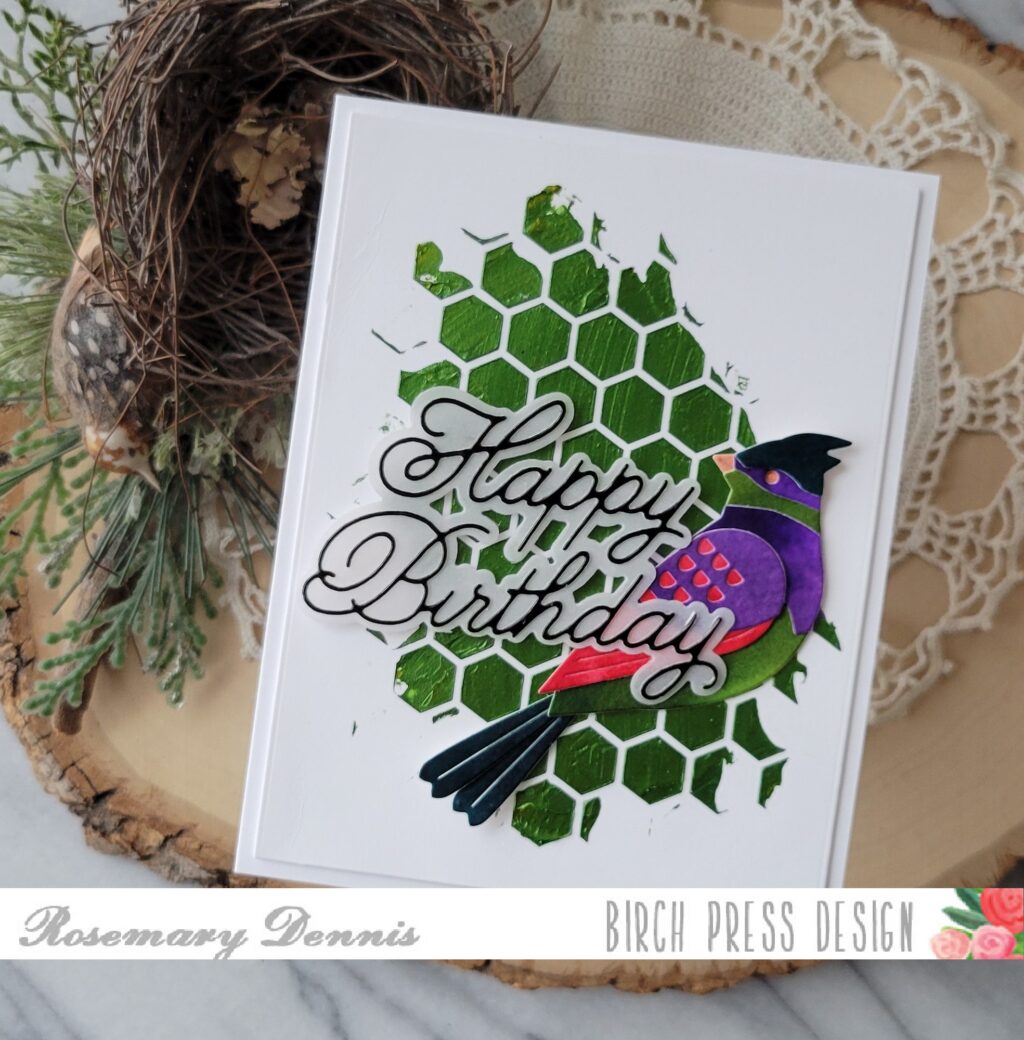
I adhered the bird with liquid glue and then set him aside to dry. I used a sketch layout for my card and decided to use the Honeycomb stencil for the background. I thought I would just do some ink blending, but then decided to take a look at some of the stencil butters that I had. I decided to combine a bright yellow and bright green and came up with this darker green that you see. I die cut white heavystock cardstock and then applied my stencil butter mix.
Once the panel was dry I got to work putting the card together. I adhered the bird with glue and then added the sentiment (which I had already had die cut and ready to go) with rolled up glue dots and glue
I hope you enjoyed today’s project. I had a lot of fun creating it using supplies that to be honest I had forgotten I had! Thanks for stopping by and have a wonderful day!
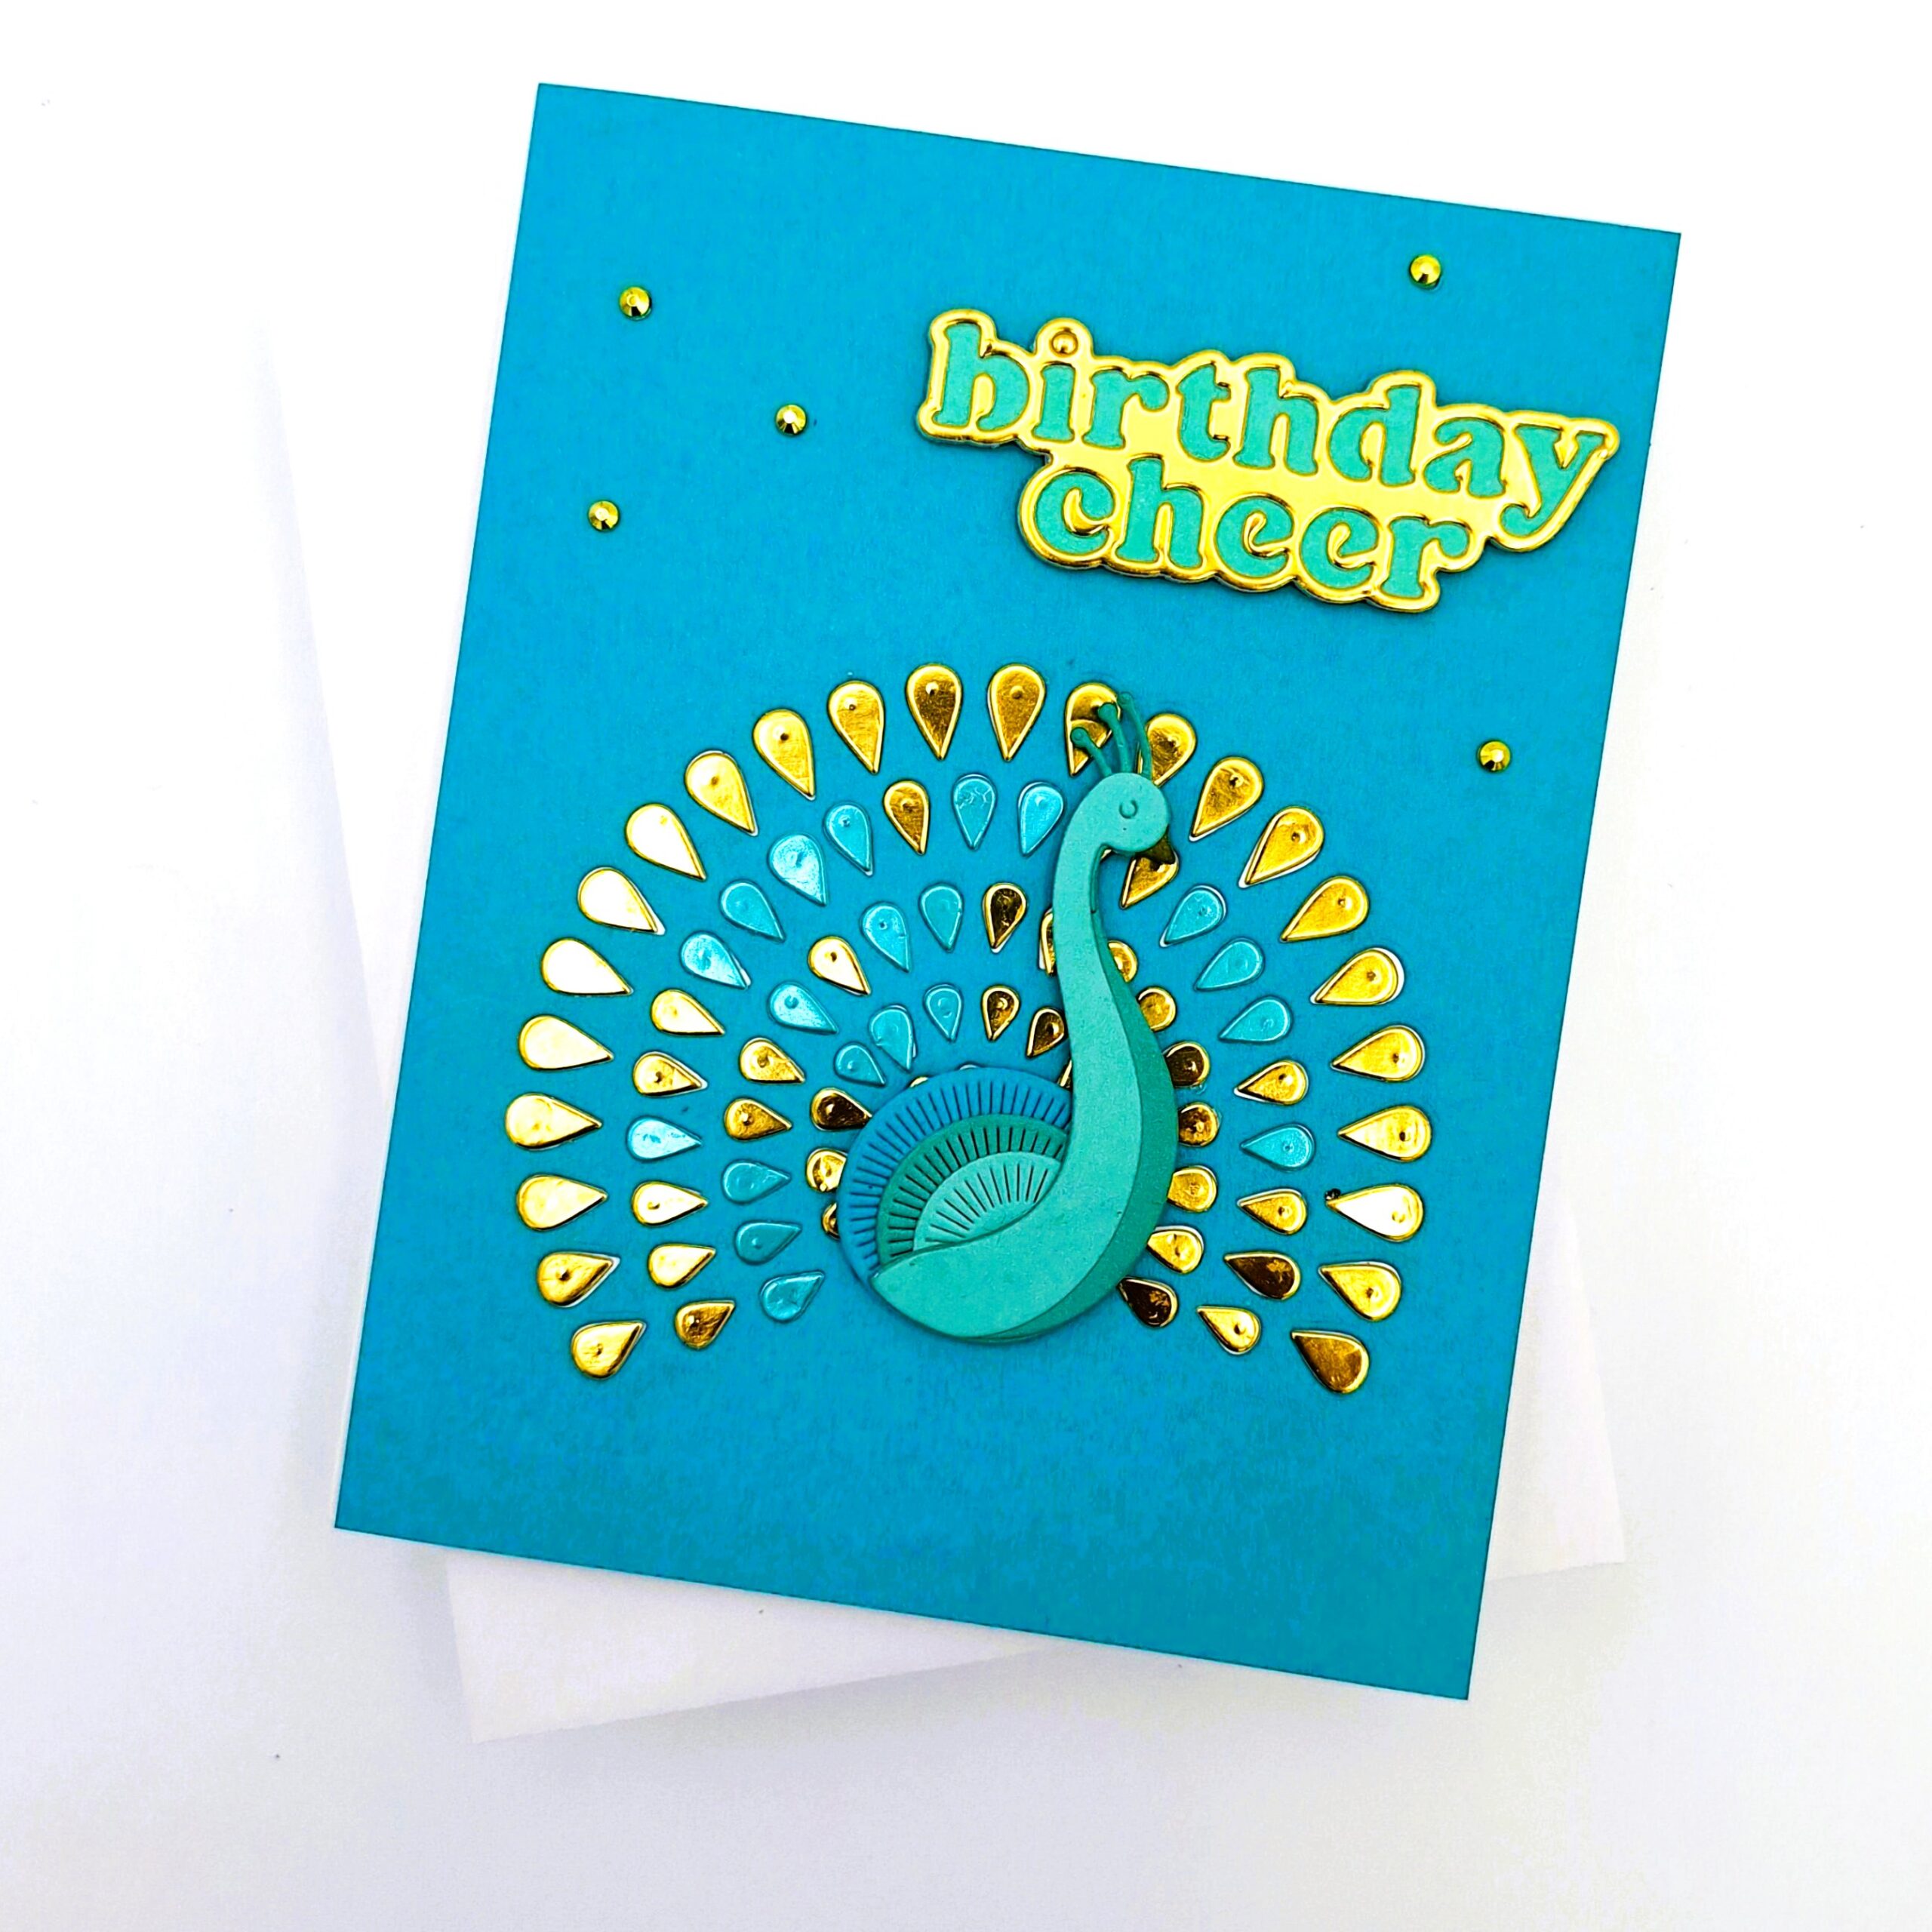
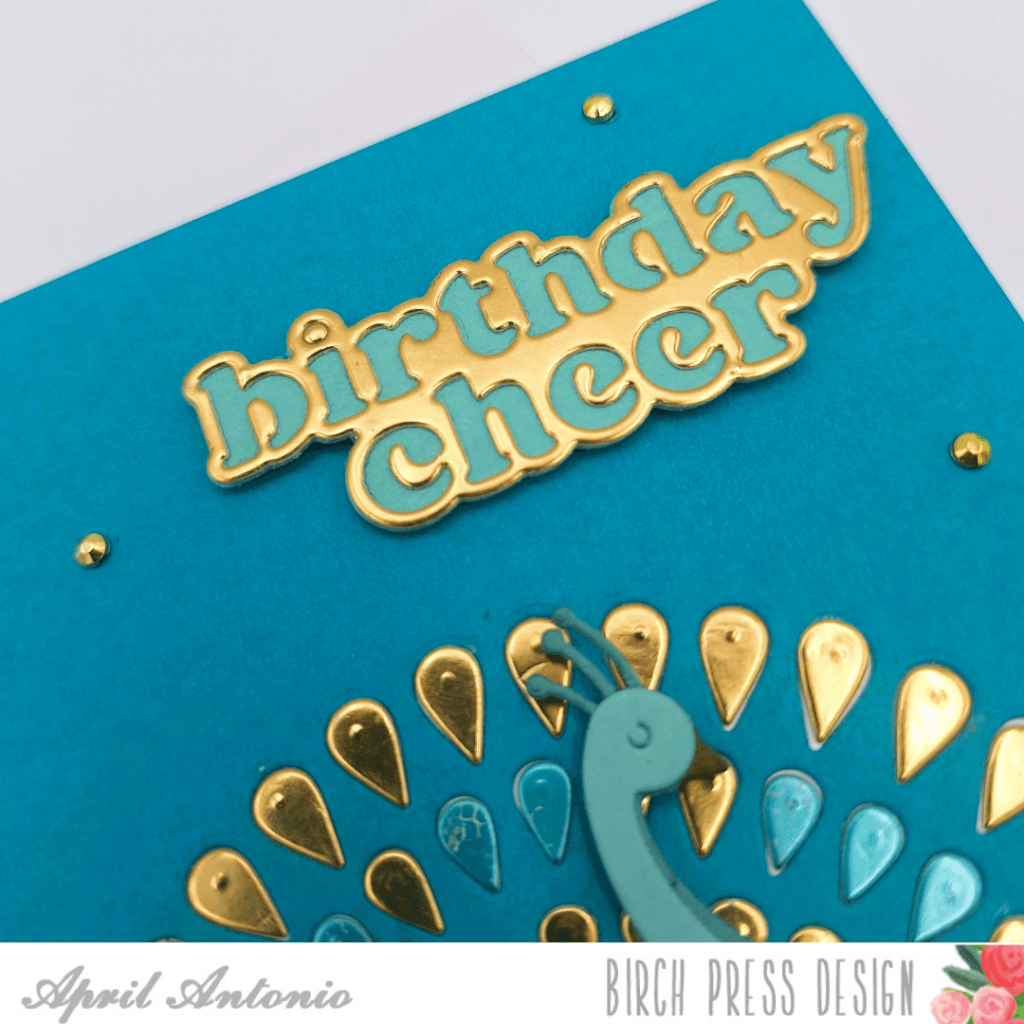
Creating a Showstopping Birthday Card with the Block Print Pretty Peacock
If you’ve been looking for a card project that feels like a true wow moment — this is it. The Block Print Pretty Peacock from Birch Press is one of those dies that stops people in their tracks, and when you pair it with gold details and a rich teal cardstock, the result is honestly stunning. Let’s walk through how this “Birthday Cheer” card came together and check out the below video for other fun ways to use this beautiful die set!
Starting with the base The foundation of this card is the Memory Box Lagoon Cardstock Pack — and honestly, it was the perfect choice for this card base. That deep teal is such a gorgeous backdrop for all the gold and shimmer that comes later. I cut my card base from the lagoon cardstock and immediately knew it was going to be a good day at the craft table.
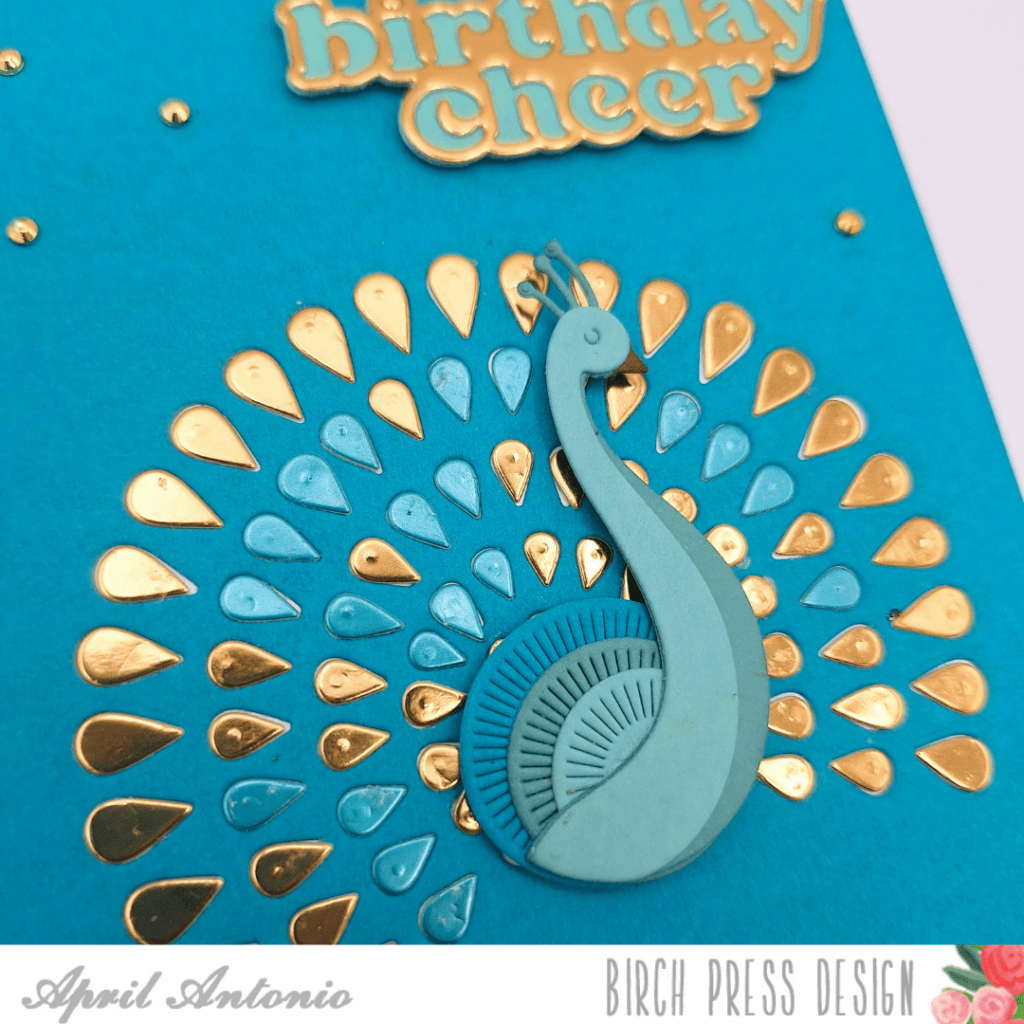
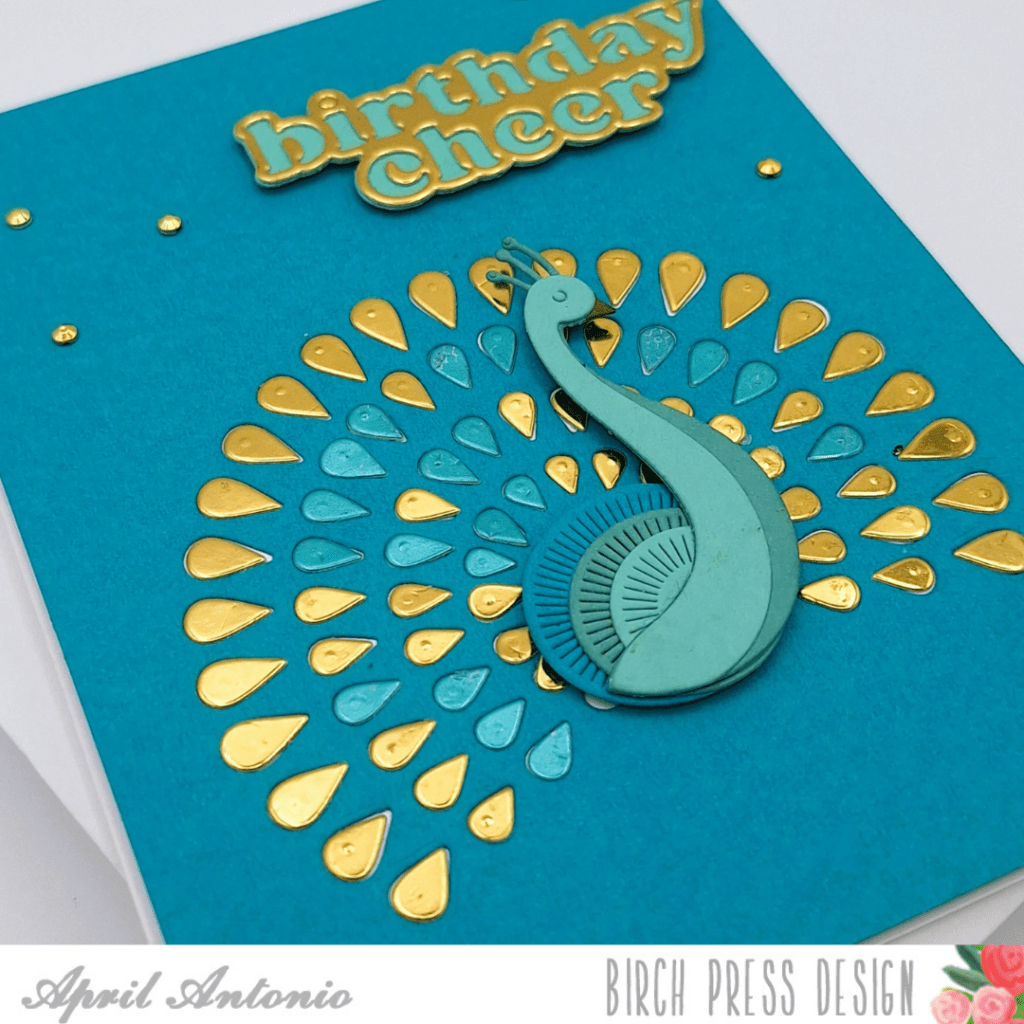
Die cutting the peacock Now for the star of the show – the Block Print Pretty Peacock die. This die is an absolute dream to work with. The tail feathers are made up of beautifully detailed teardrop shapes arranged in a gorgeous fan pattern, and the whole design just has this elegant, almost art deco feel to it. I diecut the peacock tail directly into the teal card base, which creates that beautiful inlay look where the die cut openings become part of the design itself.
For the paper piecing, I used the Memory Box Rainbow Reflections Mirror Pad behind the tail openings to get those gorgeous gold foil teardrop feathers, and those lighter, shimmery teal tones woven through the inner feathers. The combination of gold mirror and soft teal creates such a rich, layered look — it really mimics the iridescence of a real peacock tail.
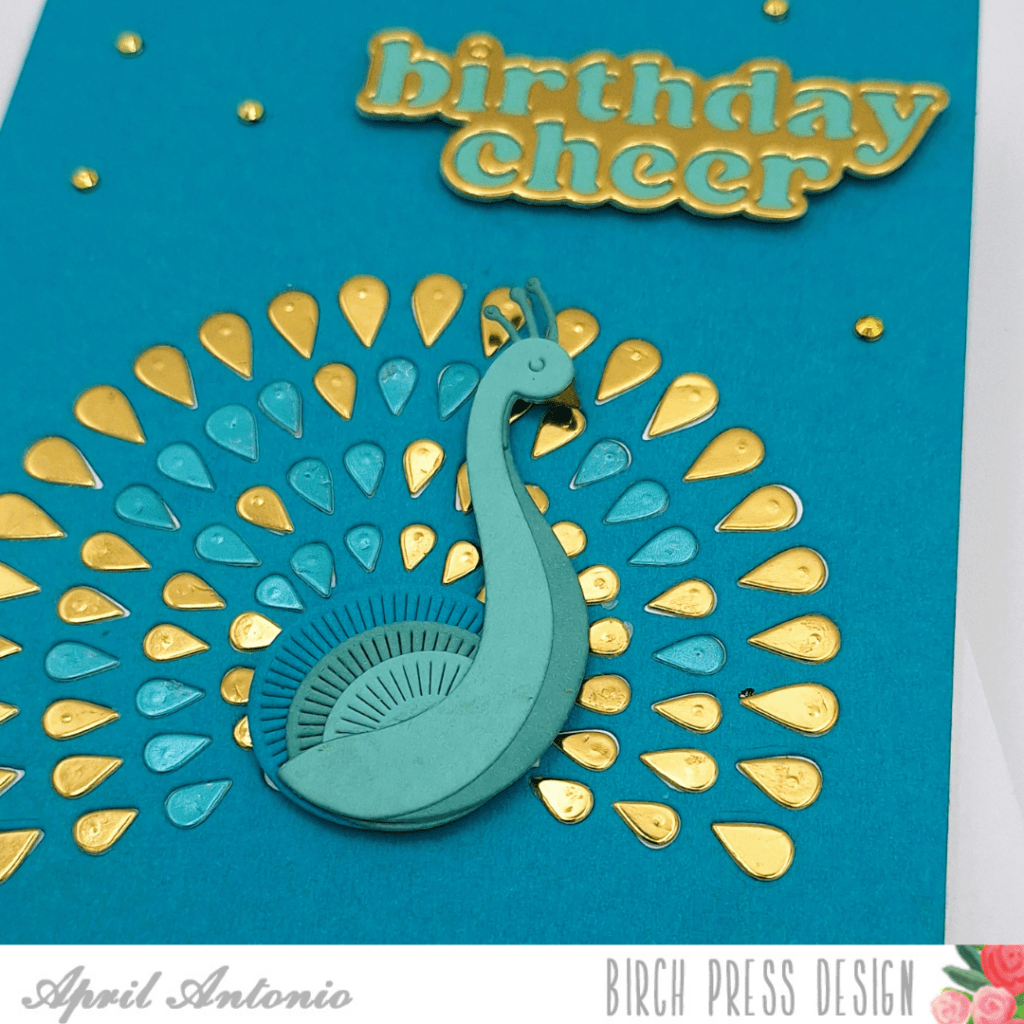
Building the peacock body The peacock body is die cut separately and foam mounted on top of the card for that lovely dimensional lift. Once the body was mounted, the whole card really started to come alive.
Adding the sentiment For the sentiment, I used the Birthday Cheer Vintage Sentiment die — and it is such a perfect match for this card. The chunky, retro-style lettering in gold (die cut from the Rainbow Reflections Mirror Pad) with teal cardstock as the shadow which gives it this gorgeous two-tone effect. I also have the Thinking of You Vintage Sentiment die on hand, which means this same peacock design could easily be adapted for so many other occasions — something to keep in mind if you fall in love with this color combo like I did!
Finishing touches To finish things off, I scattered some Open Studio Fairy Jewels across the card — a mix of warm gold and rich jewel-toned gems that tie everything together beautifully. A few gems clustered near the sentiment and dotted around the feathers adds just the right amount of sparkle without competing with all those gorgeous gold mirror feathers.
The end result is a card that looks incredibly intricate but is really all about letting these amazing dies do the heavy lifting. The Block Print Pretty Peacock is such a versatile, show-stopping die — I can’t wait to make more versions of this one!
Have you made a card with the Block Print Pretty Peacock?
We’d love to see your creations! Tag us and share your version — this is one of those designs that’s beautiful in every colorway.