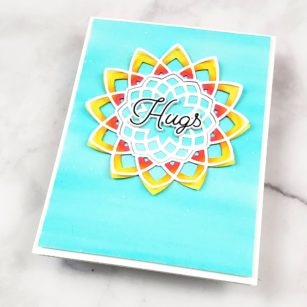
Hi there, Seeka here and today I’m sharing a sunny card using the Dazzler Layer die set.
First, I die cut Dazzer Layer C from white cardstock. Then I used three markers (Copic RV14, Y17, and Y15) to color the outer ring. I started with RV14, a pink, along the inside of the die cut and then added Y17, an orange-y yellow, next to it. This was very quick coloring with not a lot of attention to blending.

Then I added Y15, a yellow, around the outside edge.

Next, I used used the Dazzler Layer A die to cut another piece of white cardstock. I added a bit of glue around the inside of this die cut and adhered it over my Copic-colored piece, leaving the tips of each point un-glued, and curling them up a bit so that they stand up from the bottom die cut for a bit of dimension.
Then, I created a quick watercolor background using a Cool Aqua Karin Brushmarker Pro pen. I scribbled the pen over a piece of watercolor paper and then used a paintbrush and clean clear water to spread out the color, not blending out too smoothly and leaving a bit of color variation. I also added some white paint splatter using watered down white guache.

I trimmed my watercolor panel down to 4″ x 5.25″ and then adhered the my die cut piece to it. I also adhered the center die cut from Layer C (I love that each die layer results in two separate pieces!).
For the sentiment, I used the Best Friend stamp set and die cut the word “Hugs.” I die cut three more layers and then stacked and adhered all four layers together and then adhered the sentiment to the center of the star.
To finish, I used foam tape to adhere the card front to an A2-sized card base.
Thanks so much for coming by!


Supplies


