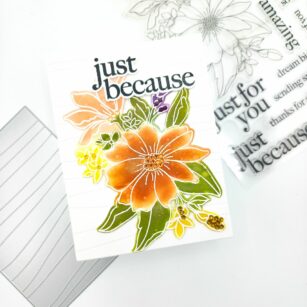
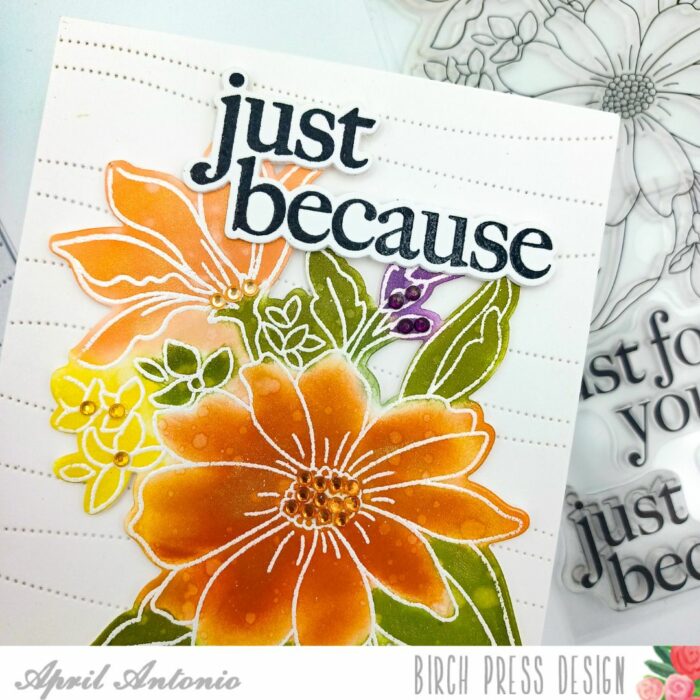
Welcome back to the blog! Today I’m bringing you a cozy Autumn themed card using some beautiful floral images, and emboss resist inking.
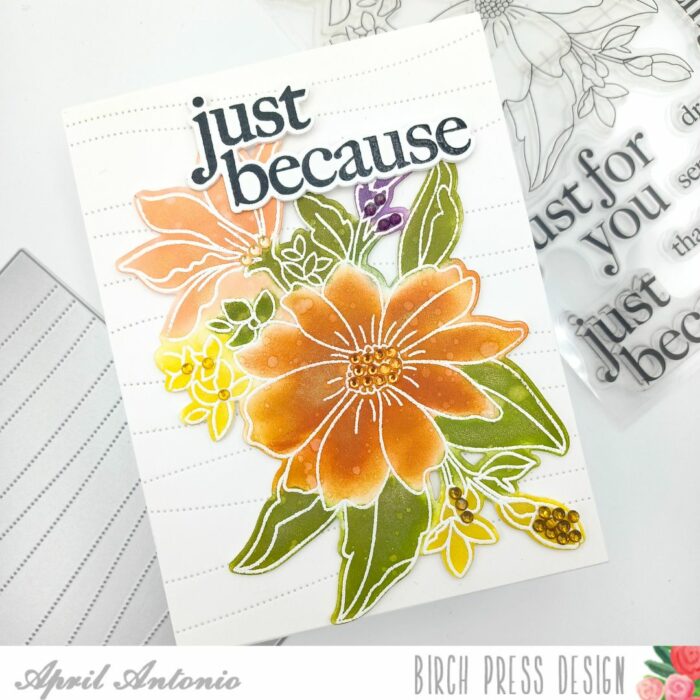
To start todays card I used the large floral image stamp from the Gracious Floral stamp and die set and heat embossed it with white powder onto a piece of white cardstock.
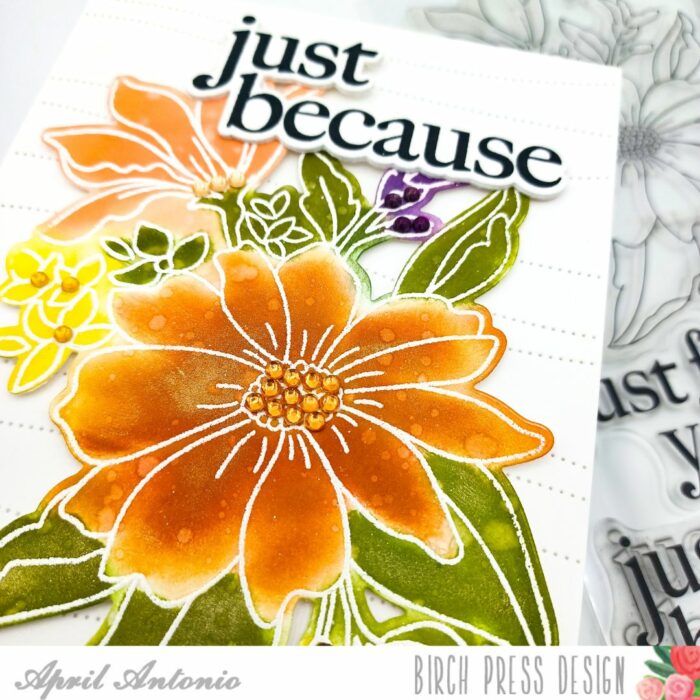
I then used my mini blending brushes and a few different ink colors to blend all the flowers and leaves, making sure to use darker colors towards the bottom of center of flowers and lighter colors towards the top.
TIP: color blending like this can be very forgiving. I was not worried about the colors overlapping each other, because once it’s all blended out it looks cohesive.
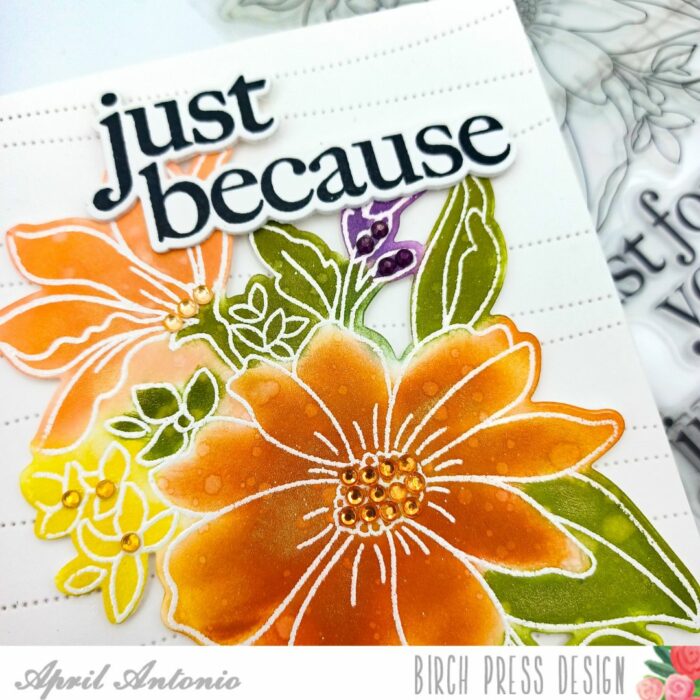
Once I was satisfied with the color blending, I took a clean paper towel and wiped it across my image to remove any residual ink from the white embossed part. Then I used the coordinating die to cut the image out.
To add some extra interest and shine to my flower I sprinkled a few drops of water so the ink would lift in those places, and also rubbed some shine powder across the image so it would sparkle a bit.
Separately, I took the Pinpoint Contour Plate die and cut it from a piece of white cardstock, and glued it to an A2 card base. I then arranged the floral image into the center of the card and adhered it using foam dots.
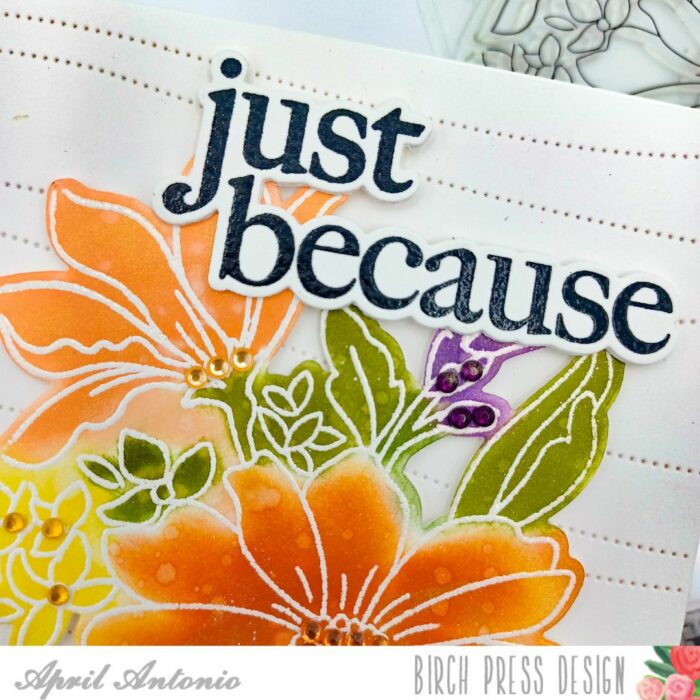
Next I took the ‘Just Because’ that is in the same Gracious Floral set and stamped it in black ink and heat embossed it with clear powder. I used the matching die to cut it out, and cut it out two more times from white cardstock. I glued all the layers together to add some dimension to the sentiment, and then added it to my card front.
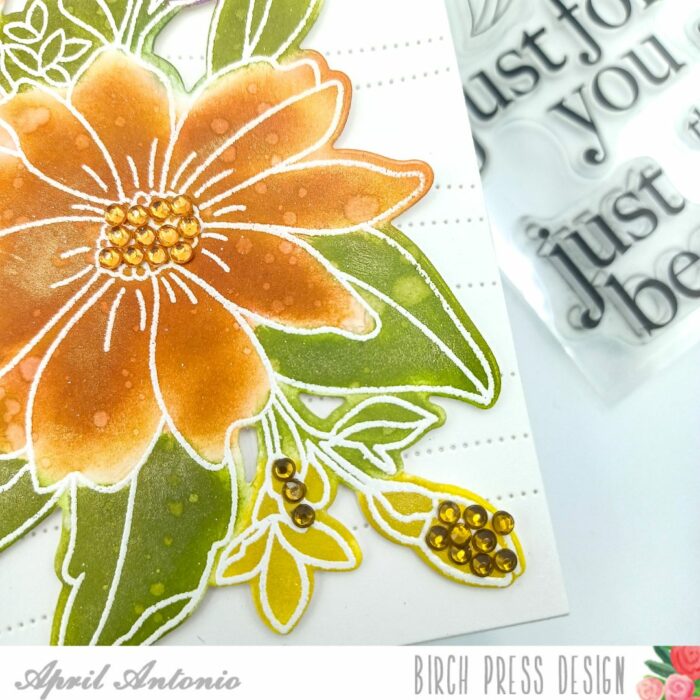
Lastly, I had to add some bling of course! I used jewels from the Autumn Fairy Jewels set to bling out the flowers. Some I filled in the center with jewels, and others I just did a few or filled in petals.
That is it! I hope you enjoyed reading through my process to create this colorful, fall themed card and see you next time!

Supplies


Supplies
