
Hello, hello! Rosemary here on the blog today with a snowy scene card that was so much fun to make! Let’s have a look.
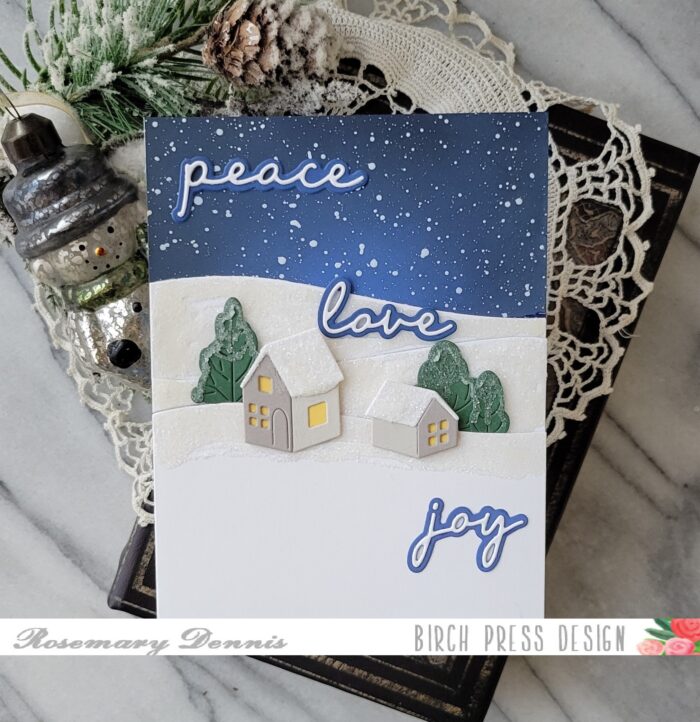
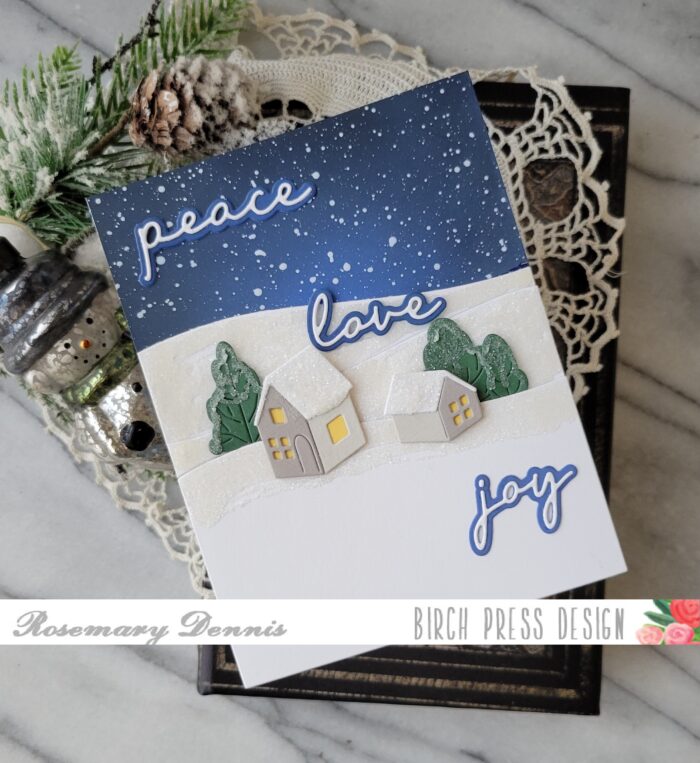
For my card I used the new Littletown Home, Wavy Hillside, and Peace Love Joy word die sets. The next few photos will show a little bit of my process for creating the card. I try to remember to take these kinds of photos, but sometimes get so involved in the process that I forget. This time I remembered!

I started by cutting piece of light blue cardstock from the Lagoon 6×6 cardstock pad to 5 1/2 by 4 1/4. I pulled out several distress oxide inks in shades of blue and blended them onto the top of the cardstock. I knew I would be covering up the bottom so no need to waste time and ink there! Once I had the blues blended to my liking I added in some black using Black Soot distress oxide. I used Blueprint Sketch, Prized Ribbon and Chipped Sapphire for the blues (could only fit the Chipped Sapphire in the photo).
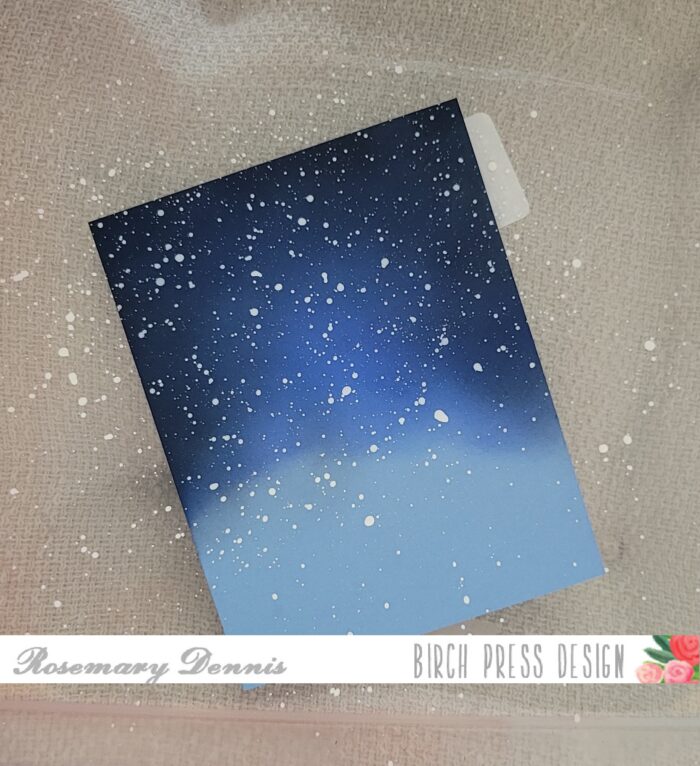
Once the ink blending was done I put the panel into my splatter box and liberally splatted the panel with white acrylic paint. I let the panel dry and moved on to the next step in my card process: creating the wintry hills for my little houses!

I used Glossy Accents to cover the hill pieces, but I didn’t cover the cardstock pieces completely as you can see in the above photo. I did this because I wanted a more realistic snow look to each piece. Giving it the look of high and low areas in the snow that are there in real life. I then covered each piece with Rock Candy glitter and let them dry.
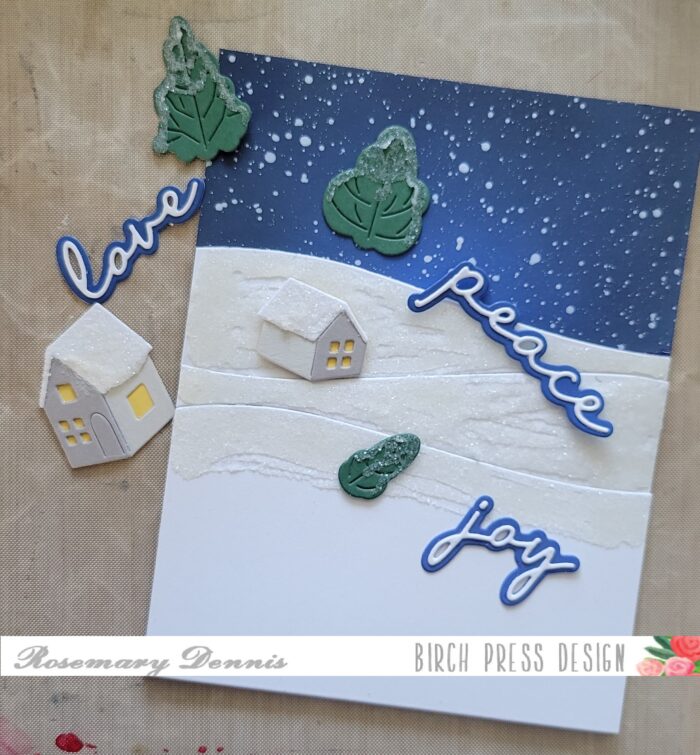
Now it was time to make the little houses, trees and sentiments. I die cut the houses from white, grey and yellow cardstocks and then adhered them together. Glossy Accents was added to the roofs and then Rock Candy glitter for that icy, snowy look. For the trees I simply added some liquid adhesive and then sprinkled on the Rock Candy Glitter. I had a scrap of the light blue cardstock so I ink blended that with the blue distress inks I used and die cut the shadow layer of each word from that. The words were die cut from white and then adhered to the shadow layer with liquid adhesive.
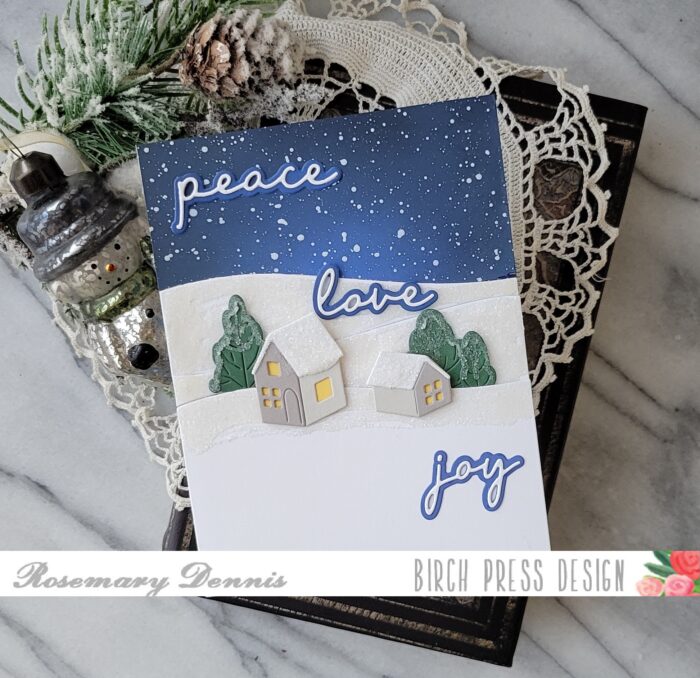
For the snowy hills I adhered the bottom one with foam tape. The middle layer was adhered with thin foam squares and the top layer with liquid adhesive. I layered the hills this way so that I could tuck the trees behind the bottom hill layer and the houses. The trees were adhered with a combination of liquid adhesive and thin foam squares. The houses were adhered in the same manner. The sentiments were adhered simply with liquid adhesive.
I hope you enjoyed today’s card and seeing a little bit of the process I used to create the card. Thanks for stopping by and have a wonderful day!

Supplies


Comments
4 responses to “Peace Love Joy | by Rosemary Dennis”
What a sweet and cozy scene you’ve created, Rosemary! I like the little bit of sparkle you’ve added to make the snow glisten. This is a darling card!
Gorgeous winter village, Rosemary! Those new layered dies look amazing!!
A peaceful and joyous scene Rosemary, love your card and those hills and houses. x
Oh my goodness–the sky is so beautiful, Rosemary! I’m glad to see how you did the snowy hills–need to try that! Great design using the 3 words–just love this card!