Hello Birch Press friends, it is Natasha here today to share a card with you using lots of color and sparkle! For today’s card I am using the Butterfly Basics die set! Let’s get started!
I started by creating 2 colorful background panels using Distress Mica Stain. I used 3 different colors to create my backgrounds. I spritzed each panel, allowed them to dry, then picked up some color with water. I repeated this process until I was happy with each panel.
Once each panel was dry, I die cut 2 butterflies using the Butterfly Basics die set. I love these large butterflies! I then die cut the antennae for each butterfly using the Memory Box Vintage Pastel Mirror Pad. I then adhered the antennae to the butterfly using liquid glue. I set these aside to work on my background.
Next I ran a piece of white card stock through my die cutting machine with the Memory Box Geometric Crystals embossing folder. I then tore a section of the panel off for a distressed look. I trimmed the panel down and then chose a piece of coordinating pattern paper. I then adhered these to an A2 card base.
To complete my card I added foam tape to the back of each butterfly then adhered them to my card front. I chose a sentiment from my stash and added a piece of pattern paper to compliment my design.
I had so much fun creating today’s card! I will be back soon with more crafty inspiration!
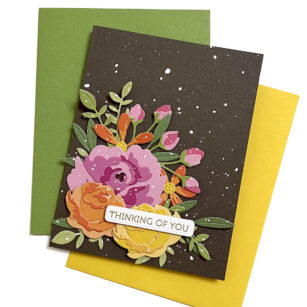
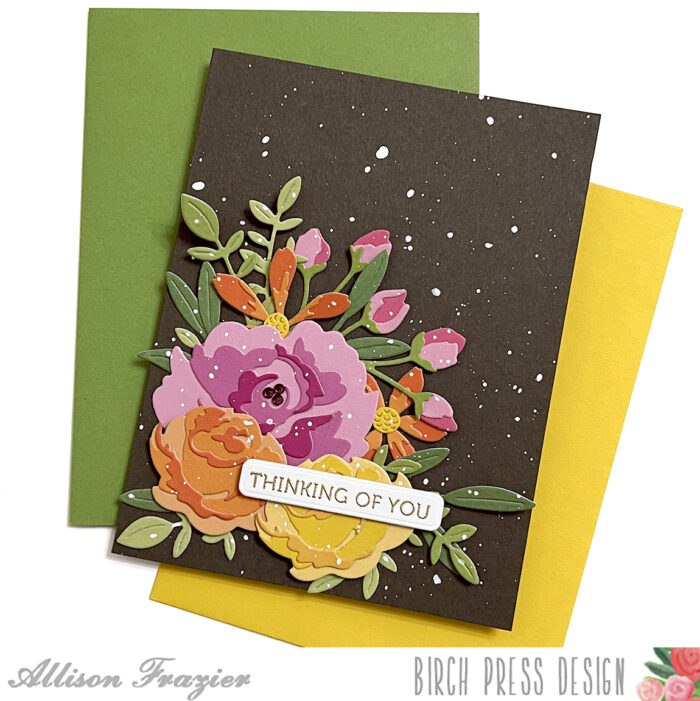
Hello, Birch Press friends! Today, I am sharing this card featuring a cluster of layered florals. There are so many amazing floral dies in the Birch Press collection, and I used a lot of them today! I love using a dark background – I think it provides a really dramatic pop.
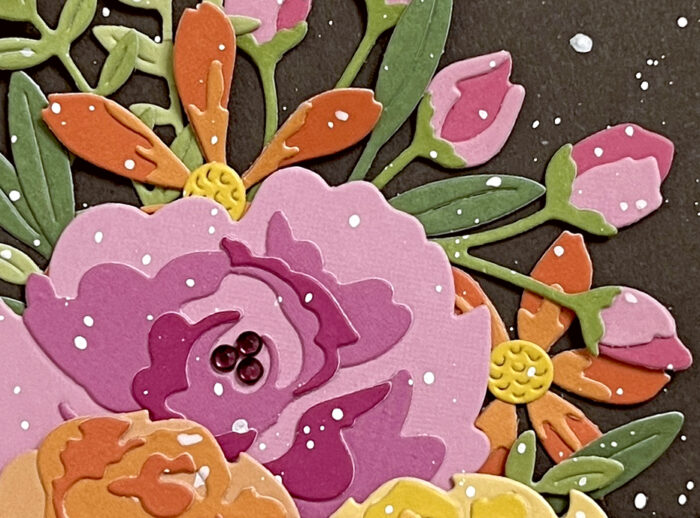
I started my card by creating the layered roses first. For each of the roses, I chose three different shades of card stock for the layers. I used the Dainty Rose and Leaves Contour Layers set to create the yellow and orange roses. I used the Morning Rose and Triple Buds Contour Layers set to create the large pink rose. I used this same set and two shades of pink card stock for the buds and one shade of green card stock for the stems.
For the orange flowers, I used the Star Flowers Contour Layers set. I used two shades of orange card stock, as well as yellow for the center of the flowers. For all of the leaves, I used two die sets – the Jovial Blooms and Leaves Contour Layers and the Tiny Tuft Flowers and Leaves Contour Layers. Once I had all of my dies cut, I assembled the layers with liquid glue and then started arranging everything onto a dark brown A2 card base.
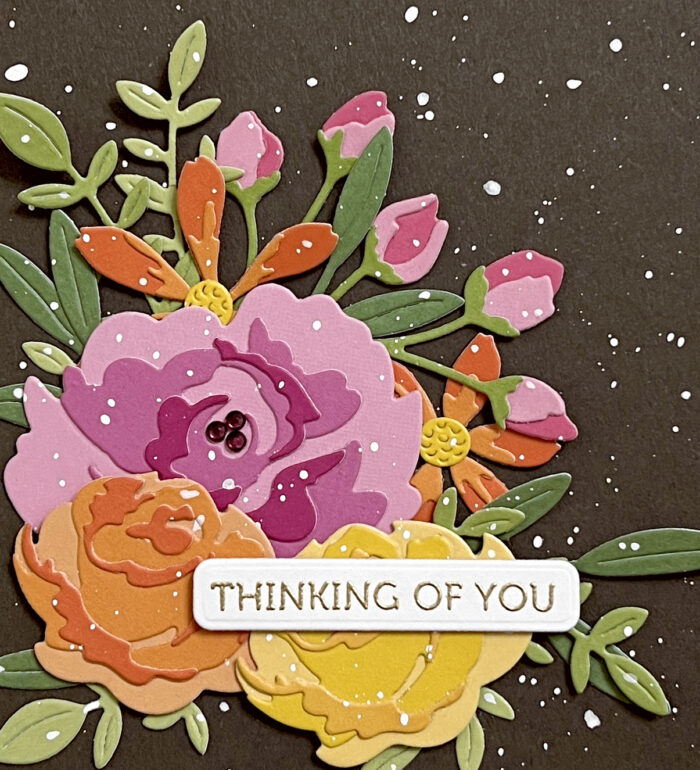
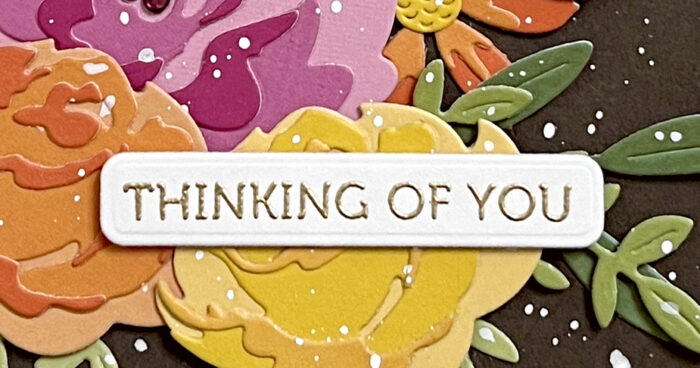
Once I was happy with the arrangement, I started glueing elements down, starting with the leaves and any other elements that were going to go behind something else, such as the smaller orange flowers and the pink buds. Once I got to the top elements, I used a couple different thicknesses of foam tape to adhere the orange and yellow roses. I heat embossed my sentiment with gold embossing powder. This sentiment comes from the Lingo Thanks Stamp Set. Before adhering my sentiment to the card, I splattered the whole thing with white acrylic paint.
For a final touch, I added some fairy jewels to the center of the large, pink rose. I love how it all turned out! Thank you so much for joining us today. I hope this card inspires you and brings a smile to your face.
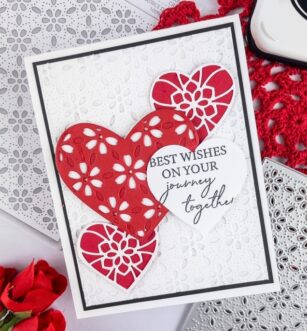
Hello friends and happy May! I feel like May is the unofficial start to summer, which also means that wedding season is upon us. This is Design Team member Crystal Komara here today to inspire you with a wedding/love themed card using a variety of product from Birch Press Design.
Card details:
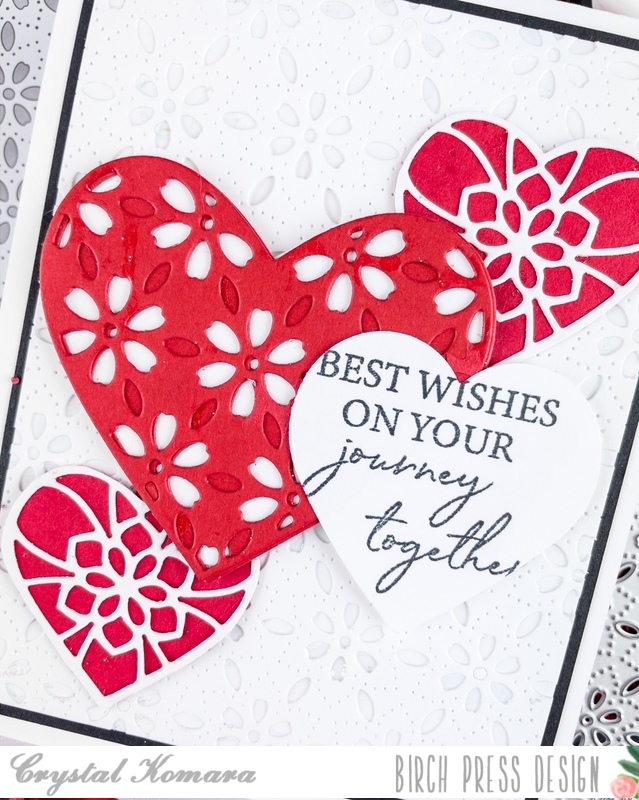
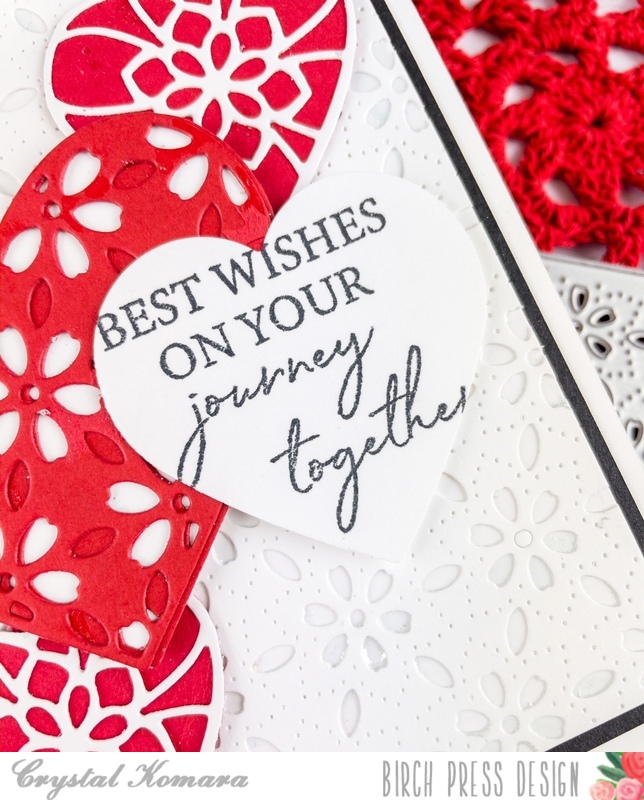
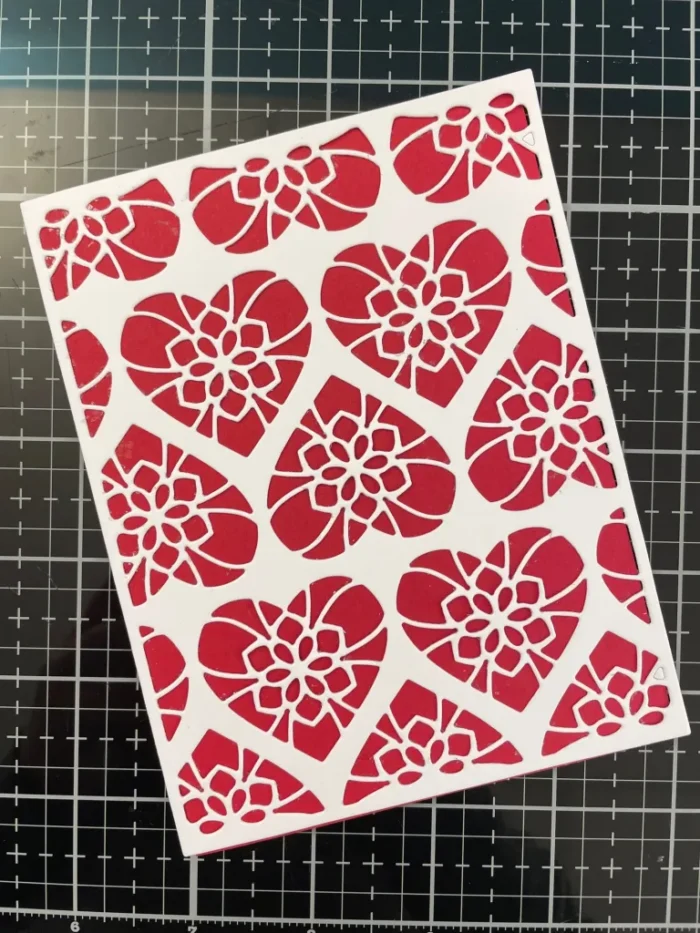
The base of this A2 sized card is made from 80 lb. Neenah Solar White smooth cardstock. This is my go-to white cardstock for e-v-e-r-y-t-h-i-n-g! To create the background of this card I used Layer Plate C of the Flora Plate Layer set, and I die cut it from white cardstock. I mounted that die cut piece onto a piece of white cardstock for a white-on-white look and then mounted both pieces onto black cardstock before adhering it to the card base.
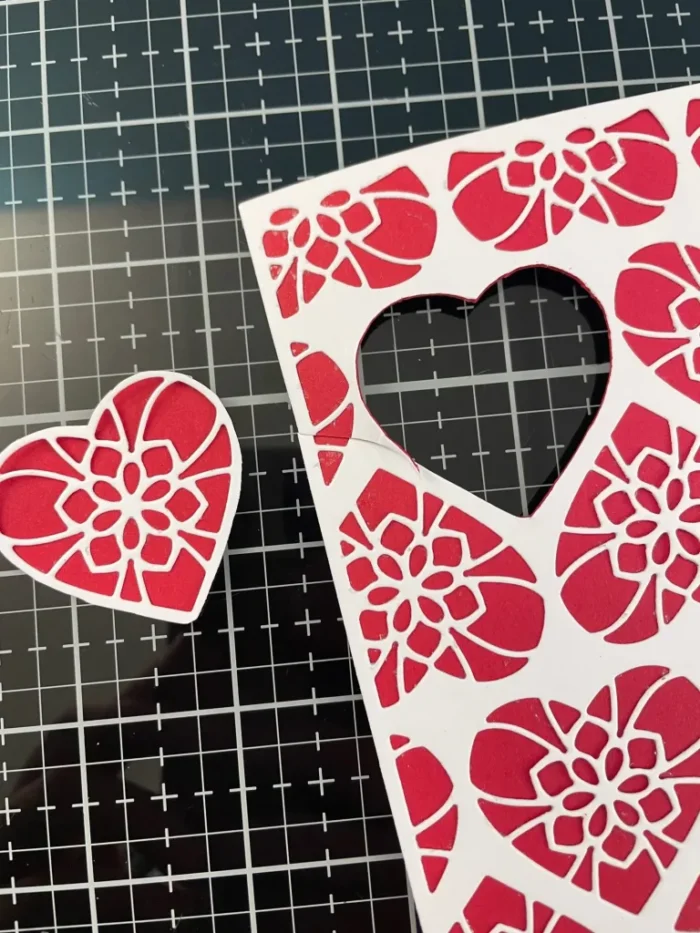
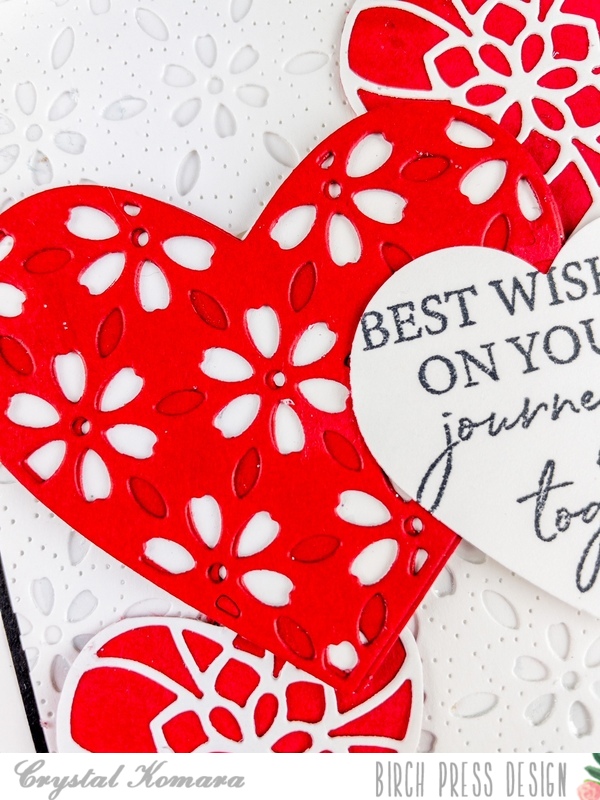
For the largest heart I used the Flora Heart Layer C. I die cut Layer A and Layer B from red cardstock. I adhered the two layers together with a fine-tip liquid glue. Then I adhered those of a piece of white cardstock and fussy cut a heart shape background. I adhered this heart to the card using 3M foam adhesive for added dimension.
To create the two smaller hearts, I die cut Layer A of the Kinsley Heart Layer Set from white cardstock. I adhered this over a sheet of red cardstock and then fussy cut the individual hearts out.
For the sentiment, I stamped the font in black ink on white cardstock. This sentiment is from the Kind Hearts clear stamp set. I then used a heart punch to punch the sentiment out. I adhered the sentiment too the card using 3M foam adhesive.
I hope you have enjoyed today’s card. Thank you for visiting and have a wonderfully creative day!
Hi friends! I’m back for this month sharing another Clean and Simple card, similar to my blog post on April 10th! If you haven’t seen that post yet, head over there first to get the deets before reading this post, as this is a continuation!
This month I’ve been focused on Clean and Simple lines in my cards. That’s a challenge for me, but I like a good challenge so decided to give this a try! I hope you like it! Clean and Simple cards can be very effective with just a few simple design ideas to add detail and interest to your card!
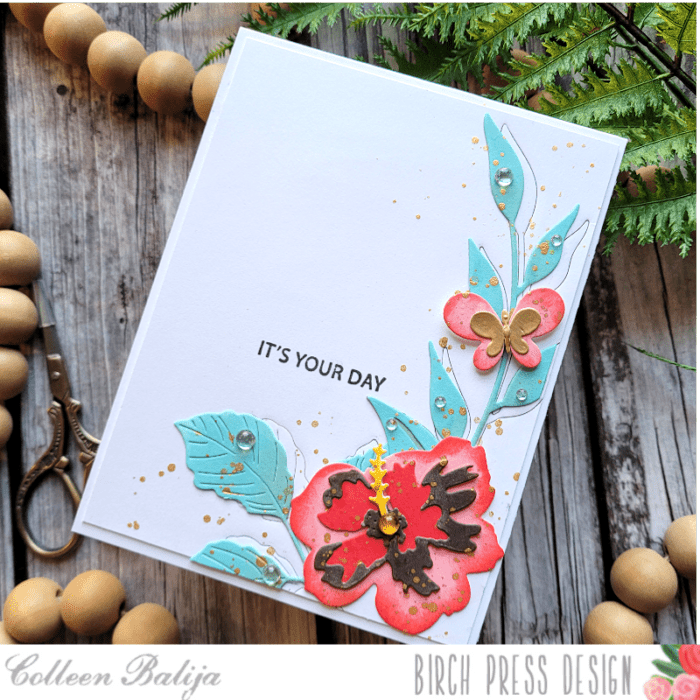
The products I’m using for today’s card are Phlox Blooms & Leaves die, Sylvan Berries & Leaves die, Tropical Hibiscus Contour Layers die, Simple Butterfly die, and Rainbow Days stamp. All of these items will be linked at the bottom of my post!
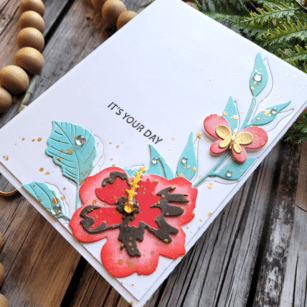
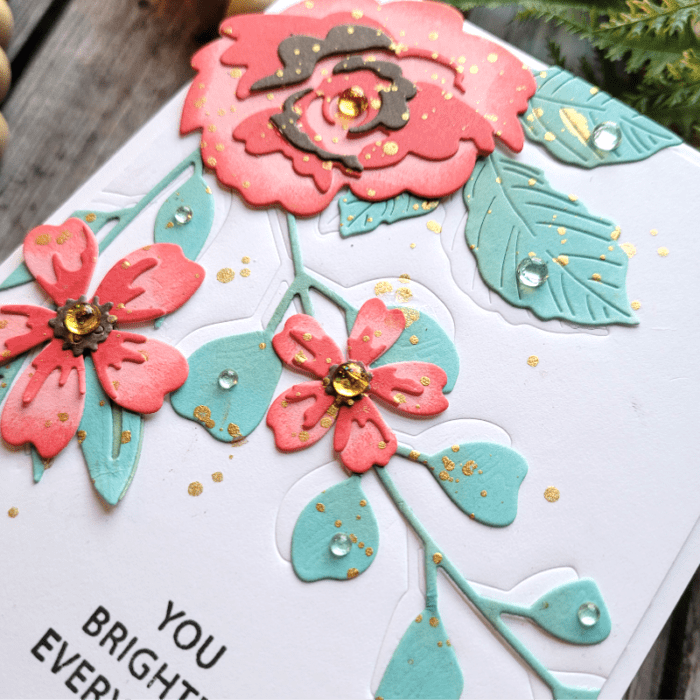
Similar to my other Clean and Simple card of April 10th, the first step was to decide on the arrangement of my flowers on the white card panel. Once that was decided upon, I die cut my flowers and leaves and then ink blended each in shades of coral and mint green. I explained in my first blog post why I die cut first and ink blend second. Basically, it allows me to get more depth of color with the flowers and leaves. You can see that in the photo above!
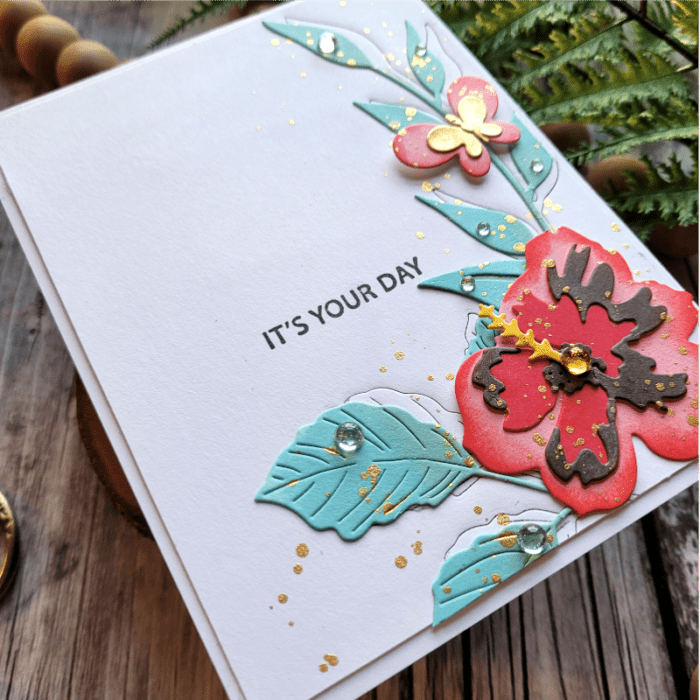
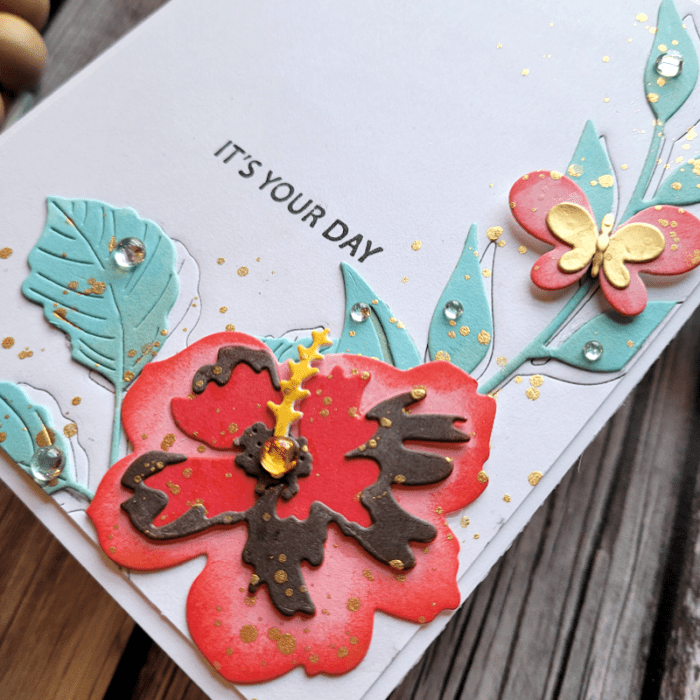
Next, I wanted to add subtle detail to the white space, so I used a few of the die cuts from earlier as embossing tools. And unlike my first card, this time I inked up the die with black ink! To do this, I inked up just the tips of the dies, placed them carefully where I wanted them (once they are in place, don’t move them or you’ll get black ink all over your nice white card panel), taped them down to the card panel so they wouldn’t move, and ran them through my die cutting machine using an embossing pad. The embossing pad allows the die cut to embed an image without cutting all the way through (Each die cut machine is different in how it works, so refer to your brand of die cut machine for details.) The black ink adds another element of interest! You can see in the photo above and below the level of detail that this technique adds! The black ink is subtle, but effective! You could use any color of ink, too!
Last step was to adhere the flowers and leaves to the card panel, placing the leaves offset from the embossed image so just a bit peeked out from behind! Then I added gold metallic splatters just around the flowers, being careful to leave most of the white card panel untouched. I placed the “It’s your day” sentiment next to the flowers and then finished with sequins over the leaves and flowers.
Clean and Simple cards are really fun, and if you keep these helpful tips in mind, you just can’t go wrong!
Emboss the white card panel with embossing folders or dies
Use splatters sparingly to add interest without overwhelming the card panel
Add detail to the focal point by ink blending to create depth and life to your florals
Keep the sentiment simple and small
Add sequins or a Nuvo Shimmer pen to add shine and shimmer to your focal point
Keep one half to one quarter of the card panel white and untouched
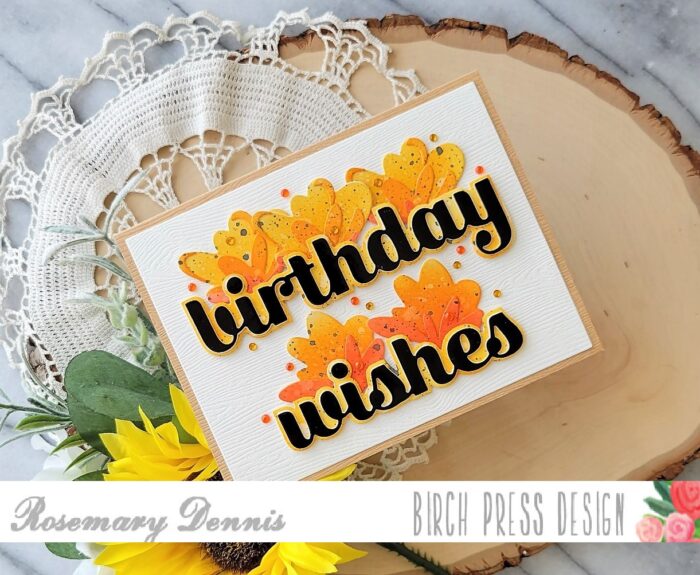
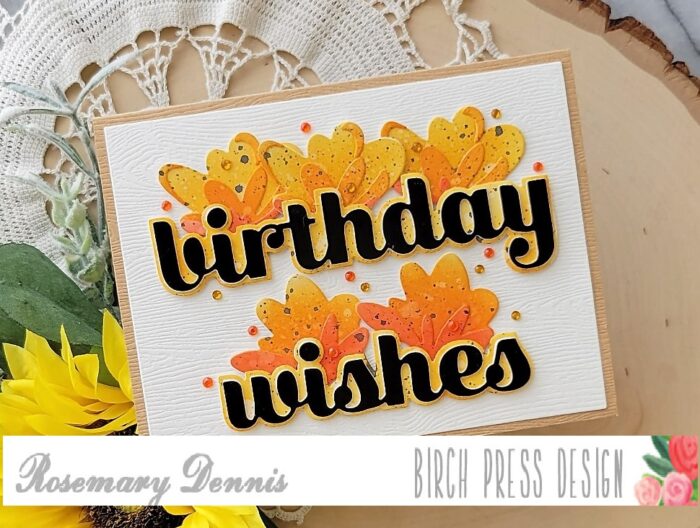
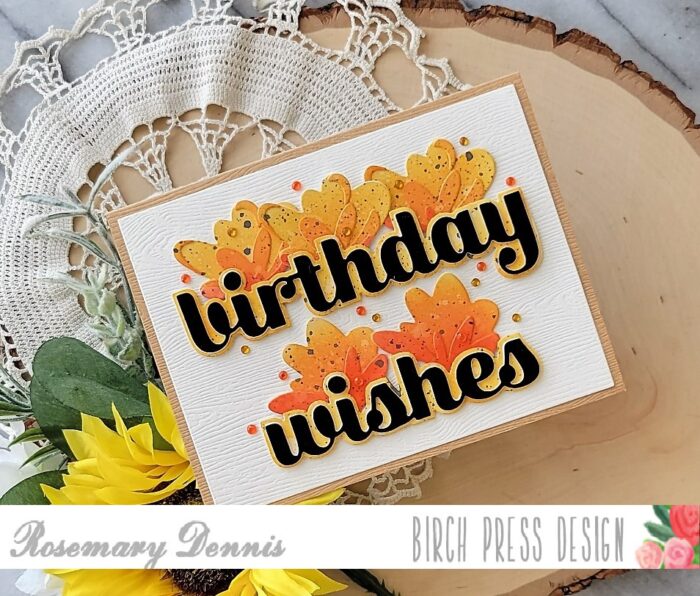
Wow, can you believe it is already the end of April? Where is the time going?! Today I’m sharing a card that was inspired by my other favorite crafting pursuit: cross-stitching. Before I started paper crafting I was an avid cross-stitcher, but I injured my shoulder and stitching became hard to do so I gave it up. Last summer I was inspired to start stitching, again, and discovered that it didn’t bother me as much as it had… yay! And that leads me to the card I’m sharing today. I had started stitching a chart using a warm orange floss and that got me to thinking about the colors I wanted to use for a card I would be making using the new Jovial Blooms and Leaves Contour Layers dies. I know it is spring, but I just love warm autumnal colors and that is where we are going, lol
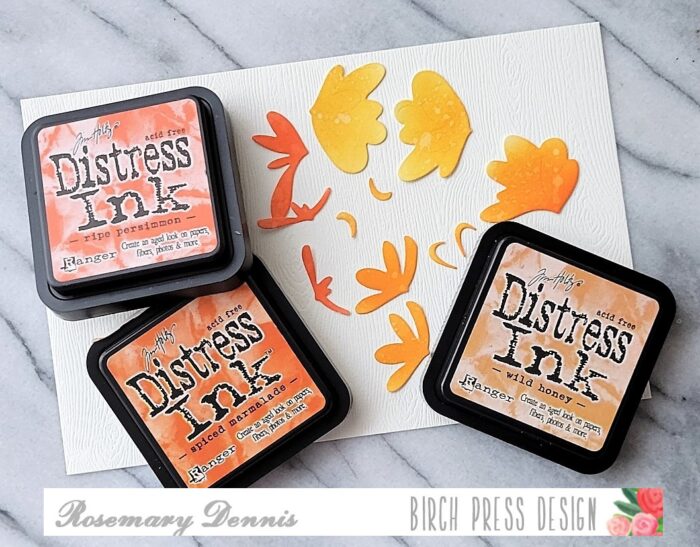
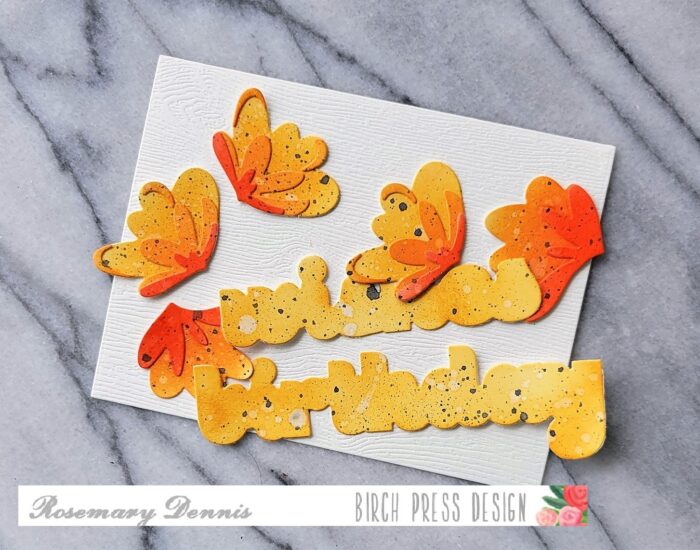
I started by die cutting all the flowers that I thought I would need for the card. Once I had everything die cut I put washi tape on the back of the panels to keep the pieces in place and did some simple ink blending using distress inks in Spiced Marmalade, Wild Honey and Ripe Persimmon. The flowers with three layers I used all three colors and for the flowers with only two layers I used Ripe Persimmon and Spiced Marmalade. I also splattered on some water to give the pieces a bit of a distressed look. Then I adhered all the layers together. I was so intent on getting my flowers put together that I completely forgot to add the stamens! Oops!
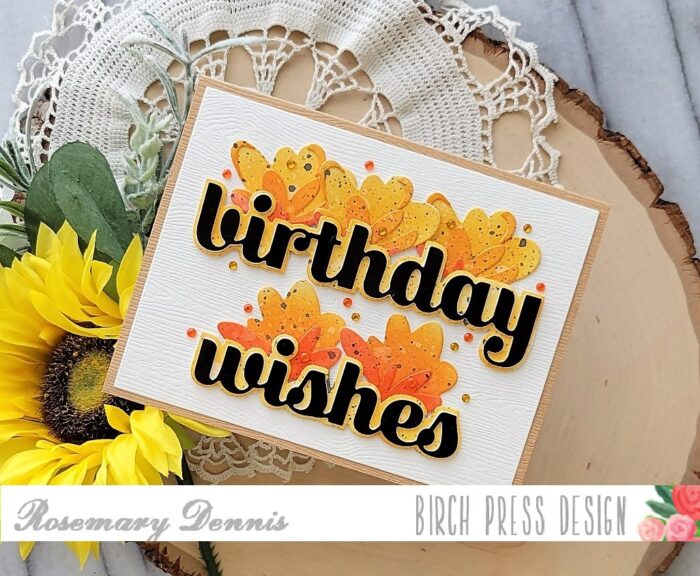
Once I had the flowers assembled I did a little bit more splattering using some black paint. At this point I pulled out the Birthday Wishes Sugar Script die set and die cut the top layer from Memory Box Open Studio glossy black cardstock. That cardstock is amazing! I love how thick and substantial it is. I die cut the shadow layers, inked them up with Wild Honey distress ink, and then splattered on water and black paint. I cut additional words out of scrap cardstock and adhered them to the glossy black words for additional dimension.
Once I had all my elements assembled and ready to go I die cut a piece of Memory Box Open Studio cream woodgrain for the background. I played around with the layout for quite sometime before finally settling on the layout you see.
I finished off the card with lots of little warm yellow and orange Open Studio fairy jewels. I did something I don’t normally do and created the card base from woodgrain cardstock. This time I used Memory Box Open Studio kraft woodgrain cardstock and I really like how it looks.
I hope you are inspired by my little trip to autumn. Thanks for stopping by and enjoy your day!
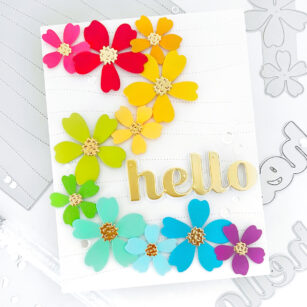
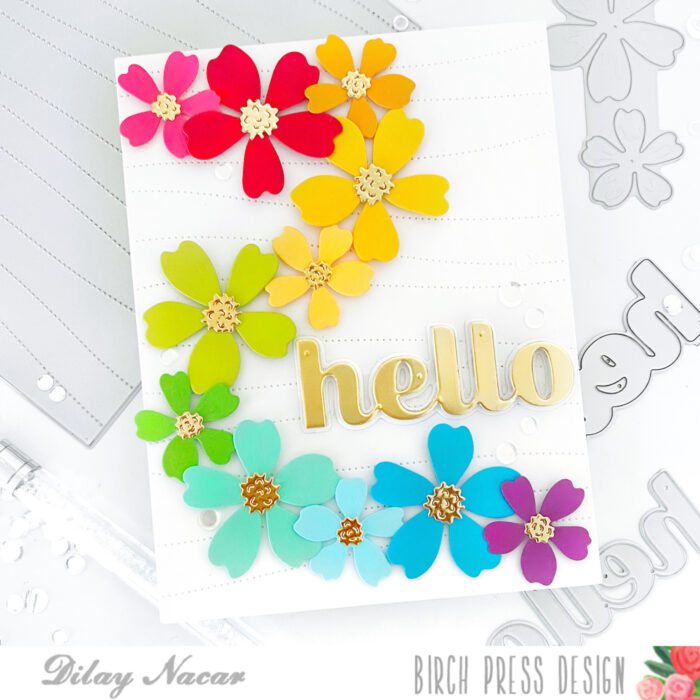
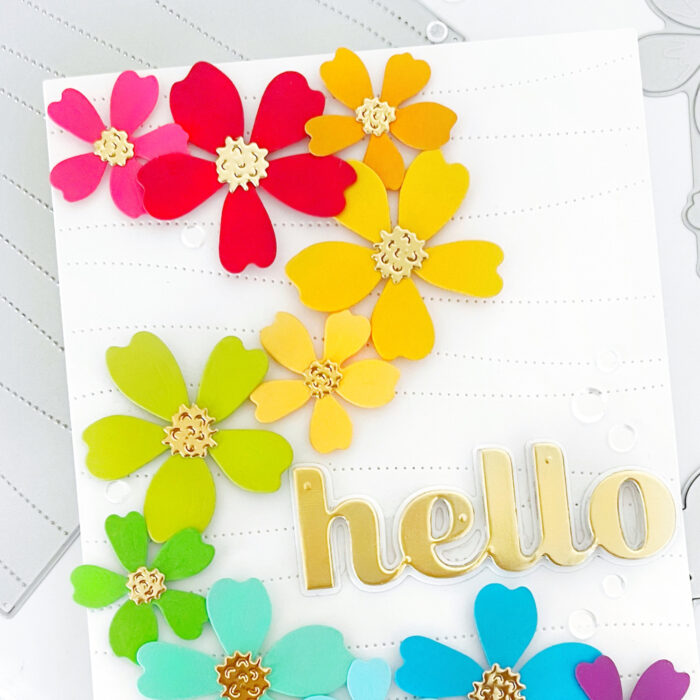
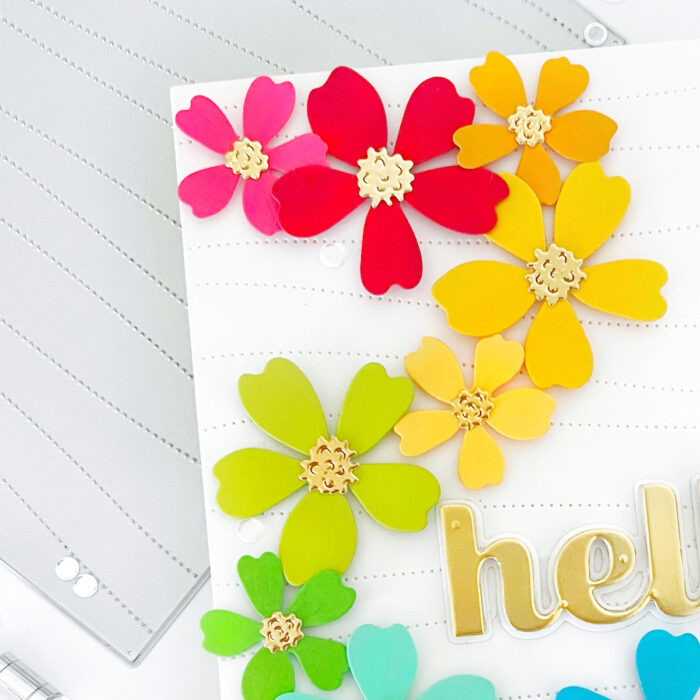
Hello and welcome, friends! Dee here with you today! A few weeks ago, I shared a mini slimline card similar this card design, but this version is a bit cleaner and easier to recreate.
To start, I die-cut each of the Phlox Blooms Lovely Layers Dies in various colors. Next, I die-cut the Pinpoint Contour Plate in white, then adhered each of the flowers with foam tape, cascading from the top in rainbow order.
Next, I die-cut Big Hello Sugar Script in mirror gold cardstock and adhered it to the top. To finish, I added a few clear sequins in between the flowers.
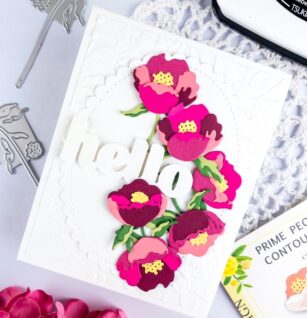
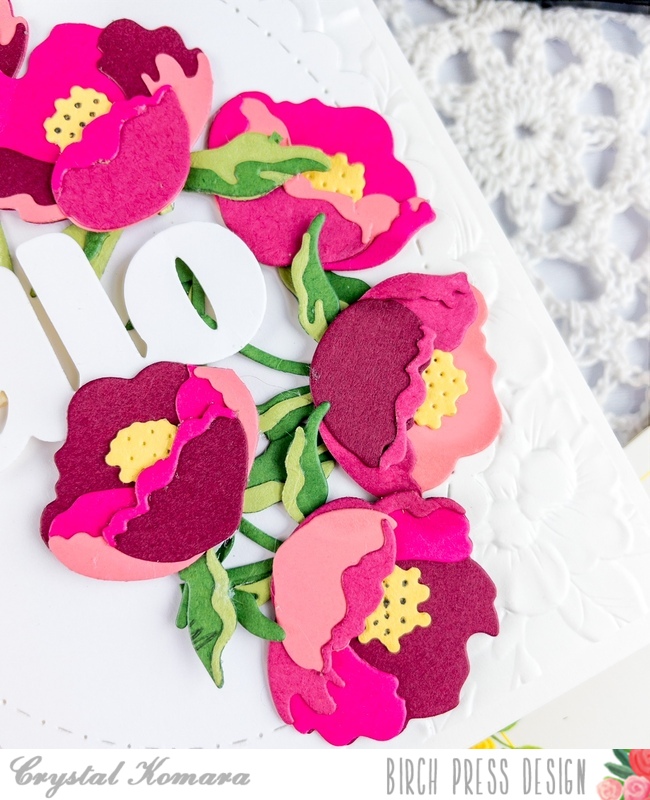
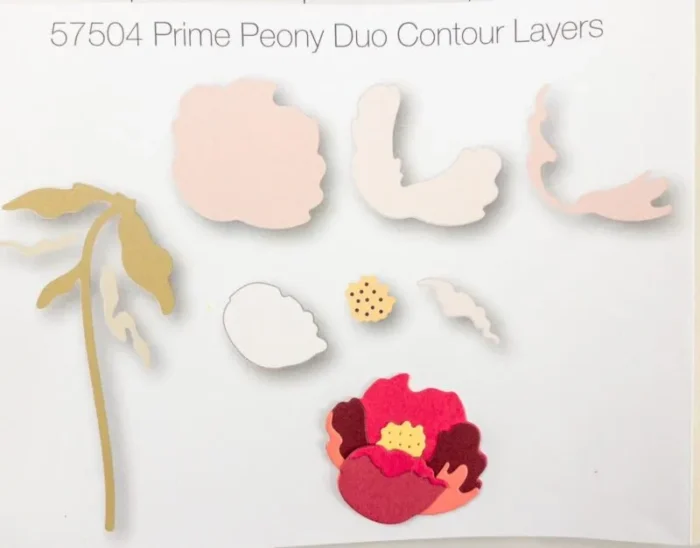
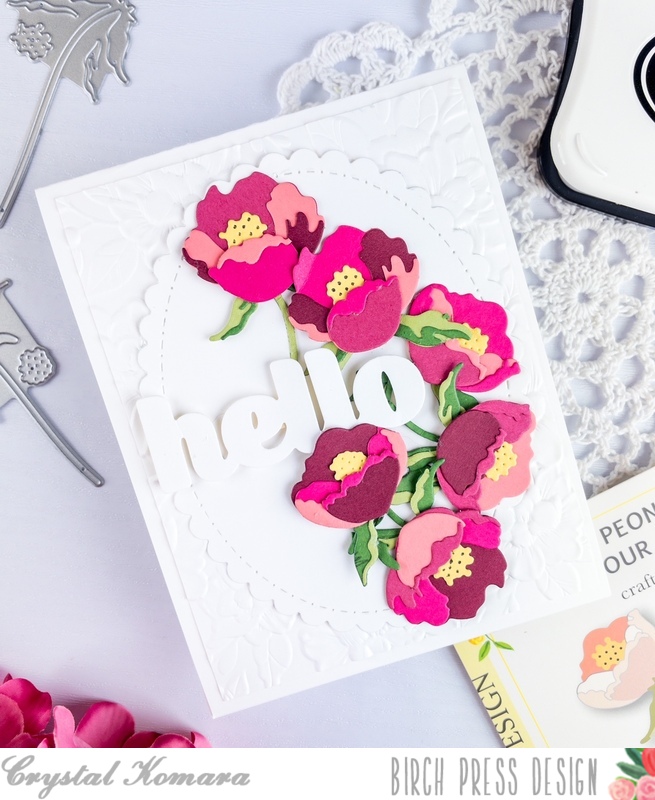
Hello readers! Now that spring is officially here (oh but wait, is it??) Oh well, I declare spring IS here! Let’s celebrate with all things floral. This is Design Team member Crystal Komara here with you today sharing this hello card made using the Prime Peony Duo Contour Layers.
Card details:
The base of this A2 sized card is made from 80 lb. Neenah Solar White Smooth cardstock. I cut a 5 1/4″ x 4″ piece of the same Neenah White cardstock and ran it through my Big Shot using the Blooming 3D embossing folder from Memory Box Co. (a sister company of Birch Press Design). I adhered this embossed background directly to the card base. Next, I die cut a large oval from white cardstock.
To create all the peonies, I die cut the various layers of the Prime Peony from different colored pink cardstocks and then using the image provided, I was able to assemble them (with only limited curse words!) Trust me, I’m not proud of my less-than patience.
After adhering all the peony pieces together I adhered them to the card using 3M foam adhesive for added dimension. Lastly, for the sentiment, I used the Big Hello Sugar Script die. I die cut just the top layer (not the shadow layer) from white cardstock. I cut this layer three times and them on top of each other before adding them to the card.
I hope you have enjoyed this card! Thanks for visiting and have a wonderfully creative day!
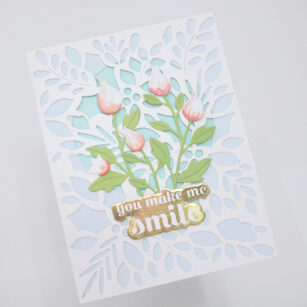
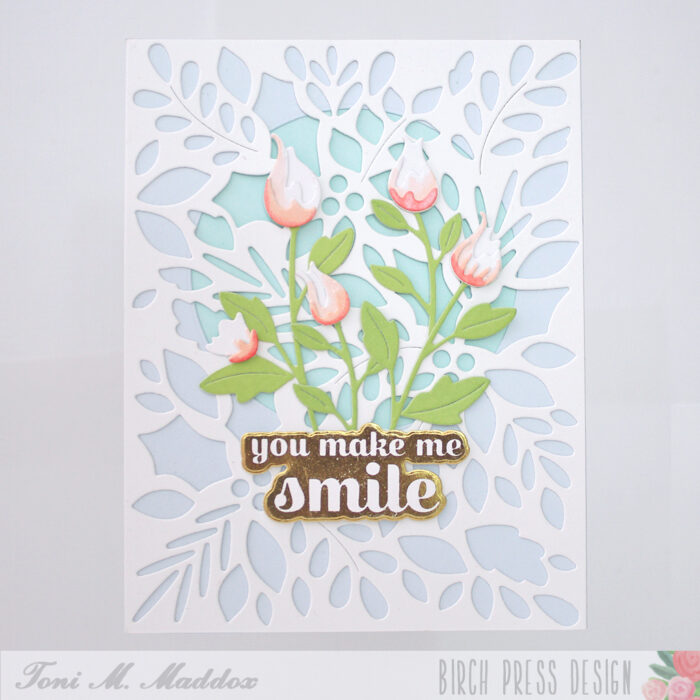
Hello, Birch Press fans! Toni here with you today sharing a spring-theme card using the Delicate Floral Buds Contour Layers.
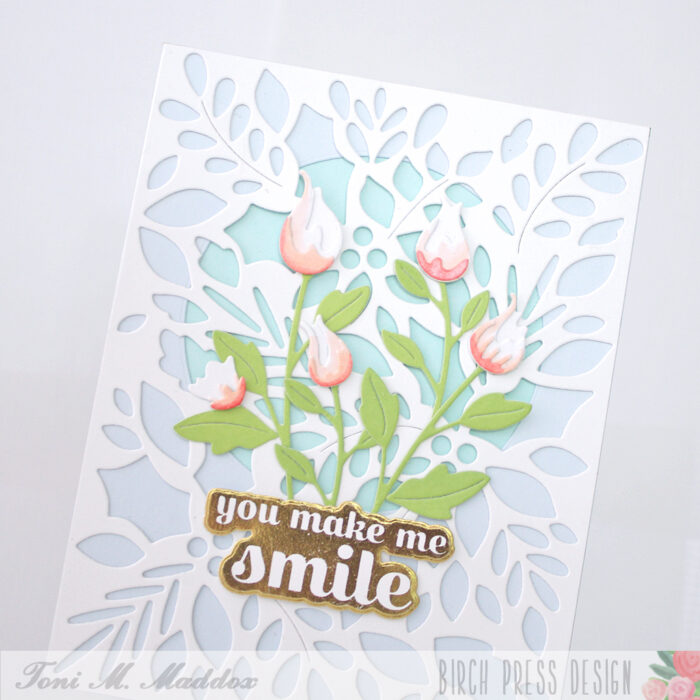
I found a piece of my cardstock in my stash with a circle cut out of it (why did I cut it from the middle?!) and thought it would make a great focal background for the buds.
I layered it on top of a scrap piece of aqua cardstock then added the Herbarium Plate Layer A in white on top of that.
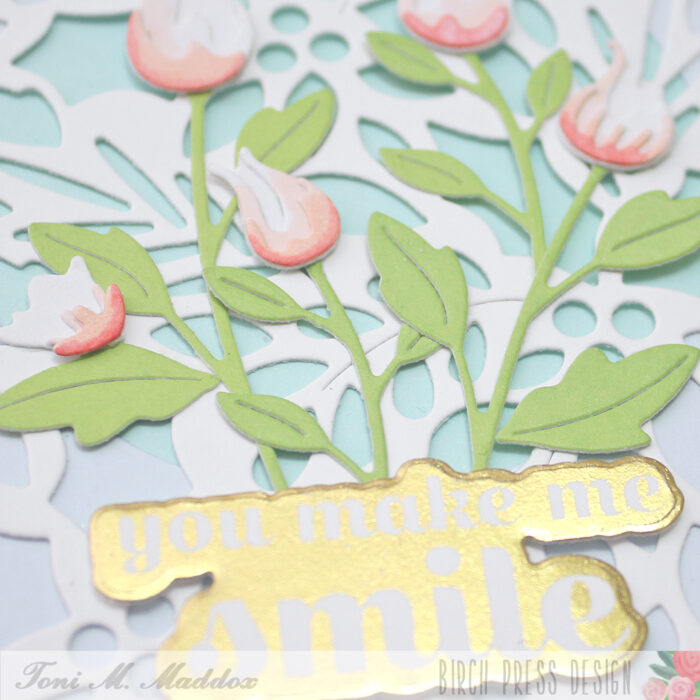
I cut the Delicate Floral Buds Contour Layers from white cardstock which I colored up with Copics R01 and R14. The leaves are cut from Lush Green 6×6 Cardstock.
For the sentiment I used the Sugar Script Sentiments 1 Hot Foil Plate along with Therm O Web Gold Hot Foil and the Pinkfresh Studio Solid Hot Foil Plate. The latter allows you to use your hot foil leftovers, creating a solid version of the design.
I hope you enjoyed today’s card and have a great rest of your week!
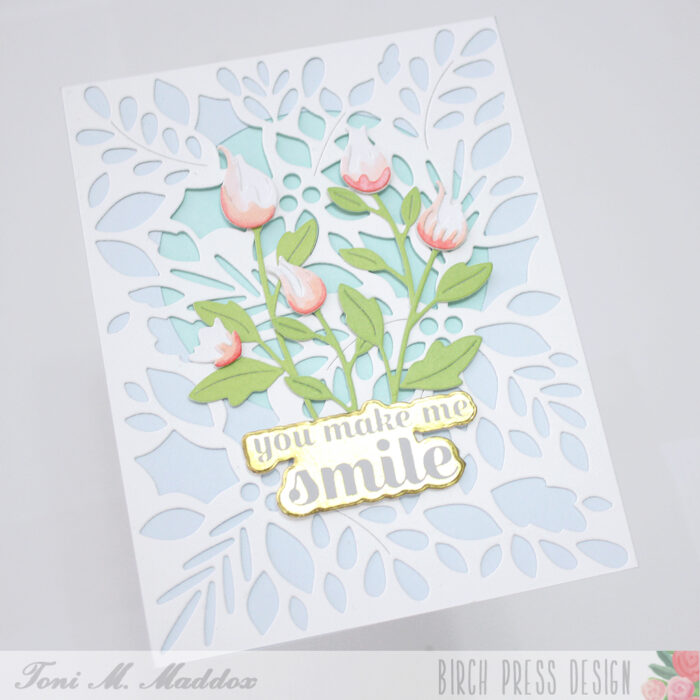
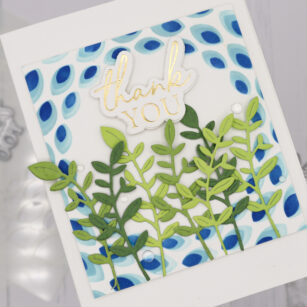
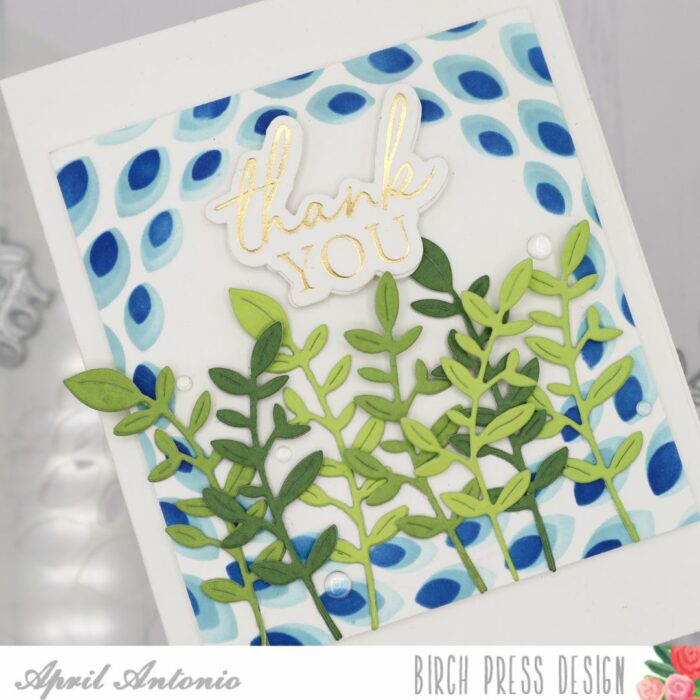
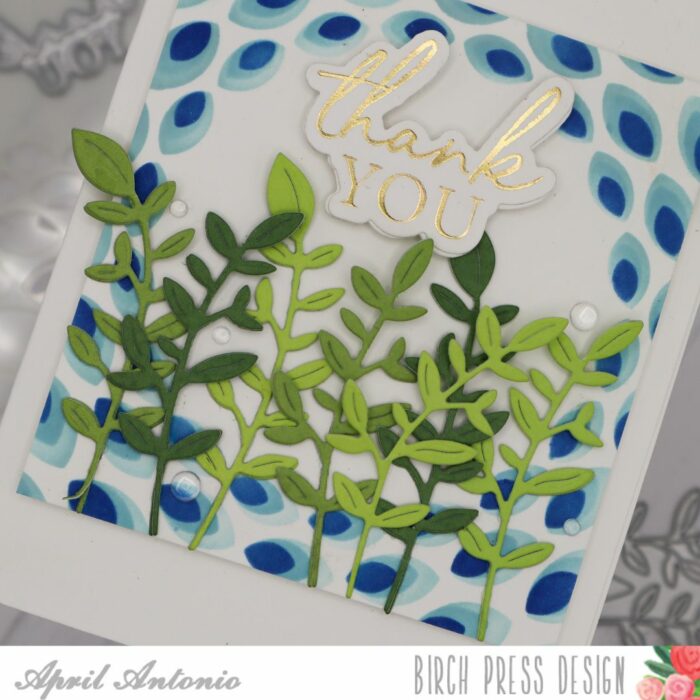
Hello and happy Monday! I’m excited to be back with you on the blog. Today’s project features some leafy dies, stenciling and hot foiling all in one card.
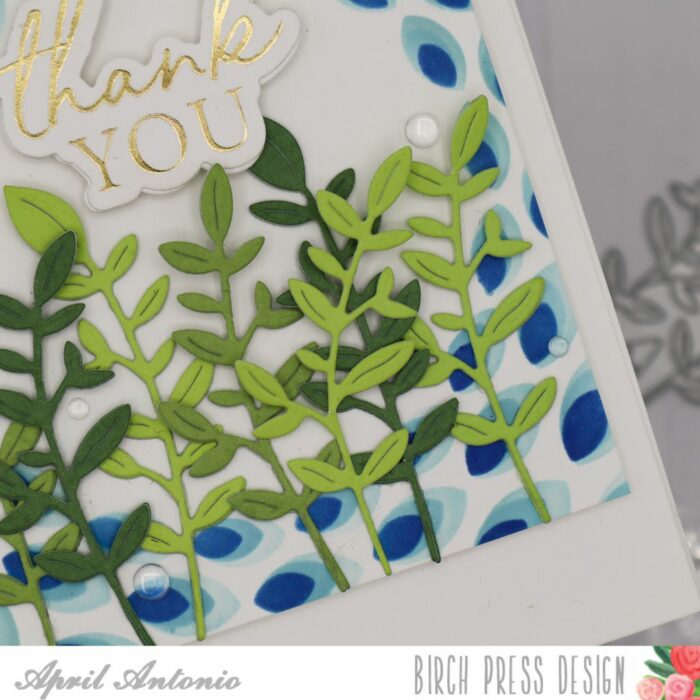
I started this card knowing that I really wanted to do some stenciling. I grabbed three complimentary shades of blue ink in a light, medium and dark tones, along with the Gilded Petalpoint Stencil Set. I placed my stick mat in the corner of my rubber stencil mat, and put a piece of A2 cardstock on top of the mat, making sure to align it with the first layer of my stencil.
Now this stencil has 3 layers and I started with the largest layer, inking up with my lightest color. Then I took the medium sized layer, using my medium ink color, and lastly I used the darkest blue with the smallest layer. This is how I created that nice, peacock-y looking, layered effect.
Next I trimmed down that A2 panel until it was approximately 3 5/8 x 4 1/8. There was no rhyme or reason — I just started large and kept on trimming until I liked how the panel looked. I then adhered it to the front of an A2 white card base using foam tape.
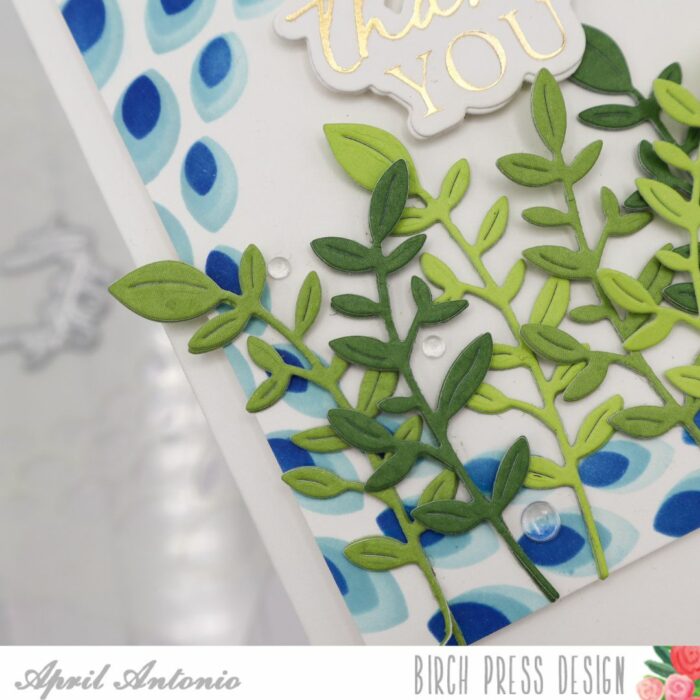
The next part was really fun to arrange. I took three shades of green from the Lush Green Collection cardstock pack and cut leaves from them using the leaves from the Jovial Blooms and Leaves Contour Layers set. After cutting from each color about 4 times, I glued two of the leaves together with liquid adhesive to create a bit more dimension and thickness. I then practiced arranging them on the front of the panel before gluing them down with liquid adhesive.
For my sentiment, I wanted something that would pop since my background was a bit busy. Since I’m low on thank you cards, I decided to use the Thank you Noted Script Hot Foil and Die set to hot foil the ‘thank you’ and die cut it out. I did die cut it two more times and glued all three layers together for some more dimension. I adhered the sentiment to my card front with foam tape.
Lastly, of course I have to add some embellishments, so I used clear Fairy Drops and sprinkled a few around the leaves.
That is it! I really enjoyed adding a square sized block to a card front and mixing and matching up the stenciled background with some detailed die cuts. I hope this inspires you as you go into your week!
Hello Birch Press Designs crafty friends! I am excited to be back on the blog today! Today’s project features a colorful tag with beautiful blooms, lots of color, and texture too! I am using a few beautiful die sets, a pre-made tag base from my collection, an embossing folder, and a gelli print! So let’s get started!
I was on the blog last week and shared how I created these flowers, leaves, and stems! When I was working on last week’s post, I made extra flowers and leaves! I love doing this as it saves time and allows you to have more die cuts for another project. I started with 4 die collections and 2 pads of colored card stock from Memory Box. I am using the Phlox Blooms and Leaves Contour Layers, Mixed Berry Contour Layers, Delicate Floral Buds Contour Layers, and the Sylvan Berries and Leaves Contour Layers. I used 2 pads from Memory Box: Berry Red and Lush Green. I love these pads of paper! The colors are amazing and they die cut beautifully and they are super easy to add ink blending on top as well! From each of the die sets listed above I die cut the leaves and stems using 2 shades of green paper from the Lush Green pad. Then for the floral dies (shared above) I used 2 shades of pink from the Berry Red paper pad.
After my leaves and florals were all die cut I laid them out on my ink blending mat. For the green die cuts I used a combination of a light and green dye ink. On the pink layers I used a combination of dark pink and a purple dye ink. Once all the inking was completed I added water droplets to add a bit more texture to each piece. I added the water droplets, then picked up the color with a paper towel. I set each piece aside and allowed them to dry. Once dry I adhered the leaves and floral layers together with liquid glue.
Next I used a pre-made tag for my base of my project. I then adhered a piece of a gelli print to my tag base. I adhered this with liquid glue. I did rough up the edges using my distress tool. Next I used the 3D Embossing Folder – Geometric Crystals from Memory Box. I ran this through my die cutting machine. I then ripped a piece of the dry embossed background and adhered this to the right side of my tag. I then added a couple more pieces of gelli print to the base layer. I did rip each of these layers as I wanted a worn look to the background. I added 2 strips of washi tape to the bottom of the tag to complete the base of the tag. Once everything was adhered I added distress ink to the edge of the tag and a few metallic gold splatters.
Next I worked on the placement of my flowers and leaves on my tag base. Once I was happy with the placement, I adhered everything down with liquid glue and foam tape. I completed the tag with a sentiment from my stash and a piece of twine on the top! I also added a few fairy drops for added interest and texture.
I hope today’s project inspires you to use your die cuts in another way! They are so much fun and the possibilities and endless!
Thank you for stopping by today, I will be back soon!